How to set up the gogoCLIENT with a Freenet6 account
Enable Routing Advertisements on the interface that goes to the Internet (in my case, the WiFi-USB)
I recommend that you complete Proj 13: Router Advertisements before this one, so you can be sure the Router Advertisements are being correctly sent.
Log in as root with password toor
Type this command and then press the Enter key:
startx
ping google.com
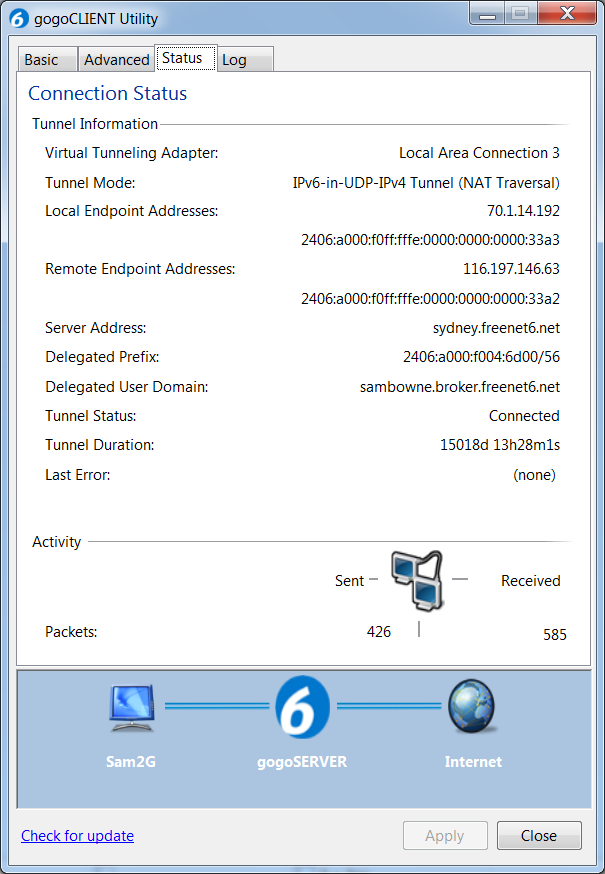
On the Windows 7 host computer, in the gogoCLIENT Utility, on the Status tab, find your Delegated Prefix. Mine is 2406:a000:f004:6d00/56, as shown below:
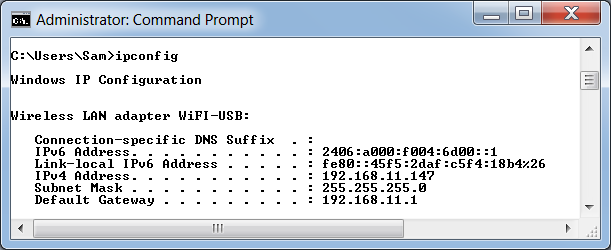
On the Windows 7 host computer, open a Command Prompt and execute this command:
ipconfig
The Router Advertisements are supposed to cause the Linux machine to automatically configure its IPv6 address and default gateway. But it fails most or all the time on BackTrack--I don't know why. The workaround I found is to manually configure the IPv6 address and default route.
In the BackTrack VM, in the Terminal Window, execute these commands to assign an IP address to the eth0 interface and a default route (replacing the address prefixes with your own delegated prefix):
ifconfig eth0 add 2406:a000:f004:6d00::5/64
ip -6 route add default via 2406:a000:f004:6d00::1
ping6 ipv6.google.com

Save a screen shot of this image with the filename
Proj L8a from Your Name
http://samsclass.info/ipv6/scan-google.html
  cd /pentest/spoofing/thc-ipv6

	./alive6 eth0
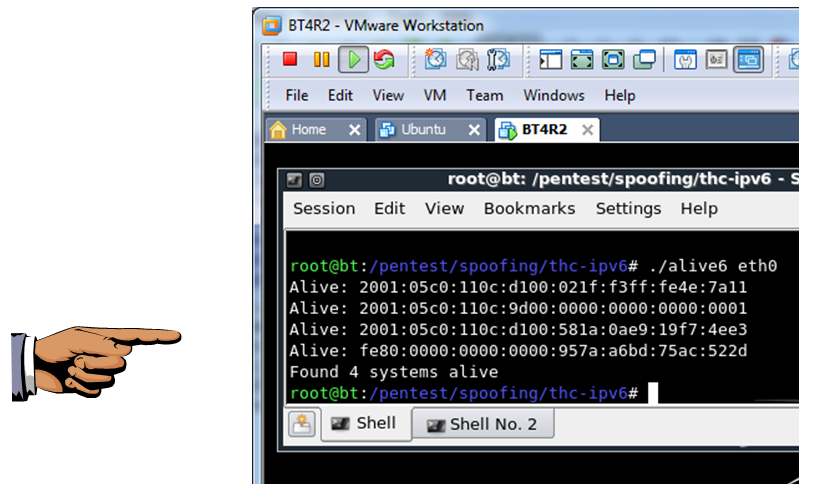
Save a screen shot of this image with the filename
Proj L8b from Your Name
Email the images to cnit.60@gmail.com with a subject line of
Proj L8 from Your Name
Last modified 10-3-12