How to Connect to the Gogo6 Server with a Freenet6 Account
Gogo6 Tunnel
Go to http://gogo6.com/. At the upper right of the page, click "Freenet6". On the next page, click Sign Up. Fill in the form to create an account. You will have to read your email and click a link to verify your account, and also fill out a profile form.Go to http://gogo6.com/ and, at the top of the page, click "Freenet6". Your name should appear at the upper right of the page--Freenet has recorded your ID with a cookie. In the "Freenet Services" section, click the Download button.
The next page offers several versions to download. Download the "gogoCLIENT - Basic version" and install it with the default options.
Now you need to create a Freenet6 Tunnel account. In your browser, on the "Download" page, at the top, click the "Freenet6" link. scroll down to the "Freenet6" section and click the "Learn more" link, as shown below on this page.
On the next page, scroll down to the "Getting started" section, and click the "here" link, as shown below on this page. Fill out the form to get a Freenet6 account.

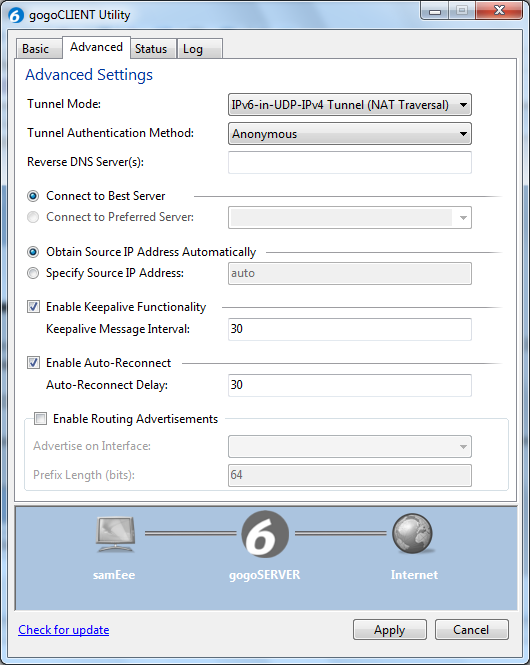
When the gogoCLIENT is installed and running, click the "Advanced" tab, and select a "Tunnel Mode" of "IPv6-in-UDP-IPv4 Tunnel (NAT Traversal)" as shown below on this page. Click "Apply". This is the best choice because it works almost everywhere--even at Starbuck's.
In the gogoCLIENT window, click the "Basic" tab. Change the "Server Address" to authenticated.freenet6.net
In the middle of the window, click the "Connect Using the Following Credentals" button. Enter your Freenet6 username and password. Click the "Connect" button. A box will pop up asking "Save changes before connecting?". Click Save.

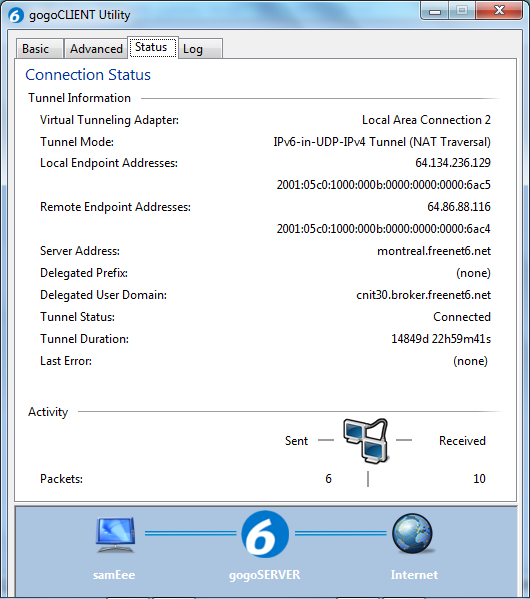
Click the "Status" tab. When it connects, you should see a long IPv6 "Local Endpoint Address", as shown below on this page. If you cannot connect, you may have to adjust your router or firewall to allow UDP port 3653.
Last modified 3-2-11 1 pm