Installing HAproxy
In a Terminal window, execute these commands:
sudo apt update
sudo apt install haproxy
Creating a Configuration File
In a Terminal window, execute these commands:
sudo cp /etc/haproxy/haproxy.cfg /etc/haproxy/haproxy.cfg.bak
sudo nano /etc/haproxy/haproxy.cfg
Then paste in this code:
global
log /dev/log local0
log /dev/log local1 notice
chroot /var/lib/haproxy
stats socket /run/haproxy/admin.sock mode 660 level admin expose-fd listeners
stats timeout 30s
user haproxy
group haproxy
daemon

defaults
log global
mode http
option httplog
option dontlognull
timeout connect 5000
timeout client 50000
timeout server 50000
errorfile 400 /etc/haproxy/errors/400.http
errorfile 403 /etc/haproxy/errors/403.http
errorfile 408 /etc/haproxy/errors/408.http
errorfile 500 /etc/haproxy/errors/500.http
errorfile 502 /etc/haproxy/errors/502.http
errorfile 503 /etc/haproxy/errors/503.http
errorfile 504 /etc/haproxy/errors/504.http

frontend http_front
  bind *:80

  acl has_excessive_slashes path_reg \/.*\/.*\/.*\/.*\/.*\/.*\/
  http-request deny if has_excessive_slashes

  default_backend http_back

backend http_back
balance roundrobin
server server1 198.199.94.12:80 check

listen stats # Define a listen section called "stats"
  bind :9000 # Listen on port 9000
  mode http
  stats enable  # Enable stats page
  stats hide-version  # Hide HAProxy version
  stats realm Haproxy\ Statistics  # Title text for popup window
  stats uri /haproxy_stats  # Stats URI
  stats auth student:P@ssw0rd  # Authentication credentials
It also displays a statistics page on port 9000 with credentials student:P@ssw0rd
Checking the Configuration File
In a Terminal window, execute this command:
sudo haproxy -c -f /etc/haproxy/haproxy.cfg
Starting the Proxy
In a Terminal window, execute these commands:
sudo systemctl start haproxy
sudo systemctl enable haproxy
sudo reboot
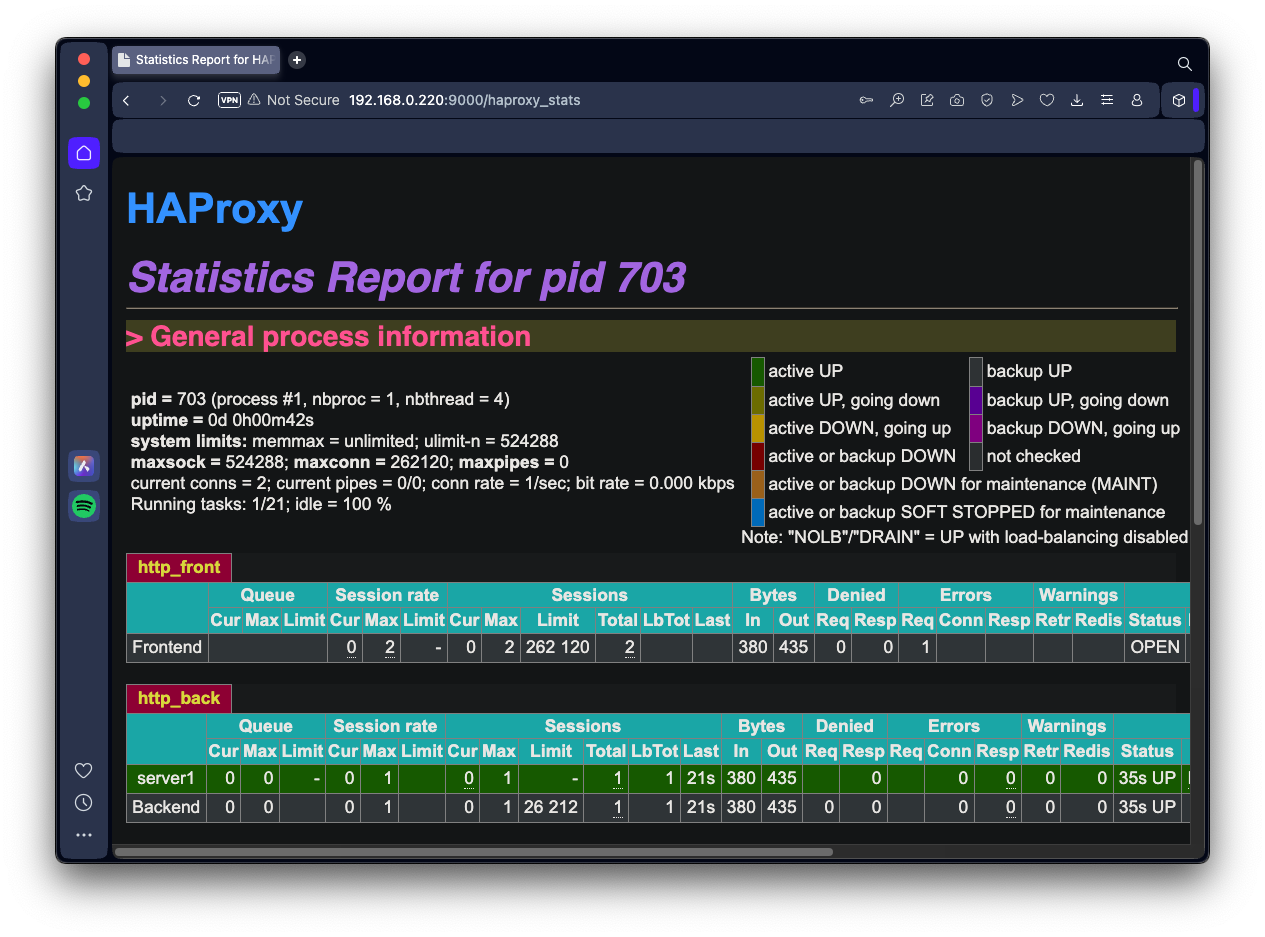
Viewing the Status Page
In a Web browser, go to this URL, replacing the IP address with the IP address of your proxy server:
http://192.168.0.220:9000/haproxy_stats
- Username: student
- Password: P@ssw0rd
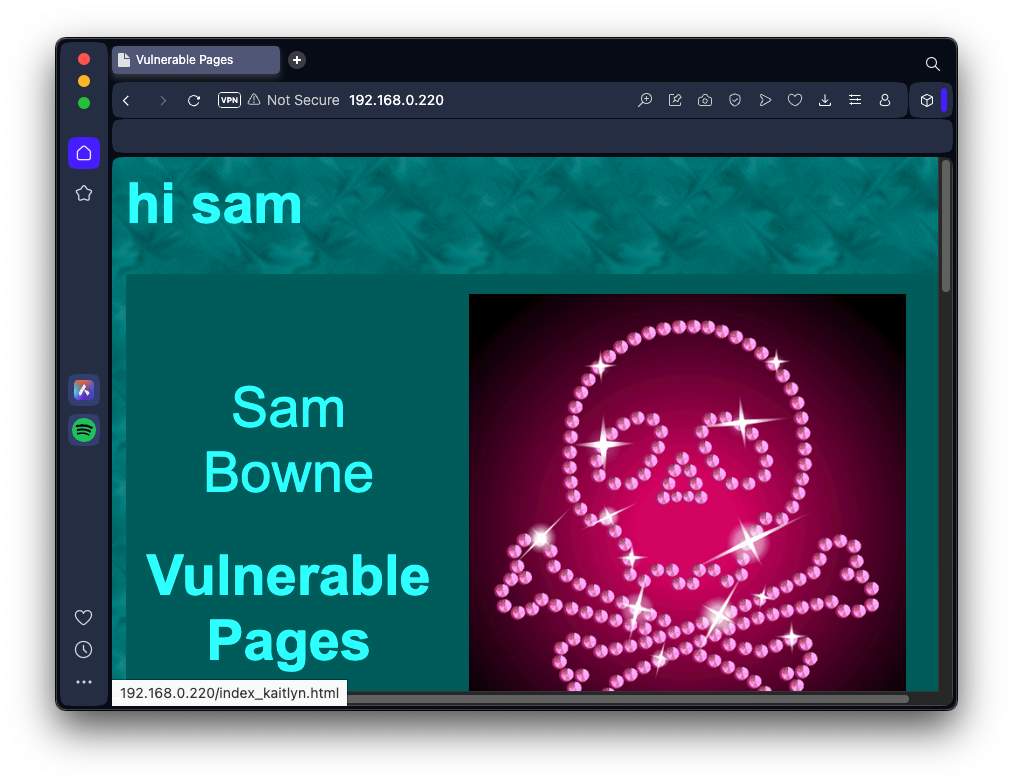
Viewing a Proxied Page
In a Web browser, go to this URL, replacing the IP address with the IP address of your proxy server:
http://192.168.0.220
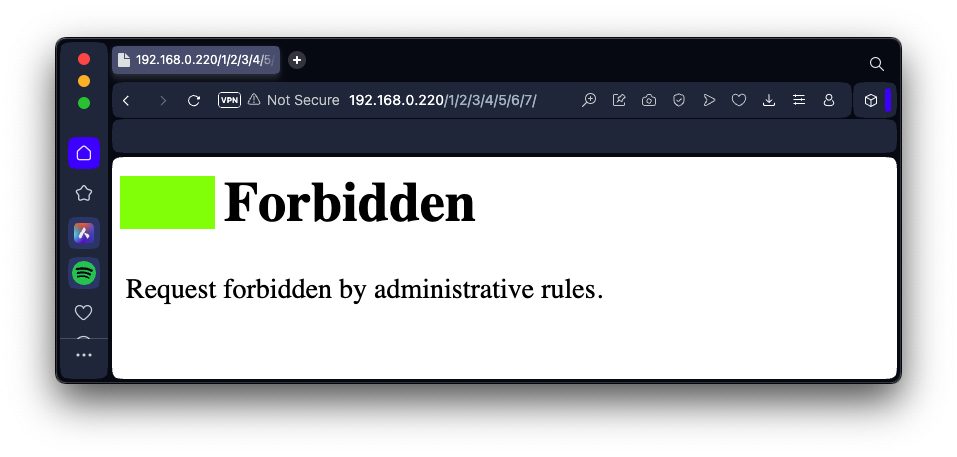
Flag H 243.1: Denied Page (10 pts)
In a Web browser, go to this URL, replacing the IP address with the IP address of your proxy server:The flag is covered by a green rectangle in the image below.