evap - SSD Data Evaporation Tester
This tool runs on the MacBook Air, and makes it easy
to test SSD evaporation.
For casual use, or classroom demos, I recommend using Disk Drill on a Mac,
or HxD on a PC, as demonstrated in the LayerOne talk below.
Download evap.gz
Slides from LayerOne 2013 Explaining Evap (PPTX)
Videos and Research into SSD Data Evaporation
Instructions
Preparing a SSD Test Partition
In Applications, open Utilities, and launch Disk Utility
Select "APPLE SSD ..." as shown below:
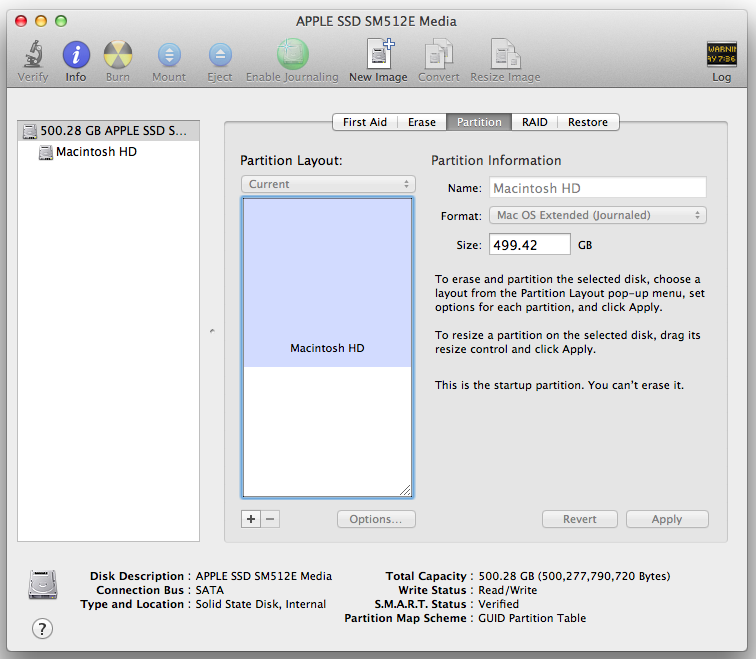
Click the Partition button near the top.
Click the + sign at the lower left to add a
new partition. In the central portion of "Disk
Utility", click the "Macintosh HD 2" box.
On the upper right, in the "Partition
Information" section, enter a
Name of ssd and a
Size of 1.13,
as shown below.
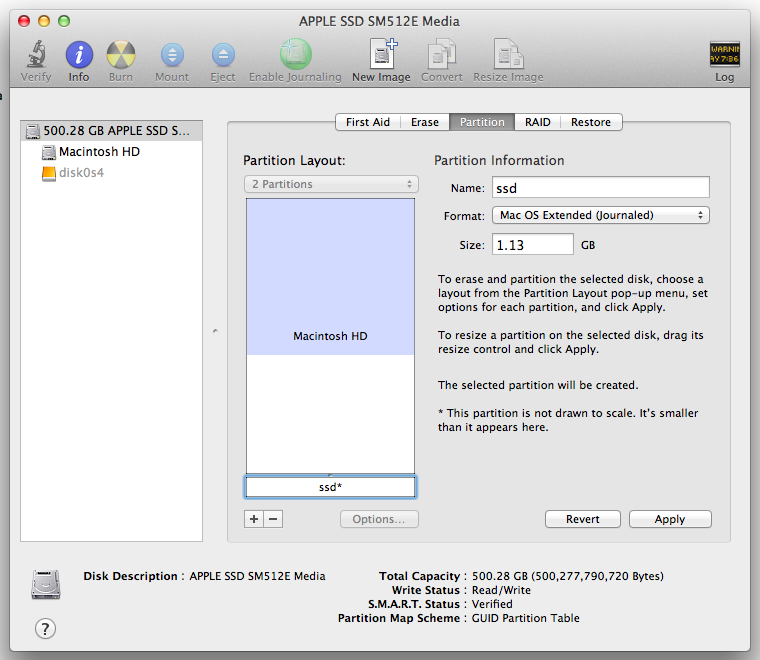
Click Apply.
In the pop-up box, click
Partition.
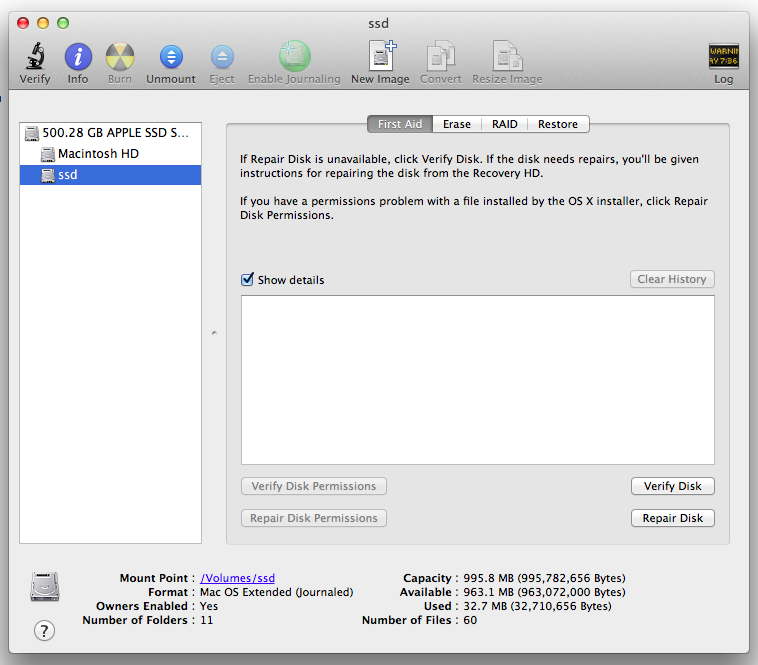
You should now have a partition with approximately
1 GB of available space, as show below:
Downloading and Installing evap
In a Terminal window, execute these commands:
cd /

sudo curl -o evap1.gz http://samsclass.info/seminars/evap/evap1.gz

md5 evap1.gz
You should see this value:
MD5 (evap1.gz) = 84559fd4ac67ec836ae217855eccb1d9
If you don't, something went wrong with your download.
In the Terminal window, execute these commands:
cd /

sudo tar xzf evap1.gz

sudo /e/evap1
Using evap
When you start evap, it warns you that you need to
have the ssd partition and the e working directory ready first.
You already did that in the steps above.
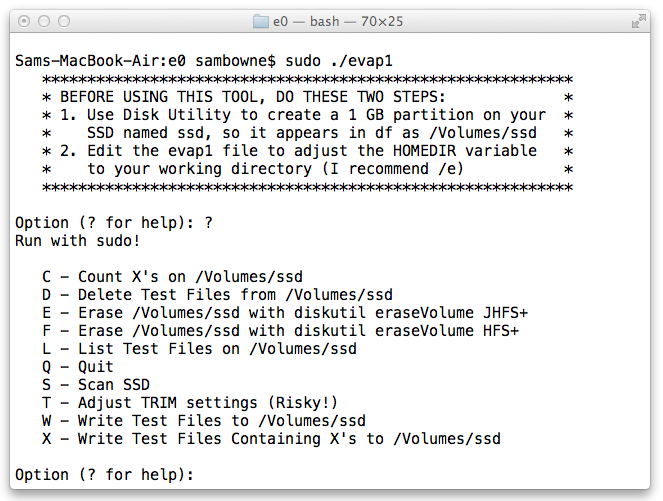
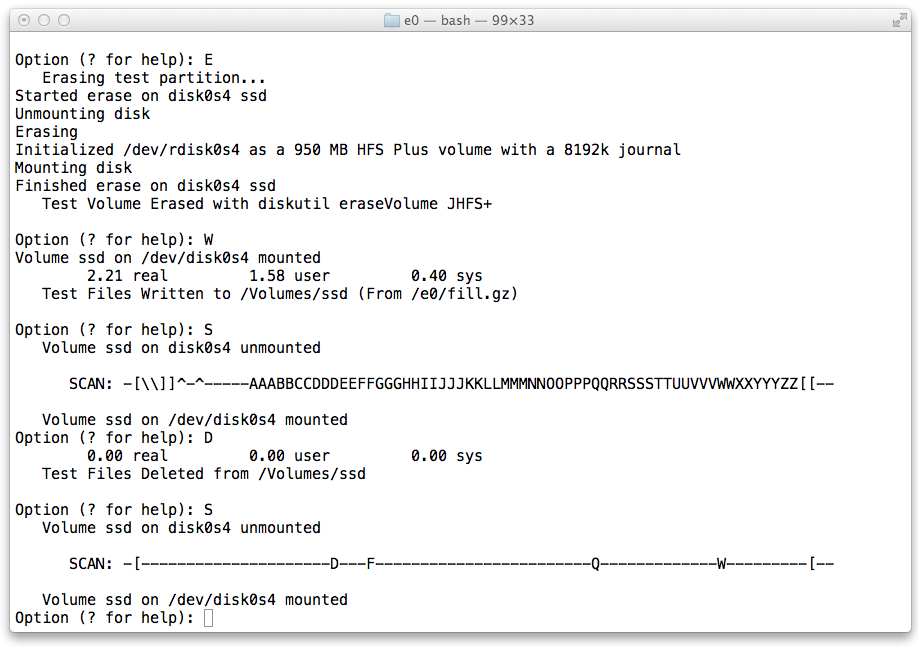
Demonstrating Evaporation on JHFS+
Use these commmands:
- E to erase the ssd partition and format it as Journaled HFS+
- W to write the test files to the ssd partition
- S to scan the ssd partition and see that it is full of ASCII data
- D to delete the test files from the ssd partition
- S to scan the ssd partition and see that the data has evaporated
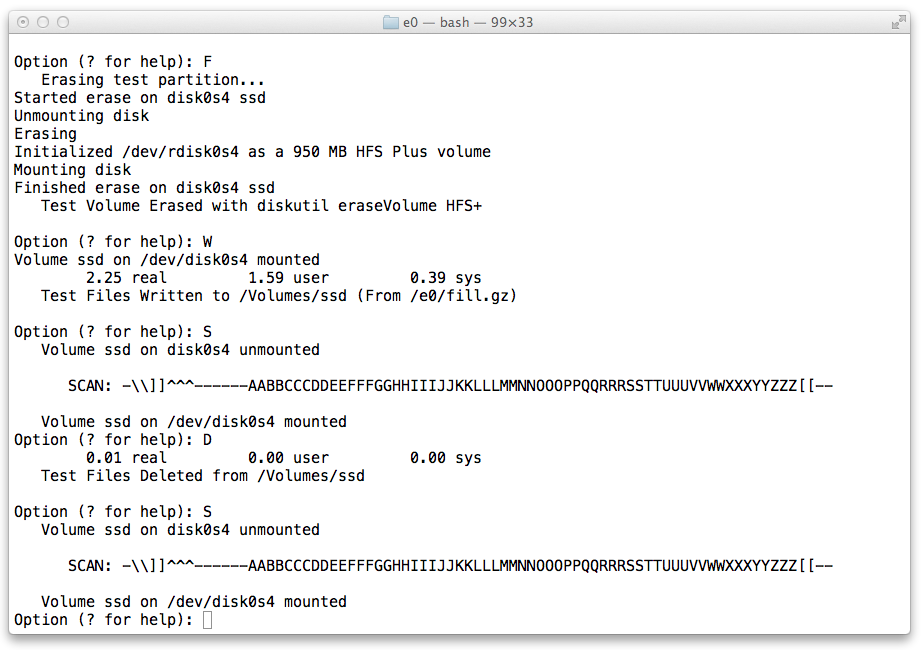
Demonstrating Remanence on HFS+
Use these commmands:
- F to erase the ssd partition and format it as HFS+ (not Journaled)
- W to write the test files to the ssd partition
- S to scan the ssd partition and see that it is full of ASCII data
- D to delete the test files from the ssd partition
- S to scan the ssd partition and see that the data is still there
Last modified 7 am 5-26-13 by Sam Bowne