On the upper right, click "Sign up". Fill in the form and click the "Sign up CloudFlare" button.
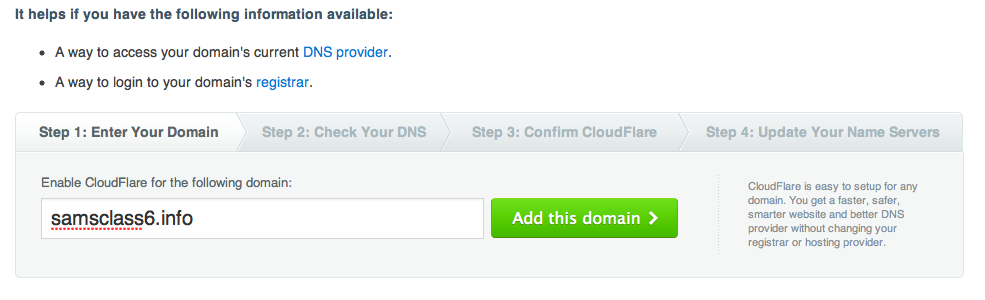
You see a screen showing the 4 steps, as shown below. Enter your domain name and click the green "Add this domain" button.
Wait while CloudFlare scans your DNS configuration. Then click the green "Continue to Step 2" button.
In Step 2, check your DNS records and make any necessary corrections. Then click the green "CI'm done checkng my DNS records, continue" button.
In Step 3, you see two records (or more), as shown below. These records currently point to your real server(s), but after you set up CloudFlare the records with the yellow cloud will be proxied by CloudFlare instead. Click the green "My settings look good, continue" button.

Step 4 requires you to update your DNS name servers at your domain registrar, as shown below.
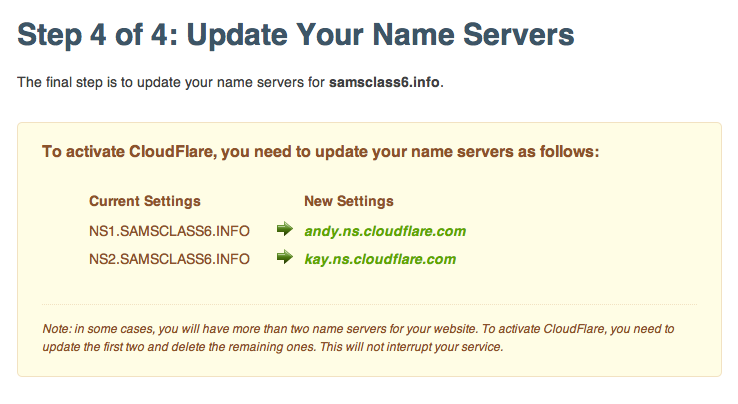
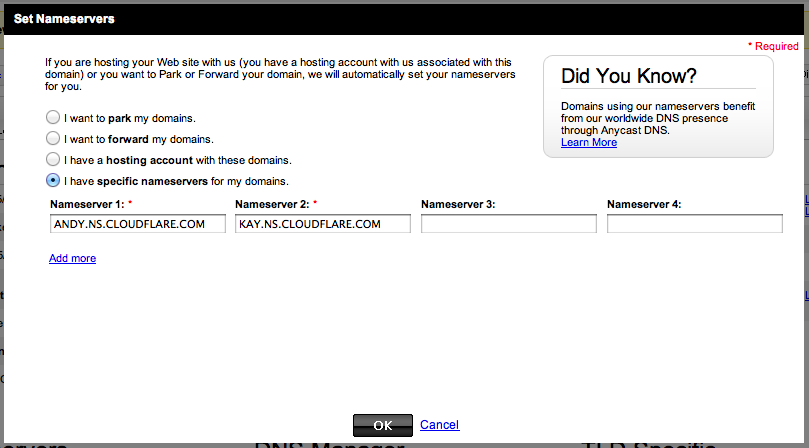
Open a new browser tab and log in to your domain registrar, which is probably Godaddy, and change your domain name servers to the indicated values, as shown below:
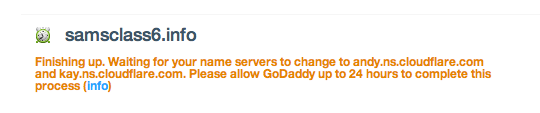
After your nameservers have been updated at your registrar, on the CloudFlare page, click the green "I've updated my name servers, continue" button. You should see a "Congratulations" message. If you see a message saying "Finishing up...", as shown below, you will need to wait for DNS updates to complete before proceeding with this project. When I tested it, it took about 30 minutes.

Click the "Settings" drop-down arrow, and click "CloudFlare Settings". Scroll down to the "Automatic IPv6" section and select Full, as shown below.

nslookup

set q=any

samsclass.info
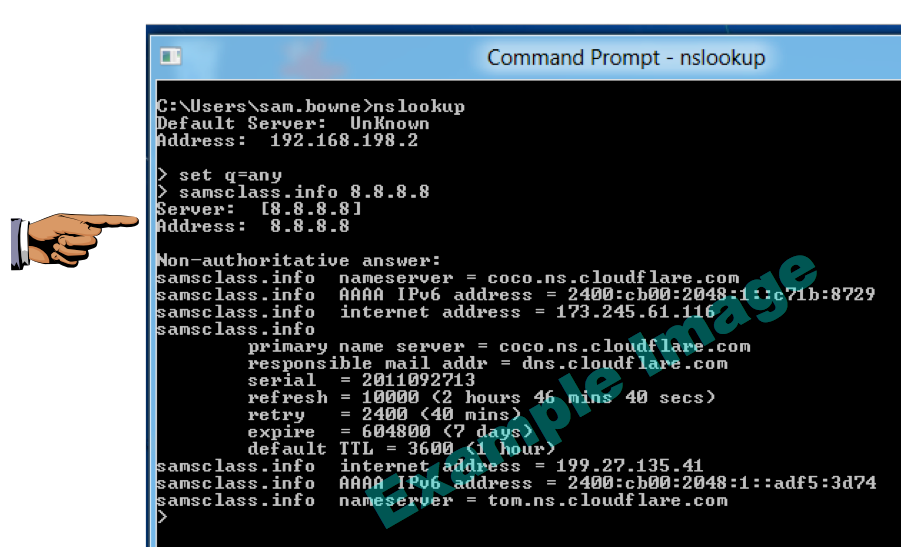
You should see these items:
Troubleshooting: when I did it on Windows 8 Developer Preview, I needed to explicitly set the DNS server after the domain name like this:
samsclass.info 8.8.8.8
Save a screen shot of this image with the filename
Proj Win3 from Your NameEmail the image to cnit.60@gmail.com with a subject line of
Proj Win3 from Your Name
Last modified 9-28-11 2 pm