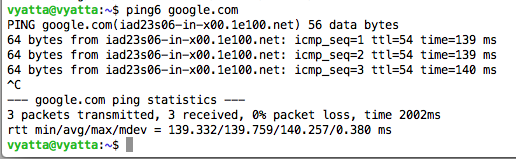
ping6 google.com
Press Ctrl+C to stop the pings.
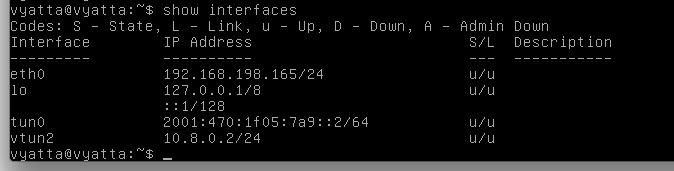
show interfaces
In my example, the correct interface to use is eth0, as shown below:
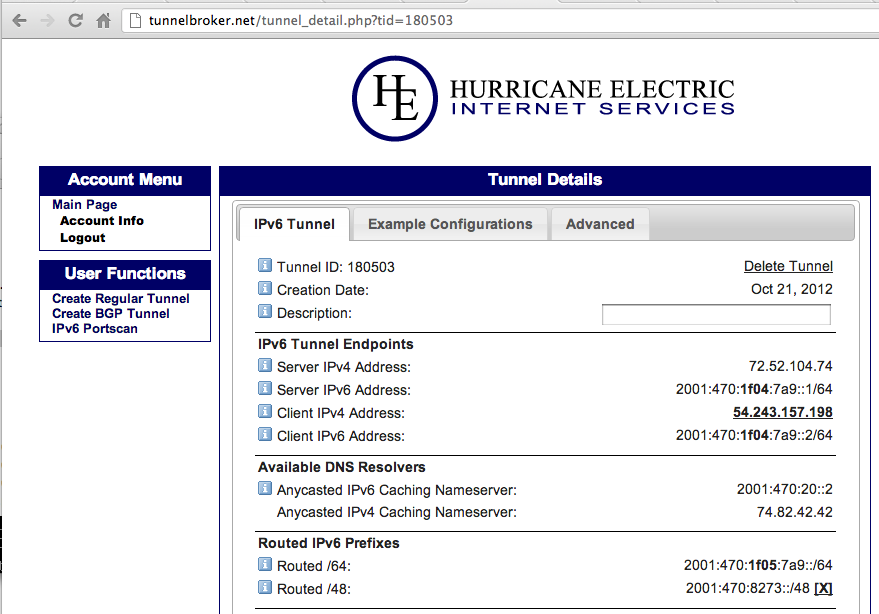
If you are using a Hurricane Electric tunnel, do this to get a "Routed /48"--the standard allocation of IPv6 addresses.
This is a large enough allocation for 65,000 subnets, each containing 16 billion billion addresses. You won't have to go ask for more any time soon.
Log in to http://tunnelbroker.net
At the bottom of the page, click on your tunnel.
In the "Tunnel Details", in the "Routed IPv6 Prefixes" section, in the "Routed /48" line, click the "Assign /48" link.
Your prefix appears. Mine is 2001:470:8273::/48, as shown below:
Since we are only allocating addresses for a single LAN now, we'll only need one /64 subnet. To get that, add a :1 after your /48 prefix, to get a /64 range, like this:
2001:470:8273:1::/64
show ipv6 forwarding

If it's not on, enable it with these commands:
configure

delete system ipv6 disable-forwarding

commit

save

exit
On your Vyatta router, execute these commands, using your subnet prefix, not mine:
configure

set interfaces ethernet eth0 address 2001:470:8273:1::1/64

set interfaces ethernet eth0 ipv6 router-advert send-advert true

set interfaces ethernet eth0 ipv6 router-advert max-interval 10

set interfaces ethernet eth0 ipv6 router-advert prefix 2001:470:8273:1::/64

set interfaces ethernet eth0 ipv6 router-advert other-config-flag true

set interfaces ethernet eth0 ipv6 router-advert default-preference true

set interfaces ethernet eth0 ipv6 router-advert managed-flag true

commit

save

exit
In my case, I am using an Amazon E2C Vyatta virtual machine.
On that device, execute these commands, using thesr values:
configure

set protocols static route6 2001:470:8273::/48 next-hop 2001:470:1f05:7a9::2

commit

save

exit
So choose the section below for your client.
Connecting a Windows 7 Client
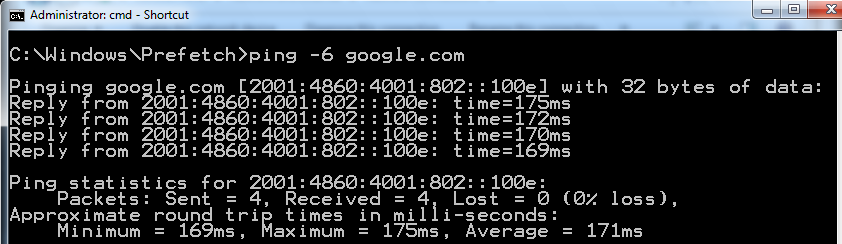
Start a Windows 7 computer, connected to the same LAN as your Vyatta's interface sending out Router Advertisements.On the Windows 7 client, in a Command Prompt window, execute this command:
You should see replies, as shown below:
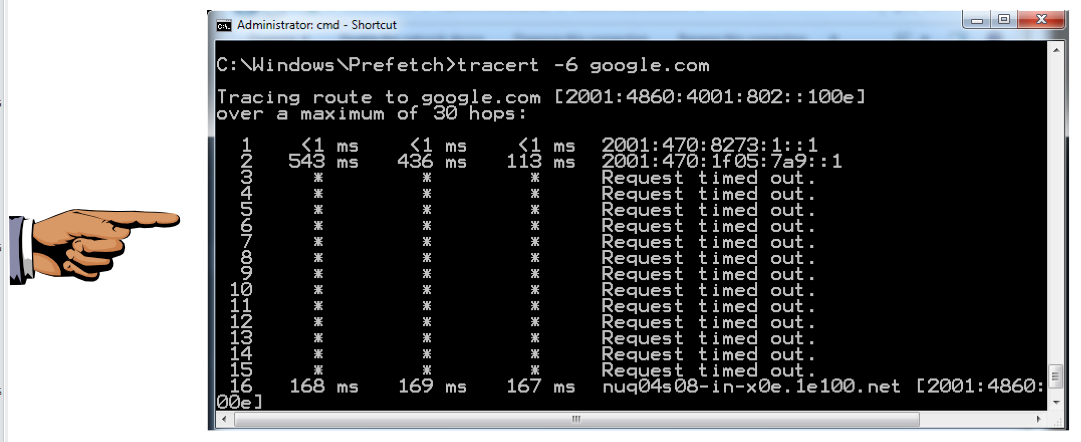
On the Windows 7 client, in a Command Prompt window, execute this command:
You should see the first hop to your routed/48, and the second to your routed/64, as shown below:
Saving the Screen Image
Make sure the first two hops have addresses starting with 2001:470Save a screen shot of this image with the filename
Proj V6 from Your Name
Connecting a Linux Client
Start a Linux computer, connected to the same LAN as your Vyatta's interface sending out Router Advertisements.I used a BackTrack 5 R2 virtual machine.
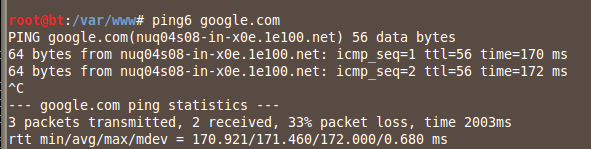
In the Linux client, in a Terminal window, execute these commands:
You should see replies, as shown below:
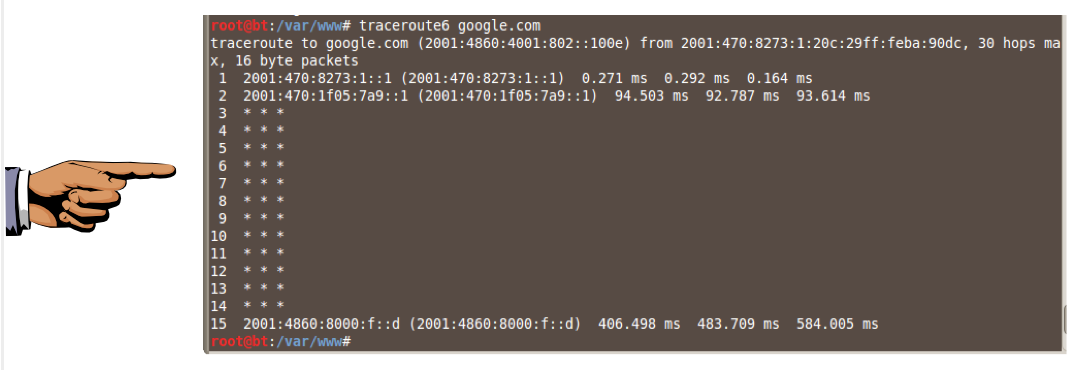
In the Linux client, in a Terminal window, execute this command:
You should see the first hop to your routed/48, and the second to your routed/64, as shown below:
Saving the Screen Image
Make sure the first two hops have addresses starting with 2001:470Save a screen shot of this image with the filename
Proj V6 from Your Name
Connecting a Mac OS X Client
Start a Mac OS X computer, connected to the same LAN as your Vyatta's interface sending out Router Advertisements.I used a MacBook Air running Lion, 10.7.4.
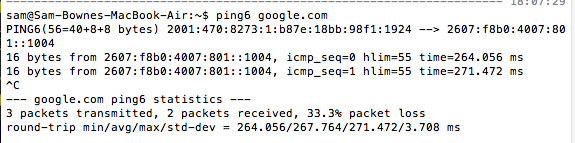
In the Mac OS X client, in a Terminal window, execute this command:
You should see replies, as shown below:
Troubleshooting
I had some problems making this work reliably. Here are things that made it work better:
- If the Vyatta is in a VM, use Bridged networking, not NAT
- To clear any old IPv6 configuration and renew it on the Mac's en0 interface, enter these two commands to disable IPv6 on that interface and then re-enable it again:
- Test the network; make sure the OpenVPN tunnel is connected. It works best to use a good, reliable underlying IPv4 network, not a busy wireless LAN.
In the Mac OS X client, in a Terminal window, execute this command:
You should see the first hop to your routed/48, and the second to your routed/64, as shown below.For some reason, the Mac doesn't show any additional hops. :

Save a screen shot of this image with the filename
Proj V6 from Your Name
Proj V6 from Your Name
set service dhcpv6-server shared-network-name lan subnet 2001:470:8273:1::/64 name-server '2620:0:ccc::2'

set service dhcpv6-server shared-network-name lan subnet 2001:470:8273:1::/64 name-server '2620:0:ccd::2'
Last modified 6:28 pm 10-22-12