In a Web browser, go to http://aws.amazon.com/
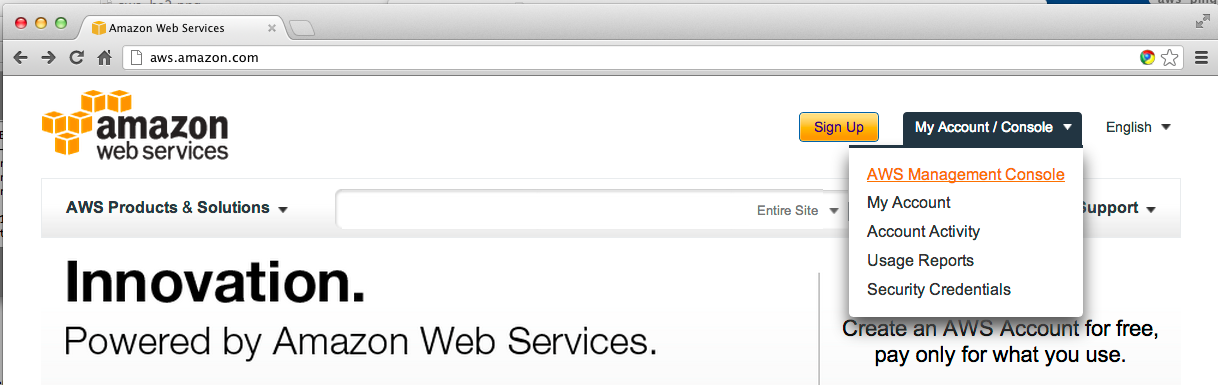
On the upper right, click My Account/Console, as shown below:
Log in if you are prompted to.
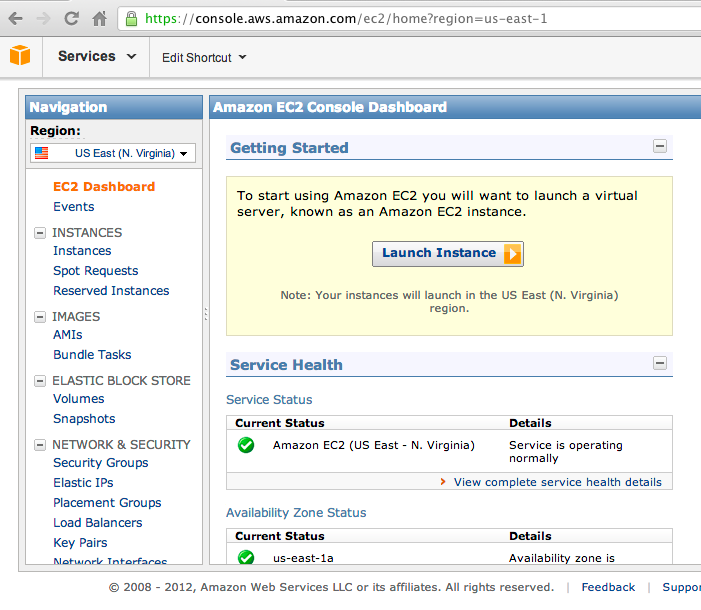
In the next page, click E2C
In the next page, on the left side, click Instances, as shown below:
In the "My Instances" page, in the top pane, click the box to select your Ubuntu instance, as shown below:
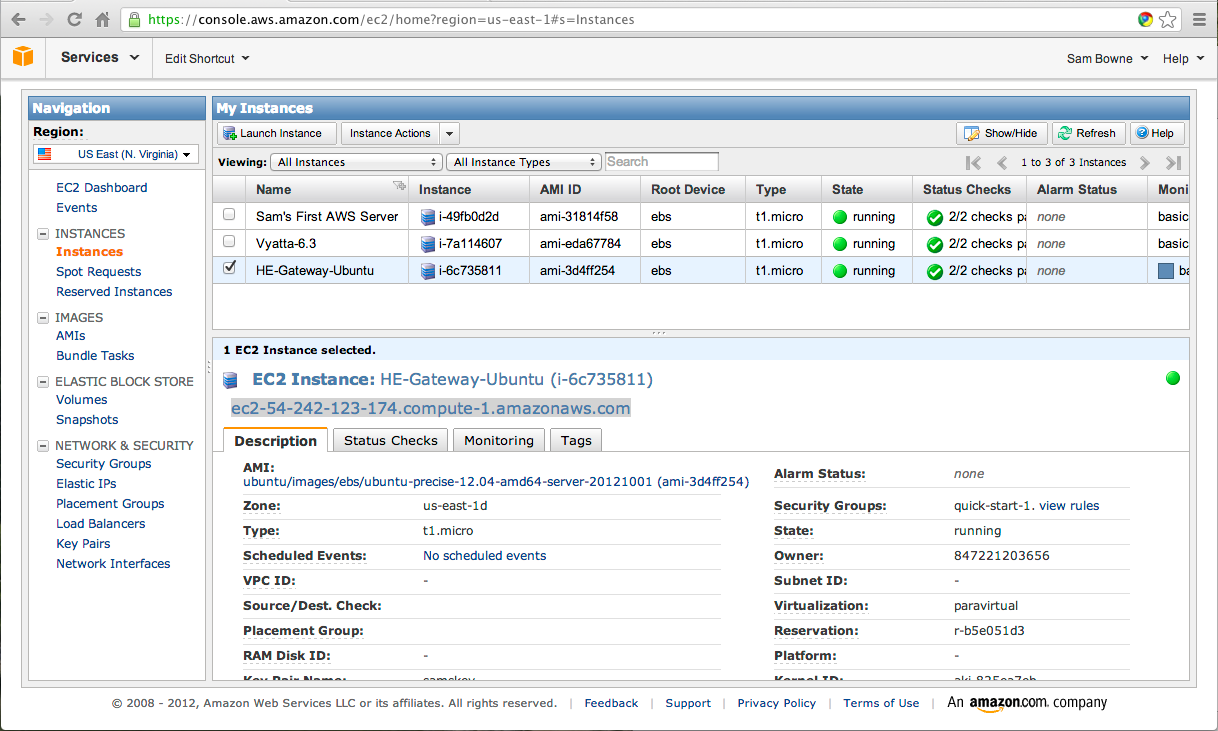
In the lower pane, note the Security Group (mine was quick-start-1).
Adjusting the Firewall Rules
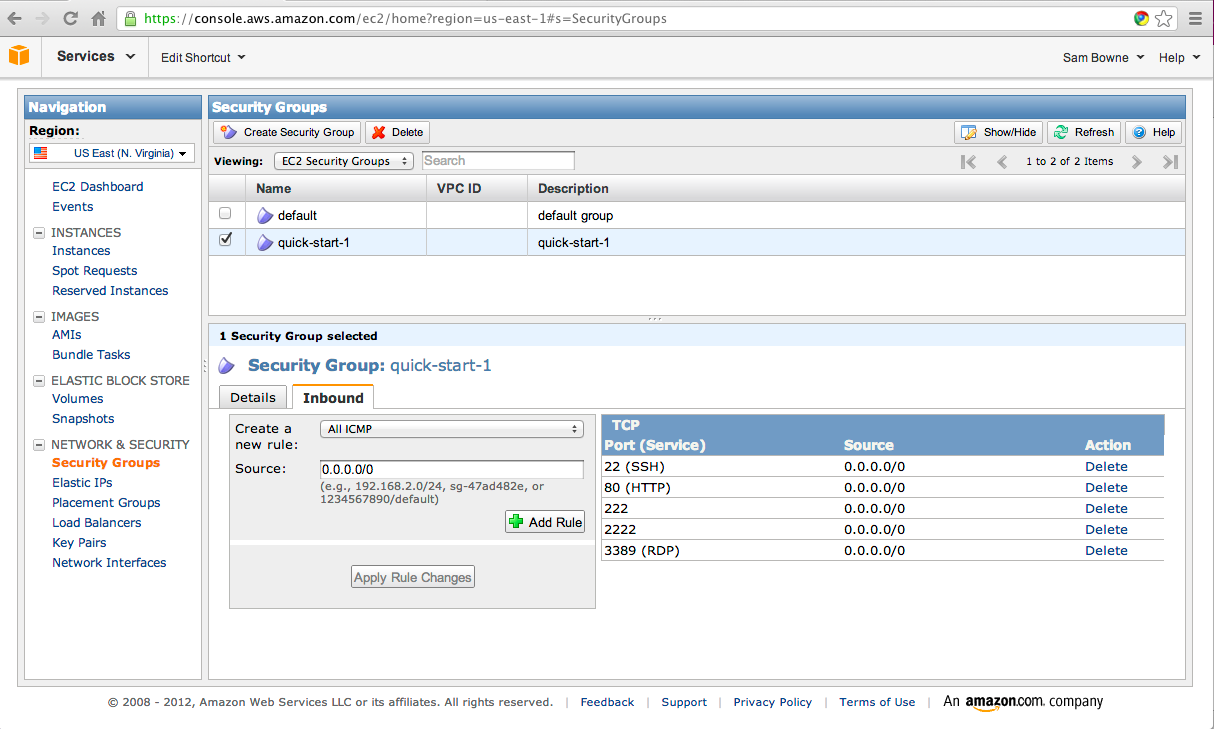
In the left pane, click "Security Groups".In the top pane, click the check box next to the relevant Security Group. In the lower pane, click the Inbound tab.
Click the "Create a new rule" drop-down list box and select "All ICMP", as shown below:
Click the "Add Rule" button.
Click the "Apply Rule Changes" button.
Getting an Elastic IP
On the left side, click "Elastic IPs".Click the "Allocate New Address" button.
In the next box, click the "Yes, Allocate" button.
In the next screen, click the "Associate Address" button.
In the "Associate Address" box, select your Ubuntu instance. Click the "Yes, Associate" button.
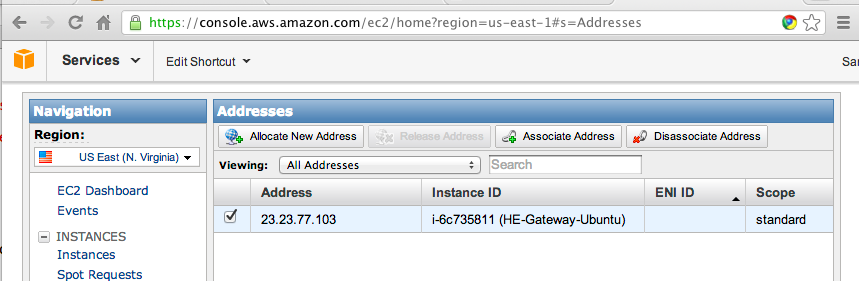
The IP address appears, associated with your Ubuntu machine, as shown below:
On your own computer, ping your elastic IP. You should see replies, as shown below:

Registering for a HE Tunnel
In a Web browser, go toOn the left side, click Register. Fill in the form, get your email, and log in.
Once you are logged in, you will see a page like the image below:
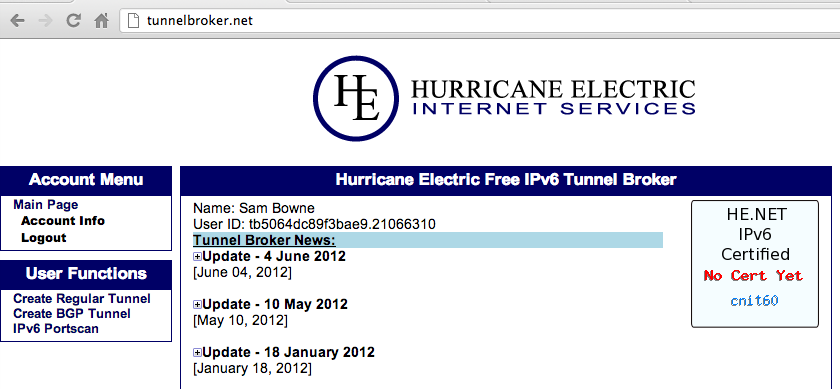
On the left side, click "Account Info" and change the password to something you won't forget.
Creating a Tunnel
On the left side of the TunnelBrokers page, click "Create Regular Tunnel"Enter your server's IP address into the "IPv4 Endpoint (Your side)" field and press Enter.
Below your IP address, in red letters, the name of the Hurricane Electric location closest to your server appears.
My server is apparently near Los Angeles, as shown below:
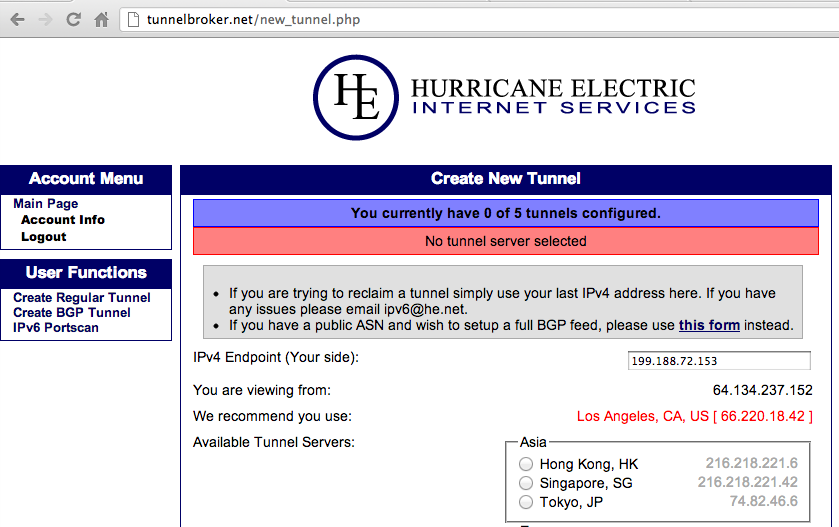
Scroll down to the bottom of the page. The recommended Hurricane Electric location should already be pre-selected. Click the "Create Tunnel" button
Your tunnel information appears, as shown below:
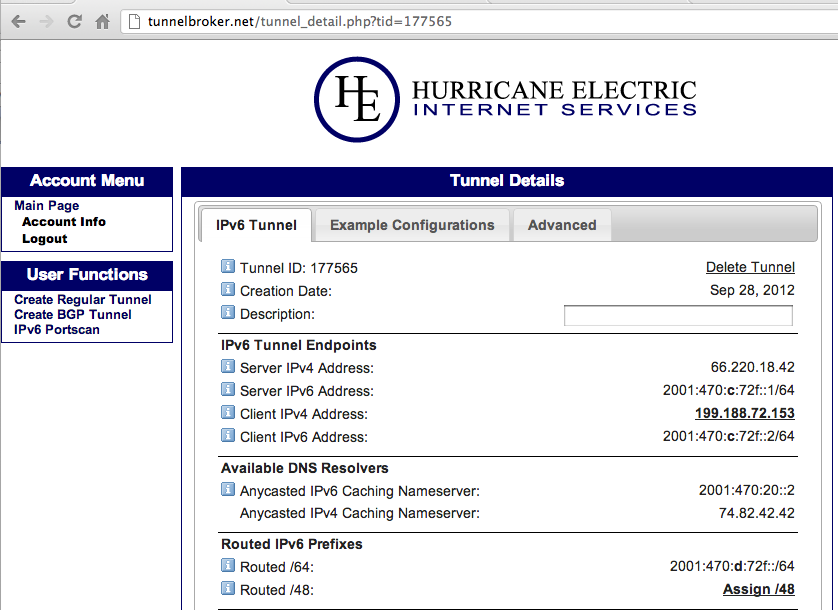
You need all these numbers to configure your server. Here's a brief explanation of the most important items:
- Server IPv4 Address: This is the IPv4 address of Hurricane Electric's tunnel broker. You will need it to configure the tunnel on your server.
- Server IPv6 Address: This is the IPv6 address of Hurricane Electric's tunnel broker. You will need this to configure the tunnel on your server, and it will be the IPv6 default gateway to the Internet from your server.
- Client IPv4 Address: This is the IPv4 address you entered.
- Client IPv6 Address: This is the IPv6 address of your server's end of the tunnel. You will have to assign this address to your server's interface.
- Routed /64: These addresses are for you to use on your LAN, routed through your server's tunnel.
Configuring the Tunnel on Your Server
Unfortunately, the configuration commands Hurricane Electric provides won't work on an Amazon Web Services machine because of the limitations of Amazon's networking.I am following the process explained here.
Finding the Local IP Address
The first script required finds the local private dynamic IP address Amazon assigns the server.On your server, execute this command:
sudo nano /usr/local/bin/checkipeth0
#!/usr/bin/perl
$check=`ip addr show dev eth0|grep "inet "|awk '{print \$2}'|awk -F/ '{print \$1}'`;
print $check;

On your server, execute these commands:
sudo chmod +x /usr/local/bin/checkipeth0

/usr/local/bin/checkipeth0

Creating the Tunnel Interface
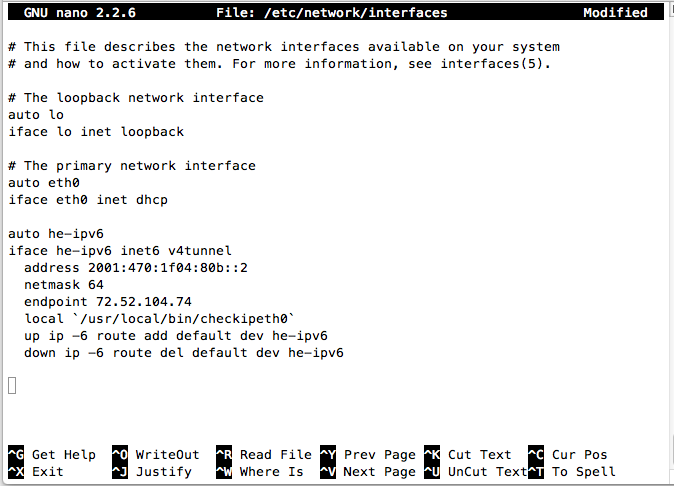
This code creates a virtual tunnel interface every time your server starts up.On your server, execute this command:
sudo nano /etc/network/interfaces
auto he-ipv6
iface he-ipv6 inet6 v4tunnel
  address $CLIENT_IPV6
  netmask 64
  endpoint $SERVER_IPV4
  local `/usr/local/bin/checkipeth0`
  up ip -6 route add default dev he-ipv6
  down ip -6 route del default dev he-ipv6
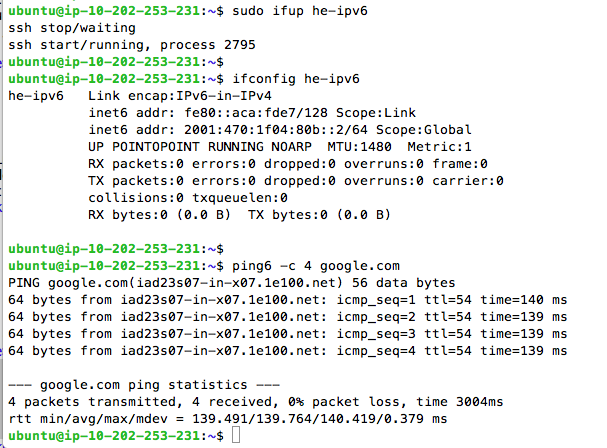
On your server, execute these commands:
sudo ifup he-ipv6

ifconfig he-ipv6

ping6 -c 4 google.com
Troubleshooting
If you do something wrong, and make a non-functional he-ipv6 interface, you need to delete it before you can try again. Otherwise you will see this error:If that happens, delete the old interface with this command:add tunnel sit0 failed: No buffer space available
Assigning a Static IPv6 Address to eth0
When you configured your Hurricane Electric tunnnel setup, you were given a "Routed /64". When I did it, I got 2001:470:1f05:80b::/64Remove the "/64" from the end, and append a 1 to get the first routed address:
2001:470:1f05:80b::1
To configure that address, on your server, execute this command:
sudo nano /etc/network/interfaces
iface eth0 inet6 static
  address 2001:470:1f05:80b::1
  netmask 64
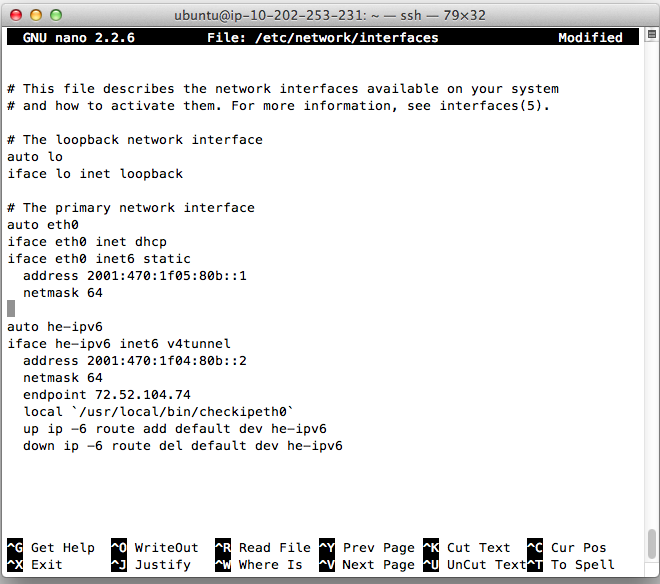
Press Ctrl+X, Y, Enter to save the file.
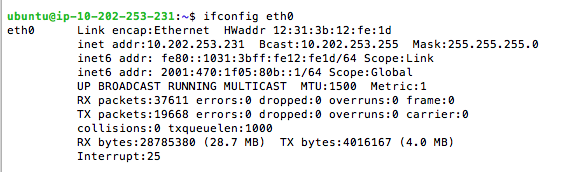
To make the change take effect, on your server, execute these commands:
sudo /etc/init.d/networking restart

ifconfig eth0
Keeping the Tunnel Up
Your tunnel will close if there isn't any traffic, so these "keepalive" pings are needed. This cron job will send three pings through the tunnel every two minutes.On your server, execute this command:
sudo nano /etc/cron.d/he-ipv6
*/2 * * * * nobody ping6 -c 3 -n -q $SERVER_IPV6 > /dev/null
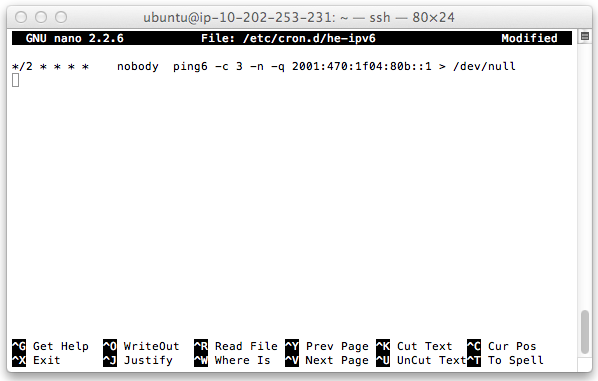
Press Ctrl+X, Y, Enter to save the file.
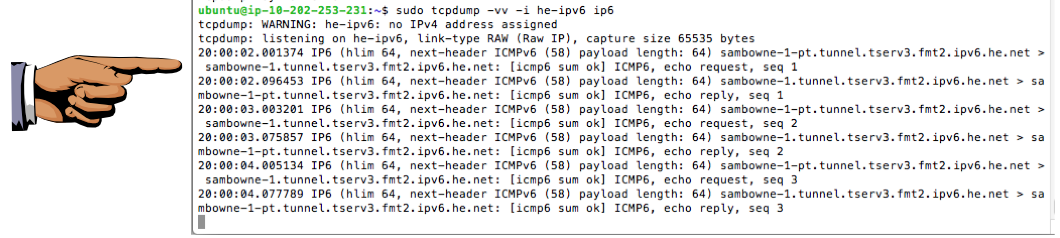
Testing your Tunnel with tcpdump
On your server, execute this command:
sudo tcpdump -vv -i he-ipv6 ip6
Now wait two minutes. You should see three "echo request" packets and three "echo reply" packets, as shown below:
Saving the Screen Image
Make sure you see three "echo request" packets and three "echo reply" packets, as shown in the image above on this page.
Save a screen image with the filename Proj HE-1A from Your Name.
Turning in Your Project
Email the image(s) to cnit.60@gmail.com with a Subject line of Proj HE-1A from Your Name.
Sources
http://blog.iphoting.com/blog/2012/06/02/ipv6-on-amazon-aws-ec2http://askubuntu.com/questions/109709/hurricane-ipv6-buffer-space-error
http://www.tldp.org/HOWTO/Linux+IPv6-HOWTO/x811.html
Last modified 1 pm 10-14-2012