How to Earn IPv6 Certifications (Windows Version) Part 2
Do Part 1 First
In part 1, you got these services running:- Web client
- Web server
- Email server
The rest of the process requires you to set up your DNS records correctly. You could set up your own DNS server, but you can use public DNS services also, and that's how these instructions do it.
Examining your DNS Records
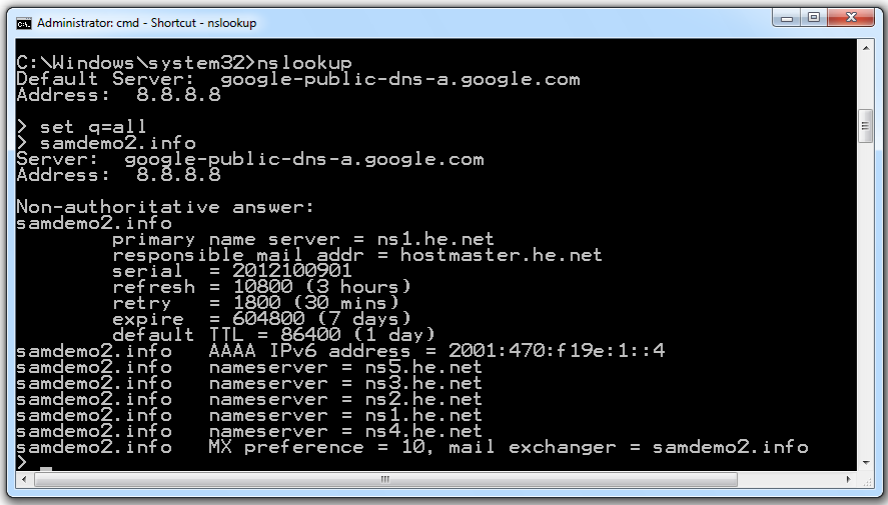
Open a Command Prompt window. Type in these commands:
nslookup

set q=all

yourdomain.info
yourdomain.info with your domain name.
You should see your
DNS records, as shown below on this page.
You should see these items:
- AAAA record pointing to your Local Endpoint IPv6 Address
- MX record pointing to your domain name
- All nameservers in the "he.net" domain
In the Command Prompt window, type this command:
exit
Reverse DNS
Forward DNS lookups are the normal ones, that start with a domain name like samdemo.info and look up an IPv6 address like 2001:5c0:1000:b::6ac5.Reverse DNS starts with the IPv6 address and looks up the domain name. This is a common test performed by email servers, to detect spammers. If a domain name doesn't resolve with reverse DNS, that indicates that there is something suspicious about the mail server, and some email servers will refuse to accept the mail.
Checking your Reverse DNS Resolution
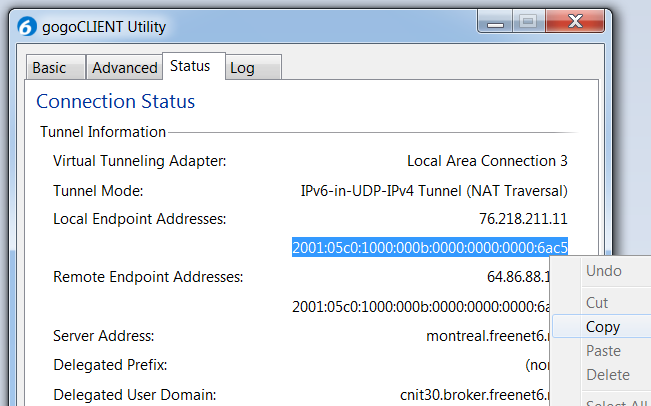
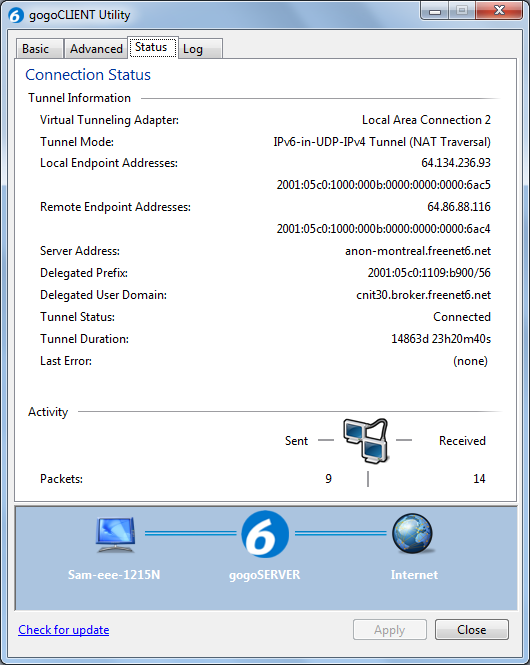
Click Start, type in gogo, and click "gogoCLIENT Utility". In the gogoCLIENT Utility, click the Status tab. Highlight your "Local Endpoint Address", right-click the highlighted address, and click Copy, as shown below on this page.
Open a Command Prompt window. Type in this command, and then press the Enter key:
nslookup
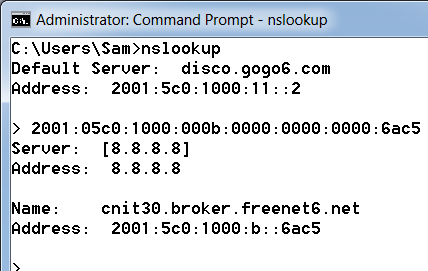
This isn't good. Your MX server is yourdomain.info,
but your reverse DNS resolves to something ending in "broker.freenet6.net".
That makes you look like a spammer to mail servers.
Adjusting the gogoCLIENT Configuration
There are two changes needed here: Reverse DNS Servers and Routing Advertisements.Reverse DNS Servers
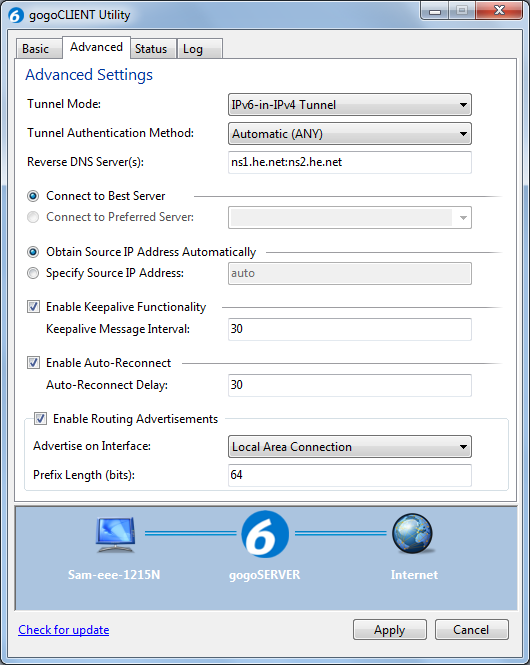
In the gogoCLIENT Utility, click the Advanced tab. In the "Reverse DNS Server(s) field, enter
ns1.he.net:ns2.he.net
Routing Advertisements
In the gogoCLIENT Utility, click the Advanced tab. At the bottom, check the "Enable Routing Advertisements" box. In the "Advertise on Interface" drop-down box, select "Local Area Connection" or whatever interface you are using to connect to the Internet.This setting tells Freenet6 that you are not just a single computer, but a router for a network. So Freenet gives you a dedicated IPv6 prefix. This is a real, publicly routed Internet address block, with an incredible number of addresses for you to use--each person who requests it gets more addresses than the entire IPv4 address space for their own use.
In the gogoCLIENT Utility, click the Basic tab. Click the Disconnect button. Click the Connect button. In the "Save changes before connecting?" box, click Save.
In the gogoCLIENT Utility, click the Status tab. You should see your "Delegated Prefix", as shown below on this page.
Finding Your New IPv6 Address
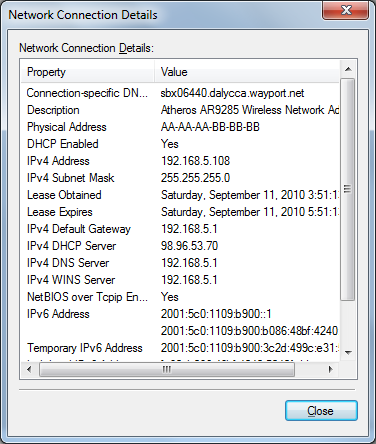
On your Windows desktop, click Start. In the Search box, type NETWORK CONNECTIONS and click "View Network Connections" in the results section. Double-click "Local Area Connection". In the "Local Area Connection Status" box, click the Details button. You should see your IPv6 address, which is your assigned prefix followed by ::1, as shown below on this page.
Correcting the AAAA Record at Hurricane Electric
In Firefox, go to dns.he.netOn the upper left, log in with the account you are using for the IPv6 Certification tests.
Now you need to add some records to your zone. Click the little pencil-and-paper icon just to the left of your domain name.
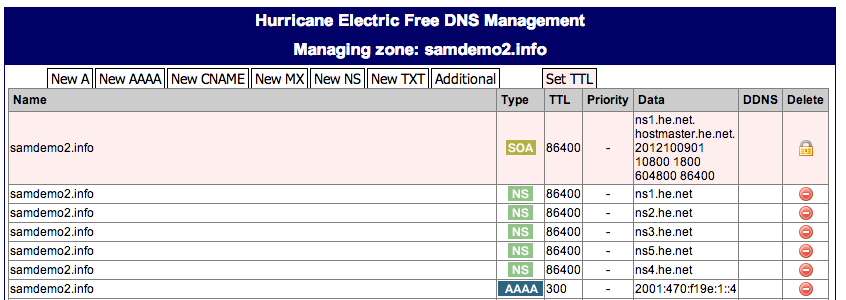
A page opens with a chart titled "Hurricane Electric Free DNS Management Managing zone:", as shown below on this page.
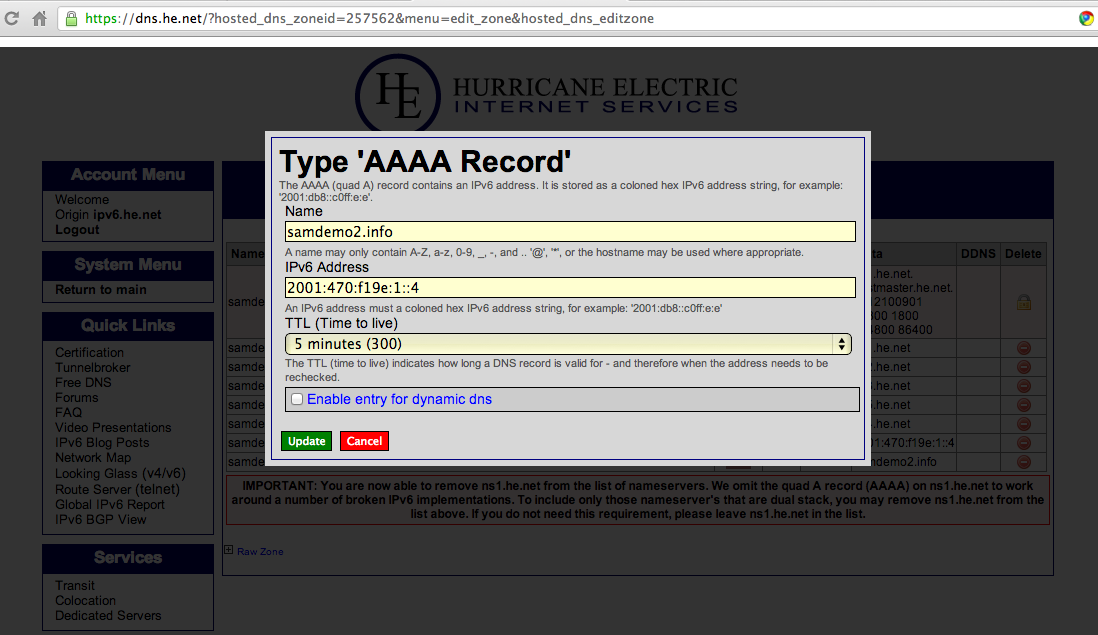
Click the blue-green "AAAA" label on your AAAA record to edit it.
In the box that appears, enter a Name of @ and an "IPv6 Address" of your interface's IPv6 address. Set the TTL to 5 minutes, as shown below on this page. Click the Submit button.
Configuring a Reverse DNS Zone at Hurricane Electric
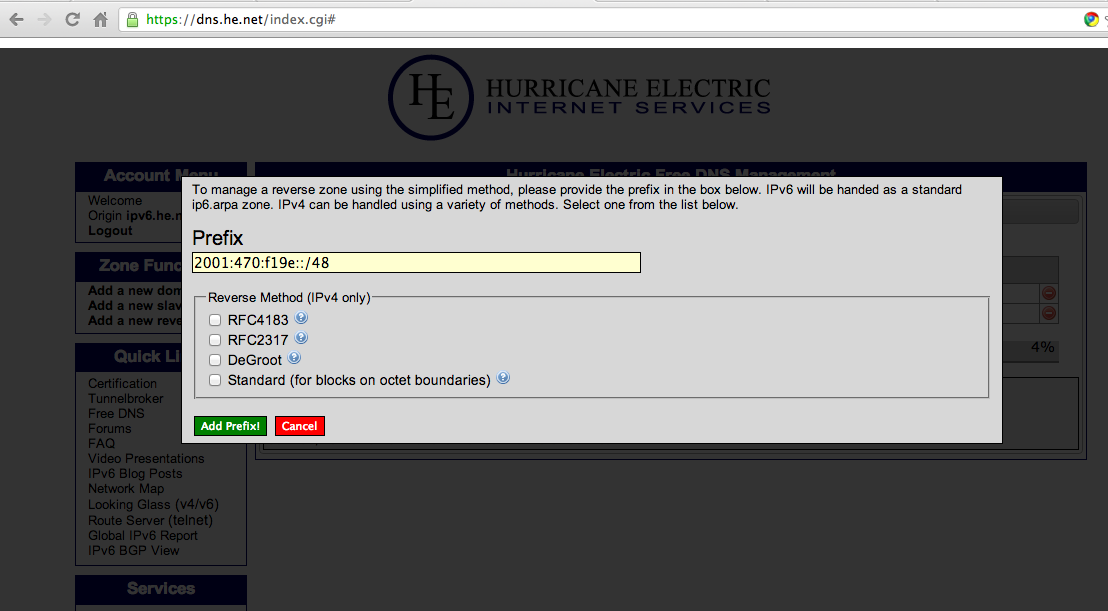
On the left side of the "Hurricane Electric Free DNS Management" page, click "Return to main".On the left, click "Add a new reverse" In the "Prefix" box, type your IPv6 Prefix, as shown below on this page. Click the "Add Prefix! button.
Note: it's best to type the address in, rather than copying and pasting it, in my experience.
The prefix now appears in the "Hurricane Electric Free DNS Management" page, as shown below on this page, with a red WARNING message which you can safely ignore.
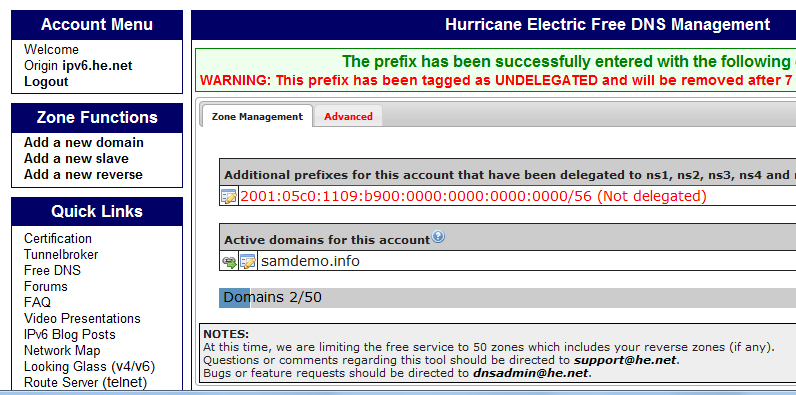
Click the little pencil-and-paper icon just to the left of your prefix.
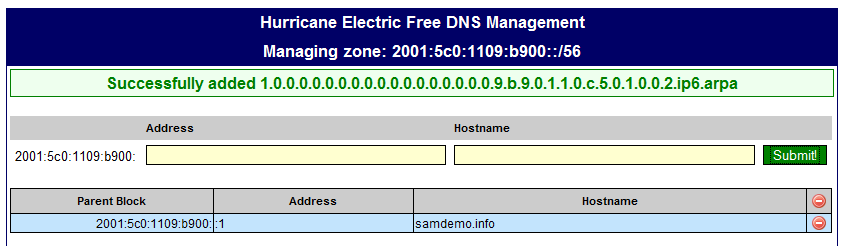
A page opens with a chart titled "Hurricane Electric Free DNS Management Managing zone:", as shown below on this page.
Enter a "Host Address" of :1 Type your domain name into the "Hostname" field. Click the Submit! button.

A message appears saying "Successfully added...", as shown below on this page. The reverse DNS record has a long name with your complete IPv6 address in it backwards.
Testing Your Reverse DNS Configuration at Hurricane Electric
In Firefox, go to http://ipv6.he.net/certification/ and log in.
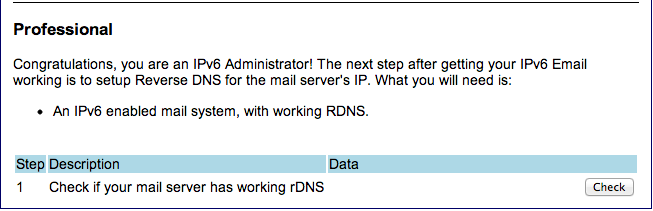
In the Professional section, in the "Check if your mail server has working rDNS" line, click the Check button, as shown below:
Passing the Reverse DNS Test
When you pass the test, the "Professional Questionnaire" appears. Fill it out.You should now be a Professional, with a badge like the one shown below on this page. Click the badge to see your score: it is now 390, worth 39 points in any of my CCSF classes.
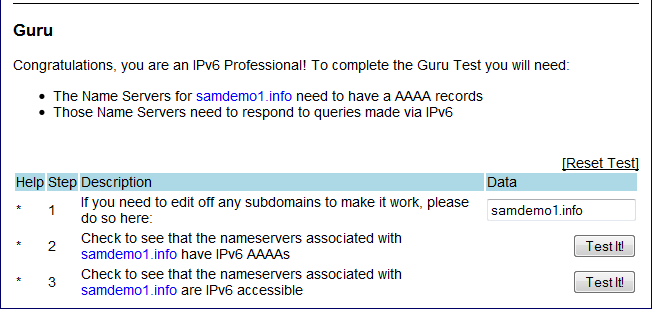
Passing the Guru Test
The Hurricane Electric Certification test now shows the Guru test, as shown below on this page. These tests determine if your namesevers are properly using IPv6, which they obviously are, since you are using the Hurricane Electric nameservers. Just click the two "Test It!" buttons. Then complete the questionnaire and you are a Guru.
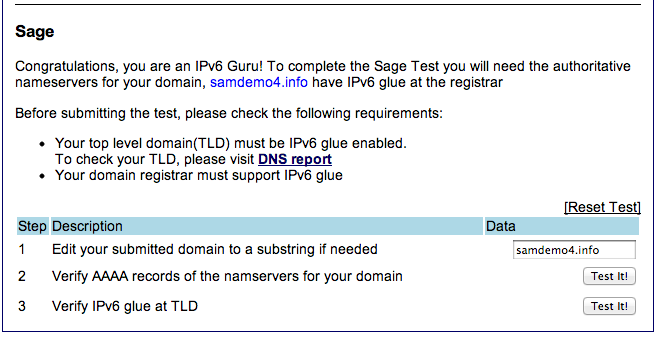
Passing the Sage Test
The Hurricane Electric Certification test now shows the Sage test, as shown below on this page. This determines if your domain name registrar put an IPv6 glue record on the root domain servers. GoDaddy does that for you.Just click the two "Test It!" buttons.
A test opens, asking for technical knowledge about IPv6 glue, as shown below:
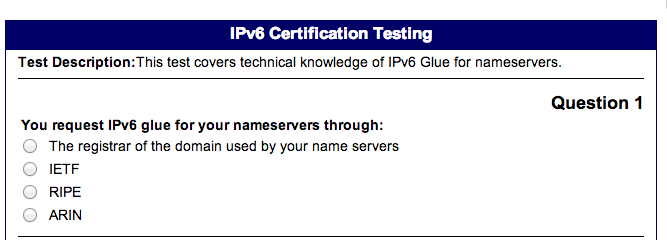
You don't need to take that test now.
In the upper left of the page, click Logout.
Log in again. Now your badge shows that you are a Sage, as shown below:

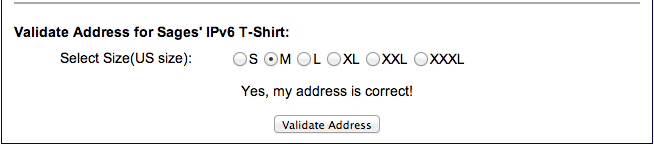
Getting Your T-Shirt
On the upper left, click "Update Info".At the bottom of the page, select a size for your T-shirt!
Then click the "Validate Address" button.
Viewing Your Score
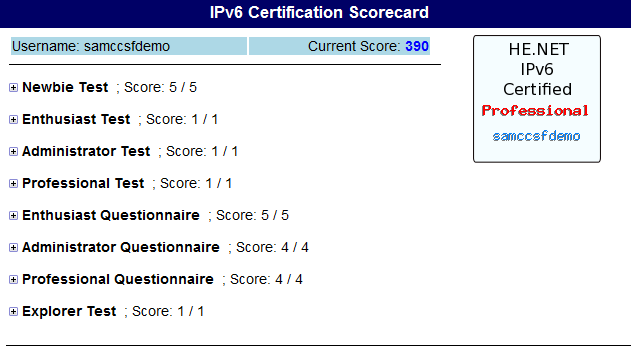
On the top left, click the "Click for main page" button. Click your badge to show your score, as shown below on this page.
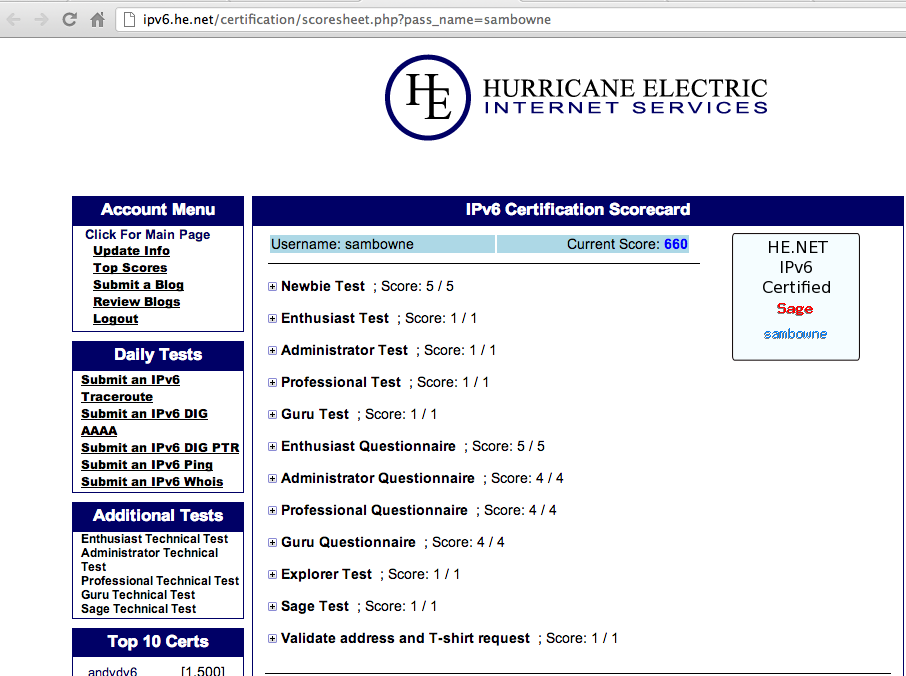
Calculating Your Points
To determine your CCSF points, divide the Hurricane Electric points by 10. If you have 660 points, as shown above on this page, you can get 66 points.However, you can get a lot more points by taking the "Additional Tests" shown on the left side.
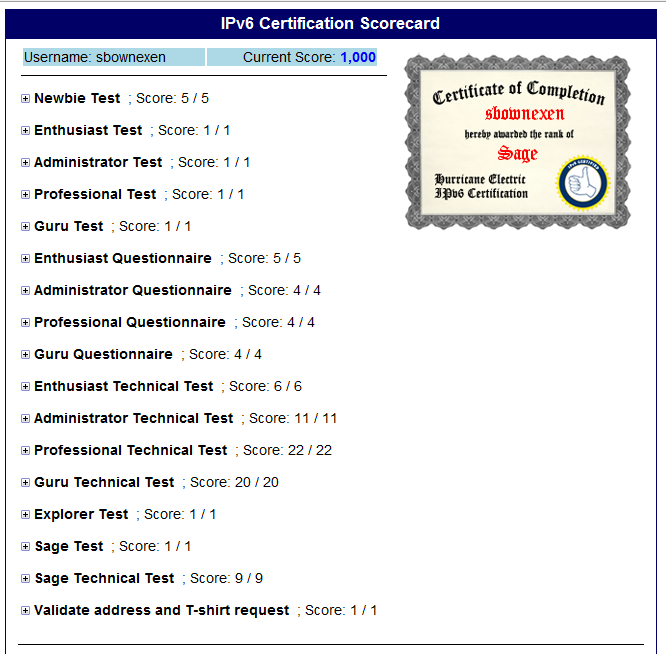
If you take them all, you can get up to 1000 Hurricane Electric points, as shown above on this page, which is worth 100 CCSF points. You can also get the IPv6 Guru T-Shirt by filling out the request form at Hurricane Electric.
Claiming Your Points
To claim your points, save a screen image showing your number of points and email it to cnit.60@gmail.com. Use a subject line of "IPv6 Cert Windows 2 from YOUR NAME".
Last modified 10-9-12 4:48 pm