Proj 5x: Wazuh 3 Setup (15 pts.)
What you need
- A 64-bit computer that can run VirtualBox. You can't use a 32-bit system.
Introduction
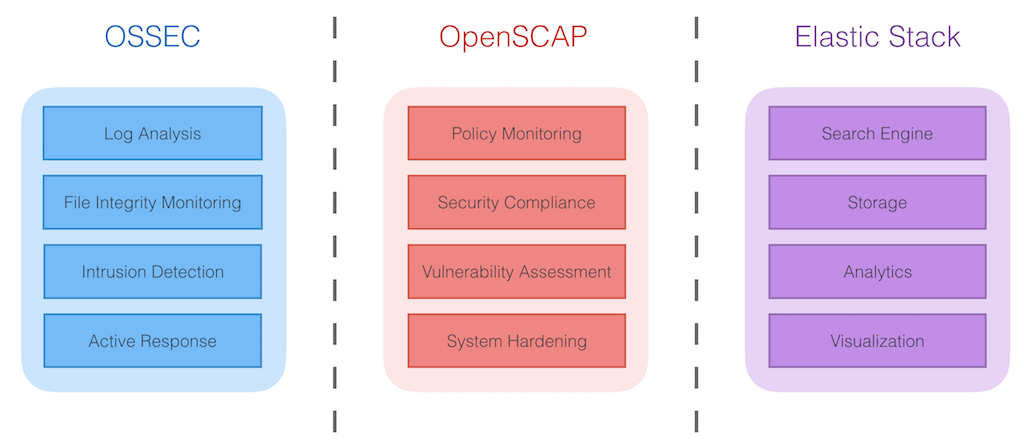
Wazuh is "a security detection, visibility, and compliance open source project". It has three main components, as shown below.
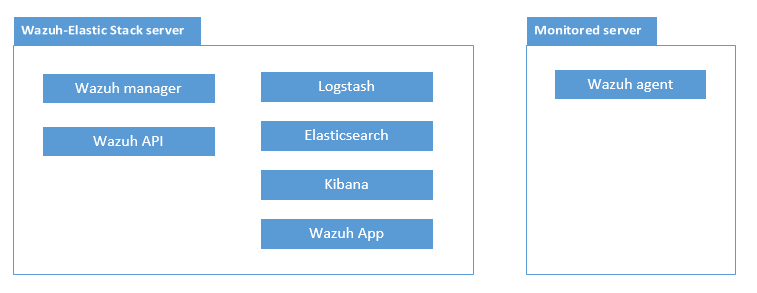
We'll set up the simplest version, a single-host
deployment, as shown below.
Installing VirtualBox
Download it here:
https://www.virtualbox.org/wiki/Downloads
Install it with the default options.
Downloading the Wazuh Virtual Appliance
In a Web browser, go to:
https://documentation.wazuh.com/3.x/installation-guide/packages-list/index.html#ova-wazuh-3-0-0-elk-6-1-0
Download the latest OVA, as shown below.
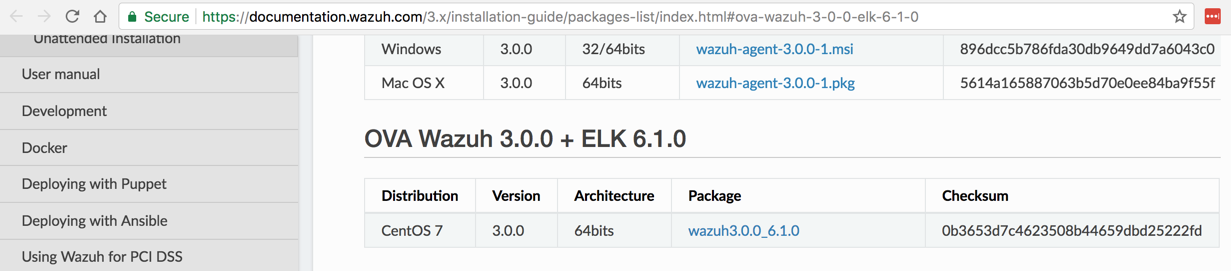
When I did it (12-26-17), the filename was
wazuh3.0.0_6.1.0.ova and the size was 2.4 GB.
The MD5 hash is provided on the Web page, as shown above,
for some degree of integrity control.
More cautious students might want to also verify this SHA256 hash: 1811e281db5dd78d35d3f9404276c6dcb143fbbb57231dd281b15acf6a14e73d
Get it here:
https://ossec.wazuh.com/vm/ossec-vm-2.8.3.ova
Importing the OVA into VirtualBox
Start VirtualBox. From the menu bar,
click File, "Import Appliance".
Navigate to the wazuh3.0.0_6.1.0.ova
file you downloaded and double-click it.
Import it with the default options.
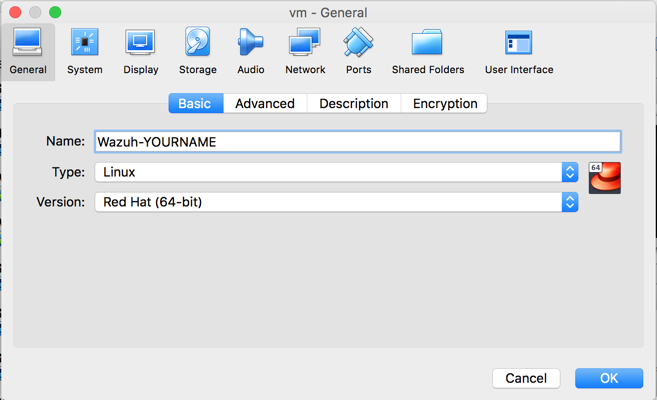
Adjusting Settings
From the VirtualBox menu bar, click
Machine, Settings.
On the General tab, change
the Name to
Wazuh-YOURNAME,
replacing "YOURNAME" with your
own name,
as shown below.
On the Network tab, select
"Bridged Adapter",
as shown below. Click OK.

Logging In
Start the VM.
You see a test-only Linux console,
as shown below.
Log in with these credentials:
- Username: root
- Password: wazuh
At the # prompt, execute this command:
ip addr show
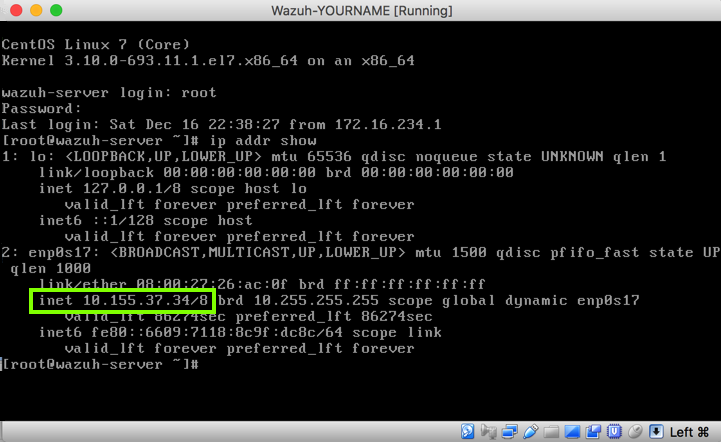
Find your IP address, as outlined in green in
the image above.
Viewing the Kibaba Web Interface
On your host system, in a Web browser, open
the address of your Wazuh VM on port 5601,
as shown below.
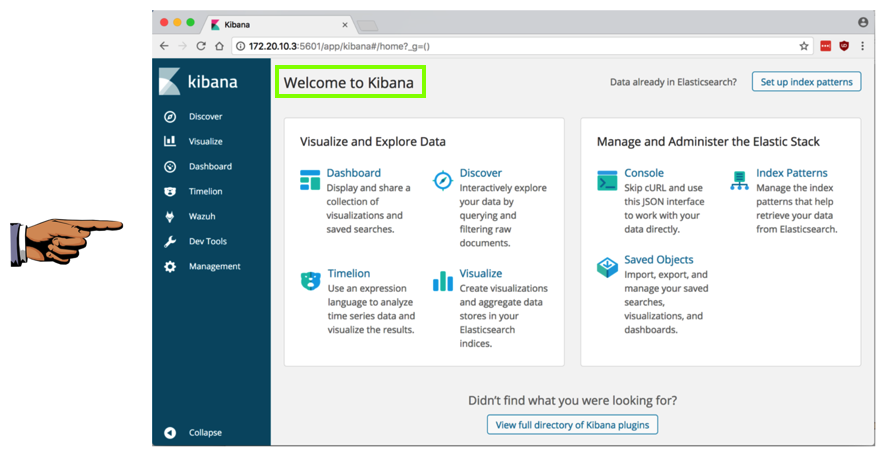
Saving a Screen Image
Make sure you can see
the "Welcome to Kibana" page,
as shown above.
Capture a whole-desktop image.
Save the image with the filename "Your Name Proj 5xa". Use your real name, not the literal text "Your Name".
YOU MUST SUBMIT AN IMAGE OF THE WHOLE DESKTOP TO GET FULL CREDIT!
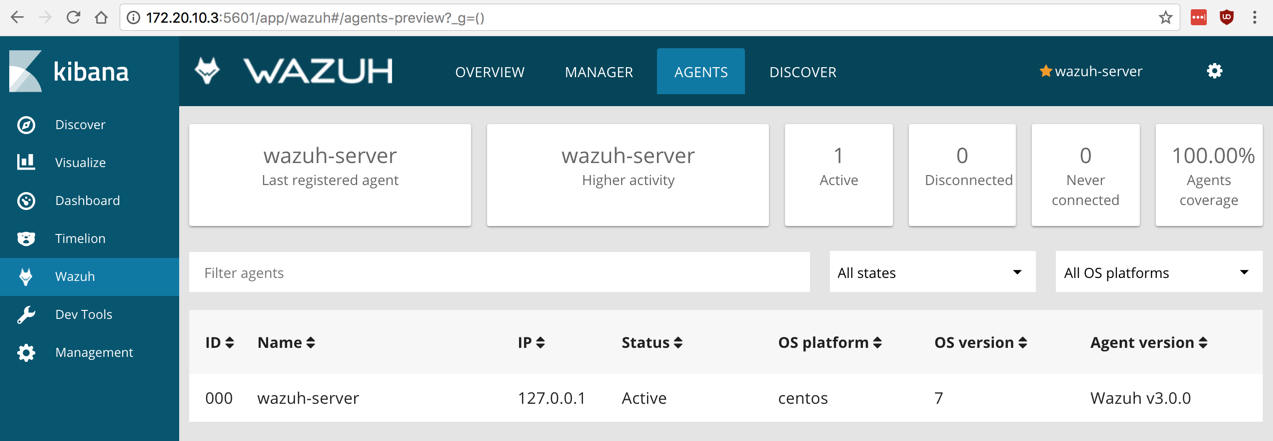
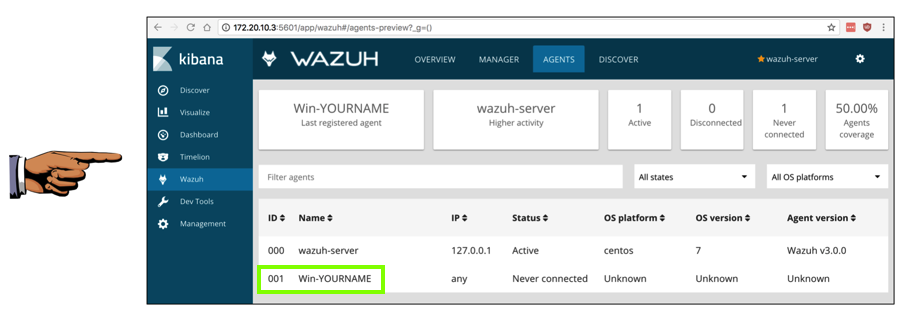
Viewing Agents
On the left, click Wazuh.
At the top, click AGENTS.
As shown below, an agent is already installed,
monitoring the Wazuh server itself.
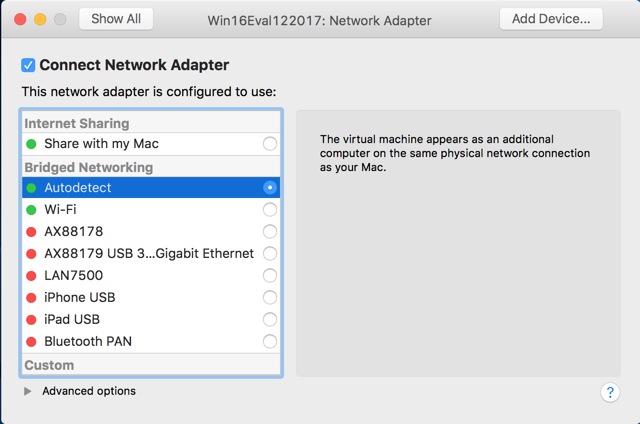
Installing an Agent on a Windows Server
Launch a Windows system to analyze. I used a
VMware Windows Server 2016 machine.
In Virtual Machine Settings, configure your
Windows Server to use Bridged networking,
as shown below.
In the Windows machine, in a Web browser, go to
https://documentation.wazuh.com/3.x/installation-guide/installing-wazuh-agent/index.html
Agents are available for many operating
systems, as shown below.
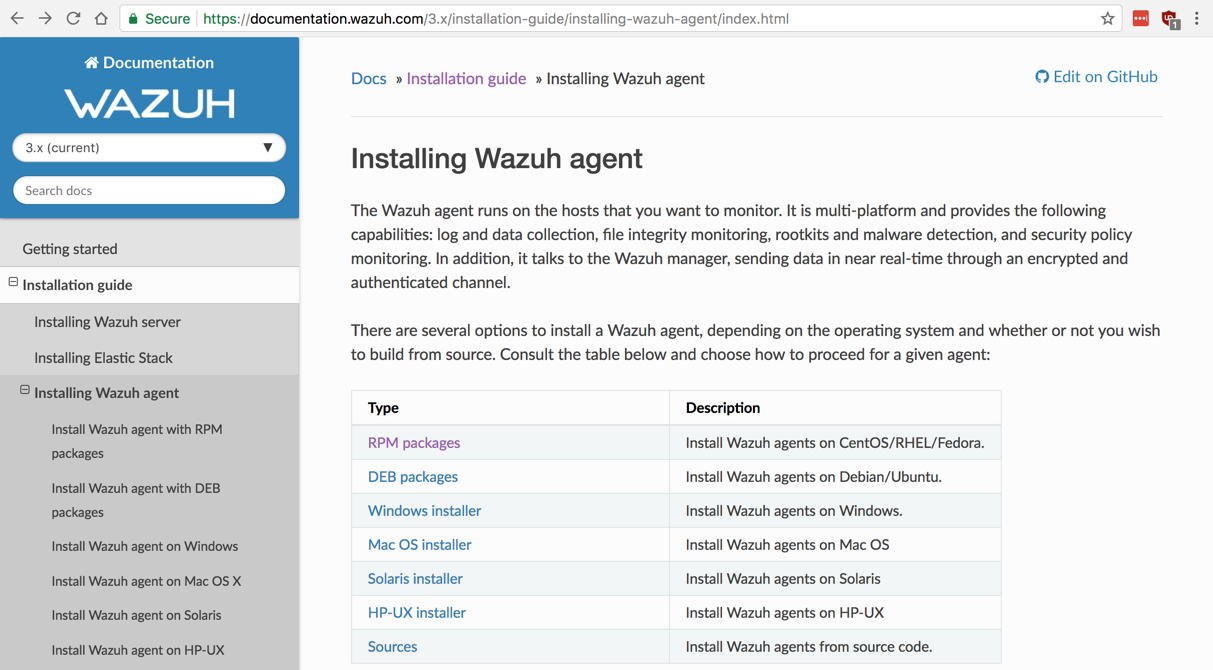
Click "Windows Installer".
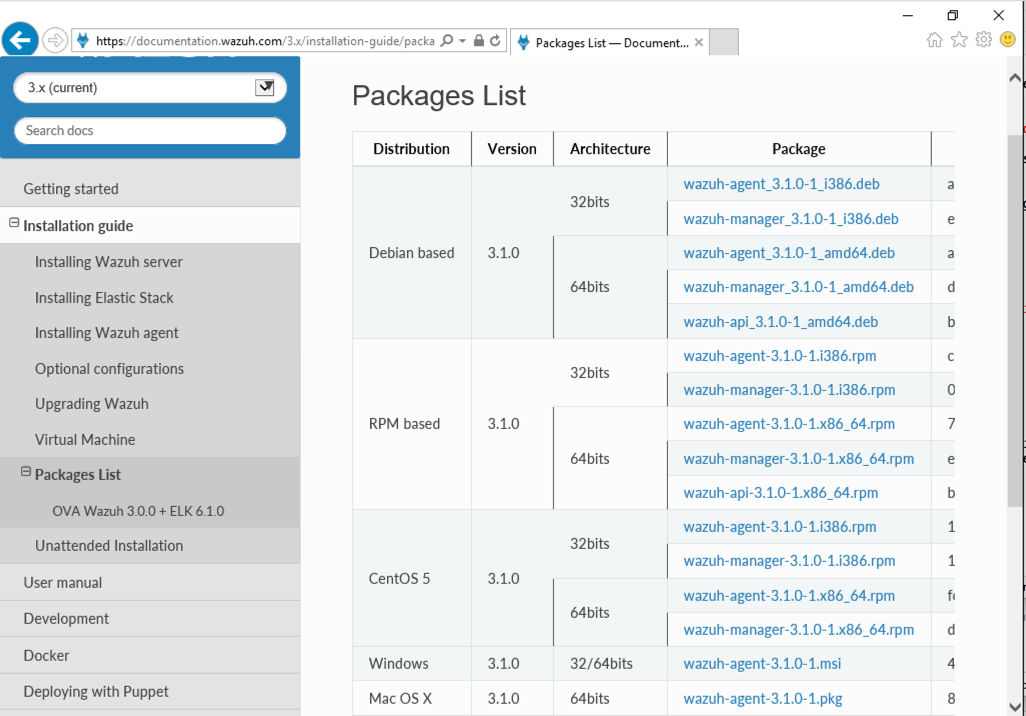
On the next page, click "packages list".
On the next page, on the Windows
row, click wazuh-agent-3.1.0-1.msi
as shown below.
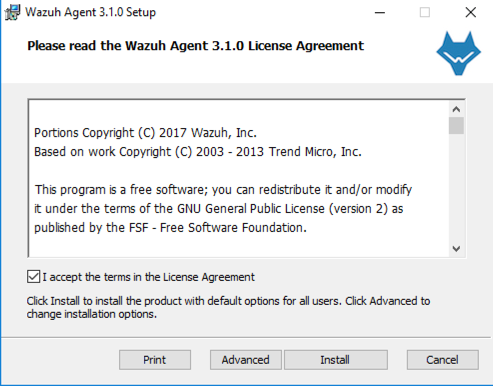
Save the file and run it. An installer
opens, as shown below.
Click Install.
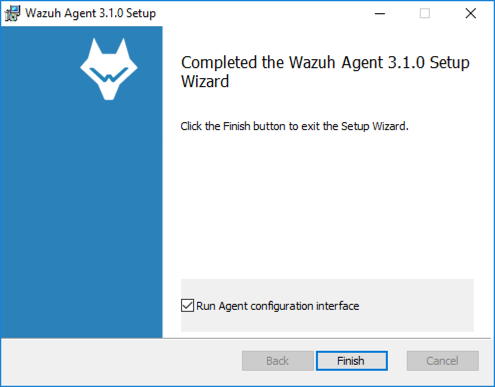
In the next screen, check the
"Run Agent configuration interface",
as shown below.
Click Finish.
Minimize your Web browser.
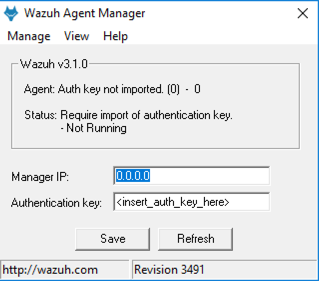
The Wazuh Agent Manager opens,
as shown below.
Click Finish.
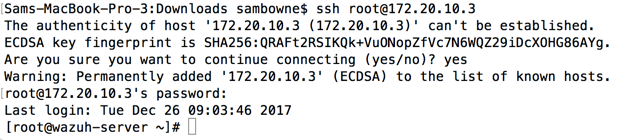
Connecting to the Wazuh Server via SSH
You cannot copy and paste text to the Console,
so use an SSH client. On a Windows host, use
PuTTY. On a Mac or Linux host, use the
command-line SSH tool, as shown below.
Connect with these credentials:
- Username: root
- Password: wazuh
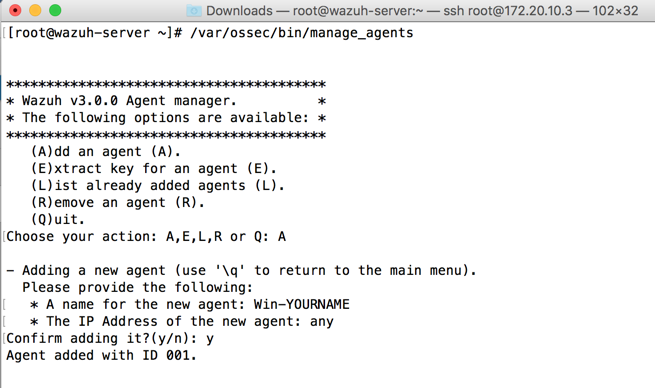
Registering the Windows Agent
In your SSH session, at the #
prompt, execute this command:
/var/ossec/bin/manage_agents
The "Agent manager" menu appears,
as shown below.
Type A and press Enter.
Enter these values,
as shown below.
- A name for the new agent: Win-YOURNAME
- The IP Address of the new agent: any
- Confirm adding it?(y/n): y
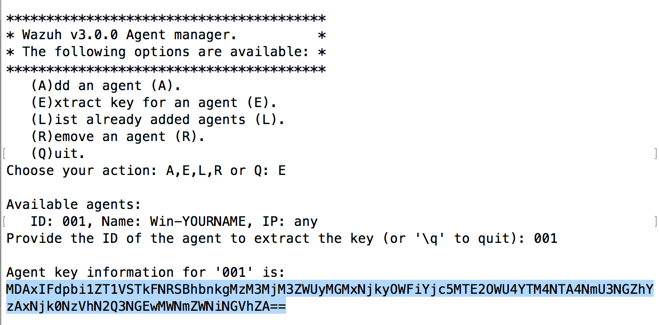
Extracting the Windows Agent's Key
In the "Agent manager",
enter these values,
as shown below.
- Choose your action: A,E,L,R or Q: E
- Provide the ID of the agent to extract the key (or '\q' to quit): 001
A long Base64 "Agent key" appears,
as shown below.
Highlight and copy this key.
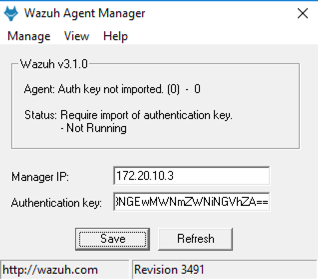
Completing Agent Registration
On your Windows server,
in the Wazuh Agent Manager,
paste in the "Agent key".
Also enter the IP address of your
Wazuh server,
as shown below.
Click Save.
Click OK.
Viewing the Agents in the Web Interface
On your host system, in the Web browser
showing the Web interface,
on the left, click Wazuh.
At the top, click AGENTS.
As shown below, there's now an agent
named Win-YOURNAME,
as shown below.
Saving a Screen Image
Make sure
the agent
named Win-YOURNAME
is visible,
as shown in the image above.
Capture a whole-desktop image.
Save the image with the filename "Your Name Proj 5xb". Use your real name, not the literal text "Your Name".
YOU MUST SUBMIT AN IMAGE OF THE WHOLE DESKTOP TO GET FULL CREDIT!
Turning in your Project
Send the image to: cnit.50sam@gmail.com with a subject line of "Proj 5x From Your Name", replacing Your Name with your own first and last name. Send a Cc to yourself.
Sources
Wazuh v3.0 released!
Docs: Welcome to Wazuh
Posted 12-26-17 by Sam Bowne