SPL 210: Ingesting Outlook Mail into SOAR (10 pts)
What you need:
- A Red Hat Linux server with Splunk and SOAR installed
Creating an Outlook Mail Account
In a Web browser, go to
https://outlook.com/
Log in, or create a new account and log in.
Getting a Splunk Account
In a Web browser, go to
https://www.splunk.com/
If you don't have an account, click the head at the top
right and create one.
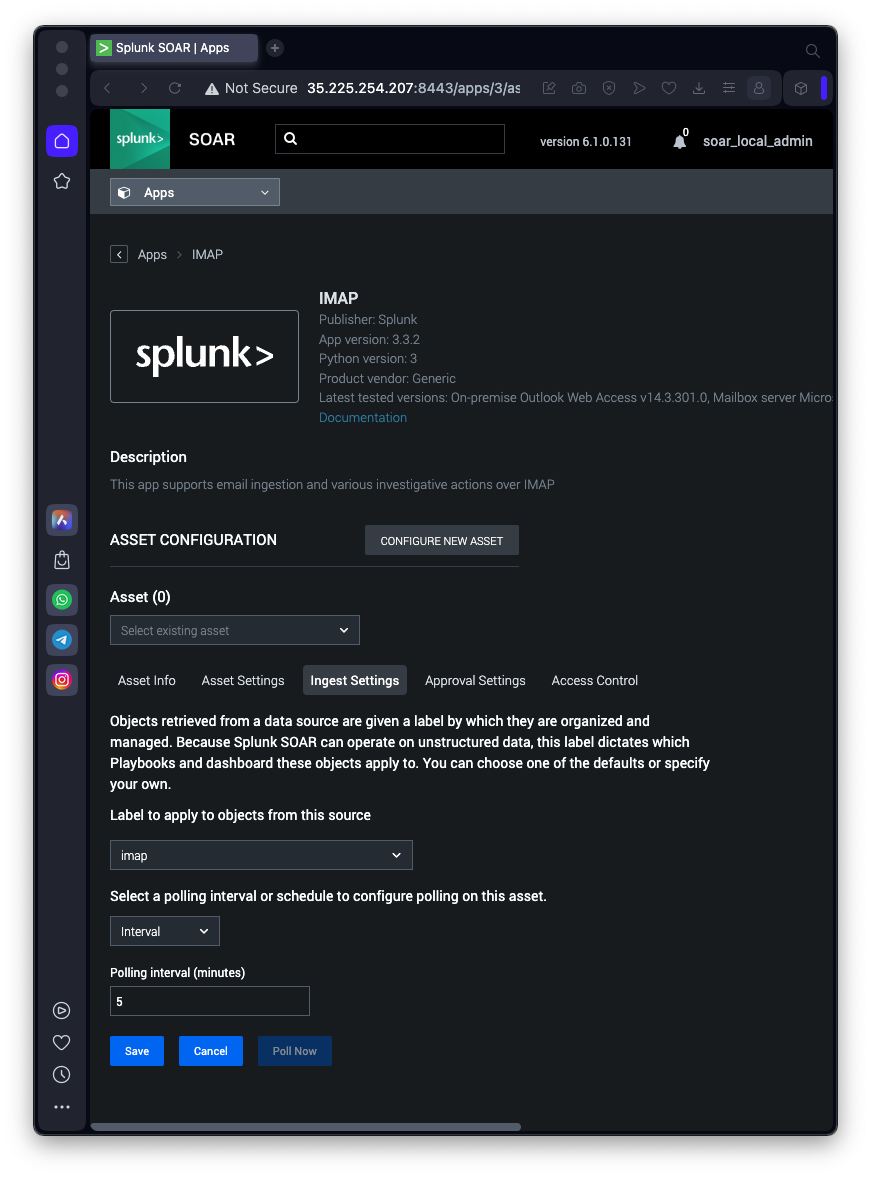
Installing the IMAP App in Splunk SOAR
On the SOAR home page, at the top left,
in the Home field, click the
drop-down arrow.
Click Apps,
as shown below.
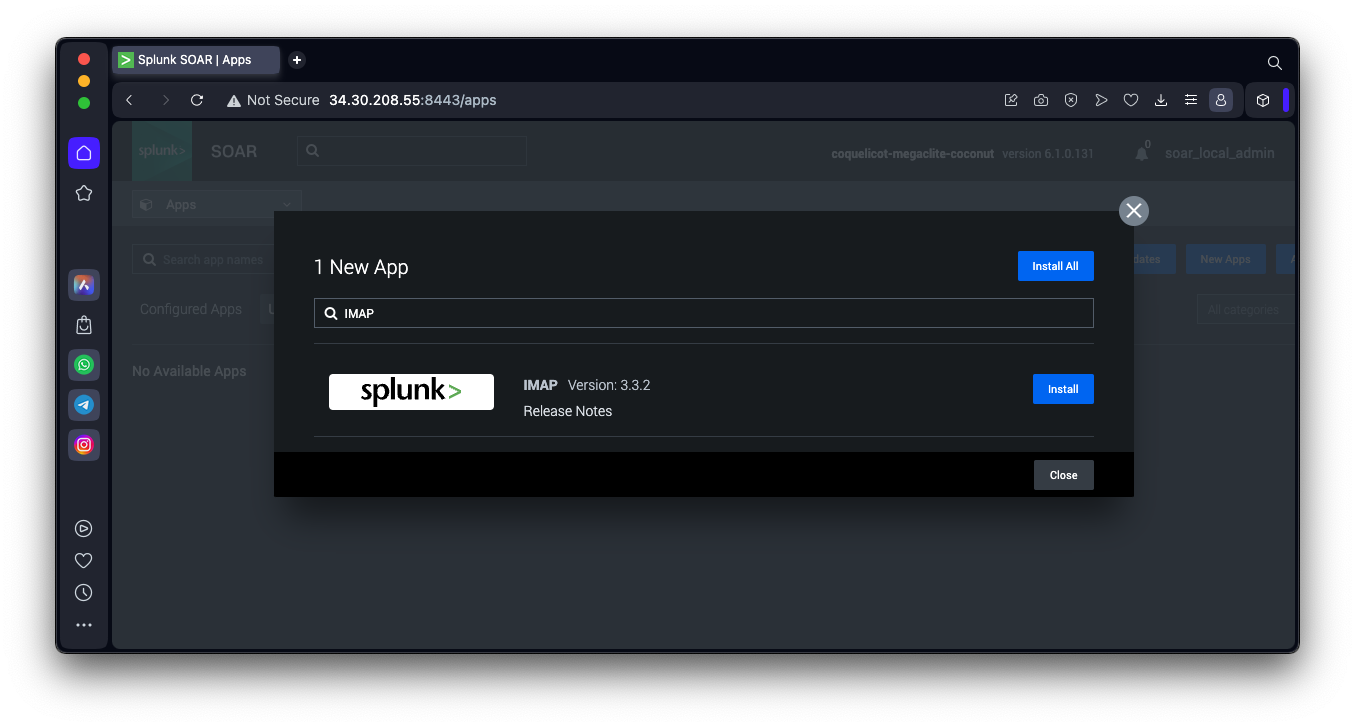
On the Apps page, at the top right,
click the "New Apps" button.
Search for IMAP.
In the "IMAP" line, click the
Install button,
as shown below.
If it asks for your Splunk login, log in to
your Splunk account.
In the "1 New App" box, at the lower right,
click the Close button.
You see the "IMAP" app on the
"Unconfigured Apps" tab,
as shown below.
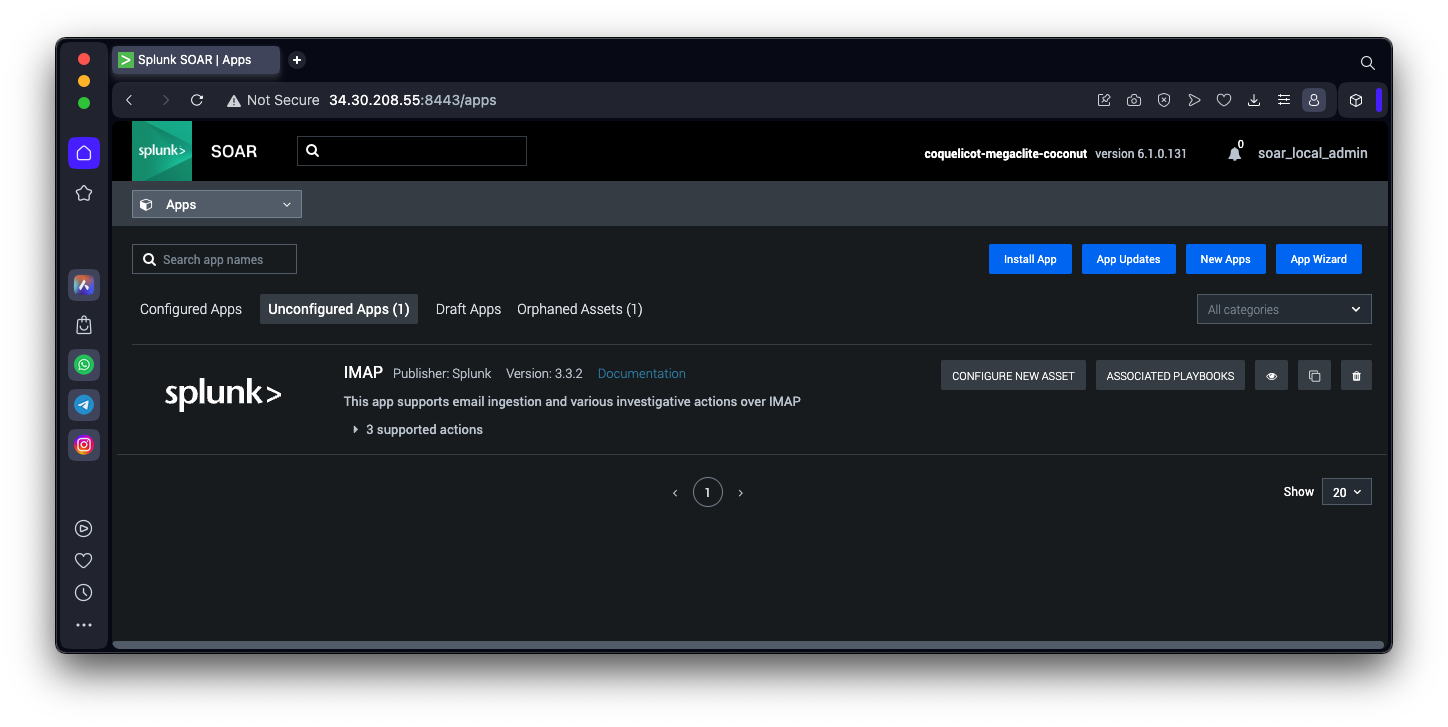
Click the "CONFIGURE NEW ASSET" button.
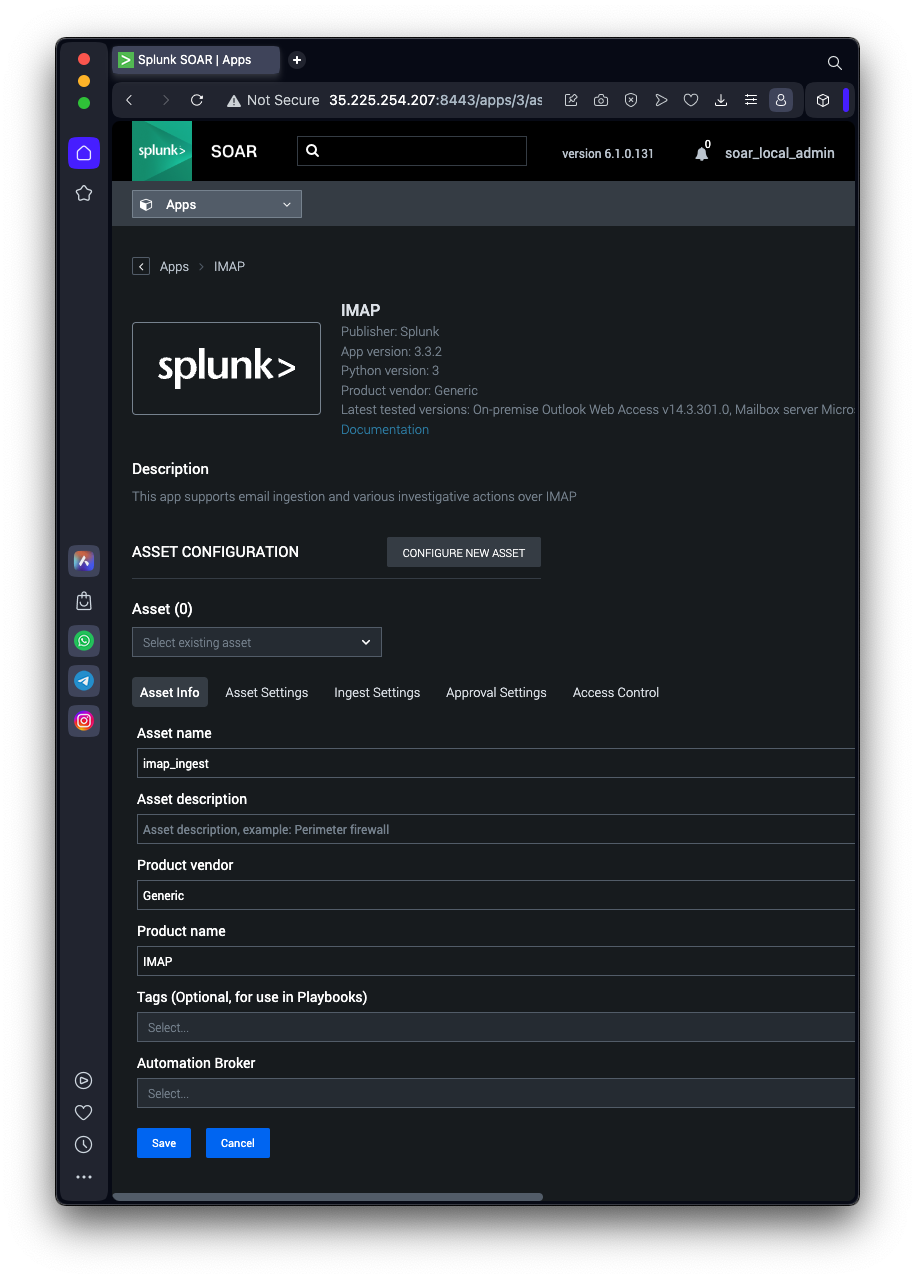
On the "ASSET CONFIGURATION" page, enter these values:
On the Asset Info tab
as shown below.
On the Ingest Settings tab
- Select label: Type imap and press Enter
- Polling schedule: Interval
- Polling interval: 5 minutes
as shown below.
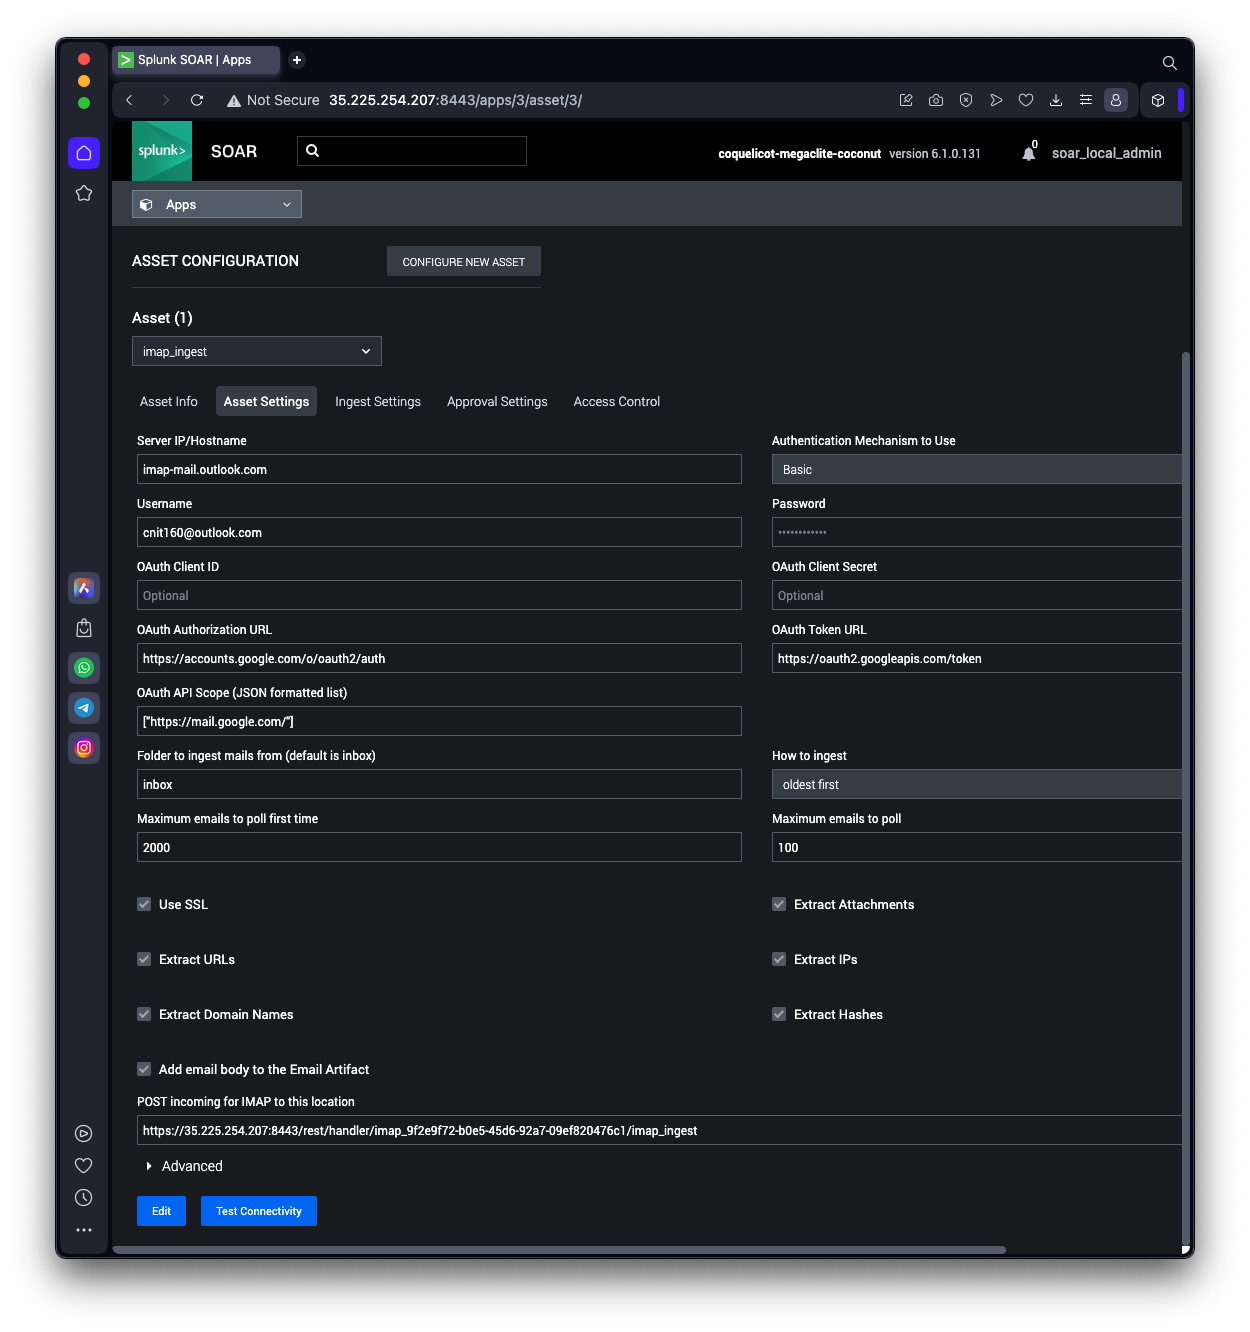
On the Asset Settings tab
- Server IP/Hostname: imap-mail.outlook.com
- Username: Your Outlook Username
- Password: Your Outlook Password
- Use SSL Check
- Add email body to the Email Artifact Check
as shown below.
At the bottom, click the Save
button.
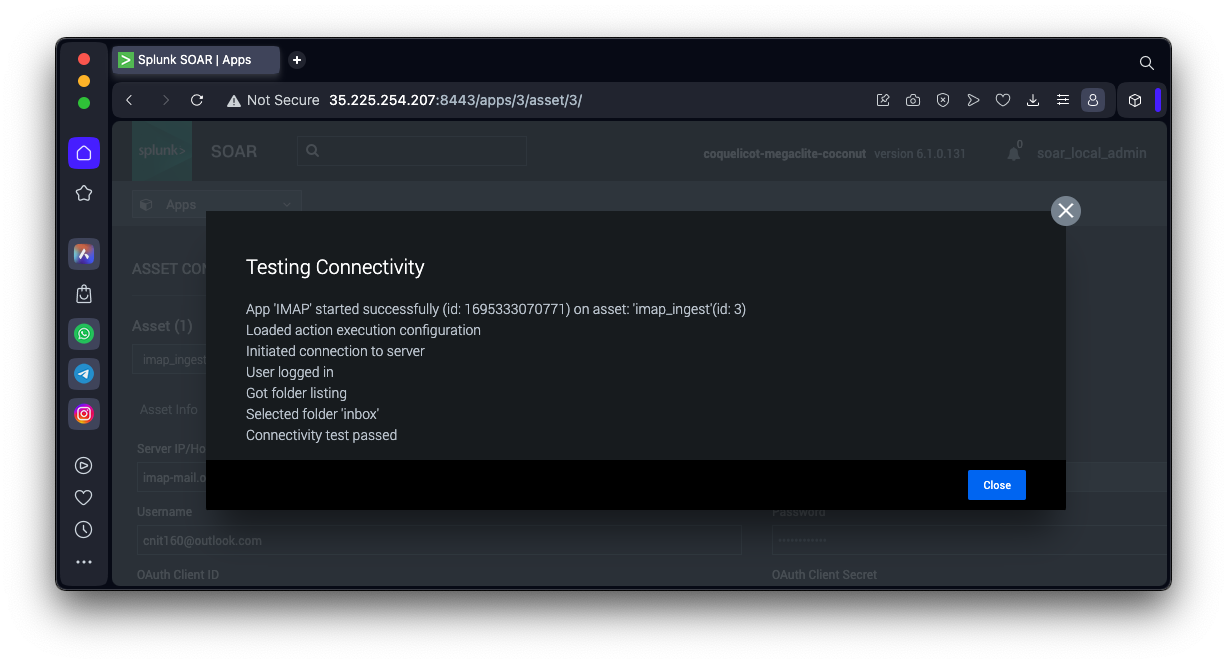
At the bottom, click the "Test Connectivity"
button.
The test passes,
as shown below.
Sending a Test Email
From another email account, send an email to your
Outlook mail with a subject line of
"TEST EMAIL".
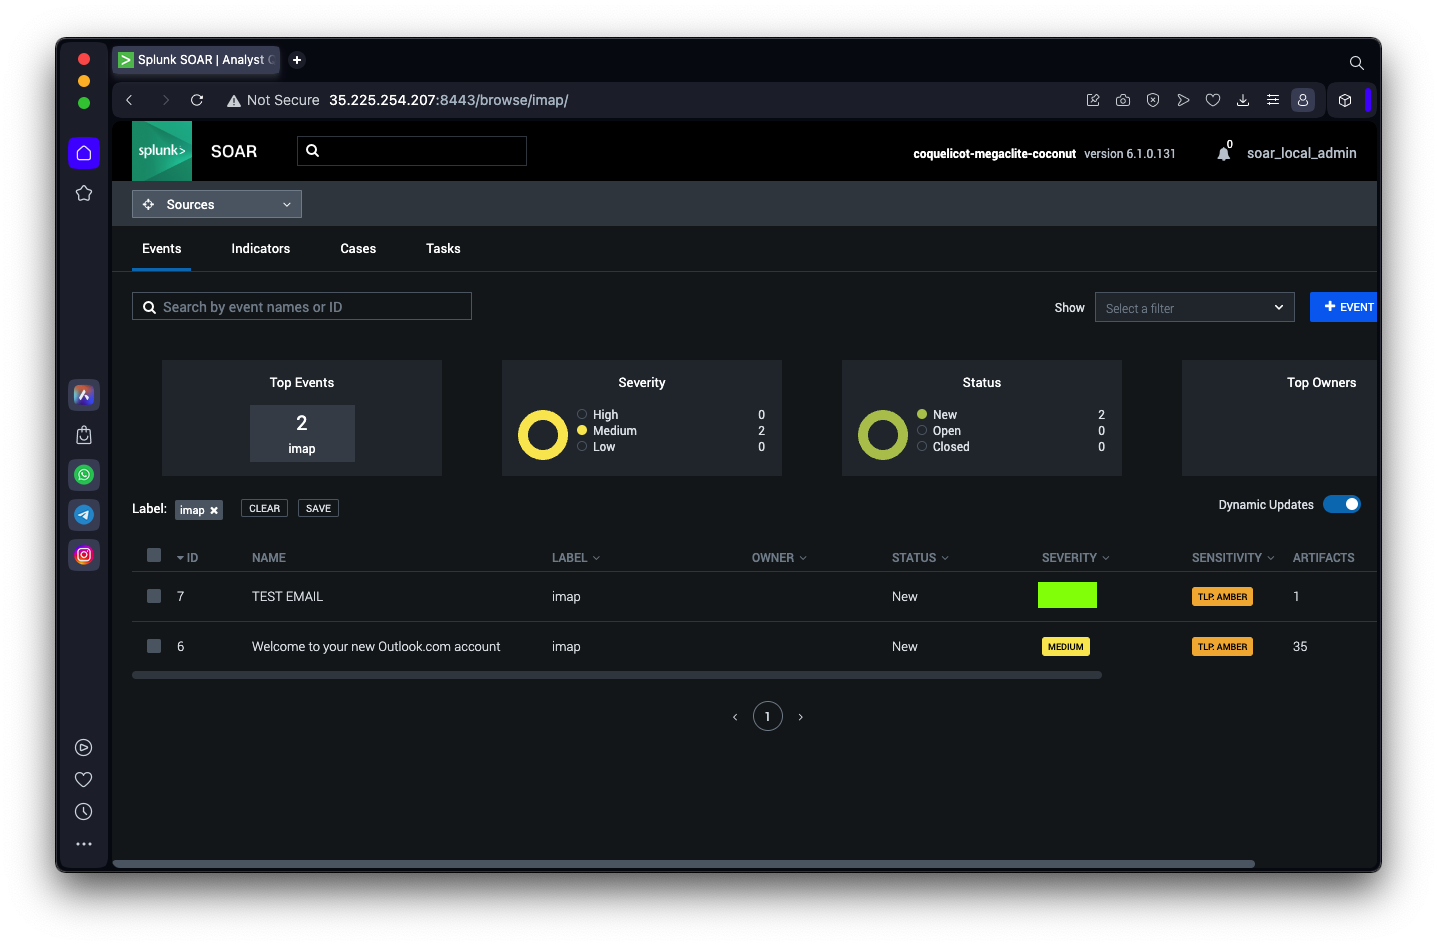
Viewing IMAP Events
In any Splunk SOAR page,
at the top left, click the drop-down
arrow and click Sources,
Imap,
as shown below.

SPL 210.1: Severity
Find the TEST EMAIL you sent yourself. You may need to wait
five minutes.
The flag is
covered by a green box in the image below.
|
Sources
Splunk SOAR IMAP
Posted 9-21-23