Local Installation
If you don't want to use Google Cloud, you can install Red Hat Linux locally instead as explained in this project:
H 201: Google Cloud Linux Server
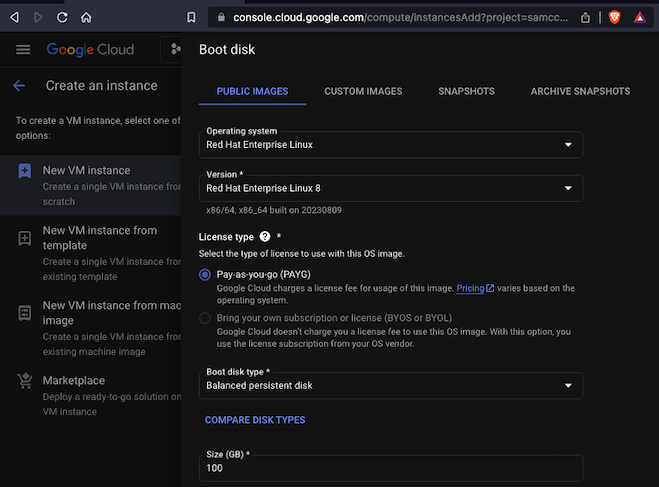
Choose a Boot Disk of "Red Hat Enterprise Linux 8" and Adjust the disk size to 100 GB, as shown below.
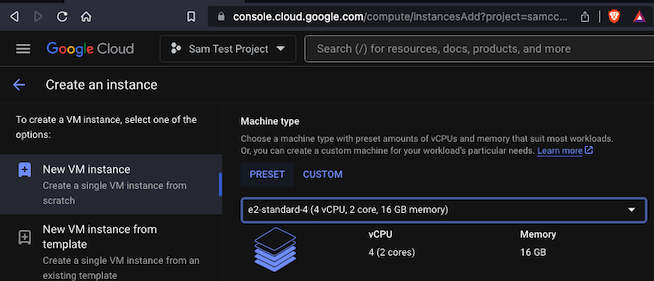
Accept the default settings for the other options.
A message appears, saying "Transferring SSH keys to the VM". After a few seconds, it asks for you to authorize the connection.
Click Authorize. An SSH window opens.
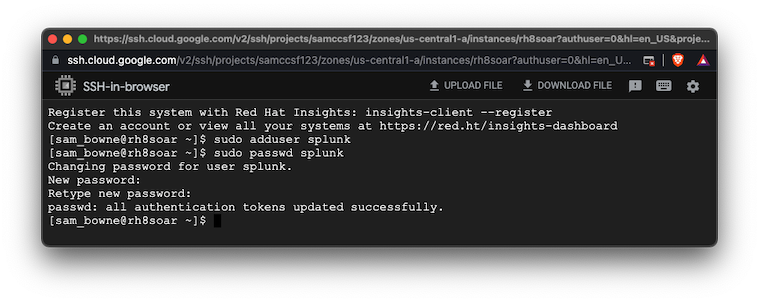
sudo adduser splunk
sudo passwd splunk
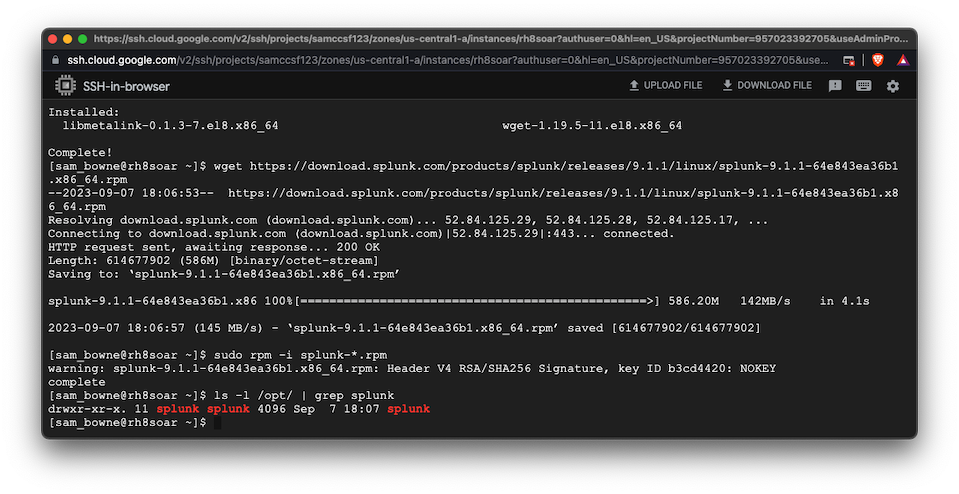
sudo yum install wget -y

wget https://download.splunk.com/products/splunk/releases/9.1.1/linux/splunk-9.1.1-64e843ea36b1.x86_64.rpm

sudo rpm -i splunk-*.rpm
ls -l /opt/ | grep splunk
Now execute this command to switch to the "splunk" user:
su - splunk
Execute this command:
/opt/splunk/bin/splunk start --accept-license
Enter a password twice, such as R@bbit!!
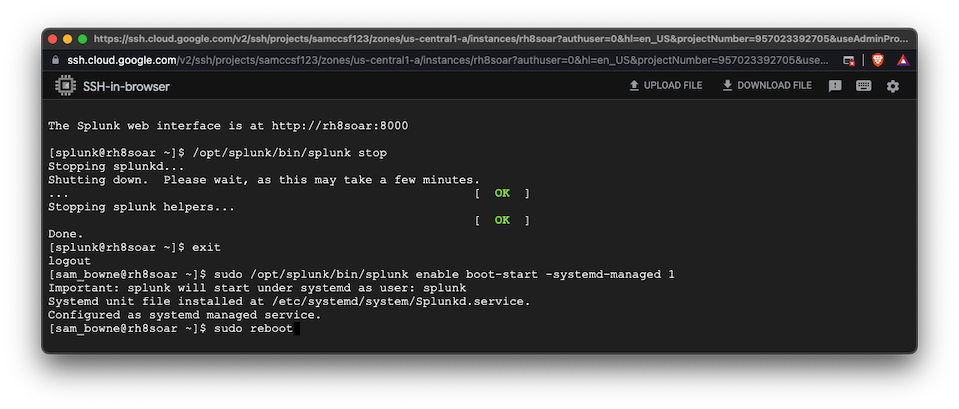
You should see a message showing that the Splunk web interface is available on port 8000, as shown below.

Next we need to stop Splunk, configure it to start automatically, and start it again.
Execute these commands, as shown below.
/opt/splunk/bin/splunk stop
exit
sudo /opt/splunk/bin/splunk enable boot-start -systemd-managed 1

sudo reboot
After a few seconds, reconnect to the server and execute this command:
sudo ss -plnt

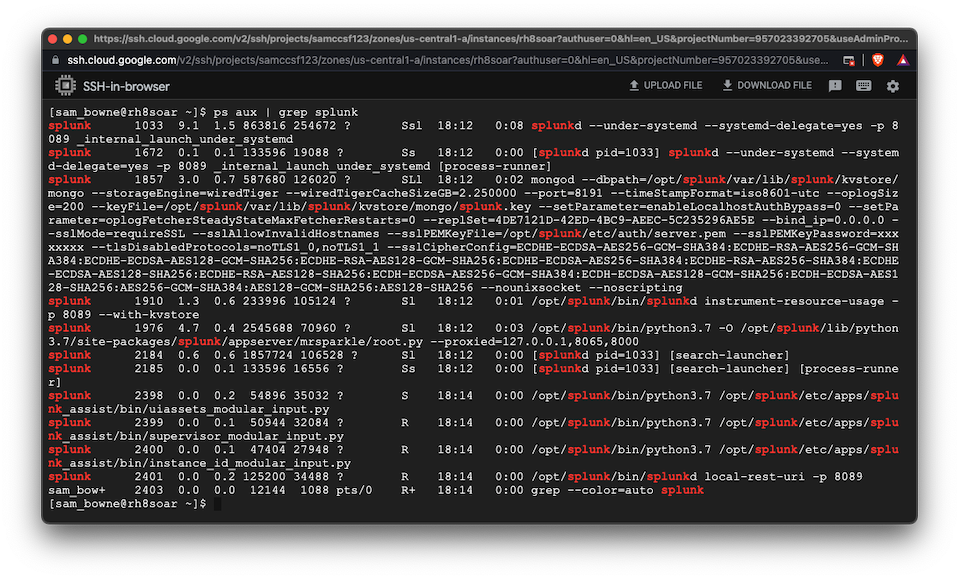
To see the running processes, execute this command:
ps aux | grep splunk
On the left side, point to "VPC network" and click Firewall, as shown below.
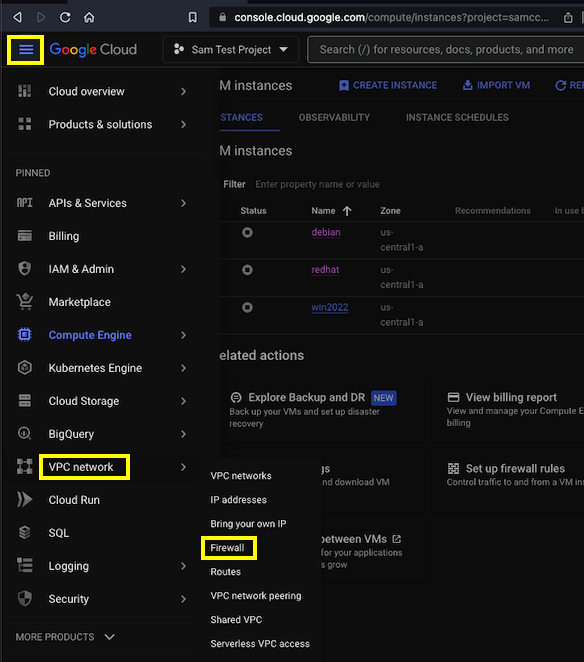
At the top center of the next page, click "CREATE FIREWALL RULE".
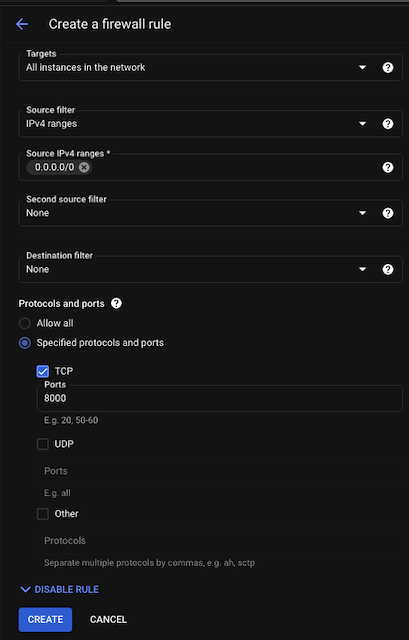
Enter these fields, as shown below:
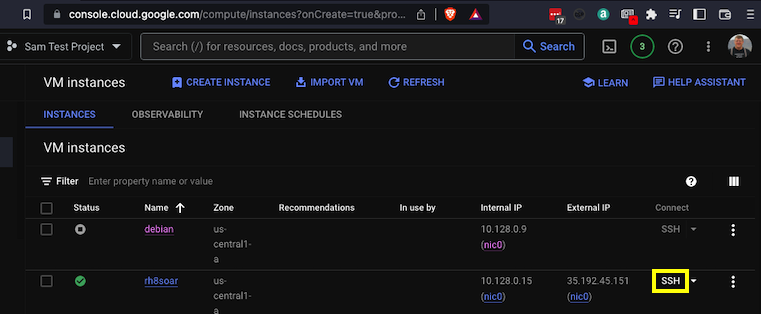
Find the External IP of your Red Hat server, outlined in yellow in the image below.

http://34.16.118.140:8000The Splunk Web login page opens, as shown below.
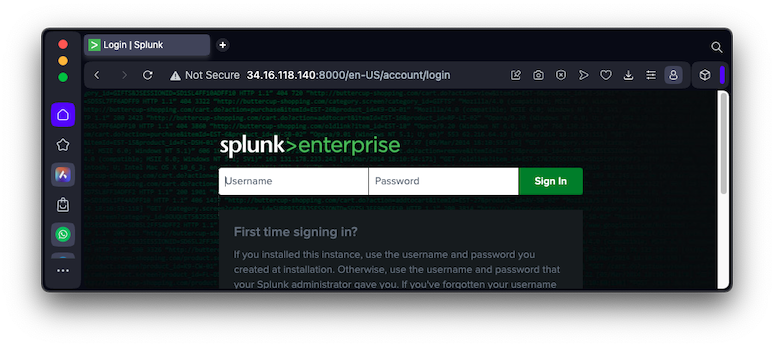
Log in with a username of admin and the password you selected during installation, which might be R@bbit!!
A box pops up saying "Helping You Get More Value...". Click "Got It!".
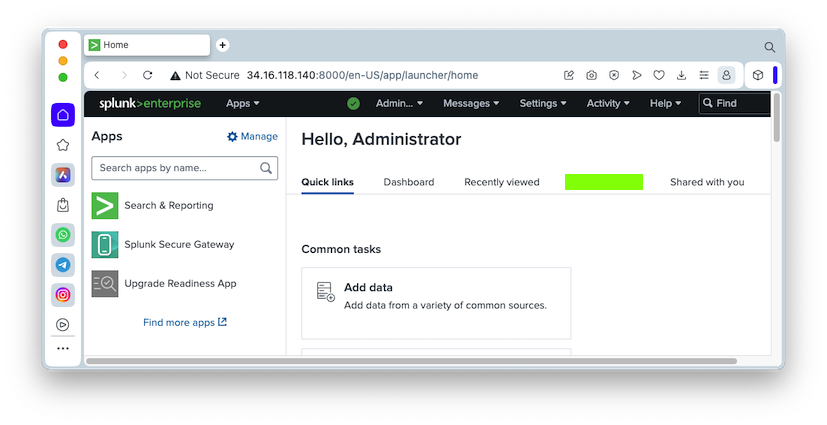
The Splunk Web page appears, as shown below.
SPL 100.1: Splunk Web Home Page
The flag is covered by a green box in the image below.
To fix that, in the Google Cloud console, at the top left, click the three-nar icon.
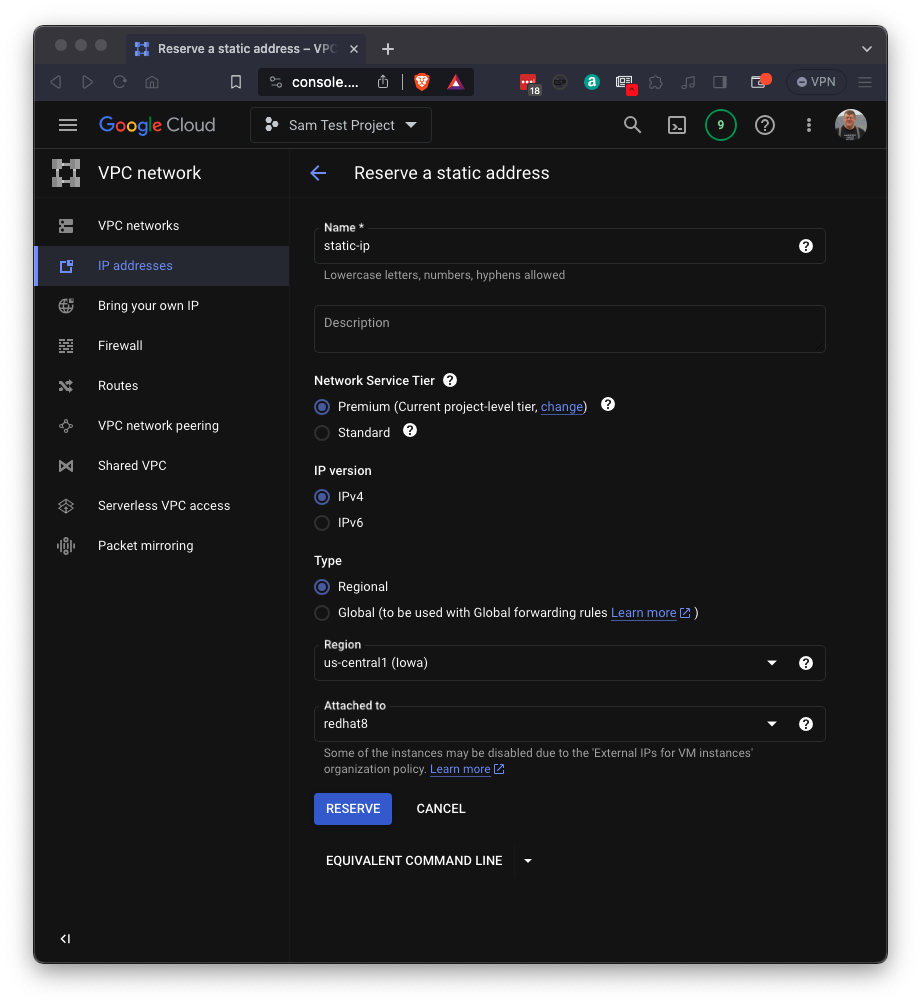
Point to "VPC network" and click "IP Addresses".
At the top center, click "RESERVE EXTERNAL STATIC IP ADDRESS".
Configure a static IP attached to your Red Hat server, as shown below.
At the bottom, click the RESERVE button.
How to install Splunk Enterprise as non-root user RHEL 9?
Posted 9-7-23
Link to Red Hat license added 9-10-23
Static IP instructions added 9-24-23
Link to local installation project added 9-25-23