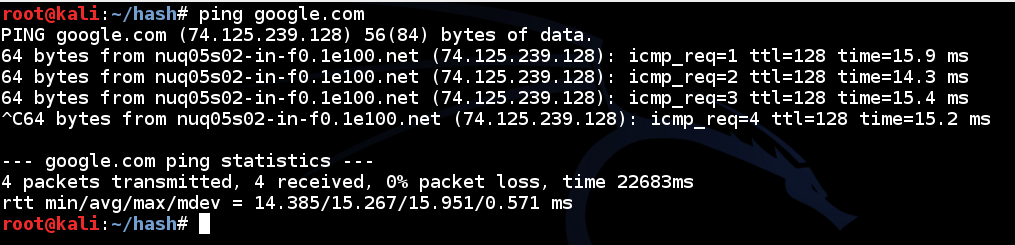
In a Terminal window, execute this command:
ping google.com
Press Ctrl+C to stop the pings.
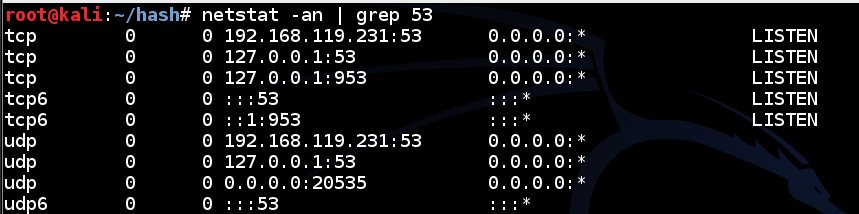
In a Terminal window, execute these commands:
service bind9 restart

netstat -an | grep 53
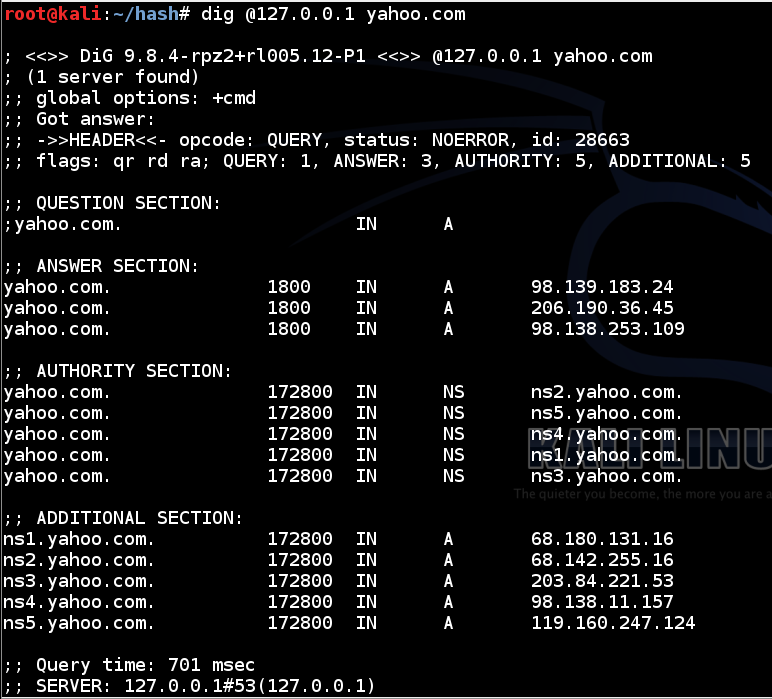
In a Terminal window, execute this command:
dig @127.0.0.1 yahoo.com
If you don't see the answers, you need to restart or reinstall Bind.
In a Terminal window, execute these commands:
cp /etc/bind/named.conf /etc/bind/named.conf.bak

nano /etc/bind/named.conf
logging {
   channel default_debug {
   file "/var/log/named/named.run" versions 3 size 5m;
   severity dynamic;
   print-time yes;
   };

channel queries_channel {
   file "/var/log/named/queries.log" versions 3 size 5m;
   severity debug 3;
   print-category yes;
   print-severity yes;
   print-time yes;
   };

channel security_channel {
   file "/var/log/named/security.log" versions 3 size 5m;
   severity debug 3;
   print-category yes;
   print-severity yes;
   print-time yes;
   };

channel update_security_channel {
   file "/var/log/named/updates.log" versions 3 size 5m;
   severity debug 3;
   print-category yes;
   print-severity yes;
   print-time yes;
   };

channel dnssec_channel {
   file "/var/log/named/dnssec.log" versions 3 size 5m;
   severity debug 3;
   print-category yes;
   print-severity yes;
   print-time yes;
   };

channel xfers_channel {
   file "/var/log/named/zone_transfers.log" versions 3 size 5m;
   severity debug 3;
   print-category yes;
   print-severity yes;
   print-time yes;
   };

category queries { queries_channel; };
category security { security_channel; };
category update-security { update_security_channel; };
category dnssec { dnssec_channel; };
category xfer-out { xfers_channel; };

};
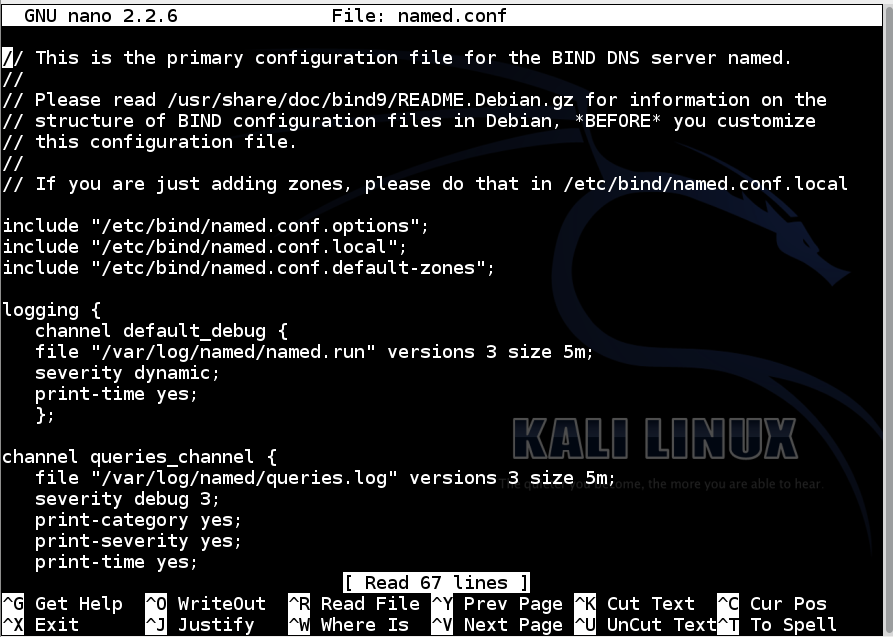
Save the file with Ctrl+X, Y, Enter.
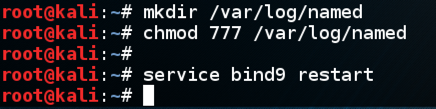
In a Terminal window, execute these commands:
mkdir /var/log/named

chmod 777 /var/log/named

service bind9 restart
Troubleshooting
If bind won't start, open another Terminal window and execute this command.Then, in another Terminal window, execute this command:tail -f /var/log/daemon.logThe first window should show helpful error messages.service bind9 start
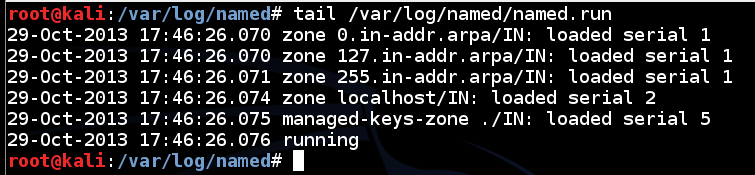
tail /var/log/named/named.run
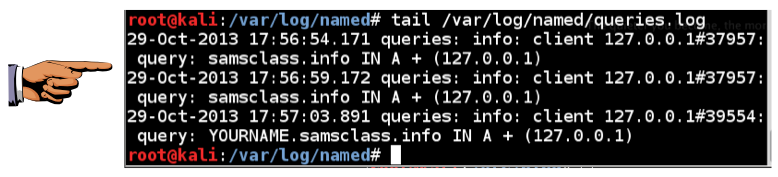
In the second command, replace "YOURNAME" with your own name:
dig @127.0.0.1 samsclass.info

dig @127.0.0.1 YOURNAME.samsclass.info

tail /var/log/named/queries.log
Click the taskbar at the bottom of your host Windows 7 desktop, to make the host machine listen to the keyboard, instead of the virtual machine.
Press the PrintScrn key in the upper-right portion of the keyboard. That will copy the whole desktop to the clipboard.
YOU MUST SUBMIT A FULL-DESKTOP IMAGE FOR FULL CREDIT!
Paste the image into Paint and save it with the filename "YOUR NAME Proj 6a", replacing "YOUR NAME" with your real name.
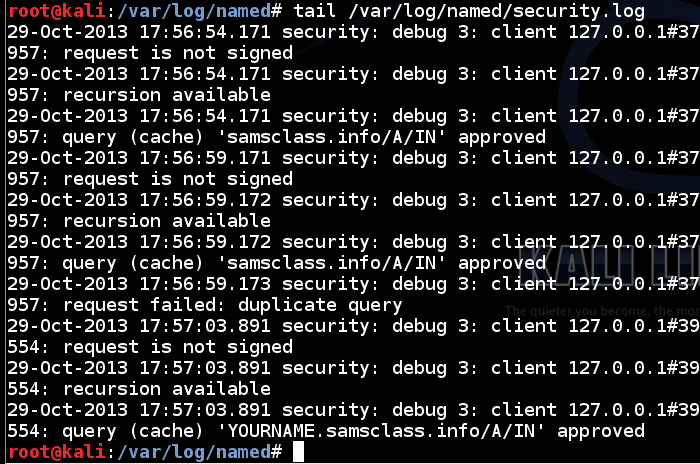
tail /var/log/named/security.log
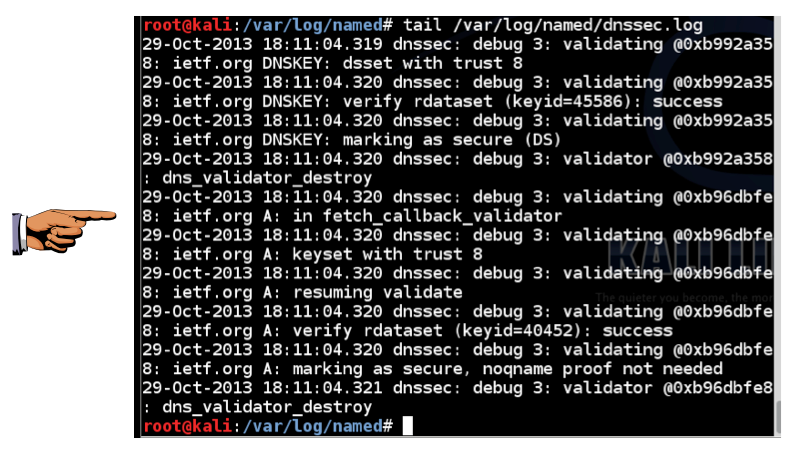
dig @127.0.0.1 ietf.org

tail /var/log/named/dnssec.log
Click the taskbar at the bottom of your host Windows 7 desktop, to make the host machine listen to the keyboard, instead of the virtual machine.
Make sure you can see at least one "validating" message.
Press the PrintScrn key in the upper-right portion of the keyboard. That will copy the whole desktop to the clipboard.
YOU MUST SUBMIT A FULL-DESKTOP IMAGE FOR FULL CREDIT!
Paste the image into Paint and save it with the filename "YOUR NAME Proj 6b", replacing "YOUR NAME" with your real name.
Send a Cc to yourself.