On Windows Server 2016, click the yellow File Explorer button at the bottom of the desktop, and in the File Explorer window, right-click "This PC", and click Properties.
In the System box, on the left side, click "Advanced system settings".
In the "System Properties" box, click the "Computer Name" tab.
Click the Change... button.
Click the More... button.
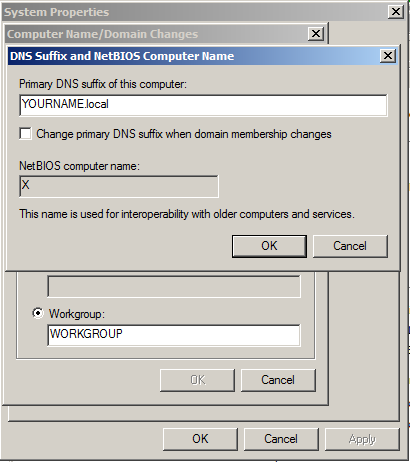
In the "Primary DNS suffix of this computer" box, type
YOURNAME.local
Click OK, OK, OK, Close.
Click "Restart Now".
When your server restarts, log in again.
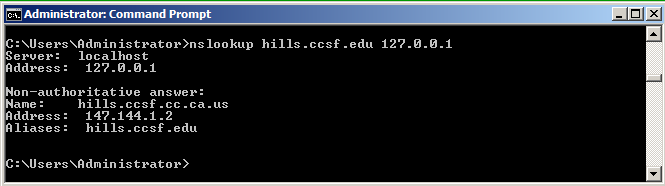
nslookup hills.ccsf.edu 127.0.0.1
You should see non-authoritative answers from the google-public-dns server, as shown below.
http://www.wireshark.org/download.html
Start Wireshark. On the left side, click your Internet-facing adapter. Click Start.
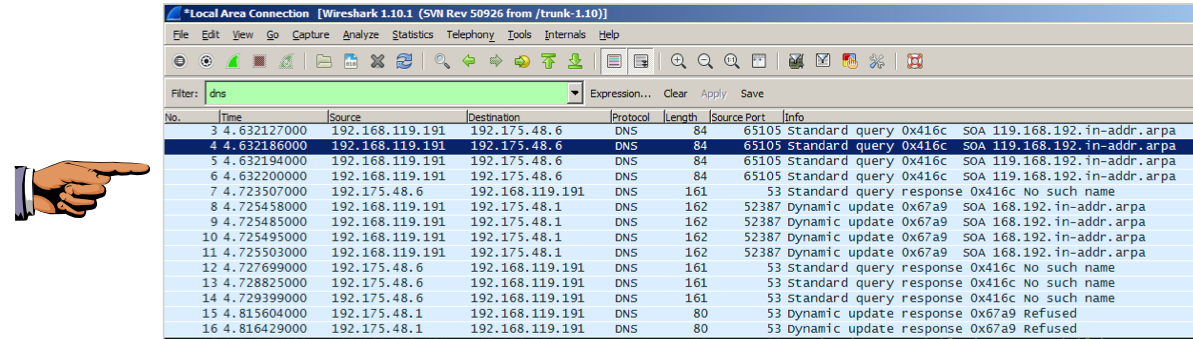
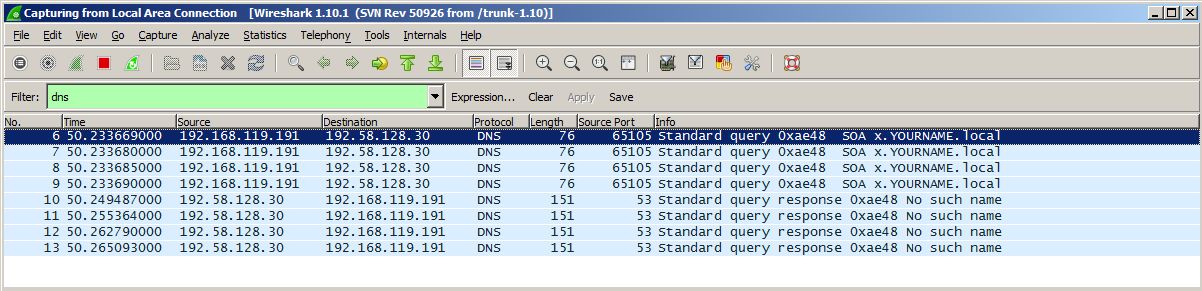
In the "Filter" bar, type dns and press Enter.
We'll force an update with the ipconfig command to see how it works.
In a Command Prompt, execute the following command:
ipconfig /registerdns
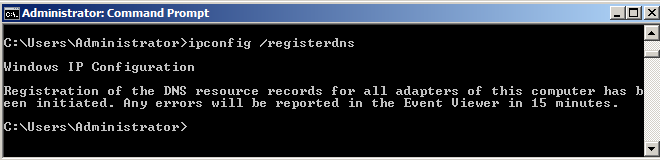
Wireshark should show reverse DNS queries ending in "in-addr.arpa", as shown below.
Troubleshooting
If you don't see the required DNS packets, check the "Use this connection's DNS suffix in DNS registration" box, as shown below.Then disable and re-enable the network adapter.
Click the taskbar at the bottom of your host computer's desktop, to make the host machine listen to the keyboard, instead of the virtual machine.
Press the PrintScrn key in the upper-right portion of the keyboard. That will copy the whole desktop to the clipboard.
YOU MUST SUBMIT A FULL-DESKTOP IMAGE FOR FULL CREDIT!
On the host machine, not the virtual machine, click Start.
Type mspaint into the Search box and press the Enter key.
Click in the untitled - Paint window, and press Ctrl+V on the keyboard. The desktop appears in the Paint window.
In the upper left corner of the "untitled - Paint" window, click the little blue square icon (it looks like a floppy disk, something people used to use long ago--you might never have seen one).
Save the image with the filename "YOUR NAME Proj 5a", replacing "YOUR NAME" with your real name.
There is no sense in that--private addresses aren't tied to any specific computer, and Windows has no reason to ask external servers that question.
But this has been default Windows operation for more than a decade, and it creates a lot of problems, including a large amount of worthless traffic at the ARPA servers, and it also leaks internal private address information out of companies and home networks.
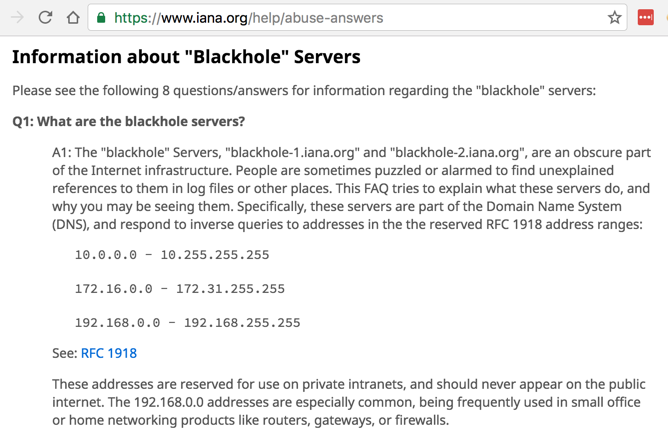
It's such a large problem, RFC 6304 established AS 112 using these two Anycast clouds just to handle them:
BLACKHOLE-1.IANA.ORG (192.175.48.6) and BLACKHOLE-2.IANA.ORG (192.175.48.42)Click the image below for more information:
There are two recommended fixes for this behavior: turning off Dynamic DNS, and configuring a local DNS server to be authoritative over the private address range.
In this project, we'll do the first one: turning off Dynamic DNS.
In Server 2008, right-click Network. Click Properties. Network and Sharing Center opens. On the left side, click "Manage network connections".
In Server 2016, click the yellow File Explorer button at the bottom of the desktop, and in the File Explorer window, right-click Network. Click Properties. Network and Sharing Center opens. On the left side, click "Change adapter settings".
In the "Network Connections" window, right-click the "Local Area Connection" icon and click Properties.
In the "Local Area Connection Properties" box, Double-click "Internet Protocol Version 4 (TCP/IPv4)".
In the "Internet Protocol Version 4 (TCP/IPv4) Properties" box, click the Advanced... button.
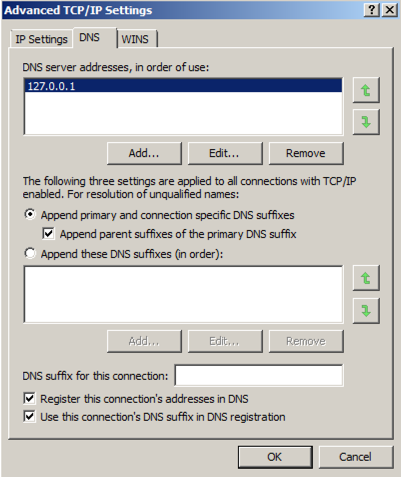
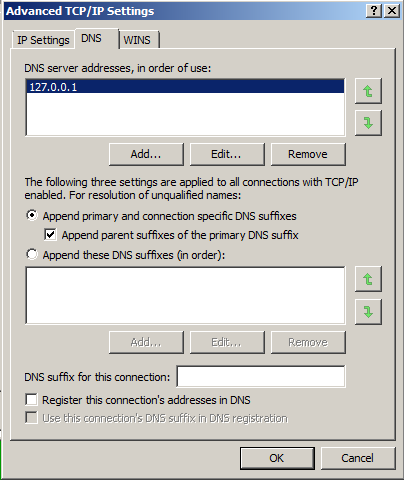
In the "Advanced TCP/IP Settings" box, click the DNS tab.
At the bottom of this box, clear the "Register this connection's addresses in DNS" checkbox, as shown below.
In the "Advanced TCP/IP Settings" box, click OK.
In the "Internet Protocol Version 4 (TCP/IPv4) Properties" box, click OK.
In the "Local Area Connection Properties" box, click OK.
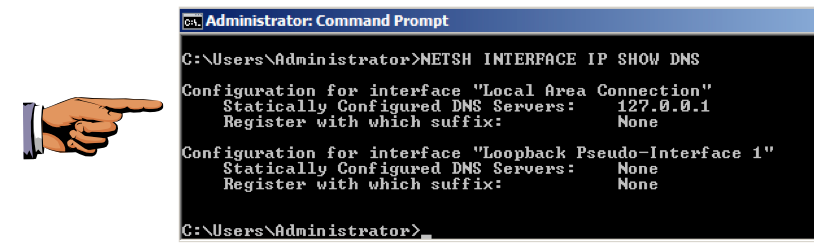
NETSH INTERFACE IP SHOW DNS
Click the taskbar at the bottom of your host computer's desktop, to make the host machine listen to the keyboard, instead of the virtual machine.
Capture whole-desktop image and save it with the filename "YOUR NAME Proj 5b", replacing "YOUR NAME" with your real name.
In a Command Prompt, execute the following command:
ipconfig /registerdns
Send a Cc to yourself.
How to Disable Dynamic DNS Updates on Windows Systems (caida)
http://www.iana.org/abuse/answers