https://my.vmware.com/web/vmware/free#desktop_end_user_computing/vmware_player/5_0
Making a Windows 2016 Server Virtual Machine
http://google.comIf you cannot open Google, which happens very often, try the troubleshooting steps listed below.
Troubleshooting a VMware Network Connection
- RESTART: Restart the virtual machine
- USE DHCP: In the virtual machine, click Start. In the Search box, type CONTROL NETCONNECTIONS and press Enter. Right-click "Local Area Connection" and click Properties. Double-click "Internet Protocol Version 4 (TCP/IPv4)" and make sure both the "Obtain an IP address automatically" and "Obtain DNS server address automatically" buttons are selected. Click OK. Click OK.
- REPAIR THE CONNECTION: In the virtual machine, click Start, Control Panel, Network Connections. Right-click "Local Area Connection" and click Repair.
- VMWARE BRIDGE PROTOCOL: In the Host machine, click Start and type "NETWORK CONNECTIONS" into the Search box. In the results, click "View network connections". Right-click "Local Area Connection" and click Properties. Make sure the "VMware Bridge Protocol" item is checked. Click OK.
- MAKE A NEW VIRTUAL MACHINE: When all these actions fail, which is very common, you need to discard the virtual machine and extract a fresh one from the original .7z file.
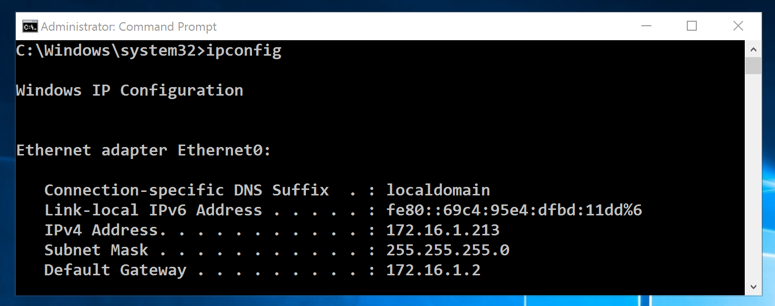
In the Command Prompt screen, type in IPCONFIG and press the Enter key.
Your IP address apears, with the Subnet Mask and Default Gateway, as shown below.
From your Windows Server's desktop, click Start. Type Network. Click "View Network Connections".
Right-click the Ethernet0 icon and click Properties.
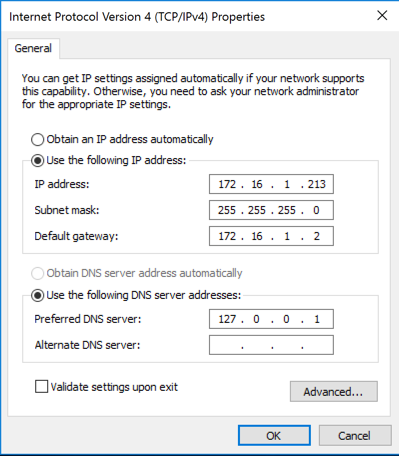
Double-click "Internet Protocol Version 4 (TCP/IPv4)".
Assign the same IP address, Subnet Mask and Default Gateway your saw in the IPCONFIG results, as shown below.
Set the DNS Server field to 127.0.0.1 and click OK.
In the "Local Area Connection Properties" box, click OK.
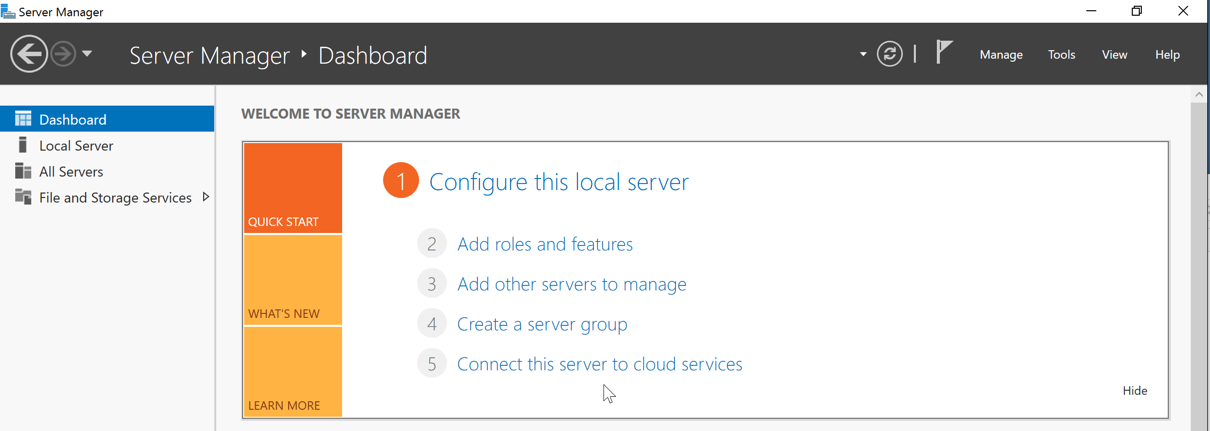
in the center of the window, click item 2: "Add Roles and Features" as shown below.
In the "Before You Begin" screen, click Next.
In the "Select installation type" screen, accept the default selecion of "Role-based or feature-based installation" and click Next.
In the "Select destination server" screen, accept the default selecion and click Next.
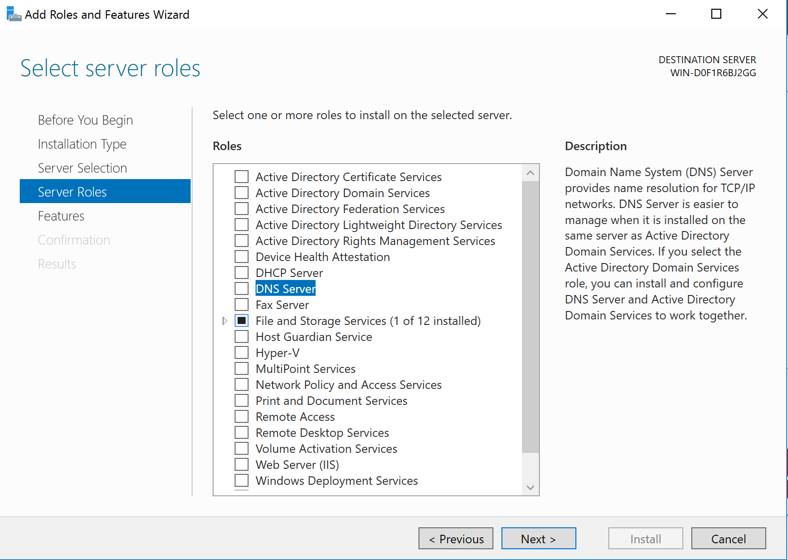
In the "Select Server Roles" screen, click the check box next to "DNS Server", as shown below:
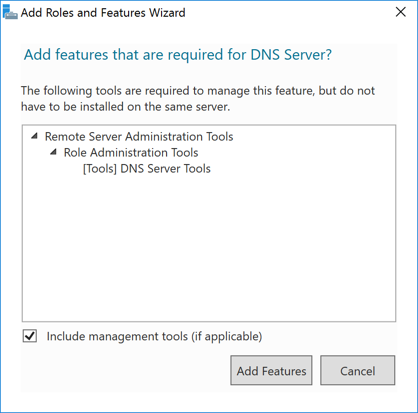
A box pops up, titled "Add features that are required for DNS server?", as shown below. Click the "Add Features" button.
Click Next.
In the "Select features" screen, click Next.
In the "DNS server" screen, click Next.
In the "DNS server" screen, click Next.
In the "Confirm Installation Selections" screen, click Install.
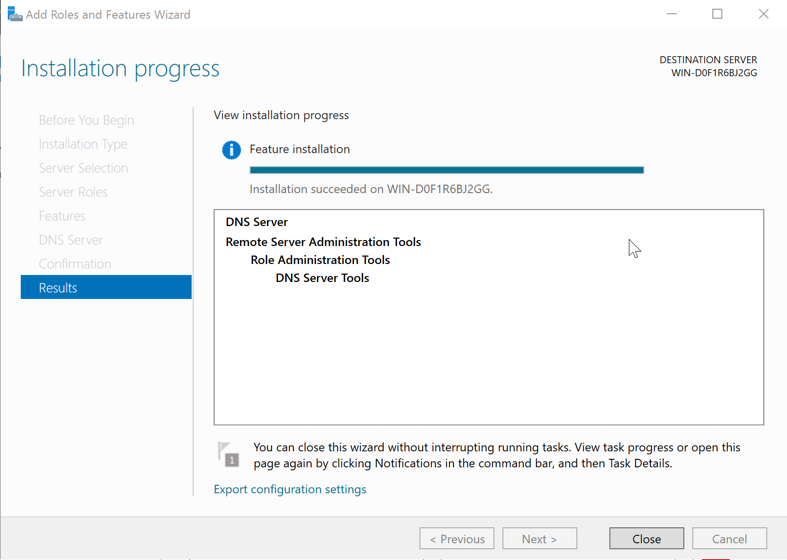
When the process finishes, an "Installation succeeded" message appears, as shown below:
Click Close.
Right-click the Start button, point to "Shut down or sign out", and click Restart.
In the "Choose a reason..." box, click Continue.
When the server restarts, log in as usual.
Execute this command:
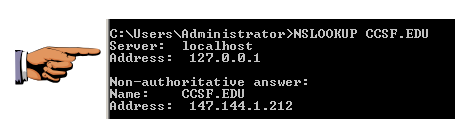
NSLOOKUP CCSF.EDU
Troubleshooting
If your server times out, repeat the command again. Windows DNS servers are incredibly slow; it may succeed the second or third time.Some machines fail to show the "Non-authoritative answer" message--I don't know why. Also, some machines connect via IPv6 and show a link-local address beginning with fe80:: instead of 127.0.0.1. If those things happen, don't worry about them and submit the image as it is.
You have now completed the first part of Project 1. To prove it, you need to capture an image of the screen and email it to me.
Note the hand symbol on the image above: that indicates screen images that you must capture and turn in.
Click the taskbar at the bottom of your host machine's desktop, to make the host machine listen to the keyboard, instead of the virtual machine.
Press Shift+PrintScrn (the key in the upper-right portion of the keyboard). That will copy the whole desktop to the clipboard.
YOU MUST SUBMIT A FULL-DESKTOP IMAGE FOR FULL CREDIT!
On the host machine, not the virtual machine, click Start.
Type mspaint into the Search box and press the Enter key.
Click in the untitled - Paint window, and press Ctrl+V on the keyboard. The desktop appears in the Paint window.
In the upper left corner of the "untitled - Paint" window, click the little blue square icon (it looks like a floppy disk, something people used to use long ago--you might never have seen one).
Save the document with the filename "YOUR NAME Proj 1a", replacing "YOUR NAME" with your real name.
To find the authoritative server for CCSF.EDU, from your Windows Server's desktop, in a Command Prompt window, execute this command:
NSLOOKUP
At the > prompt, enter these two commands, pressing Enter after each one (be careful, the "set" command is case-sensitive):
set type=ANY

CCSF.EDU
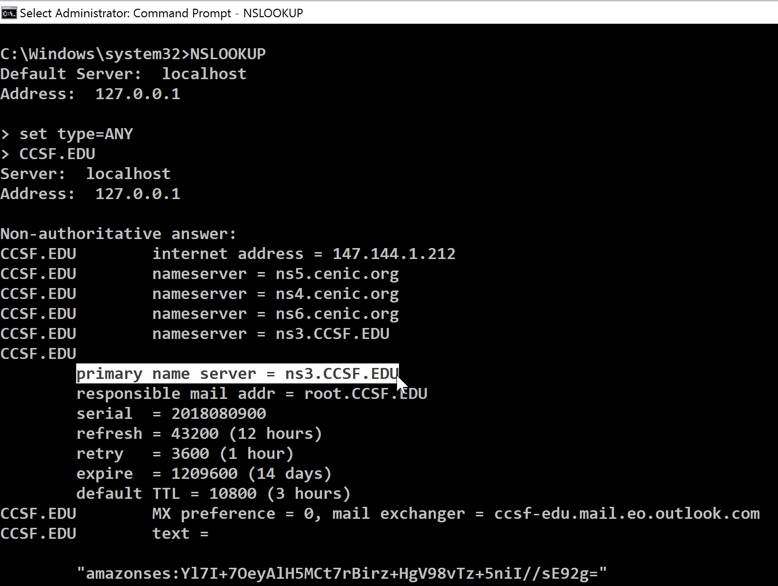
The results start with a message saying "Non-authoritative answer", because they came from your own local DNS server.
Notice the "primary name server" line in the middle of the output. That's the authoritative name server for the CCSF domain.
At the > prompt, execute these commands:
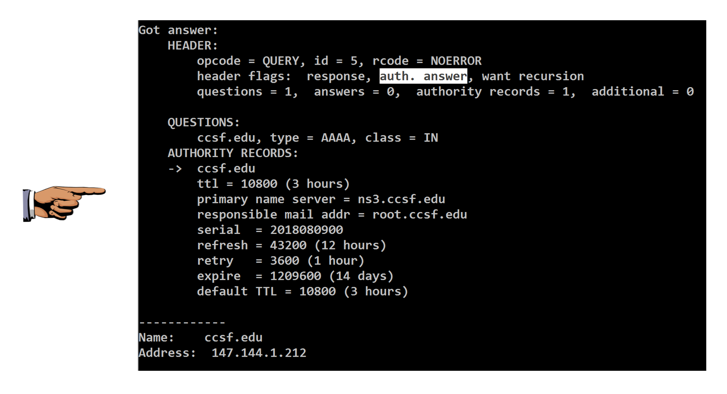
set type=a
set debug
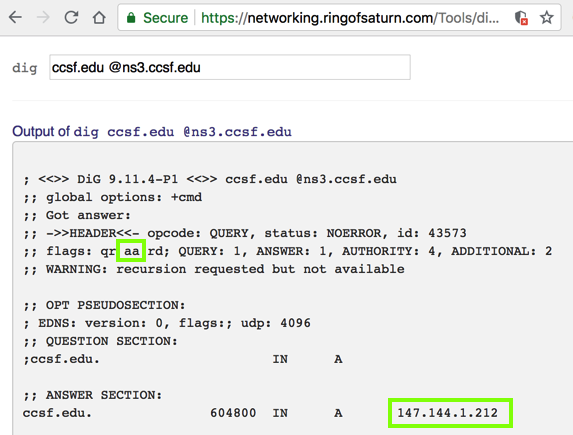
CCSF.EDU ns3.ccsf.edu
YOU MUST SUBMIT A FULL-DESKTOP IMAGE FOR FULL CREDIT!
Troubleshooting
If you don't see "auth. answer", and you see "timed out" messages at the bottom of the response, you are probably using the CCSF wireless network, which blocks access to ns3.ccsf.edu. Use a wired network, or the "Danger Zone" network in SCIE 37 or SCIE 214, or an off-campus network, instead.Another option is to use a looking glass server for this part of the project, such as
http://networking.ringofsaturn.com/Tools/dig.php
The result shows the aa flag, which indicates "authoritative answer", as shown below.
quit
IPCONFIG /flushdns
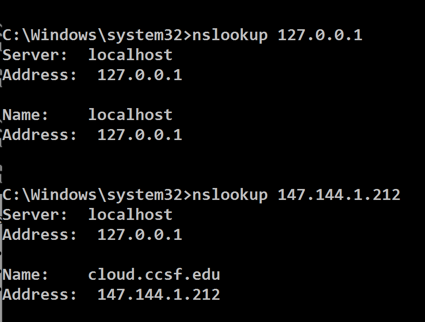
nslookup localhost
nslookup 127.0.0.1
These commands perform:
ping ccsf.edu
ipconfig /displaydns
YOU MUST SUBMIT A FULL-DESKTOP IMAGE FOR FULL CREDIT!
The "DNS Manager" opens.
Troubleshooting
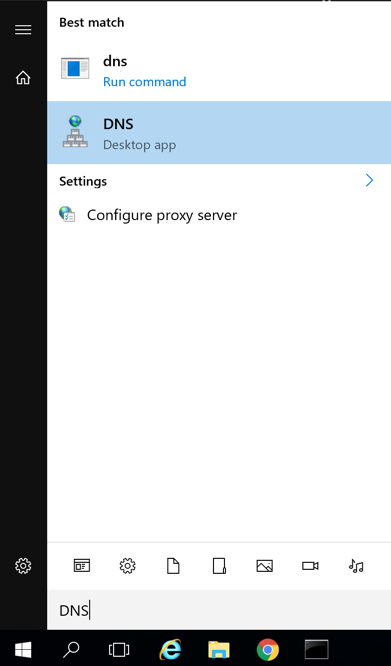
If you can't open DNS from the Start button, open Server Manager and click Tools, DNS to open it.
From the menu bar, click View, Advanced.
In the left pane, click and expand the server item (it starts with WIN).
Expand "Cached Lookups".
Expand .(root).
Expand EDU.
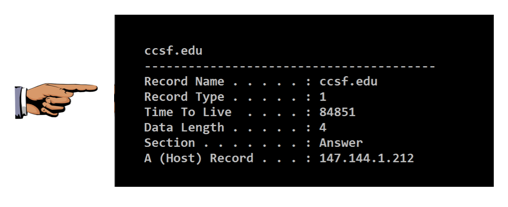
In the left pane, click CCSF.
Several entries appear, including ns3.ccsf.edu and 147.144.1.212, as shown below.
TROUBLESHOOTING
If there is no "Cached Lookups" item visible, right-click your server in the left pane and click View, Advanced.If there are no cached entries, they may have timed out. In a Command Prompt, ping ccsf.edu again. Then, in DNS Manager, click Action, Refresh.
Save a full-desktop image with the filename "YOUR NAME Proj 1d", replacing "YOUR NAME" with your real name.
YOU MUST SUBMIT A FULL-DESKTOP IMAGE FOR FULL CREDIT!
Send a Cc to yourself.