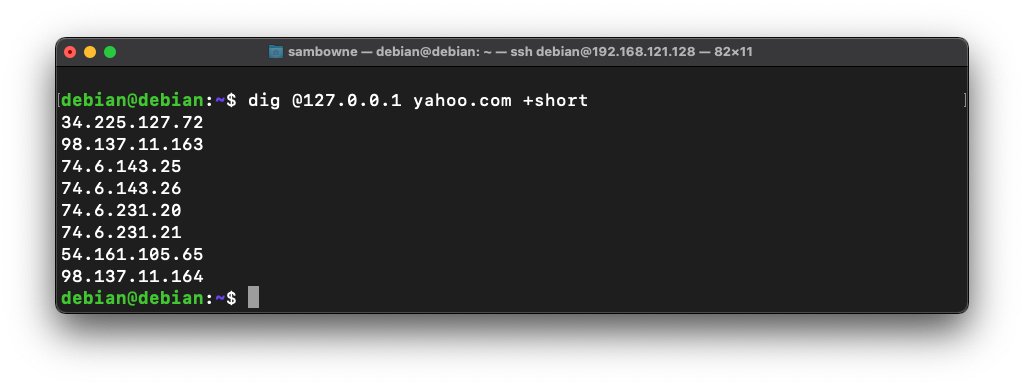
dig @127.0.0.1 yahoo.com +short
If you don't see the answers, you need to restart or reinstall Bind.
This shows that your server is now operating as a recursive server, which is not what a SOA server should do.
ip a
In a Terminal window, execute these commands, one at a time. Enter your password when you are prompted to.
sudo cp /etc/bind/named.conf.local /etc/bind/named.conf.local.bak
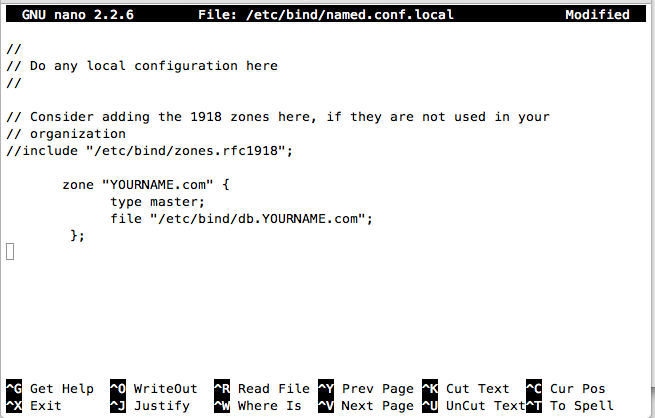
sudo nano /etc/bind/named.conf.local
       zone "YOURNAME.com" {
             type master;
             file "/etc/bind/db.YOURNAME.com";
        };
Save the file with Ctrl+X, Y, Enter.
sudo nano /etc/bind/db.YOURNAME.com
;
; BIND data file for YOURNAME.com
;
$TTL    604800
@       IN      SOA     ns1.YOURNAME.com. root.YOURNAME.com. (
                              2         ; Serial
                         604800         ; Refresh
                          86400         ; Retry
                        2419200         ; Expire
                         604800 )       ; Negative Cache TTL
;
@       IN      NS      ns1.YOURNAME.com.
@       IN      NS      ns2.YOURNAME.com.

YOURNAME.com.           IN      A       199.188.72.153
ns1                     IN      A       199.188.72.153
ns2                     IN      A       199.188.72.153
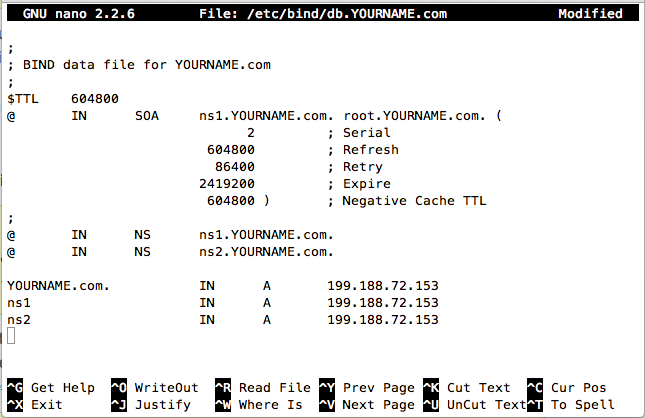
Save the file with Ctrl+X, Y, Enter.
sudo service bind9 restart
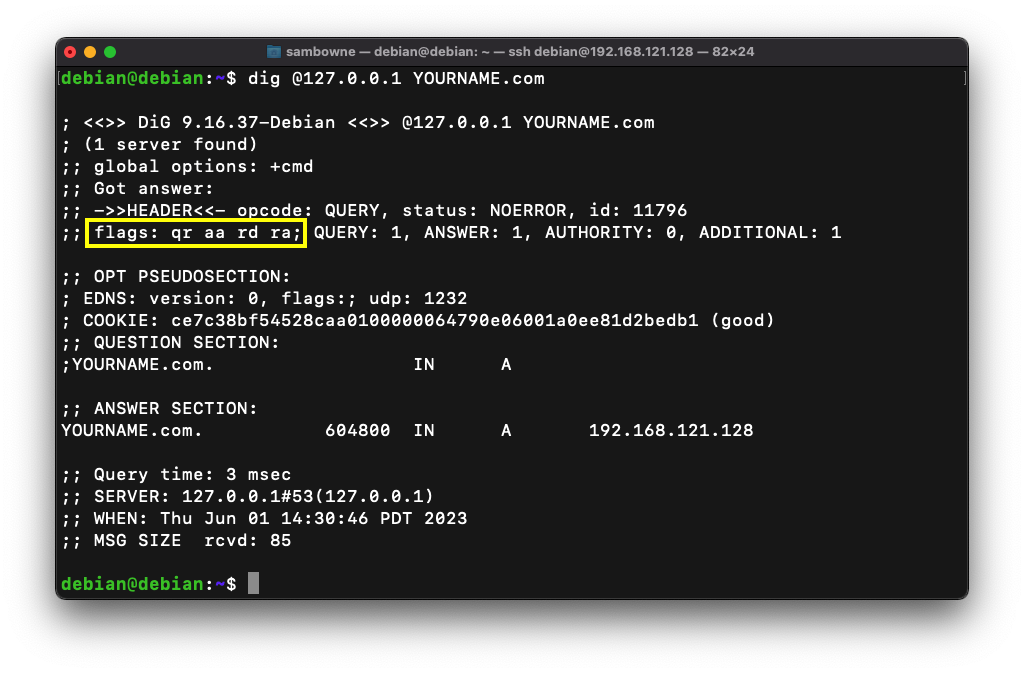
dig @127.0.0.1 YOURNAME.com
dig @127.0.0.1 yahoo.com +short
This shows that your server is still operating as a recursive server.
That's not something an SOA server should do. The purpose of this server is to serve as the SOA for the YOURNAME.com domain, not to provide general DNS resolution for the machines on a LAN.
In a Terminal window, execute these commands:
sudo cp /etc/bind/named.conf.options /etc/bind/named.conf.options.bak
sudo nano /etc/bind/named.conf.options
};
allow-transfer {"none";};
allow-recursion {"none";};
recursion no;
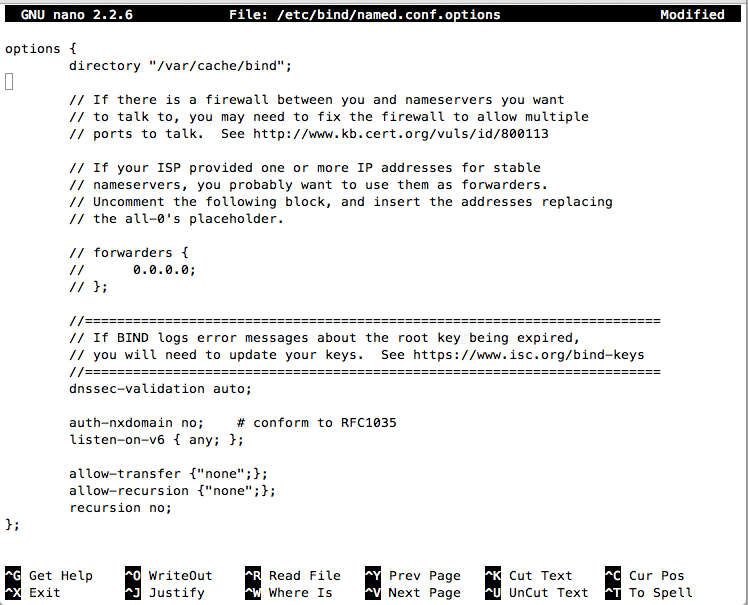
Save the file with Ctrl+X, Y, Enter.
Flag D 6: Status (15 pts)
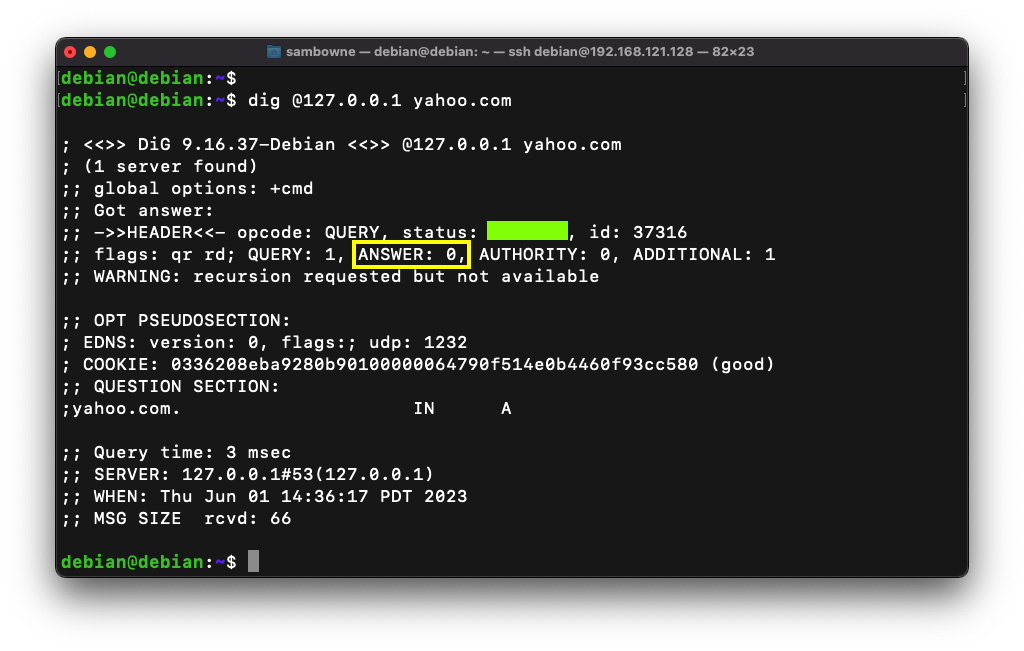
In a Terminal window, execute these commands:You should see "ANSWER: 0", outlined in yellow in the image below.The flag is the status, covered by a green rectangle in the image below.
Posted 6-1-23