Open Internet Explorer and go to wireshark.org
Download and install Wireshark for Windows.
Click "Command Prompt".
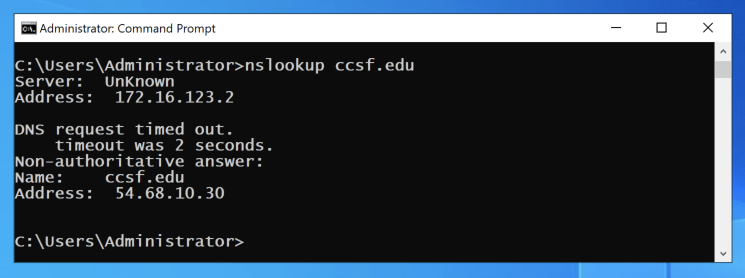
In the Command Prompt window, execute this command:
nslookup ccsf.edu
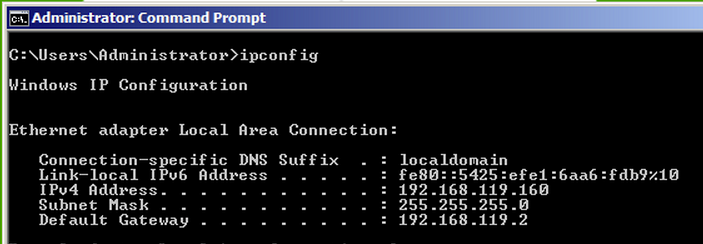
ipconfig
From your Windows Server desktop, click Start. Type NETWORK
Click "Ethernet settings".
Click "Change adapter options".
Right-click Ethernet0 and click Properties.
Double-click "Internet Protocol Version 4 (TCP/IPv4)".
Assign the same IP address, Subnet Mask and Default Gateway your saw in the IPCONFIG results, as shown below.
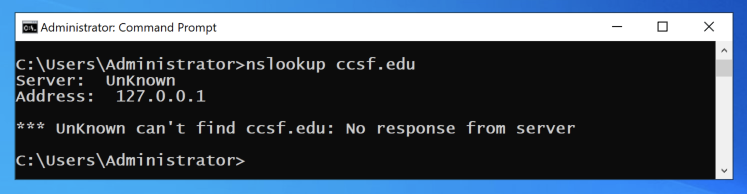
Set the DNS Server field to 127.0.0.1 and click OK. Click OK again.

nslookup ccsf.edu
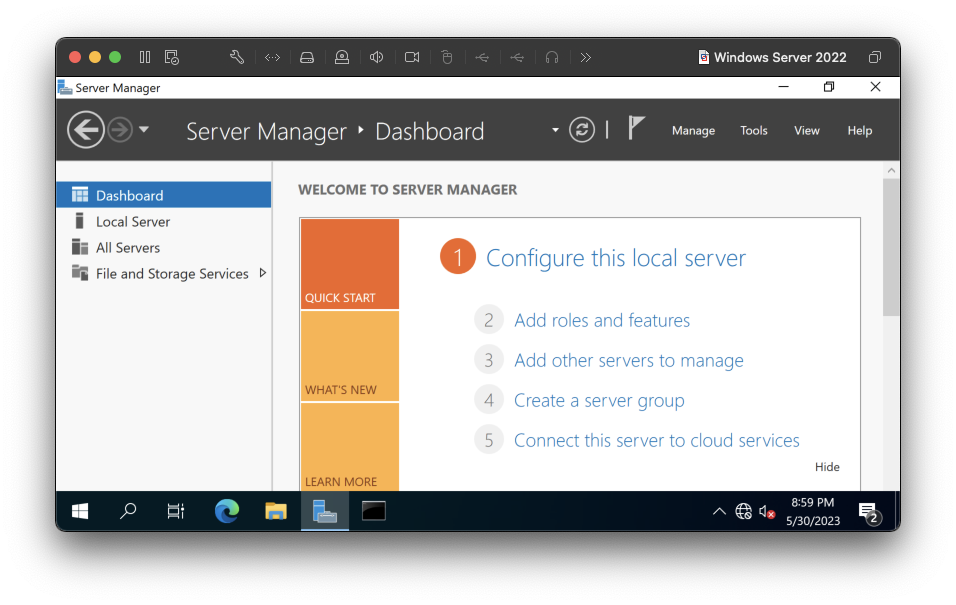
At the center top, click "Add roles and features", as shown below.
In the "Before You Begin" screen, click Next.
In the "Select installation type" screen, accept the default selection of "Role-based or feature-based installation" and click Next.
In the "Select destination server" screen, accept the default selection and click Next.
In the "Select Server Roles" screen, click the check box next to "DNS Server", as shown below:

A box pops up. Click the "Add features" button.
Click Next.
In the "Select features" screen, click Next.
In the "DNS Server" screen, click Next.
In the "Confirm Installation Selections" screen, click Install.
When the installation completes, click Close.
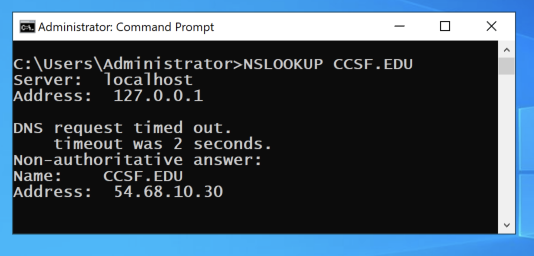
Execute this command:
NSLOOKUP CCSF.EDU
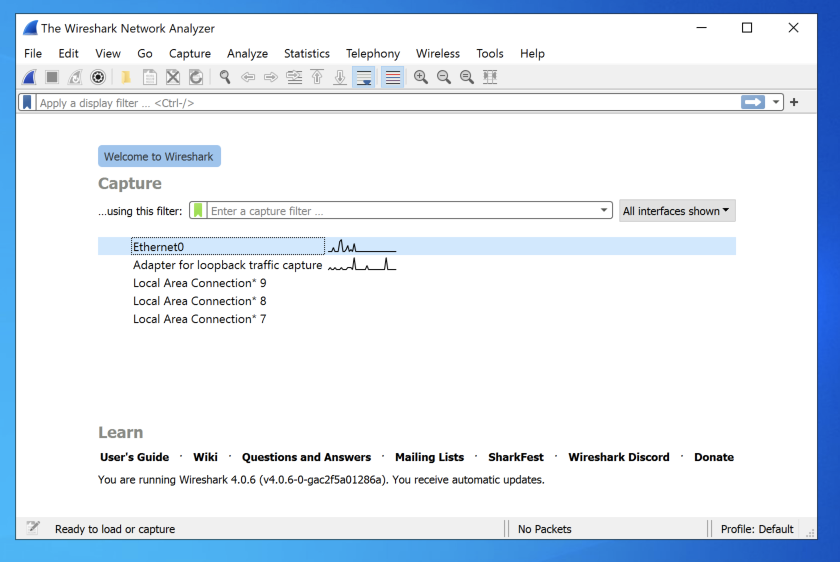
In the main Wireshark window, double-click Ethernet0, as shown below.
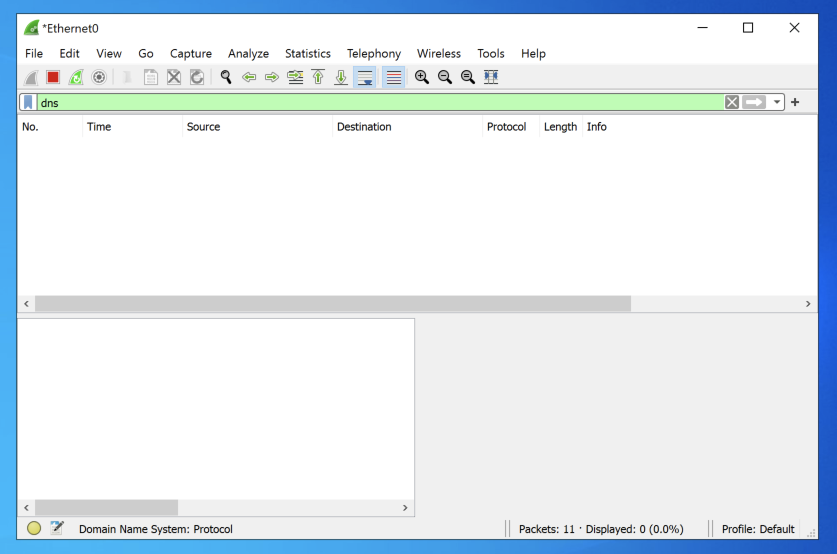
In the the "Capturing from Ethernet0" window, at the top left, in the "Apply a display filter" bar, type dns and press Enter.
The filter bar turns green, as shown below.
Execute this command:
NSLOOKUP yahoo.com
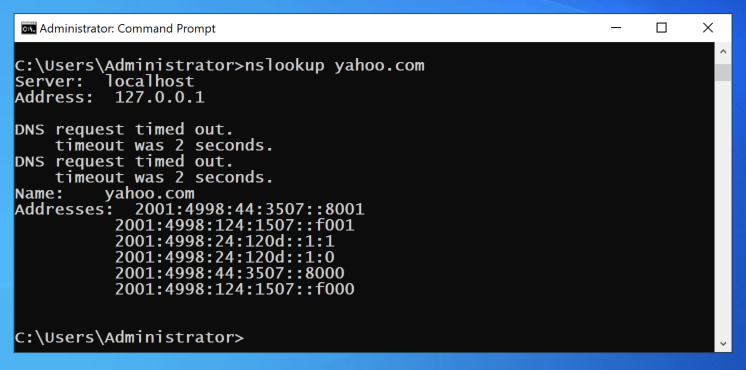
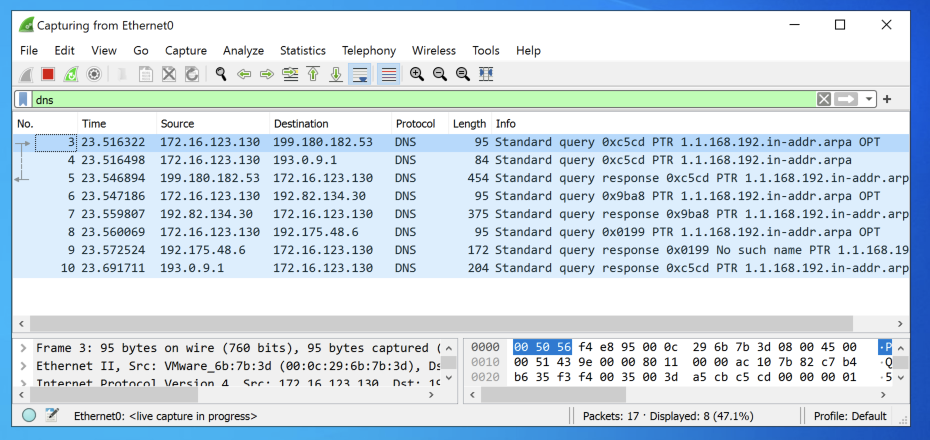
Wireshark shows a series of DNS requests to various servers, as shown below.
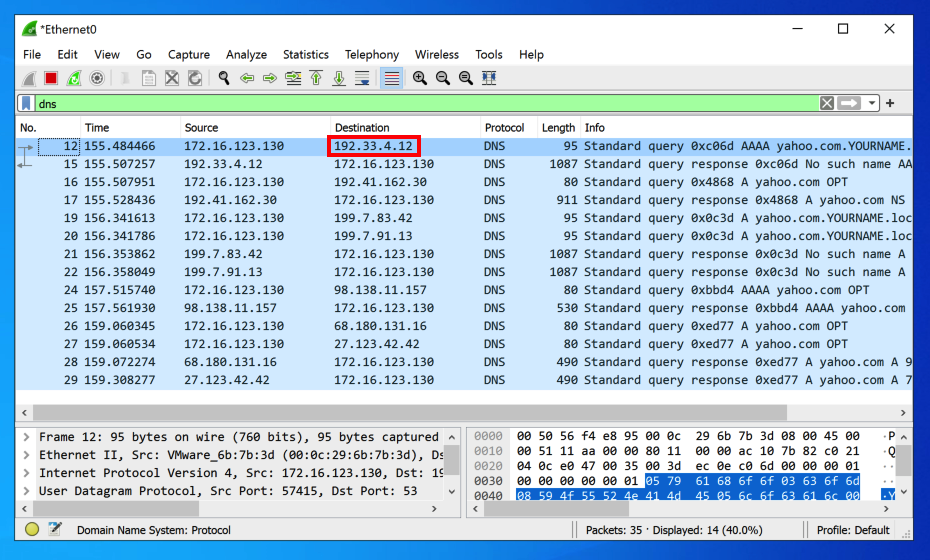
Notice the first destination address, outlined in red in the image above. Your address will probably be different.
How did your DNS server know that address?
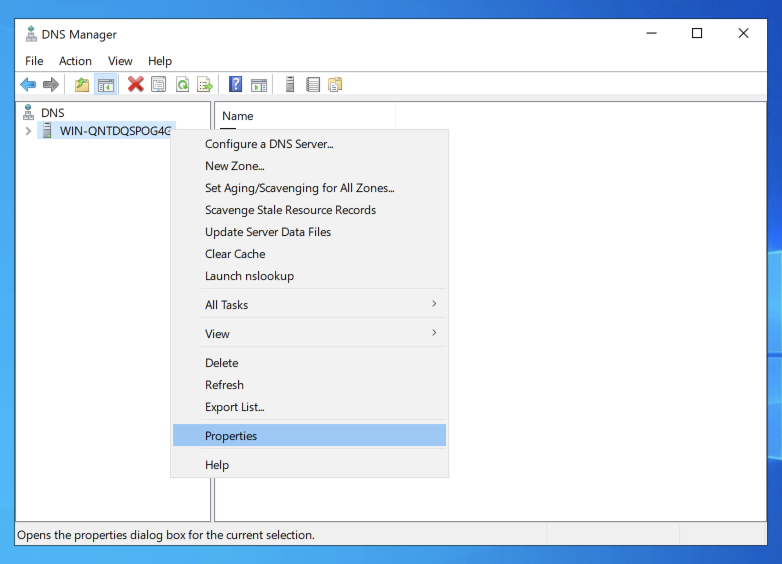
In "DNS Manager", on the left side, left-click your server to highlight it. Then right-click your server and click Properties, as shown below.
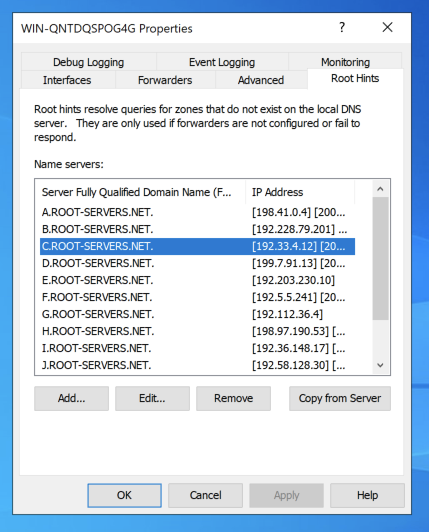
In the Properties sheet, click the "Root Hints" tab.
The IP address you saw in Wireshark is in this list. Your DNS server starts from the root of DNS, and performs a series of queries to find the IP address.
Close the Properties sheet.
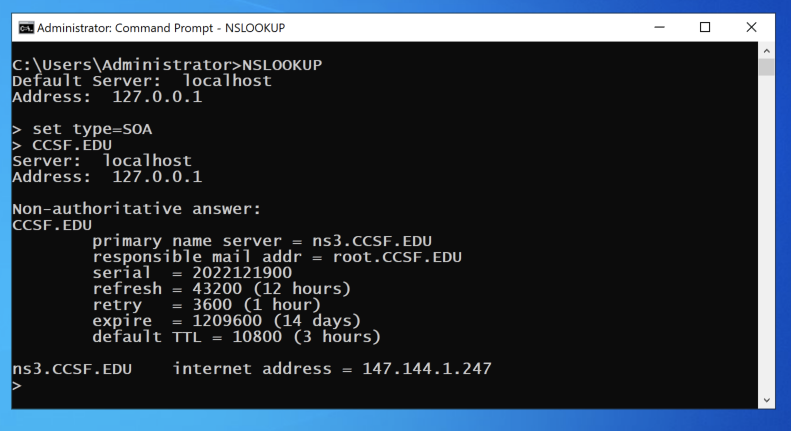
To find the authoritative server for CCSF.EDU, from your Windows Server desktop, in a Command Prompt window, execute this command:
NSLOOKUP
At the > prompt, enter these two commands, pressing Enter after each one (be careful, the "set" command is case-sensitive):
set type=SOA
CCSF.EDU
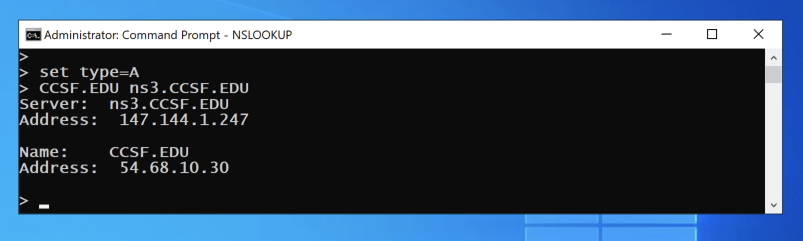
At the > prompt, execute these commands:
set type=A
CCSF.EDU ns3.CCSF.EDU
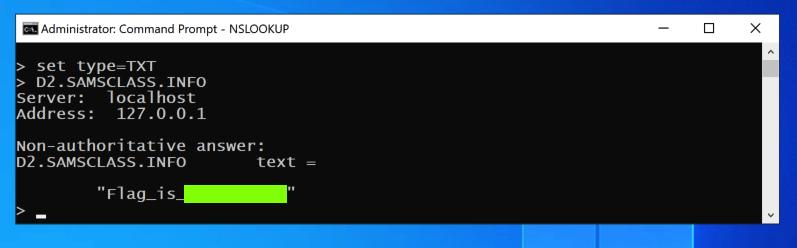
Flag D 2.1: TXT Record (15 pts)
At the > prompt, execute these commands:The flag appears, covered by a green rectangle in the image below.
Click "Continue without Saving".
Wireshark is listening for new DNS traffic, as shown below.
Execute this command:
NSLOOKUP 192.168.1.1
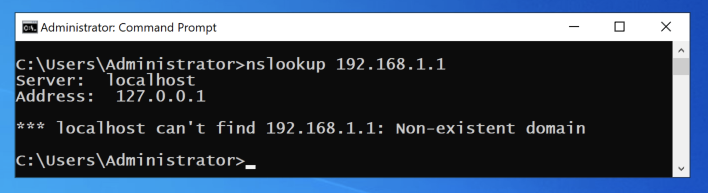
Wireshark shows a series of DNS requests trying to find a public DNS name for the address 192.168.1.1, as shown below.
Such DNS queries are a large problem for the Internet. 192.168.1.1 is a reserved name for private use, and cannot be assigned to any public server, so such queries are just junk.
It's better to tell our recursive server not to ask other servers about such useless queries.
In DNS Manager, in the left pane, right-click "Reverse Lookup Zones" and select "New Zone...".
In the "Welcome to the New Zone Wizard" box, click Next.
In the "Zone Type" page, accept the default selection of "Primary zone" and click Next.
In the "Reverse Lookup Zone Name" page, accept the default selection of "IPv4 Reverse Lookup Zone" and click Next.
In the "Reverse Lookup Zone Name" page, enter a Network ID of
192.168

Click Next.
In the "Zone File" page, accept the default selection to create a new file named "168.192.in-1ddr.arpa.dns" and click Next.
In the "Dynamic Update" page, accept the default selection of "Do not allow dynamic updates" and click Next.
Click Finish.
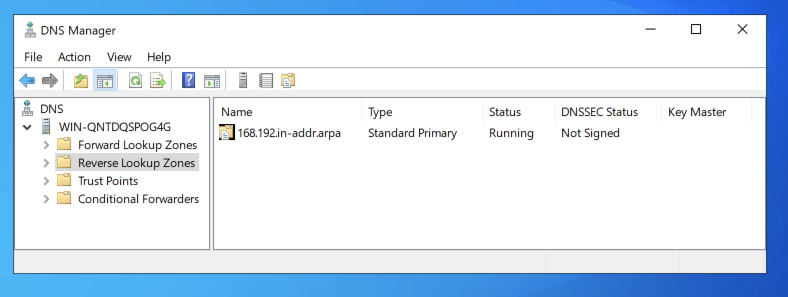
You now have a reverse lookup zone for 168.192.in-addr.arpa, as shown below.
172.16

172.17

10
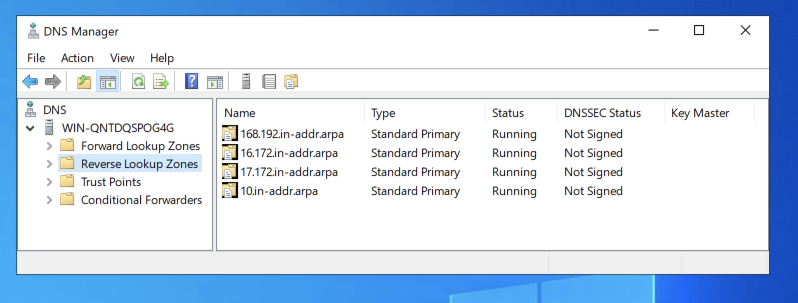
NOTE: To properly block the whole RFC 1918 space, you should configure zones for "172.18" through "172.31", and also for "169.254". I omitted them here to make the project shorter.
Click "Continue without Saving".
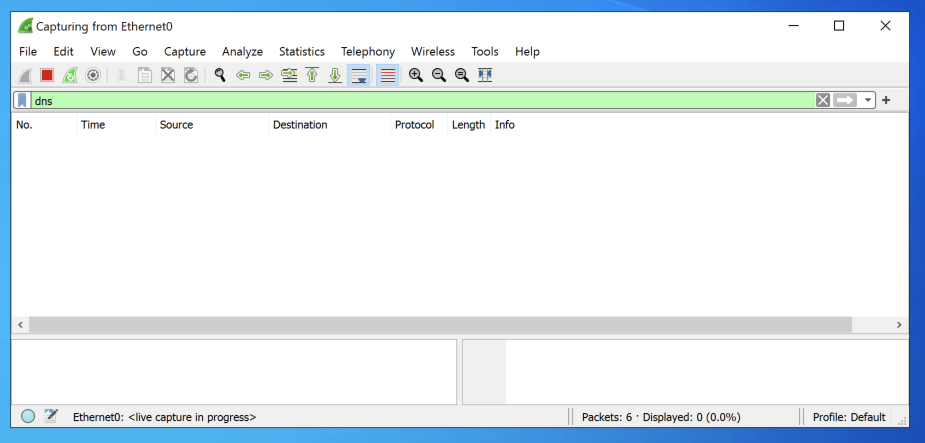
Wireshark is listening for new DNS traffic, as shown below.
NSLOOKUP 192.168.1.1
Wireshark doesn't show any of those junk requests to resolve the IP address this time.
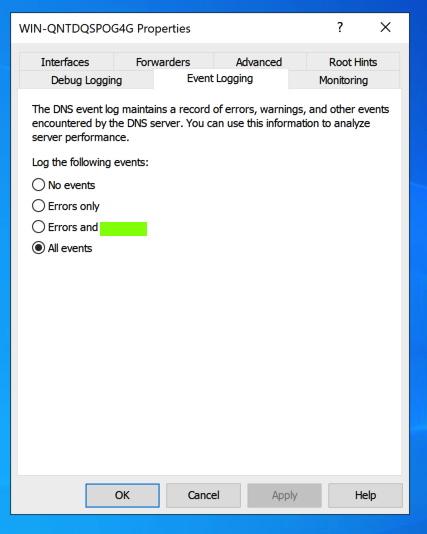
Flag D 2.2: Event Logging (5 pts)
In "DNS Manager", on the left side, right-click your server and click Properties.In the Properties sheet, click the "Event Logging" tab.
The flag appears, covered by a green rectangle in the image below.