sudo apt update
sudo apt install dirmngr software-properties-common -y
sudo apt install apt-transport-https -y
sudo apt-key adv --keyserver keyserver.ubuntu.com --recv-keys 1484120AC4E9F8A1A577AEEE97A80C63C9D8B80B
sudo add-apt-repository 'deb [arch=amd64] https://pkg.osquery.io/deb deb main'
sudo apt update
sudo apt install osquery -y
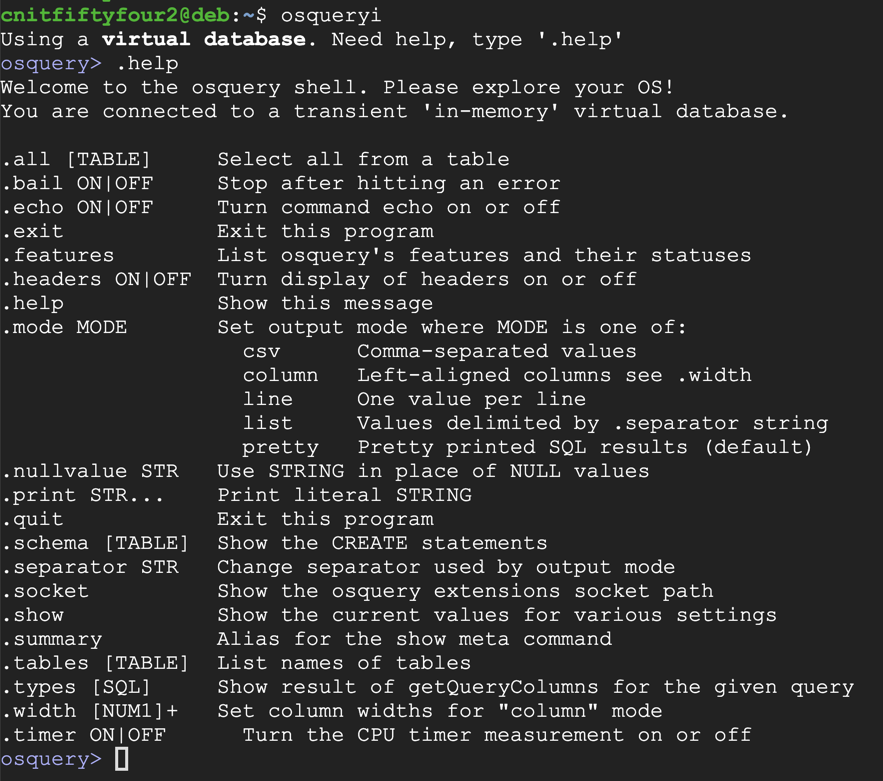
osqueryi
.help
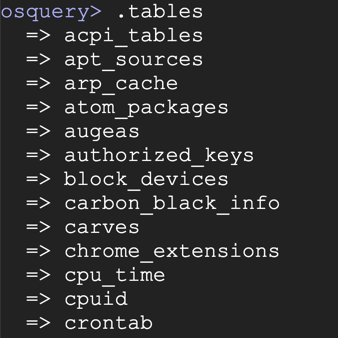
.tables
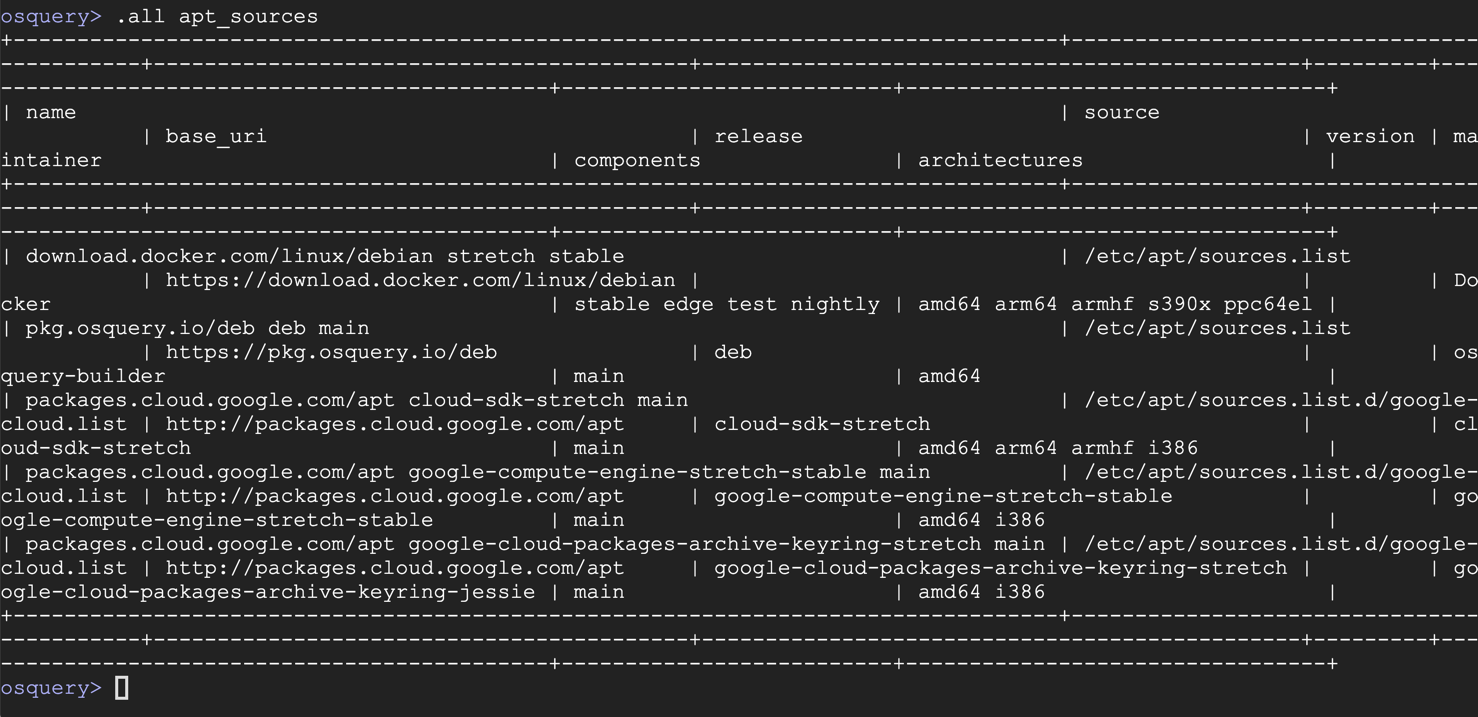
.all apt_sources
arp_cache
uptime
users
shell_history
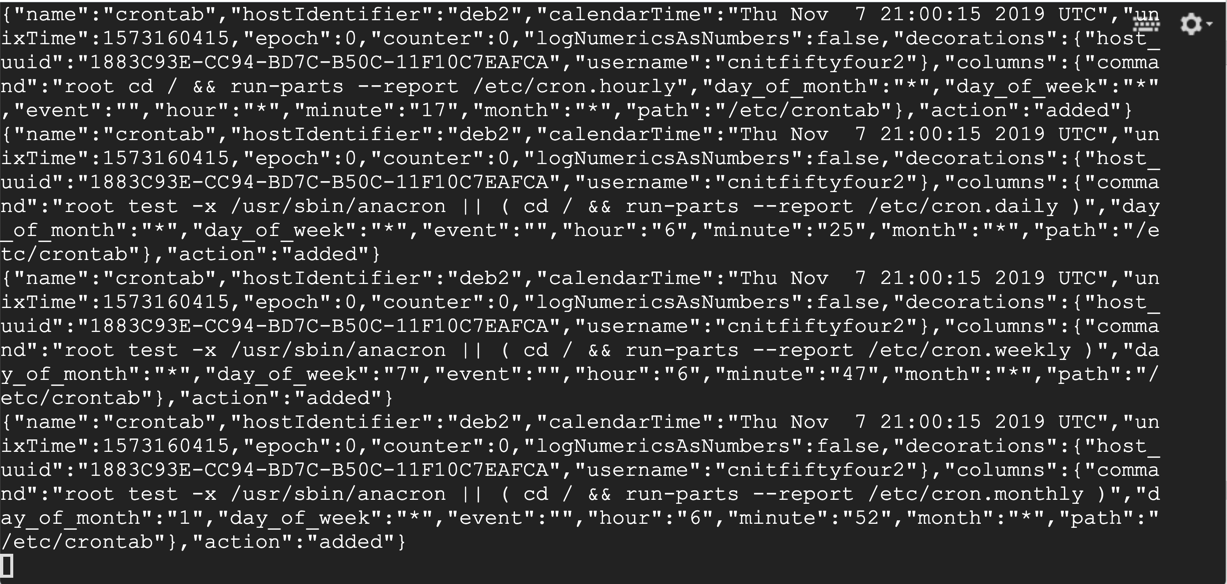
crontab
kernel_info
logged_in_users
memory_info
suid_bin
os_version

.quit
sudo apt install rsyslog -y
sudo nano /etc/rsyslog.d/osquery.conf
template(
  name="OsqueryCsvFormat"
  type="string"
  string="%timestamp:::date-rfc3339,csv%,%hostname:::csv%,%syslogseverity:::csv%,%syslogfacility-text:::csv%,%syslogtag:::csv%,%msg:::csv%\n"
)
*.* action(type="ompipe" Pipe="/var/osquery/syslog_pipe" template="OsqueryCsvFormat")
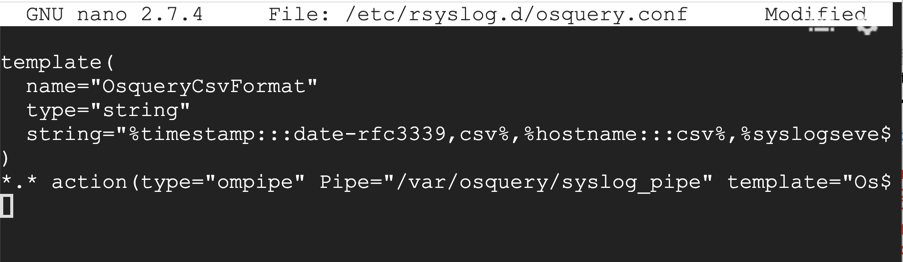
Save the file with Ctrl+X, Y, Enter.
On your Linux machine, execute these commands:
sudo systemctl restart rsyslog
sudo nano /etc/osquery/osquery.conf
{
"options": {
"config_plugin": "filesystem",
"logger_plugin": "filesystem",
"logger_path": "/var/log/osquery",
"disable_logging": "false",
"schedule_splay_percent": "10",
"pidfile": "/var/osquery/osquery.pidfile",
"events_expiry": "3600",
"database_path": "/var/osquery/osquery.db",
"verbose": "false",
"worker_threads": "2",
"disable_events": "false",
"disable_audit": "false",
"audit_allow_config": "true",
"host_identifier": "hakase-labs",
"enable_syslog": "true",
"syslog_pipe_path": "/var/osquery/syslog_pipe",
"force": "true",
"audit_allow_sockets": "true",
"schedule_default_interval": "3600"
},
"schedule": {
"crontab": {
"query": "SELECT * FROM crontab;",
"interval": 300
},
"system_info": {
"query": "SELECT hostname, cpu_brand, physical_memory FROM system_info;",
"interval": 3600
},
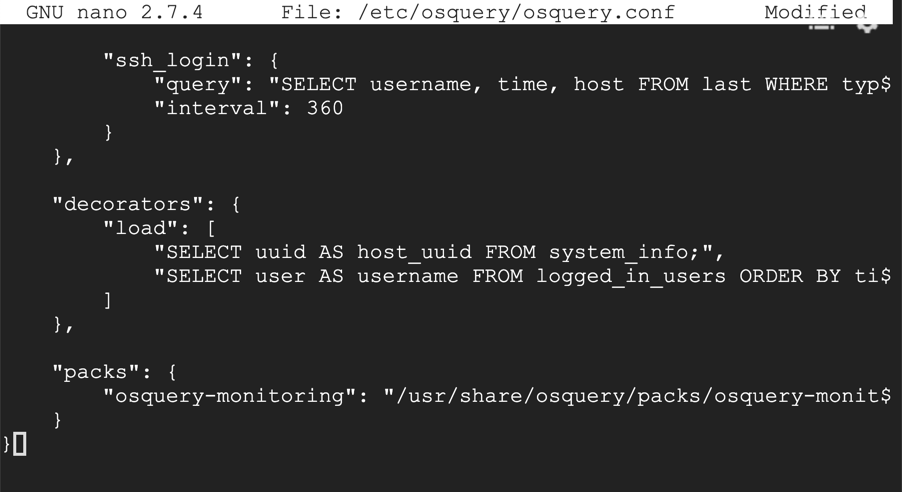
"ssh_login": {
"query": "SELECT username, time, host FROM last WHERE type=7",
"interval": 360
}
},
"decorators": {
"load": [
"SELECT uuid AS host_uuid FROM system_info;",
"SELECT user AS username FROM logged_in_users ORDER BY time DESC LIMIT 1;"
]
},
"packs": {
"osquery-monitoring": "/usr/share/osquery/packs/osquery-monitoring.conf"
}
}
Save the file with Ctrl+X, Y, Enter.
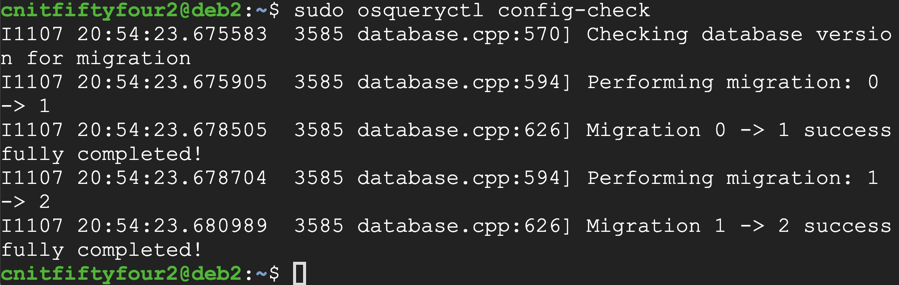
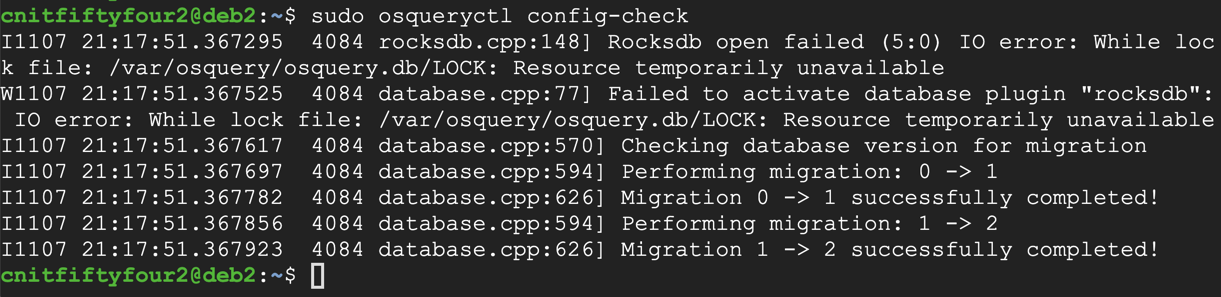
sudo osqueryctl config-check
On your Linux machine, execute these commands:
sudo systemctl start osqueryd
sudo systemctl enable osqueryd
sudo systemctl restart rsyslog

On your Linux machine, execute this command:
sudo nano /usr/share/osquery/packs/fim.conf
{
  "queries": {
    "file_events": {
      "query": "SELECT * FROM file_events;",
      "removed": false,
      "interval": 300
    }
  },
  "file_paths": {
    "homes": [
      "/home/%/.ssh/%%"
    ],
      "etc": [
      "/etc/%%"
    ],
      "home": [
      "/home/%%"
    ],
      "tmp": [
      "/tmp/%%"
    ]
   }
}
On your Linux machine, execute this command:
sudo nano /etc/osquery/osquery.conf
    "packs": {
        "osquery-monitoring": "/usr/share/osquery/packs/osquery-monitoring.conf",
        "fim": "/usr/share/osquery/packs/fim.conf"
    }

Save the file with Ctrl+X, Y, Enter.
sudo systemctl stop osqueryd
sudo osqueryctl config-check
sudo systemctl restart osqueryd
sudo tail -f /var/log/osquery/osqueryd.results.log
Leave this window open with the "tail" command running.
touch /tmp/AAAAAAAAAAAAAAAAAAAAAAAAAAAAAAAAAABBB

Posted 11-7-19
stop command added 6-28-2020
apt-transport-https added 9-17-20