Proj Multichain 1: Getting Started with Multichain

What you need:

Purpose

Multichain is a very nice, free product that allows you to easily set up blockchains and to customize them. For an excellent explanation of possible business cases for such blockchains, read:

Four genuine blockchain use cases

In this project, you will make your own private blockchain.

The coins we create won't be publicly traded, and they won't be worth any real money. The purpose of this project is merely to learn how blockchain technology works, not to get rich quick.

MultiChain's Original Tutorial

I am following this interactive tutorial very closely. My only contribution has been to add screen shots and some explanatory notes. If you have some experience with cryptocurrency, you might prefer to work from that tutorial directly instead of using my instructions.

MultiChain is by far the best blockchain software I have encountered. It has clear instructions that actually work without problems. That is almost unheard-of in the world of open-source software, and especially blockchain software. These folks really know what they are doing, as far as I can tell!

0. Install Multichain

On both of your Ubuntu machines, execute these commands:
cd /tmp
wget http://www.multichain.com/download/multichain-1.0-alpha-21.tar.gz
tar -xvzf multichain-1.0-alpha-21.tar.gz
cd multichain-1.0-alpha-21
sudo mv multichaind multichain-cli multichain-util /usr/local/bin 
Choose one of your Ubuntu machines to be the "First Server".

Note: It's surprising to me that they deliver the software over http instead of https, and that they don't verify a hash value or signature. I'd like to see a more secure software distribution channel than this, as a future upgrade.

1. Creating a blockchain on the First Server

First we will create a new blockchain named chain1. On the first server, run this command:
multichain-util create chain1
View the blockchain's default settings (these can also be modified but we recommend using the defaults for now):
cat ~/.multichain/chain1/params.dat

Interesting parameters

target-block-time = 15
Target time between blocks (transaction confirmation delay), seconds. (5 - 86400)
This is far faster than Bitcoin's 10-minute delay, which should make it far more useful for real-time transaction processing.
maximum-block-size = 1000000
Maximum block size in bytes. (1000 - 1000000000)
This is the infamous "block size" parameter that is causing a crisis on the Bitcoin blockchain now (June, 2016). Bitcoin is almost at its limit of transactions per block. With this value, and the 15-second delay above, this blockchain should be able to handle 40 times as many transactions per day as Bitcoin, assuming that the transaction size is the same as Bitcoin.
skip-pow-check = false
Skip checking whether block hashes demonstrate proof of work.
This blockchain will force miners to work hard and prove it. This seems like a critical adjustment to me. Requiring proof-of-work makes it more expensive for legitimate miners, but it also requires attackers to work harder to corrupt the blockchain.
pow-minimum-bits = 16
Initial and minimum proof of work difficulty, in leading zero bits. (1 - 32)
This means that each miner will have to calculate 2^16 hashes on average, hunting for a valid one to sign a block with. For comparison, the current bitcoin difficulty is 69.53 bits. So it seems like a default Multichain is far easier to mine than Bitcoin, at least at first. And it also seems like the real difficulty will rapidly rise above 32 bits, if there's a free market of competing miners, and the asset value is comparable to a Bitcoin.
target-adjust-freq = 86400
Interval between proof of work difficulty adjustments, in seconds. (3600 - 4294967295)
Bitcoin adjusts its difficulty every 14 days . This blockchain will adjust its difficulty every day. That seems sensible; roughly in accordance with the 15 second transaction delay.

Network Ports

default-network-port = 2645
Default TCP/IP port for peer-to-peer connection with other nodes.
default-rpc-port = 2644
Default TCP/IP port for incoming JSON-RPC API requests.
MultiCoin warns users not to change these values. It's useful to know what ports are used, so we can examine traffic with netstat, tcpdump, and wireshark later.
Initialize the blockchain, including mining the genesis block:
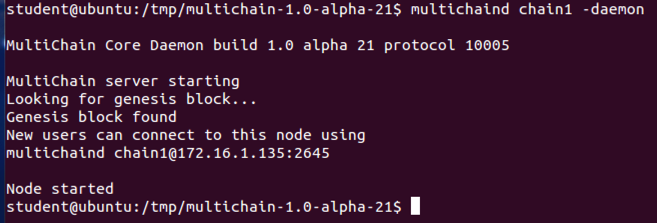
multichaind chain1 -daemon
You should be told that the server has started and then after a few seconds, that the genesis block was found. You should also be given the node address that others can use to connect to this chain.

Make a note of your node address. In the figure below, it is

chain1@172.16.1.135:2645
          

2. Connecting to a blockchain

Now we'll connect to this blockchain from elsewhere. On the second server, run the following command, replacing the node address with your own value:
multichaind chain1@172.16.1.135:2645
You should be told that the blockchain was successfully initialized, but you do not have permission to connect. You should also be shown a message containing an address in this node's wallet. Make a note of the wallet address which appears at the end of the "multichain-cli" commands at the bottom of this message. In the figure below, it's

1563sRd7muFNrVumhsX9RNF3hBohba1wcKmSx2


Back on the first server, add connection permissions for this address:

multichain-cli chain1 grant 1563sRd7muFNrVumhsX9RNF3hBohba1wcKmSx2 connect


Now try reconnecting again from the second server:

multichaind chain1 -daemon
You should be shown a message that the node was started, and it should display this second node's address.


3. Some commands in interactive mode

Before we proceed, let's enter interactive mode so we can issue commands without typing multichain-cli chain1 every time. On both servers:
multichain-cli chain1
You should see a "chain1:" prompt, as shown below.


Now that the blockchain is working on two nodes, you can run the commands in this section on either or both. To get general information:

getinfo
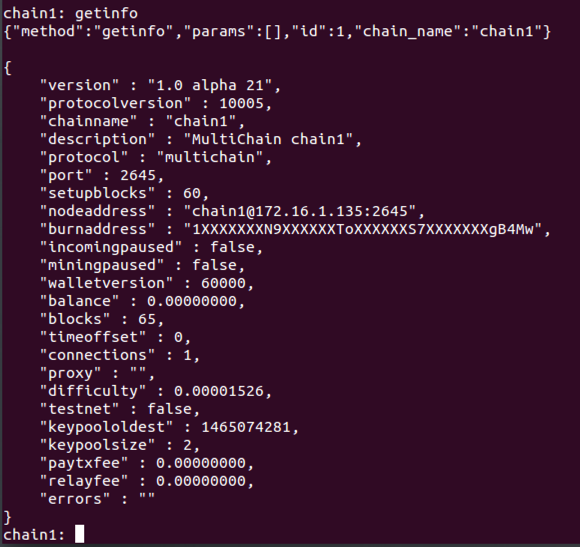
as shown below.


See a list of all available commands:

help
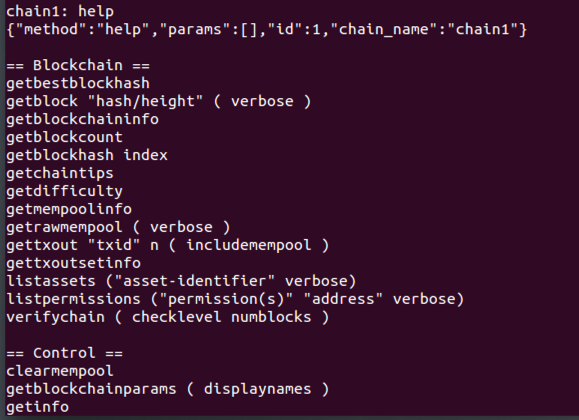
The commands are very similar to bitcoin-cli, as shown below.


To see more information about a specific command, enter "help" followed by the command name, like this:

help listwallettransactions
There's a lot of useful information here as shown below. At the bottom there are JSON versions of the commands, too (not shown in the image below).


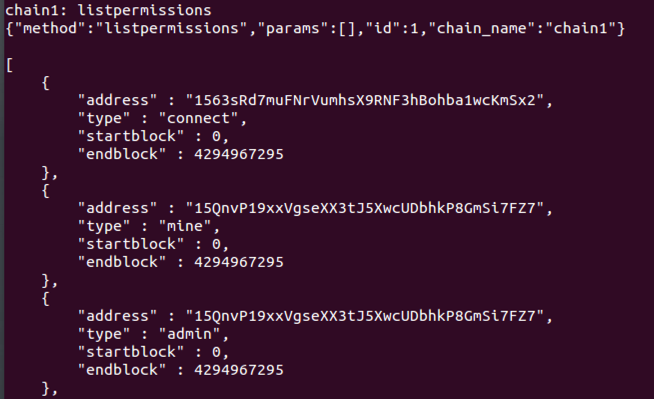
Show all permissions currently assigned:

listpermissions
The first item is the "connect" permission I assigned to the other node earlier.

After that there are many entries showing my First Server with many permissions, such as "mine" and "admin".
          

Create a new address in the wallet:

getnewaddress
Just as in bitcoin-cli, this displays a new address that can be used to receive assets, as shown below.


List all addresses in the wallet:

getaddresses
There are now two addresses: the first one is the new one revealed by the "getnewaddress" command, and the second one is the address we saw earlier with the "mine" and "admin" permissions.


Get the parameters of this blockchain (based on params.dat file):

getblockchainparams
These are the same parameters we saw previously.


For each node, get a list of connected peers:

getpeerinfo
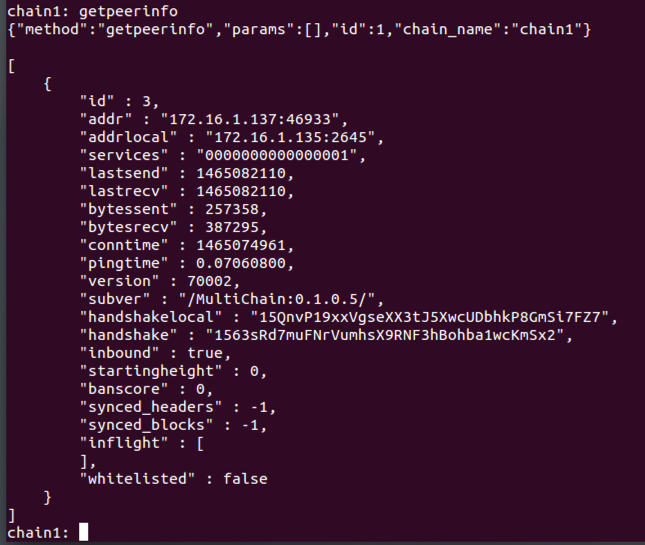
There's only one peer right now, as shown below.


4. Using native assets

Now we are going to create a new asset and send it between nodes. On the first server, get the address that has the permission to create assets:
listpermissions issue
Make a note of this address. In the figure below, it's 15QnvP19xxVgseXX3tJ5XwcUDbhkP8GmSi7FZ7.


Now we'll create a new asset on this node with 1000 units, each of which can be subdivided into 100 parts, sending it to itself.

On your First Server, execute this command, using the address you noted in the previous step.

issue 15QnvP19xxVgseXX3tJ5XwcUDbhkP8GmSi7FZ7 asset1 1000 0.01


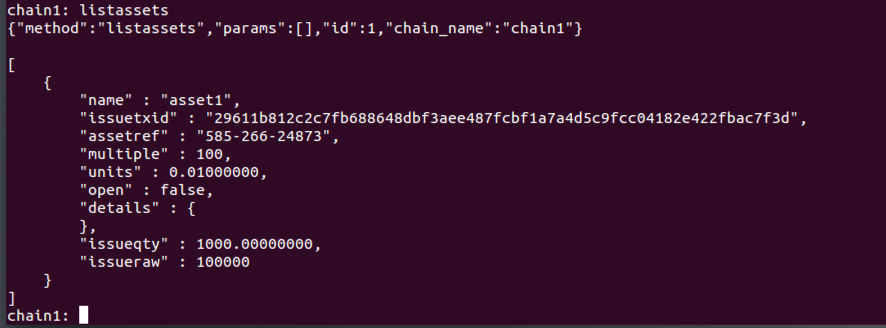
On both servers, verify that the asset named asset1 is listed:

listassets
          

Now check the asset balances on the First Server:

gettotalbalances
The First Server has 1000 units of "asset1", as shown below.


Now check the asset balances on the Second Server:

gettotalbalances
The Second Server doesn't have any "asset1", as shown below.


On the first server, now try sending 100 units of the asset to the second server's wallet. The address here is the address of your Second Server, which you found back in section "2. Connecting to a blockchain".

sendassettoaddress 1563sRd7muFNrVumhsX9RNF3hBohba1wcKmSx2 asset1 100
The transaction fails, because the Second Server's address doesn't have "receive permission", as shown below.


So let's add receive and send permissions. On your First Server, execute this command, using your Second Server's address:

grant 1563sRd7muFNrVumhsX9RNF3hBohba1wcKmSx2 receive,send
The grant succeeds, as shown below.


Now try sending the asset again. On your First Server, execute this command, using your Second Server's address:

sendassettoaddress 1563sRd7muFNrVumhsX9RNF3hBohba1wcKmSx2 asset1 100
Now there's no error message, as shown below.


Note: the transaction that created the asset requires 30 seconds or so for confirmation.

If you are working really fast, you may see another error at this point. If that happens, wait 30 seconds and try again.

On the First Server, execute this command to check its asset balances:
gettotalbalances
The First Server has 900 units of "asset1" left, as shown below.


On the Second Server, execute this command to check its asset balances:

gettotalbalances
The Second Server has 100 units of "asset1", as shown below.


On the First Server, execute this command to see the most recent transaction.

listwallettransactions 1
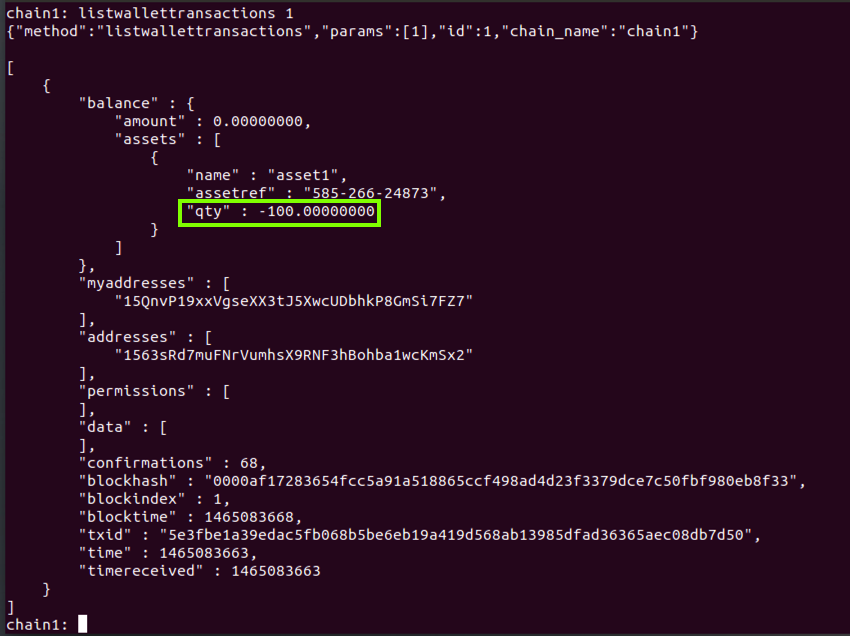
This transaction has "qty" of -100, indicating that the First Server lost 100 units of asset1, as shown below.


On the Second Server, execute this command to see the most recent transaction.

listwallettransactions 1
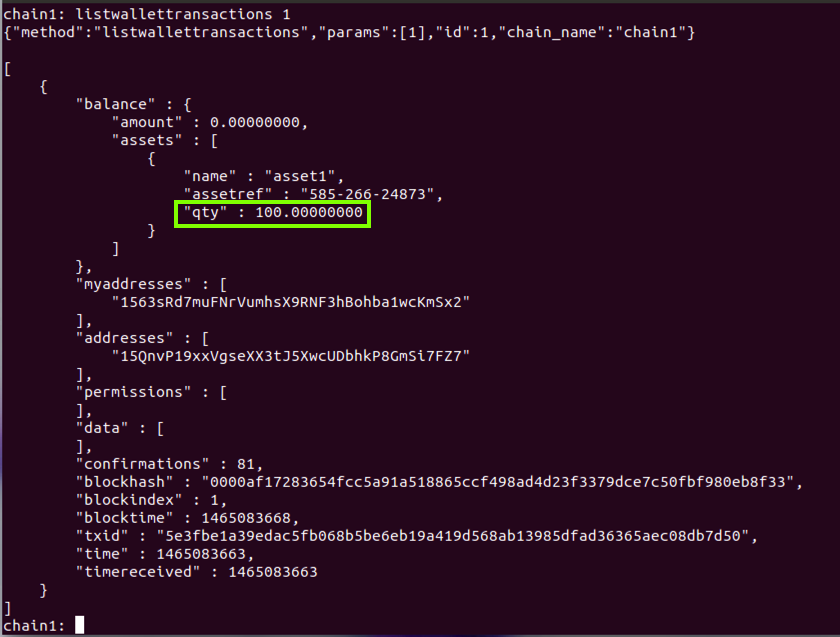
This transaction has "qty" of 100, indicating that the First Server gained 100 units of asset1, as shown below.


5. Transaction metadata

On the First Server, execute this command to learn about the "sendwithmetadata" command:
help sendwithmetadata 
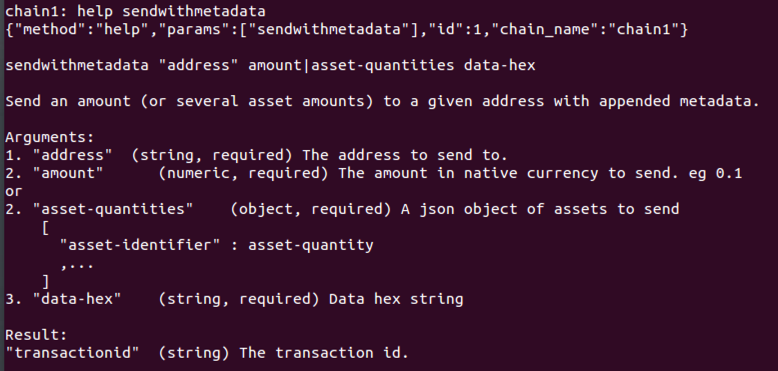
We can include metadata in a transaction, but it has to be in hexadecimal format, as shown below.


Let's send 125 units of asset1 along with metadata of "deadbeef". On your First Server, execute this command, using the address of your Second Server.

sendwithmetadata 1563sRd7muFNrVumhsX9RNF3hBohba1wcKmSx2 '{"asset1":125}' deadbeef
The transaction succeeds, and returns a Transaction ID, as shown below.


To examine the transaction, execute this command on your Second Server, using that Transaction ID:

getwallettransaction 8197e05c7eb34856b9bf9b17aaceedfa5ce2b11a86212719608ce30f92484683
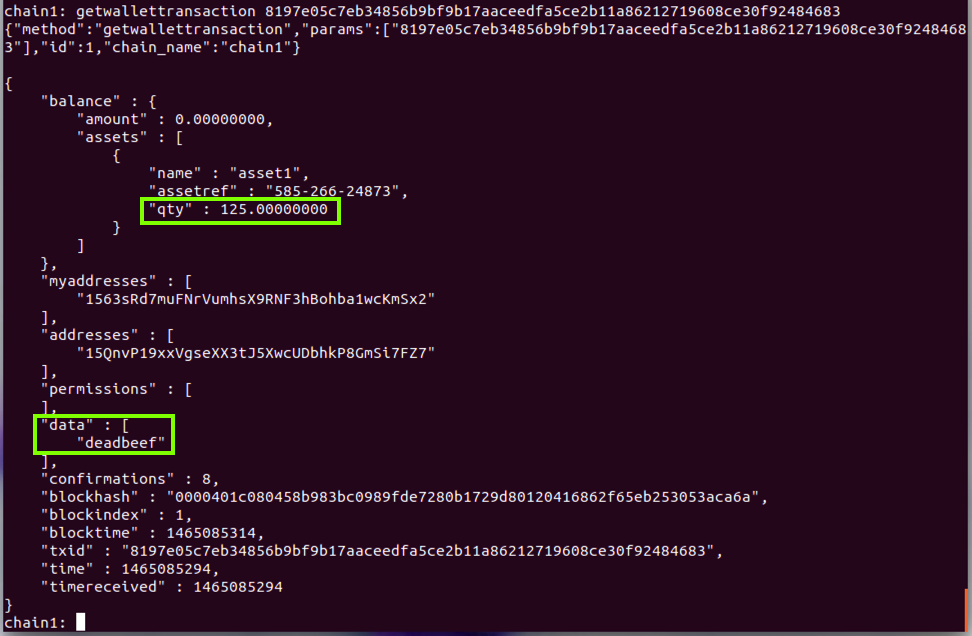
The "qty" and "data" fields appear, as shown below.


6. Atomic exchange transactions

Now we'll create a second asset and build an exchange transaction which swaps some of the first asset for some of the second. This transaction will be atomic, meaning that the two-way exchange must succeed or fail as a whole (also known as delivery-versus-payment).

First let's create the second asset with 10 indivisible units. On your First Server, execute this command, using the address you noted in section "4. Using native assets":

issue 15QnvP19xxVgseXX3tJ5XwcUDbhkP8GmSi7FZ7 asset2 10 1
The command completes without errors, as shown below.


On your First Server, check your assets:

listassets
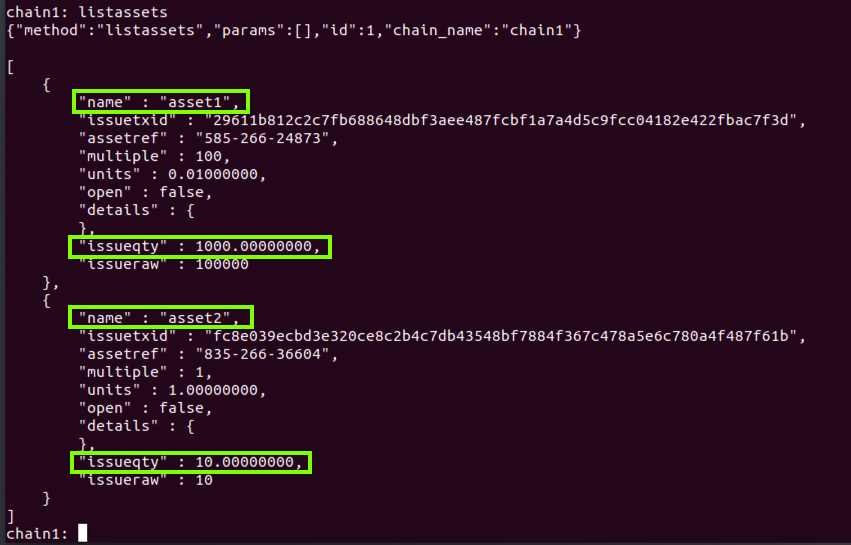
Your blockchain now contains two types of assets: 1000 units of asset1, and 10 units of asset2, as shown below.


We are going to swap 50 units of asset1 for 1 unit of asset2. To do this, we will begin building the exchange transaction on the First Server, then complete it on the Second Server.

On the First Server, create a locked transaction output containing 1 unit of asset2:

preparelockunspent '{"asset2":1}'
The response includes a "txid" value, and a "vout" value, as shown below.


Because it is locked, this transaction output will be protected against spending unless explicitly spent or unlocked. Now we will use it to start the exchange transaction, specifying that we want 50 units of asset1 in exchange for this output.

On the First Server, execute this command, using the "txid" you got from the previous command. The "0" is the "vout" value, which is probably the same on your system.

createrawexchange 9895f9da49d95b8ee489a2cbee92983e4368f8d522e02679604c823ef1375b3b 0 '{"asset1":50}'
as shown below.


This will output a large hexadecimal blob of text that contains the raw transaction data representing the offer of exchange. Copy this blob from the first server, then on the second server, run:

decoderawexchange [paste-hex-blob]
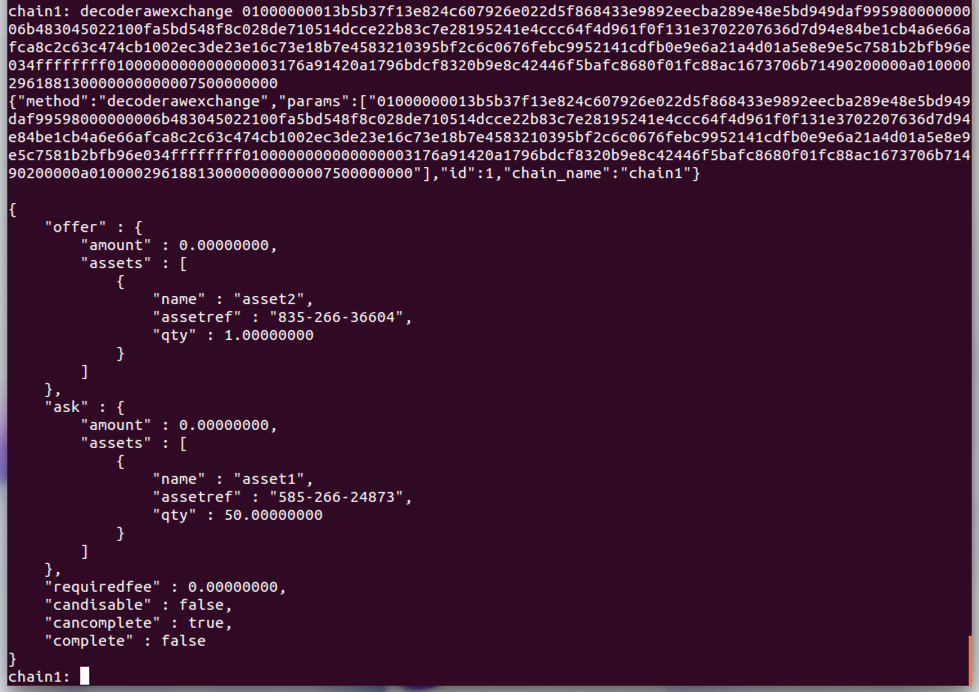
as shown below.


The output will show you exactly what is represented by this exchange offer in the offer and ask sections. In addition, "cancomplete" should be "true" meaning that the second server has the assets required to complete the exchange.

Now on the second server, create a locked transaction output containing 50 units of asset1:

preparelockunspent '{"asset1":50}'
Note the "txid" and "vout" values returned, as shown below.


Now we will prepare the exchange transaction. On your Second Server, execute this command, using your hex-blob, and the "txid" and "vout" values returned by the previous command:

appendrawexchange [paste-hex-blob] a7676682a1db07fa7d359b8791bb2f2b718b200ae5ad27118f0fc26cc8fdcb8ae 1 '{"asset2":1}'
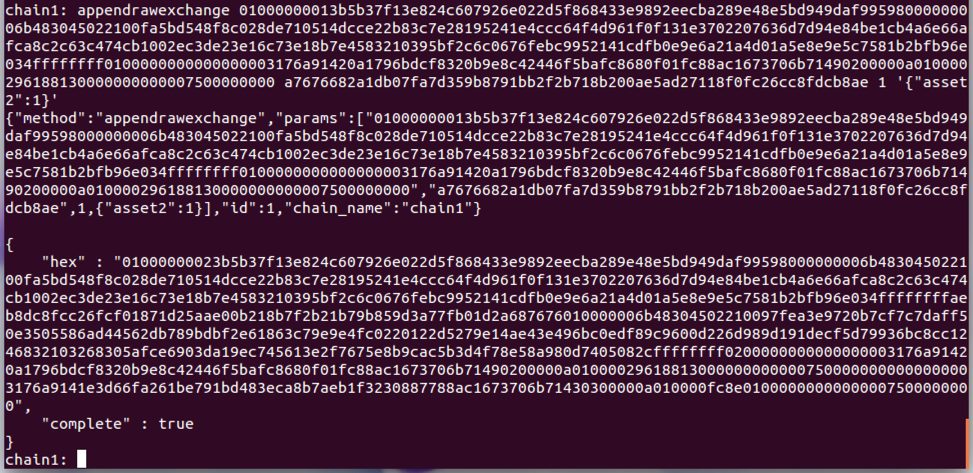
The output should contain an even longer hexadecimal blob of text, alongside another field "complete" whose value is "true", as shown below.


This final hex blob is a raw transaction representing the completed exchange. On your Second Server, execute this command to send the transaction to the network:

sendrawtransaction [paste-longer-hex-blob]
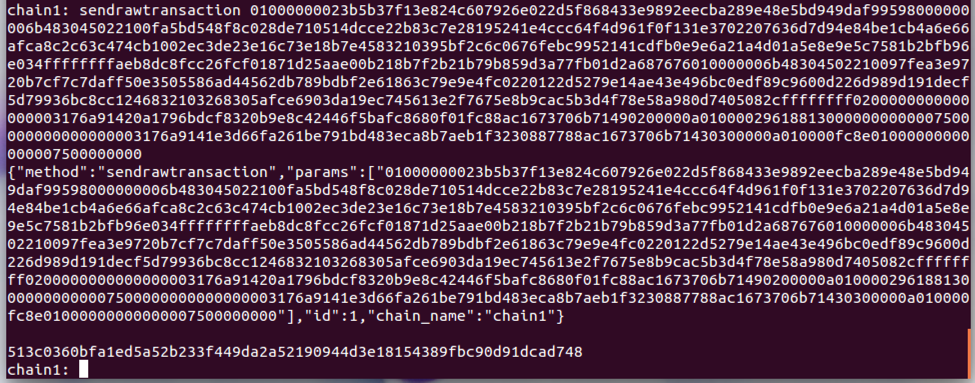
The response contains a regular transaction ID, as shown below.


To verify that the exchange was successful, on your First Server, execute this command:

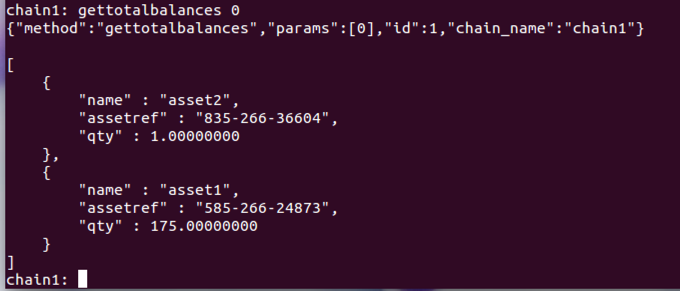
gettotalbalances 0
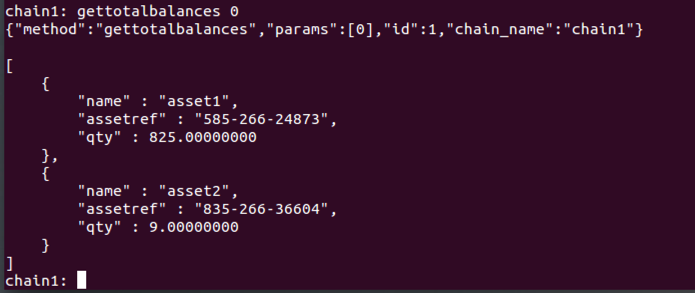
The First Server now has 825 units of asset1 and 9 units of asset2, as shown below.


To verify that this is correct, let's review the transactions we've performed.

We created 1000 units of asset1 on the First Server.
We sent 100 units of asset1 to the Second Server.
We sent 125 more units of asset1 to the Second Server with metadata.
We created 10 units of asset2 on the First Server.
We sent 1 unit of asset2 to the Second Server and received 50 units of asset1 in exchange.
So the First Server should have:
1000 - 100 - 125 + 50 = 825 units of asset1 and
10 - 1 = 9 units of asset2
As you can see above, the balances are correct on the First Server.

The Second Server should have:

100 + 125 - 50 = 175 units of asset1 and
1 unit of asset2
On your Second Server, execute this command:
gettotalbalances 0
The balances are correct, as shown below.


The last exchange of assets was performed atomically in a single transaction, which you can view on either server using:

listwallettransactions 1
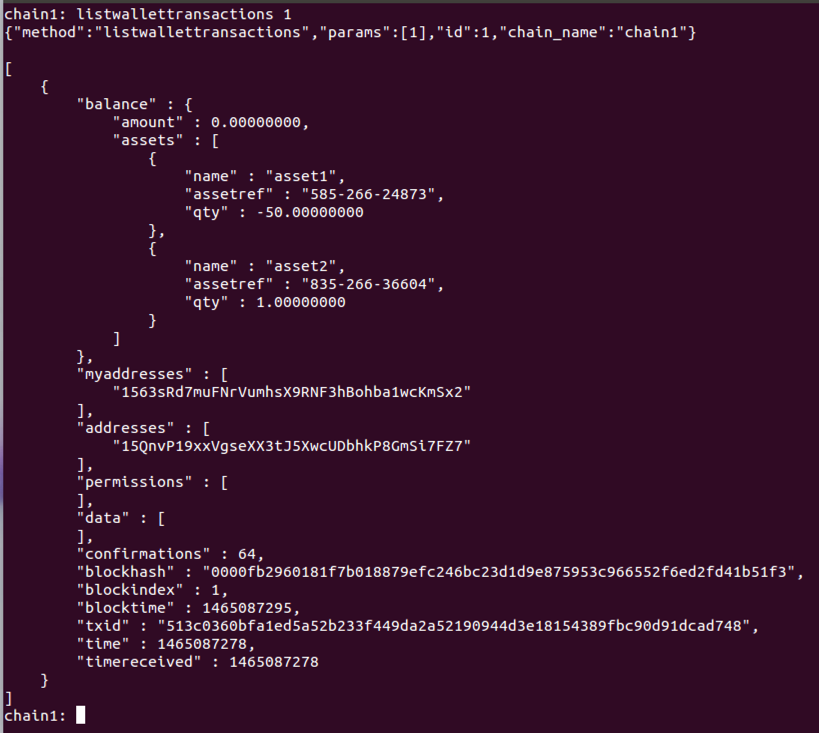
as shown below.


7. Round-robin mining

In this section we'll start collaborative mining between the nodes. To do that, we need to give the Second Server permission to mine.

On your First Server, execute this command, using the address of your Second Server from the "2. Connecting to a blockchain" section:

grant 1563sRd7muFNrVumhsX9RNF3hBohba1wcKmSx2 mine
The command completes without error, as shown below.


On the Second Server, execute this command to see how many permitted miners there are:

listpermissions mine
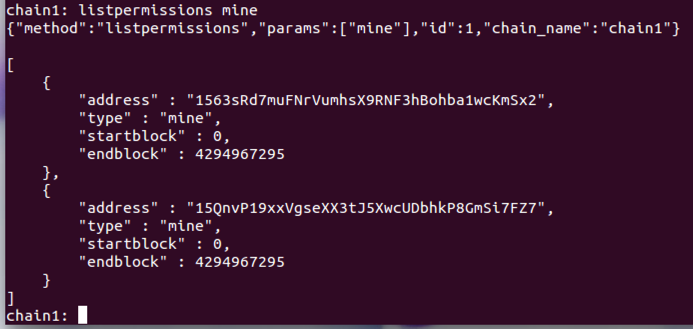
There are two addresses listed, as shown below.


Now wait for a couple of minutes, so that a few blocks are mined. On either server, check the current block height:

getinfo
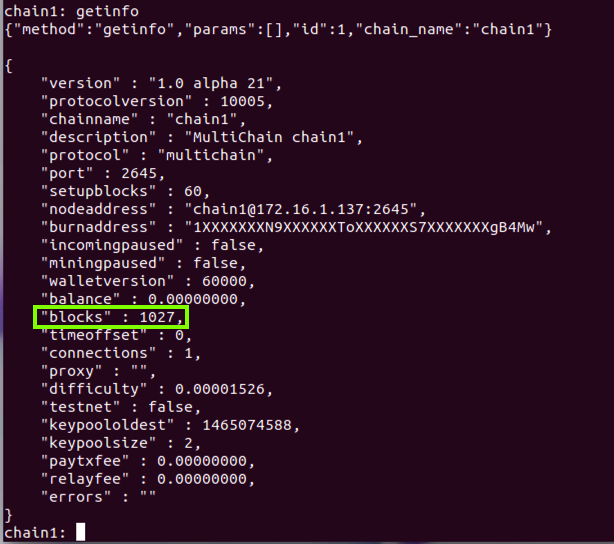
Find the number of blocks, as shown below.


Now get the hashes of the last few blocks, with commands like this:

getblockhash 1027
getblockhash 1026
getblockhash 1025
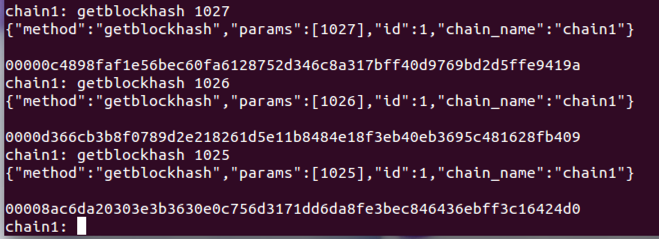
as shown below.


For each hash, get more information about the block:

getblock [block-hash]
When I did it, blocks 1027, 1026, and 1025 were all from the same miner, but block 1024 was from the other miner, as shown below. It's a race between the miners, so they each have a 50% chance of winning, if both machines have the same processing power.


Sources

Installing MultiChain


Posted 6-4-16 by Sam Bowne
Revised 6-18-16