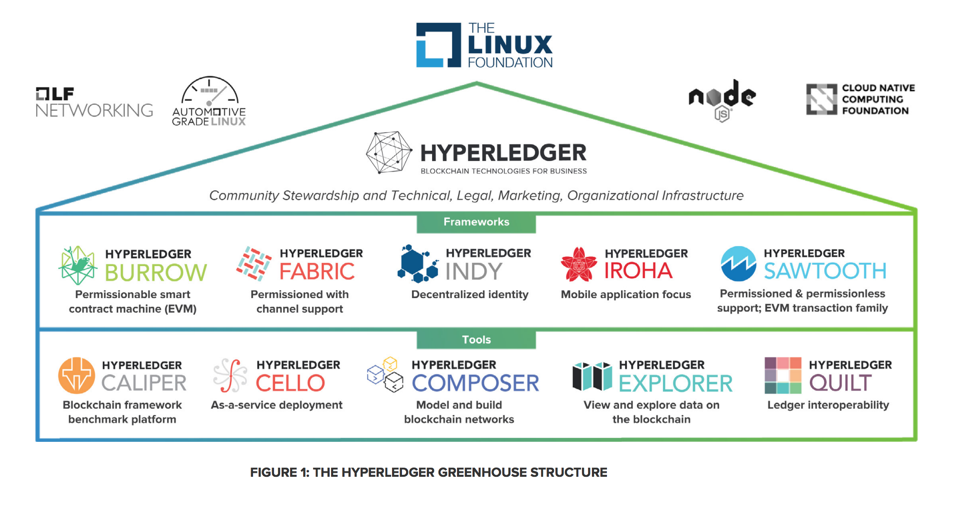
"Hyperledger serves as a 'greenhouse' that brings together users, developers, and vendors from many different sectors and market spaces. All these participants have one thing in common: All are interested in learning about, developing, and using enterprise blockchains.Here are the main components currently available for Hyperledger:
sudo apt update
sudo apt install docker.io
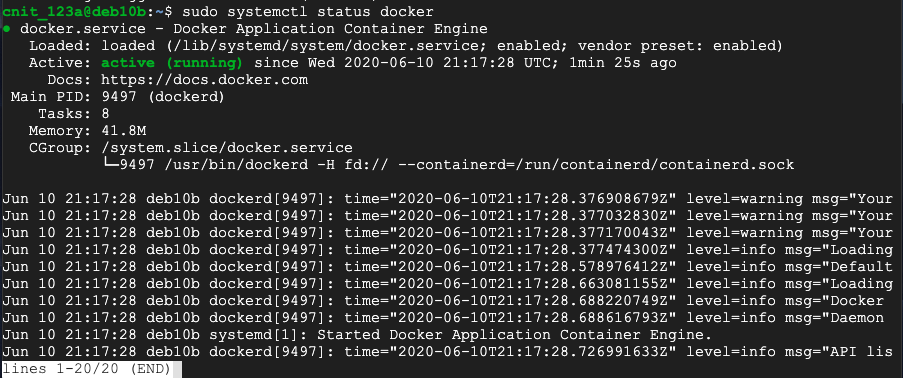
sudo systemctl status docker
Press Q to exit the status page.
We need to create a virtual network so they can communicate with one another.
Execute this command:
sudo docker network create iroha-network
Execute this command:
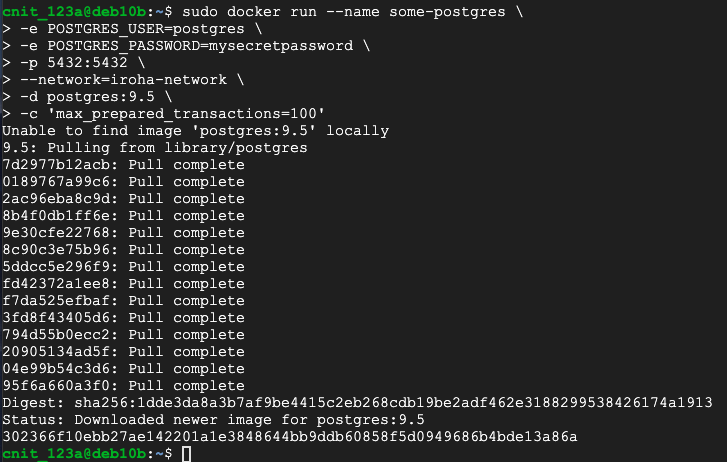
sudo docker run --name some-postgres \
-e POSTGRES_USER=postgres \
-e POSTGRES_PASSWORD=mysecretpassword \
-p 5432:5432 \
--network=iroha-network \
-d postgres:9.5 \
-c 'max_prepared_transactions=100'
Execute this command:
sudo ss -nltp

Execute this command:
sudo docker volume create blockstore
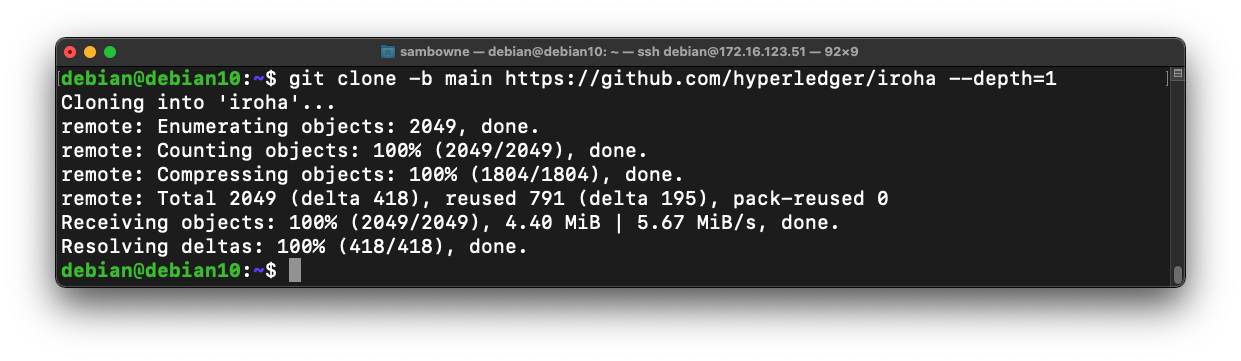
git clone -b main https://github.com/hyperledger/iroha --depth=1
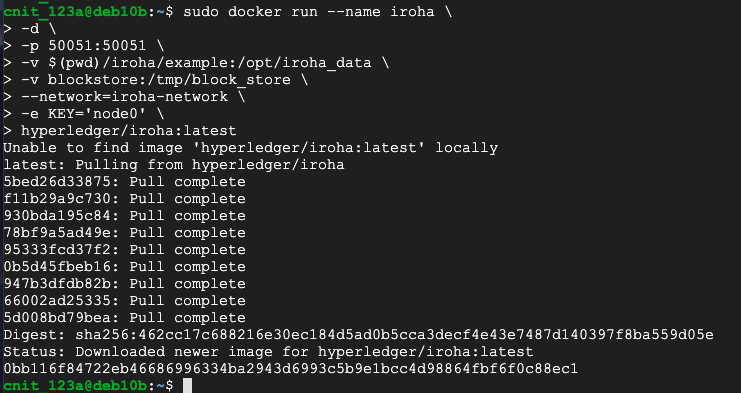
sudo docker run --name iroha \
-d \
-p 50051:50051 \
-v $(pwd)/iroha/example:/opt/iroha_data \
-v blockstore:/tmp/block_store \
--network=iroha-network \
-e KEY='node0' -it \
hyperledger/iroha:latest /bin/bash
Execute this command:
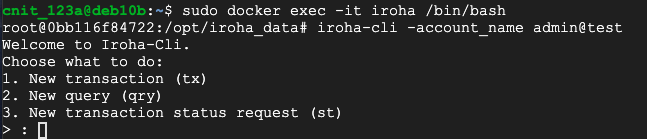
sudo docker exec -it iroha /bin/bash
Execute these commands to create the admin account and use it:
iroha-cli --new_account --account_name admin@test

iroha-cli -account_name admin@test
1. New transaction (tx)The command is formed, as shown below.
14. Create Asset (crt_ast)
Asset name: coolcoin
Domain Id: test
Asset precision: 2
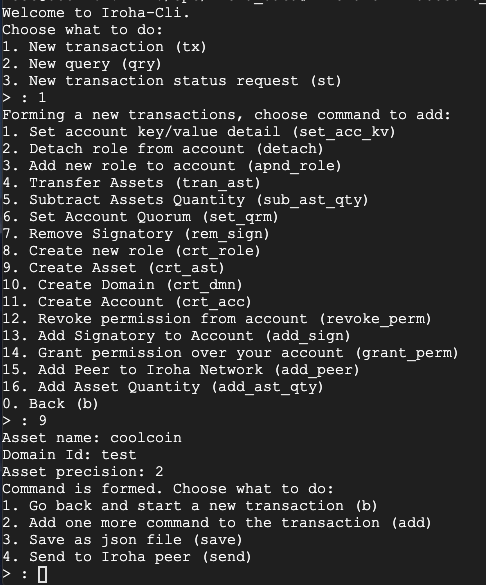
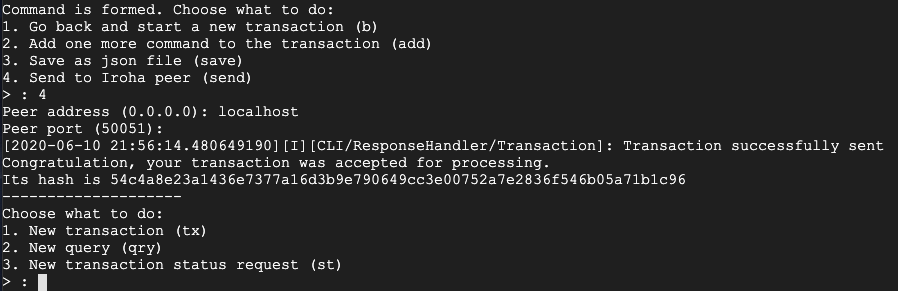
4. Send to Iroha peer (send)The transaction is accepted, as shown below.
Peer address (0.0.0.0): localhost
Peer port (50051): Press Enter
Make these selections, one at a time:
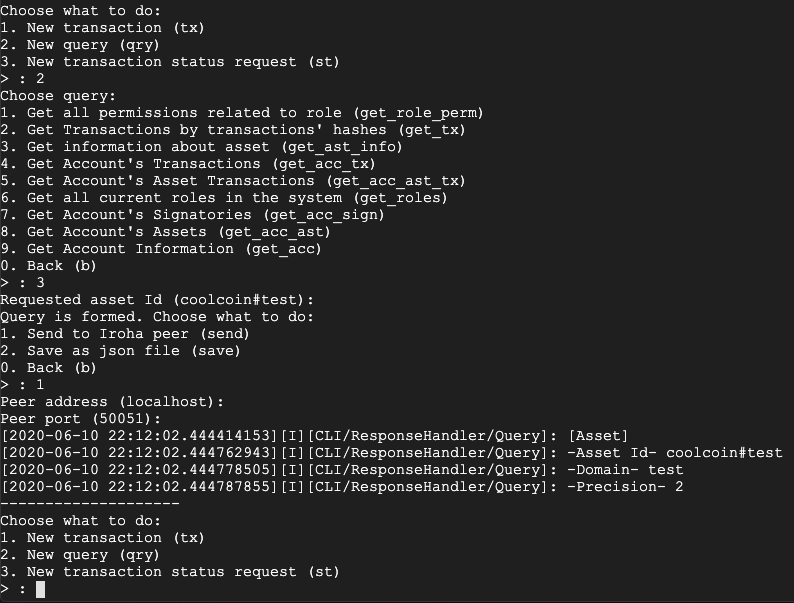
2. New query (qry)Four lines of information are returned, showing that the asset has been created, as shown below.
2. Get information about asset (get_ast_info)
Requested Asset Id: coolcoin#test
1. Send to Iroha peer (send)
Peer address (0.0.0.0): localhost
Peer port (50051): Press Enter
Type the bold text:
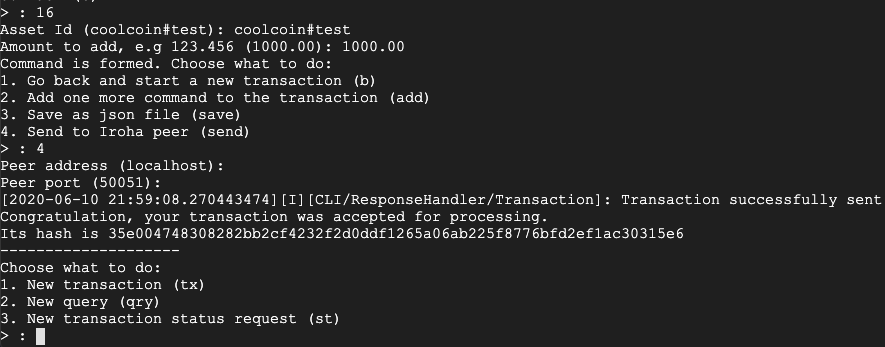
1. New transaction (tx)The transaction is accepted, as shown below.
16. Add Asset Quantity (add_ast_qty)
Asset Id: coolcoin#test
Amount to add, e.g 123.456: 1000.00
4. Send to Iroha peer (send)
Peer address (localhost): Press Enter
Peer port (50051): Press Enter
Make these selections, one at a time:
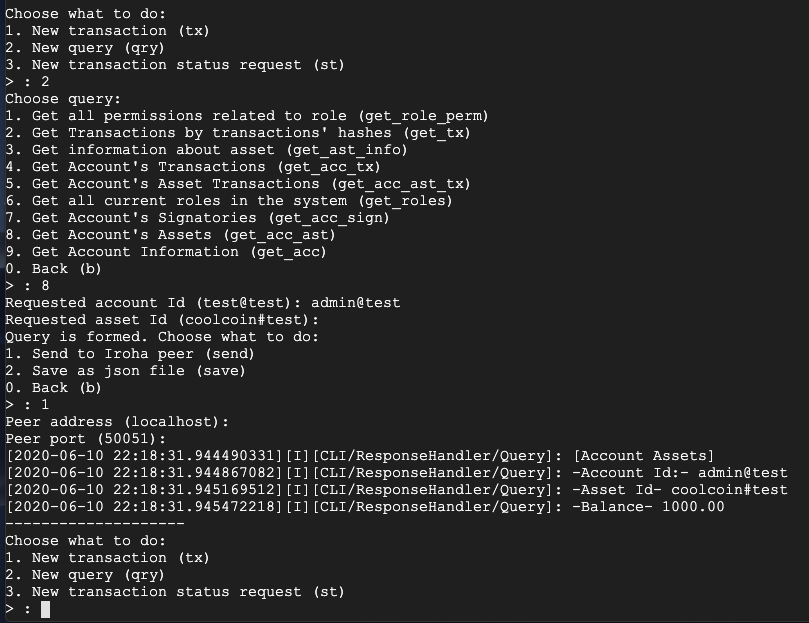
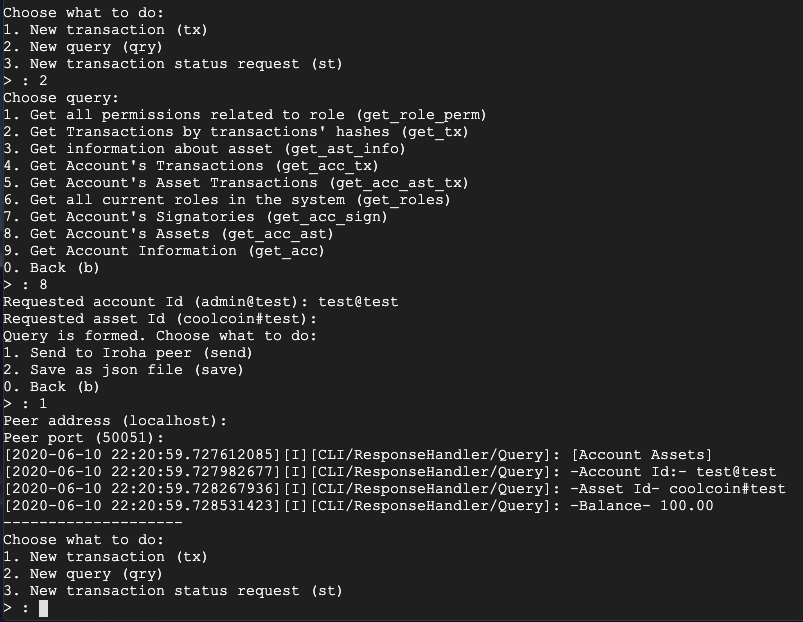
2. New query (qry)The account has a balance of 1000, as shown below.
8. Get Account's Assets (get_acc_ast)
Requested account Id: admin@test
Requested Asset Id: coolcoin#test
1. Send to Iroha peer (send)
Peer address (localhost): Press Enter
Peer port (50051): Press Enter
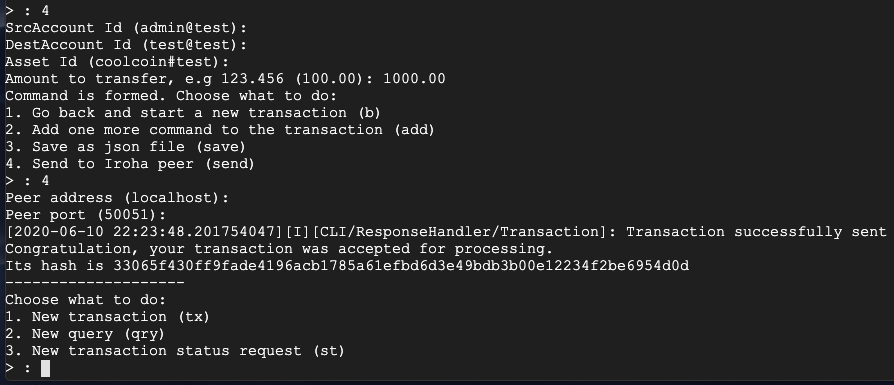
Make these selections, one at a time, to create a new asset. Type the bold text:
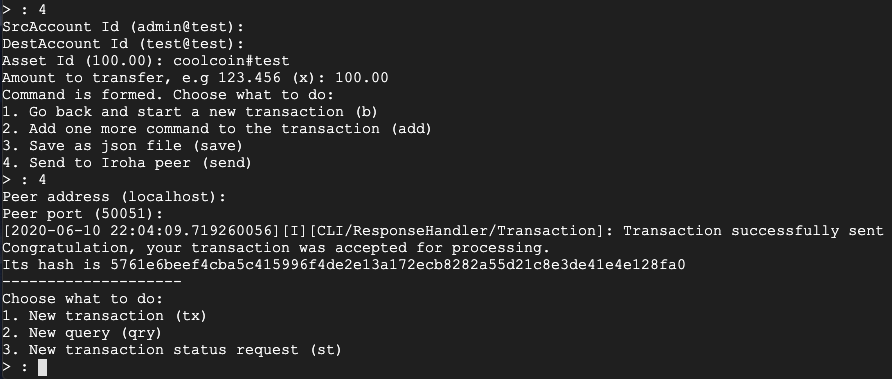
1. New transaction (tx)The transaction is accepted, as shown below.
4. Transfer Assets (tran_ast)
SrcAccount Id: admin@test
DestAccount Id: test@test
Asset Id: coolcoin#test
Amount to transfer, e.g 123.456: 100.00
4. Send to Iroha peer (send)
Peer address (localhost): Press Enter
Peer port (50051): Press Enter
Make these selections, one at a time:
2. New query (qry)The account has a balance of 100, as shown below.
8. Get Account's Assets (get_acc_ast)
Requested account Id: test@test
Requested Asset Id: coolcoin#test
1. Send to Iroha peer (send)
Peer address (localhost): Press Enter
Peer port (50051): Press Enter
Make these selections, one at a time, to create a new asset. Type the bold text:
1. New transaction (tx)The transaction is accepted, as shown below.
4. Transfer Assets (tran_ast)
SrcAccount Id: admin@test
DestAccount Id: test@test
Asset Id: coolcoin#test
Amount to transfer, e.g 123.456: 1000.00
4. Send to Iroha peer (send)
Peer address (localhost): Press Enter
Peer port (50051): Press Enter
Notice the long transaction hash value, below the "Congratulation" line. Copy it to the Clipboard--you'll need it later.
If you are using Google Cloud, highlight it to copy it--don't press Ctrl+C.
Make these selections, one at a time:
3. New transaction status request (st)The transaction was rejected, as shown below.
1. Get status of transaction (get_tx_info)
Requested tx hash: Paste in your hash value
1. Send to Iroha peer (send)
Peer address (0.0.0.0): localhost
Peer port (50051): Press Enter

2. New query (qry)There are three roles, as shown below.
6. Get all current roles in the system (get_roles)
1. Send to Iroha peer (send)
Peer address (localhost): Press Enter
Peer port (50051): Press Enter
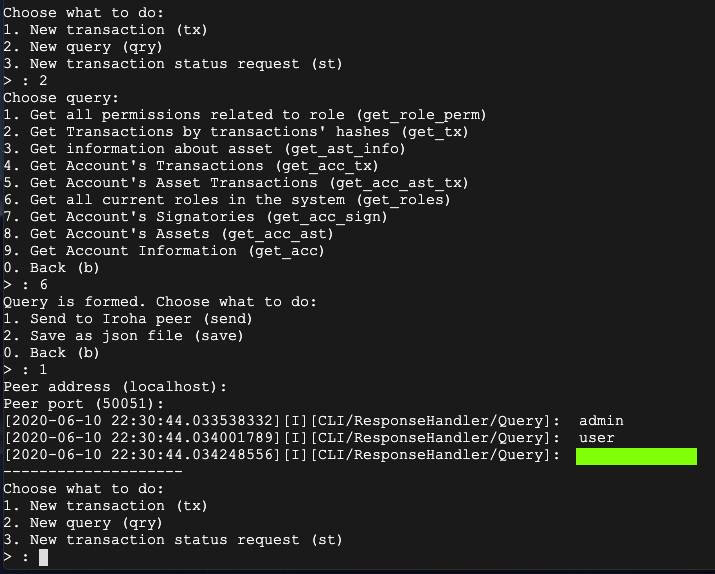
H 531.1: Role (15 pts)
Find the third role, which is govered by a green rectangle in the image above.That's the flag.
Ctrl+Z.
exit
exit
Posted 6-10-2020
Updated 9-20-2021
Updating 12-9-24