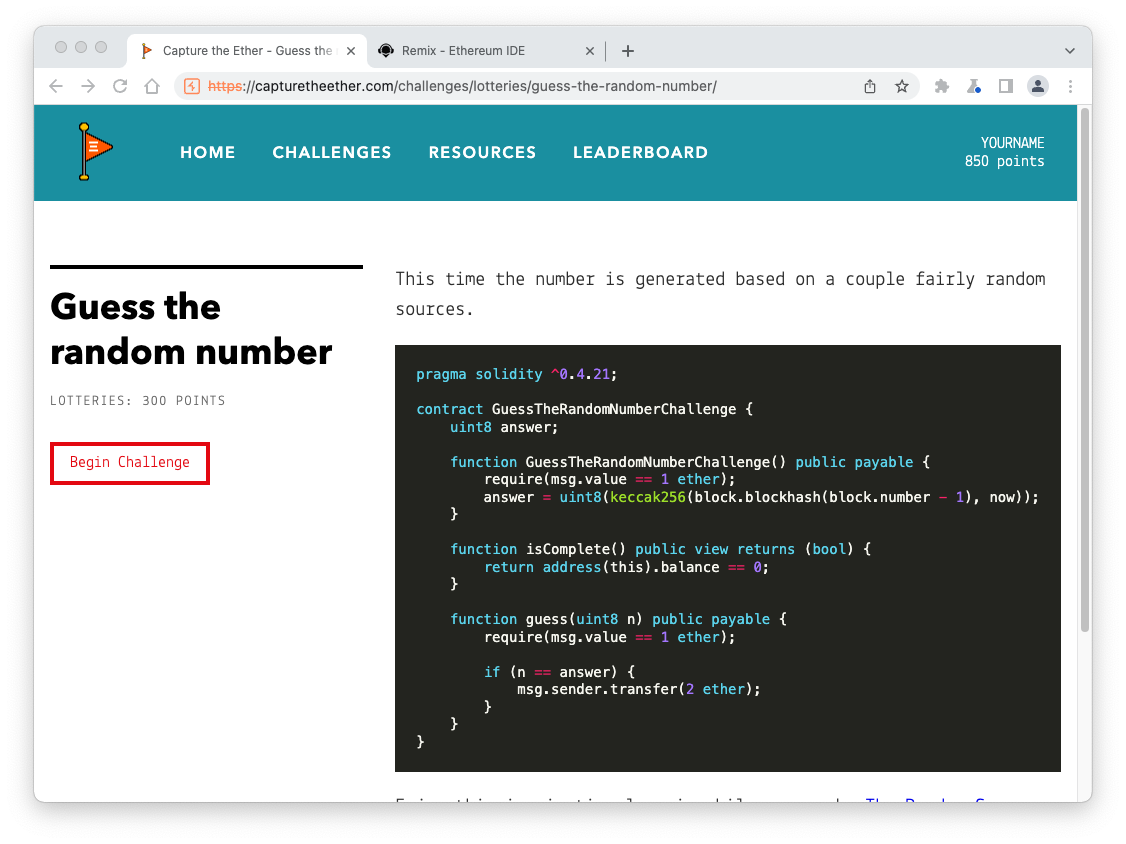
You see the "Guess the random number" page, as shown below.
Read the Solidity code. Notice these things:
A MetaMask box pops up.
Click Confirm.
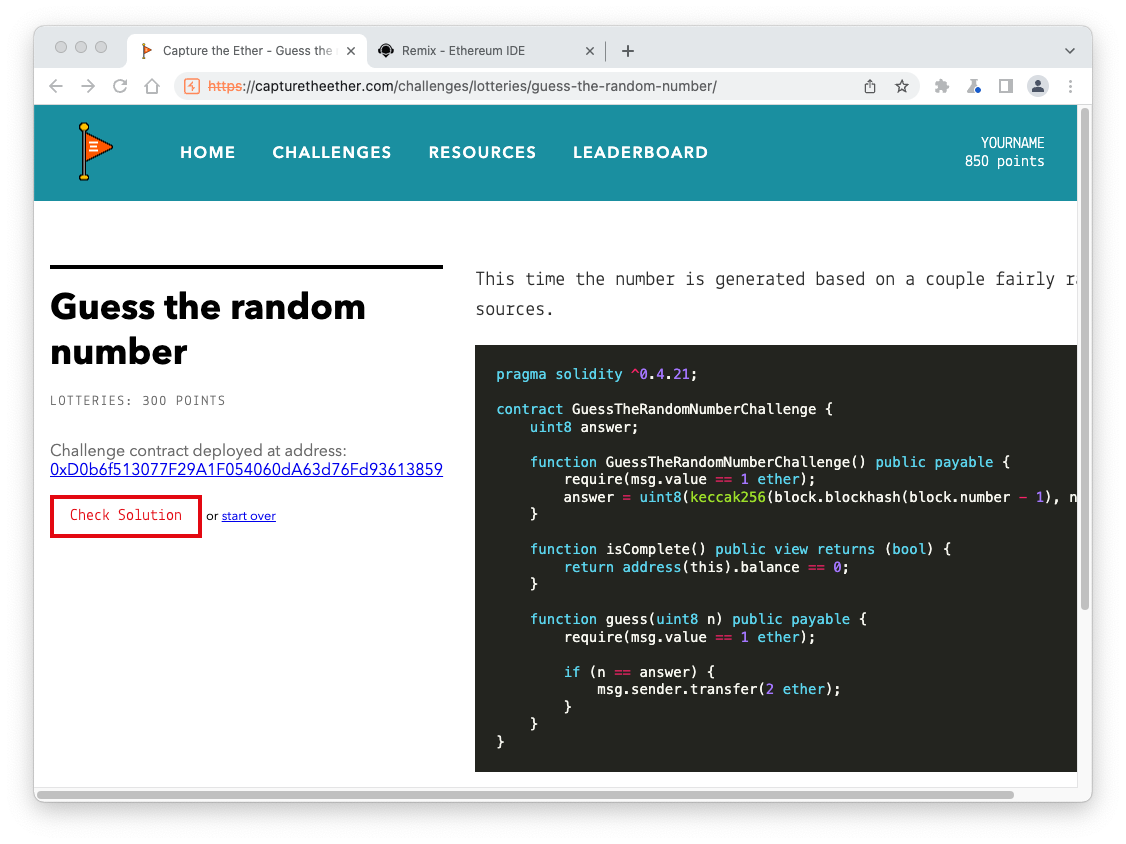
After a few seconds, the left side of the page shows your contract's address, as shown below.
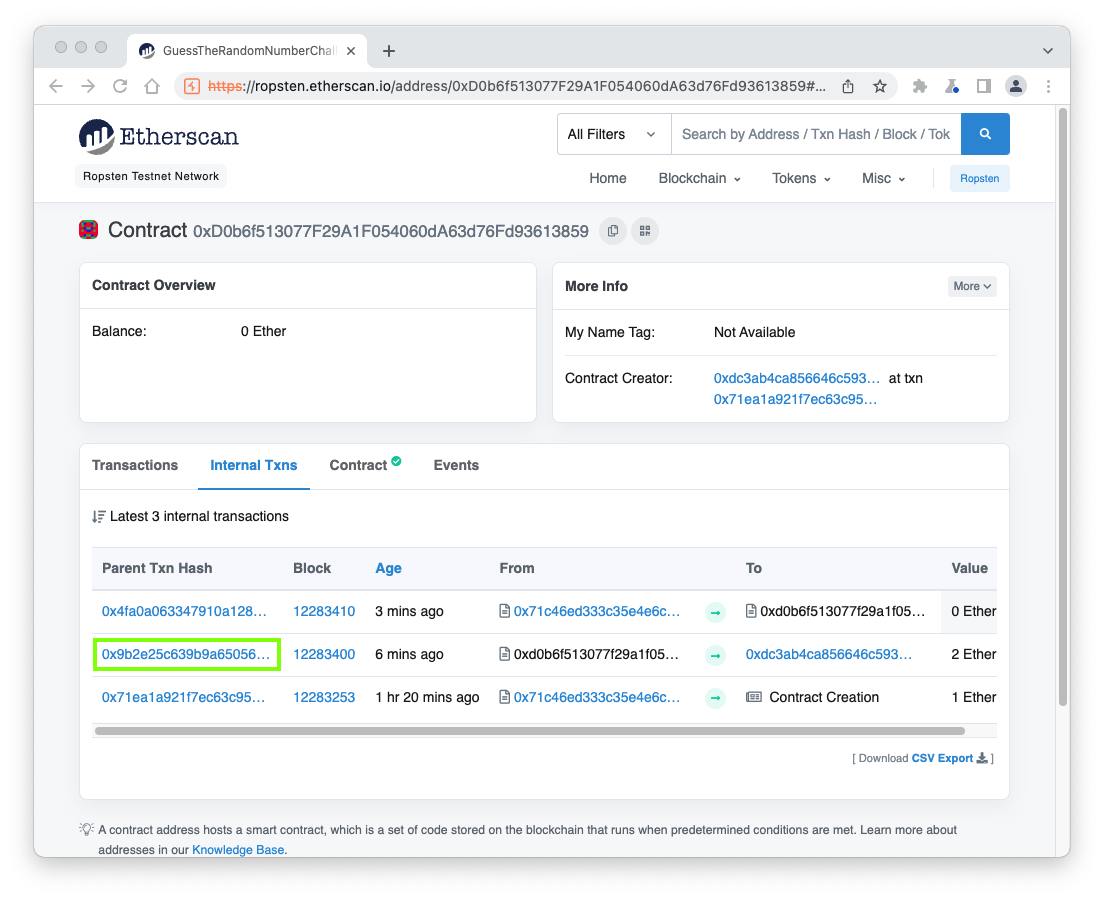
An Etherscan page opens, showing information about your contract, as shown below.
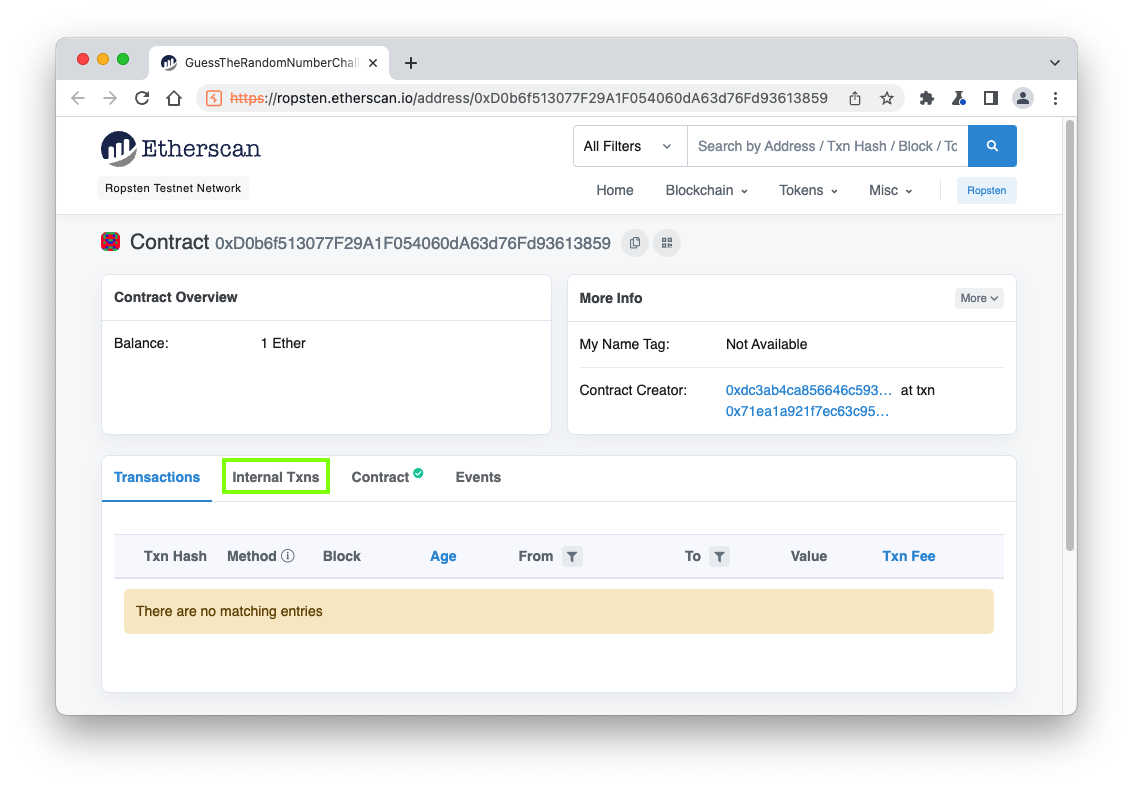
In the Etherscan page, in the lower center, click the "Internal Txns" tab, outlined in green in the image above.
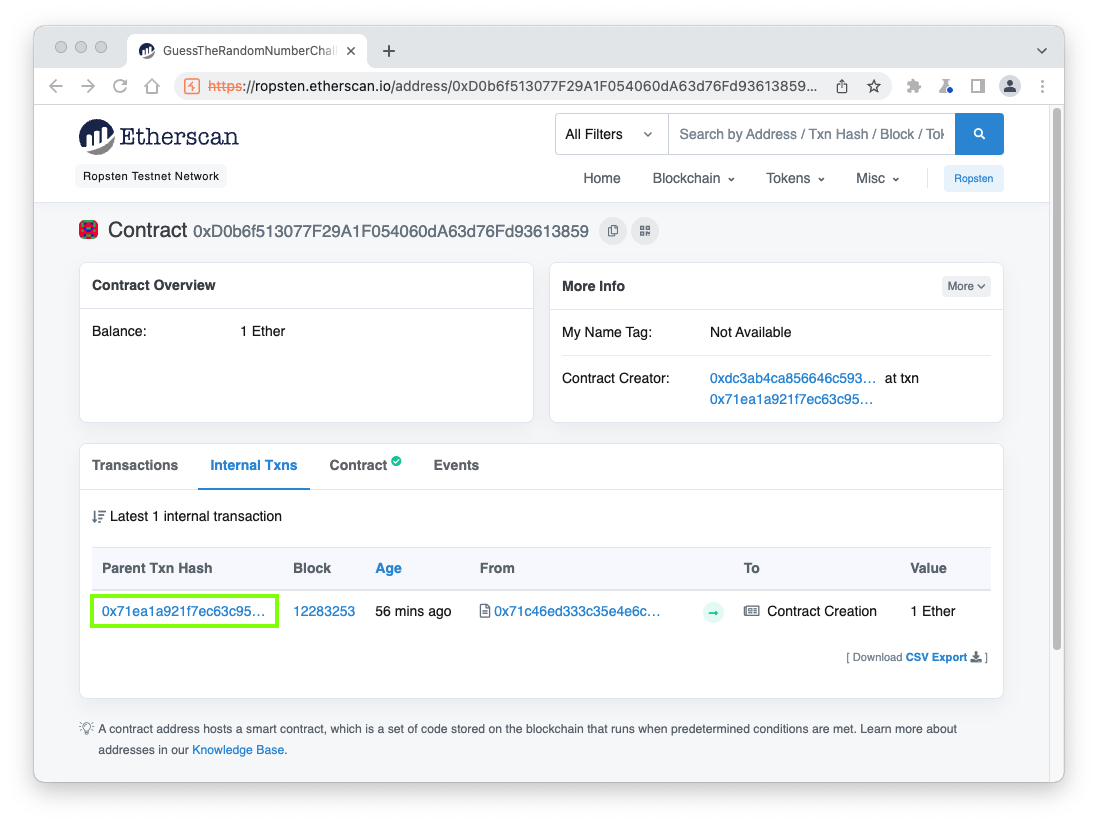
On the next page, click the blue Parent Txn Hash value, outlined in green in the image below.
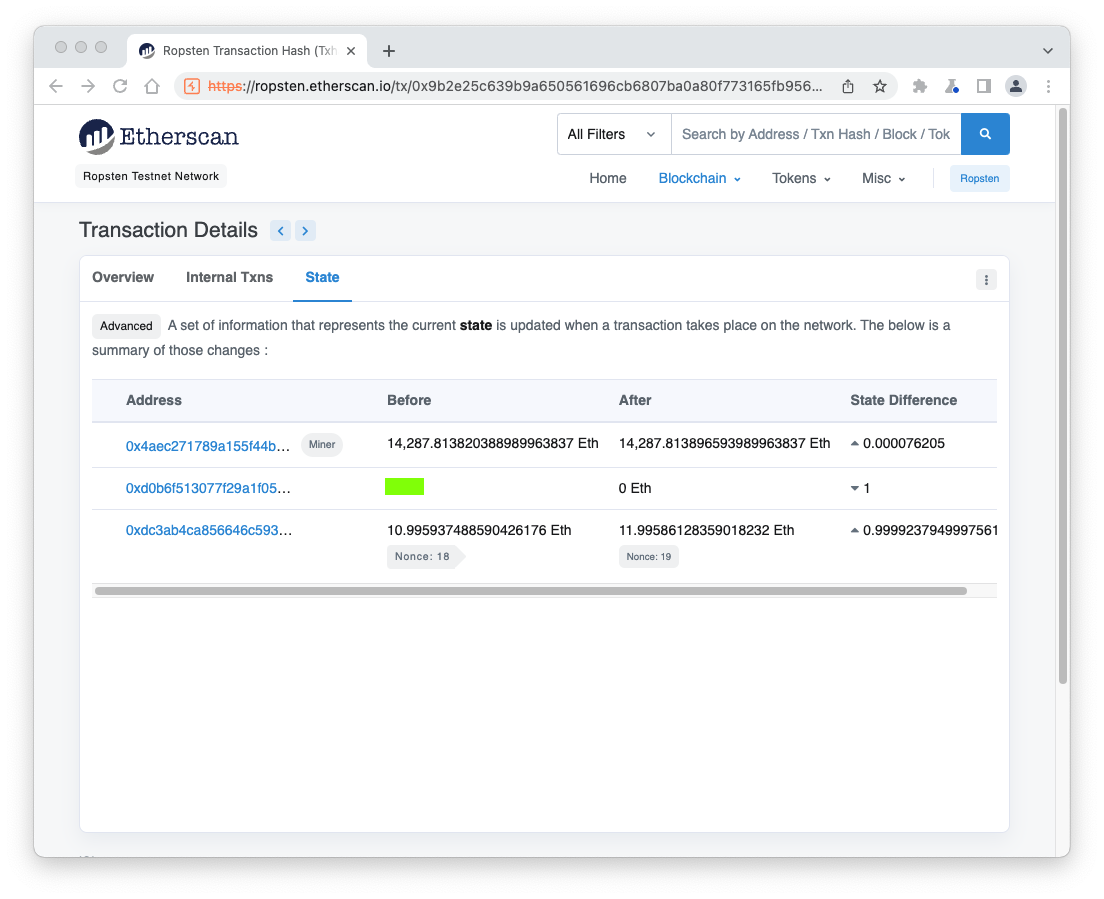
On the next page, click the State tab, outlined in green in the image below.
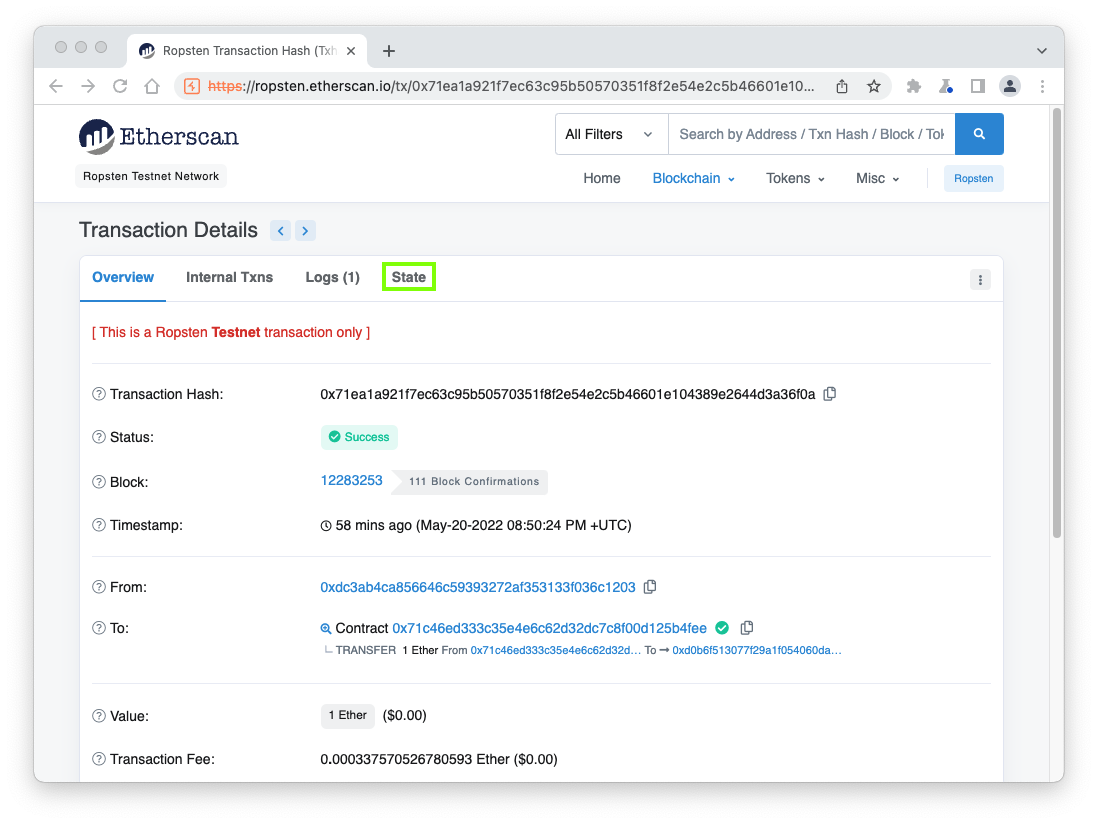
On the next page, several state changes are shown.
Find the one that has a Before of "0 Eth" and an After of "1 Eth"--that's the constructor running. Expand that line by clicking the down-arrow at the left of the line, revealing the details.
The Storage changes appear, as shown below. In the After line, change the data type to Num, outlined in green in the image below.
The answer appears to the right of that box, outlined in red in the image below. Note: your value will be different from the image below, because each time the contract is deployed the answer changes.

Right-click the contracts folder and click "New File".
Name the new file random.sol
Paste in the code from the "Guess the random number" page, as shown below.
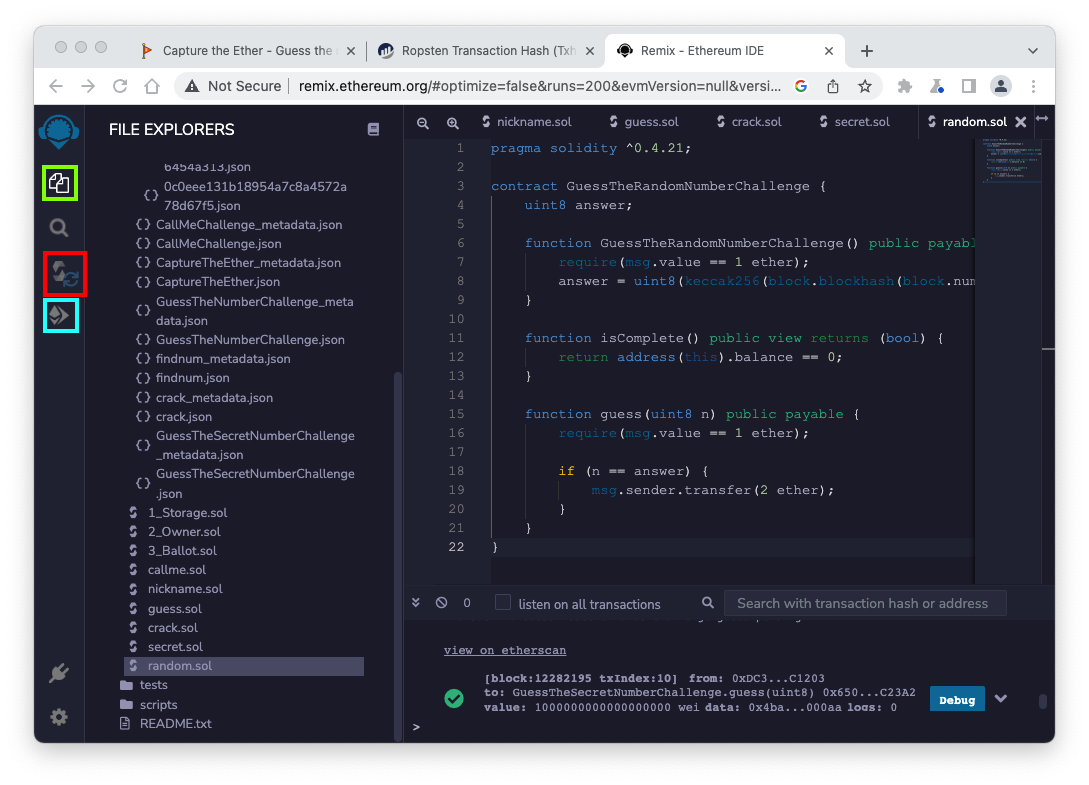
On the left side of the Remix page, click the Compile icon, outlined in red in the image above.
Click the "Compile random.sol" button.
Then click the Deploy icon, outlined in light blue in the image above.
On the "Guess the random number" page, copy the address of your deployed contract.
In the Remix page, in the lower portion of the "DEPLOY & RUN TRANSACTIONS" pane, paste that address into the box next to the "At Address" button, outlined in red in the image below.
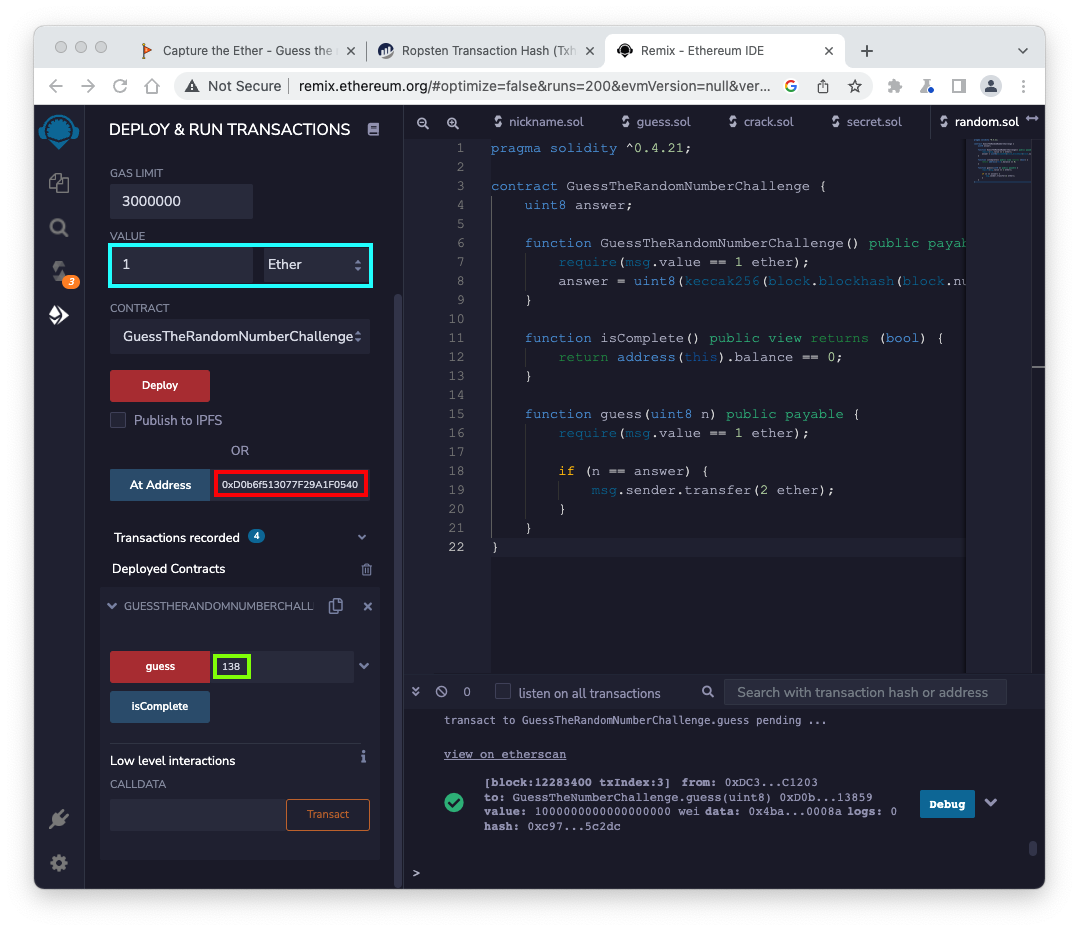
Click the "At Address" button.
In the field next to the red guess button, enter the answer you found from Etherscan, outlined in green in the image above.
Enter a VALUE of 1 Ether, outlined in light blue in the image above.
Click the red guess button.
If a box pops up saying "Gas estimation failed", click "Send Transaction".
A MetaMask box pops up.
Click Confirm.
At the lower right, a green check mark appears, showing that the transaction succeeded.
A MetaMask box pops up. Click Confirm. You win, and a little dancing figure appears on the lower left, as shown below.

Find the transaction with a Value of 2 Ether and click its Parent Txn Hash value, outlined in green in the image below.
Flag C 605.1 Before (15 pts)
On the next page, click the State tab.The flag is the Before value, covered by a green rectangle in the image below.
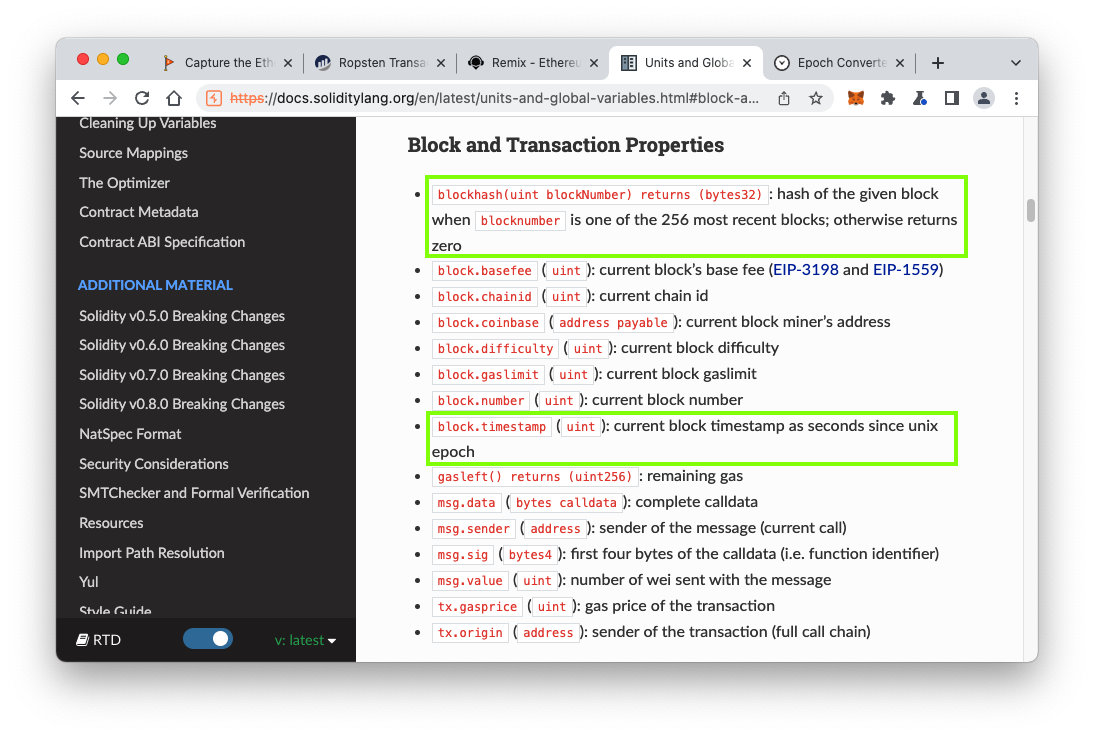
As shown below, we need two values: a blockhash and now, a timestamp.

The Solidity documentation explains these properties, outlined in the image below. ("now" is an alias for block.timestamp.)
In the Etherscan page, in the lower center, click the "Internal Txns" tab.
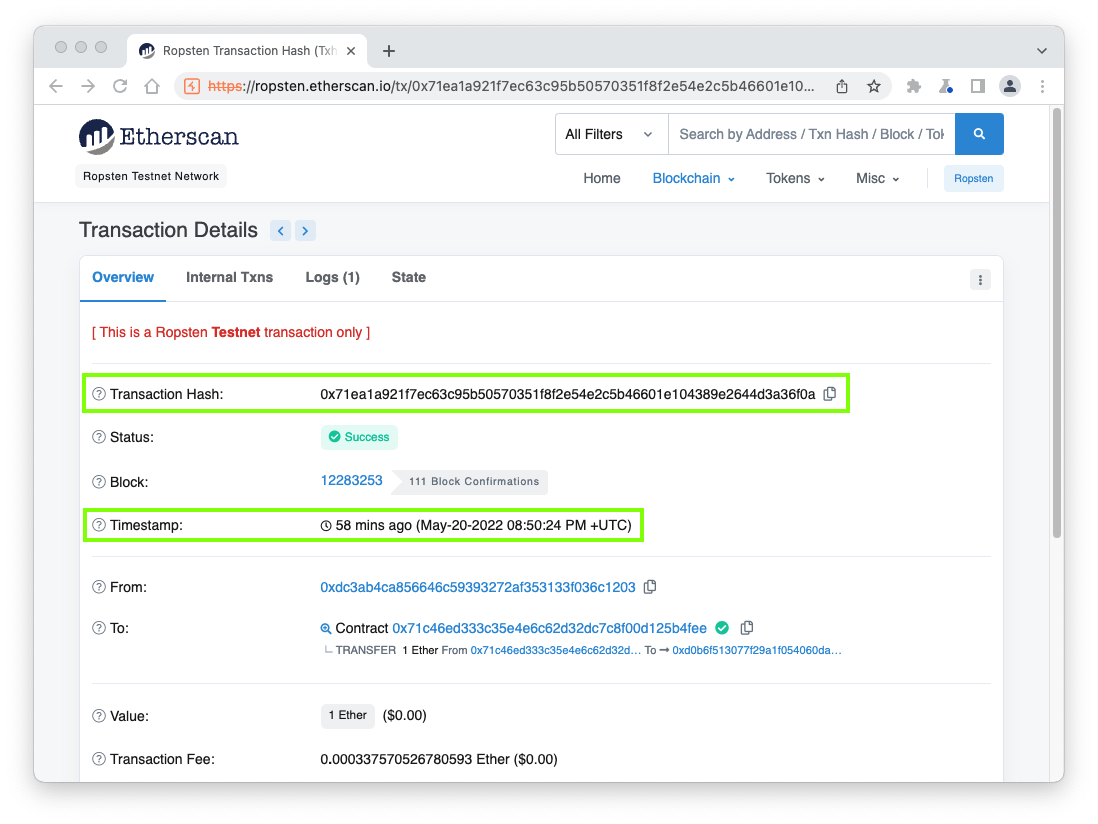
On the next page, click the oldest blue Parent Txn Hash value.
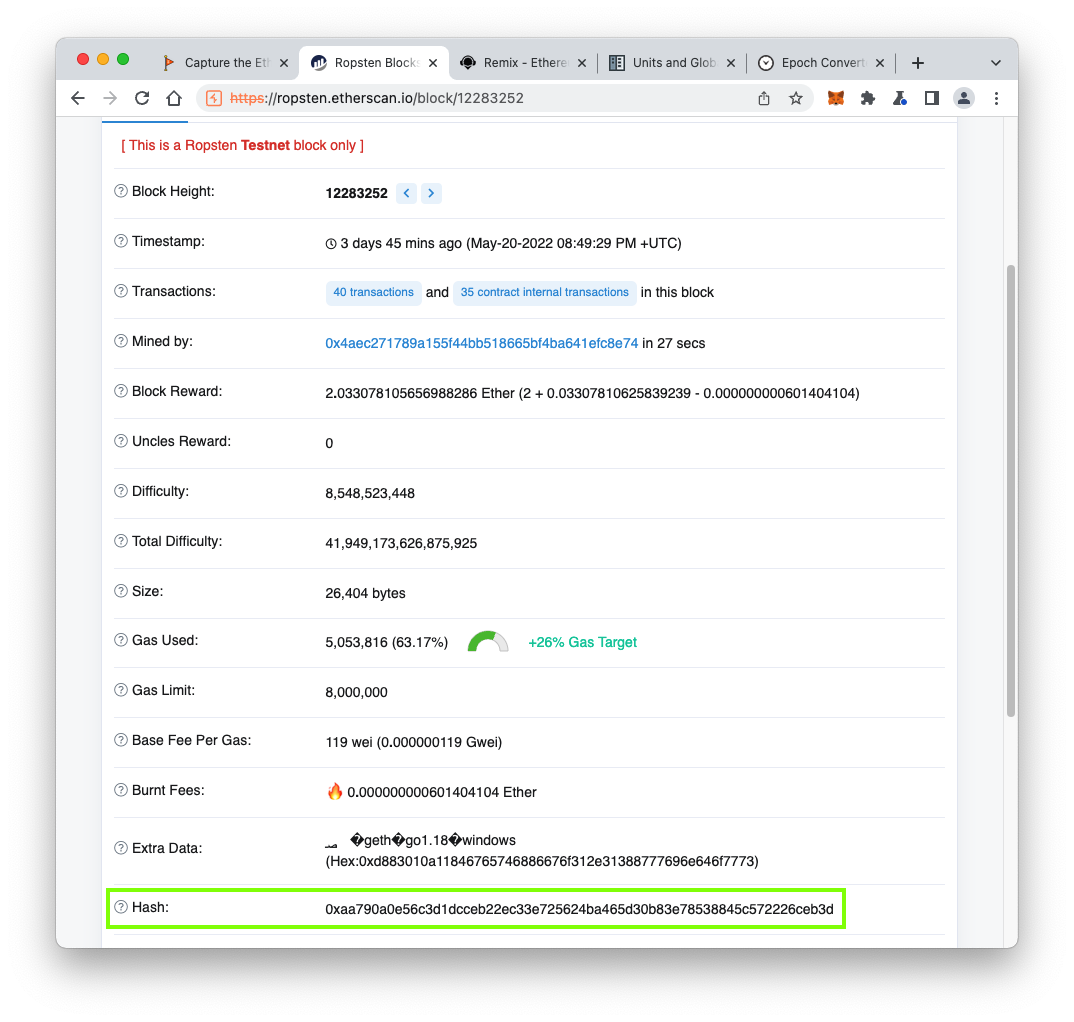
The hash and timestamp are shown, outlined in green in the image below.
https://www.epochconverter.com/
Enter the timestamp from your Etherscan page to get the Epoch timestamp, as shown below.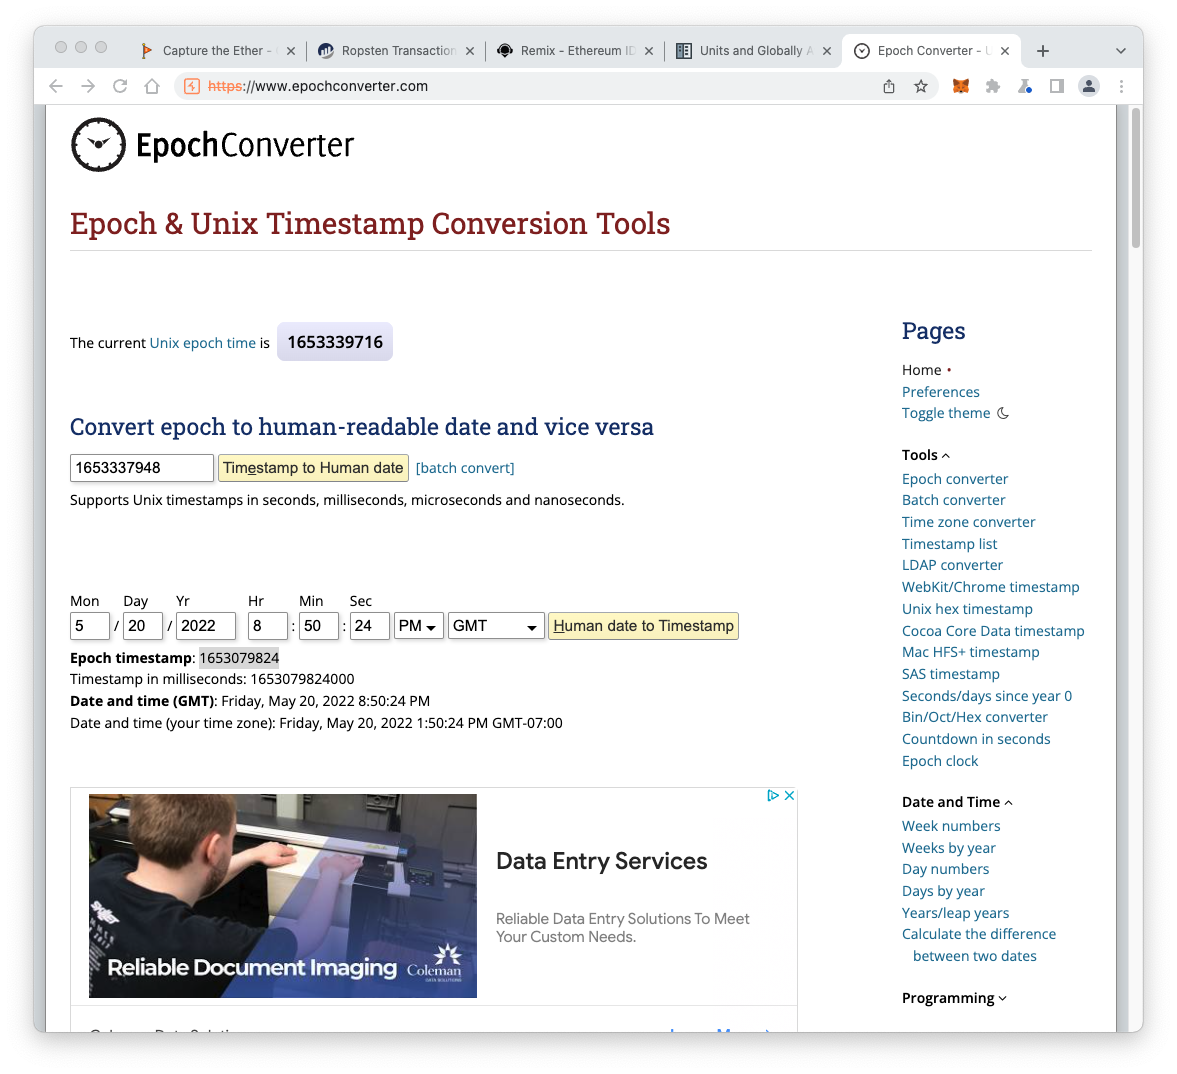
Right-click the contracts folder and click "New File".
Name the new file calcSecret.sol
Paste in the code below, replacing the hash and timestamp values with the correct values for your contract.
pragma solidity ^0.4.21;

contract calcSecret{
	function find() public view returns(uint8) {
		bytes32 hash = 0x71ea1a921f7ec63c95b50570351f8f2e54e2c5b46601e104389e2644d3a36f0a;
        uint timestamp = 1653079824;
        uint8 answer = uint8(keccak256(hash, timestamp));
        return answer;
    }
}
Click the "Compile calcSecret.sol" button.
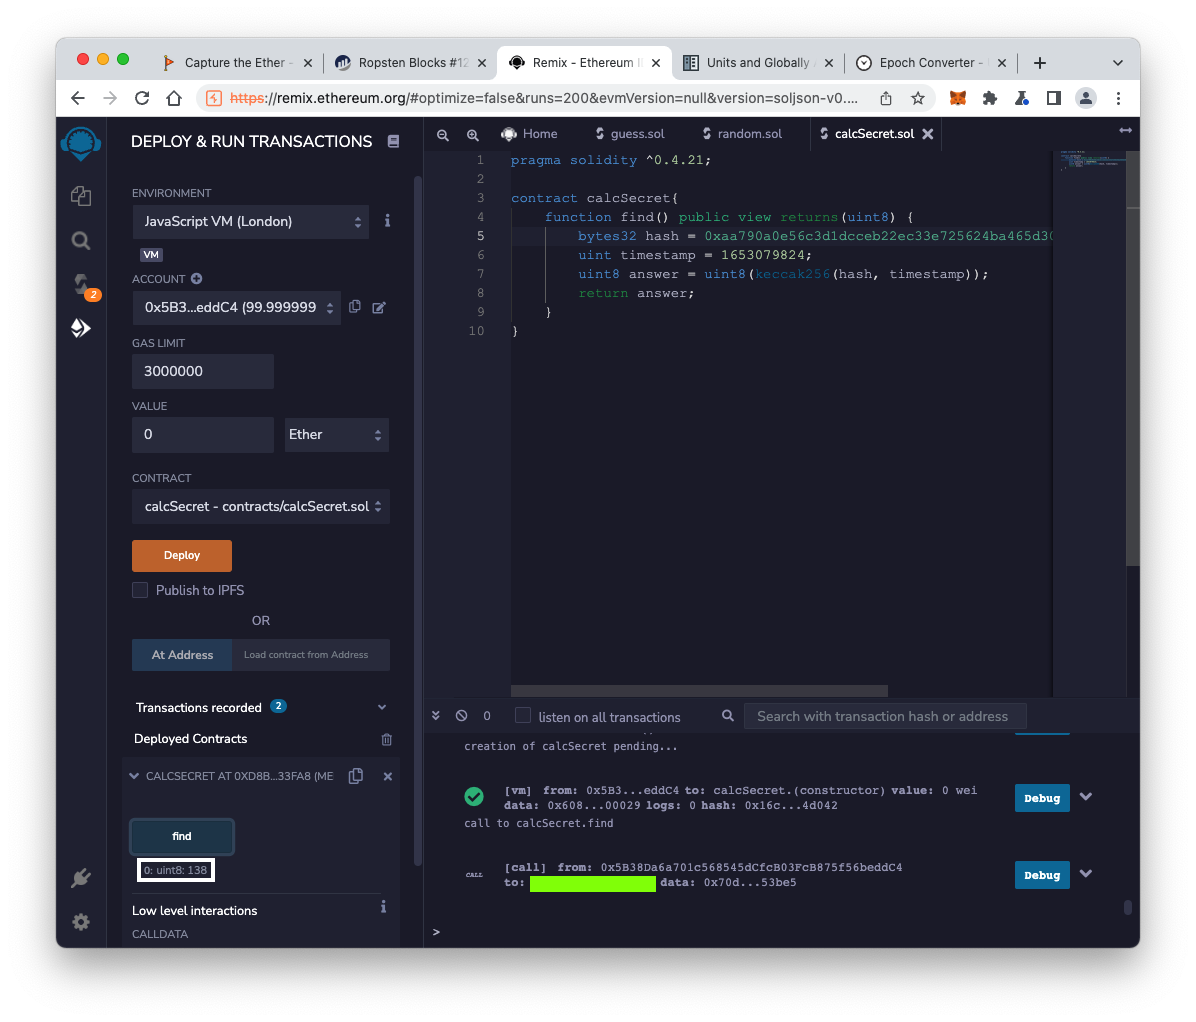
Then click the Deploy icon, outlined in light blue in the image below.
In the "DEPLOY & RUN TRANSACTIONS" pane, at the top, change the ENVIRONMENT to "JavaScript VM (London)", outlined in yellow in the image below.
Click the orange Deploy button.
At the bottom of the "DEPLOY & RUN TRANSACTIONS" pane, expand the "CALCSECRET AT ..." container.
Click the blue-gray find button.
The answer appears, outlined in white in the image below.
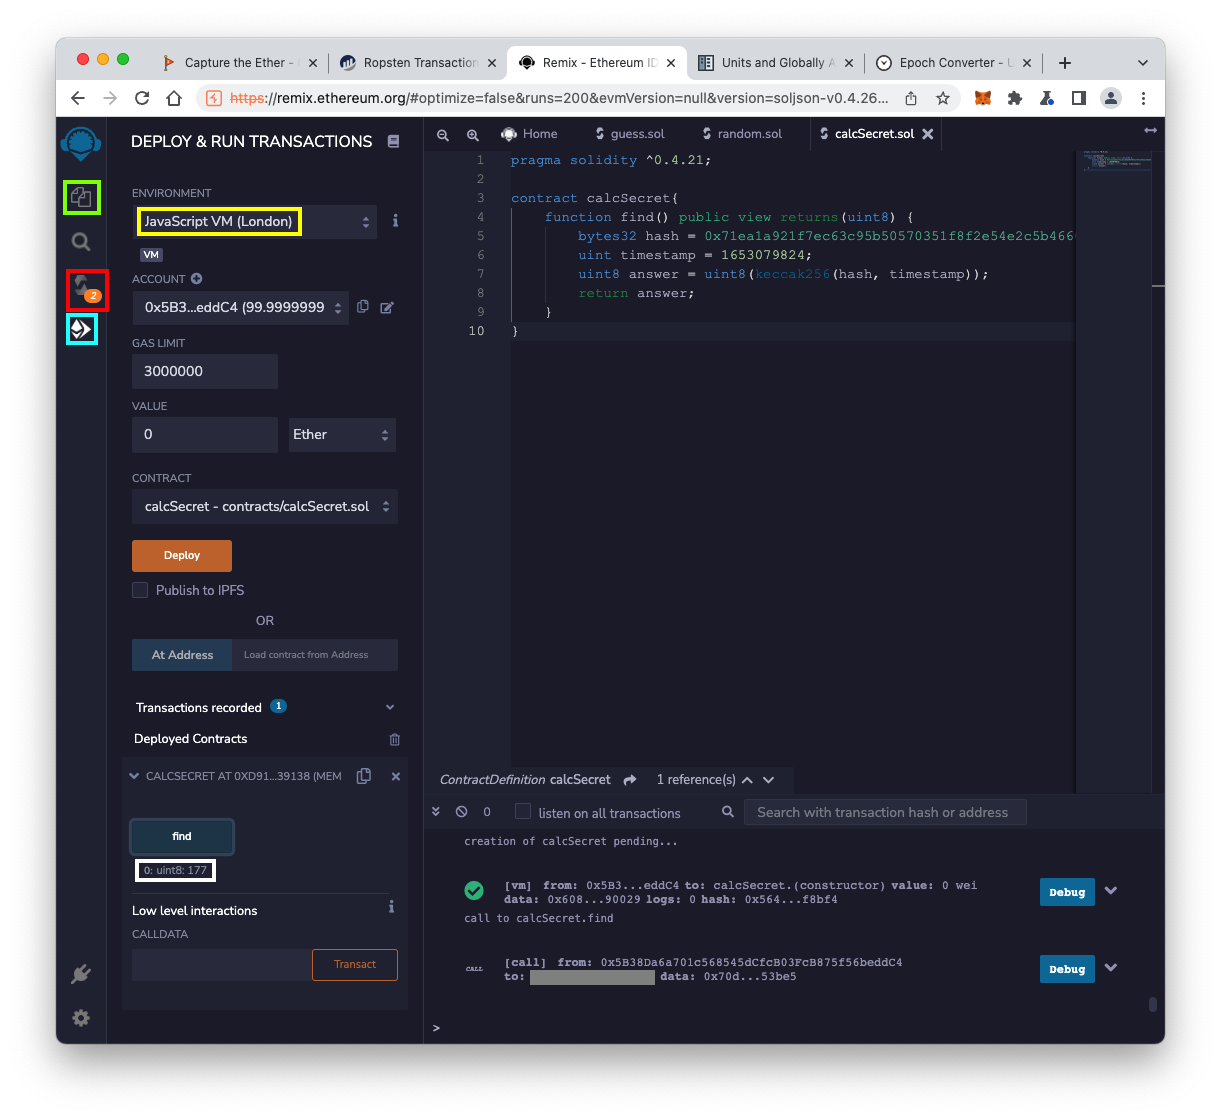
There's one problem: that answer is wrong! It does not match the answer we found directly stored on the blockchain earlier in this project.
block.number - 1
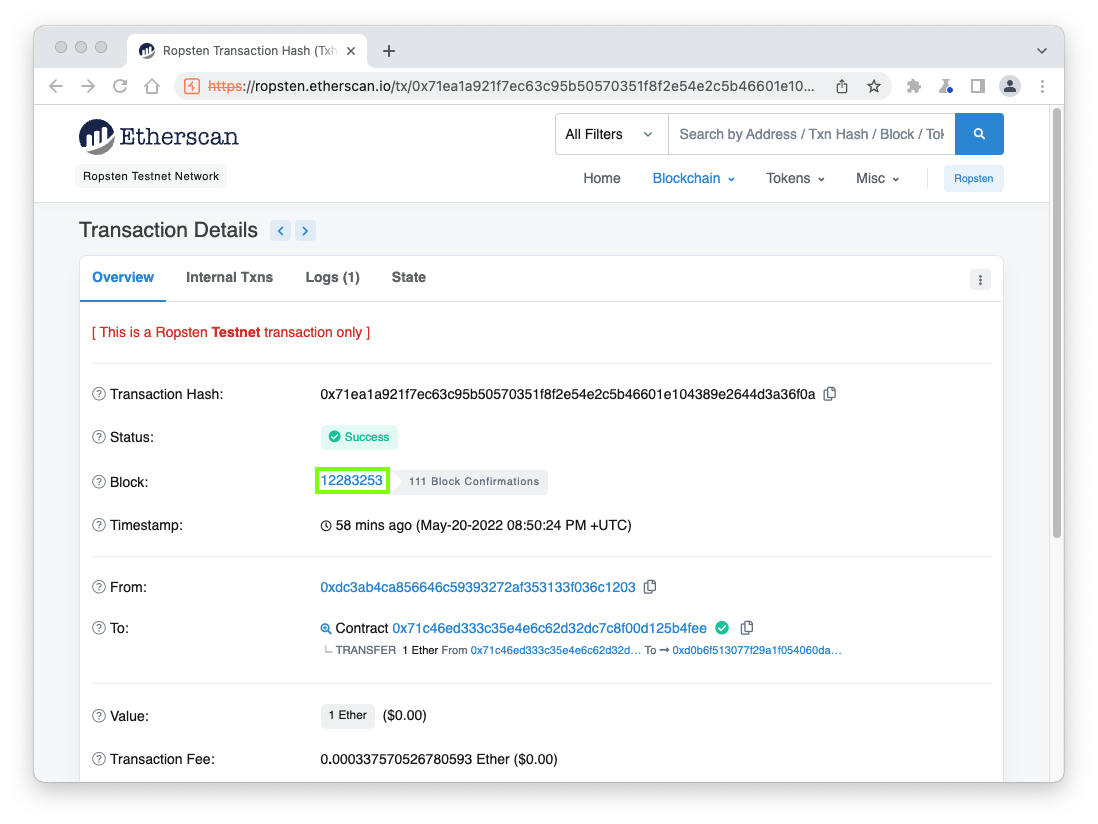
In Etherscan, find the block number for the block that created your contract, outlined in green in the image below.
Click that block number.
On the next page, next to the block number, click the left-arrow, outlined in green in the image below.
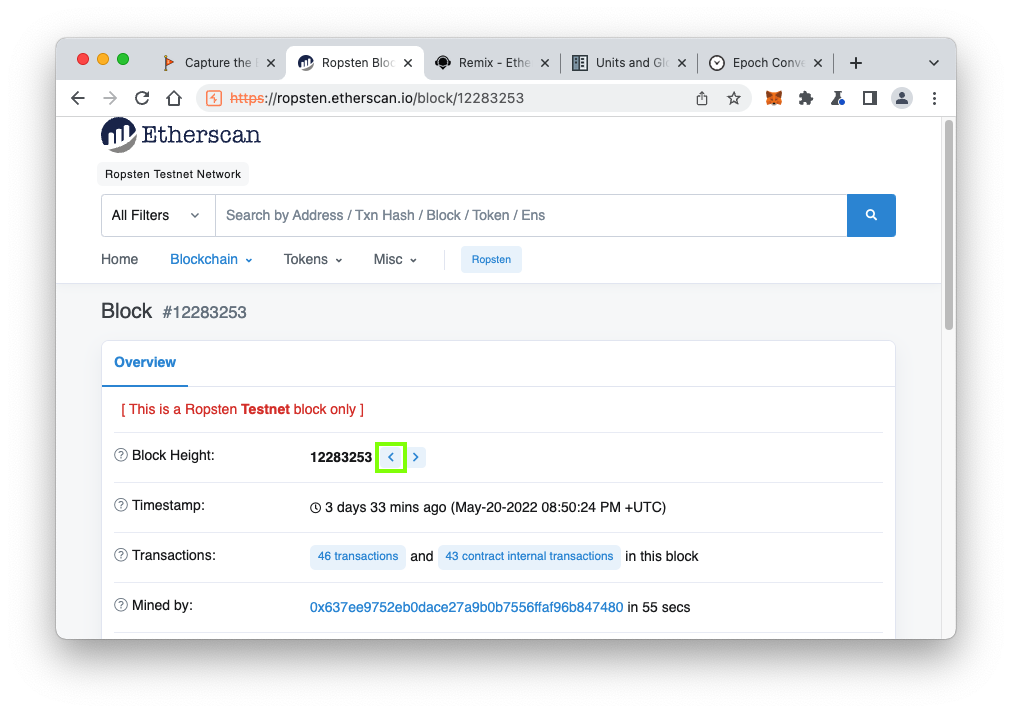
Scroll down and click the "Click to see more" link to reveal the block hash, outlined in green in the image below.
Now the calculation finds the correct value, outlined in white in the image below.
Flag C 605.2 Log Message (10 pts)
The flag is in the log message, covered by a green rectangle in the image below.
Posted 5-20-22 by Sam Bowne