Using Cloud Servers
You can't copy and paste into the Console in Proxmox. To enable copy and paste, do this:On your Debian machine, execute the ip a command to see your IP address.
On your Windows machine, install PuTTY from
SSH into your Debian system from Windows using PuTTY.
Now you can copy and paste from a browser in Windows to get to Debian.
sudo apt update
sudo apt install curl
curl -L https://glow-lang.org/install/glow-install | sh
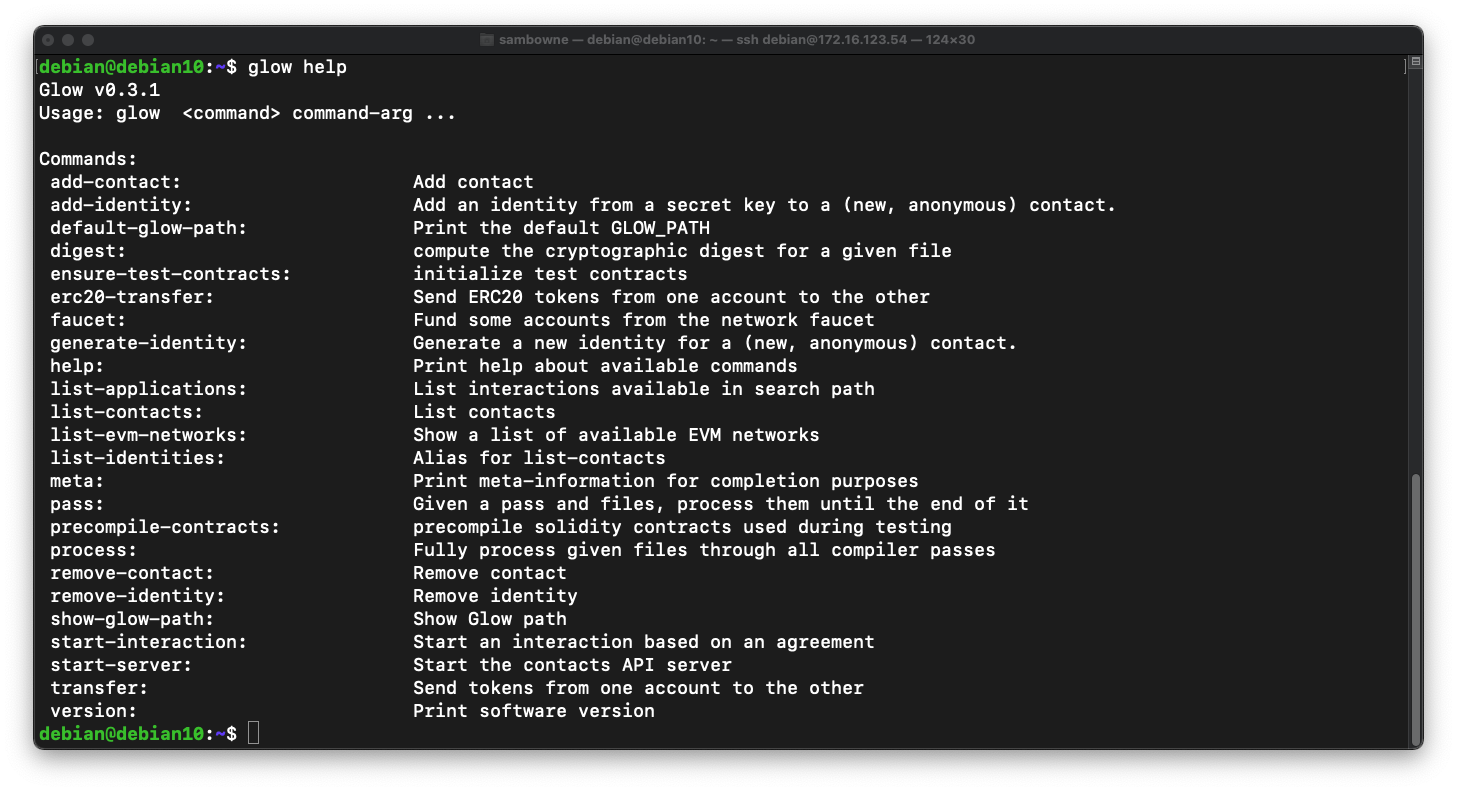
glow help
run-ethereum-test-net help
run-ethereum-test-net
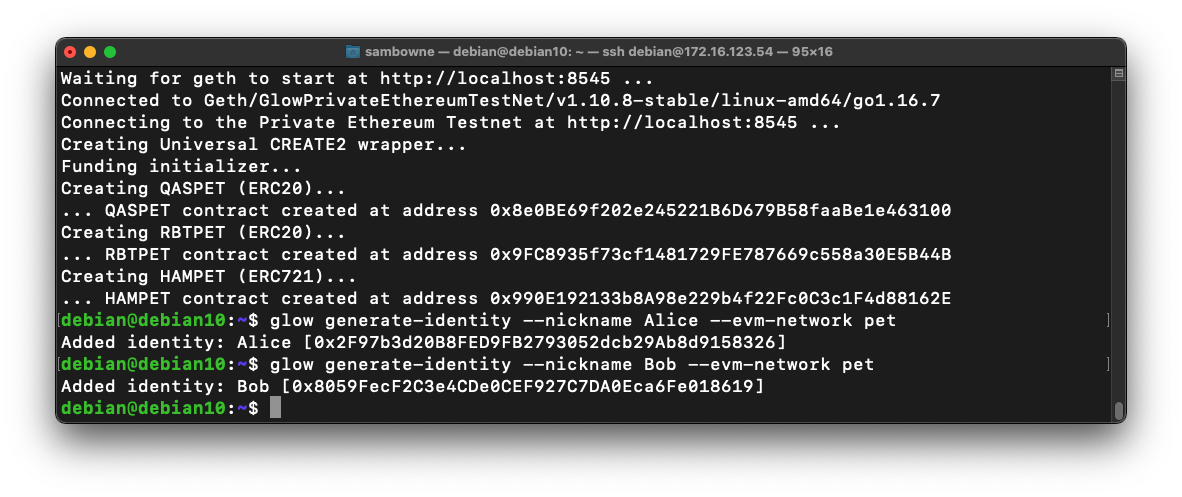
glow generate-identity --nickname Alice --evm-network pet
glow generate-identity --nickname Bob --evm-network pet
glow list-identities
glow faucet --to Alice --evm-network pet
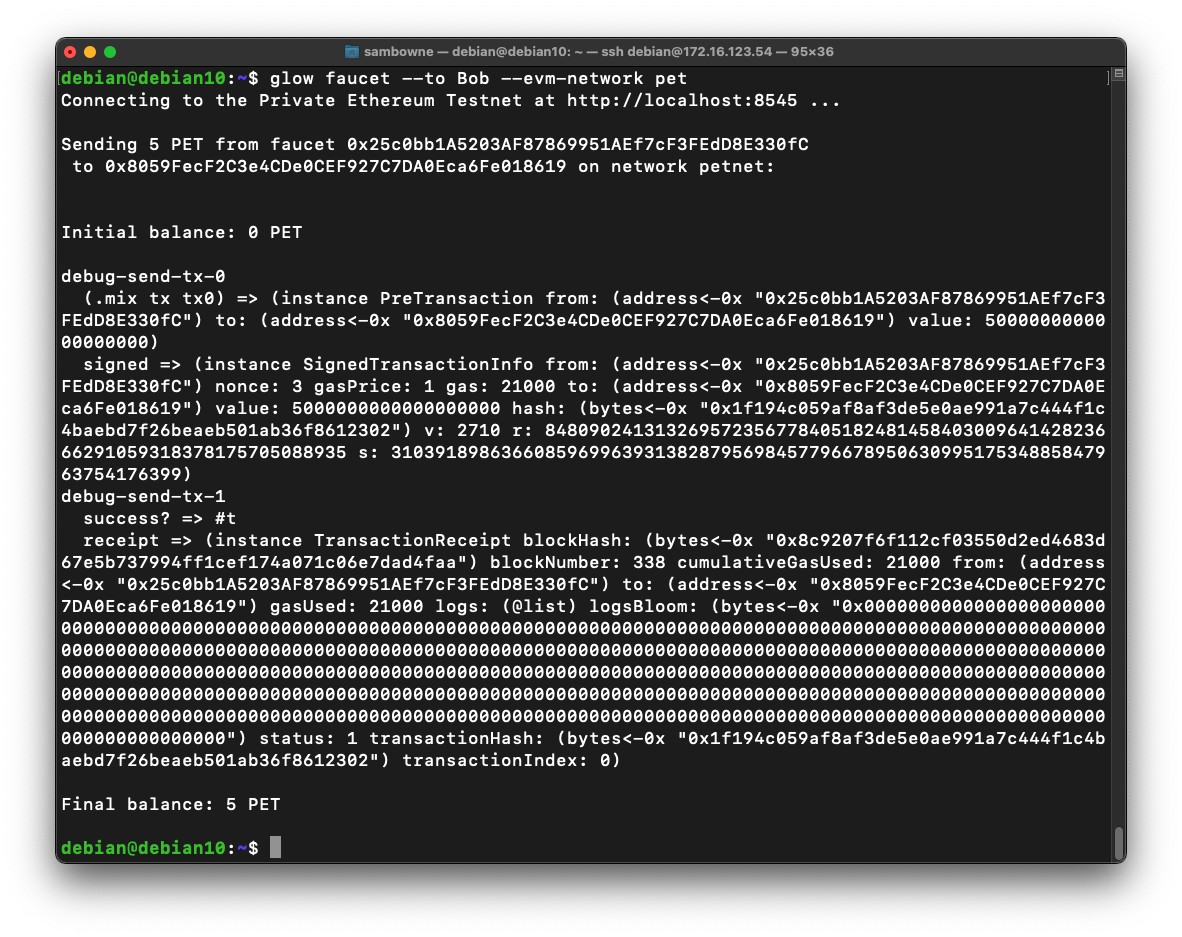
glow faucet --to Bob --evm-network pet
glow transfer --evm-network pet --database Alice -f Alice -t Bob -v 1
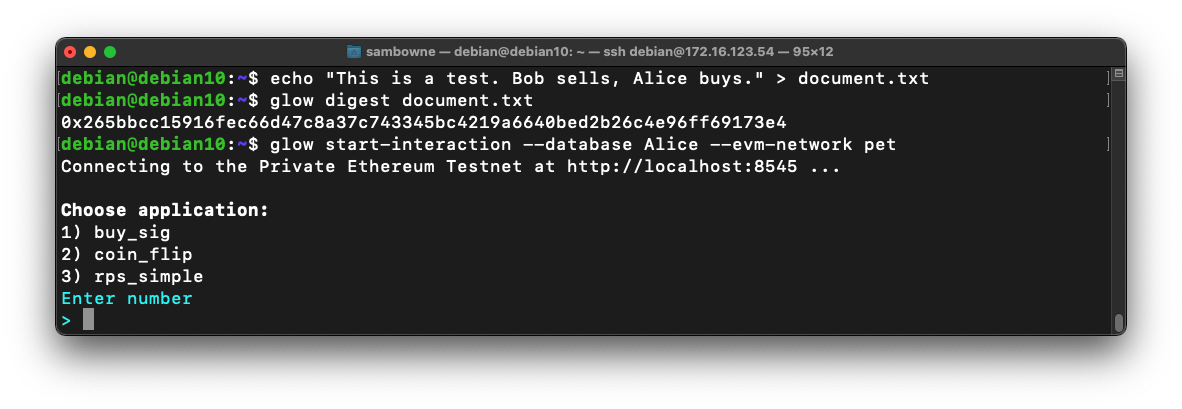
echo "This is a test. Bob sells, Alice buys." > document.txt
glow digest document.txt
glow start-interaction --database Alice --evm-network pet
You also see a "Choose application" prompt, as shown below.
Enter these values:
Leave this Terminal window open.
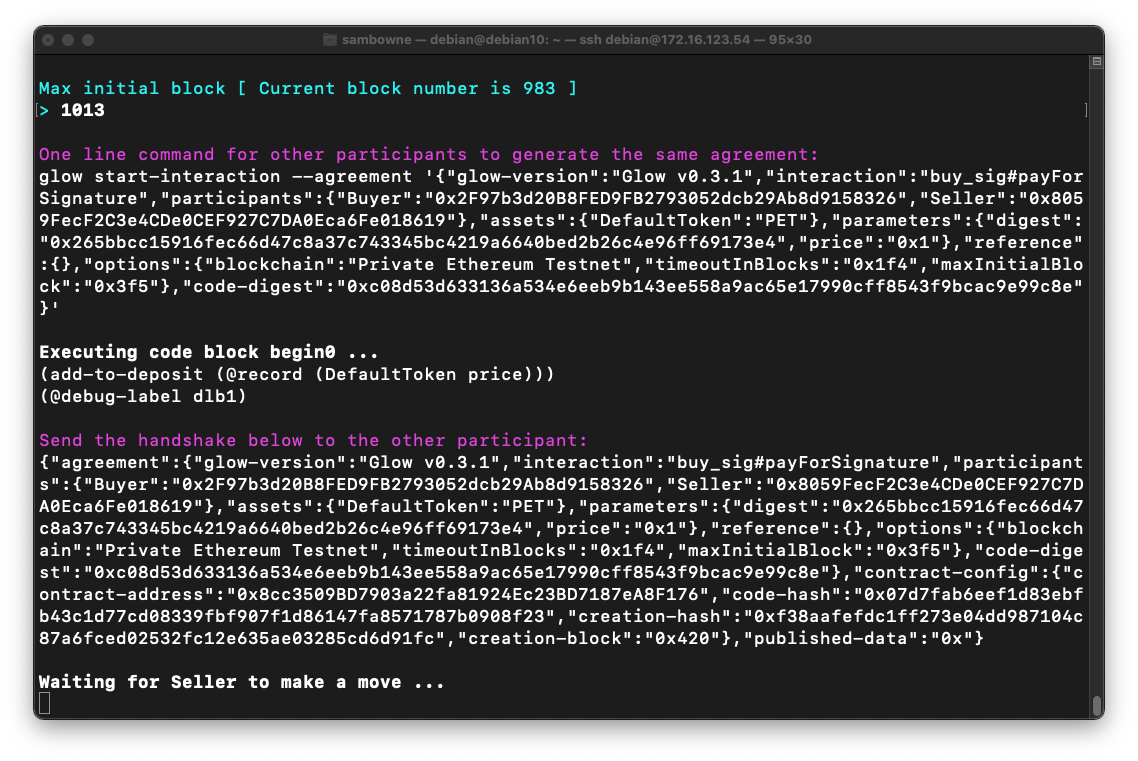
Copy and paste in the first commands from the other window, starting with "glow start-interaction --agreement".
Add this to the end of the command:
--evm-network pet
Enter these values:
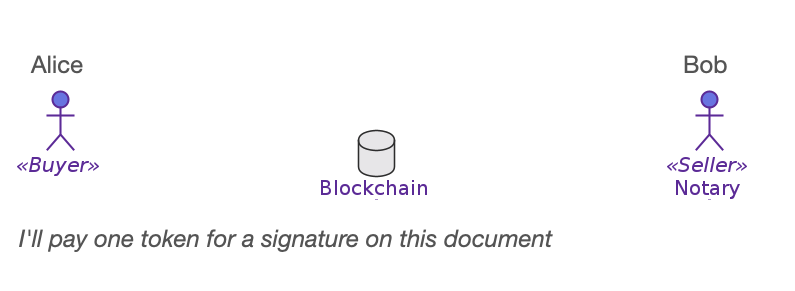
C 391.1 Signature (10 pts)
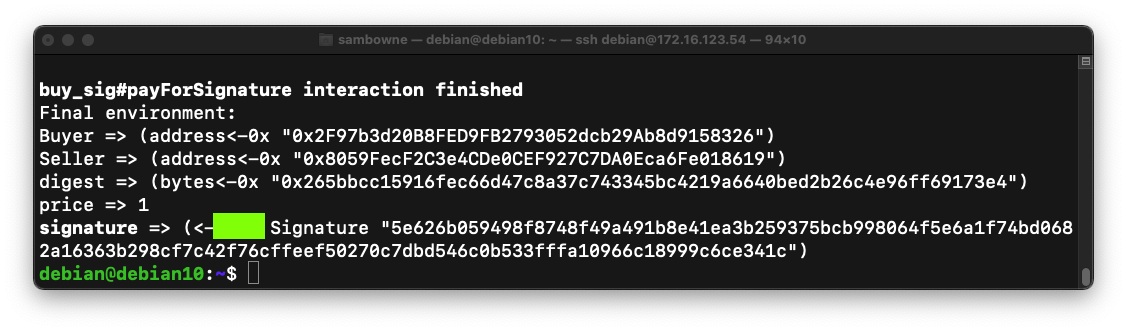
Both windows show a "interaction finished" message, as shown below.The flag is covered by a green rectangle in the image below.

1    #lang glow
2    @interaction([Buyer, Seller])
3    let payForSignature = (digest : Digest, price : Nat) => {
4      deposit! Buyer -> price;
5      @verifiably!(Seller) let signature = sign(digest);
6      publish! Seller -> signature;
7      verify! signature;
8      withdraw! Seller <- price;
9    }
3 The digest of the message to sign is a parameter of the interaction, as is the convened price.
4 The buyer deposits the money according to the price.
5 The seller signs, but it is private only to the seller.
6 The signature is made public for everyone to see.
7 The signature is verified by everyone in a way that the contract enforces.
8 Finally, the money is transferred to the seller.
The language itself takes care of prerequisites; If the buyer never deposits, then the seller never will be able to sign.
Buyer Never PaysProcess stops at line 4, so seller never creates signature. The interaction times out and is cancelled. No funds are exchanged.Buyer Pays, but Seller Never SignsAt line 4, the payment is deposited (into escrow).Seller Sends Invalid Signature
The process stops at line 5.
The interaction times out and the funds are returned to the Buyer.Process stops at line 7 because the signature does not validate.
The interaction times out and the funds are returned to the Buyer.
mkdir ~/.local/share/glow/dapps
nano ~/.local/share/glow/dapps/sig2.glow
#lang glow
@interaction([Buyer, Seller])
let payForSignature = (digest : Digest, price : Nat) => {
  deposit! Buyer -> price;
  @verifiably!(Seller) let signature = sign(digest);
  verify! signature;
  withdraw! Seller <- price;
};
glow list-applications

C 391.2 Error Message (5 pts)
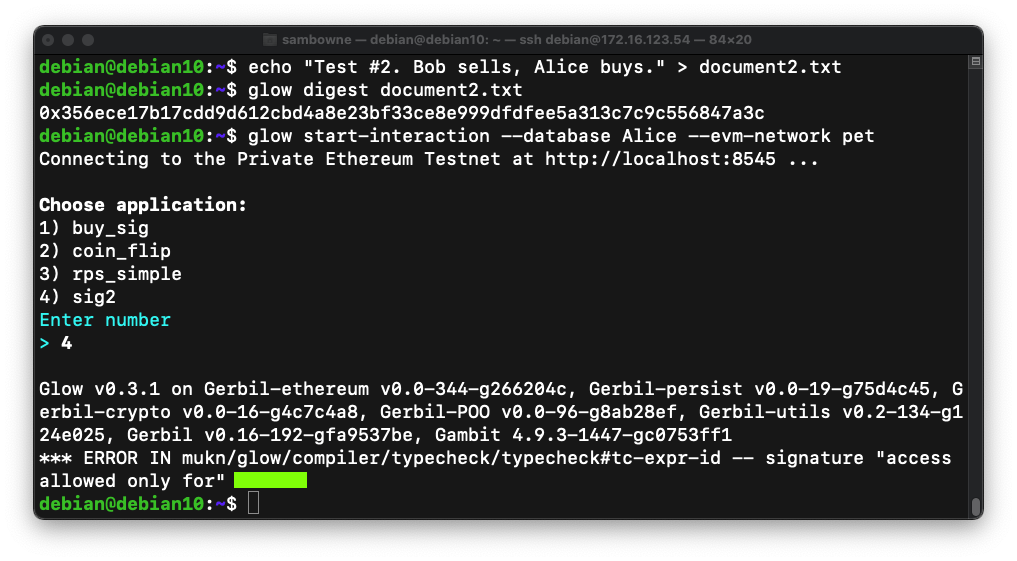
Execute these commands to prepare another document to sign:Select Dapp 4: sig2.An error message appears.
The flag is covered by a green rectangle in the image below.
C 391.3 Missing Line (5 pts)
Fix the "sig2" Dapp. You need to add one line. That line is the flag.
Posted 9-29-2021
Extra failure case removed 10-22-21
Cloud server note added 11-8-21