This project is based on the Ethernaut challenges and this walkthrough.
https://remix.ethereum.org/
Type the name Fallback.sol and press Enter.
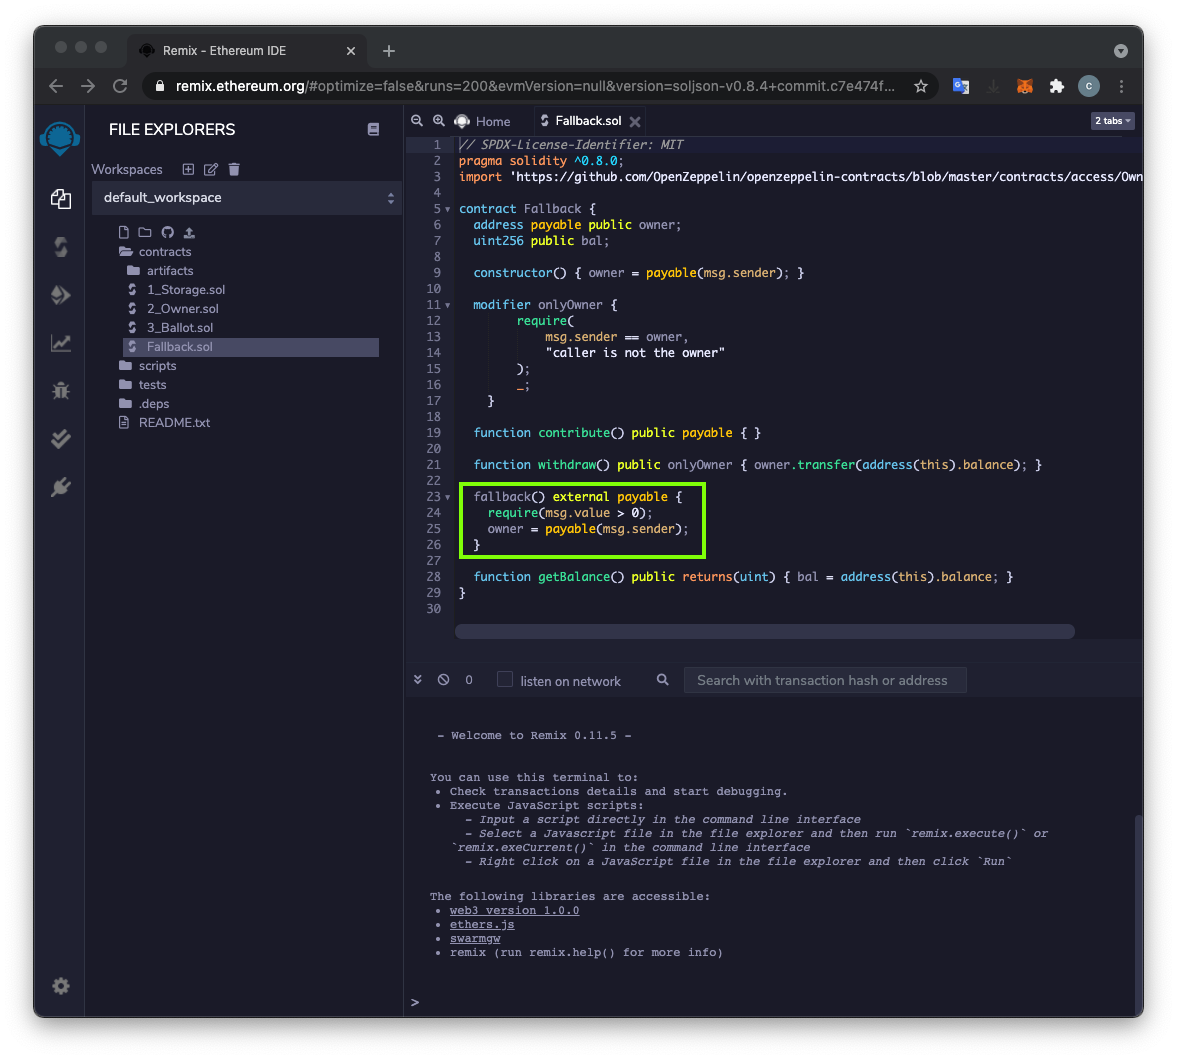
A "Fallback.sol" tab appears on the right side. Paste in this code, as shown below.
(Note: the images show an extra "import" statement in the contract which was unnecessary. I removed it from the instructions after making the screenshots.)
// SPDX-License-Identifier: MIT
pragma solidity ^0.8.0;

contract Fallback {
  address payable public owner;
  uint256 public bal;

  constructor() { owner = payable(msg.sender); }

  modifier onlyOwner {
        require(
            msg.sender == owner,
            "caller is not the owner"
        );
        _;
    }

  function contribute() public payable { }

  function withdraw() public onlyOwner { owner.transfer(address(this).balance); }

  fallback() external payable {
    require(msg.value > 0);
    owner = payable(msg.sender);
  }

  function getBalance() public returns(uint) { bal = address(this).balance; }
}
This function is one way to allow a contract to receive Ether. However, anyone can trigger a fallback function by
On the left side, the third icon now has an orange "2" on it indicating two warnings, as shown below.
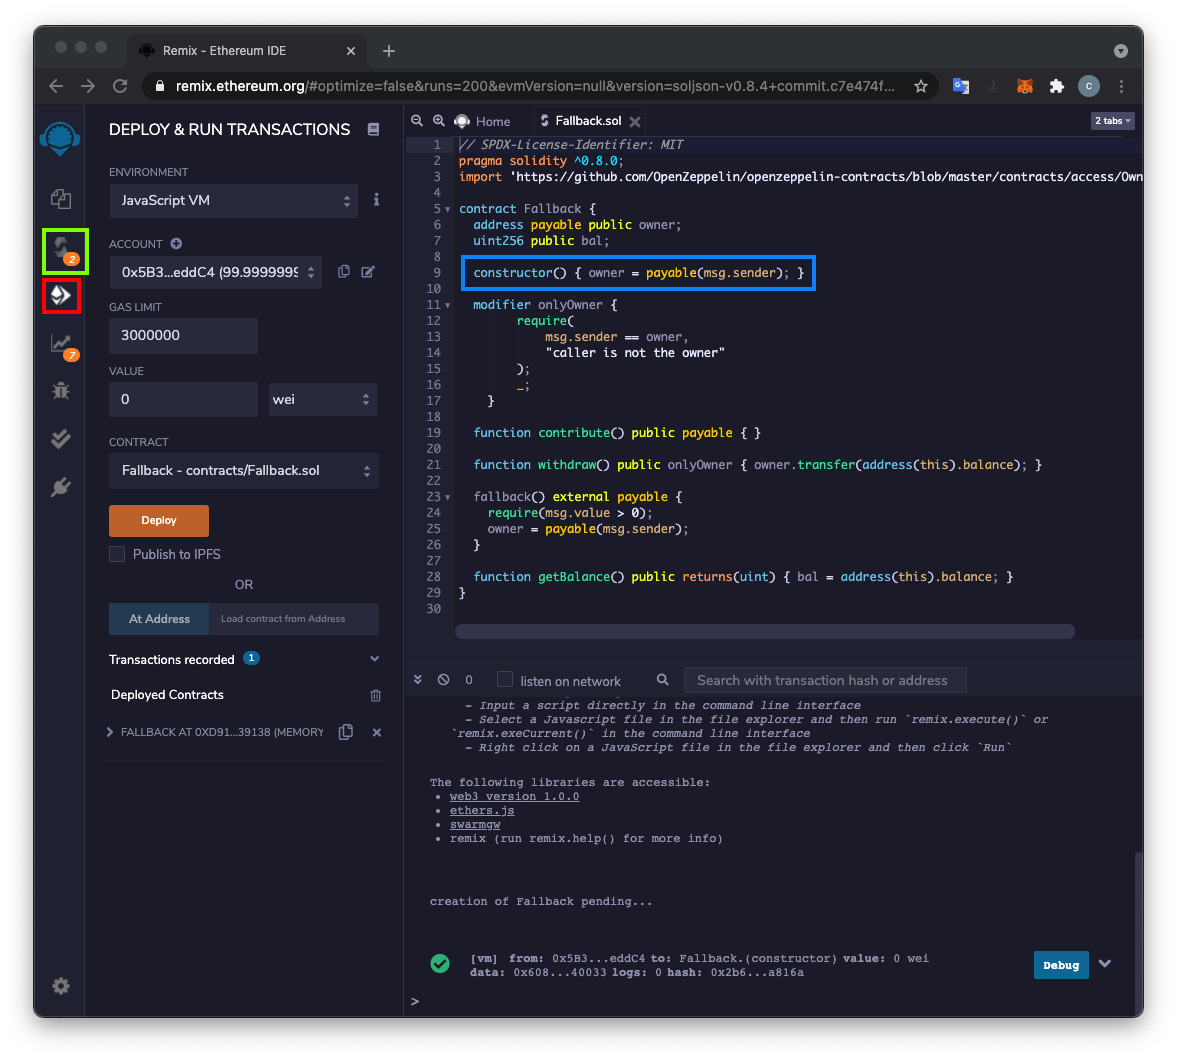
Use an Environment of "JavaScript VM (London)". If the account balances are not all 100 Ether, switch to "JavaScript VM (Berlin)" and back to "JavaScript VM (London)" to refresh the blockchain to its initial state.
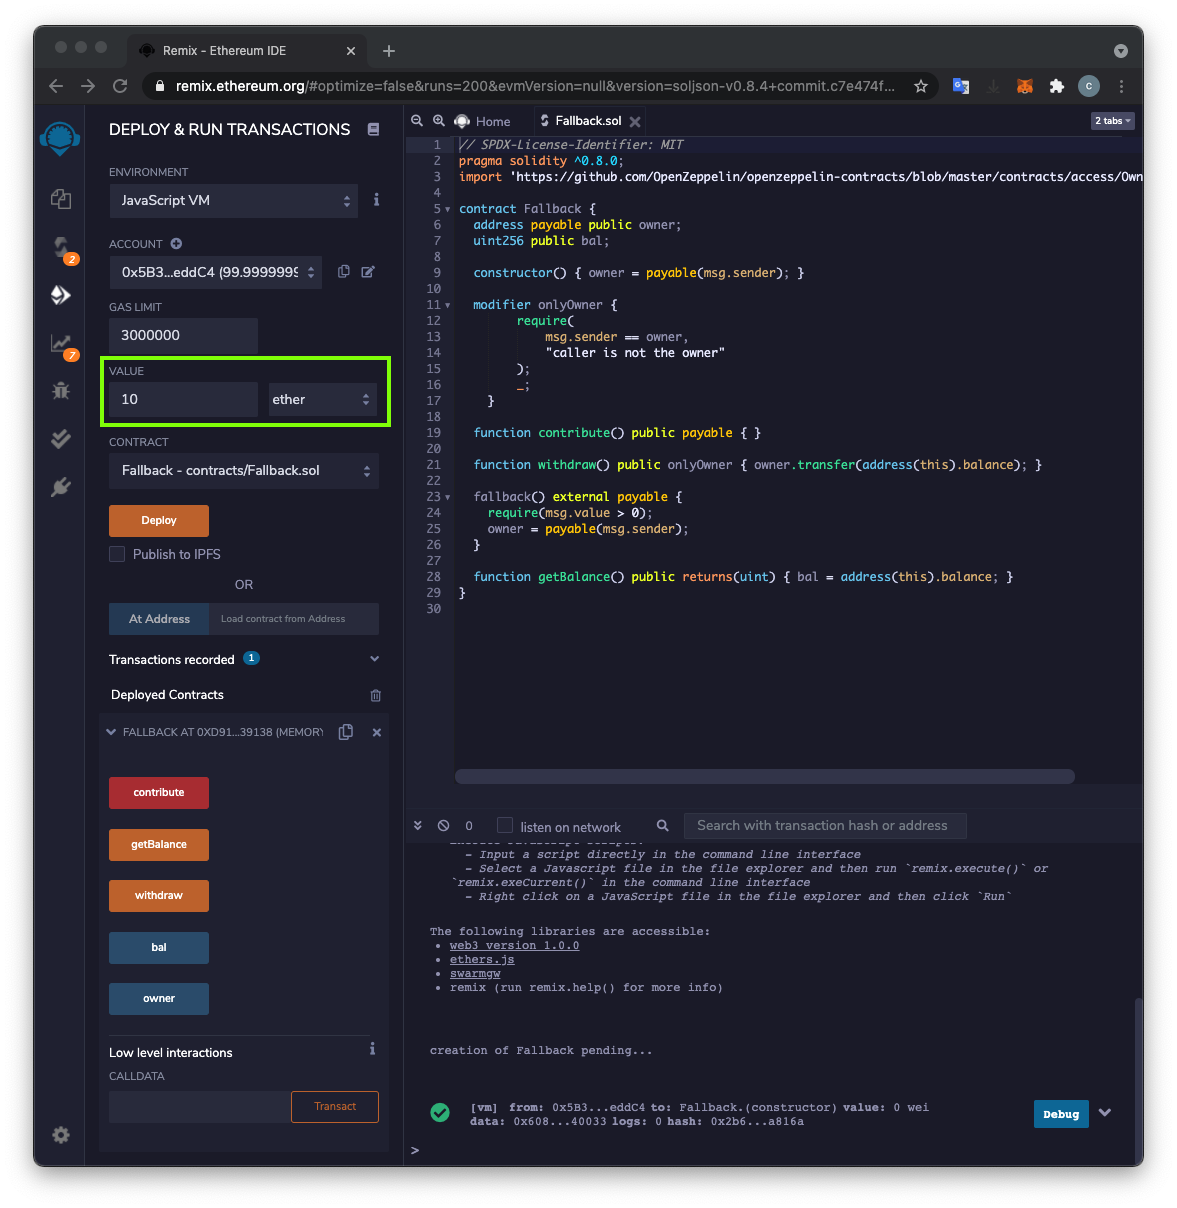
Click the orange Deploy button.
Deploying the contract implements the constructor() function, outlined in blue in the image below. This sets the owner of the contract to the account that created it.
At the lower left, click the > next to FALLBACK to expand that section, as shown below.
At the lower left, click the red contribute button.
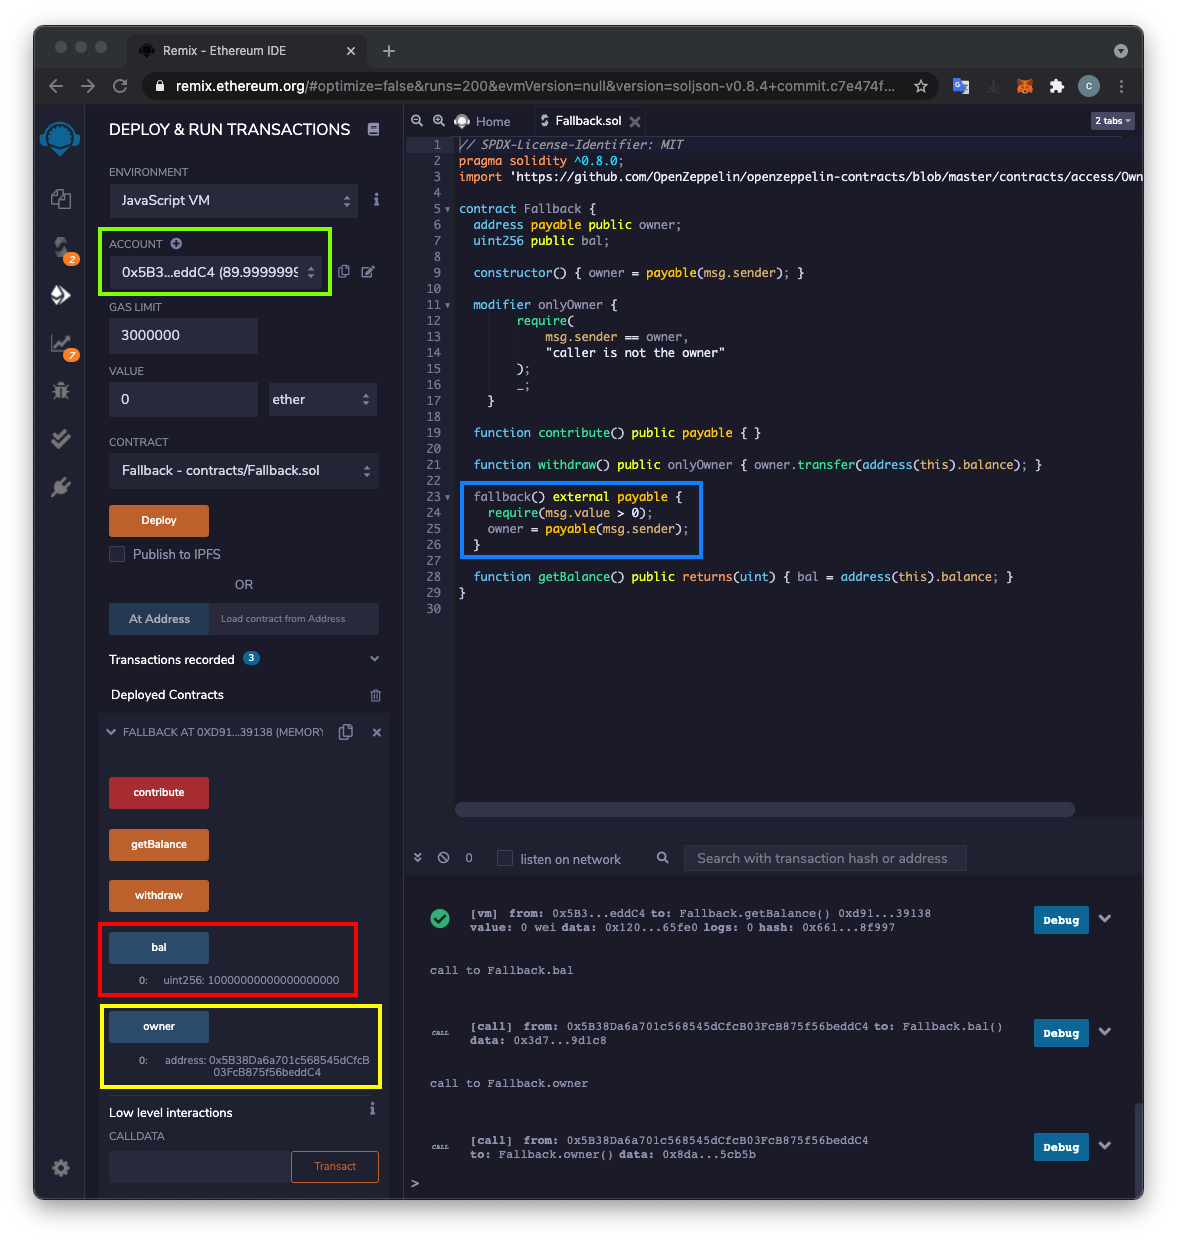
Your ACCOUNT balance falls to approximately 90 ether, outlined in green in the image below.
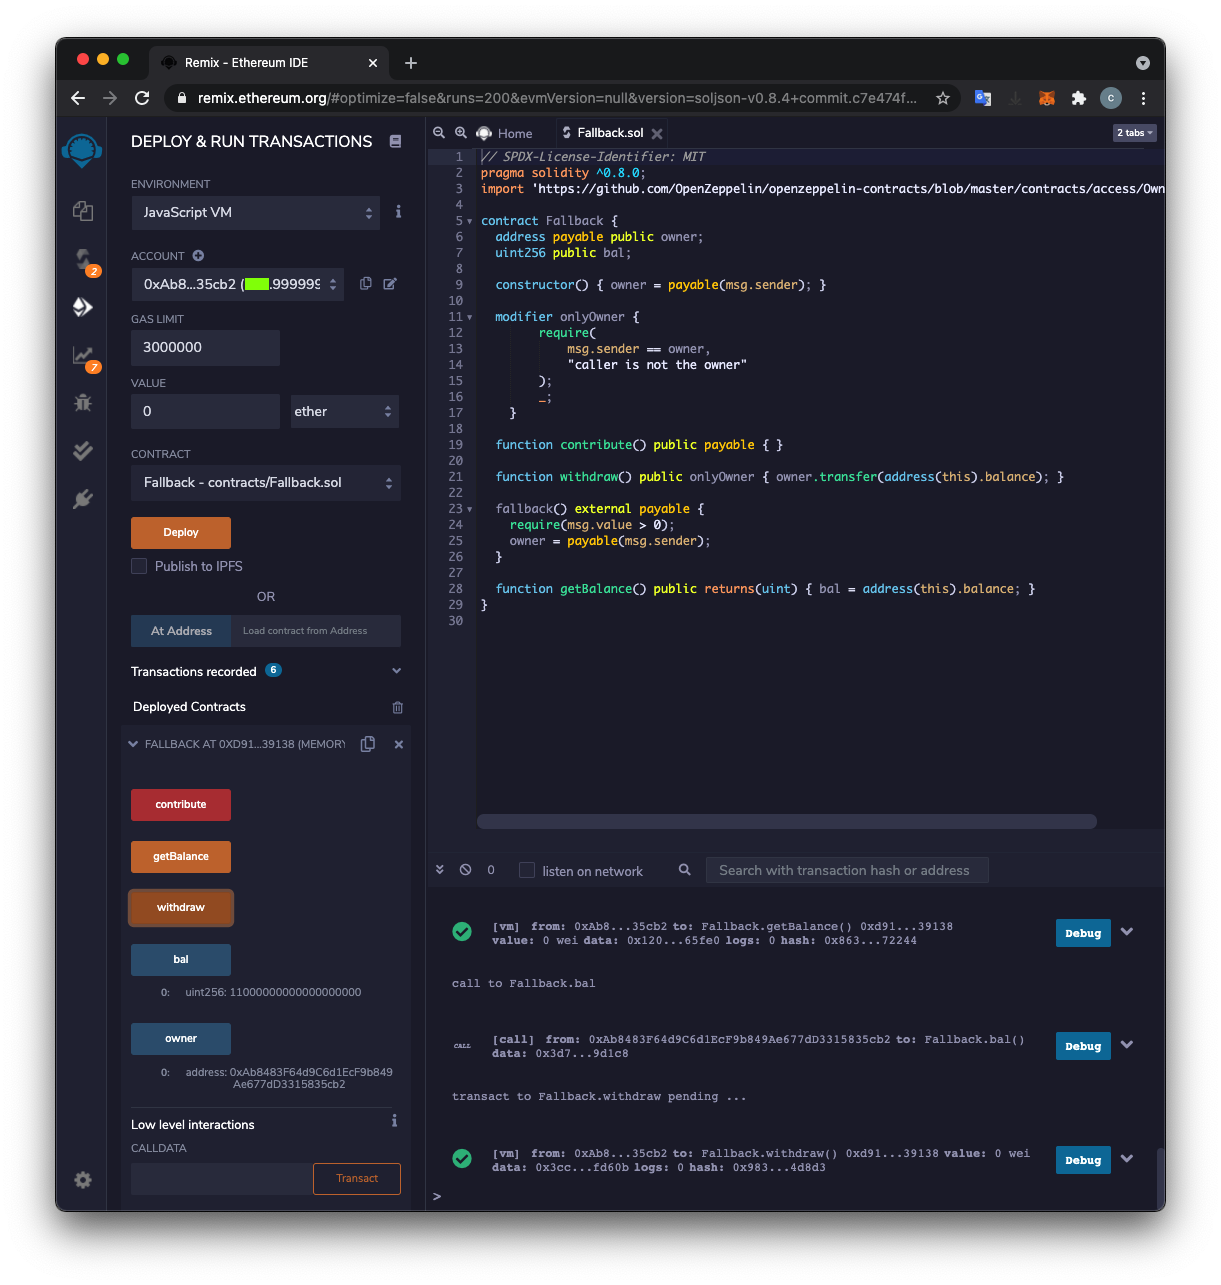
At the lower left, click the orange getBalance button.
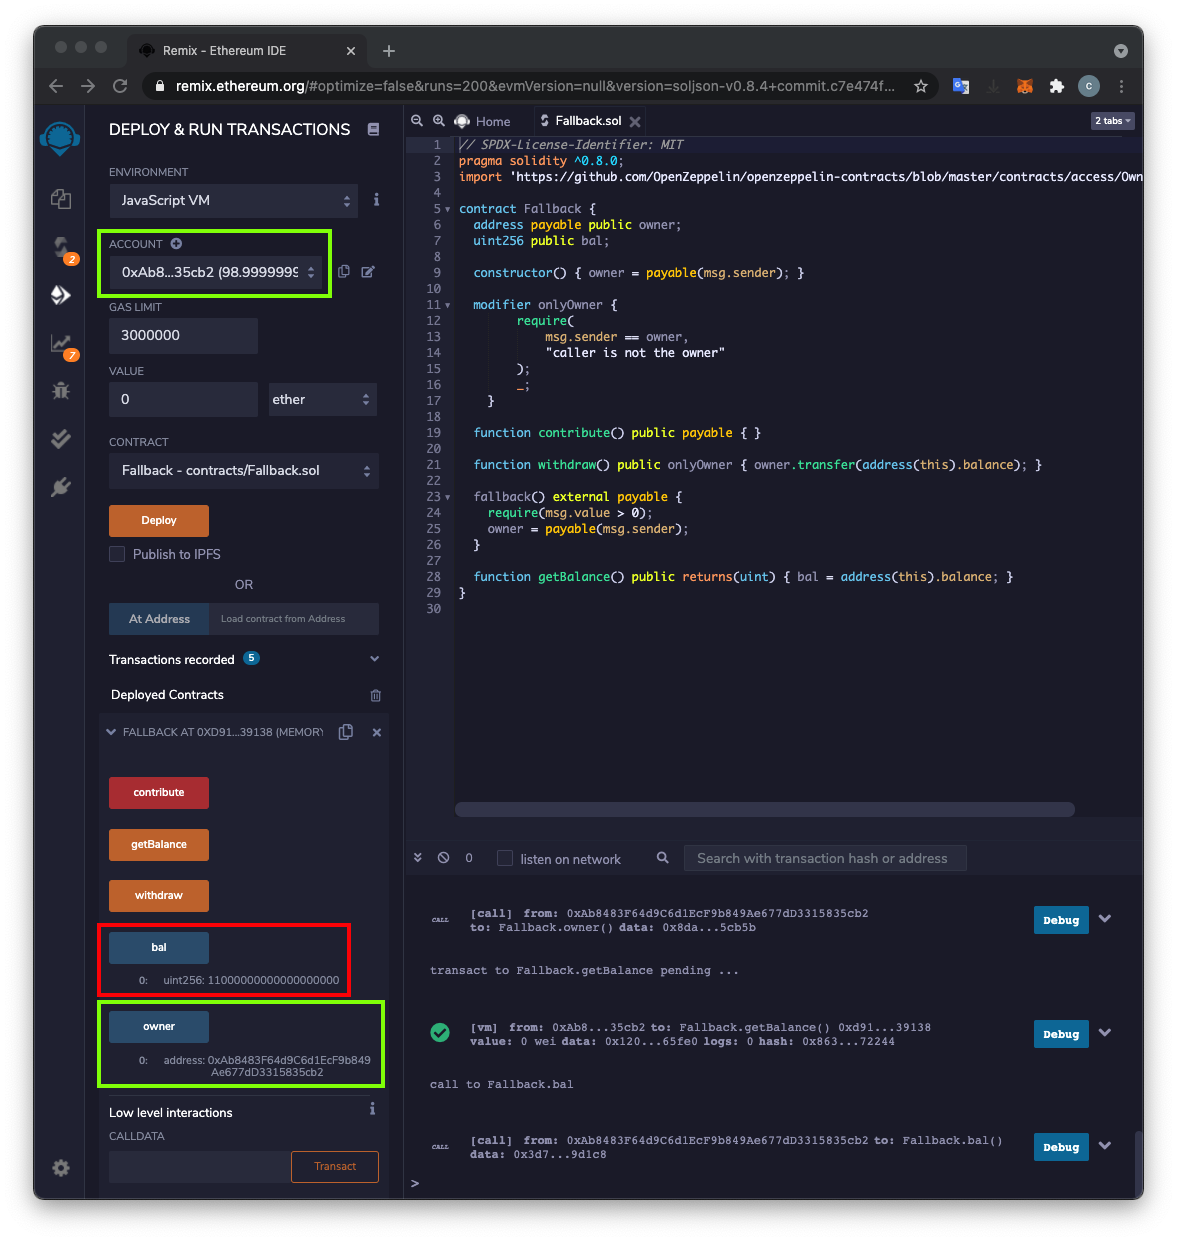
At the lower left, click the blue-gray bal button.
The result is a large number: one followed by 19 zeroes, which is 10 ether (in units of wei), outlined in red in the image below.
At the lower left, click the blue-gray owner button.
The result is your ACCOUNT number, outlined in yellow in the image below. Notice that this number matches your account number as shown in the top left, outlined in green in the image below.
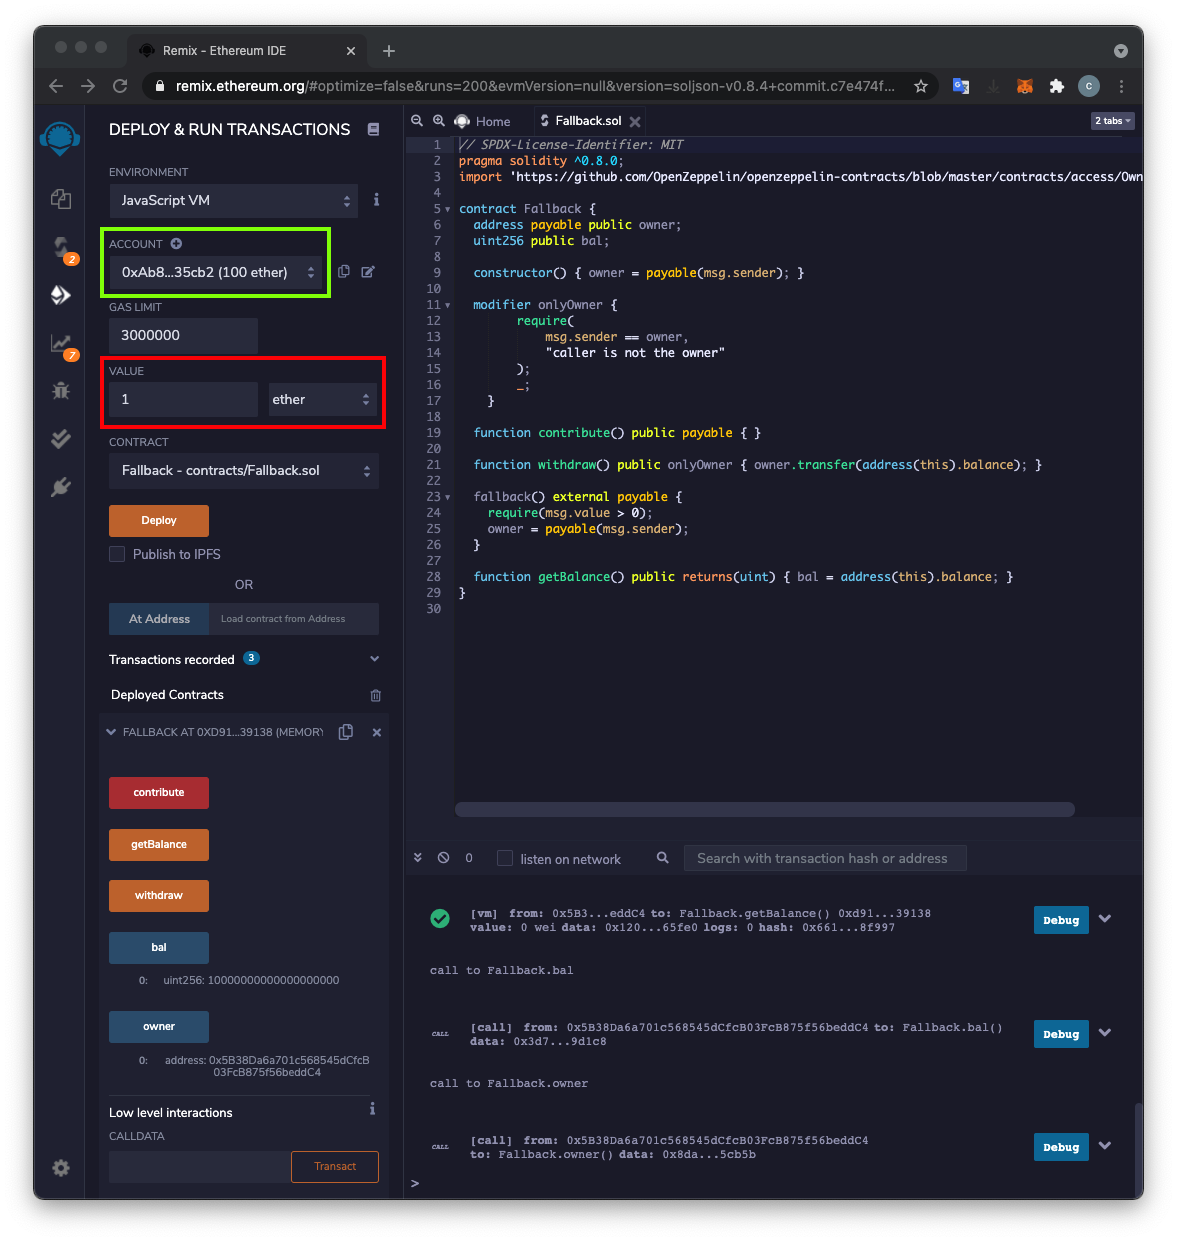
We can become the owner by calling this function, if we send some Ether (msg.value > 0).
Enter an amount of 1 ether, outlined in red in the image below.
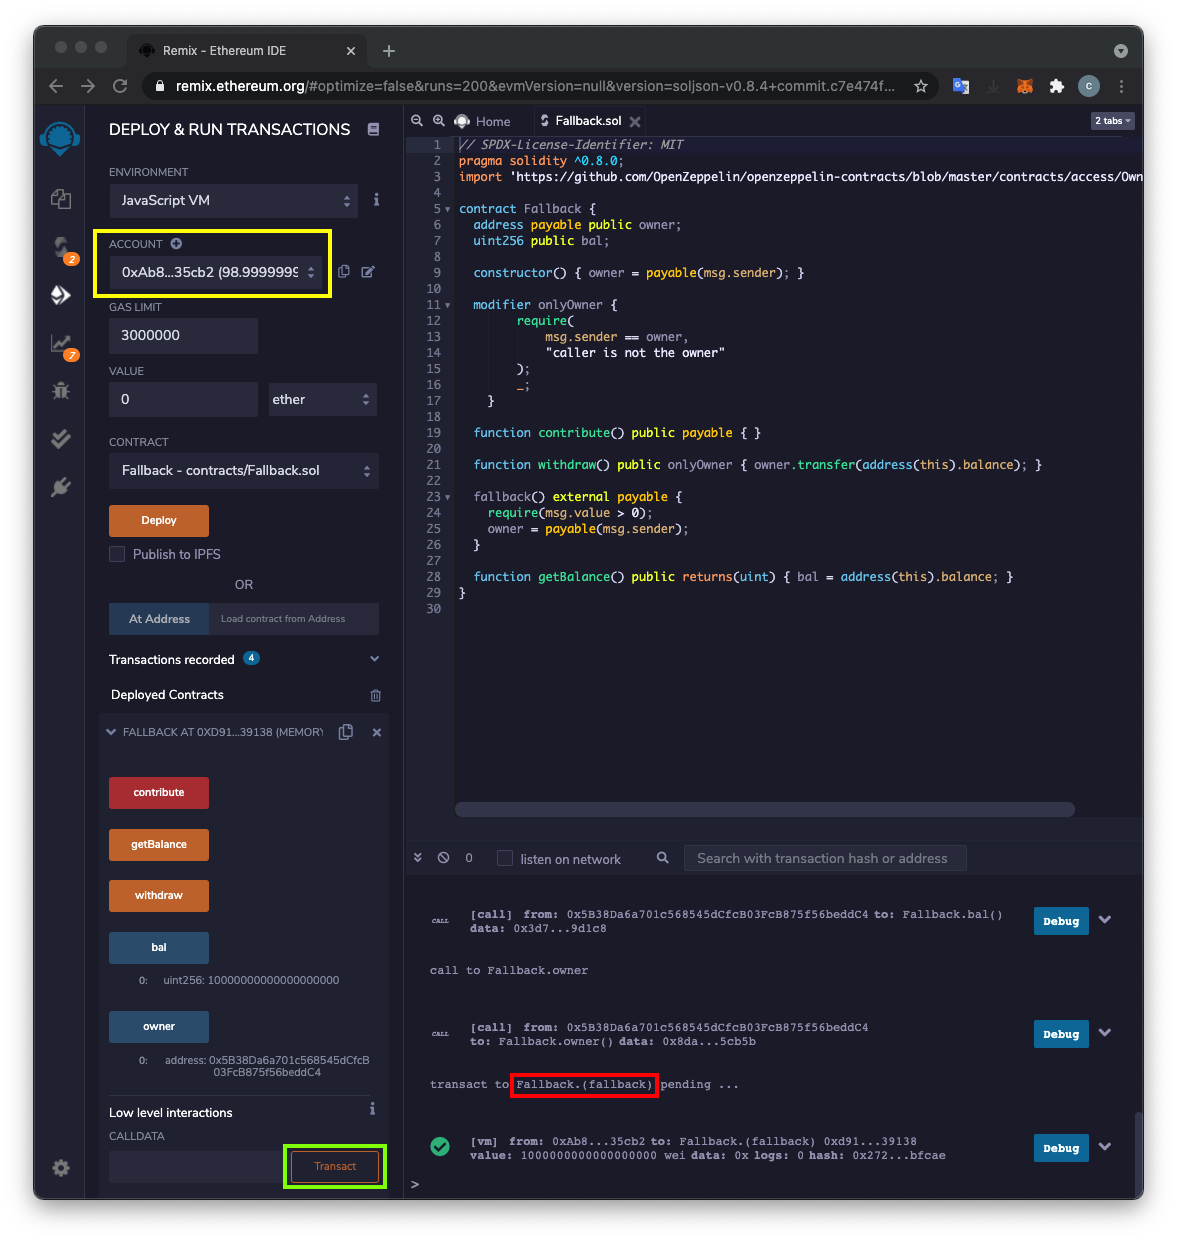
At the lower left, in the "Low level interactions" section, click the Transact button, outlined in green in the image below.
In the lower right, notice that this transaction implemented the fallback method, outlined in red in the image below.
At the top left, notice that your balance has fallen to approximately 99 ether, outlined in yellow in the image below.
The result is your current ACCOUNT number, outlined in green in two places in the image below. You now own the contract, instead of the original owner.
At the lower left, click the orange getBalance button.
At the lower left, click the blue-gray bal button.
The contract now has 11 ether, outlined in red in the image below. Ten of them came from the original owner and one from your current ACCOUNT.
C 355.1 Stealing the Ether (10 pts)
At the lower left, click the orange withdraw button.The flag is the your new balance, at the top left, covered by a green rectangle in the image below.
Solidity Security: Comprehensive list of known attack vectors and common anti-patterns
Solidity Top 10 Common Issues
Common attacks in Solidity and how to defend against them
Posted 5-19-2021
Environment updated to Javascript VM (London) on 10-26-21