Click the image to see an article with more details of The Merge.
I just put a block under my M1's back to lift it off the table, and ran a fan blowing air across it during mining. That worked.
On your M1, in "System Preferences", click Battery, on the Battery tab, Slide the "Turn display off after" slider to Never
In "System Preferences", "Desktop & Screen Saver", on the "Screen Saver" tab, clear the "Show screen saver after" box
On your M1 Mac, in a Terminal, execute this command:
brew help
/bin/bash -c "$(curl -fsSL https://raw.githubusercontent.com/Homebrew/install/HEAD/install.sh)"
After the installation is done, you will see two commands you need to run, outlined in the image below.
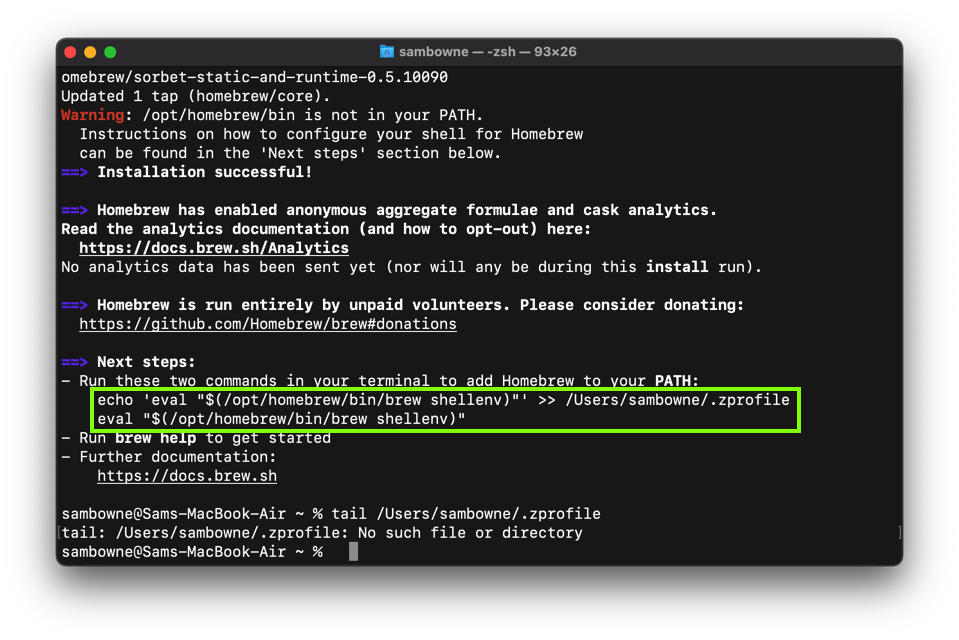
Execute those commands in your Terminal.
Then execute this command:
brew help
On your M1 Mac, in a Terminal, execute these commands, one at a time:
brew tap ethereum/ethereum
brew install ethereum
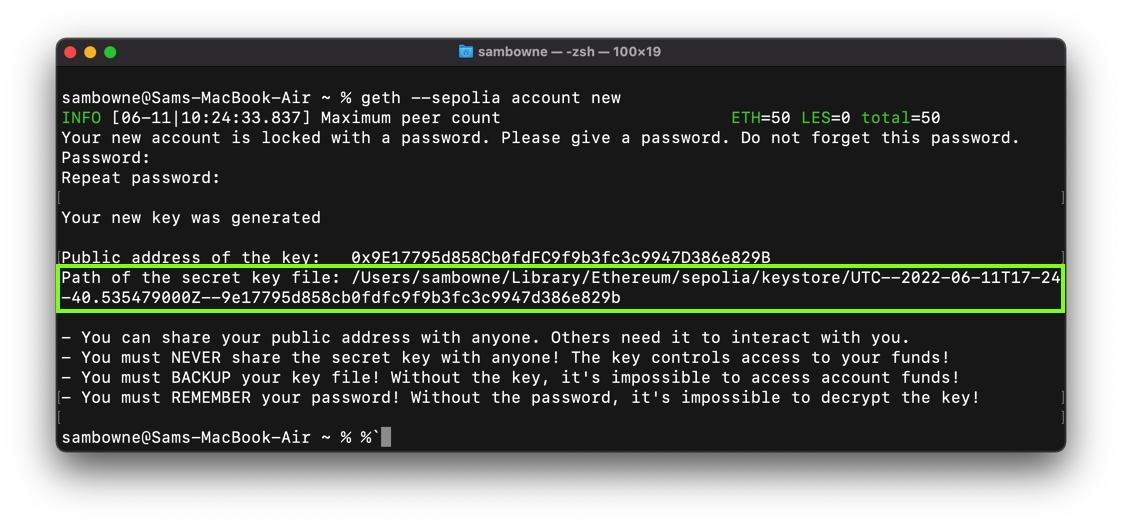
On your M1 Mac, in a Terminal, execute this command:
geth --sepolia account new
Obviously, if you get real Ether worth real money, you need to use a more secure passphrase.
Notice the Path value, outlined in the image below.
You'll need this for the next step.
Execute this command, replacing the first path with the correct path from your geth output:
cp /Users/sambowne/Library/Ethereum/sepolia/keystore/* ~/Desktop
geth --sepolia --http --http.addr 0.0.0.0 -http.port 8545 \
 --http.api eth,net,web3,personal,miner,admin,txpool,debug
You can proceed with the steps below while the node is working.
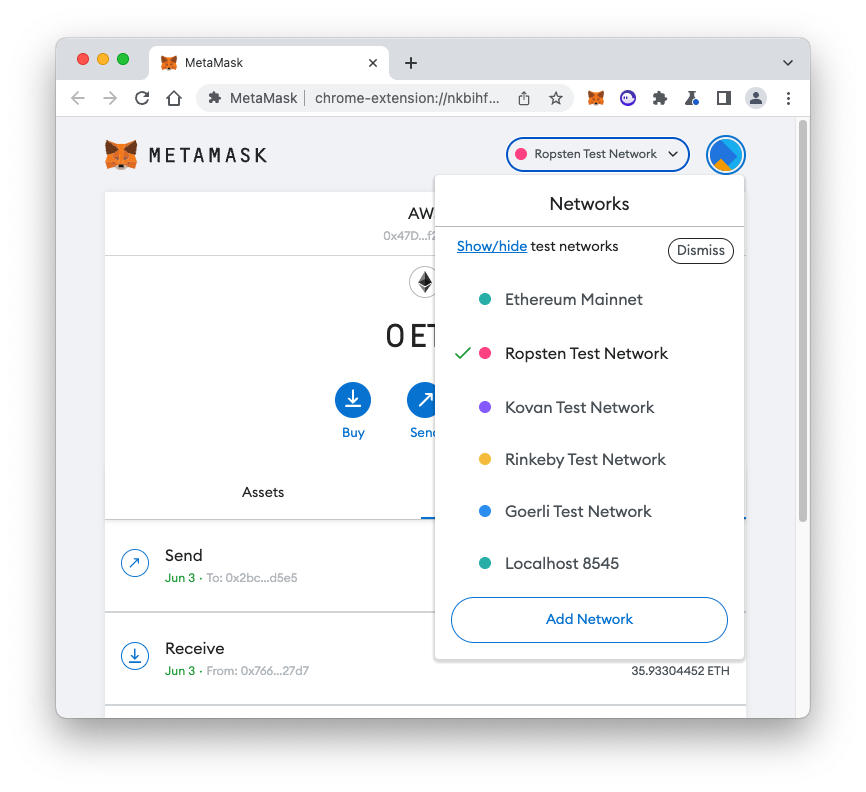
Open MetaMask. At the top right, click the network name. Click the "Add Network" button, as shown below.
Enter these values, as shown below.
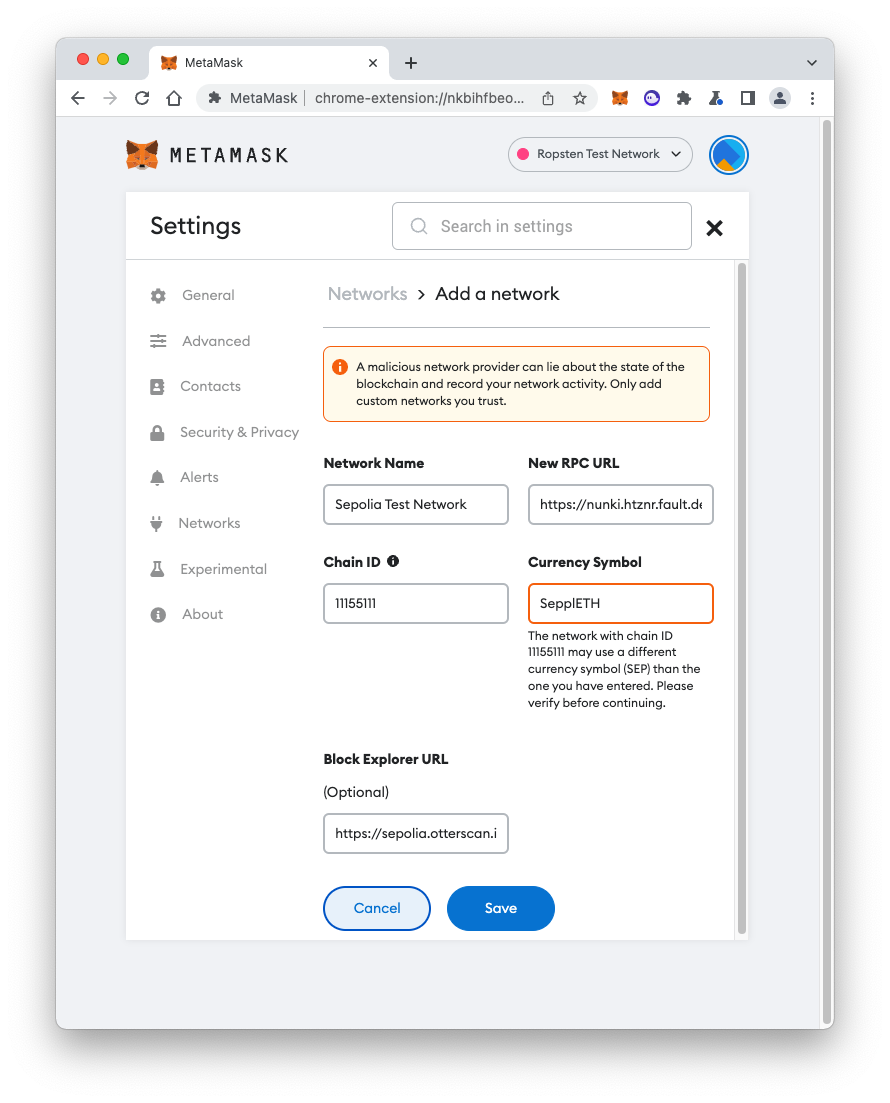
Click the Save button.
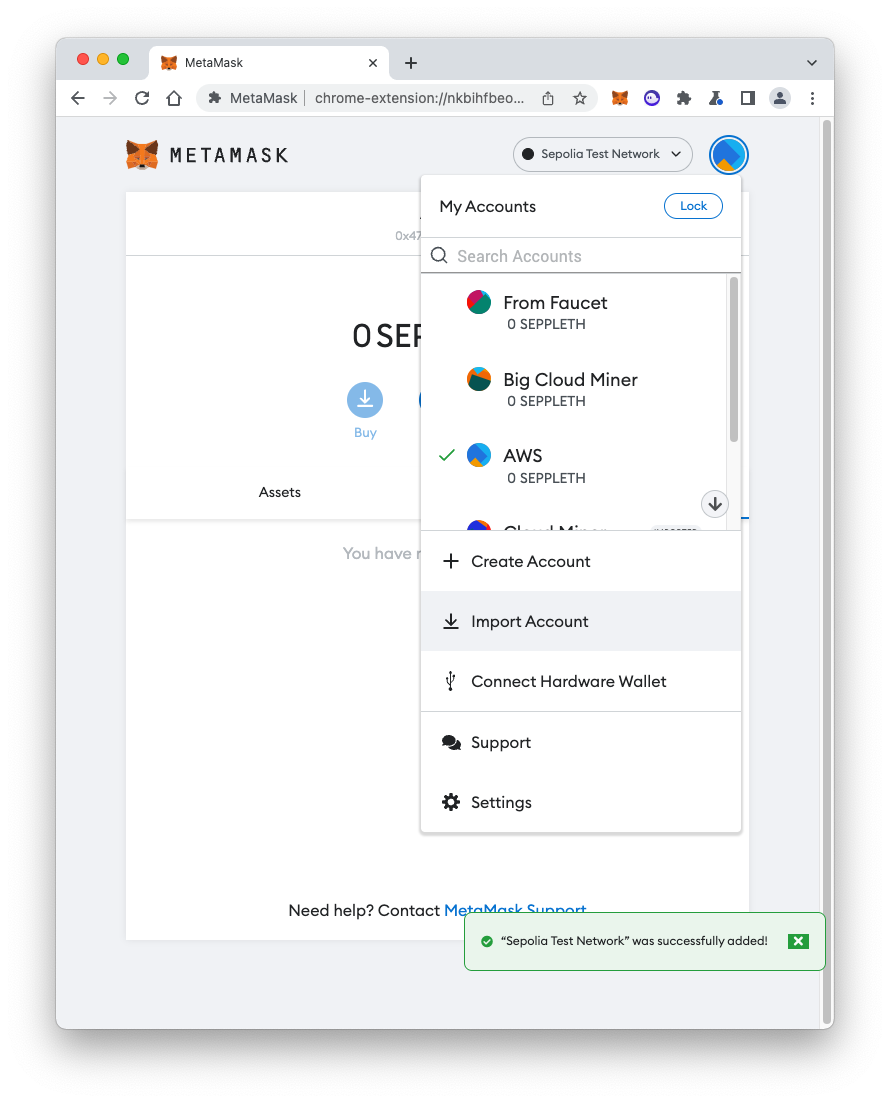
Click the circular icon at the top right and click "Import Account", as shown below.
On the Import Account page, select a Type of "JSON File".
Click the "Choose File" button and navigate to the private key file on your desktop.
Enter your password, which is probably
P@ssw0rd
as shown below.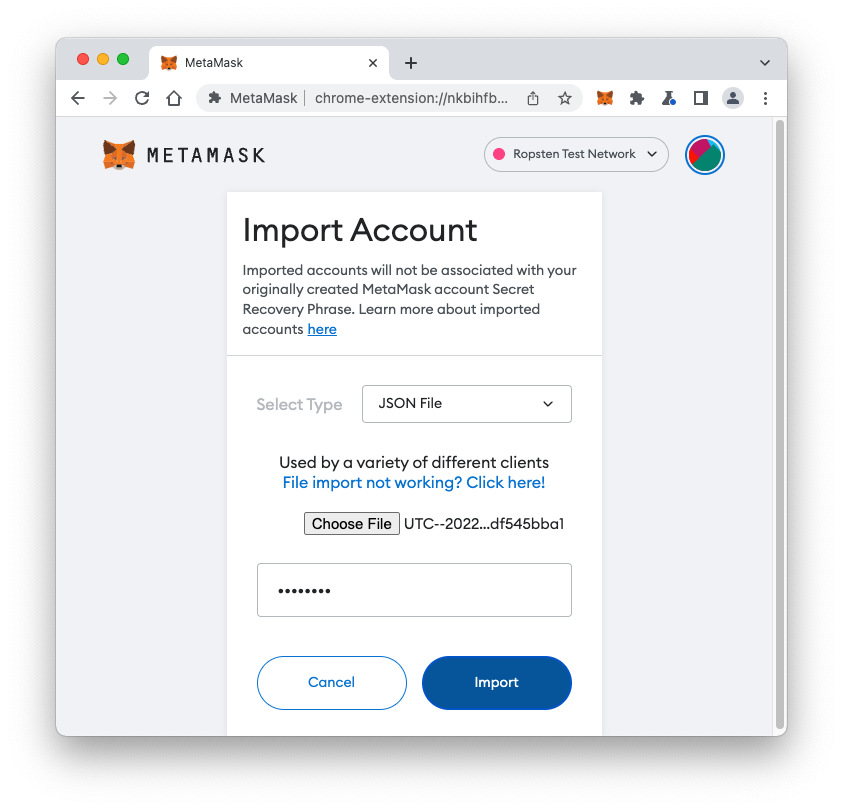
Click Import.
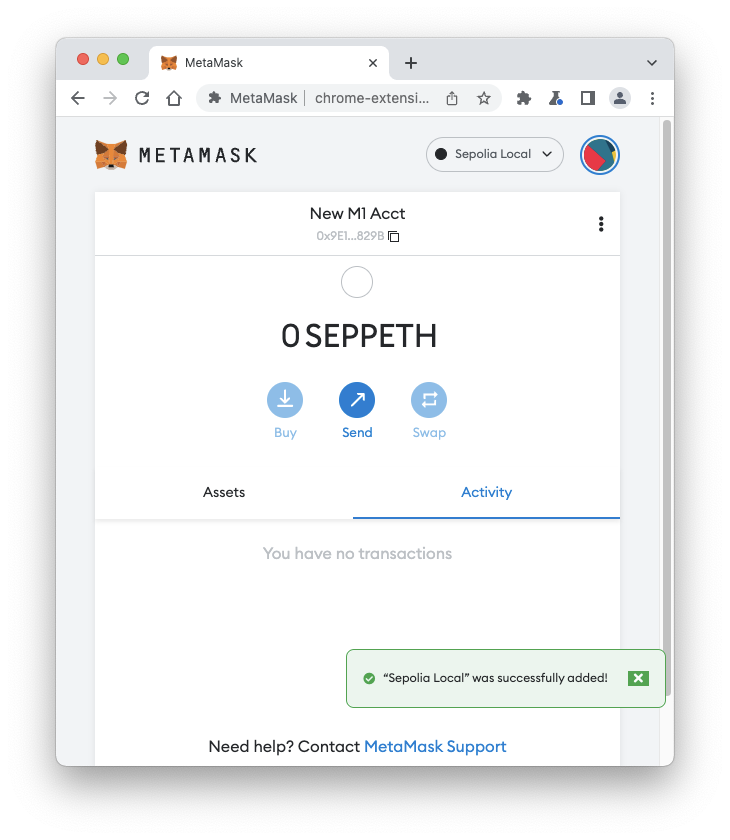
You see a frozen page, as shown below.
The import is working, but it is incredibly slow, due to a known limitation of MetaMask.
It may take up to 20 minutes to finish. You can leave this running while doing other steps below.

When the import finishes, you see your account, with a zero balance, as shown below.
Leave the other Terminal window open with geth running.
Open a second Terminal window on your M1. In the new window, execute these commands:
geth attach http://127.0.0.1:8545
net
eth.syncing
The "eth.syncing" command shows the progress of building your local copy of the blockchain.
If you see a list of numbers starting with "currentBlock", your node is still syncing and not ready to start mining yet.
When the synchronization process is complete, The "eth.syncing" command will respond with "false", as shown below.
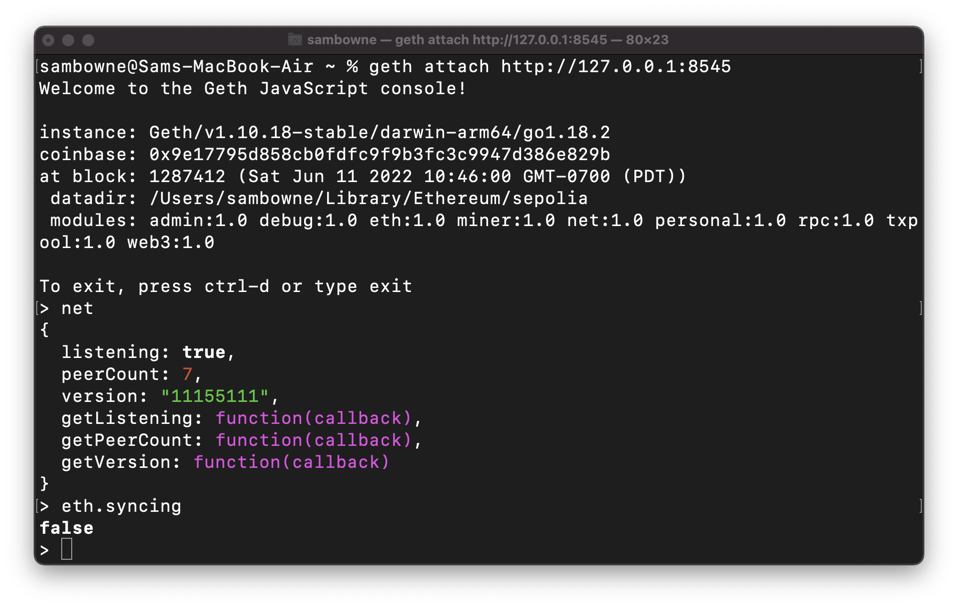
Don't proceed past this point until your node is done syncing, so "eth.syncing" responds with "false."
eth.accounts
miner.setEtherbase(eth.accounts[0])
miner.start(1)
eth.getBalance(eth.accounts[0])/1E18
Your current account balance is zero.
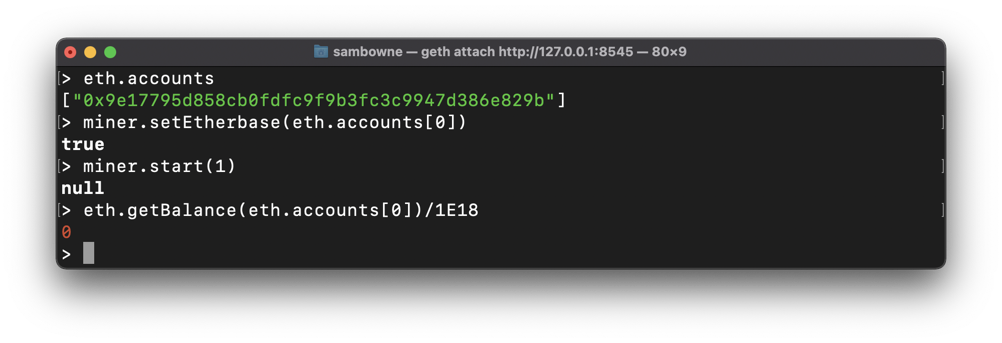
This starts your M1 mining with one processor core, which is far too slow to earn any Ether. However, it causes your node to finish prepare for mining.
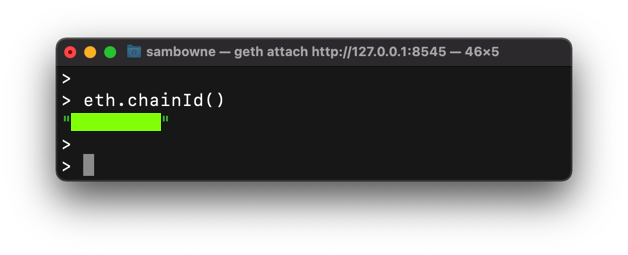
C 343.1: chainID (10 pts)
In the Terminal window connected to your node via RPC, execute this command:The flag is covered by a green rectangle in the image below.
On your M1, in a Web browser, go to
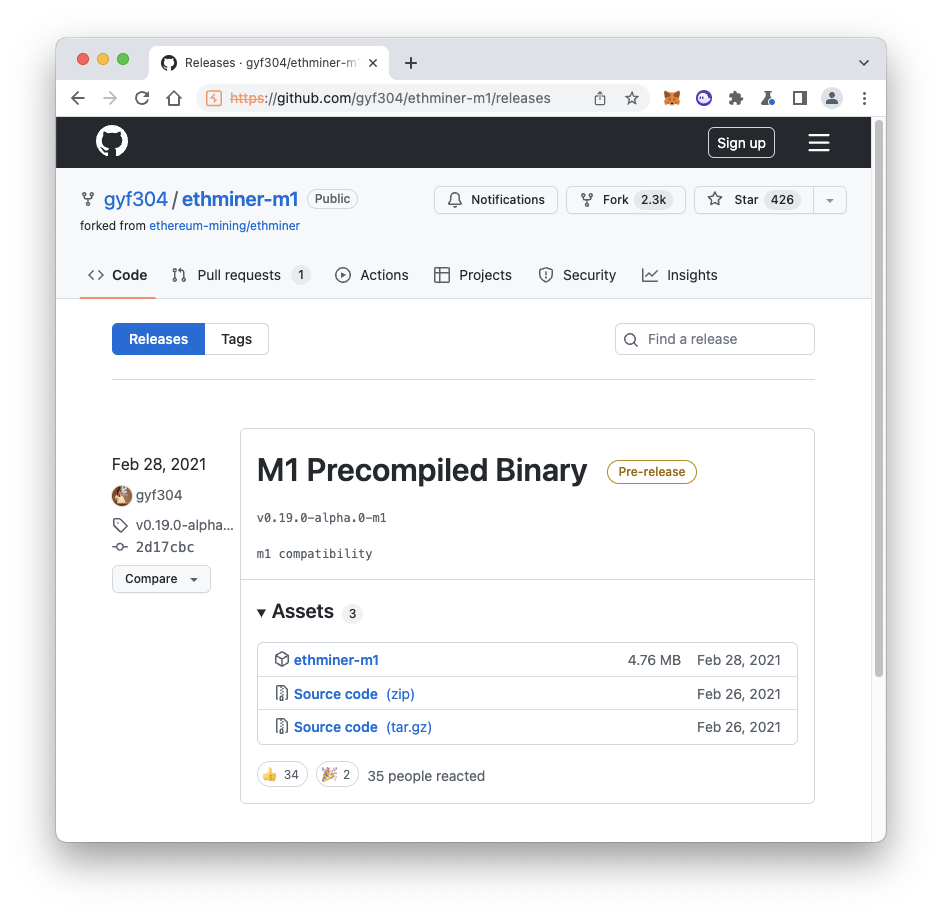
https://github.com/gyf304/ethminer-m1/releases
In the "M1 Precompiled Binary" section, click the arrow next to Assets to expand that section, and click ethminer-m1, as shown below.The program downloads into your Downloads folder.
cd
cd Downloads
chmod +x ethminer-m1
./ethminer-m1
Click OK to close the error message, then open "System Preferences". Click "Security and Privacy" and then click "Allow anyway" next to the "ethminer-m1 was blocked from use" message.
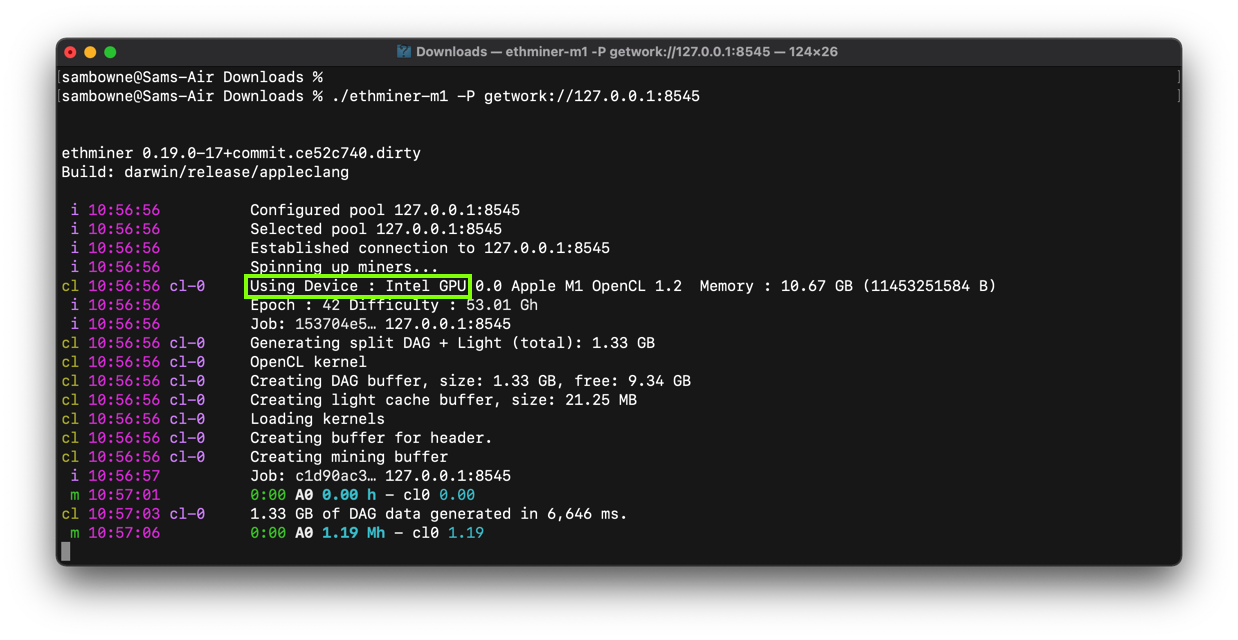
Now restart ethminer with this command:
./ethminer-m1 -P getwork://127.0.0.1:8545
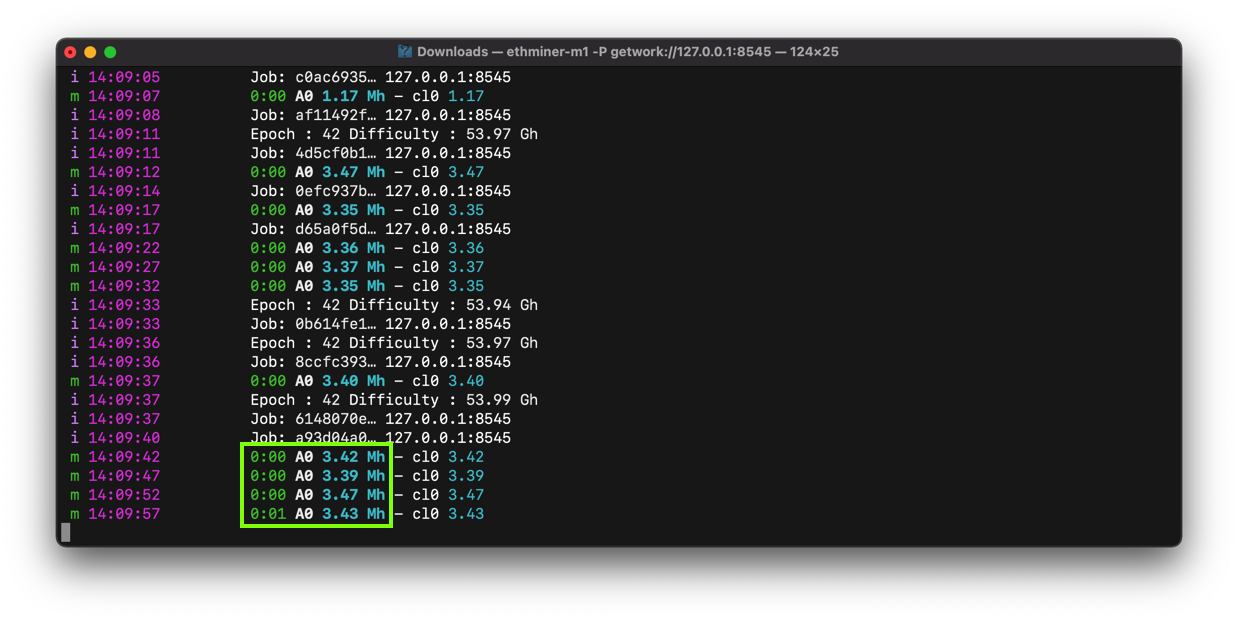
After a few minutes, it settles down to a steady mining rate. On my system, I got 3.4 Mh, as shown below.
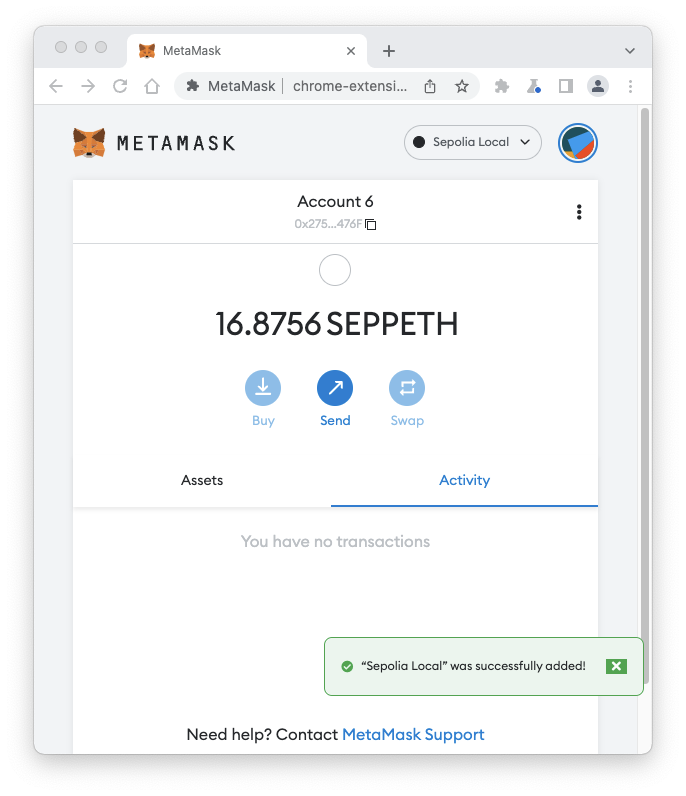
You'll gradually earn Ether. When I did it, in June, 2022, three days of mining earned about 16 seppETH, as shown below.
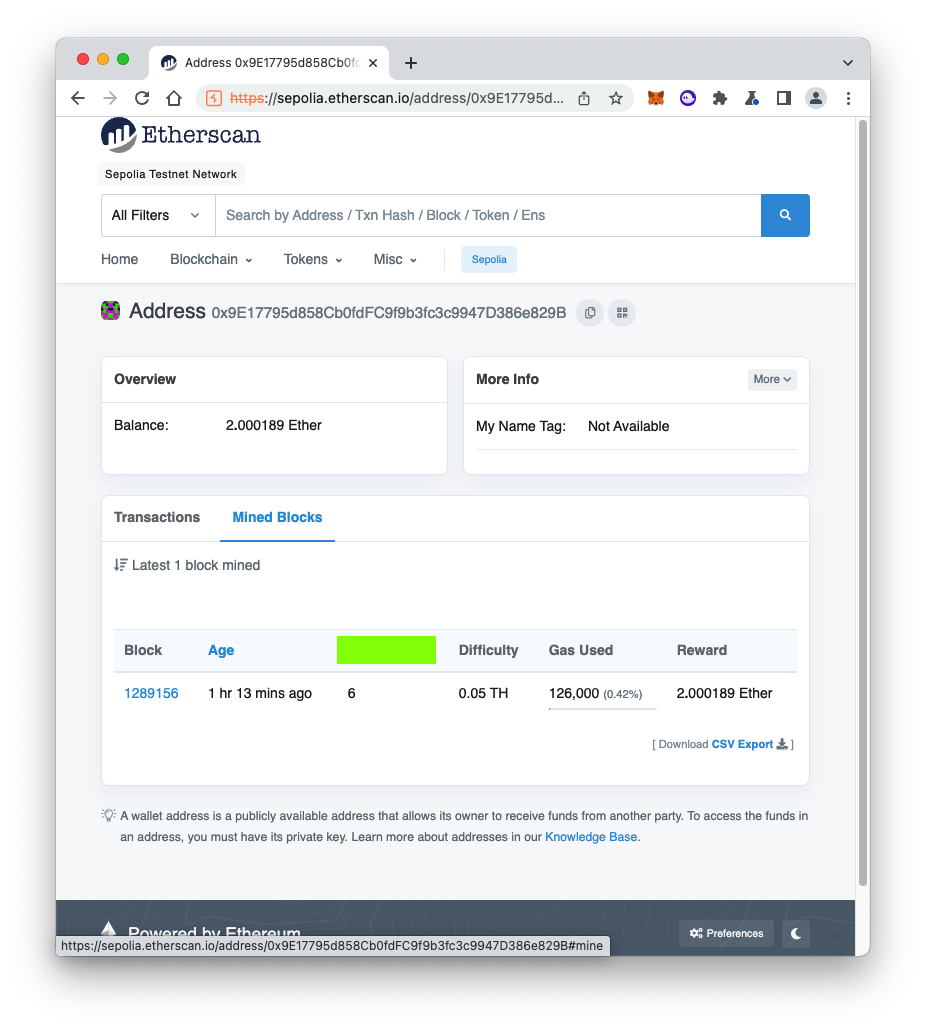
C 343.2: Mined Blocks (10 pts)
Once you have earned some seppETH, go to this website: Set the search type to Addresses and search for your miner's etherbase address.There are no Transactions, but you will see some "Mined Blocks".
The flag is covered by a green rectangle in the image below.