Four genuine blockchain use cases
cd /tmp
wget https://www.multichain.com/download/multichain-2.1.2.tar.gz
tar -xvzf multichain-2.1.2.tar.gz
cd multichain-2.1.2
sudo mv multichaind multichain-cli multichain-util /usr/local/bin
Do this on the Primary Node:
multichain-util create chain1
multichaind chain1 -daemon
Make sure to adjust the IP address and port number to match the instructions from your primary node.
multichaind chain1@10.138.0.3:6759
The command that must be executed on the Primary Node is shown, as highlighted in the image below.
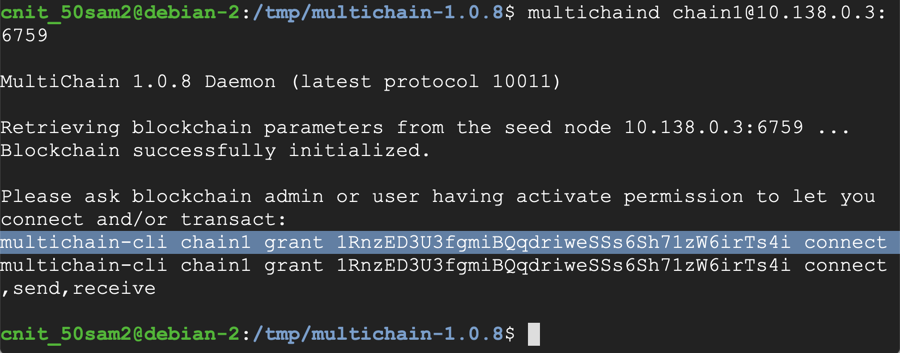
multichain-cli chain1 grant 1RnzED3U3fgmiBQqdriweSSs6Sh71zW6irTs4i connect

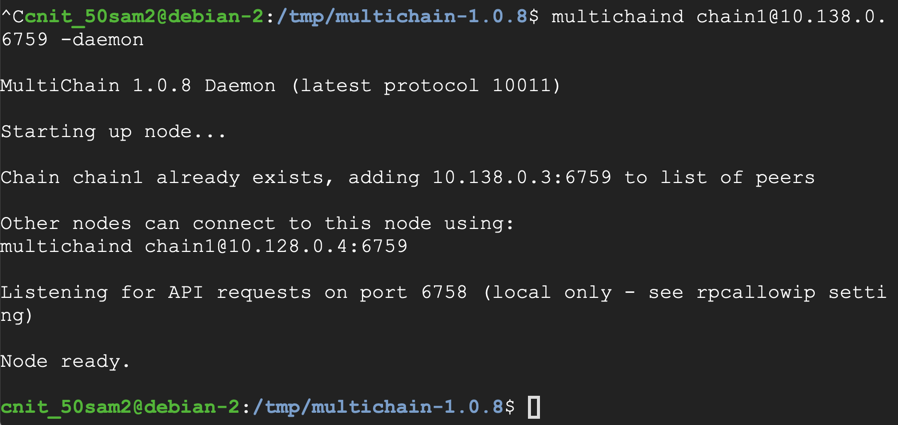
multichaind chain1@10.138.0.3:6759 -daemon
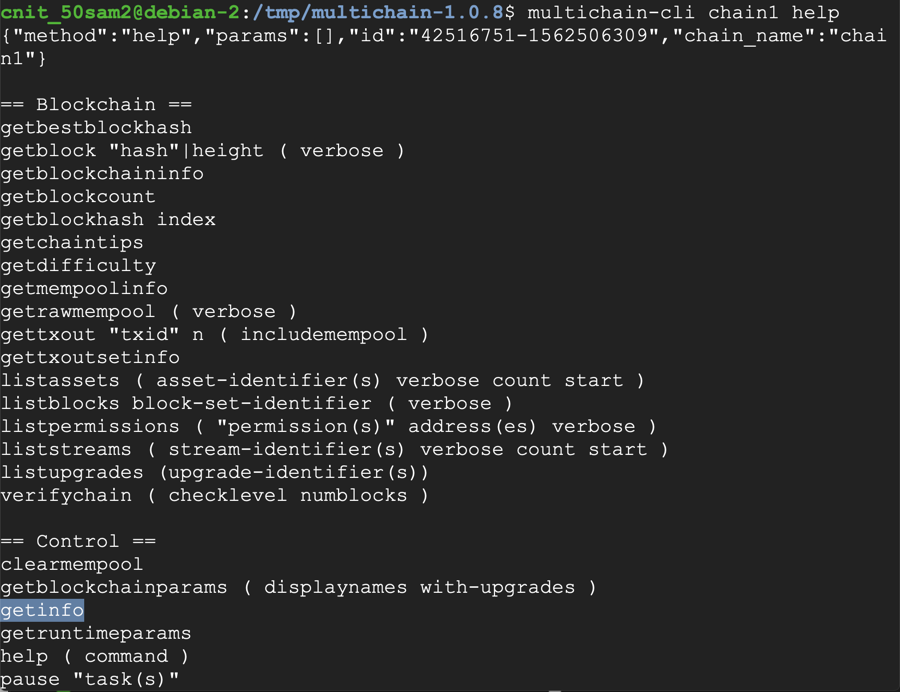
multichain-cli chain1 help
On either node, execute this command:
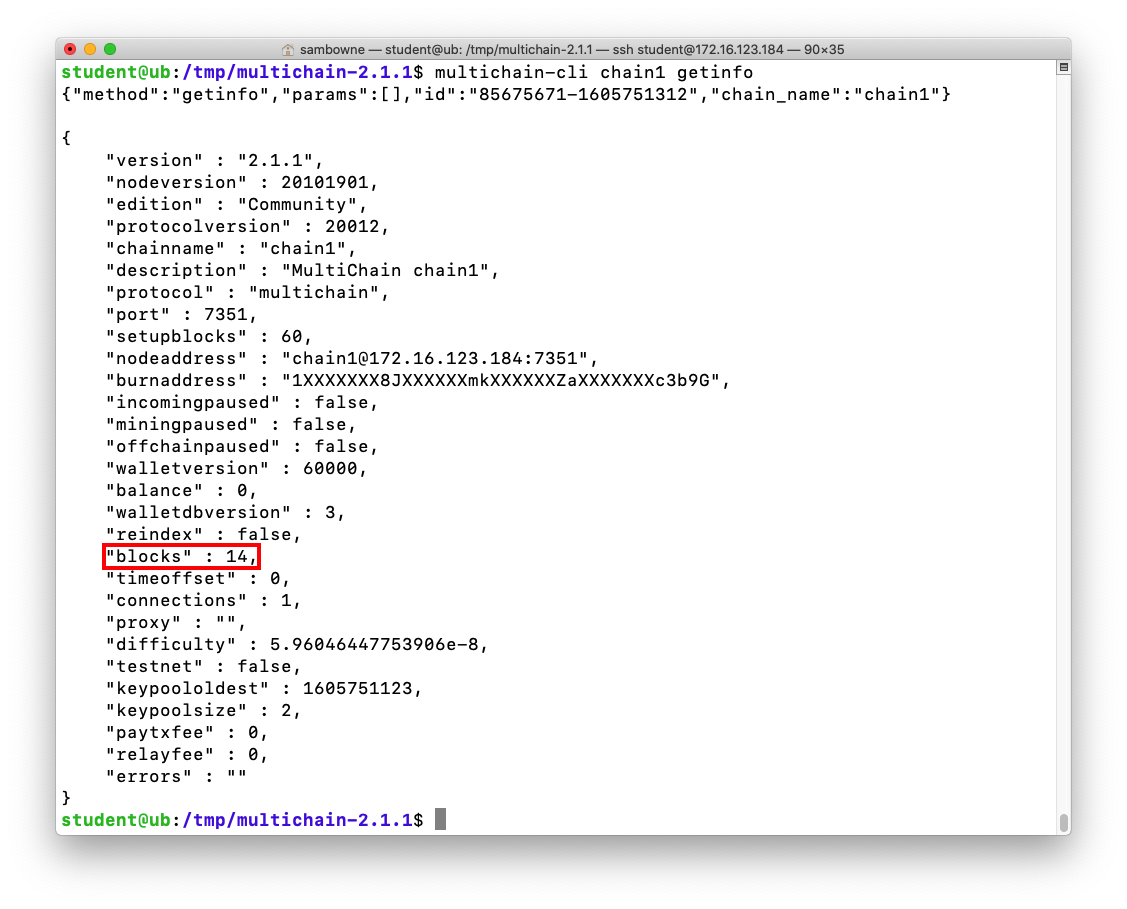
multichain-cli chain1 getinfo
On either node, execute this command:
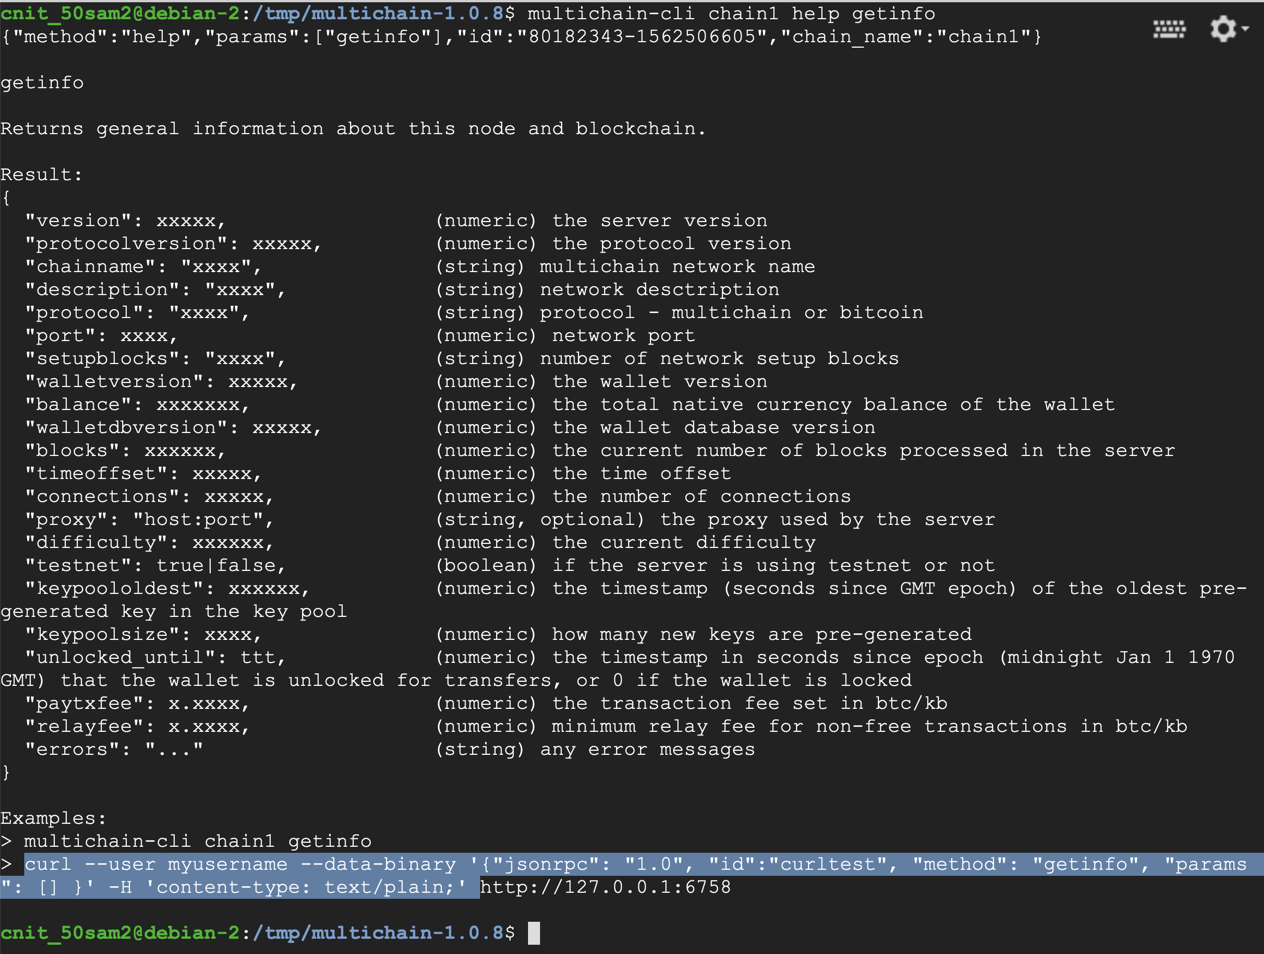
multichain-cli chain1 help getinfo
The "curl" commands show how to use the RPC, which is designed for Web-based clients and GUI's.
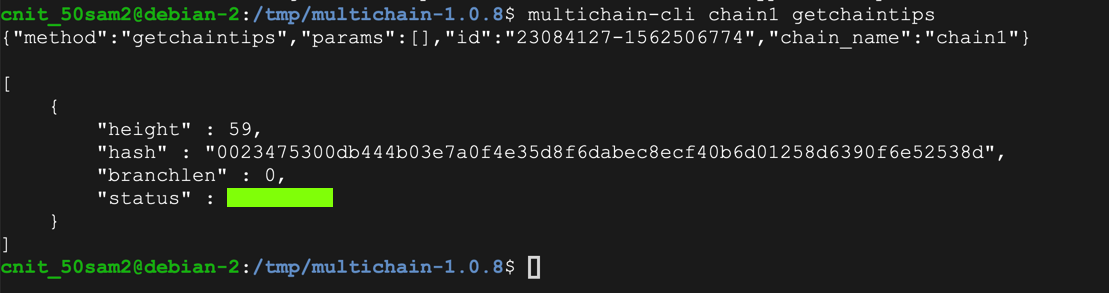
C 311.1: Blockchain Status (10 pts)
On either node, execute this command:The flag is the "status" of your blockchain, covered by a green box in the image below.
sudo apt update
sudo apt install git curl apache2 -y
sudo apt install ca-certificates apt-transport-https lsb-release -y
sudo apt install php libapache2-mod-php php-curl -y
cd /var/www/html
sudo git clone https://github.com/MultiChain/multichain-web-demo.git
cd multichain-web-demo/
sudo cp config-example.txt config.txt
cat ~/.multichain/chain1/multichain.conf
grep rpc-port ~/.multichain/chain1/params.dat

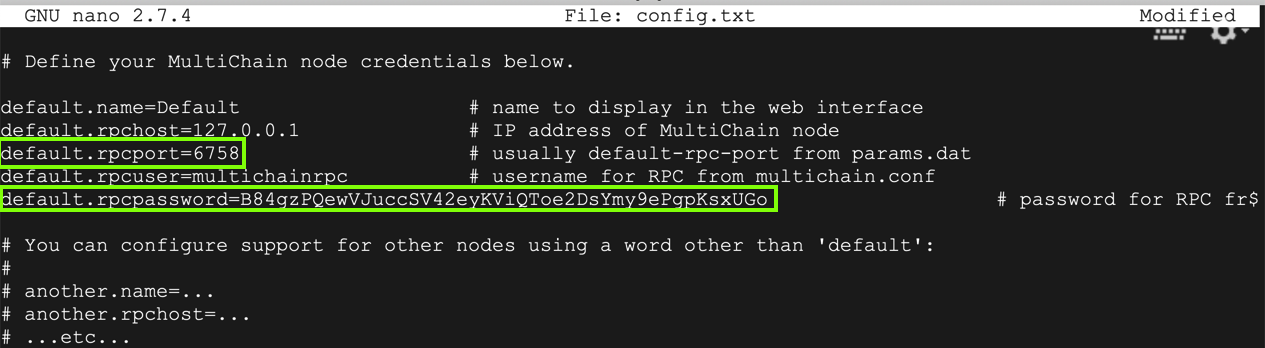
Now you need to enter those credentials into the GUI configufation file.
Execute this command:
sudo nano config.txt
To save the file, press Ctrl+X, Y, Enter.
Execute this command to restart Apache:
sudo service apache2 restart
Troubleshooting
If you have a Multichain node running and you want to delete it and start over, execute these commands:
Troubleshooting
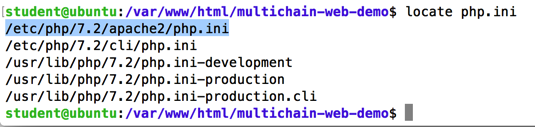
If you are developing more PHP pages, it helps to turn on PHP error reporting. This is insecure, and should not be enabled on production servers.To find the PHP configuration file, execute these commands:
Find the file in an "apache2" folder, as highlighted in the image below.
Execute this command to edit that file, adjusting the file path as necessary:
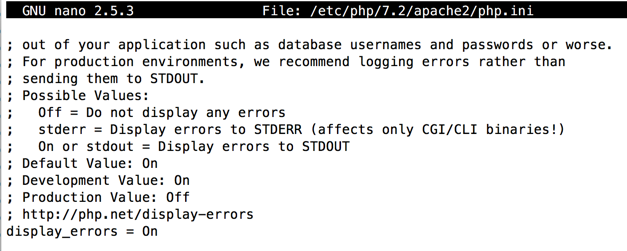
Change display_errors to On, as shown in the image below.Save the file with Ctrl+X, Y, Enter.
Execute this command to restart Apache:
Google Cloud Firewall
If you are using Google Cloud machines, you need to do these steps. If you are using local virtual machines, you can skip them.Allowing HTTP Traffic (Both Nodes)
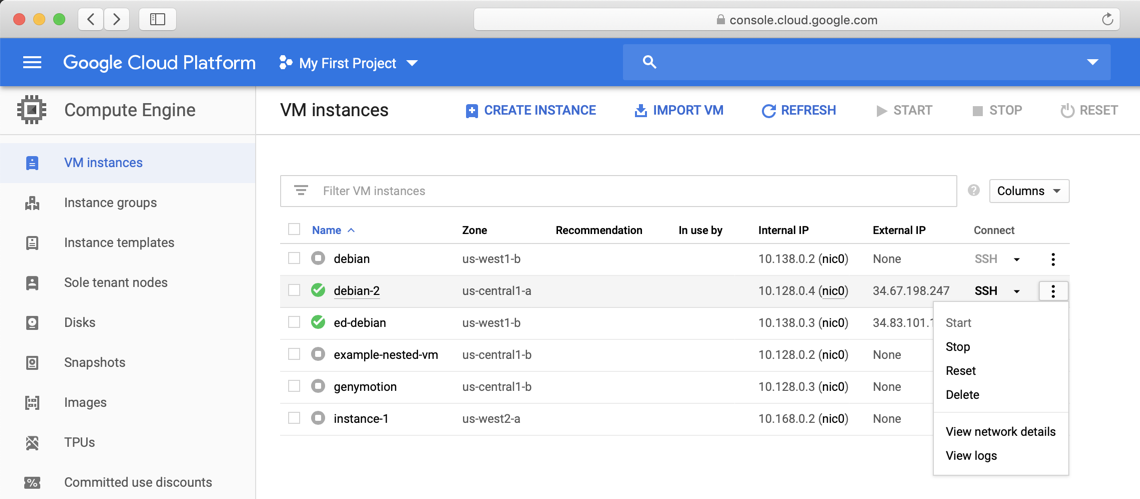
In the Google Cloud Platform page, in the line for one of your Debian servers, on the right side, click the three-dot icon, and click "View network details", as shown below.
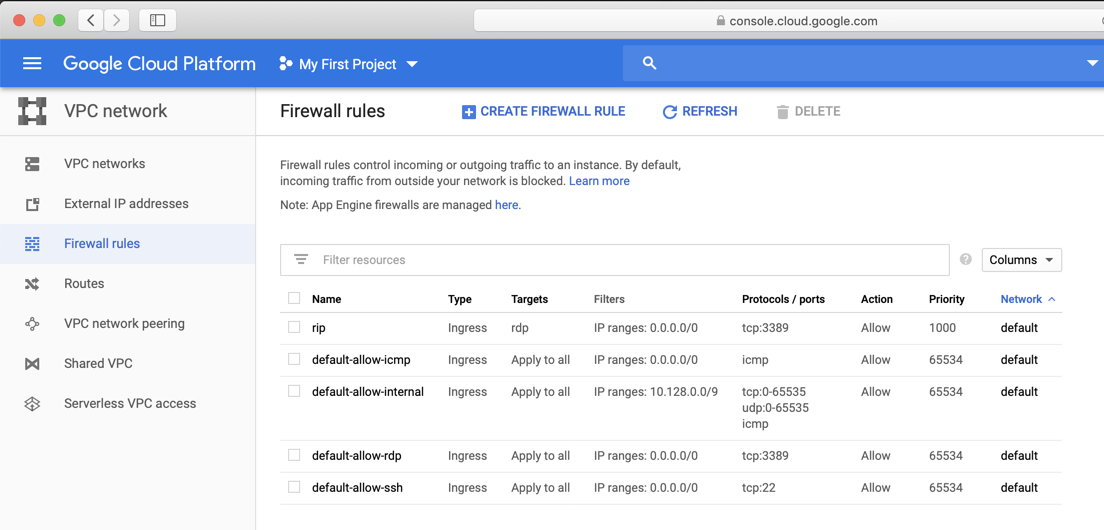
On the "Firewall rules" page, click "CREATE FIREWALL RULE", as shown below.
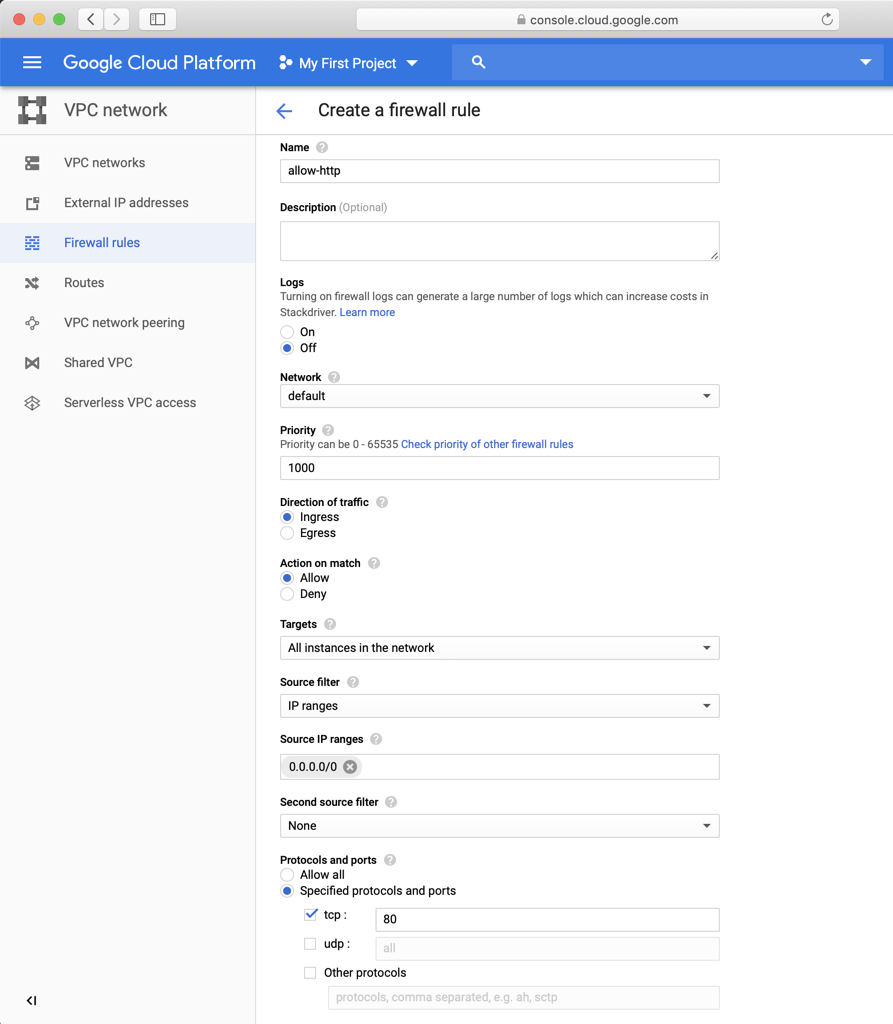
On the 'Create a firewall fule" page, make these entries, as shown below:
- Name: allpw-http
- Targets: "All instances on the network"
- Source IP tanges 0.0.0.0/0
- "Specified protocols and ports" tcp 80
At the bottom of the page, click the Create button.
Finding your IP Address
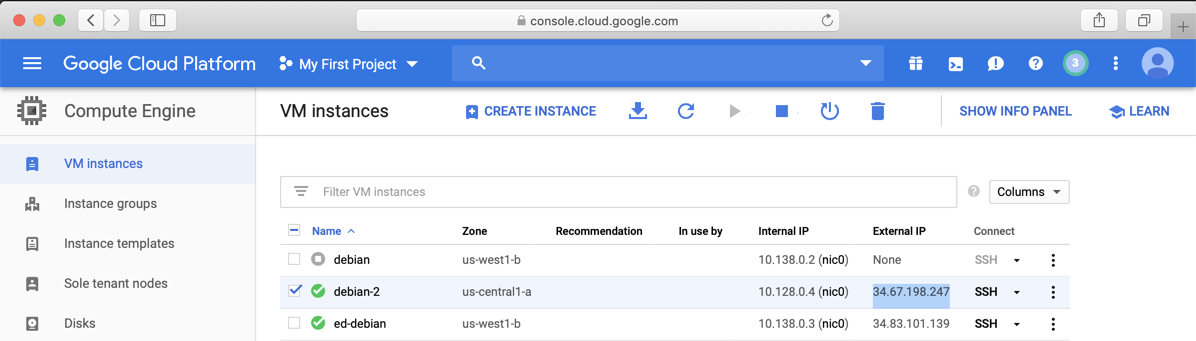
In the Google Cloud Platform page, on the top left, click the three-bar "hamburger" icon.Click "Compute engine", "VM instances".
Find the "External IP" of your instance, as shown below.
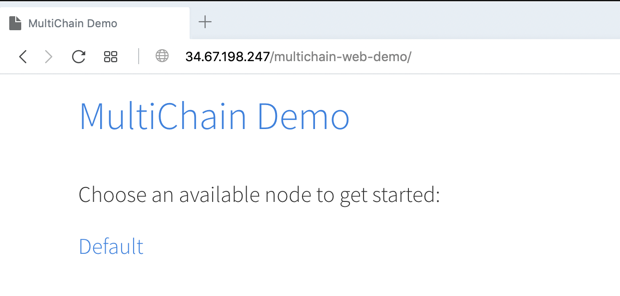
In a Web browser, enter your server's IP address followed by /multichain-web-demo.
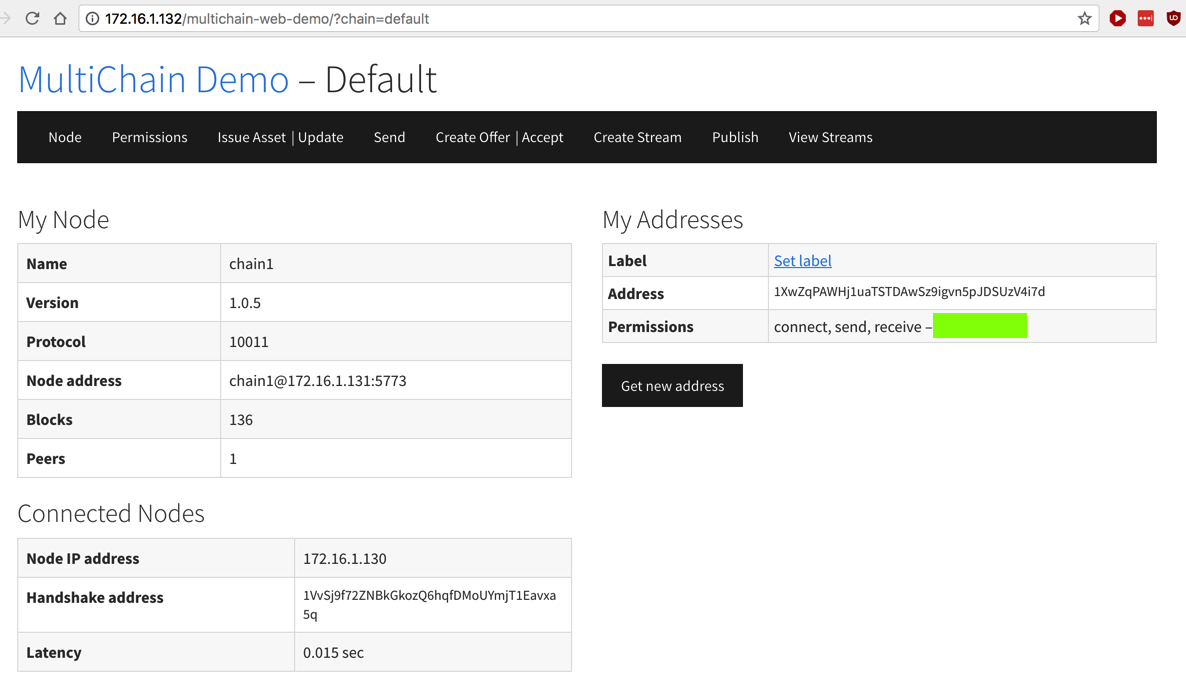
The GUI opens, as shown below. Click Default.
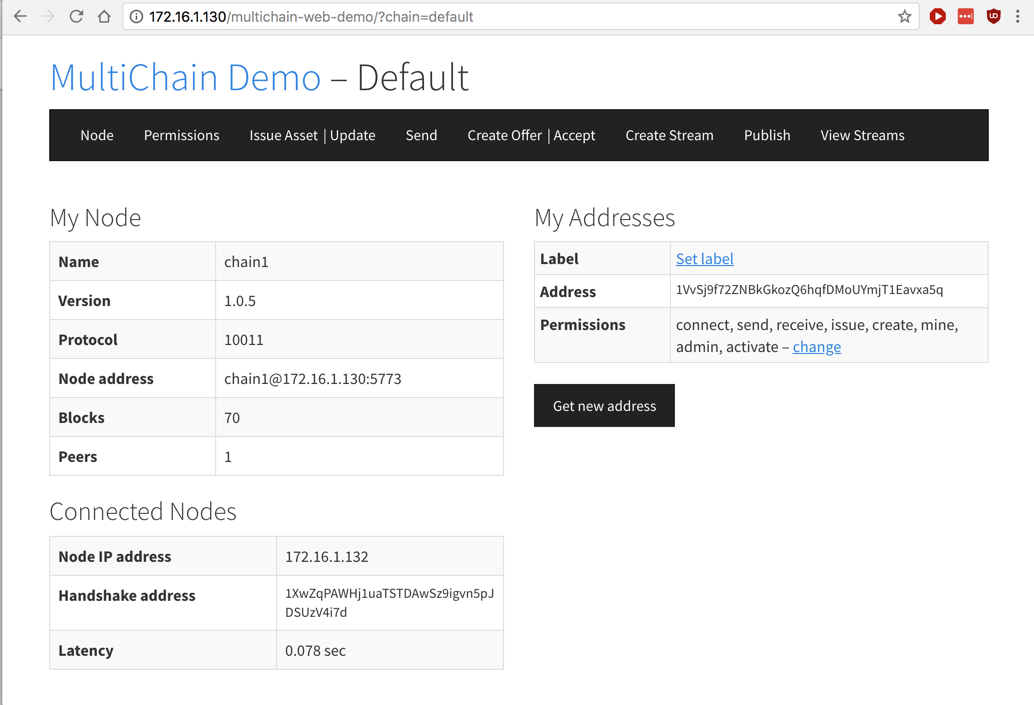
You see basic information about your blockchain, as shown below.
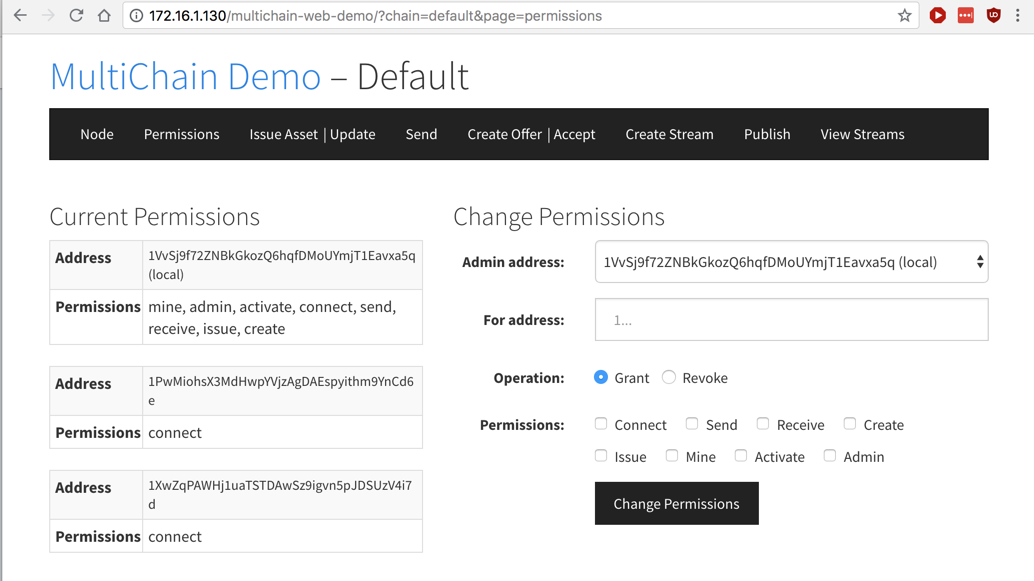
Notice on the right side that the Primary Node has many Permissions, including "send", "receive", "create", and "admin".
Troubleshooting
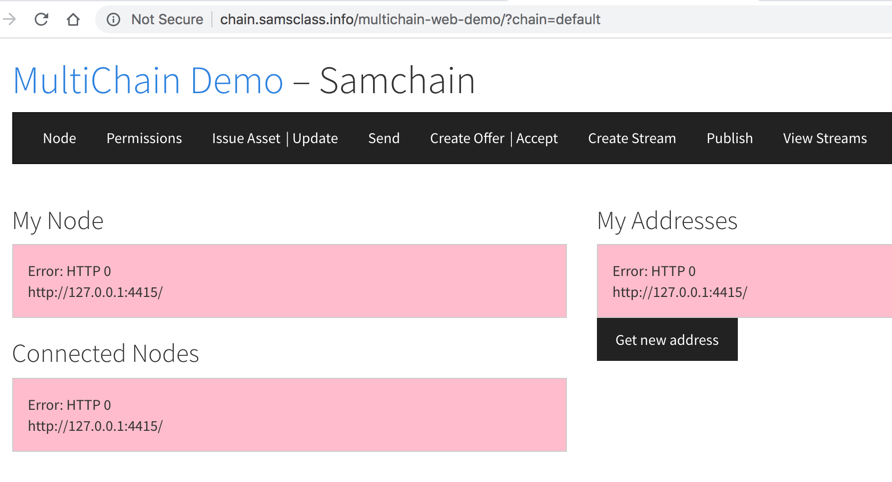
Here are some common problems and solutions.Multichain Not Running
Problem: "Error: HTTP 0", as shown below.Solution: on the primary node, execute this command:
Solution: on a secondary node, execute this command, adjusting the IP and port number as needed.
Incorrect RPC Password
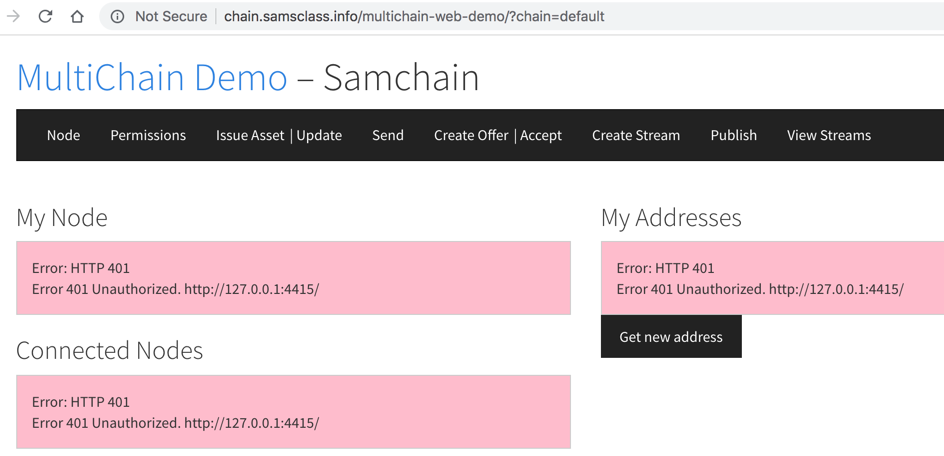
Problem: "Error 401 Unauthorized", as shown below.Solution: execute this command to find the correct password:
Execute this command to correct it:
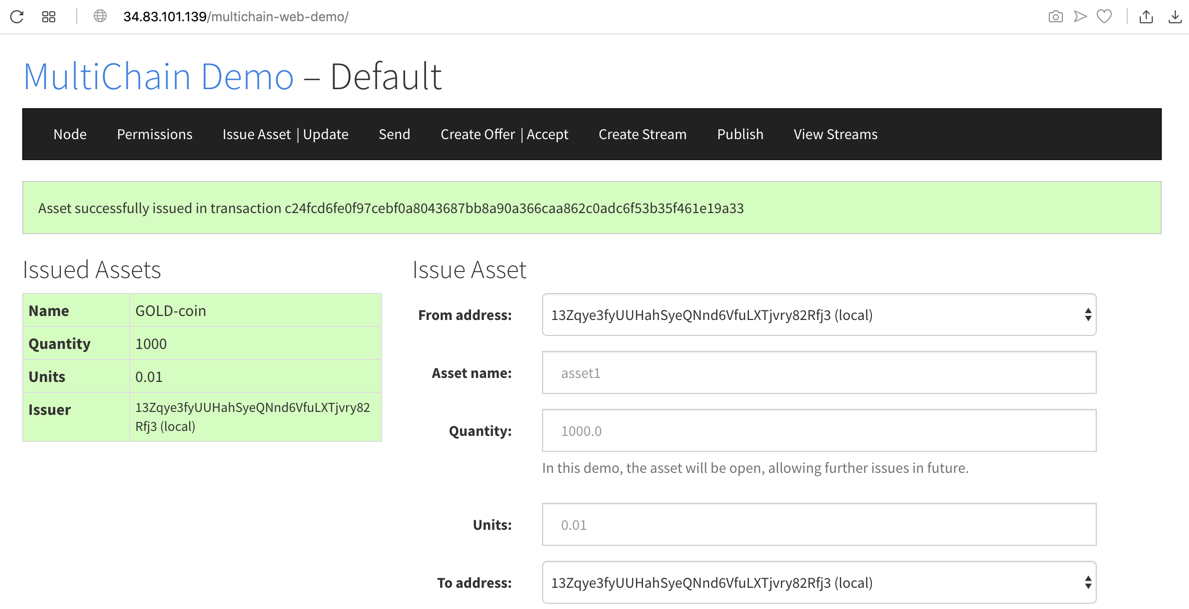
Fill in these fields, leaving the other fields at their default values, and replacing "YOURNAME" with your own name, as shown below.

Scroll to the bottom of the page and click the "Issue Asset" button.
A green message says "Asset successfully issued...", as shown below.
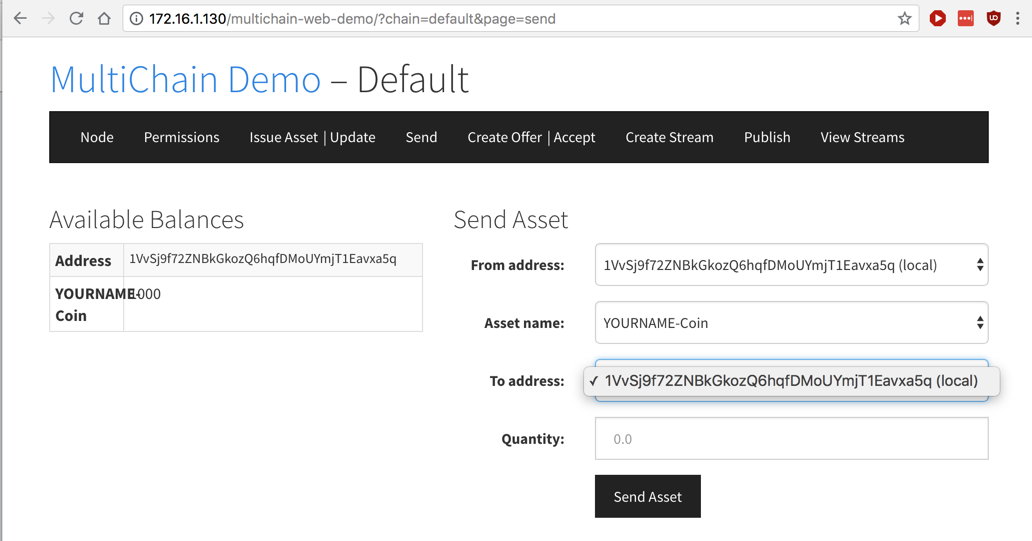
On the right side, in the "Send Asset" section, click the "To address" field. Only one address is available, as shown below, and it's "local" -- that is, the Primary Node itself.
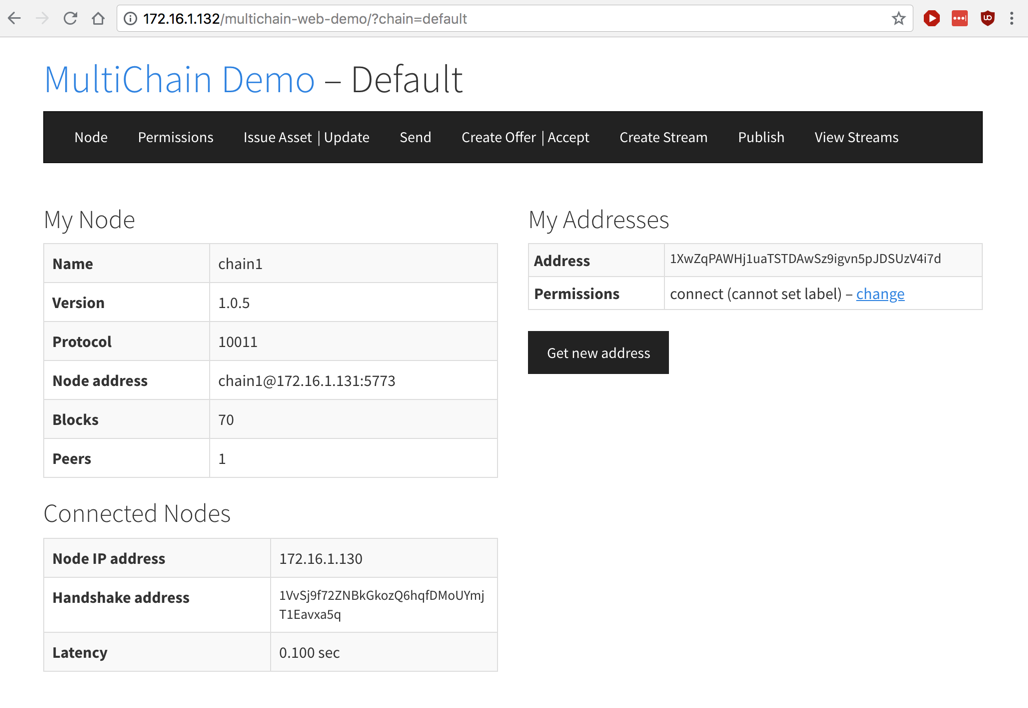
We can't send assets to the Secondary Node, because it doesn't have receive permission.
On the right side, in the "Change Permissions" section, the "For address" is empty, as shown below.
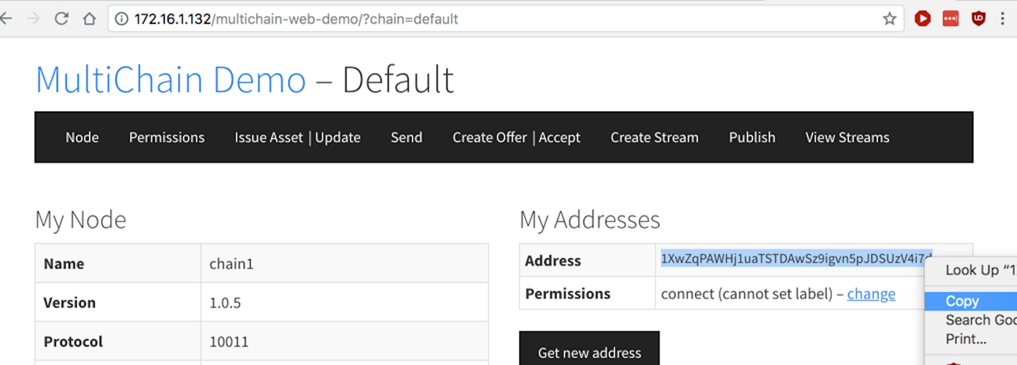
In the Secondary Node's GUI, at the top right, in the "My Addresses" section, highlight the address, right-click, and click Copy, as shown below.
In the Primary Node's GUI, in the right side, in the "Change Permissions" section, paste the address into the "For address" field.
Check Send and Receive, as shown below.

Click the "Change Permissions" button. A green message says "Permissions successfully changed...".
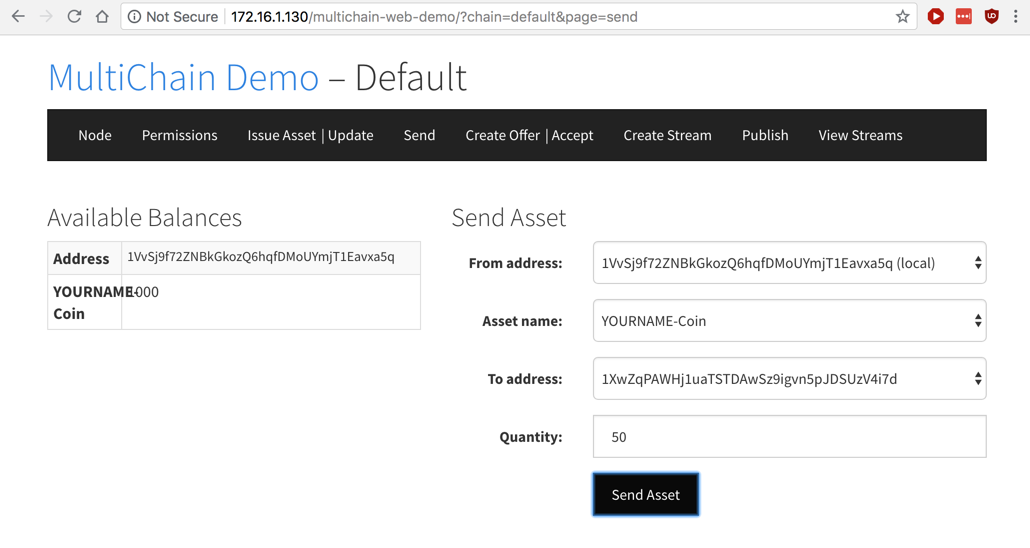
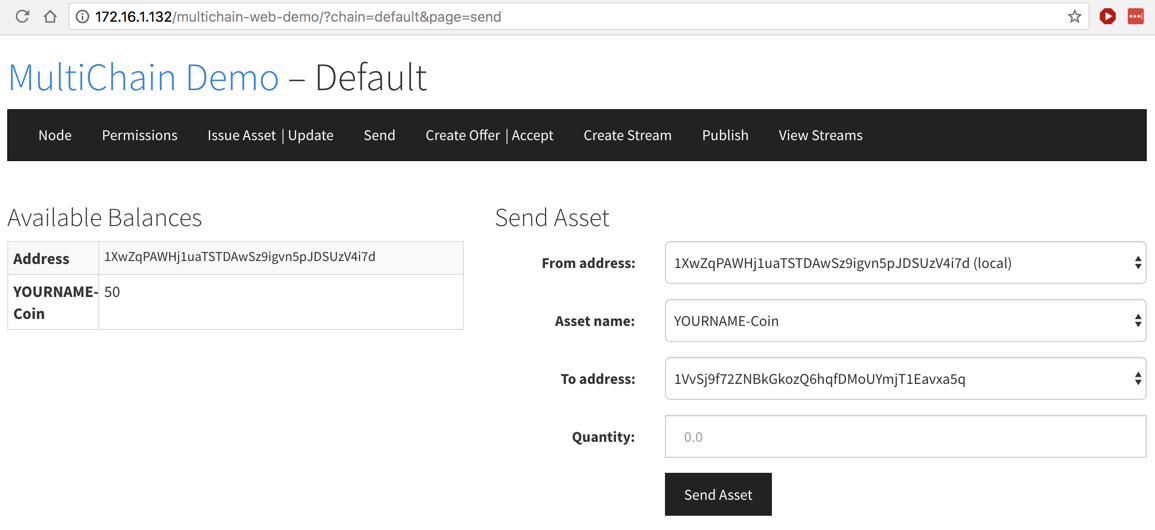
On the right side, in the "Send Asset" section, click the "To address" field and select the address that is not "local".
Enter a Quantity of 50, as shown below.
Click the "Send Asset" button.
A green message says "Asset successfully sent...".
In the Secondary Node's GUI, in the top menu bar, click Send.
On the left side, the "Available Balances" section now shows 50 "YOURNAME-Coin", as shown below.
Fill in these fields, leaving the other fields at their default values, and replacing "YOURNAME" with your own name, as shown below.
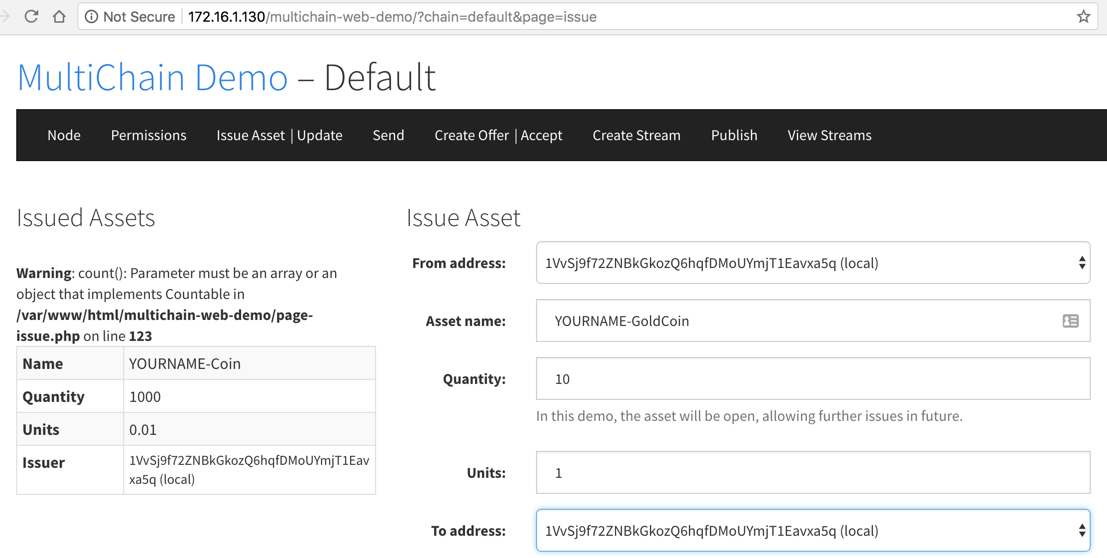
Scroll to the bottom of the page and click the "Issue Asset" button.
A green message says "Asset successfully issued...".
In the Primary Node's GUI, in the top menu bar, click "Create Offer".
On the left side, verify that your Available Balances include both GoldCoins and Coins, as shown below.
On the right side, in the "Create Offer" section, enter these values:
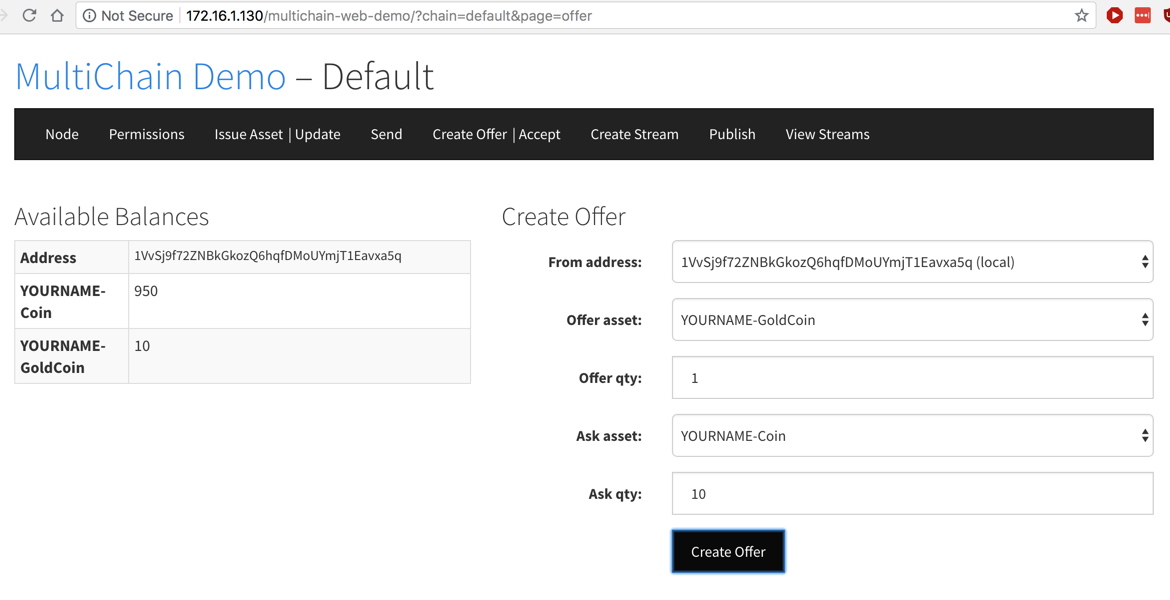
Click the "Create Offer" button.
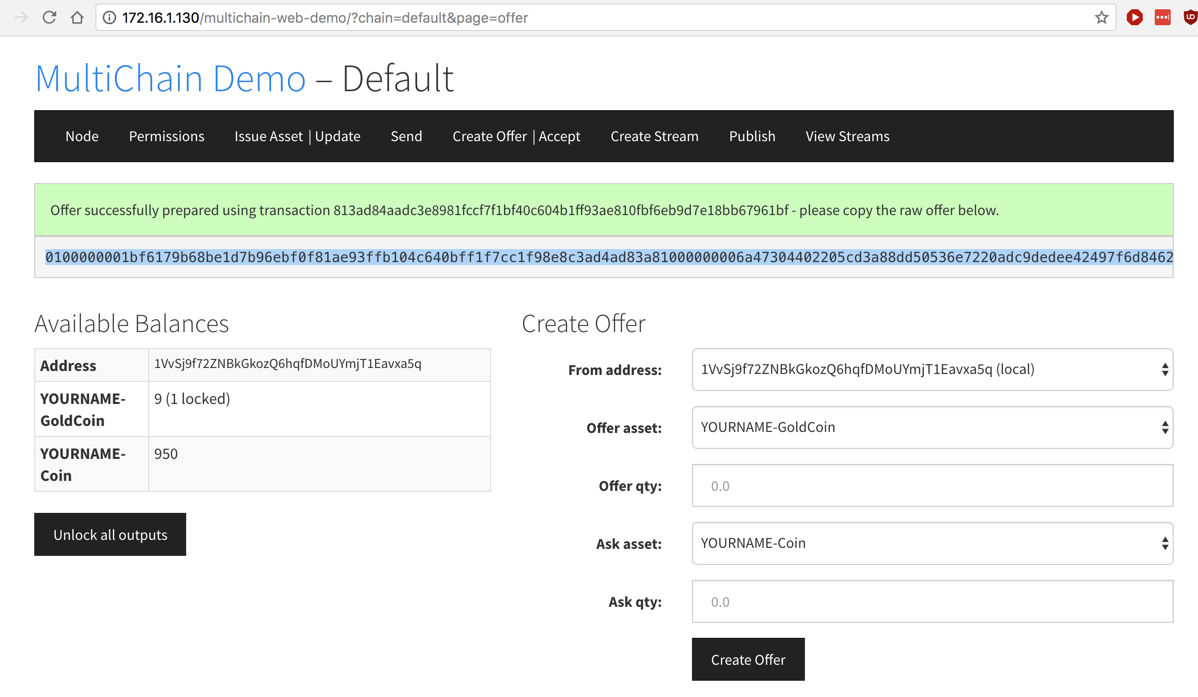
A green message says "Offer successfully prepared...", as shown below.
On the left side, in the "Available Balances" section, one YOURNAME-GoldCoin is now "locked" -- that is, it cannot be spent for any other purpose, to ensure that it remains available for the atomic exchange.
Under the green message a long line of hexadecimal text appears, as highlighted in the image below. Double-click it and copy it to the Clipboard.
On the right side, in the "Decode Offer" field, paste in the hexadecimal text, as shown below.
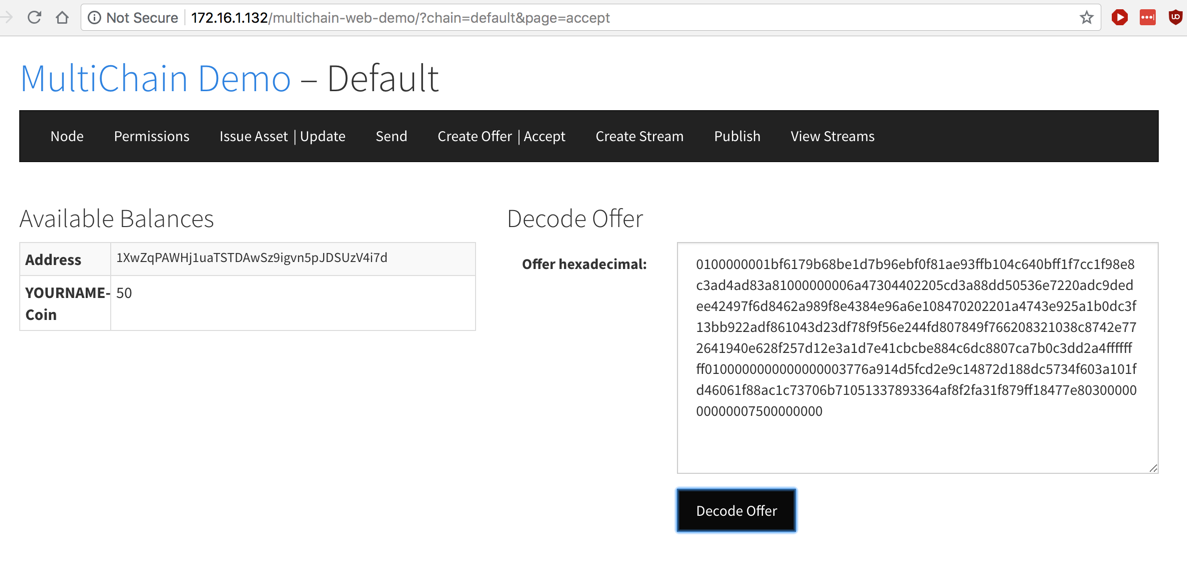
Click the "Decode Offer" button.
The "Complete Offer" section appears, as shown below, showing that we can get a YOURNAME-GoldCoin for ten YOURNAME-Coins.
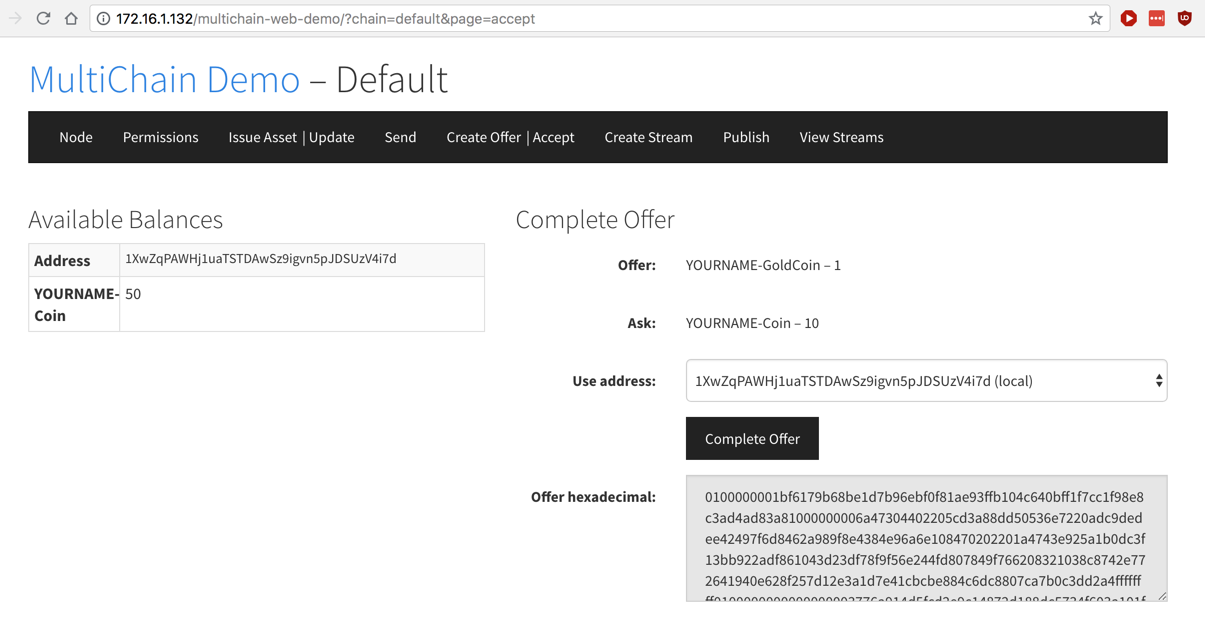
Click the "Complete Offer" button.
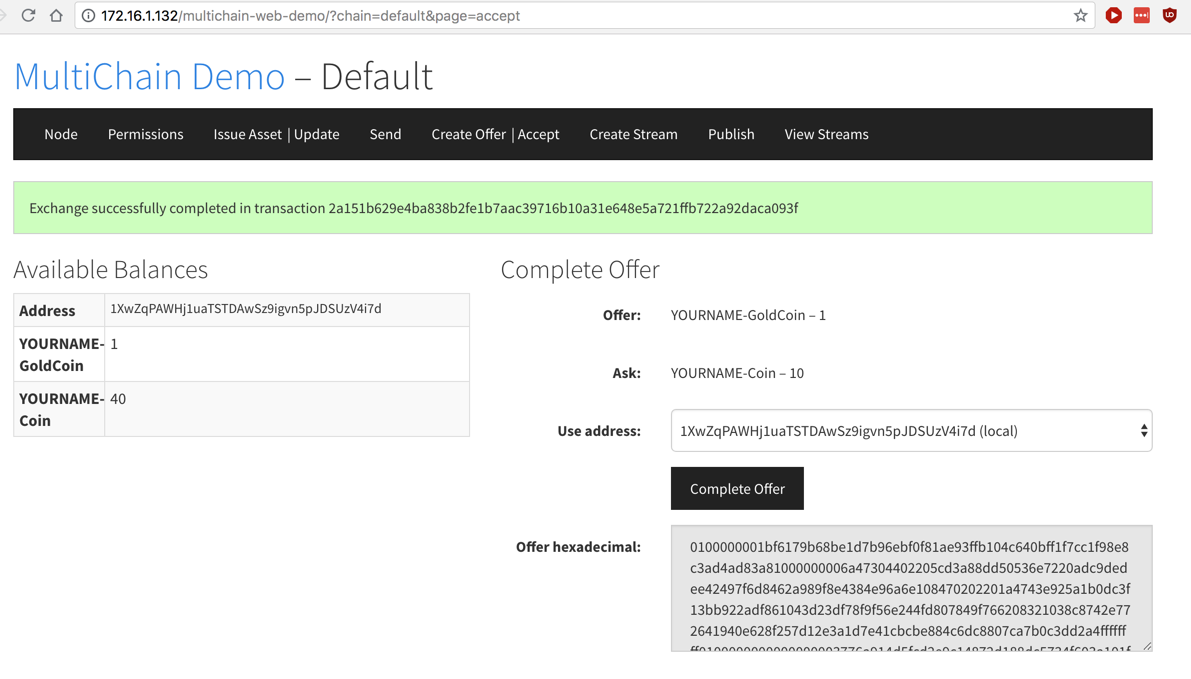
The exchange is successful, and you now have a GoldCoin, as shown below.
C 311.2: Viewing the Secondary Node (10 pts)
In the Secondary Node's GUI, in the top menu bar, click Node.On the right side, in the "Permissions" line, find the word that is redacted in the image below. That's the flag.
Posted 6-4-16 by Sam Bowne
Revised 6-11-17
Updated to 1.0.1 10-16-17
Changed to a Windows project 6-15-18
GUI Troubleshooting images added 7-20-18
Moved to Google Cloud and new scoring engine 7-7-19
Updated 11-18-20
Updated 9-20-2021