Vector image by VectorStock / vectorstock
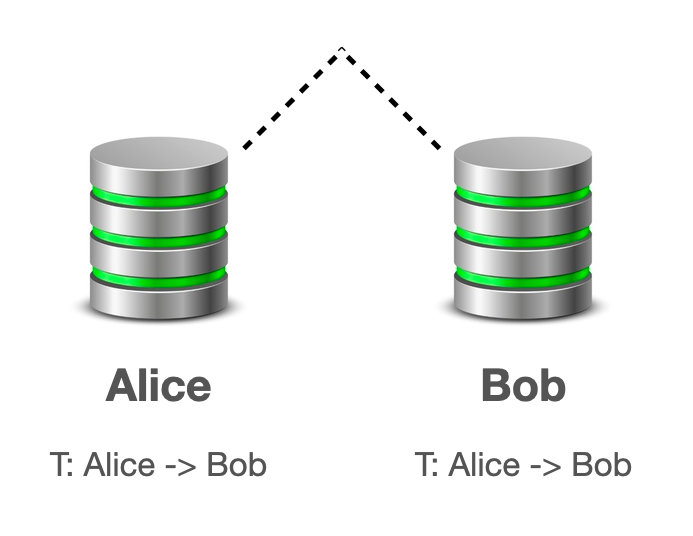
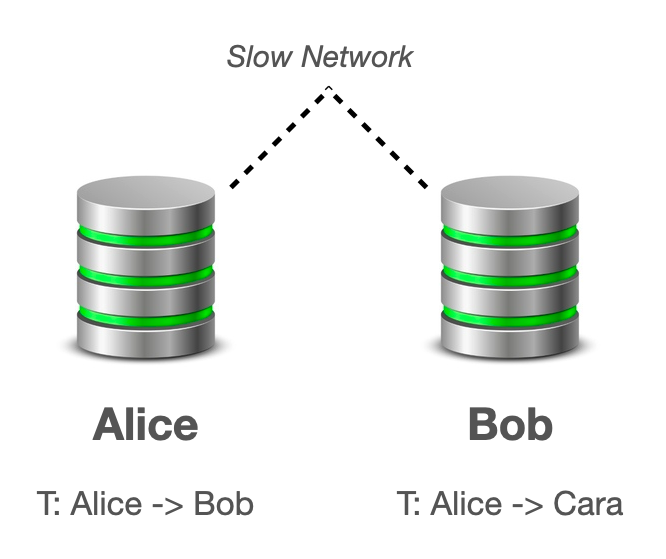
If the network connecting the miners is slow, both Alice's and Bob's miners can mine that block and proceed to later blocks, forking the blockchain into two branches.
Eventually the two blockchains will connect, the longer one will be retained, and the shorter one discarded.
But before that happens, Alice can run away with both the items she purchased from Bob and Cara, so one of them becomes a victim of fraud.
In order to get away with it consistently, one miner needs more than half the total mining power on the network, hence the name "51%". Then the fast miner can choose which transaction to keep, and race ahead, producing the longer blockchain, so the other one will be discarded later.
wget https://bitcoin.org/bin/bitcoin-core-0.21.1/bitcoin-0.21.1-x86_64-linux-gnu.tar.gz
tar xvf bitcoin-0.21.1-x86_64-linux-gnu.tar.gz
mv bitcoin-0.21.1 bitcoin
bitcoin/bin/bitcoind -regtest -fallbackfee='0.00000001' \
  -rpcport=8332 -rpcuser=alice -rpcpassword=alicepass
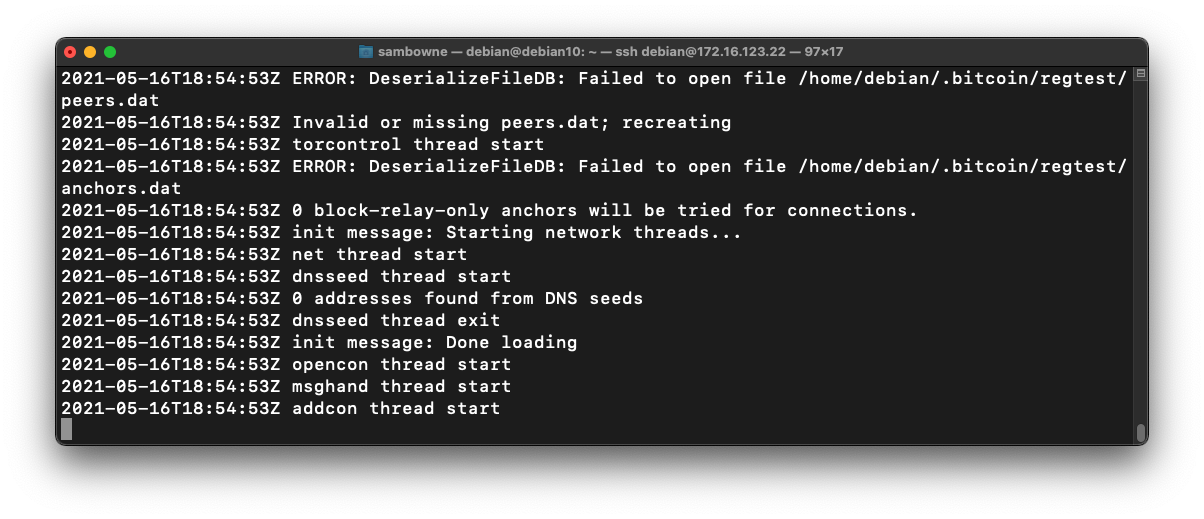
Leave this window running.
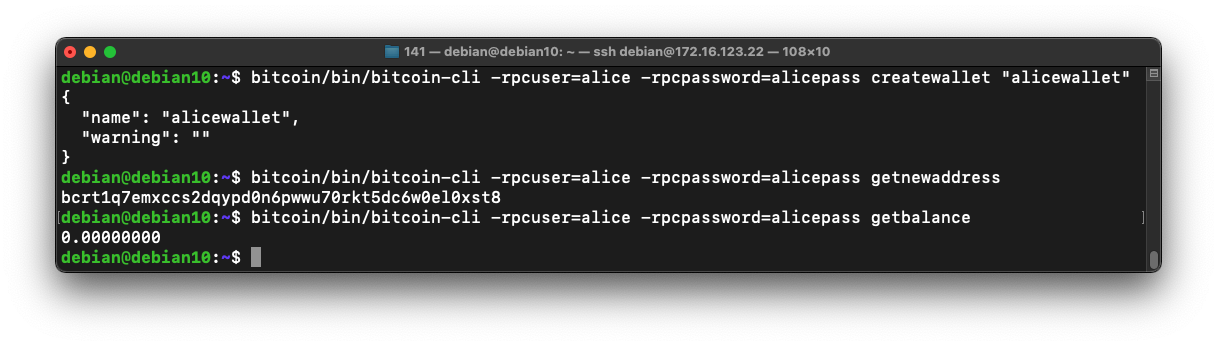
bitcoin/bin/bitcoin-cli -rpcuser=alice -rpcpassword=alicepass createwallet "alicewallet"
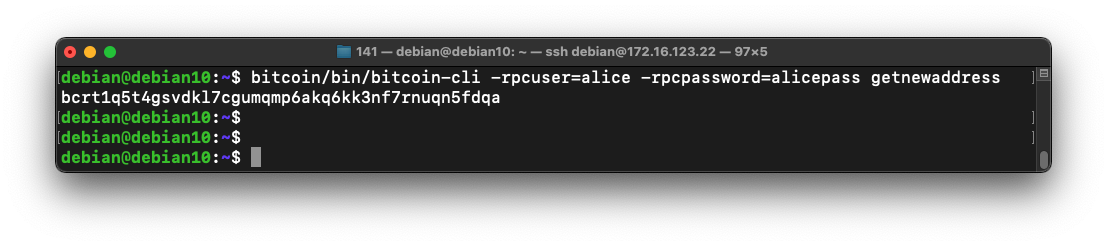
bitcoin/bin/bitcoin-cli -rpcuser=alice -rpcpassword=alicepass getnewaddress
bitcoin/bin/bitcoin-cli -rpcuser=alice -rpcpassword=alicepass getbalance
Right now Alice's balance is zero, as shown below.
Open a third Terminal window and execute these commands:
mkdir .bitcoin2
bitcoin/bin/bitcoind -regtest \
  -rpcuser=bob -rpcpassword=bobpass \
  -port=28445 -rpcport=28333 \
  -datadir=.bitcoin2
bitcoin/bin/bitcoin-cli -rpcuser=alice -rpcpassword=alicepass \
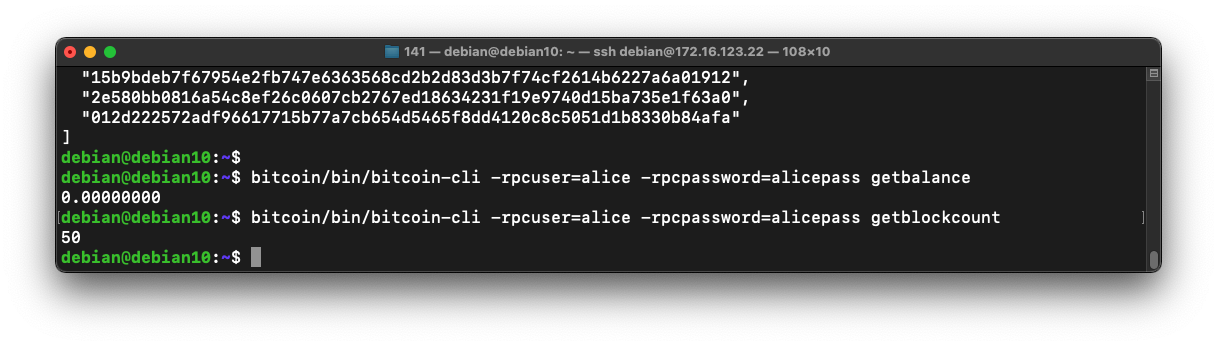
generatetoaddress 50 bcrt1q7emxccs2dqypd0n6pwwu70rkt5dc6w0el0xst8
bitcoin/bin/bitcoin-cli -rpcuser=alice -rpcpassword=alicepass getbalance
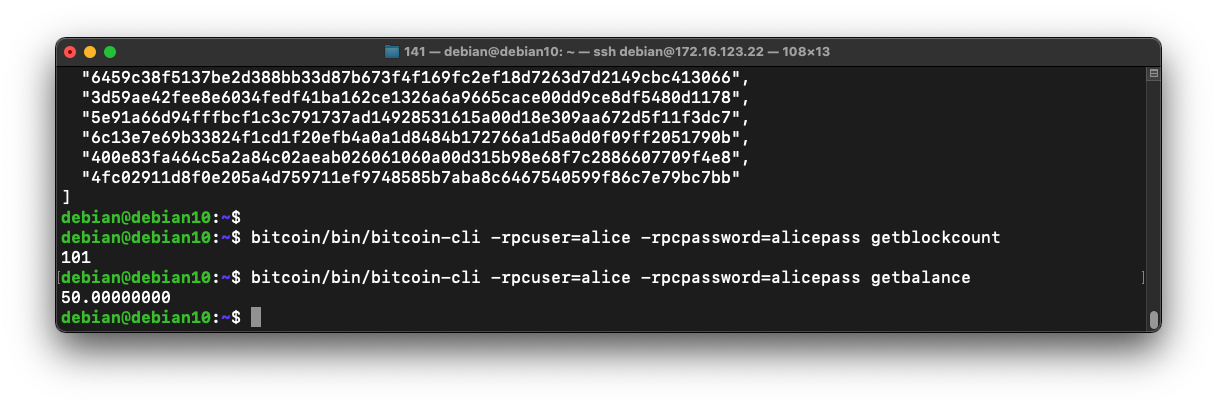
bitcoin/bin/bitcoin-cli -rpcuser=alice -rpcpassword=alicepass getblockcount
However, your balance is still zero, as shown below, even though the block count is now 50.
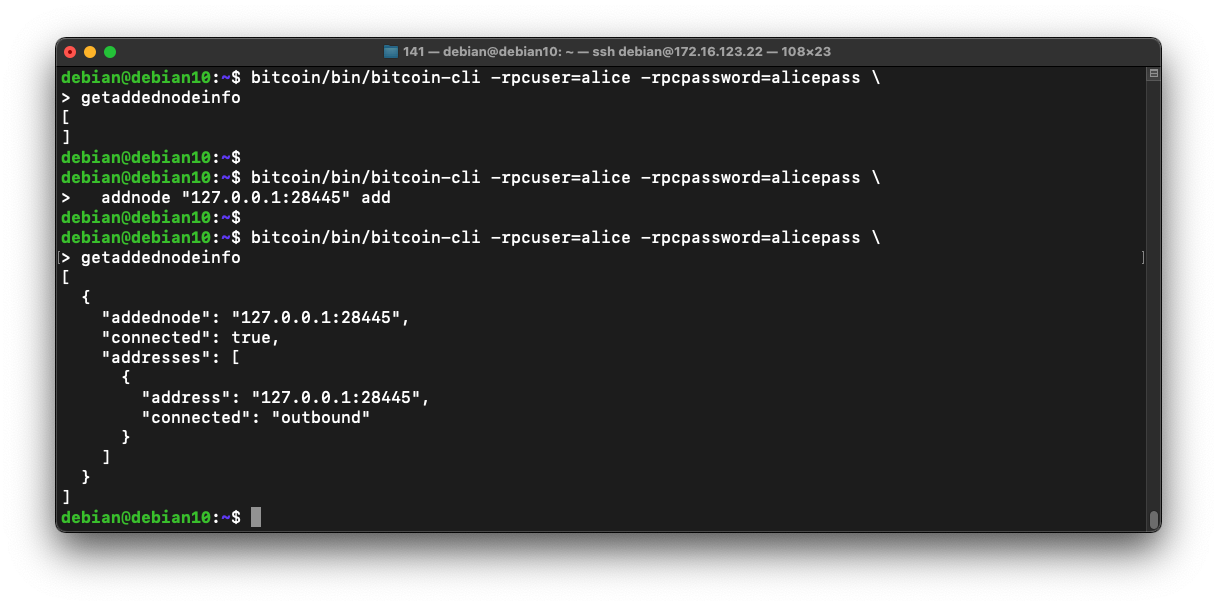
bitcoin/bin/bitcoin-cli -rpcuser=alice -rpcpassword=alicepass \
getaddednodeinfo
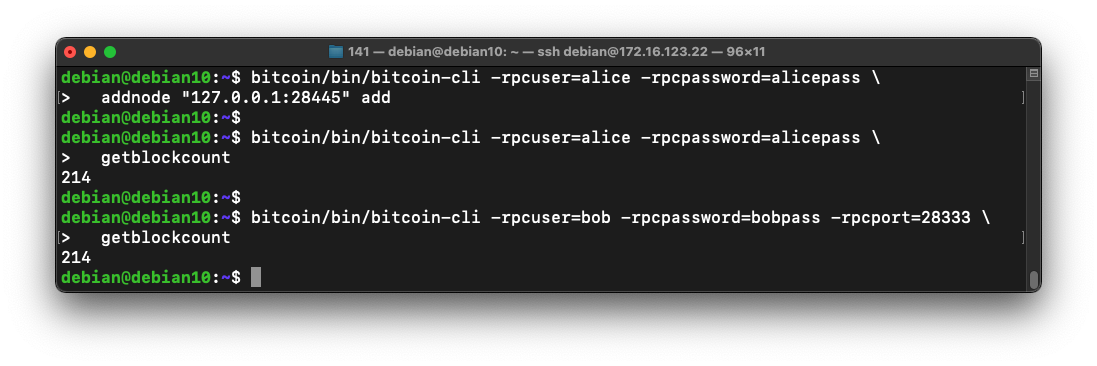
bitcoin/bin/bitcoin-cli -rpcuser=alice -rpcpassword=alicepass \
addnode "127.0.0.1:28445" add
bitcoin/bin/bitcoin-cli -rpcuser=alice -rpcpassword=alicepass \
getaddednodeinfo
The second command runs without errors.
Now the "getpeerinfo" command shows information about Bob's node, as shown below.
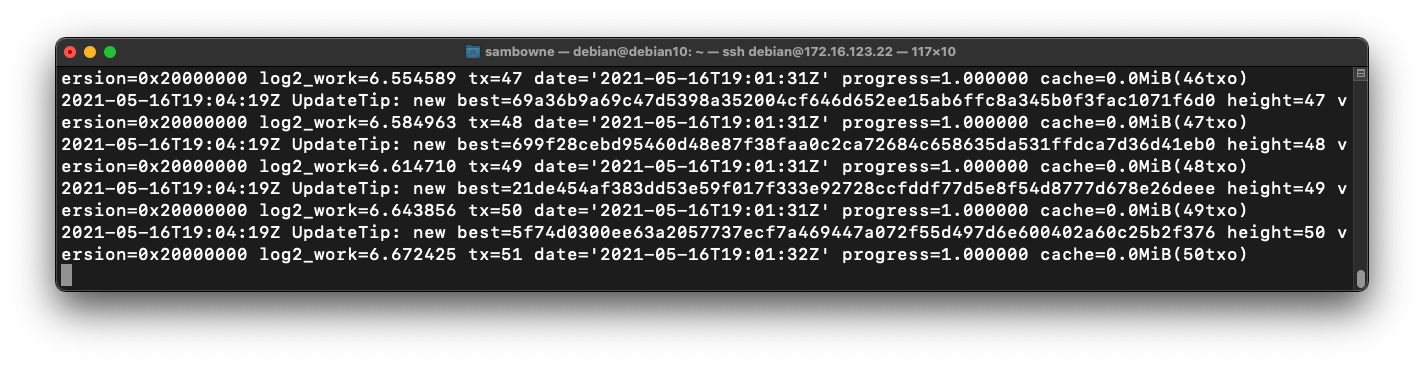
The window running your second node shows a long list of "UpdateTip" messages, as shown below.
These show Bob's node catching up with the blocks that were mined on Alice's node.
Execute these commands, replacing the address with Alice's address:
bitcoin/bin/bitcoin-cli -rpcuser=alice -rpcpassword=alicepass \
  generatetoaddress 51 bcrt1q7emxccs2dqypd0n6pwwu70rkt5dc6w0el0xst8

bitcoin/bin/bitcoin-cli -rpcuser=alice -rpcpassword=alicepass getblockcount
bitcoin/bin/bitcoin-cli -rpcuser=alice -rpcpassword=alicepass getbalance
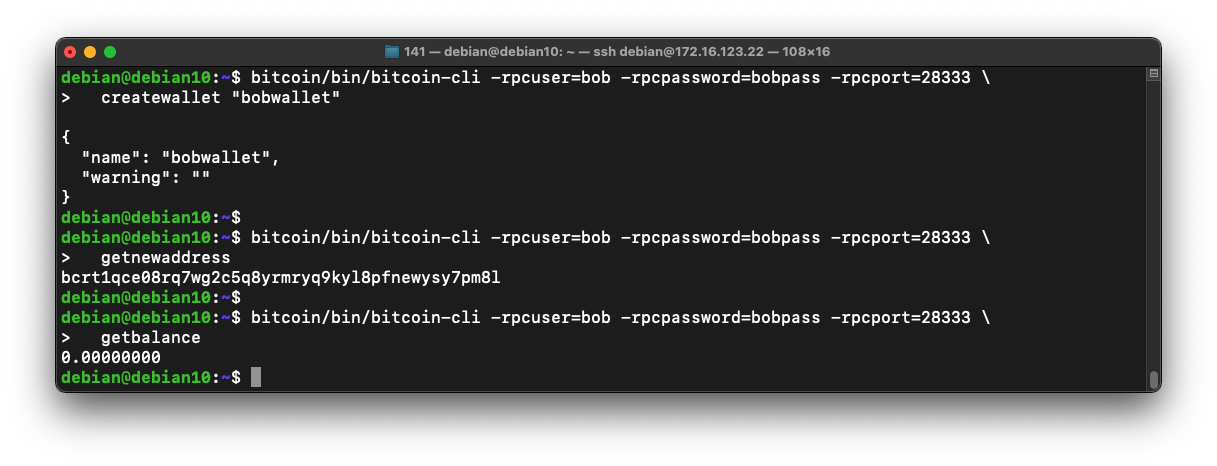
bitcoin/bin/bitcoin-cli -rpcuser=bob -rpcpassword=bobpass -rpcport=28333 \
  createwallet "bobwallet"

bitcoin/bin/bitcoin-cli -rpcuser=bob -rpcpassword=bobpass -rpcport=28333 \
  getnewaddress

bitcoin/bin/bitcoin-cli -rpcuser=bob -rpcpassword=bobpass -rpcport=28333 \
  getbalance
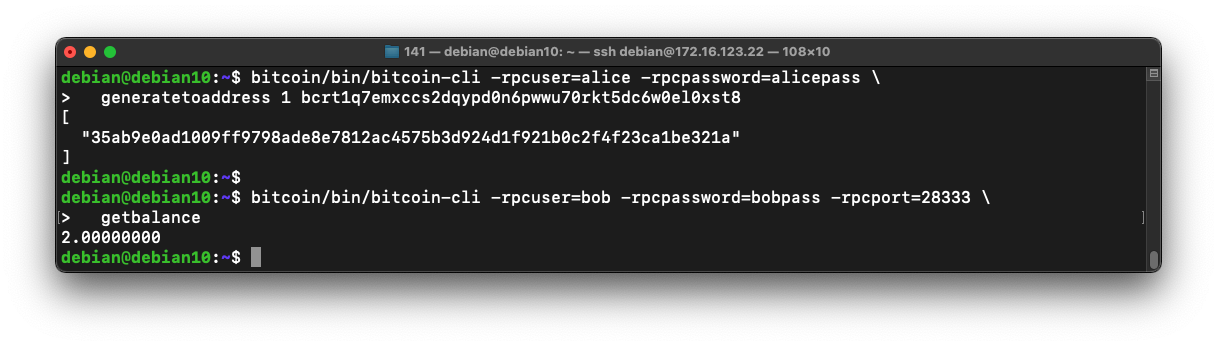
Bob's balance is zero, as shown below.
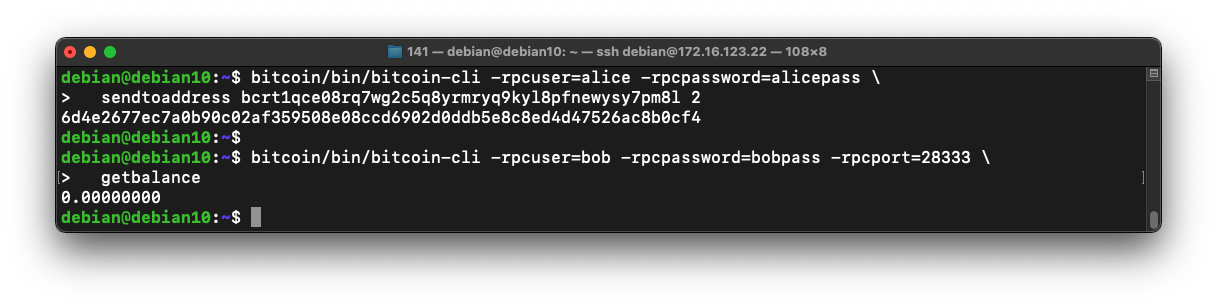
bitcoin/bin/bitcoin-cli -rpcuser=alice -rpcpassword=alicepass \
  sendtoaddress bcrt1qce08rq7wg2c5q8yrmryq9kyl8pfnewysy7pm8l 2

bitcoin/bin/bitcoin-cli -rpcuser=bob -rpcpassword=bobpass -rpcport=28333 \
  getbalance
This is because the transaction has been submitted, but not yet added to a block and mined.
Make a note of this Transaction ID--you'll need it below.
bitcoin/bin/bitcoin-cli -rpcuser=alice -rpcpassword=alicepass \
  generatetoaddress 1 bcrt1q7emxccs2dqypd0n6pwwu70rkt5dc6w0el0xst8

bitcoin/bin/bitcoin-cli -rpcuser=bob -rpcpassword=bobpass -rpcport=28333 \
  getbalance
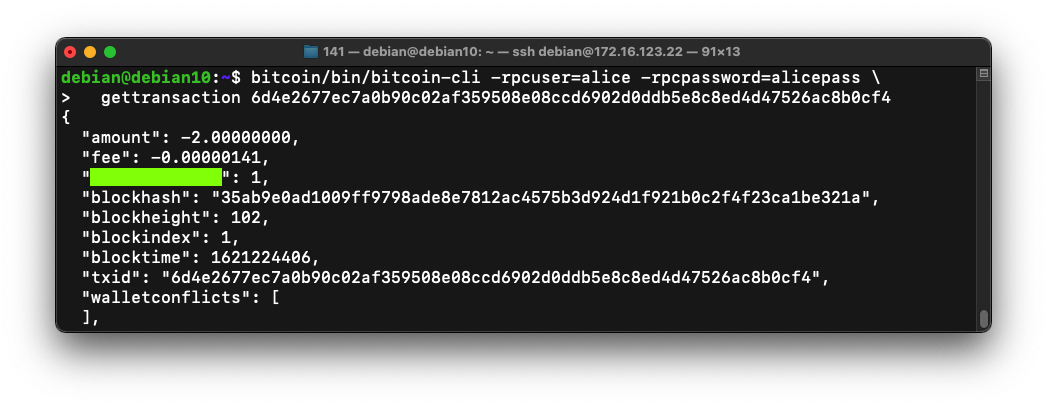
C 303.1: gettransaction (10 pts)
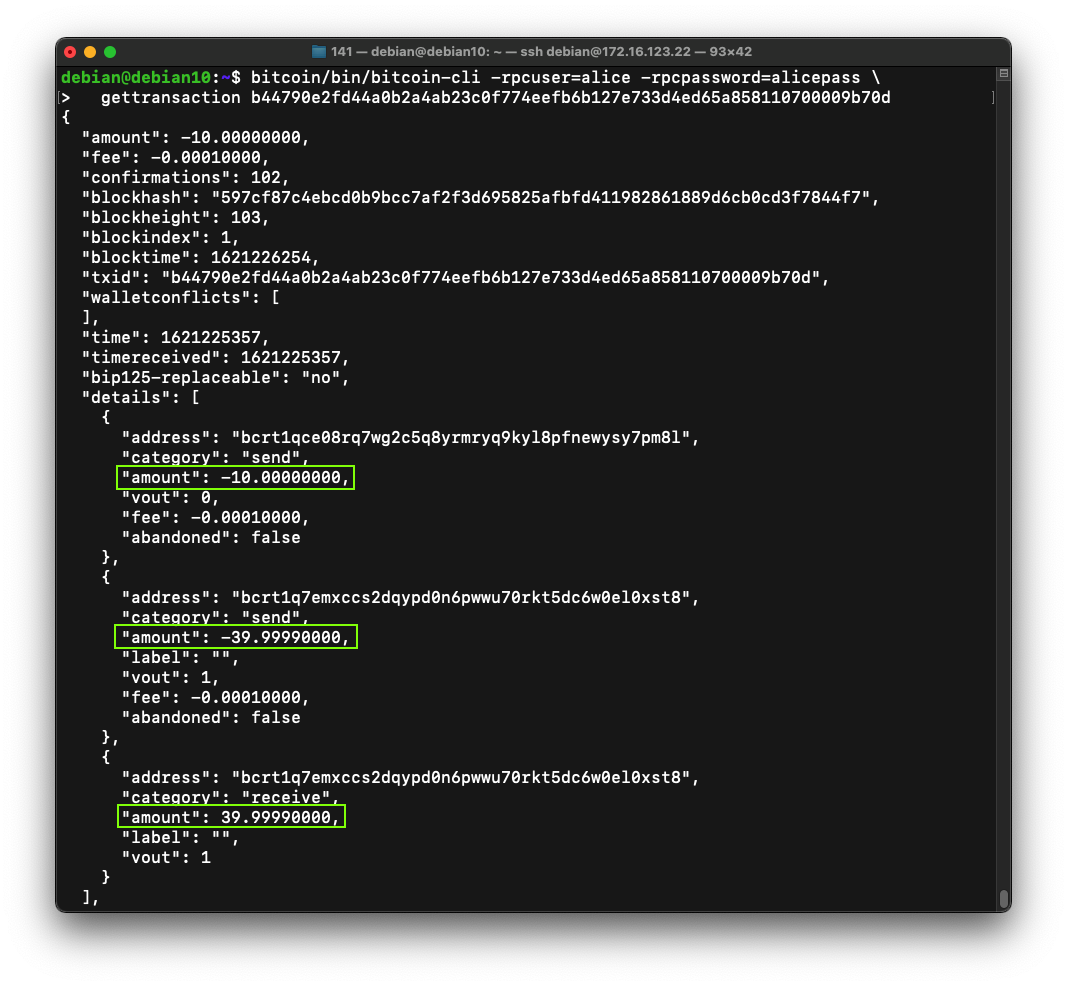
Execute this command, replacing the Transaction ID with the value you noted previously:The flag is covered by a green rectangle in the image below.
bitcoin/bin/bitcoin-cli -rpcuser=alice -rpcpassword=alicepass getnewaddress
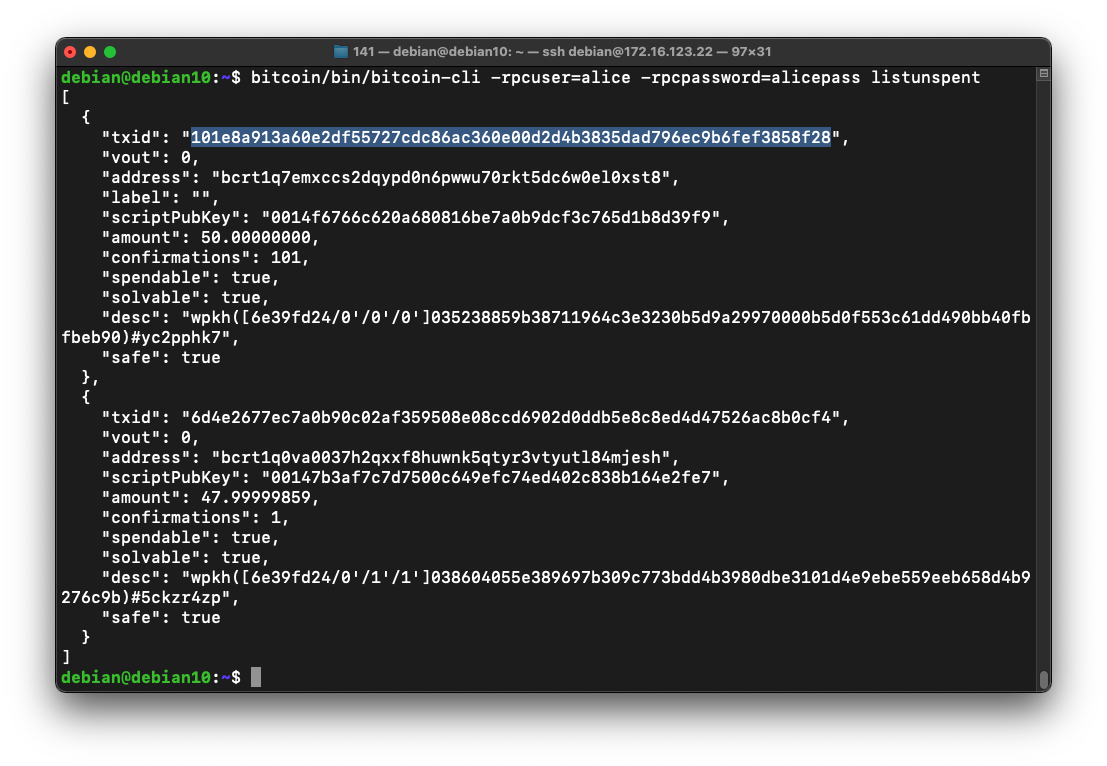
Execute this command:
bitcoin/bin/bitcoin-cli -rpcuser=alice -rpcpassword=alicepass listunspent
Find the txid. In the image below, it's
101e8a913a60e2df55727cdc86ac360e00d2d4b3835dad796ec9b6fef3858f28
Execute this command, replacing the three values below with:
bitcoin/bin/bitcoin-cli -rpcuser=alice -rpcpassword=alicepass createrawtransaction \
    '[{"txid" : "101e8a913a60e2df55727cdc86ac360e00d2d4b3835dad796ec9b6fef3858f28", "vout" : 0}]' \
    '{"bcrt1qce08rq7wg2c5q8yrmryq9kyl8pfnewysy7pm8l": 10.0, "bcrt1q7emxccs2dqypd0n6pwwu70rkt5dc6w0el0xst8": 39.9999}'

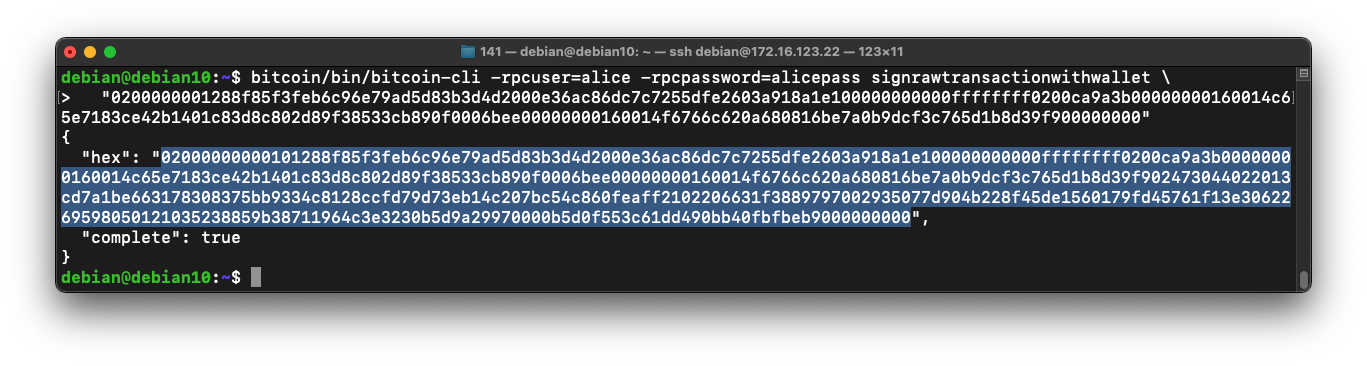
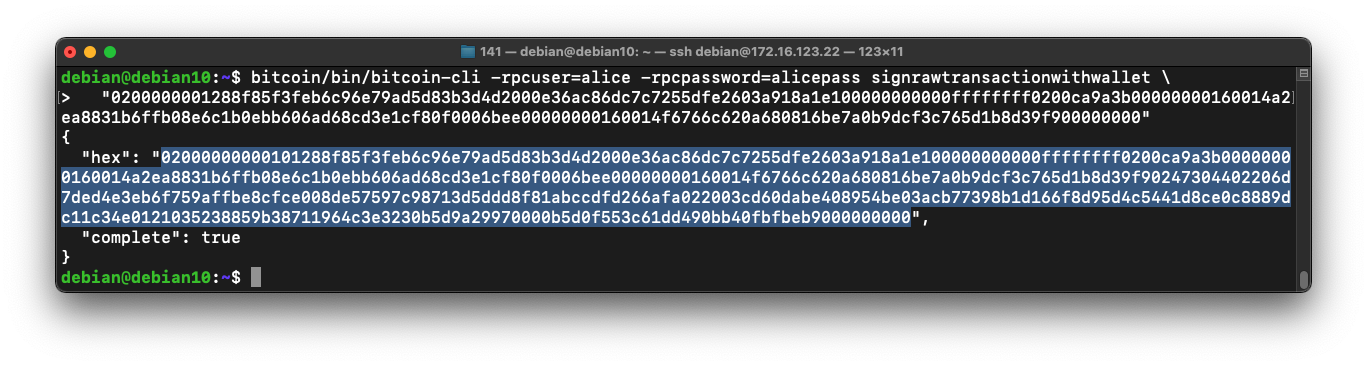
Finally, we need to sign that transaction with Alice's private key.
Execute this command, replacing the argument with your raw transaction data. (I omitted the center of the blob to fit the command on the page).
bitcoin/bin/bitcoin-cli -rpcuser=alice -rpcpassword=alicepass signrawtransactionwithwallet \
  "0200000...9636a5d00000000"
This is the signed raw transaction for Alice -> Bob. Save it--you'll need it later.
bitcoin/bin/bitcoin-cli -rpcuser=alice -rpcpassword=alicepass createrawtransaction \
    '[{"txid" : "101e8a913a60e2df55727cdc86ac360e00d2d4b3835dad796ec9b6fef3858f28", "vout" : 0}]' \
    '{"bcrt1q5t4gsvdkl7cgumqmp6akq6kk3nf7rnuqn5fdqa": 10.0, "bcrt1q7emxccs2dqypd0n6pwwu70rkt5dc6w0el0xst8": 39.9999}'

Finally, we need to sign that transaction with Alice's private key.
Execute this command, replacing the argument with your raw transaction data.
bitcoin/bin/bitcoin-cli -rpcuser=alice -rpcpassword=alicepass signrawtransactionwithwallet \
  "0200000...9636a5d00000000"
This is the signed raw transaction for Alice -> Cara. Save it--you'll need it later.
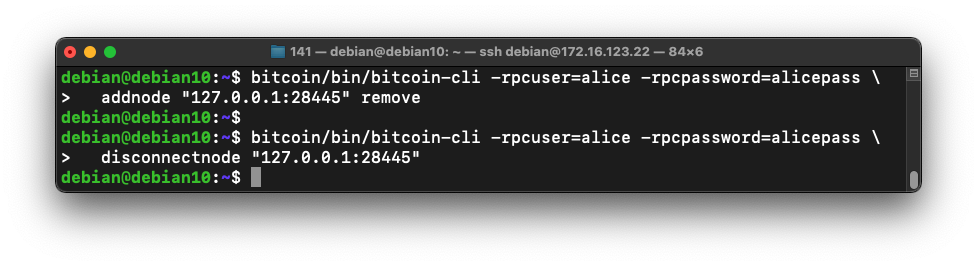
bitcoin/bin/bitcoin-cli -rpcuser=alice -rpcpassword=alicepass \
  addnode "127.0.0.1:28445" remove

bitcoin/bin/bitcoin-cli -rpcuser=alice -rpcpassword=alicepass \
  disconnectnode "127.0.0.1:28445"
bitcoin/bin/bitcoin-cli -rpcuser=alice -rpcpassword=alicepass \
  sendrawtransaction "020000...000000"
Record this Transaction ID--you'll need it later.
The transaction appears in Alice's node (the top Terminal window), but not in Bob's node, because the two nodes are disconnected.
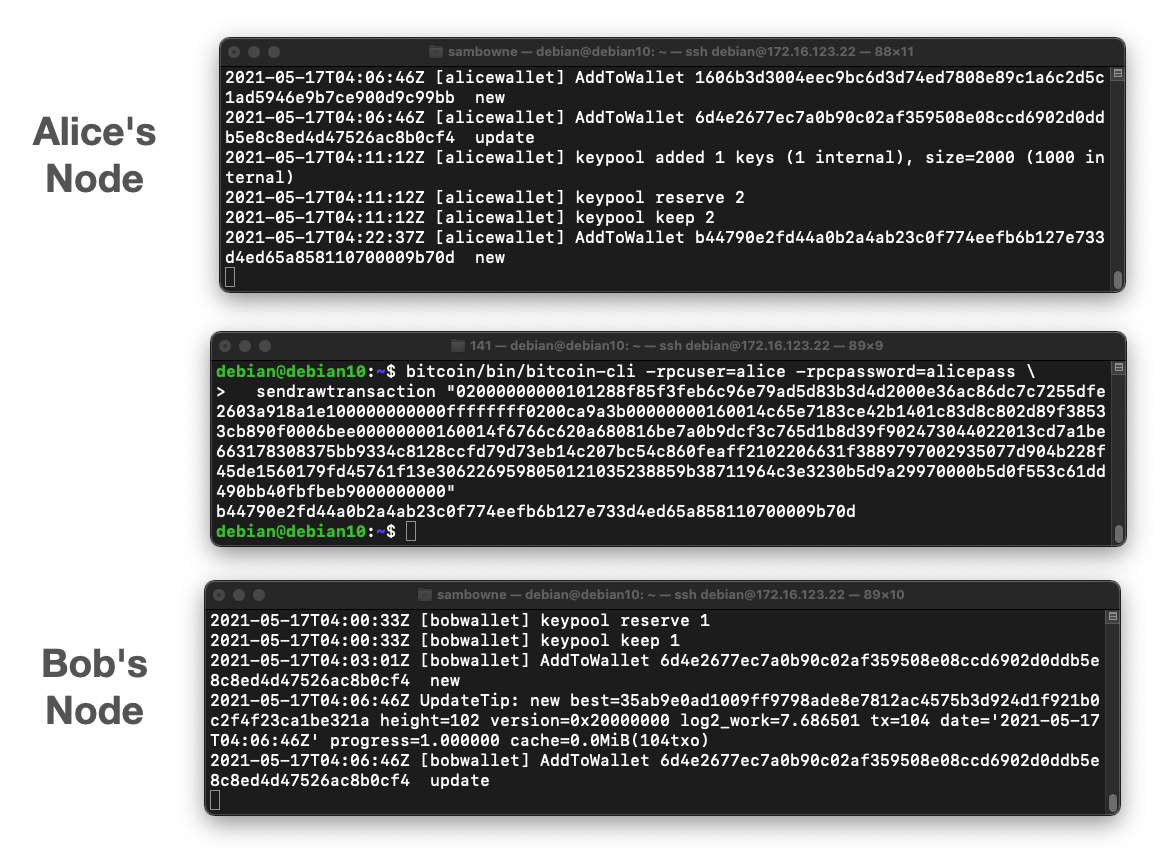
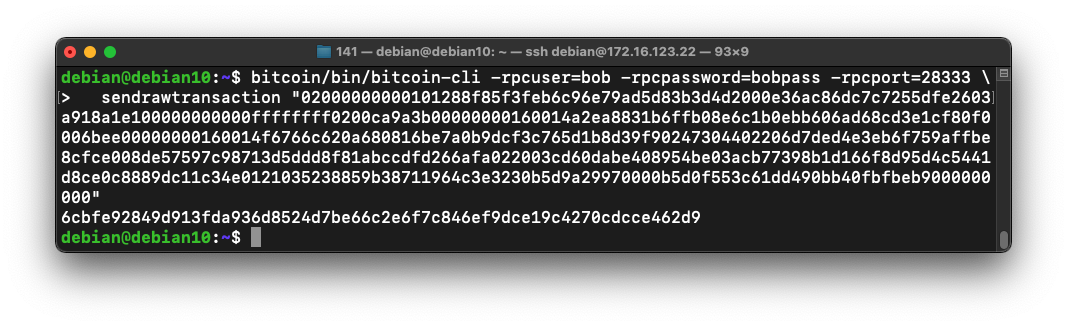
bitcoin/bin/bitcoin-cli -rpcuser=bob -rpcpassword=bobpass -rpcport=28333 \
  sendrawtransaction "020000...000000"
Record this Transaction ID--you'll need it later.
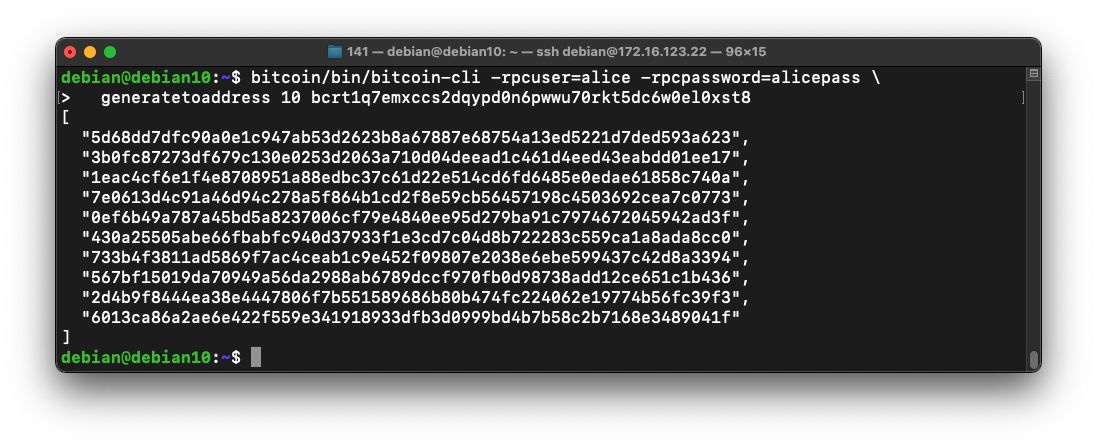
bitcoin/bin/bitcoin-cli -rpcuser=alice -rpcpassword=alicepass \
  generatetoaddress 10 bcrt1q7emxccs2dqypd0n6pwwu70rkt5dc6w0el0xst8
bitcoin/bin/bitcoin-cli -rpcuser=alice -rpcpassword=alicepass \
  gettransaction b44790e2fd44a0b2a4ab23c0f774eefb6b127e733d4ed65a858110700009b70d
(You will have a smaller number of confirmations--don't worry about that.)
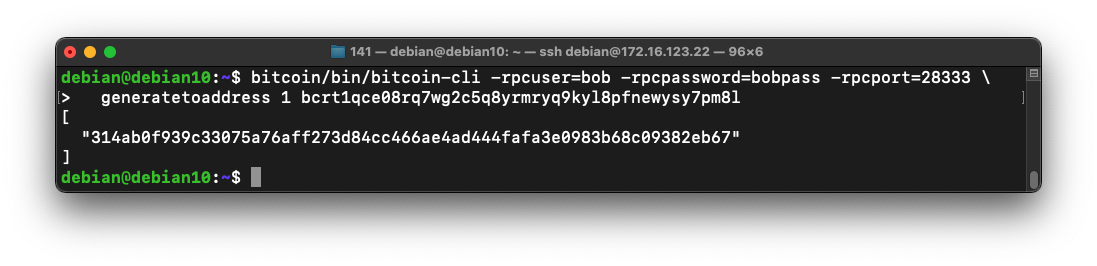
bitcoin/bin/bitcoin-cli -rpcuser=bob -rpcpassword=bobpass -rpcport=28333 \
  generatetoaddress 1 bcrt1qce08rq7wg2c5q8yrmryq9kyl8pfnewysy7pm8l
We can't verify this transaction, because it doesn't involve Bob's wallet, but it's on the blockchain. If you try to perform the sendrawtransaction action again, you'll see an error telling you that.
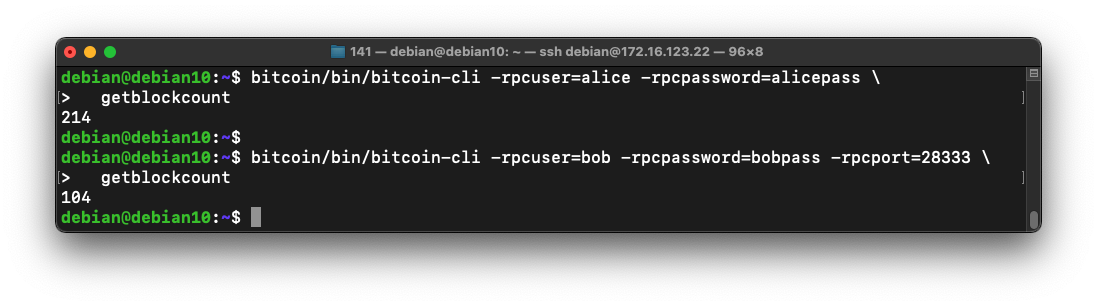
bitcoin/bin/bitcoin-cli -rpcuser=alice -rpcpassword=alicepass \
  getblockcount

bitcoin/bin/bitcoin-cli -rpcuser=bob -rpcpassword=bobpass -rpcport=28333 \
  getblockcount
bitcoin/bin/bitcoin-cli -rpcuser=alice -rpcpassword=alicepass \
  addnode "127.0.0.1:28445" add

bitcoin/bin/bitcoin-cli -rpcuser=alice -rpcpassword=alicepass \
  getblockcount

bitcoin/bin/bitcoin-cli -rpcuser=bob -rpcpassword=bobpass -rpcport=28333 \
  getblockcount
bitcoin/bin/bitcoin-cli -rpcuser=alice -rpcpassword=alicepass \
  gettransaction b44790e2fd44a0b2a4ab23c0f774eefb6b127e733d4ed65a858110700009b70d
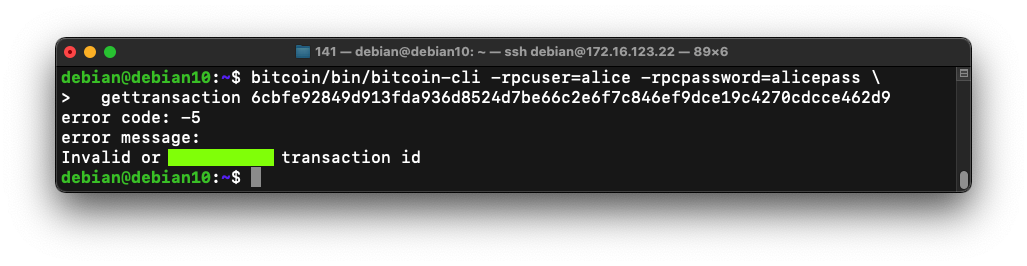
C 303.2: Verifying the Alice -> Cara Transaction (10 pts)
Execute this command, replacing the transaction ID with the value you noted earlier for the Alice -> Cara Transaction:The flag is covered by a green rectangle in the image below.
Posted 5-16-2021 by Sam Bowne