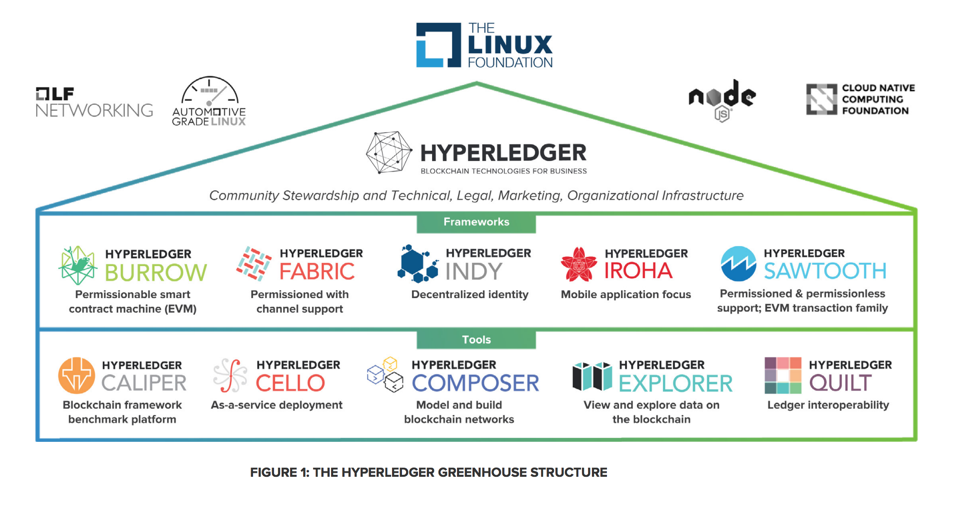
"Hyperledger serves as a 'greenhouse' that brings together users, developers, and vendors from many different sectors and market spaces. All these participants have one thing in common: All are interested in learning about, developing, and using enterprise blockchains.Here are the main components currently available for Hyperledger:
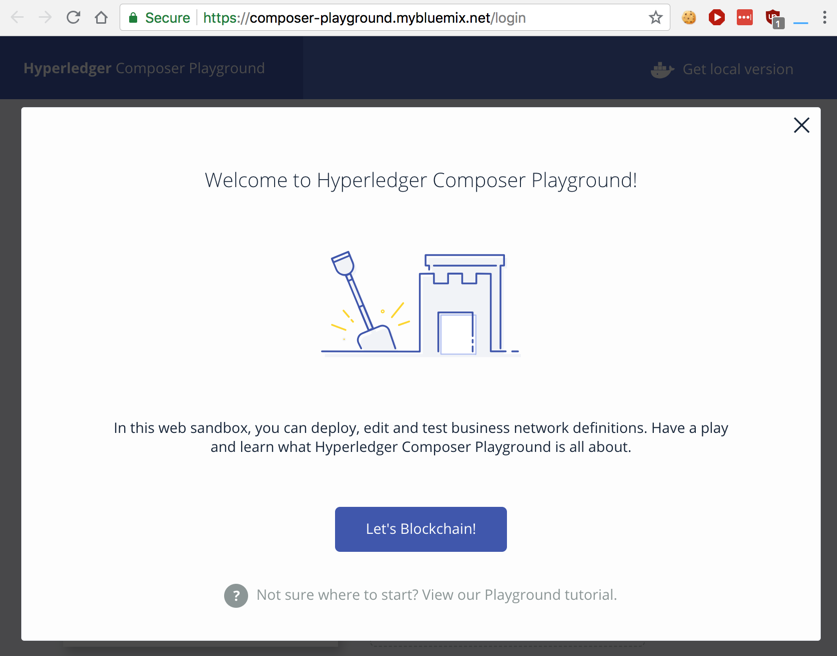
https://composer-playground.mybluemix.net/login
Click the "Let's Blockchain!" button, as shown below.
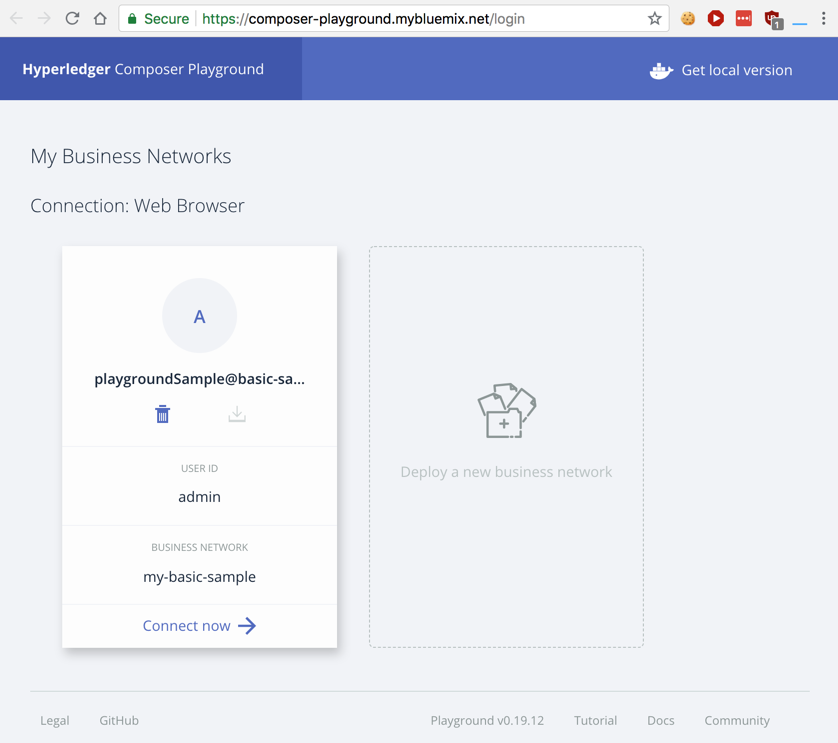
In the "playgroundSample@basic-samp..." box, click "Connect now".
The next page shows the available blockchains. The "playgroundSample" blockchain is ready to use, as shown on the left side in the image below.
In the "playgroundSample" box, click "Connect now".
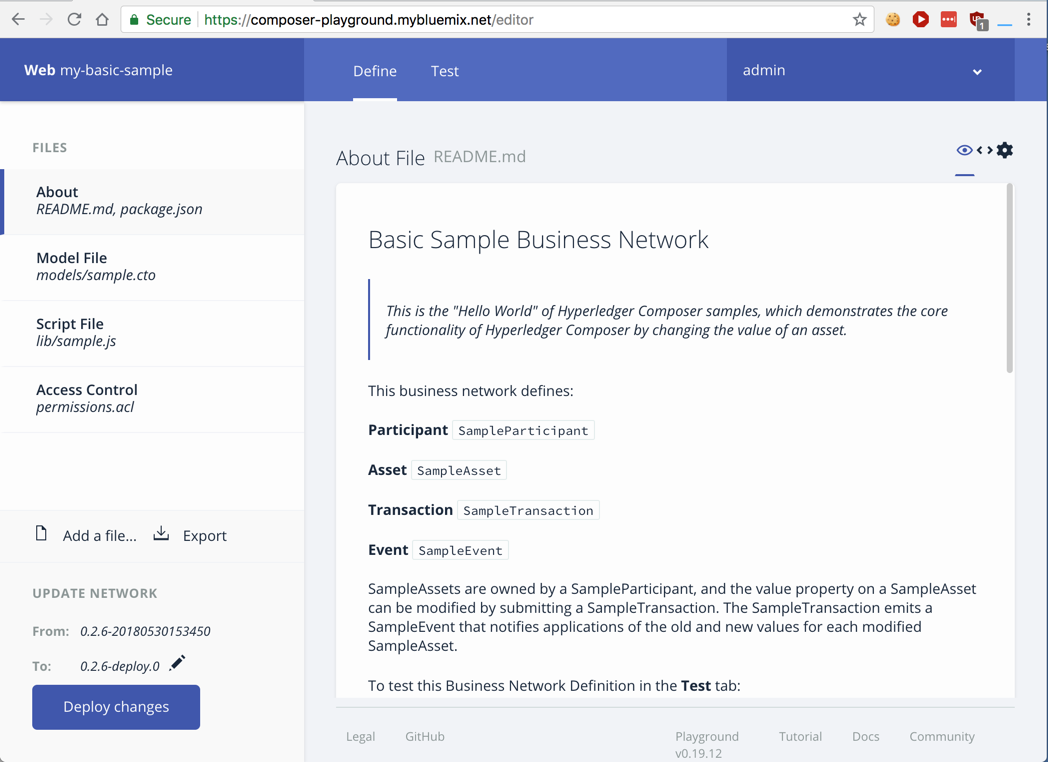
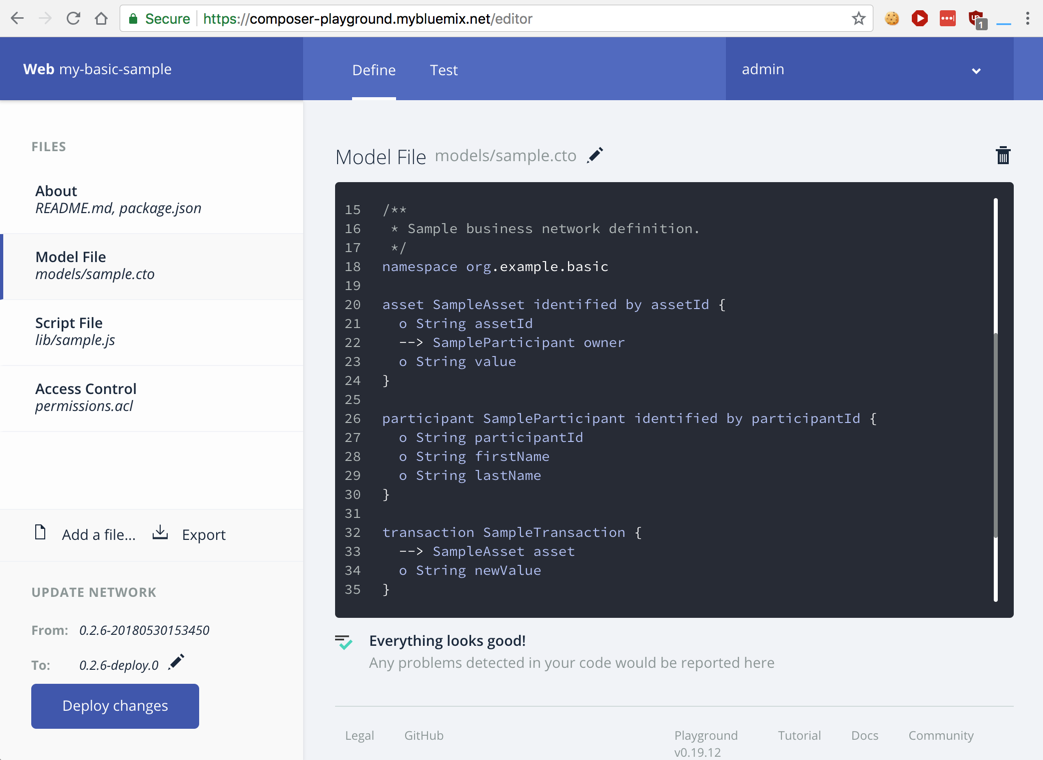
This blockchain uses four data structures, named Participant, Asset, Transaction, and Event. A Participant owns an Asset, and when the value of it changes, that is recorded by a Transaction. Each value change also triggers an Event to inform other applications of the change.
As shown below, the asset object has three attributes: "assetId", "owner", and "value", and the participant object has three attributes: "participantID", "firstName", and "lastName".
You can also see that a transaction has only one attribute: "newValue".
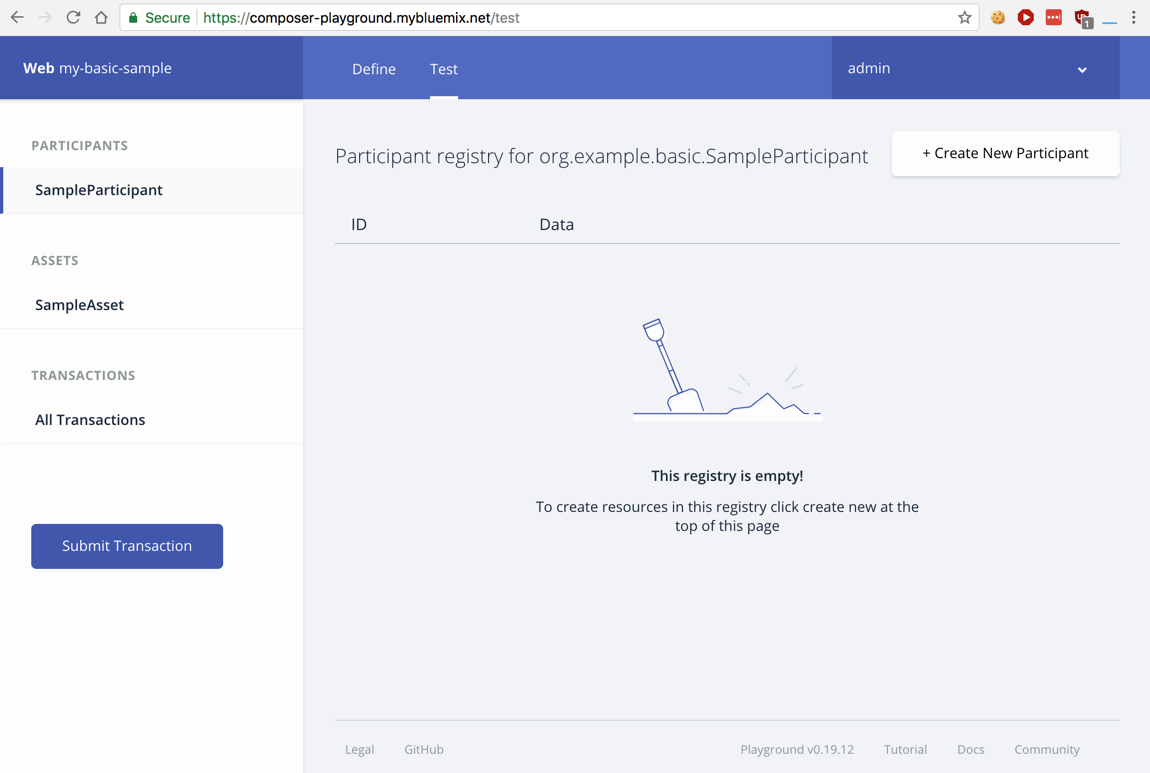
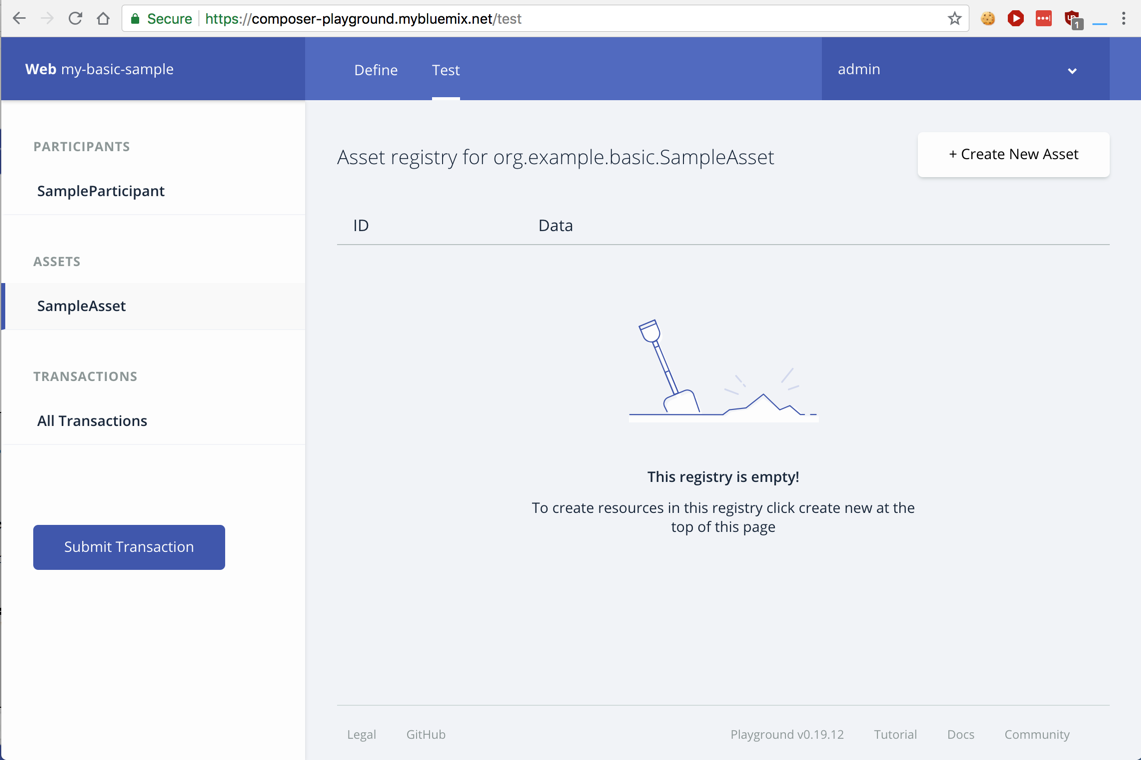
The participant registry is empty, as shown below.
At the top right, click the "+ Create New Participant" button.
Delete the code in the black box, and insert the code shown below:
{
  "$class": "org.example.basic.SampleParticipant",
  "participantId": "BG",
  "firstName": "Bill",
  "lastName": "Gates"
}
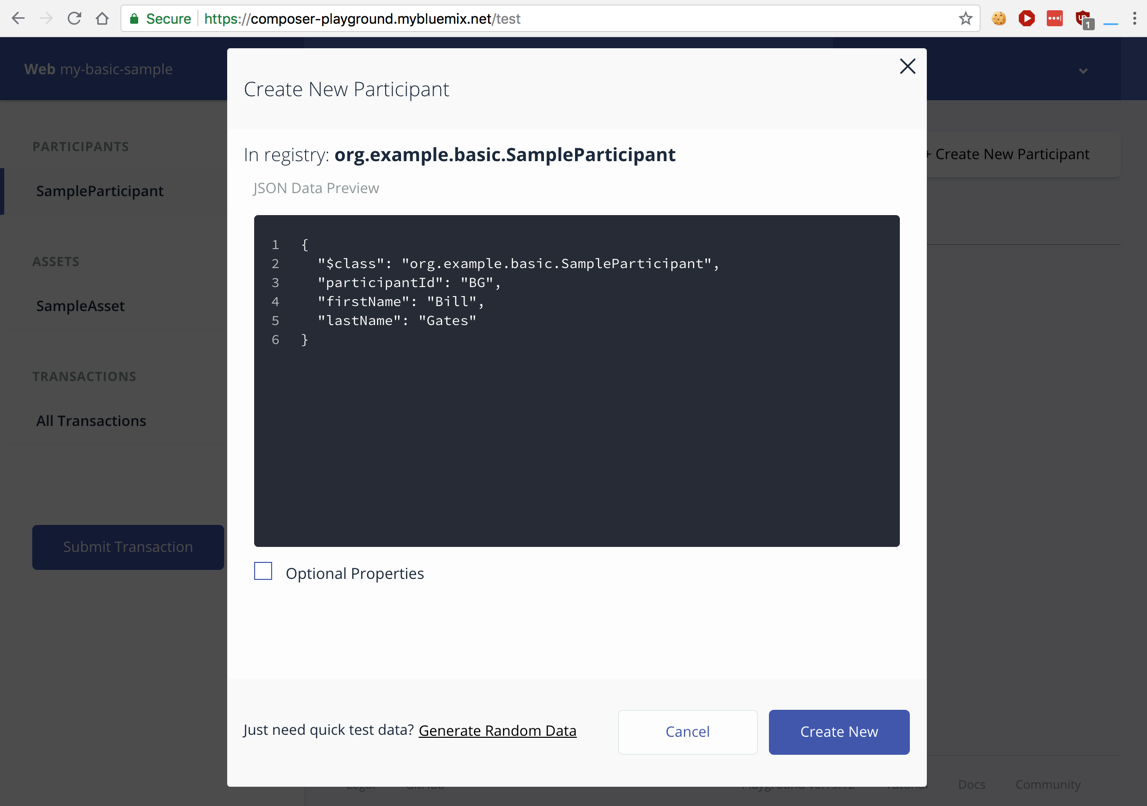
At the lower right, click the "Create New" button.
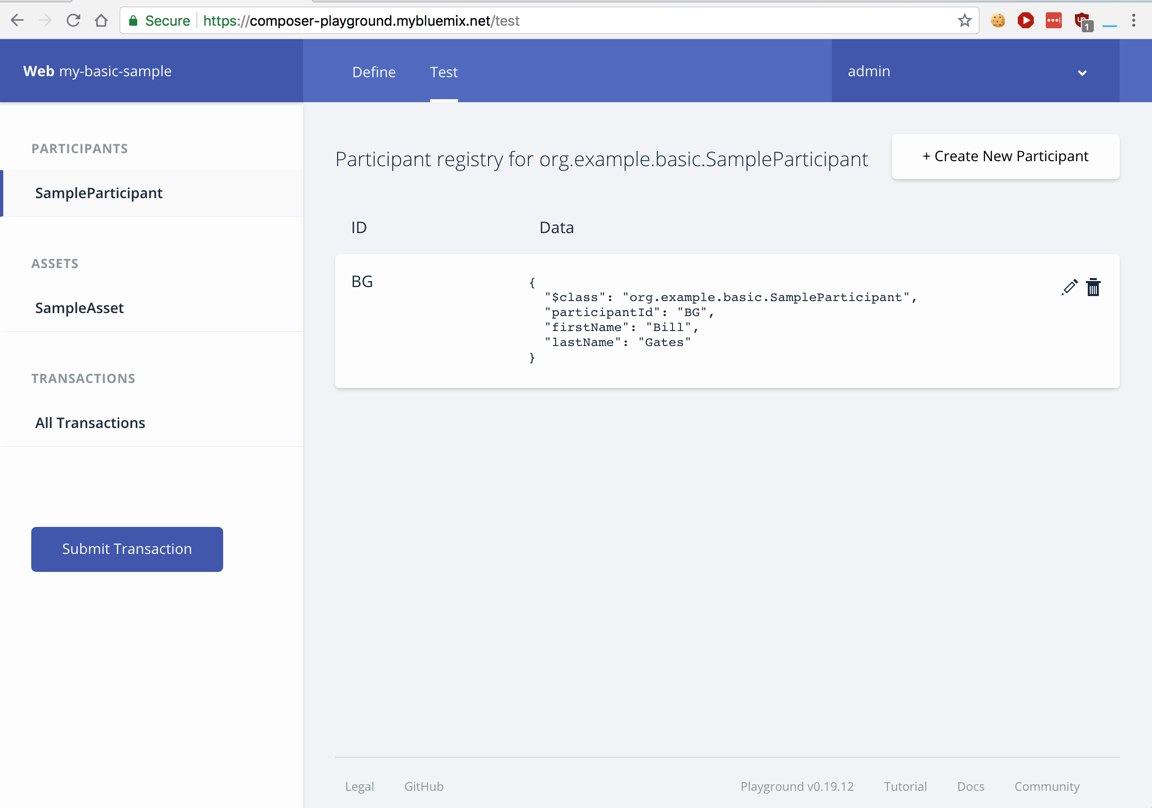
Now the registry contains one participant, as shown below.
At the top right, click the "+ Create New Participant" button again.
Delete the code in the black box, and insert the code shown below:
{
  "$class": "org.example.basic.SampleParticipant",
  "participantId": "SJ",
  "firstName": "Steve",
  "lastName": "Jobs"
}
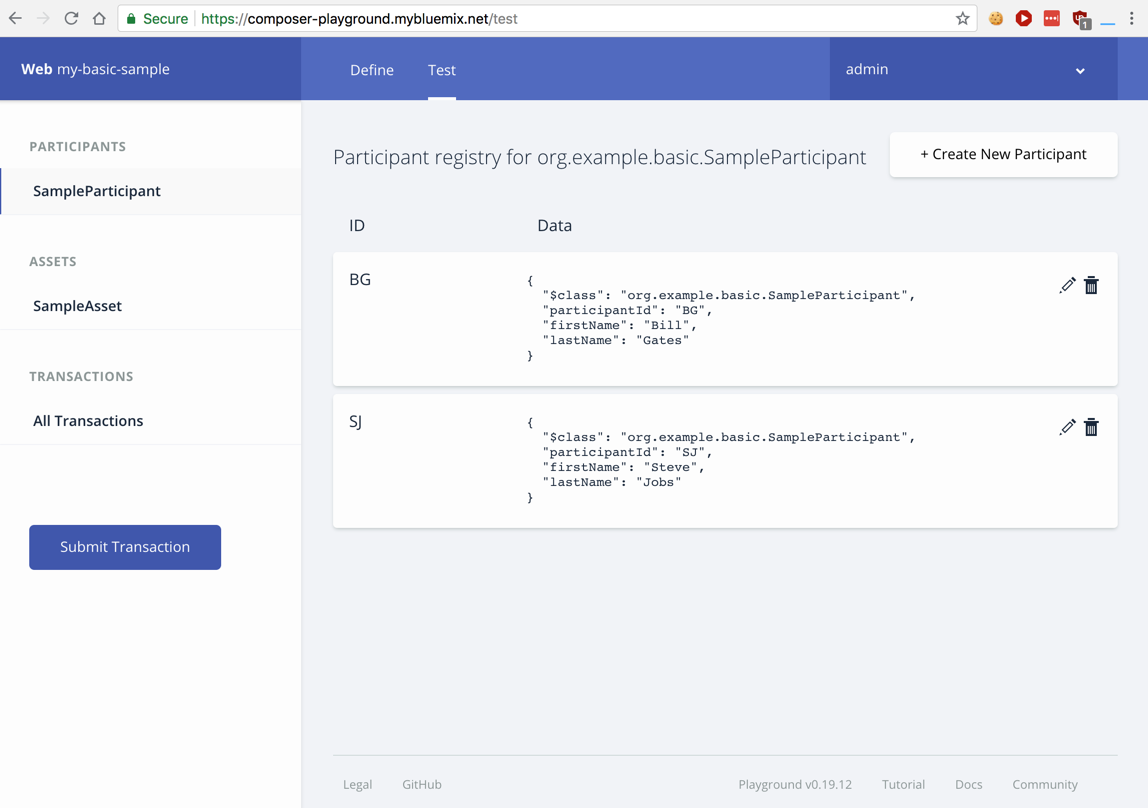
Now there are two participants, as shown below.
On the top right, click the "+ Create New Asset" button.
Delete the code in the black box, and insert the code shown below.
This code assigns an asset named "MSFT" with a value of "100" to the participant "BG".
{
  "$class": "org.example.basic.SampleAsset",
  "assetId": "MSFT",
  "owner": "resource:org.example.basic.SampleParticipant#BG",
  "value": "100"
}
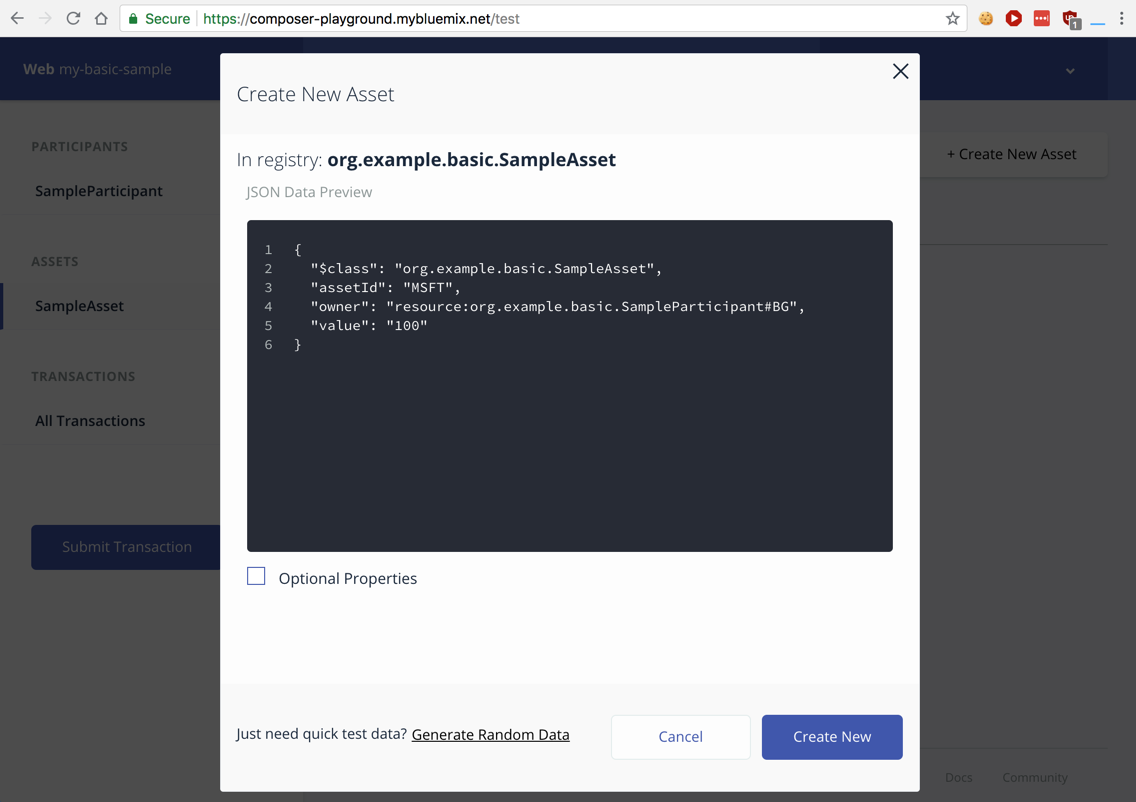
Click "Create New".
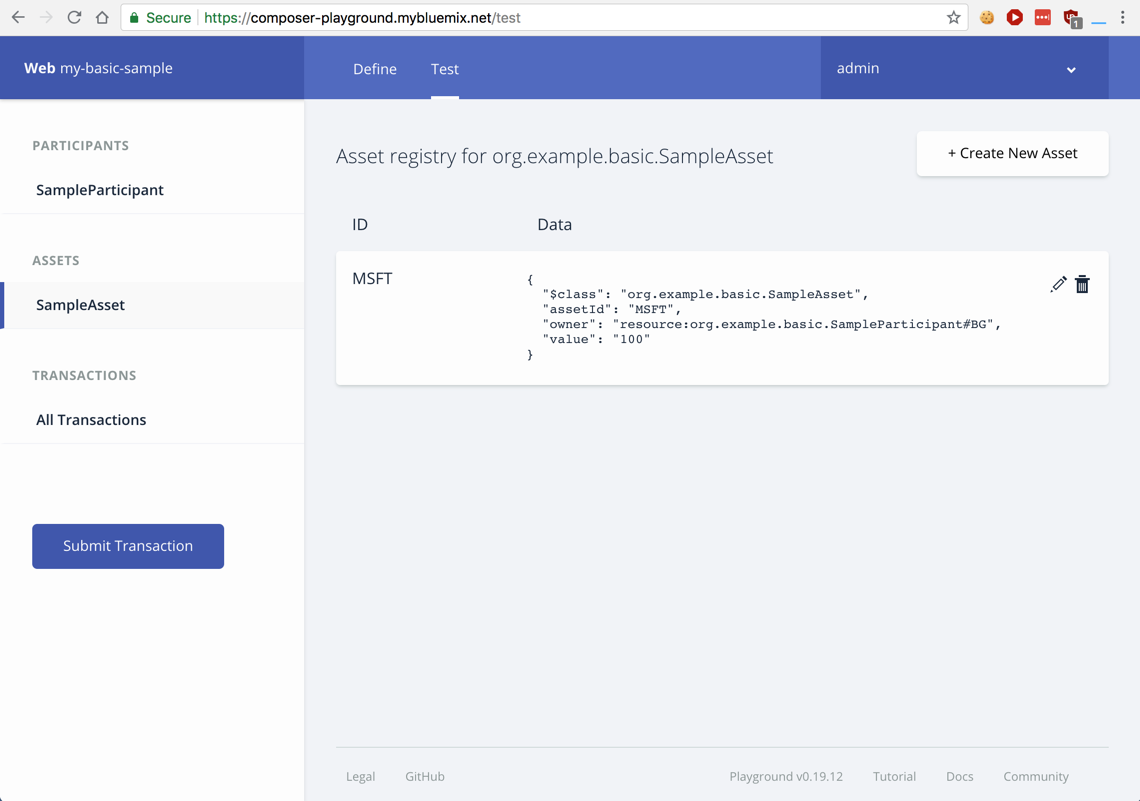
The registry shows the new asset, as shown below.
Delete the code in the black box, and insert the code shown below.
This code changes the value of the "MSFT" asset to "105".
{
  "$class": "org.example.basic.SampleTransaction",
  "asset": "resource:org.example.basic.SampleAsset#MSFT",
  "newValue": "105"
}
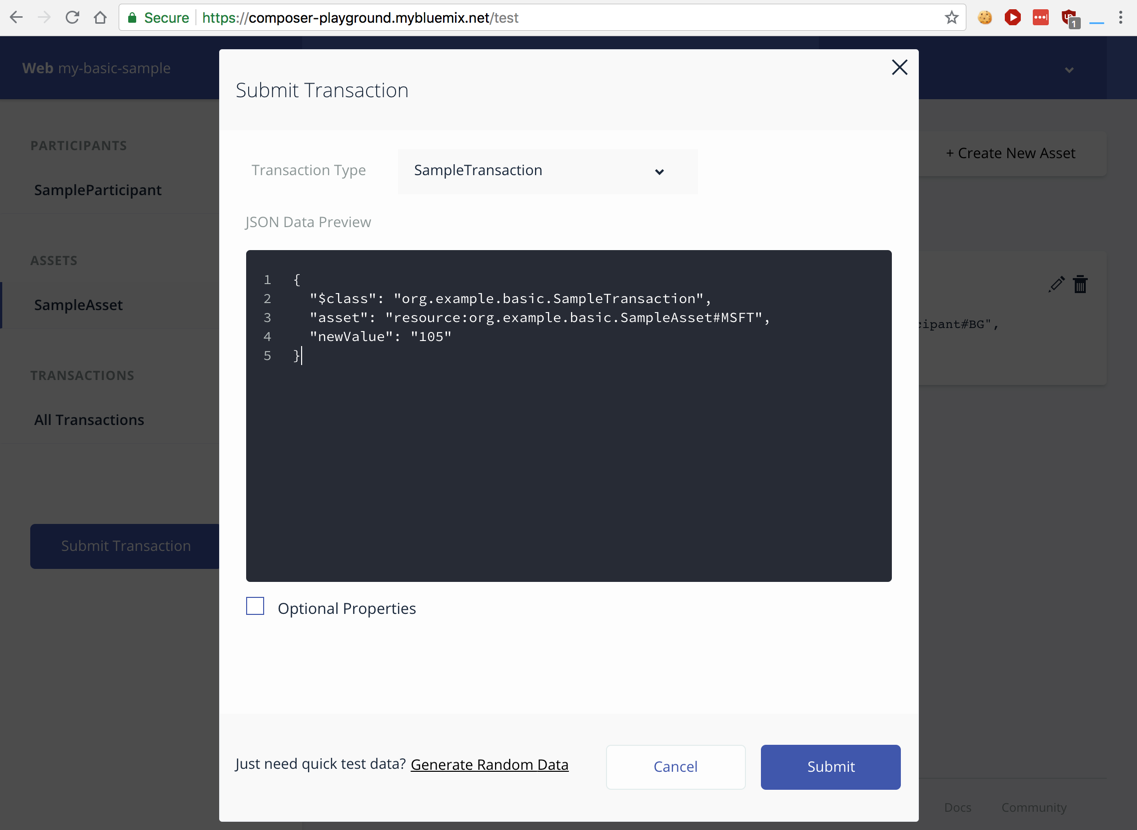
At the lower right, click the blue Submit button.
A box pops up briefly in the upper right saying "Transaction Successful!".
Everything you've done is recorded on the blockchain, with the newest activity on the top.
Reading from the bottom, creating the blockchain caused four transactions to occur within a couple of seconds, named "AddParticipant", "IssueIdentity", "StartBusinessNetwork", and "ActivateCurrentIdentity", as shown below.
The next four transactions recorded the actions you took: "AddParticipant" twice, then "AddAsset", and, finally, "SampleTransaction".
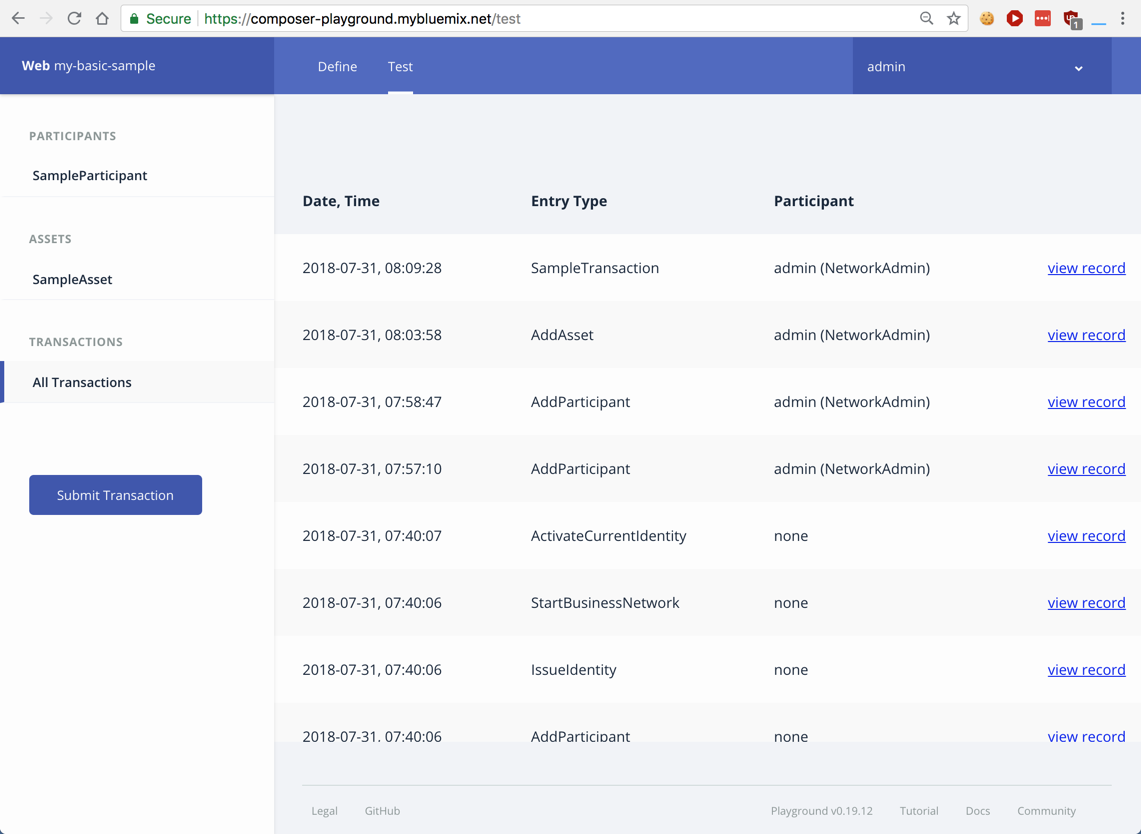
This is the entire purpose of a blockchain: to keep a complete, accurate ledger of data and all its changes and events, so every stakeholder can inspect and audit it at any time.
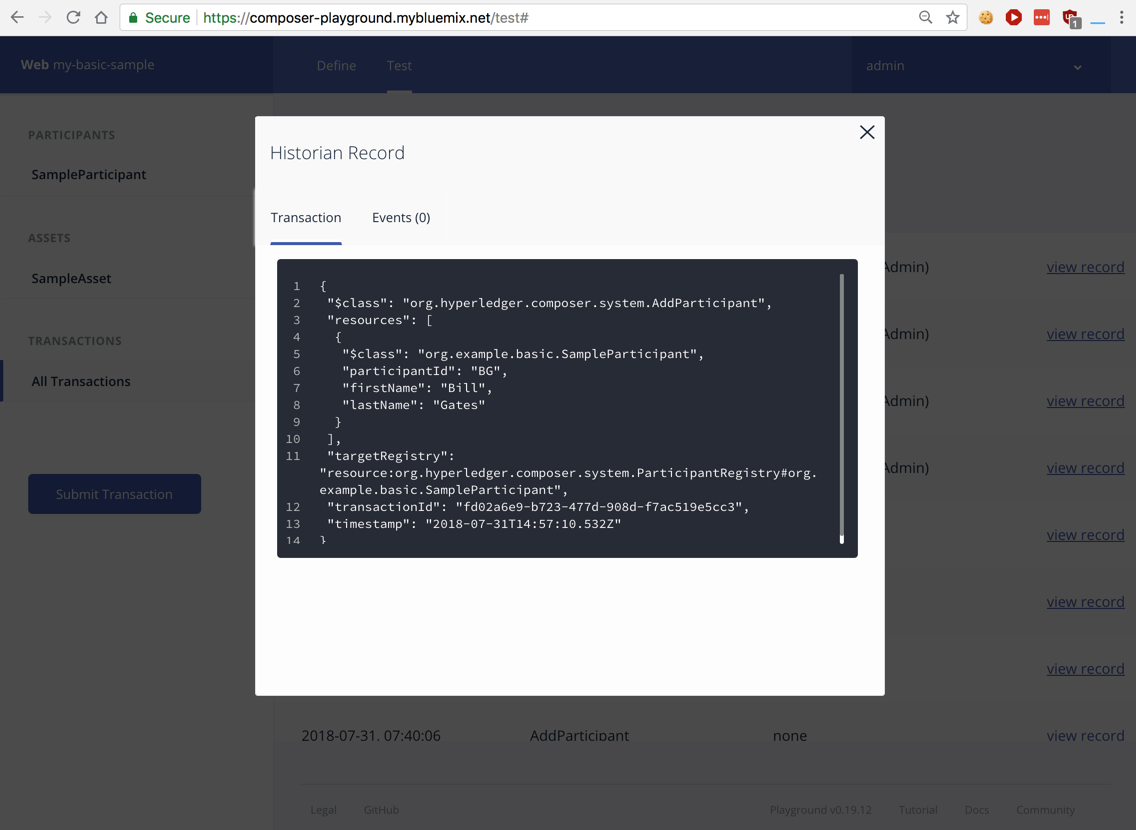
In the fourth row from the top, which is an "AddParticipant" entry, on the right side, click the "view record" link.
A "Historian Record" box appears, as shown below. This shows that the user "Bill Gates" was created, with a timestamp and an unique "transactionId".
Close the "Historian Record" box.
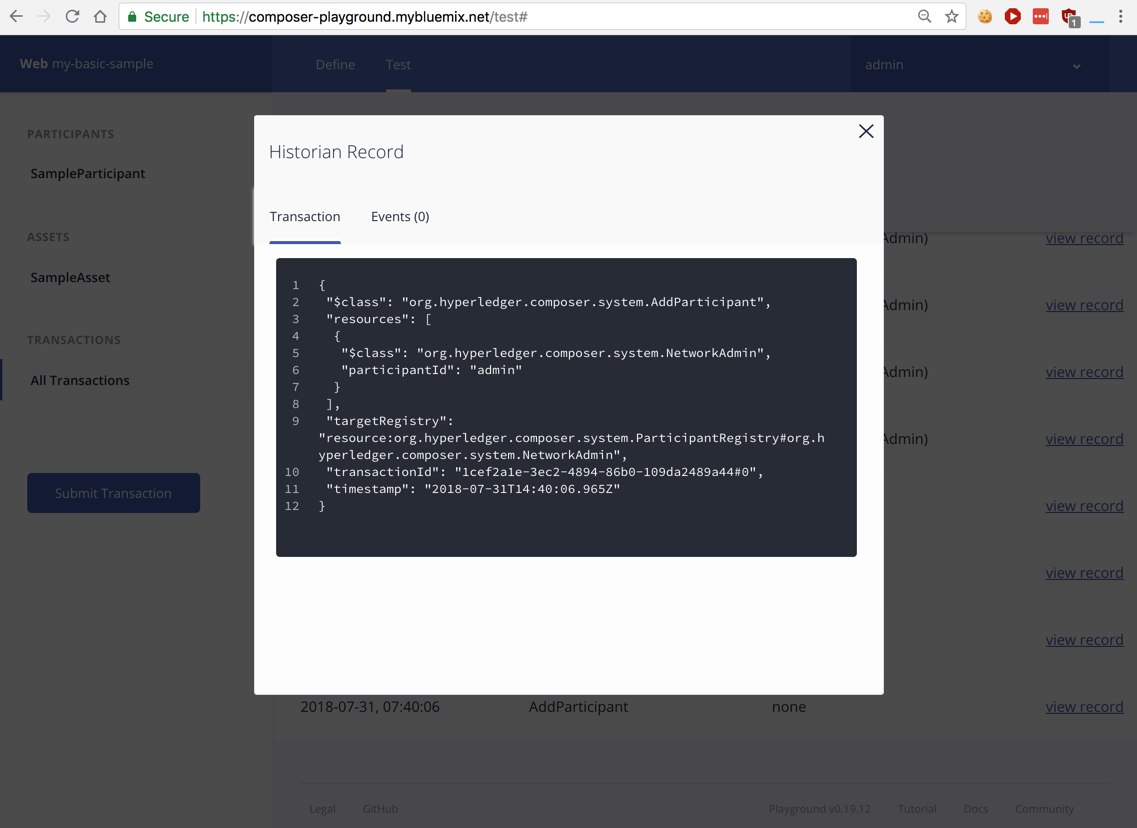
As shown below, this record documents the creation of the "admin" account.
Close the "Historian Record" box.
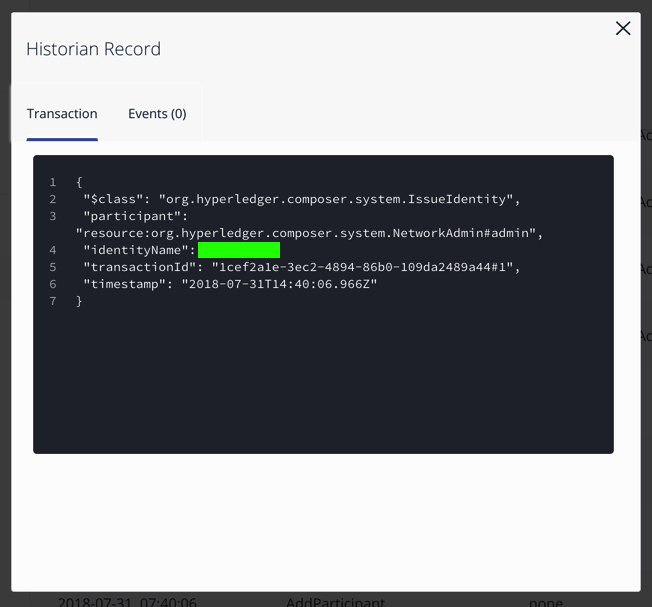
This record assigned an "identityName" value to the "NetworkAdmin#admin" account, which is covered by a green box in the image below.
Enter the "identityName" value in the form below to record your success.
If you don't have a Canvas account, see the instructions here.
Added to CNIT 123 8-4-18