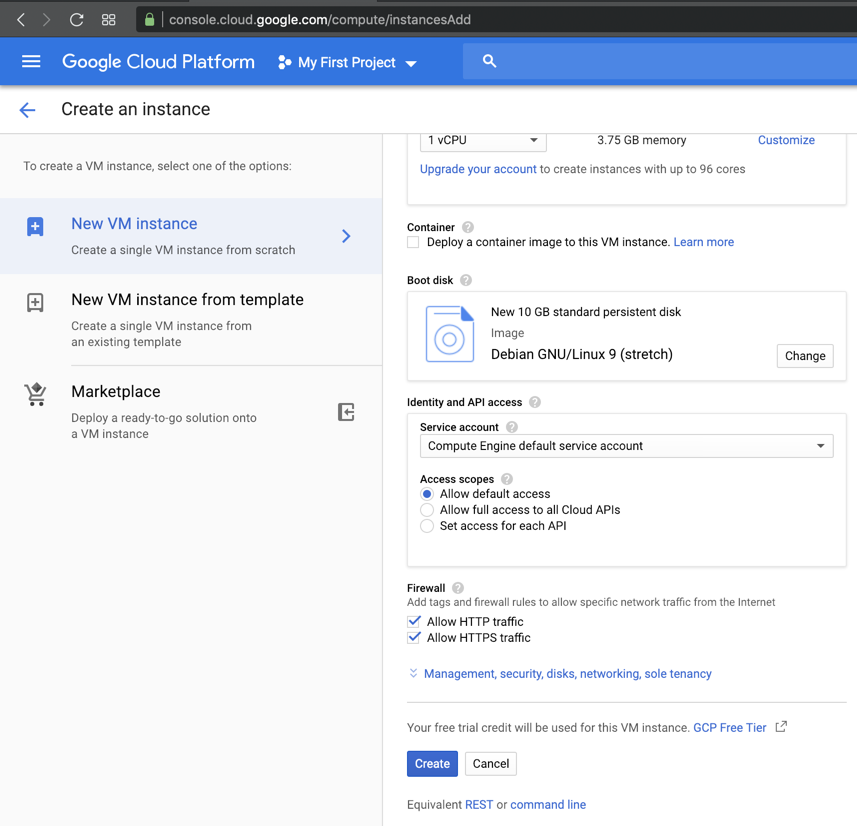
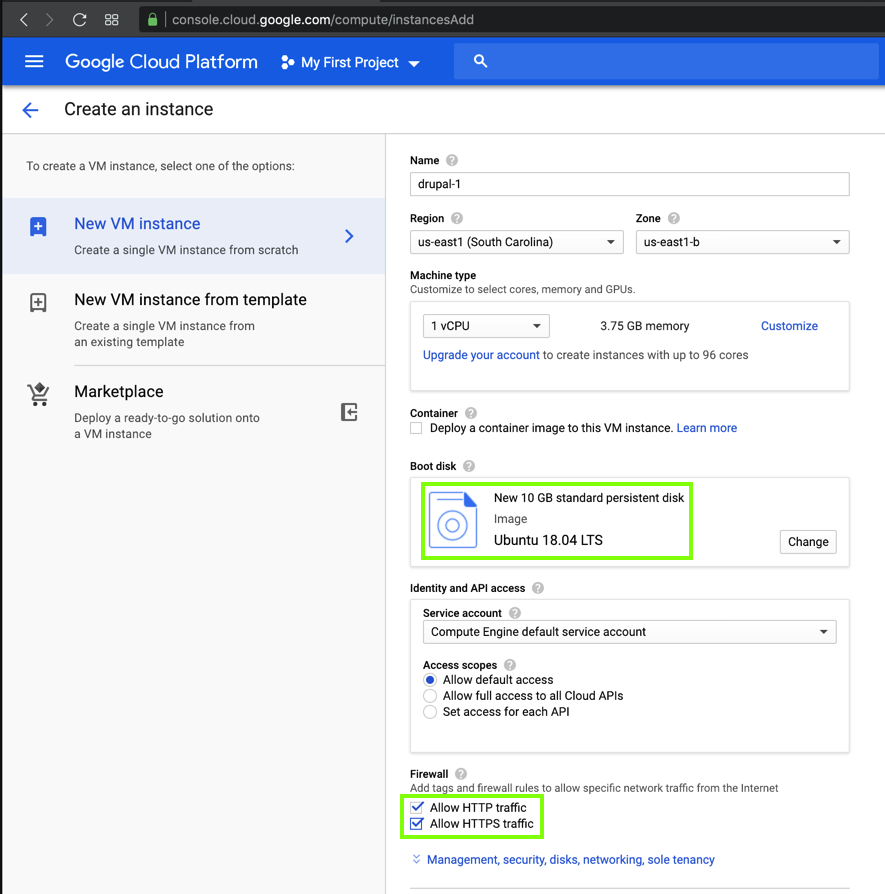
One machine is the attacker running Debian 9, and the other is the target running Ubuntu 18.04.
Instructions are available here:
https://bowneconsultingcontent.com/pub/EH/proj/cloud/ED200_tkp/ED200ch_tkp.htm
sudo apt update
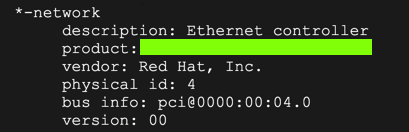
sudo apt install lshw -y
lshw
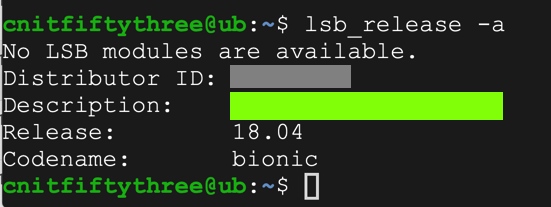
lsb_release -a
sudo apt-get update
sudo apt-get install nano
sudo apt-get install apache2
sudo apt-get install mysql-server mysql-client
sudo mysql_secure_installation
sudo systemctl start mysql.service
sudo mysql -u root -p
mysql> prompt,
execute these commands:
CREATE DATABASE drupal;
CREATE USER drupaluser@localhost IDENTIFIED BY 'password';

GRANT ALL ON drupal.* TO drupaluser@localhost;

FLUSH PRIVILEGES;
exit
sudo apt-get install php
sudo apt-get install libapache2-mod-php php-mysql php-xml
sudo apt-get install php-curl php-gd
sudo apt-get install imagemagick
sudo apt-get install php-recode php-tidy php-xmlrpc
cd /tmp && wget ftp.drupal.org/files/projects/drupal-7.26.tar.gz
tar xzvf drupal*
sudo mv drupal-7.26/* /var/www/html

cp /var/www/html/sites/default/default.settings.php /var/www/html/sites/default/settings.php

sudo rm /var/www/html/index.html

sudo chmod -R 755 /var/www/html/*
sudo chown -R www-data:www-data /var/www/html/*

sudo a2enmod rewrite
sudo a2enmod env
sudo a2enmod dir
sudo a2enmod mime
sudo nano /etc/apache2/sites-enabled/000-default.conf
<VirtualHost *:80>

     ServerAdmin admin@example.com
     DocumentRoot /var/www/html/
     ServerName example.com
     ServerAlias www.example.com
     ErrorLog ${APACHE_LOG_DIR}/error.log
     CustomLog ${APACHE_LOG_DIR}/access.log combined

      <Directory /var/www/html/>
           Options FollowSymlinks
           AllowOverride All
           Require all granted
      </Directory>
      <Directory /var/www/html/>
           RewriteEngine on
           RewriteBase /
           RewriteCond %{REQUEST_FILENAME} !-f
           RewriteCond %{REQUEST_FILENAME} !-d
           RewriteRule ^(.*)$ index.php?q=$1 [L,QSA]
      </Directory>

</VirtualHost>
Execute this command to restart Apache2:
sudo systemctl restart apache2
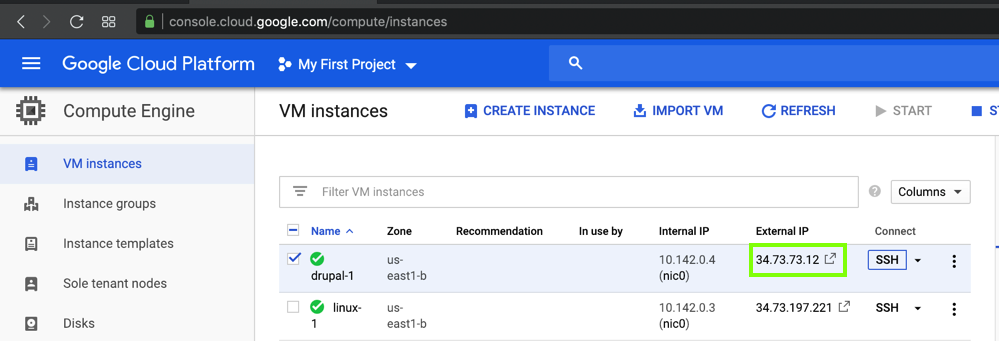
In a Web browser, open this URL, adjusting the IP address as necessary:
http://34.73.73.12
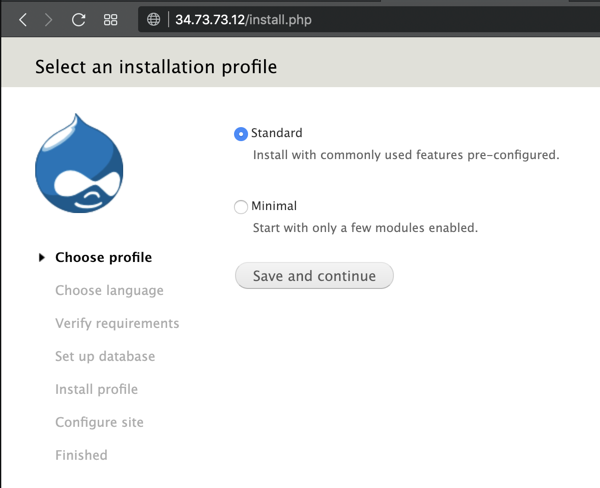
Install Drupal with the default options. You chose the Drupal database name, username, and password earlier, after installing "MySQL".
DON'T ALLOW UPDATES!
We need to use an old, vulnerable version of Drupal.
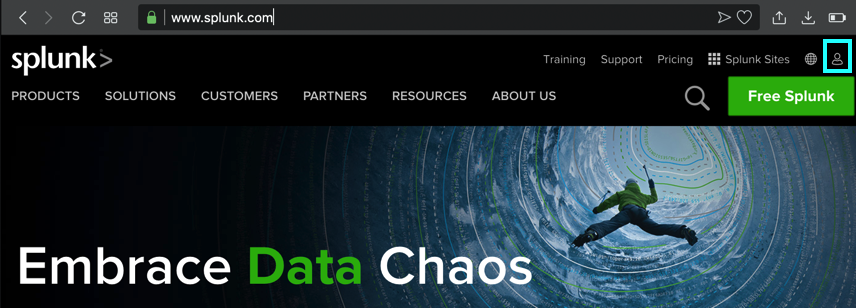
Your Drupal page appears, as shown below.
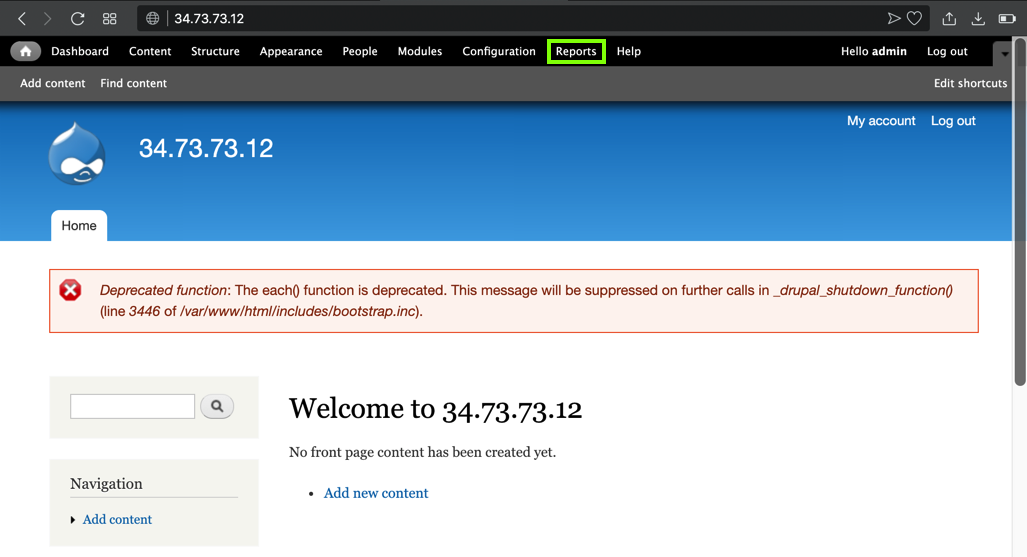
At the top right, click the tiny head-and-shoulders icon, outlined in aqua in the image below.
If you have a Splunk account, log in. Otherwise create one now.
At the top right, click the green "Free Splunk" button.
At the lower left of the next page, in the "Splunk Enterprise" sectin, click "Download Free 60-Day Trial", as shown below.

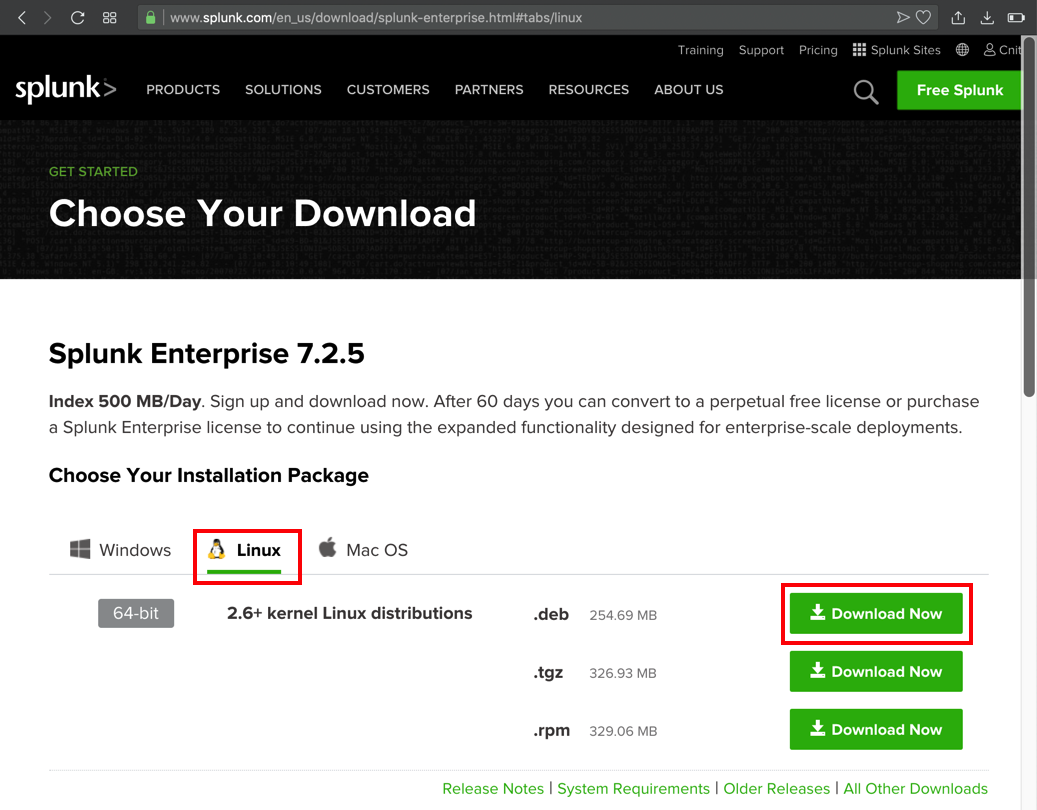
On the next page, click the Linux tab, and, in the ".deb" line, click the "Download Now" button, as shown below.
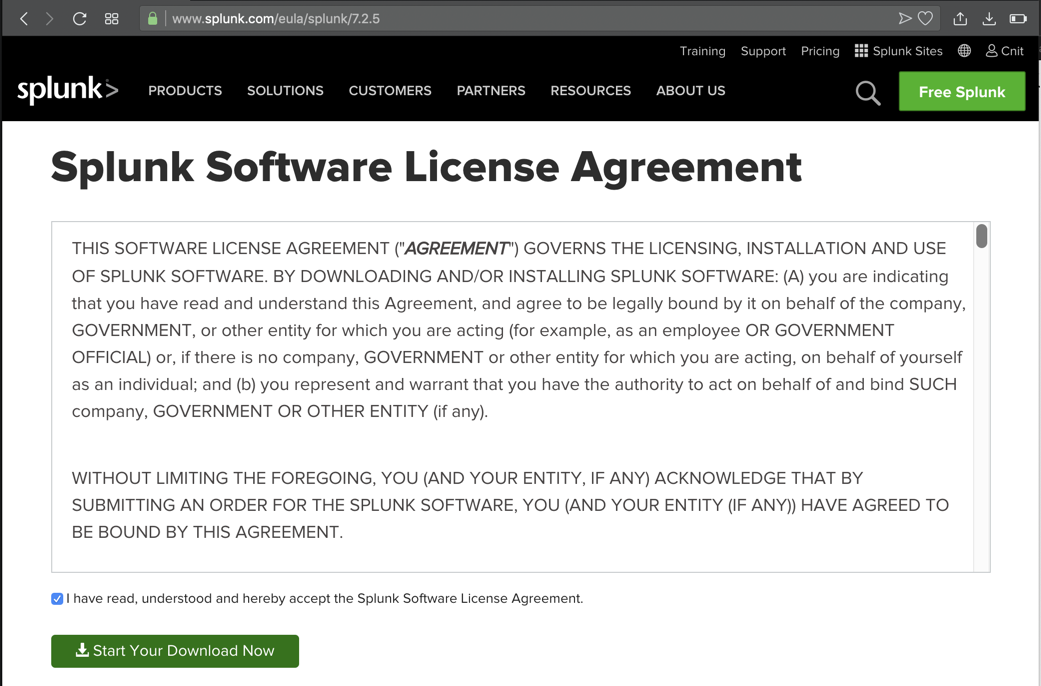
On the next page, accept the agreement and click the "Start Your Download Now" button, as shown below.
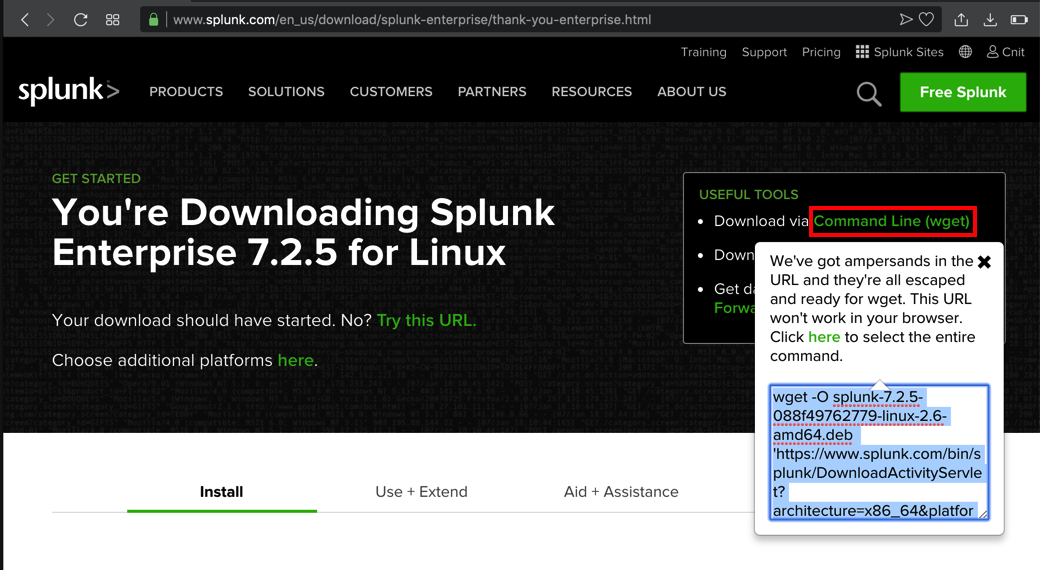
When the download starts, cancel it. At the top right of the next page, click "Command Line (wget)".
Highlight the command in the pop-up box and copy it, as shown below.
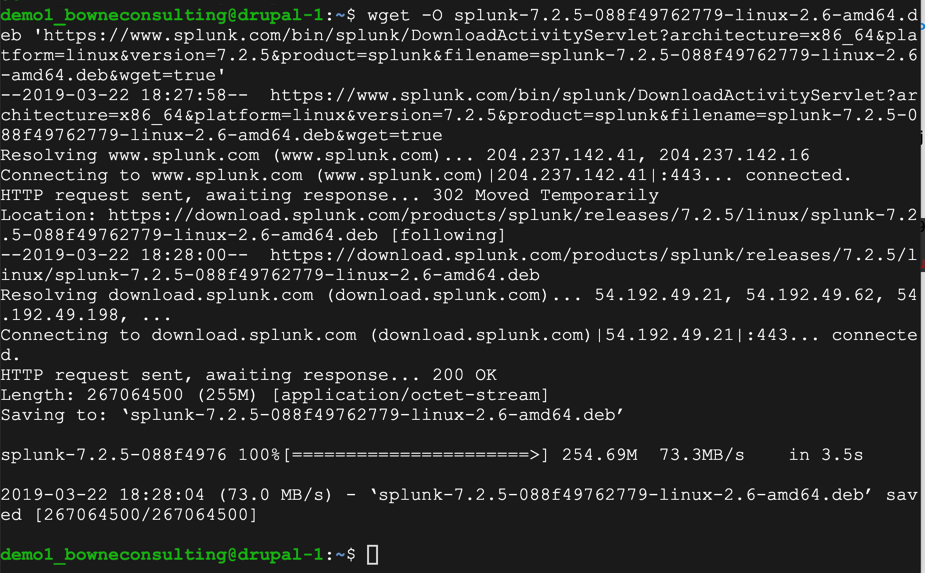
On the Ubuntu server, execute these commands.
sudo dpkg -i splunk-7.2.5-088f49762779-linux-2.6-amd64.deb
cd /opt/splunk/bin
sudo ./splunk start
Enter y to agree to the license. Enter a username and password for Splunk.
Splunk installs, as shown below.
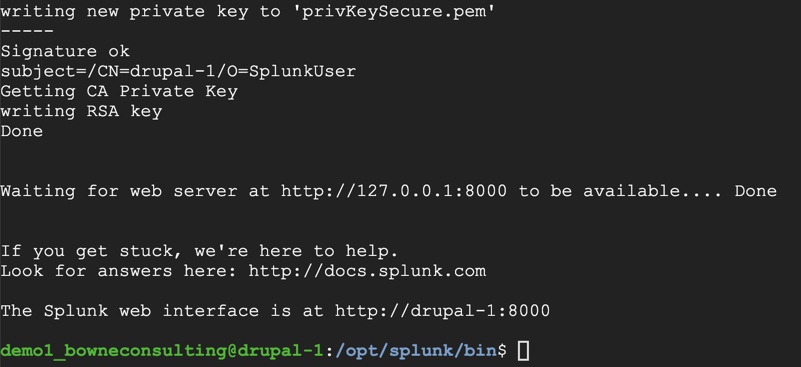
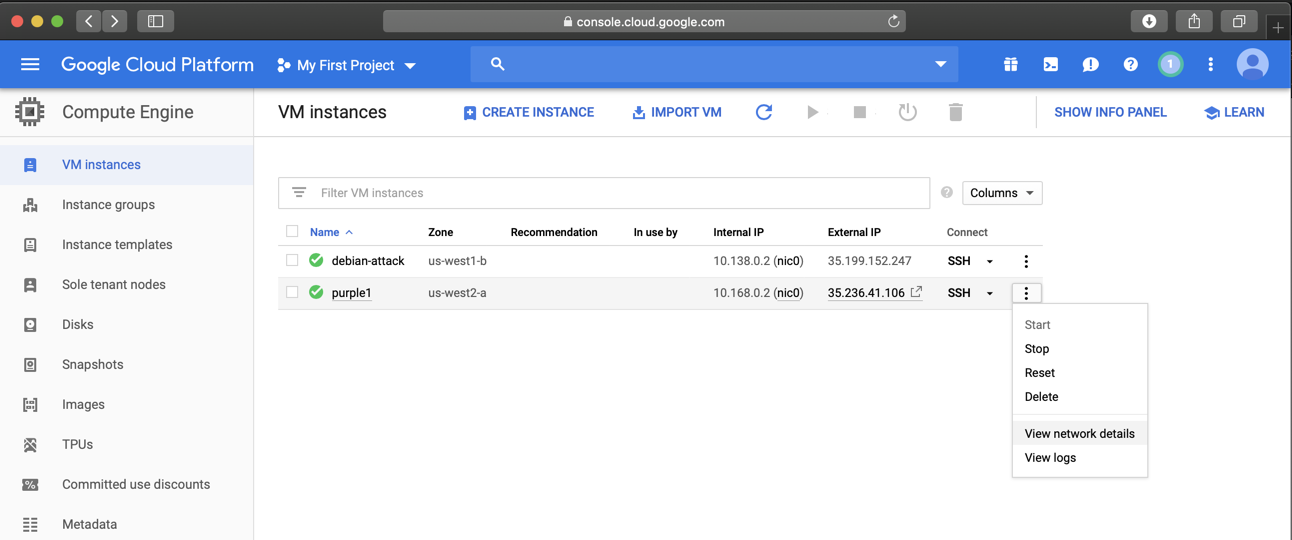
http://34.73.73.12:8000
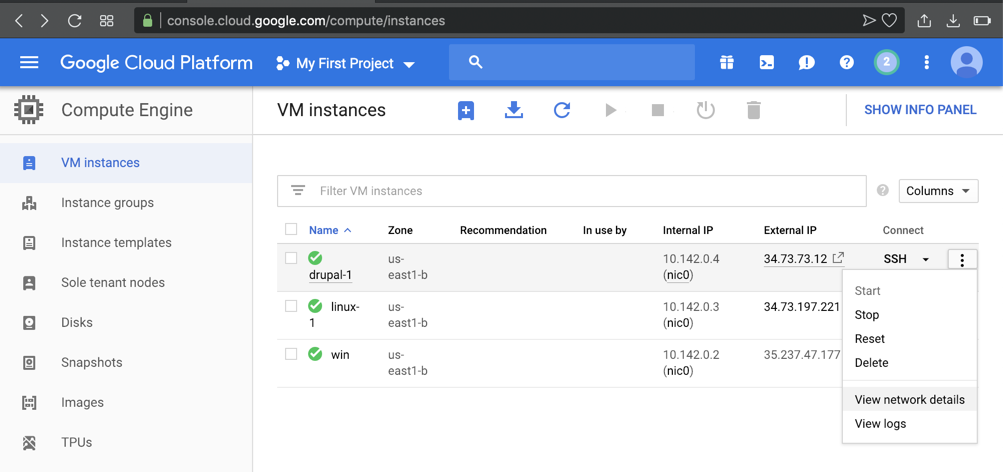
On the next page, on the left side, click "Firewall rules".
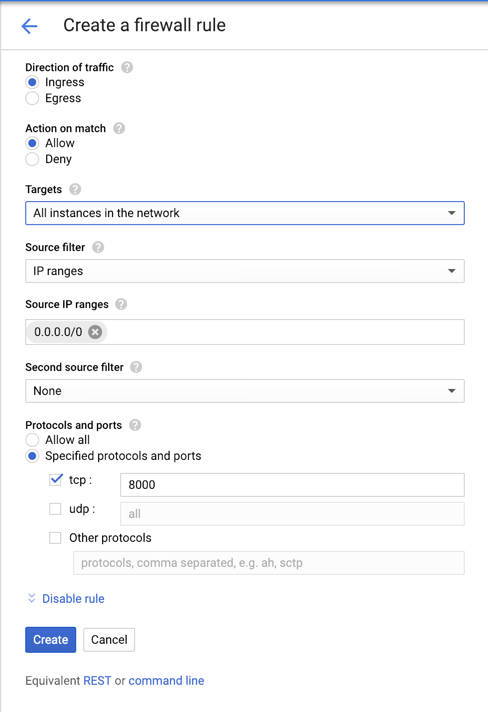
At the top center, click "CREATE FIREWALL RULE", as shown below.
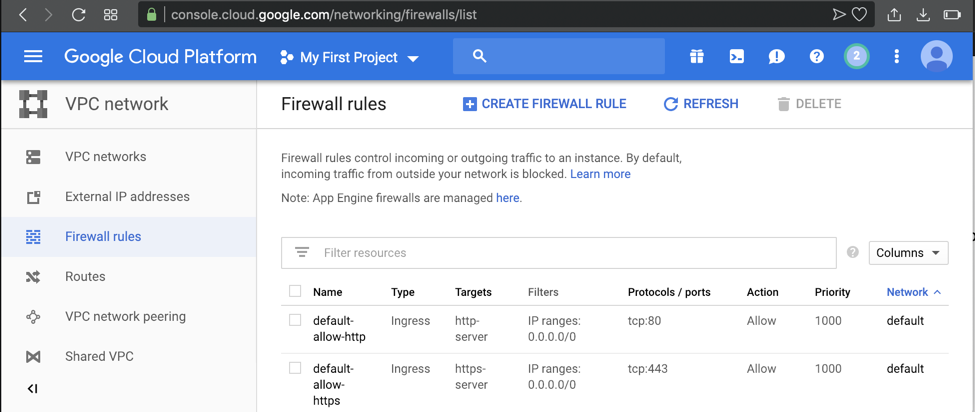
Add a new "ingress" rule allowing port 8000, as shown below.
Open the Splunk management page again. It appears, as shown below.
Log in with the administrator credentials you specified when installing Splunk, as shown below.
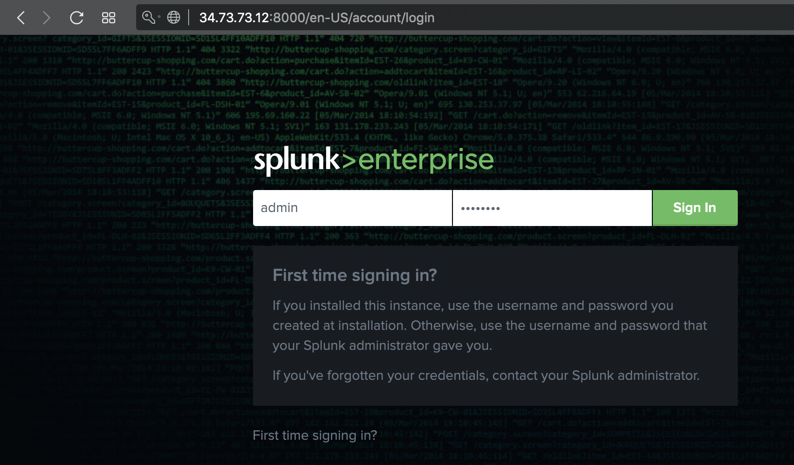
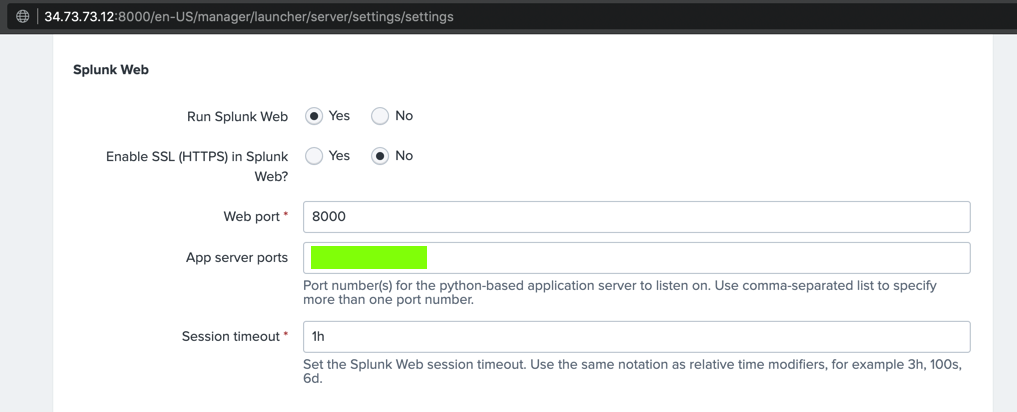
The text covered by the green box in the image below is the flag.
If a box pops up asking you to take a tour, click Skip.
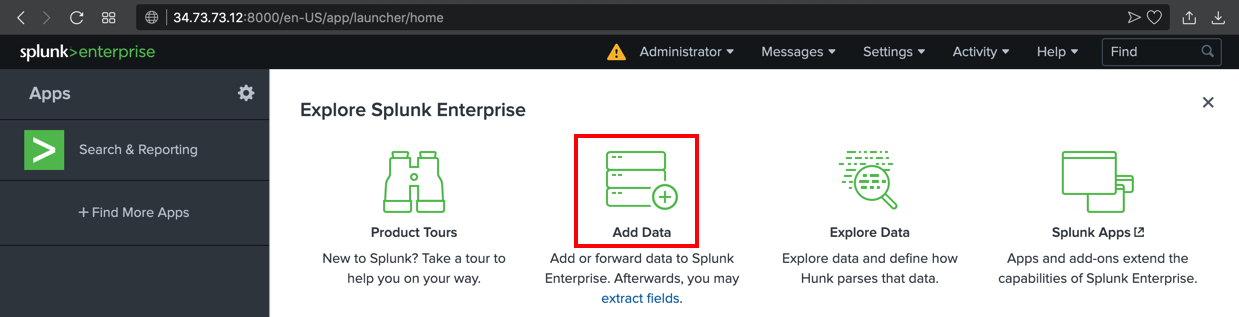
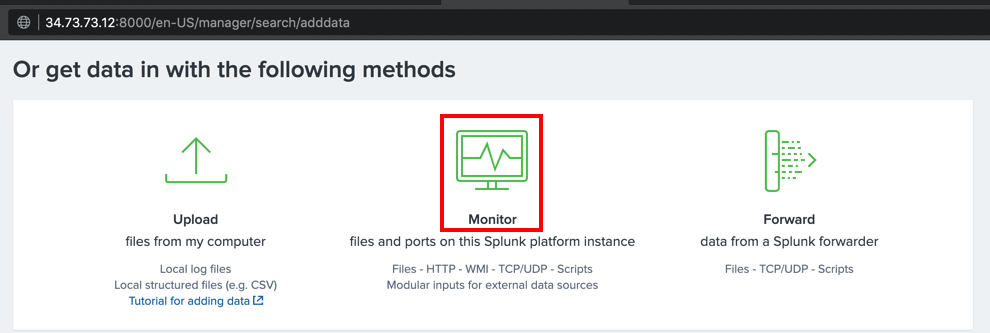
In the next page, scroll down to the "Or get data in with the following methods" section, and click Monitor, as shown below.
In the "Add Data" screen, on the left side, click "Files & Directories".
On the right side, enter a "File or Directory" of
/var/log
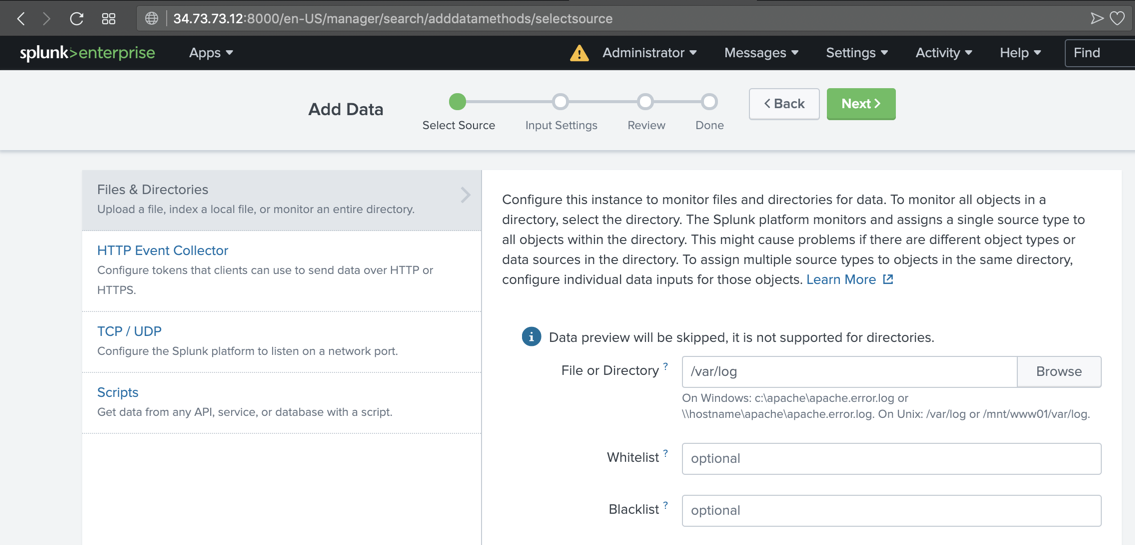
At the top right, click the green Next button.
Click Review. Click Submit.
Click "Start Searching".
If a box pops up asking you to take a tour, click Skip.
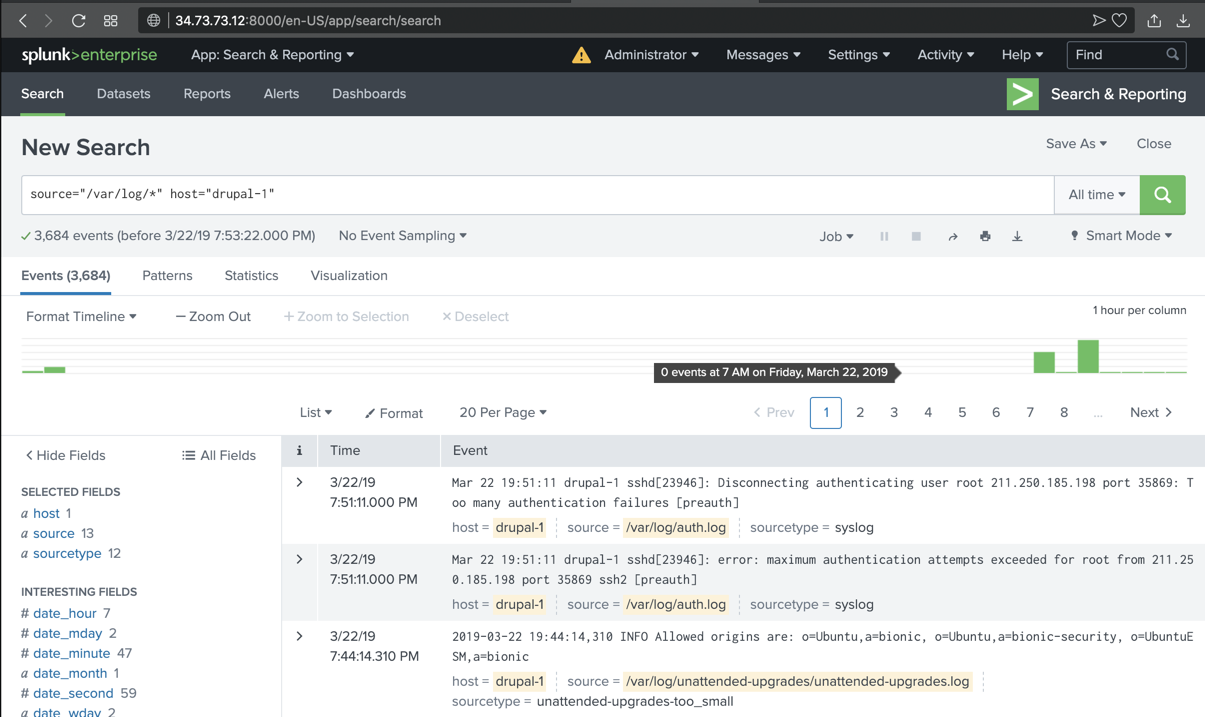
Splunk shows log entries, as shown below.
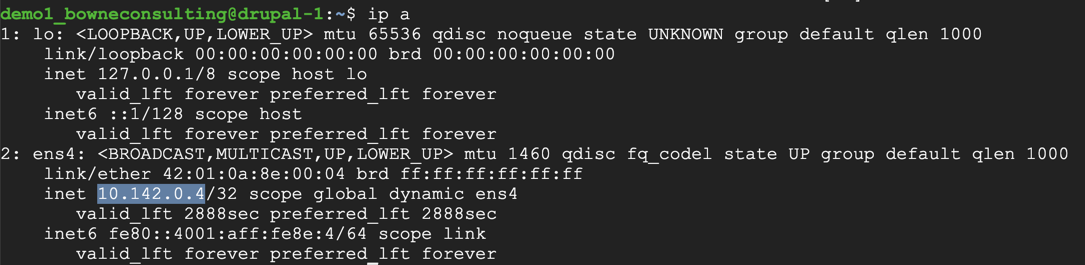
ip a
sudo nano /etc/ssh/sshd_config
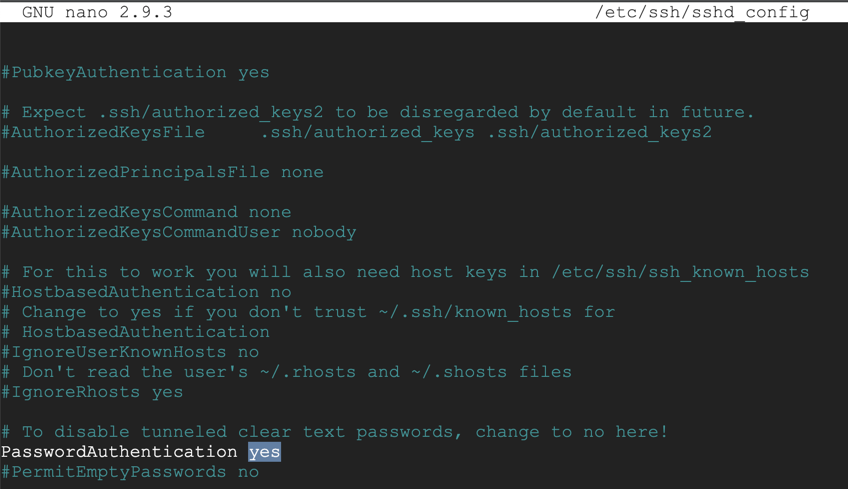
Save the file with Ctrl+X, Y, Enter.
Execute this command to restart SSH:
sudo systemctl restart ssh
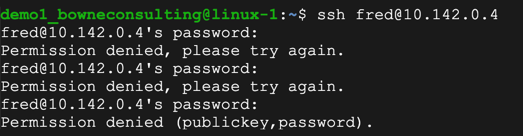
ssh fred@10.142.0.4
On the left side, click "Search & Reporting".
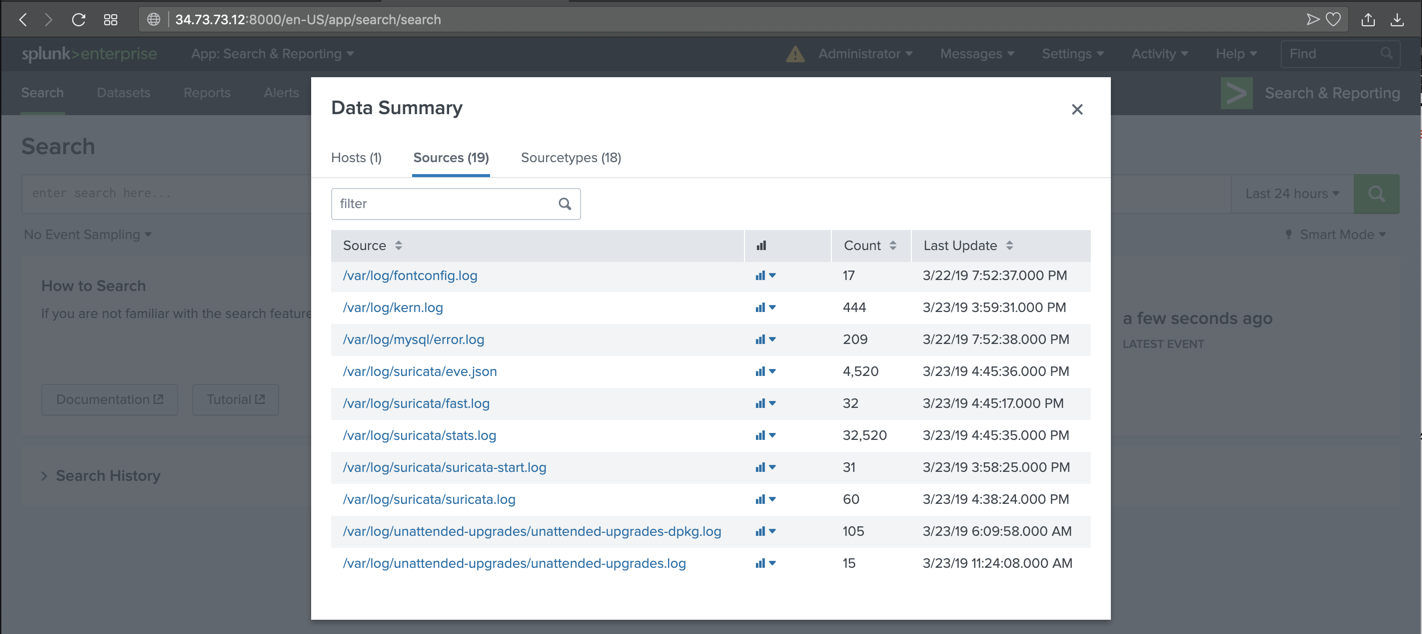
In the Search page, in the lower right, click the "Data Summary" button, as shown below.

A "Data Summary" box pops up, as shown below.
Click the hostname of your server, which appears in blue letters.
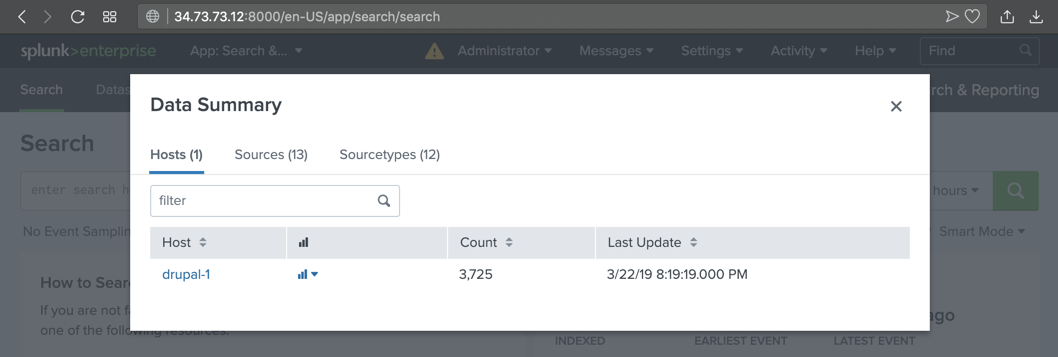
The text covered by the green box in the image below is the flag.

sudo apt install software-properties-common -y
sudo add-apt-repository ppa:oisf/suricata-stable
sudo apt update
sudo apt-get install suricata
sudo nano /etc/suricata/rules/test-ddos.rules
alert tcp any any -> $HOME_NET 80 (msg: "Possible DDoS attack"; flags: S; flow: stateless; threshold: type both, track by_dst, count 20, seconds 1; sid:1000001; rev:1;)
On your Drupal target server, execute this command:
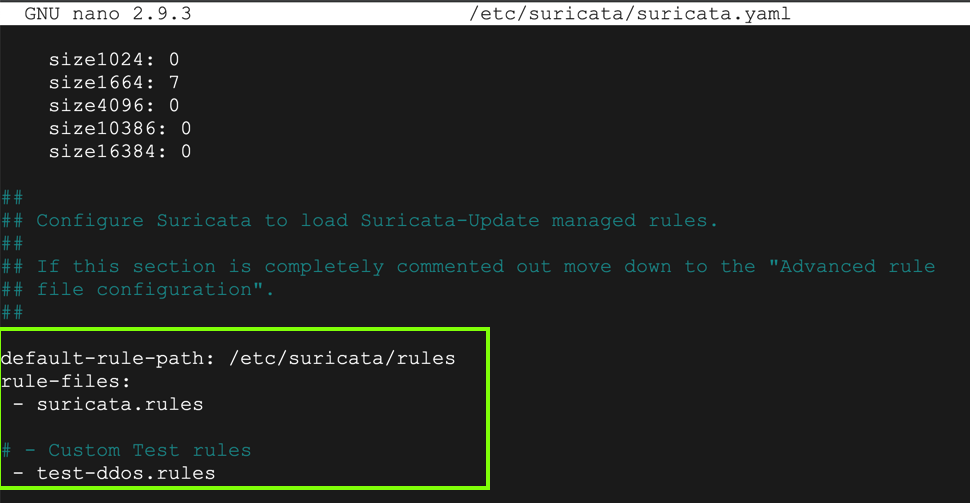
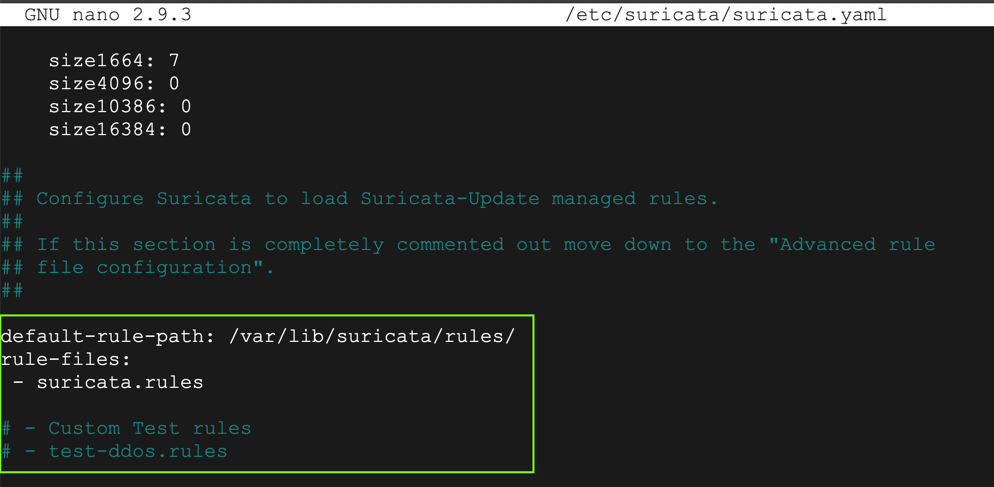
sudo nano /etc/suricata/suricata.yaml
Adjust the "default-rule-path" and insert a "Custom Test Rule", as shown below.
Use Ctrl+W to find all references to "eth0" and change them to "ens4"
Save the file with Ctrl+X, Y, Enter.
sudo service suricata stop
sudo rm /var/run/suricata.pid
sudo suricata -D -c /etc/suricata/suricata.yaml -i ens4
tail -f /var/log/suricata/fast.log
sudo apt install hping3
sudo hping3 -c 20 -S -p 80 -i u10000  10.142.0.4
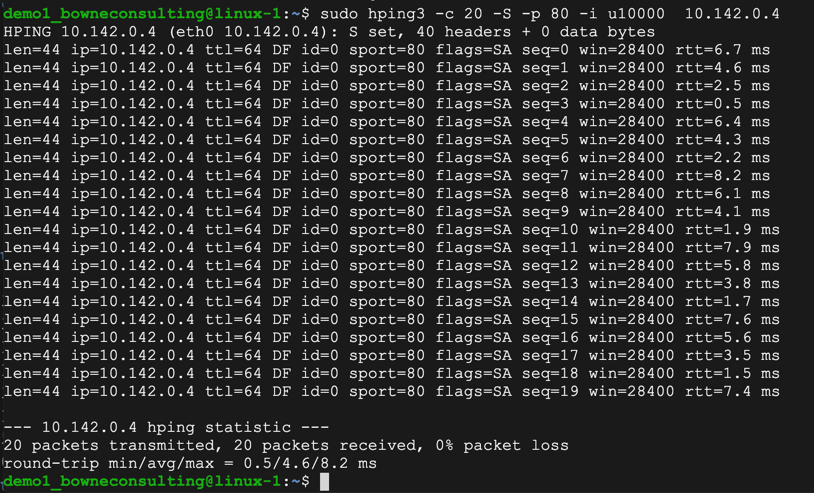
The text covered by the green box in the image below is the flag.

Troubleshooting
If you see no alerts, check the /etc/suricata/suricata.yaml file and make sure it is exactly as shown above.
sudo suricata-update

sudo nano /etc/suricata/suricata.yaml
Adjust the "default-rule-path" and comment out the "Custom Test Rule", as shown below.
Save the file with Ctrl+X, Y, Enter.
sudo service suricata stop
sudo rm /var/run/suricata.pid
sudo suricata -D -c /etc/suricata/suricata.yaml -i ens4
On the left side, click "Search & Reporting".
In the lower center, click the "Data Summary" button.
In the "Data Summary" box, click the Sources tab. Several Suricata files appear, as shown below.
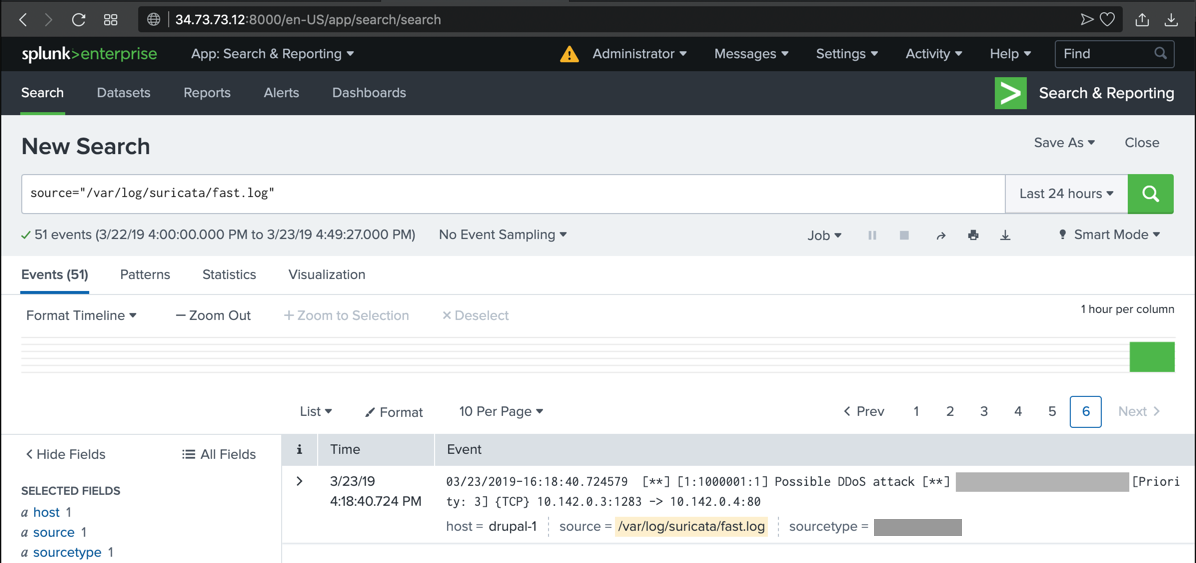
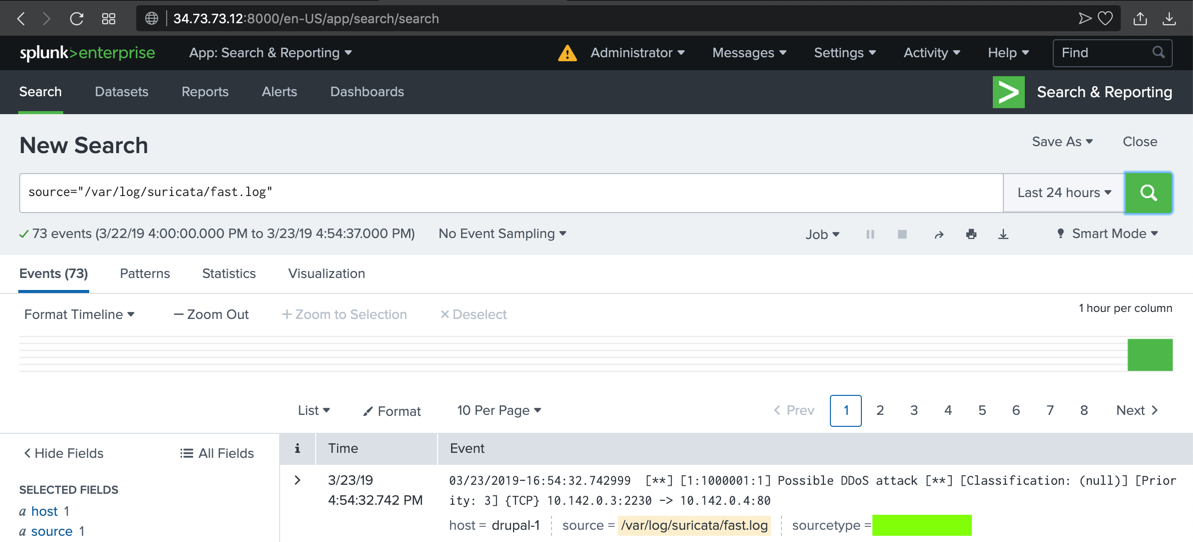
Click /var/log/suricata/fast.log.
The alert you saw previously appears in Splunk, as shown below.
sudo hping3 -c 20 -S -p 80 -i u10000 10.142.0.4
The text covered by the green box in the image below is the flag.
To prevent that, we'll configure the Google Cloud firewall to restrict access to only trusted IP addresses.
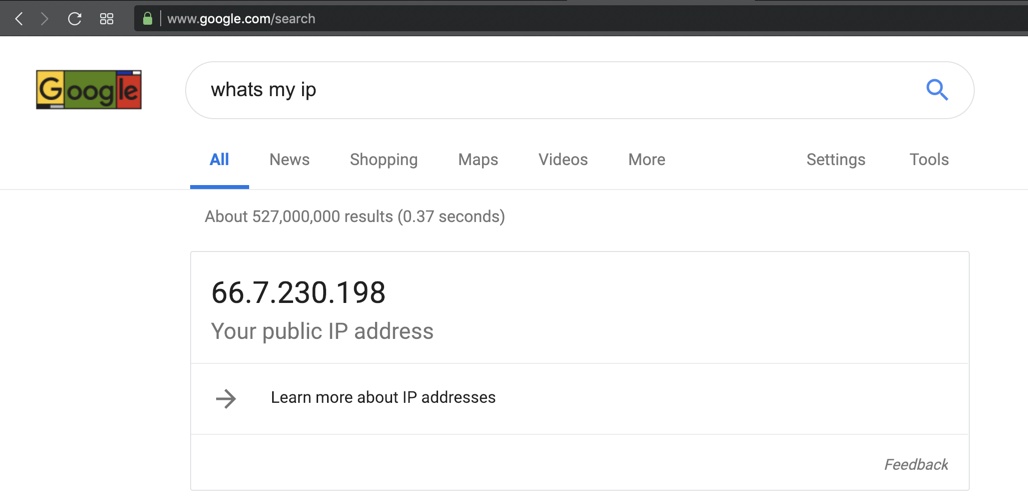
whats my ip
Your public IP appears, as shown below.
Make a note of it.
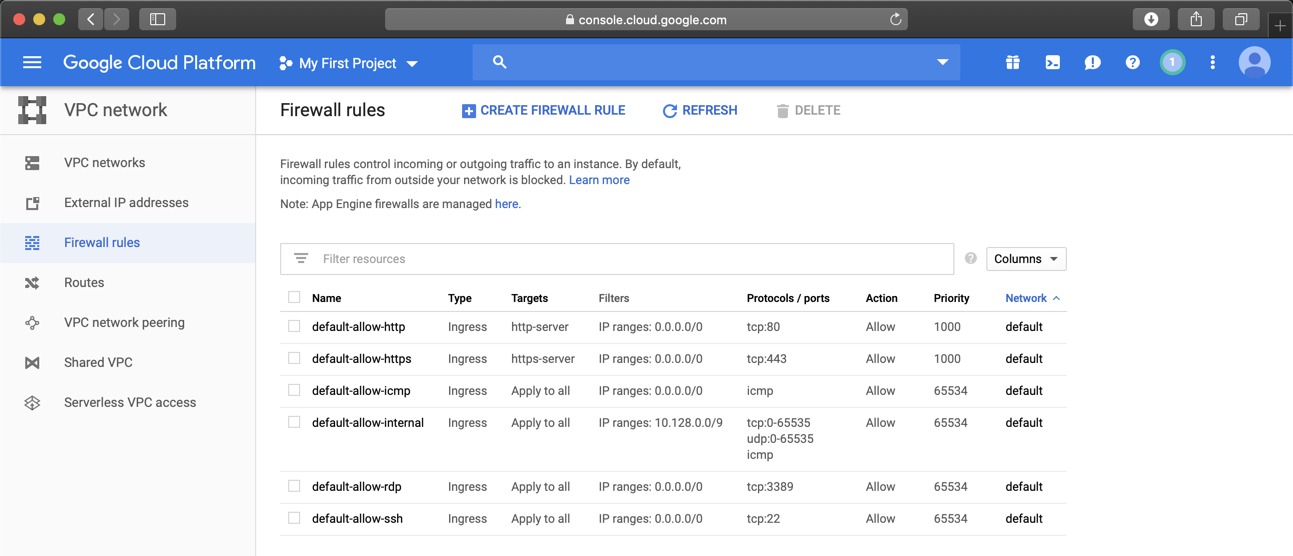
On the next page, on the left side, click "Firewall rules".
In the list of rules, click default-allow-http, as shown below.
In the "Firewall rule details" page, at the top center, click EDIT.
Adjust the Source IP range to only include the IP of your Drupal attack server, and the public IP of your own computer, as shown below.
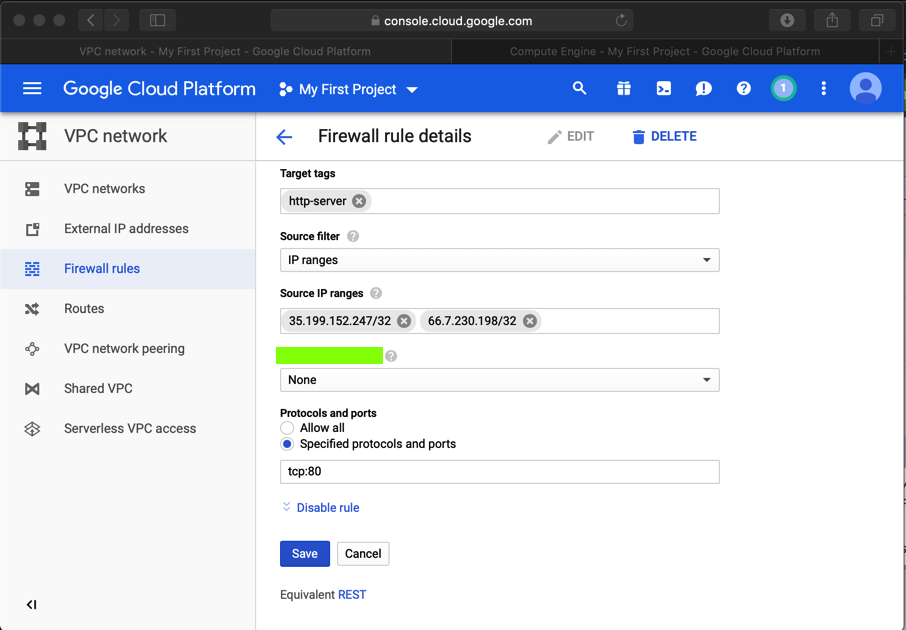
At the bottom of the page, click Save.
Posted 3-21-19
Install lshw added 5-20-19
Image fixed and software-properties-common added 5-20-19
Point total for 1.1 changed to 10 8-8-19
Update added for Ubuntu 8-8-19
Hint added for missing suricata fast alerts 8-8-19