sudo apt update
sudo apt install nano apache2 mysql-server mysql-client -y
sudo mysql_secure_installation
sudo systemctl start mysql.service
sudo mysql -u root -p
mysql> prompt,
execute these commands:
CREATE DATABASE drupal;
CREATE USER drupaluser@localhost IDENTIFIED BY 'password';

GRANT ALL ON drupal.* TO drupaluser@localhost;

FLUSH PRIVILEGES;
exit
sudo apt-get install php7.2 php7.2-gd php7.2-xml php7.2-mysql -y
sudo apt-get install libapache2-mod-php imagemagick -y
On the Ubuntu server, execute these commands.
cd /tmp
wget ftp.drupal.org/files/projects/drupal-7.26.tar.gz
tar xzvf drupal*
sudo mv drupal-7.26/* /var/www/html

cp /var/www/html/sites/default/default.settings.php /var/www/html/sites/default/settings.php

sudo rm /var/www/html/index.html

sudo chmod -R 755 /var/www/html/*
sudo chown -R www-data:www-data /var/www/html/*

sudo a2enmod rewrite
sudo a2enmod env
sudo a2enmod dir
sudo a2enmod mime
sudo nano /etc/apache2/sites-enabled/000-default.conf
<VirtualHost *:80>

     ServerAdmin admin@example.com
     DocumentRoot /var/www/html/
     ServerName example.com
     ServerAlias www.example.com
     ErrorLog ${APACHE_LOG_DIR}/error.log
     CustomLog ${APACHE_LOG_DIR}/access.log combined

      <Directory /var/www/html/>
           Options FollowSymlinks
           AllowOverride All
           Require all granted
      </Directory>
      <Directory /var/www/html/>
           RewriteEngine on
           RewriteBase /
           RewriteCond %{REQUEST_FILENAME} !-f
           RewriteCond %{REQUEST_FILENAME} !-d
           RewriteRule ^(.*)$ index.php?q=$1 [L,QSA]
      </Directory>

</VirtualHost>
Execute this command to restart Apache2:
sudo systemctl restart apache2
In a Web browser, open this URL, adjusting the IP address as necessary.
Note: you must type the http://
http://34.73.73.12
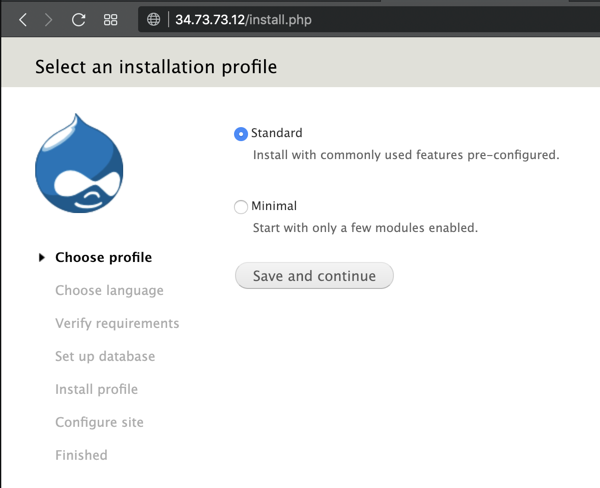
Accept the default selection of "Standard" and click the "Save and continue" button.
On the "Choose language" page, click the "Save and continue" button.
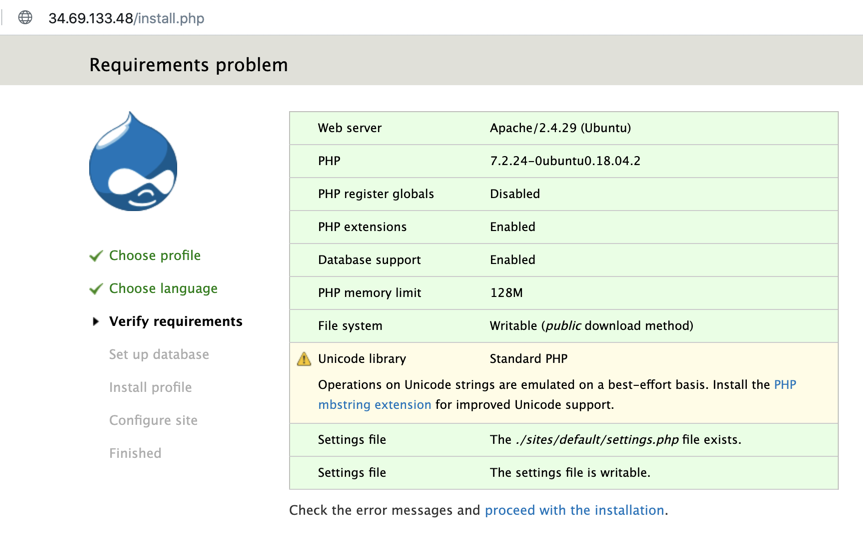
On the "Verify requirements" page, at the bottom center, click the "proceed with the installation" link, as shown below.
On the "Set up database" page, enter these values, as shown below.

After a few seconds, you see the "Configure site" page shown below.
Enter these values, as shown below.

In the "UPDATE NOTIFICATIONS" section, clear the "Check for updates automatically" box, as shown below.
Click the "Save and continue" button.

A "Drupal installation complete" page appears, as shown below.
At the bottom right, click the "your new site" link.

Your Drupal site appears, as shown below.
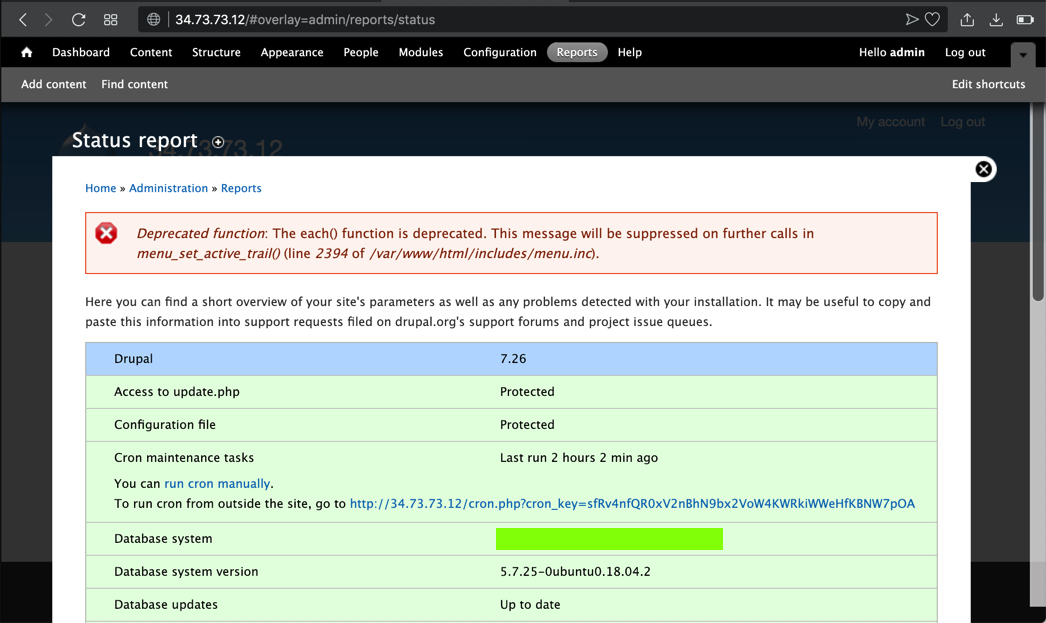
Flag W 201.1: Database System (10 pts)
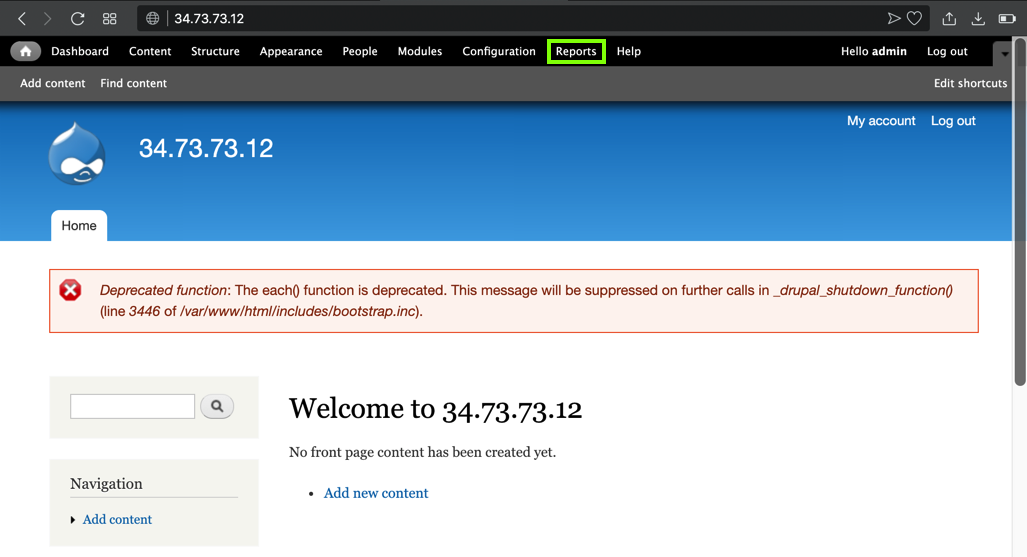
At the top right of this page, click Reports, "Status report". The text covered by the green box in the image below is the flag.
Capturing a Screen Image
Capture a WHOLE-DESKTOP image showing the flag.Save the image as "Proj W 201.1 from YOUR NAME".
In the Google Cloud Console, at the top left, click the three-bar "hamburger" icon. Scroll down to the NETWORKING section and click "VPC networks, "Firewall rules".
Check the default-allow-http rule, as shown below.
At the top right, click DELETE.
In the pop-up box, click DELETE.

Refresh your Drupal site. After a minute or two, it should time out now, as shown below.

At the top right, click the tiny head-and-shoulders icon, outlined in aqua in the image below.
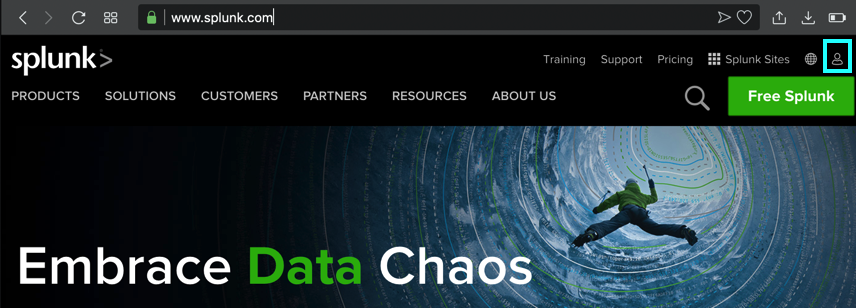
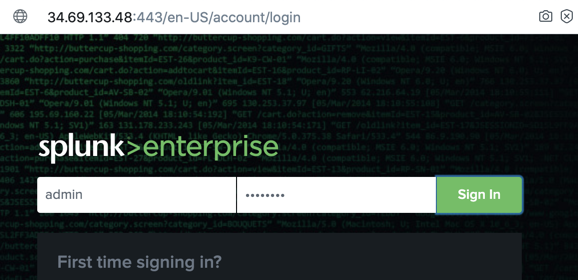
If you have a Splunk account, log in. Otherwise create one now.
At the top right, click the "Free Splunk" button.
Troubleshooting
If you have difficulty creating a Splunk account, you can get the "wget" command you need here:Get Splunk software and install on Ubuntu
At the lower left of the next page, in the "Splunk Enterprise" section, click "Download Free 60-Day Trial", as shown below.

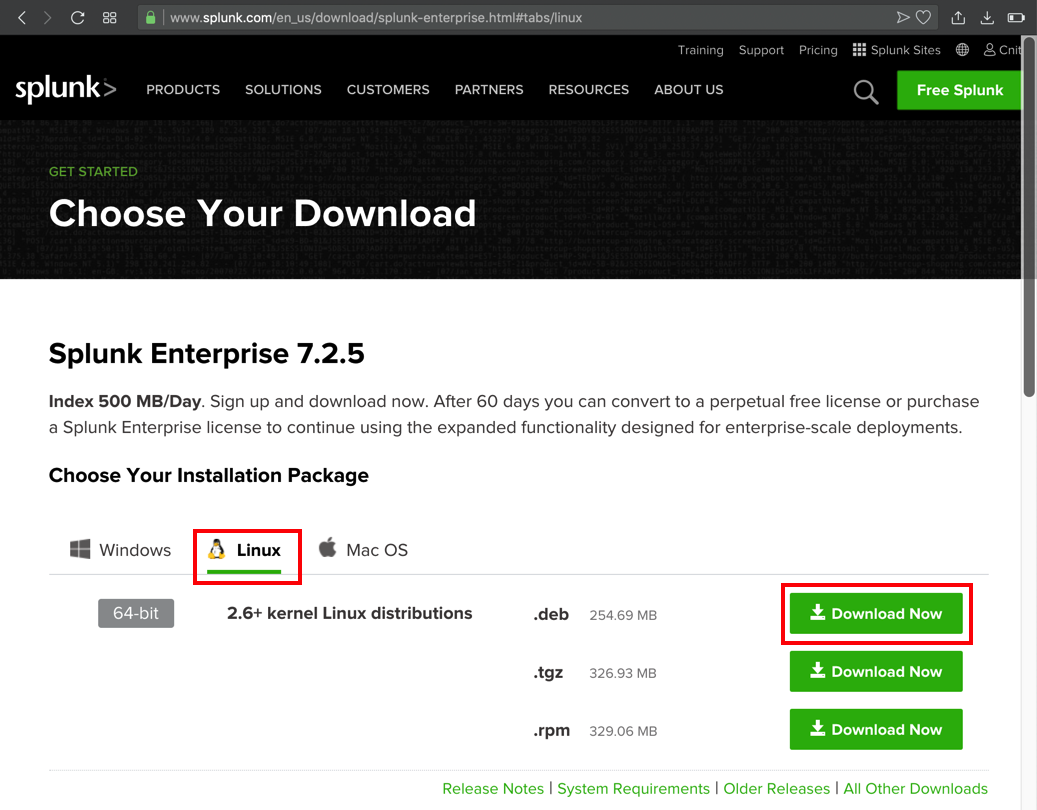
On the next page, click the Linux tab, and, in the ".deb" line, click the "Download Now" button, as shown below.
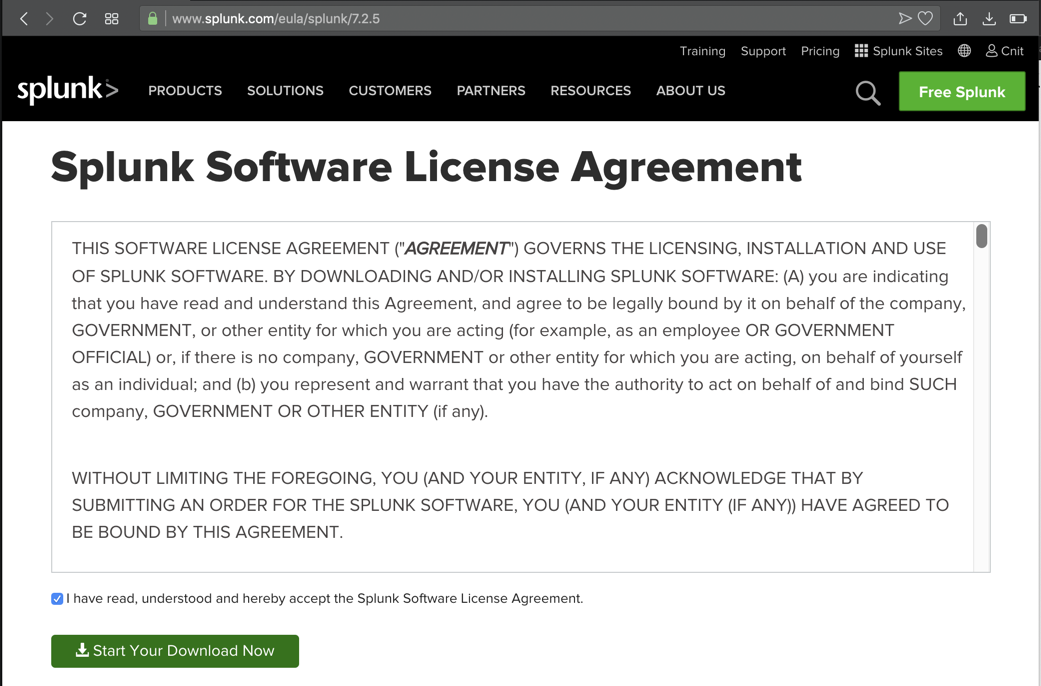
On the next page, accept the agreement and click the "Start Your Download Now" button, as shown below.
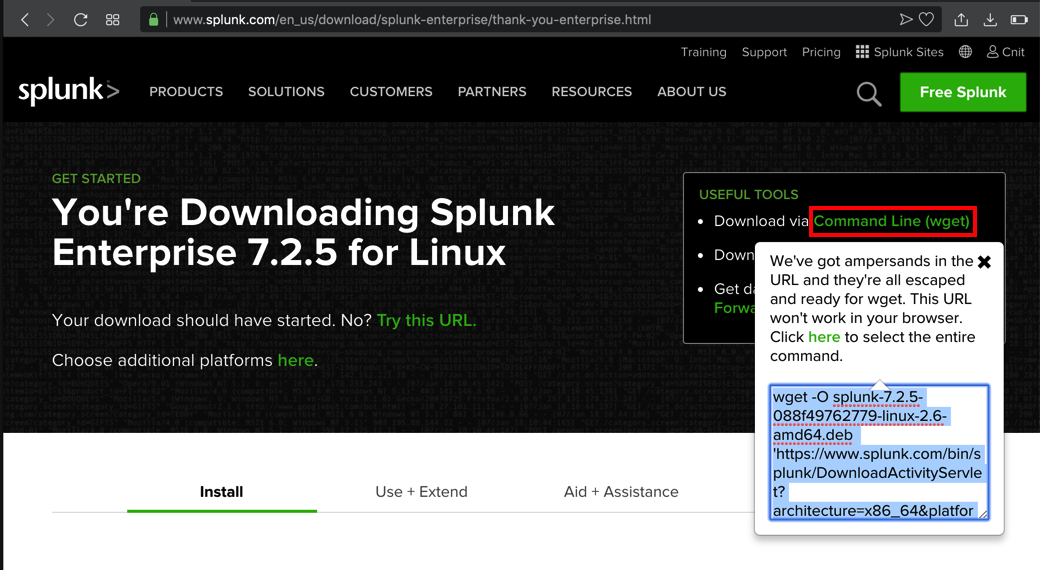
When the download starts, cancel it. At the top right of the next page, click "Command Line (wget)".
Highlight the command in the pop-up box and copy it, as shown below.
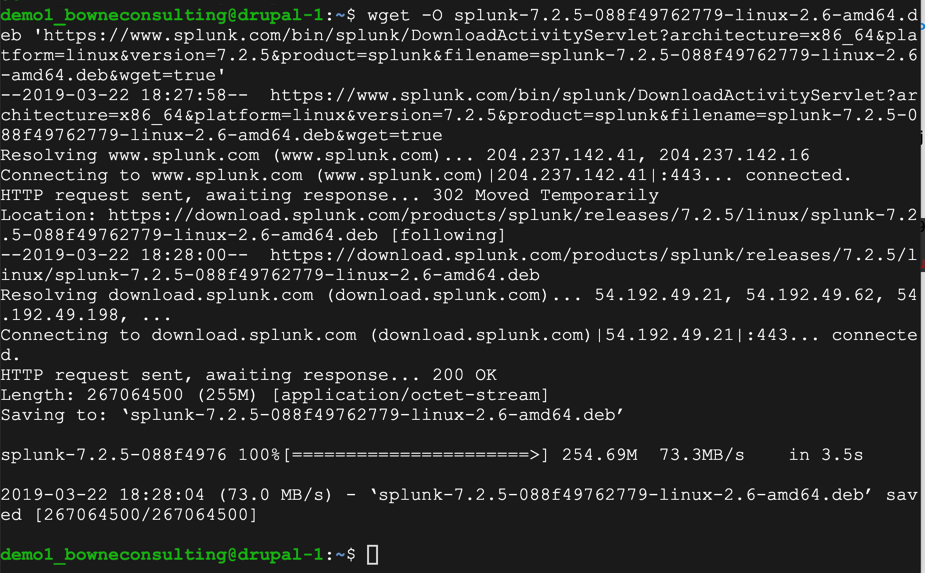
On the Ubuntu server, execute these commands, one at a time.
You will be prompted to agree to a license agreement.
sudo dpkg -i splunk*.deb
cd /opt/splunk/bin
sudo ./splunk set web-port 443
Enter y to agree to the license. Enter a username and password for Splunk, such as admin and P@ssw0rd. On the Ubuntu server, execute this command:
sudo ./splunk start
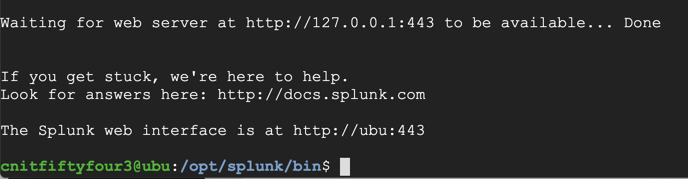
Note: this page is on port 443, but it does not use https.
http://34.73.73.12:443
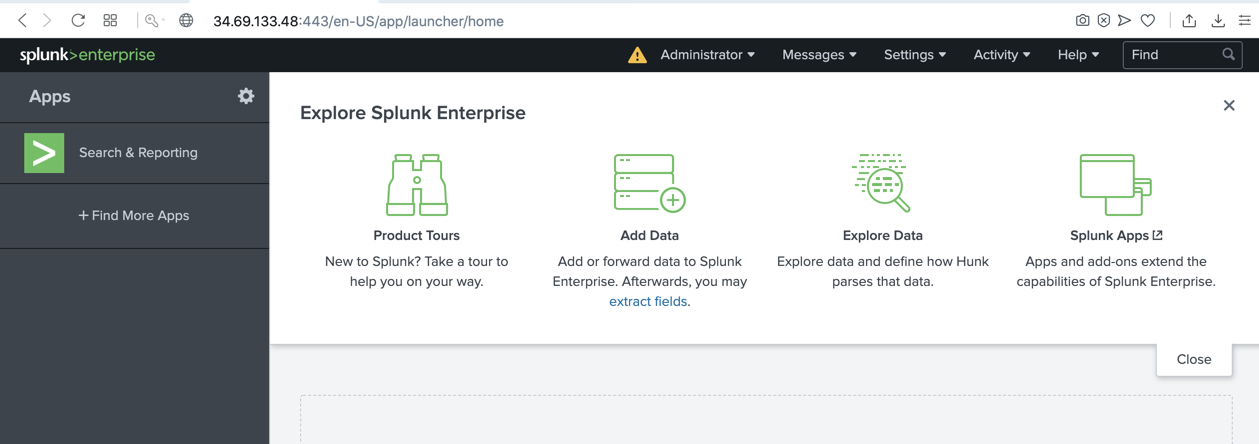
Splunk will pop up some introductory messages. Read them and close them to see the Splunk management page, as shown below.
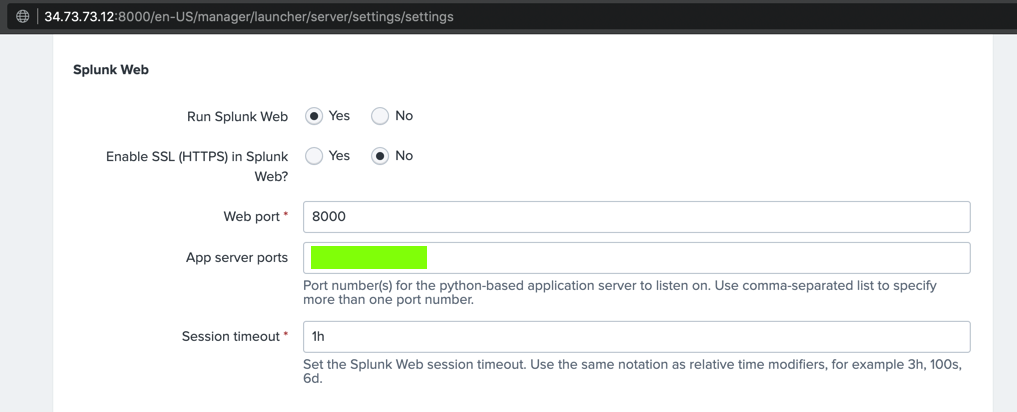
Flag W 201.2: App server ports (10 pts)
In the Splunk management page, at the top, click Settings, "Server settings".On the next page, click "General settings".
Find the "Splunk Web" section. The text covered by the green box in the image below is the flag.
Capturing a Screen Image
Capture a WHOLE-DESKTOP image showing the flag.Save the image as "Proj W 201.2 from YOUR NAME".
Posted 3-21-19
Install lshw added 5-20-19
Image fixed and software-properties-common added 5-20-19
Point total for 1.1 changed to 10 8-8-19
Update added for Ubuntu 8-8-19
Hint added for missing suricata fast alerts 8-8-19
Split into pieces for CNIT 129S 1-25-2020
Troubleshooting "wget" tip added 2-21-2020