Instructions
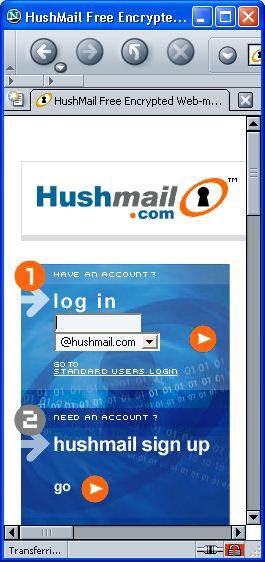
- Open a browser and go to www.hushmail.com
You may be alerted that you have requested an encrypted page.
- Under step 2 "Hushmail sign-up" click the orange go button.
- The terms of service appear. Make up your hushmail name and enter
it in the Option 1 - Choose your own Hushmail Address section.
Click the Continue button in the Option 1 - Choose your own Hushmail
Address section.
- If a box pops up asking if you want to install software, allow the software
to install.
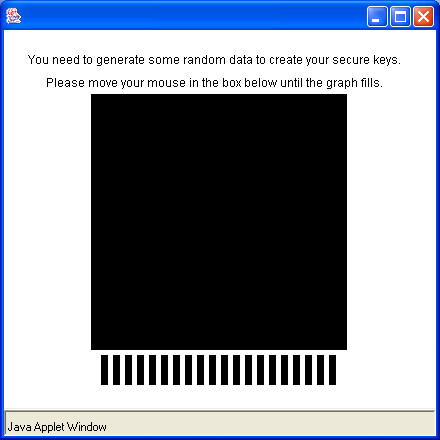
- A black box opens as shown to the right on this page. Drag your mouse around
inside that box for a couple of minutes until it vanishes. This is how
hushmail gets some random numbers to use to generate your keys.
- In the next window, enter any pass phrase you like twice and click the
Next button. Write down your pass phrase! If you lose your
pass phrase you will be locked out of your hushmail account.
- When a box pops up saying Click okay to complete account creation,
click the OK button.
- When a box pops up saying Do you want to add hushmail to your
favorites, click the Cancel button.
- The next window tells you about the paid subscriptions. It has a form
that asks for your name, credit card #, etc. Leave all that blank -- do NOT
enter a credit card number. Just Scroll down to the bottom and click the
Click here to continue with a free account button.
- Wait while the encryption engine downloads, and then enter your passphrase
when you are prompted to.
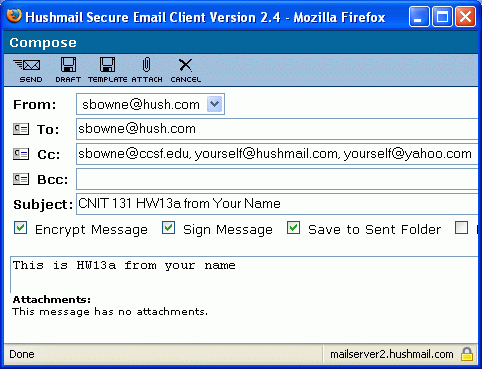
- Your Hushmail e-mail window opens as shown below.
click the Compose button.

- Compose a message to me at sbowne@hush.com as shown below.
Send a Cc to yourself at your hushmail address and also to yourself at an
insecure address such as a Yahoo or Hotmail one,
and also send a Cc to sbowne@ccsf.edu
Click the Send button.
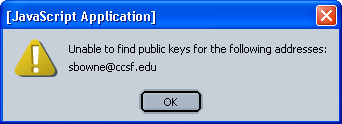
- You will see a message warning you that one or more of the addresses do
not allow encrypted e-mail, so hushmail cannot find public keys.
Click the OK button.
- Look at the copy of the message you sent to an insecure address.
It will show the HASH and the PGP signature, as shown below on this page.
-----BEGIN PGP SIGNED MESSAGE-----
Hash: SHA1

Here is the message body.

This is HW13 from Your Name.
-----BEGIN PGP SIGNATURE-----
Version: Hush 2.2 (Java)
Note: This signature can be verified at https://www.hushtools.com/verify

wl0EARECAB0FAj6wqHIWHHNhbWNjc2YxQGh1c2htYWlsLmNvbQAKCRAfkVgMfUsu/z0c
AJ9pQZZRbMhmH9QTt9dwvidsc55rnACgjBnsq8Bi+owidDU874JhaglWaU4=
=8XWx
-----END PGP SIGNATURE-----
- Look at the copy of the message you sent to hushmail.
The HASH and the PGP signature will not be visible.