Click the "Oopen Browser" button.
In Burp's browser, go to this page:
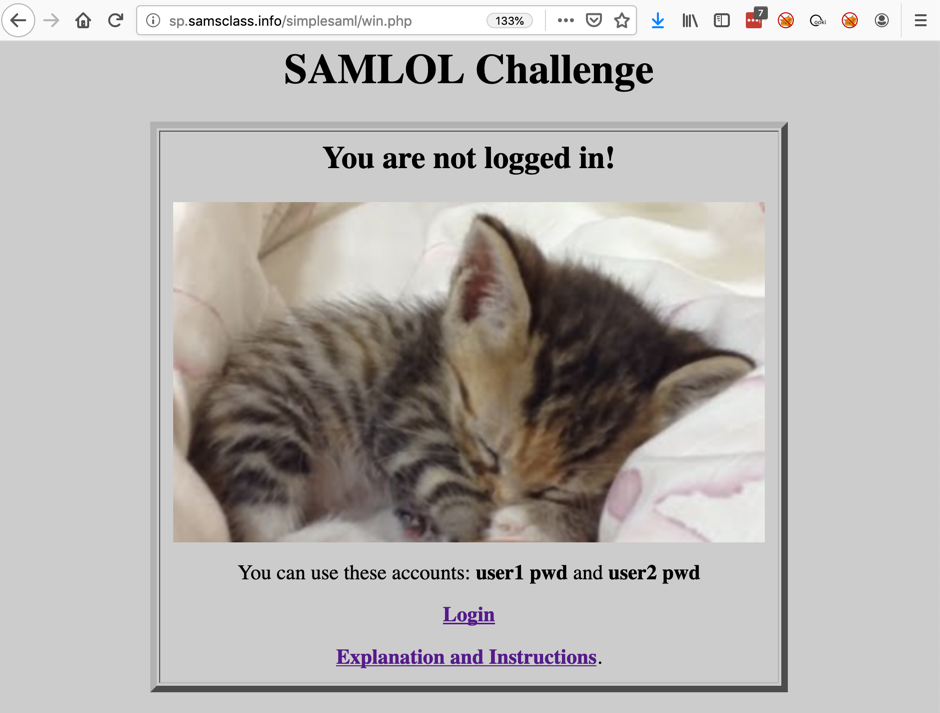
The SAMLOL Challenge page opens, as shown below. Notice the URL--it begins with "sp.samsclass.info". This is my Service Provider.
At the bottom, click Login.
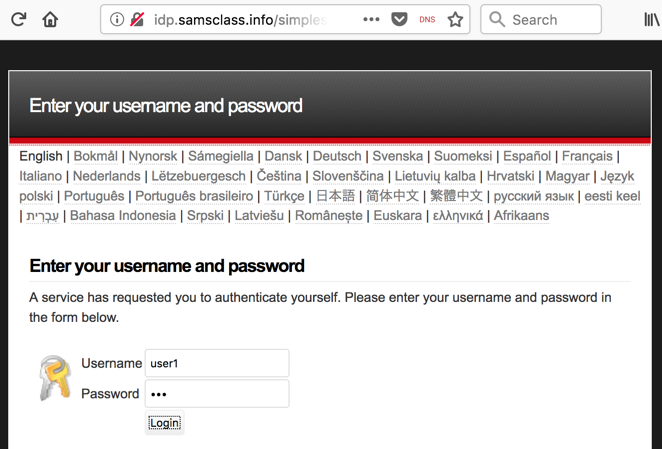
A new page opens, with a URL starting with "idp.samsclass.info", as shown below. This is my Identity Provider.
Log in with a username of user1 and a password of pwd
You are redirected back to the Service Provider, as shown below. You are now authenticated as "user1".
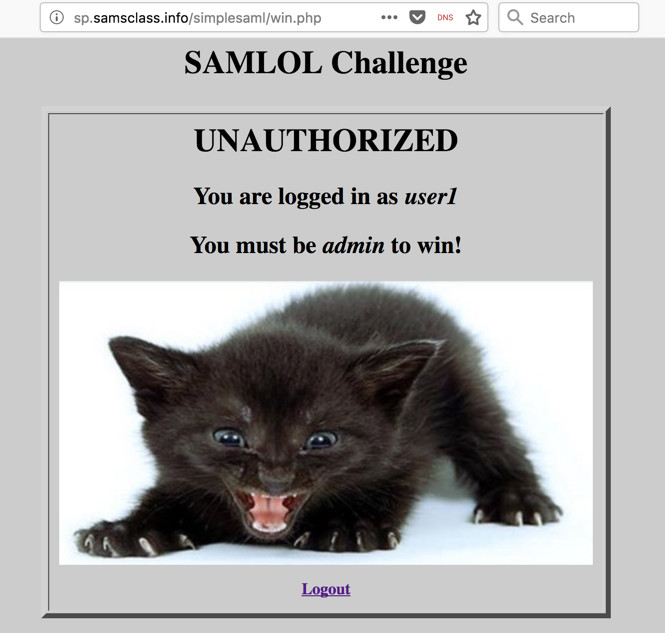
This is how "Single Sign-On" works, which is also called "Federated Identity Management". The Service Provider is trusting another system to act as an Identity Provider.
Most websites work this way now, allowing you to use some other service, such as Google or Facebook, as an identity provider. This way, you don't need to make a new account, and the Service Provider doesn't see your password. Instead, they see a digital identity token from the Identity Provider and accept that as proof of your identity.
Can we modify or forge that token? Of course we can, and if the Service Provider isn't careful, they can be fooled by the forgery :)
In Burp, click the Proxy tab and the "HTTP history" sub-tab.
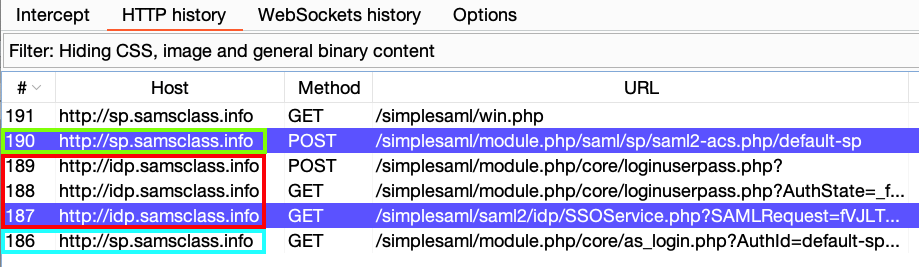
You can see the process, as shown below. (Your Burp won't highlight lines in purple yet.)
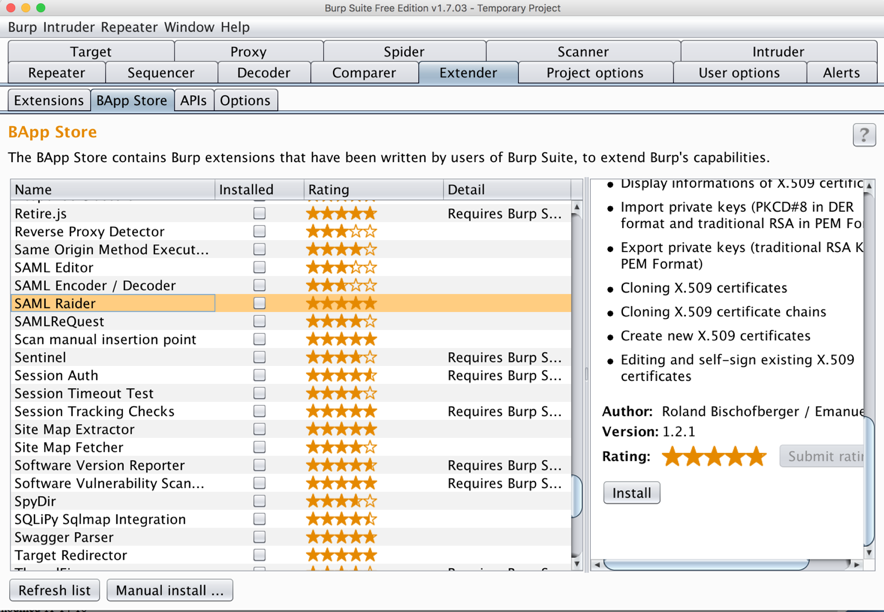
In the left pane, scroll down and click "SAML Raider". In the right pane, scroll down and click the Install button, as shown below.
On the next page, click Login.
Type in a username of user1 and a password of pwd but don't click the Login button yet.
Right-click any line and click "Clear history". Click Yes.
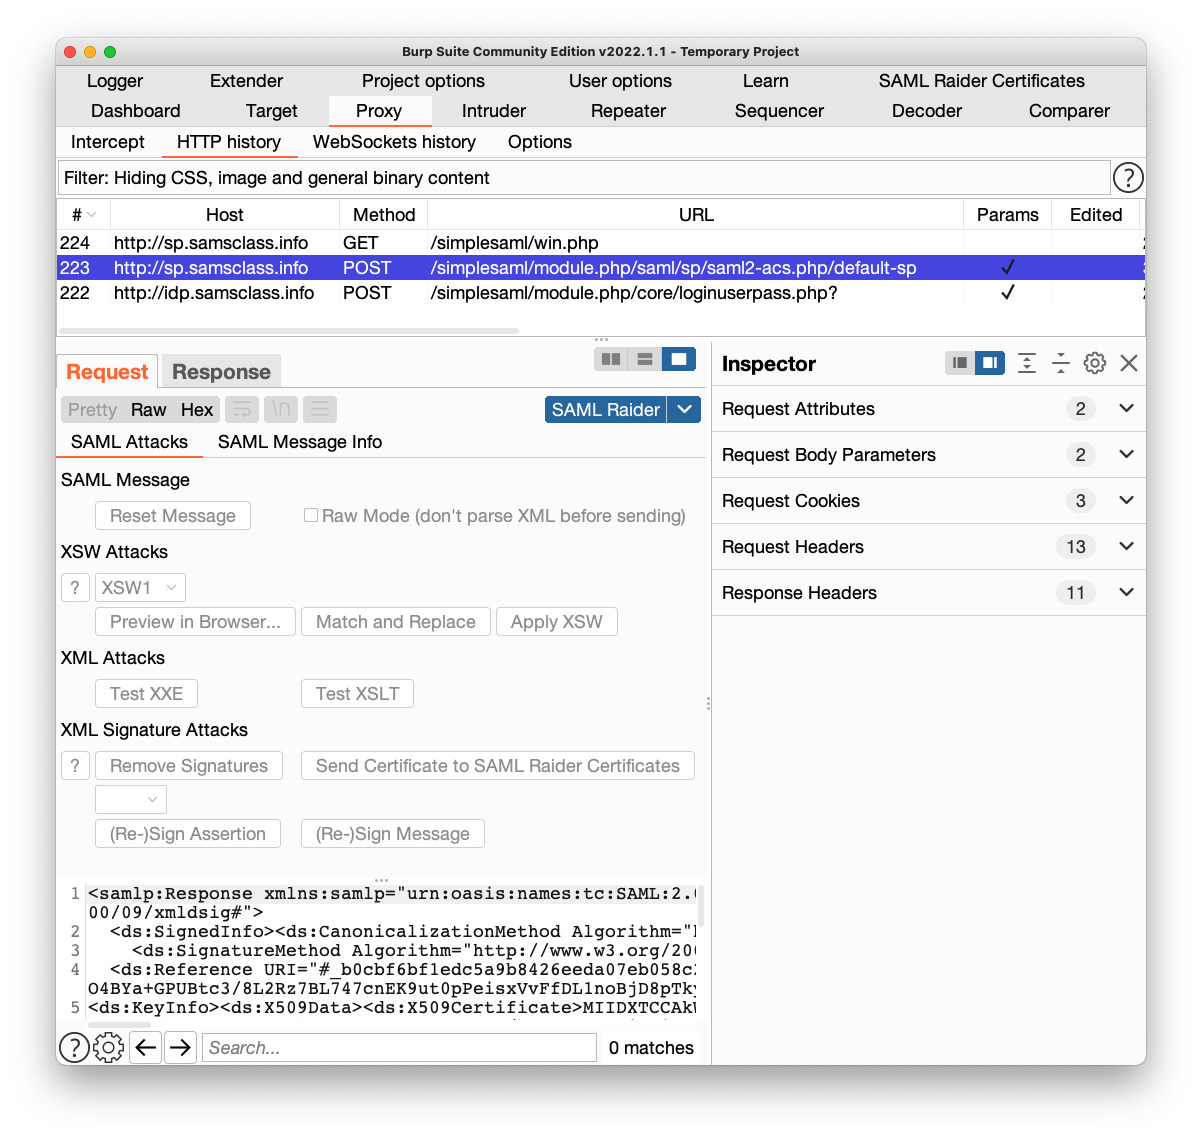
Two pages of data apear, with tabs labelled "SAML Attacks" and "SAML Message Info", as shown below.
There are interesting buttons here, like "Remove Signatures", but they are grayed out, because you can't modify anything in the History.
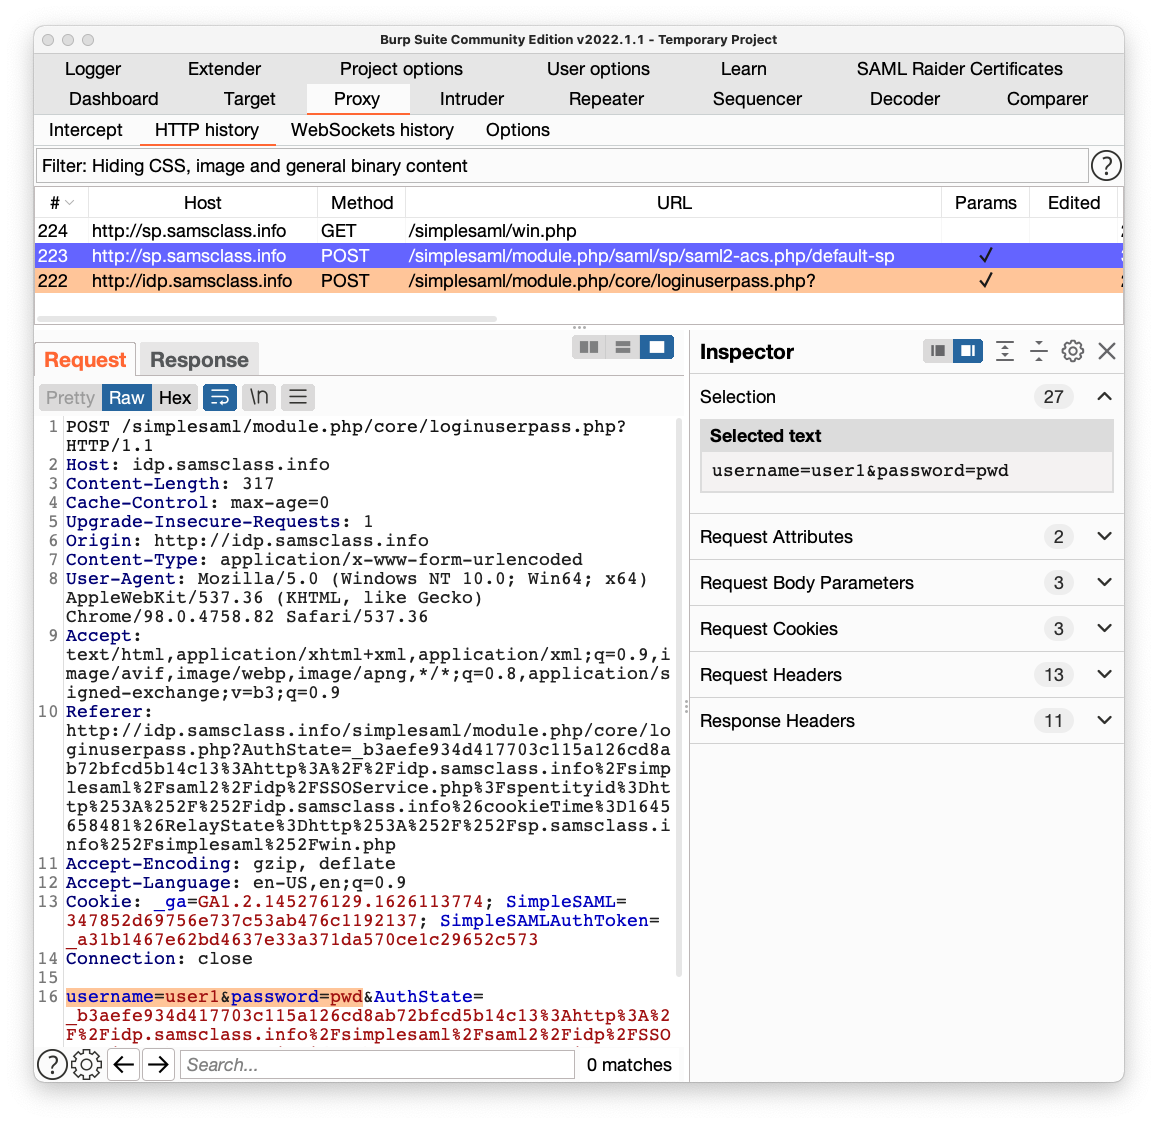
In the lower pane of Burp, click the Request tab.
You can see the username and password being sent to the server here, highlighted in orange at the bottom of the image shown below. This is where the authentication process began.
In the lower pane of Burp, click the Response tab.
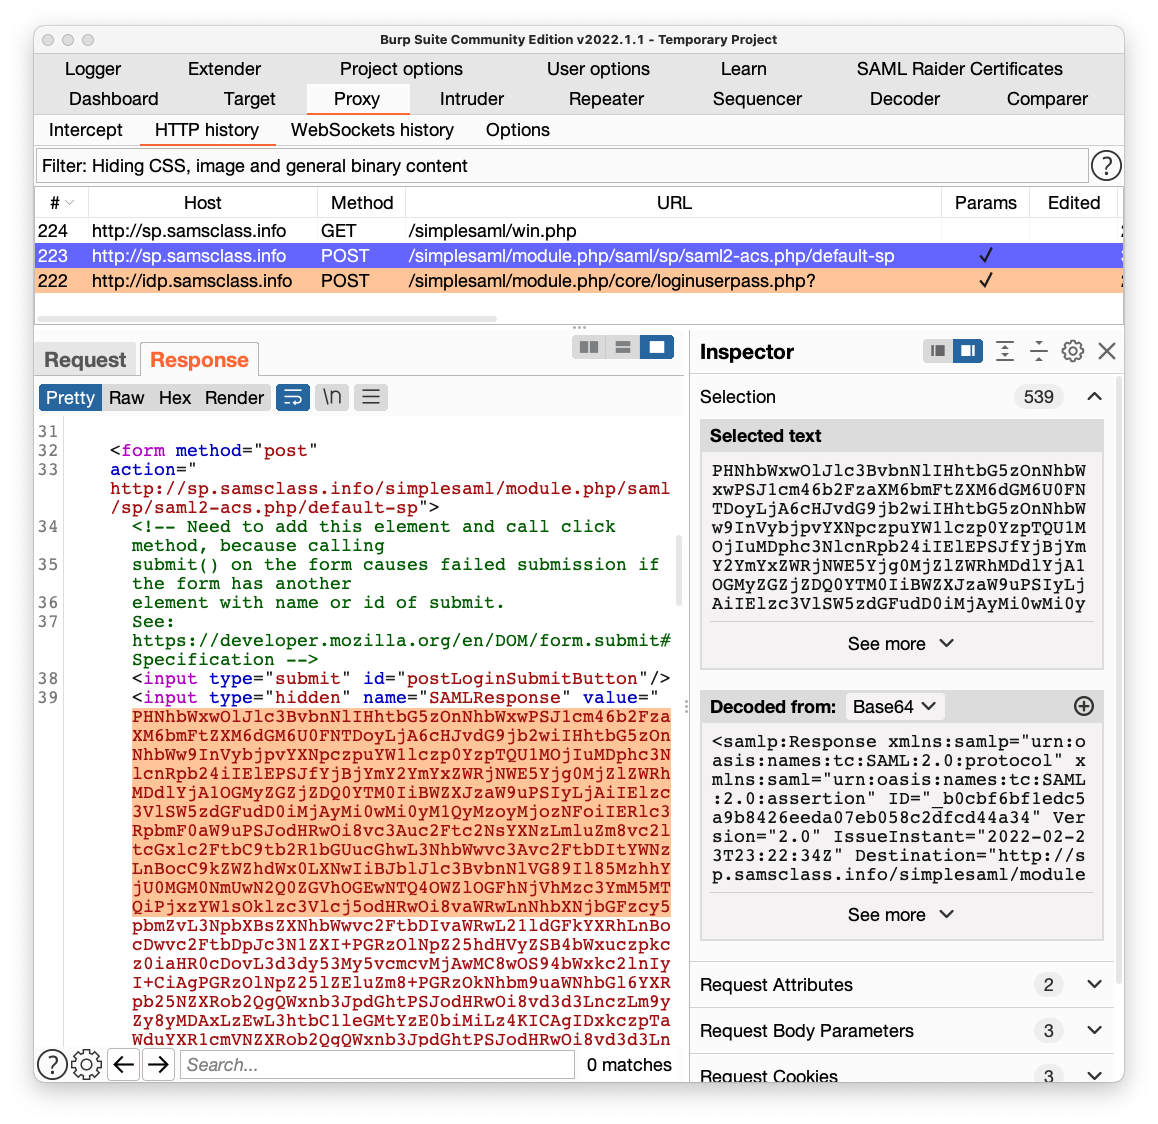
Scroll down and find the hidden field named "SAMLResponse".
Highlight a few lines of the value, as shown below.
On the right side, in the Inspector pane, in the "Decoded from Base64" section, you see some decoded data. It contains security assertions and signatures which the client's browser can send back in future requests as proof of identity.
In Burp, in the history list, click the POST request made to a Host of sp.samsclass.info and a URL ending in default-sp. In the figure above, it is request number 223.
In the lower pane of Burp, click the Request tab. In the "Select extension" drop-down list box, select "SAML Raider".
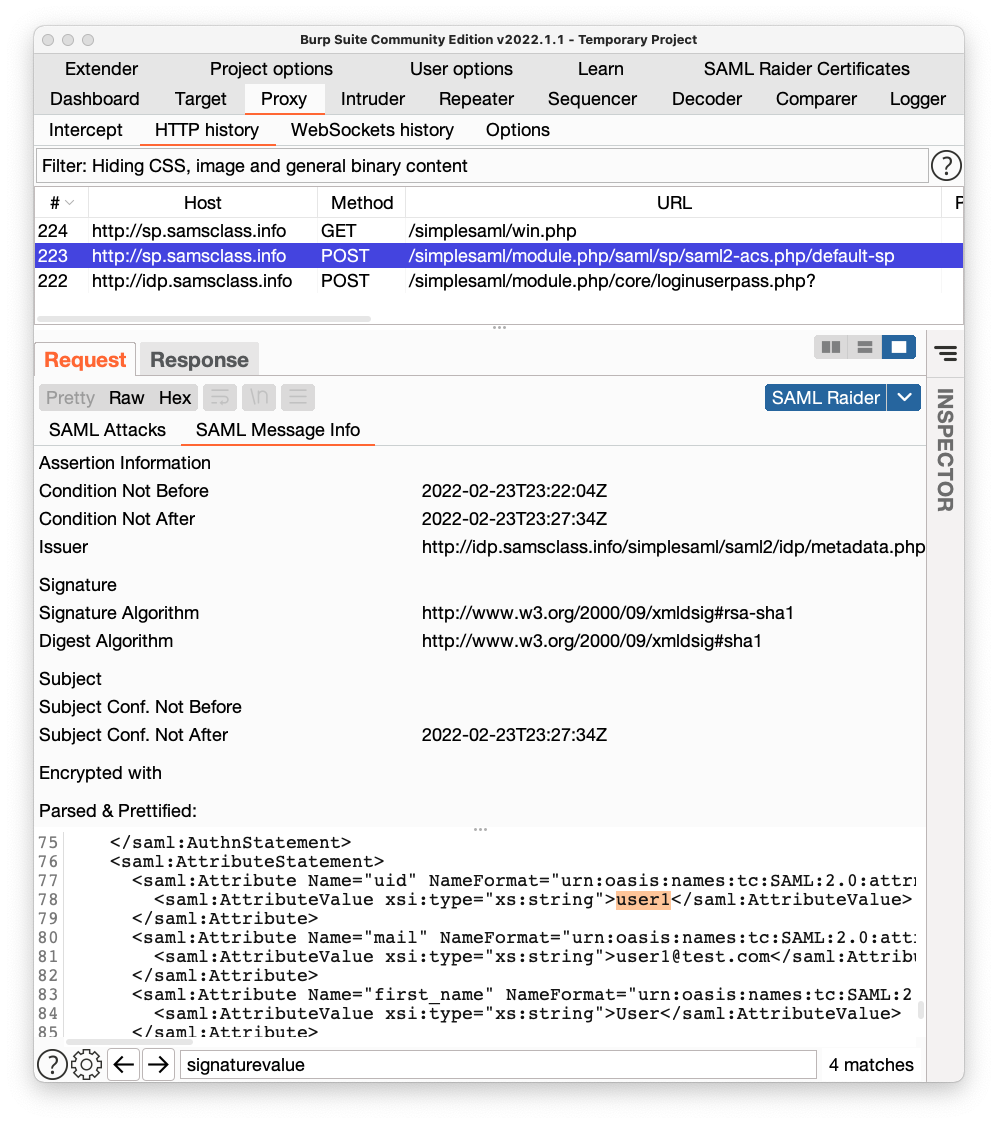
Click the "SAML Message Info" sub-tab.
In the lower left pane, the XML contents of the SAMLResponse are shown. Scroll through it. There are many items, including two long SignatureValue fields.
Near the end, find the "uid" attribute, highlighted in orange in the image below.
This attribute identifies the user that has been authenticated, and the SAMLResponse is treated like an ID card. If it passes validation checks, it proves that this request is really from "user1" and the application provides personal data for "user1".
We don't have a way to correct the signature, so we'll just ignore that problem and see if the Service Provider falls for it. Maybe the Service Provider isn't actually validating the signatures. This happens frequently, because people have difficulty correctly configuring validation tests and just disable them.
On the next page, click Login.
Type in a username of user1 and a password of pwd but don't click the Login button yet.
Click the "Intercept is off" button, so the message changes to "Intercept is on", as shown below.
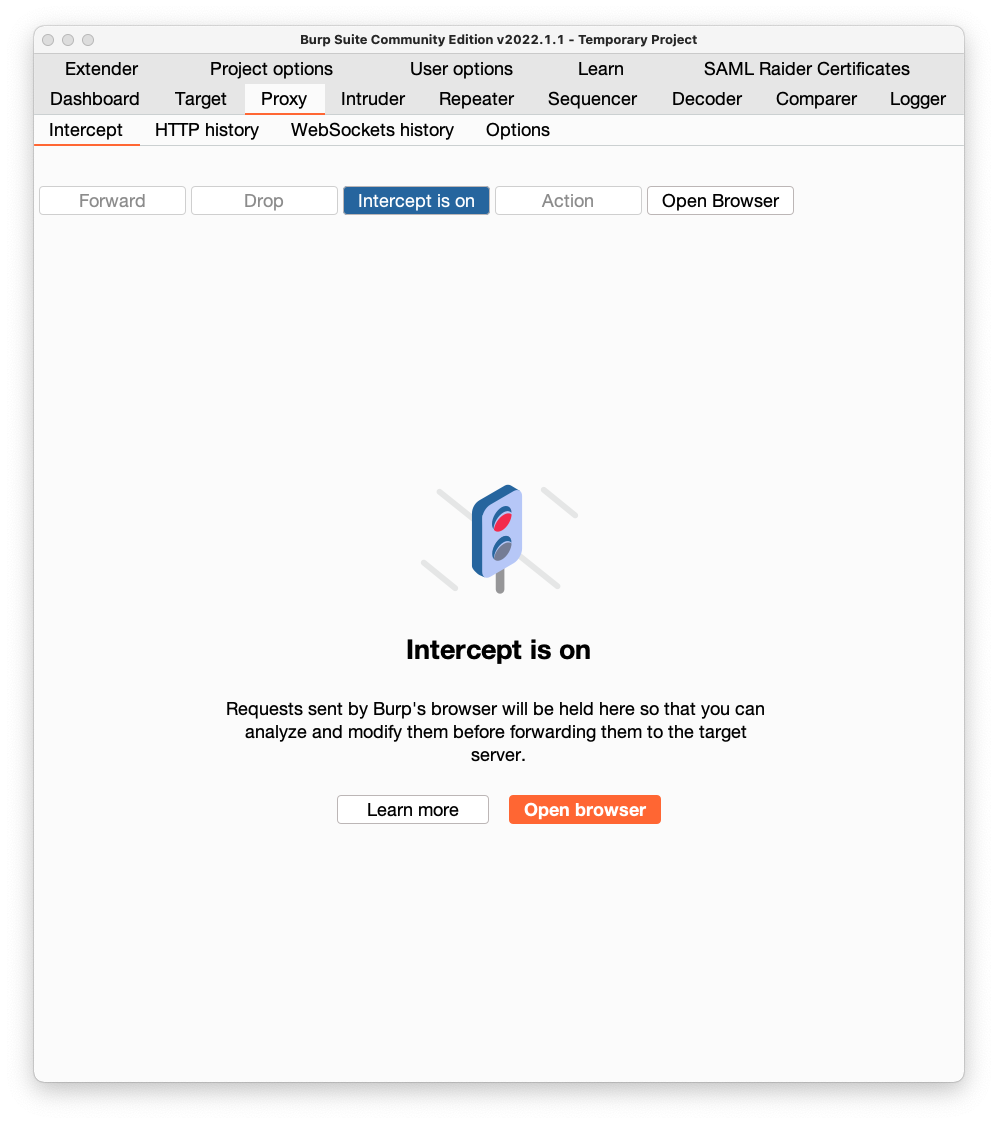
Burp intercepts the response and pops up an "Intercept" tab.
In Burp, click the Forward button once.
The next request is the one we want. In the lower pane, click the "SAML Attacks" sub-tab.
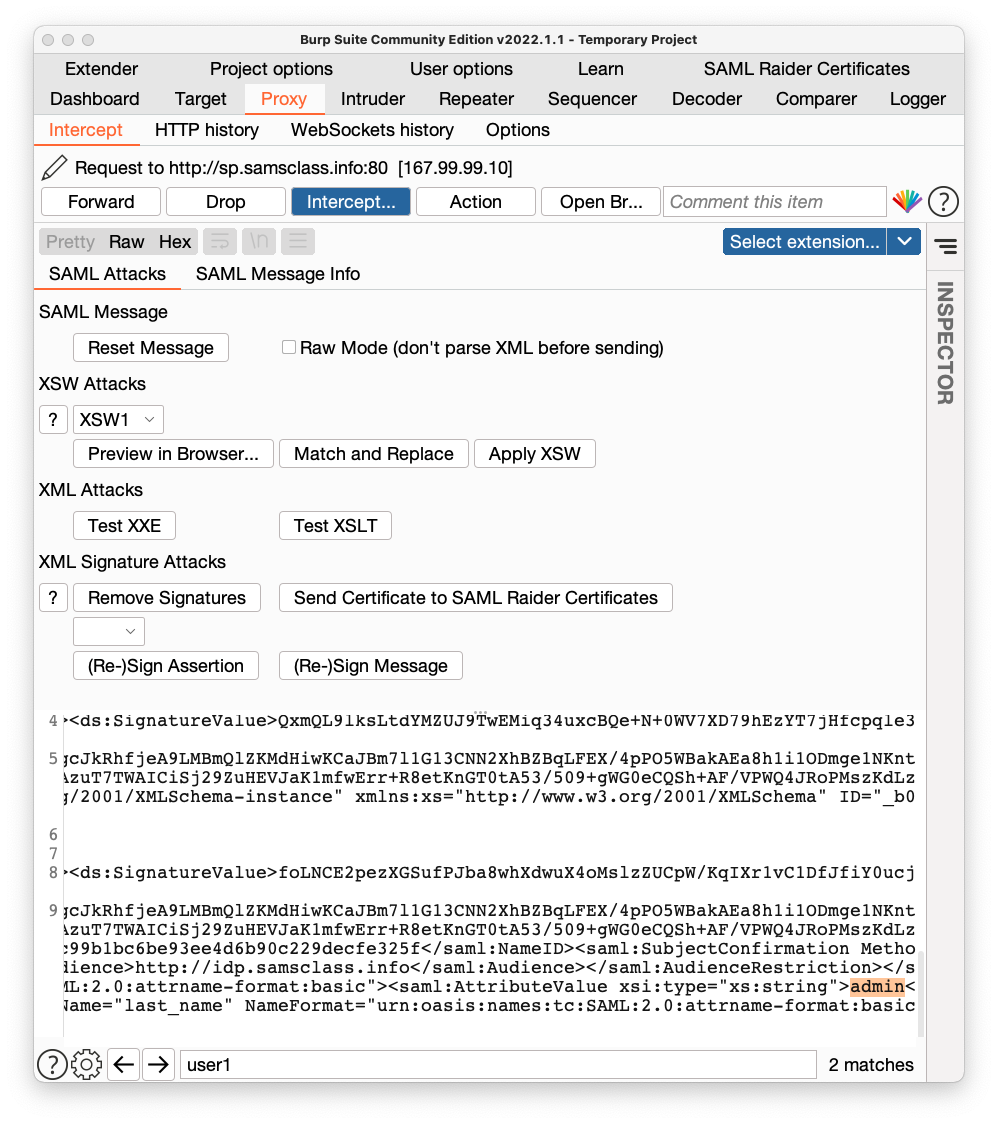
At the bottom, in the search box, enter user1, outlined in red in the image below.
In the lowest pane, scroll to the bottom and find the "uid" attribute, which is currently user1.
Click in the pane showing the decoded data and use the right-arrow on your keyboard to make the user1 text visible, which is highlighted in yellow in the image below.
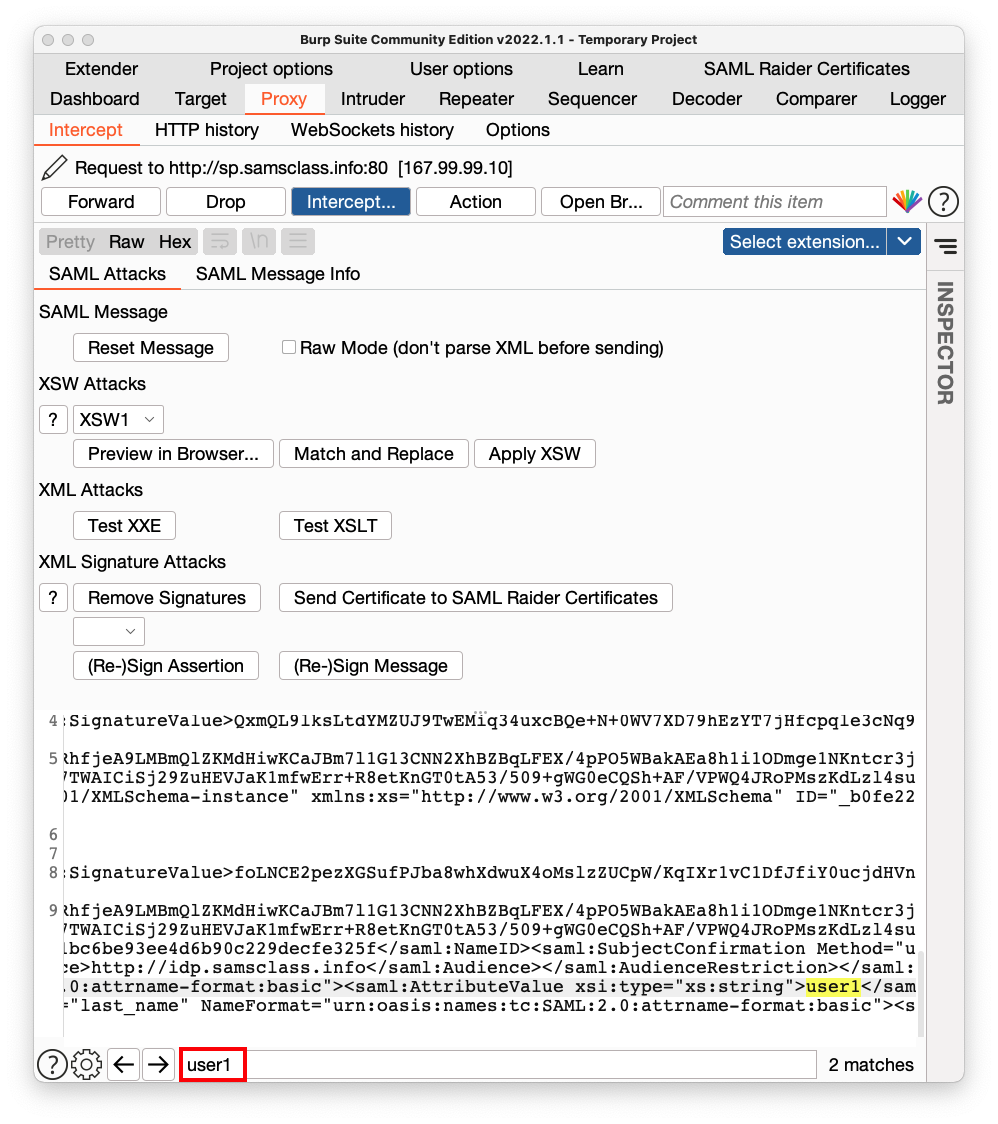
Using the keyboard, delete user1 and type in admin instead, as highlighted in orange in the image shown below.
In Burp, click the "Intercept is on" button to allow traffic to resume.
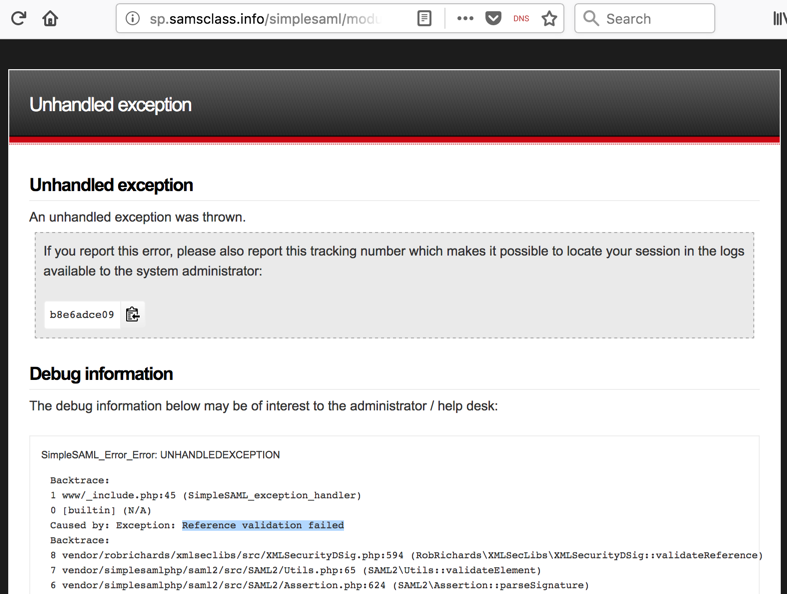
In Burp's browser, an error message appears, as shown below, saying "Reference validation failed". The Service Provider checked the signature, and detected our forgery attempt, so we did not win yet.
In Burp's browser, click the Back arrow.
Click Logout.
On the next page, click Login.
Type in a username of user1 and a password of pwd but don't click the Login button yet.
Click the "Intercept is off" button, so the message changes to "Intercept is on", as shown below.
Burp intercepts the response and pops up an "Intercept" tab.
In Burp, click the Forward button once.
The next request is the one we want. In the lower pane, click the "SAML Attacks" sub-tab.
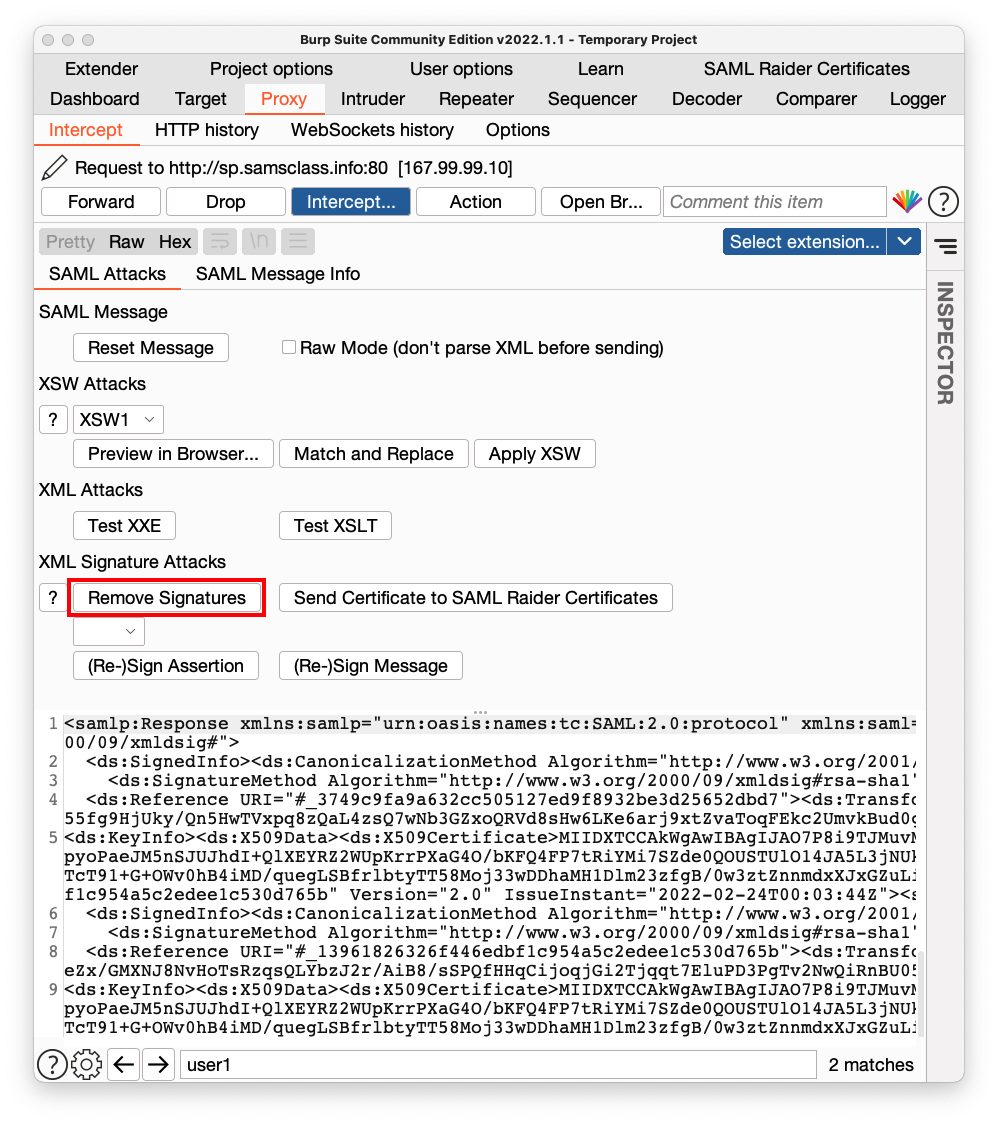
Click the "Remove Signatures" button, outlined in red in the image below.
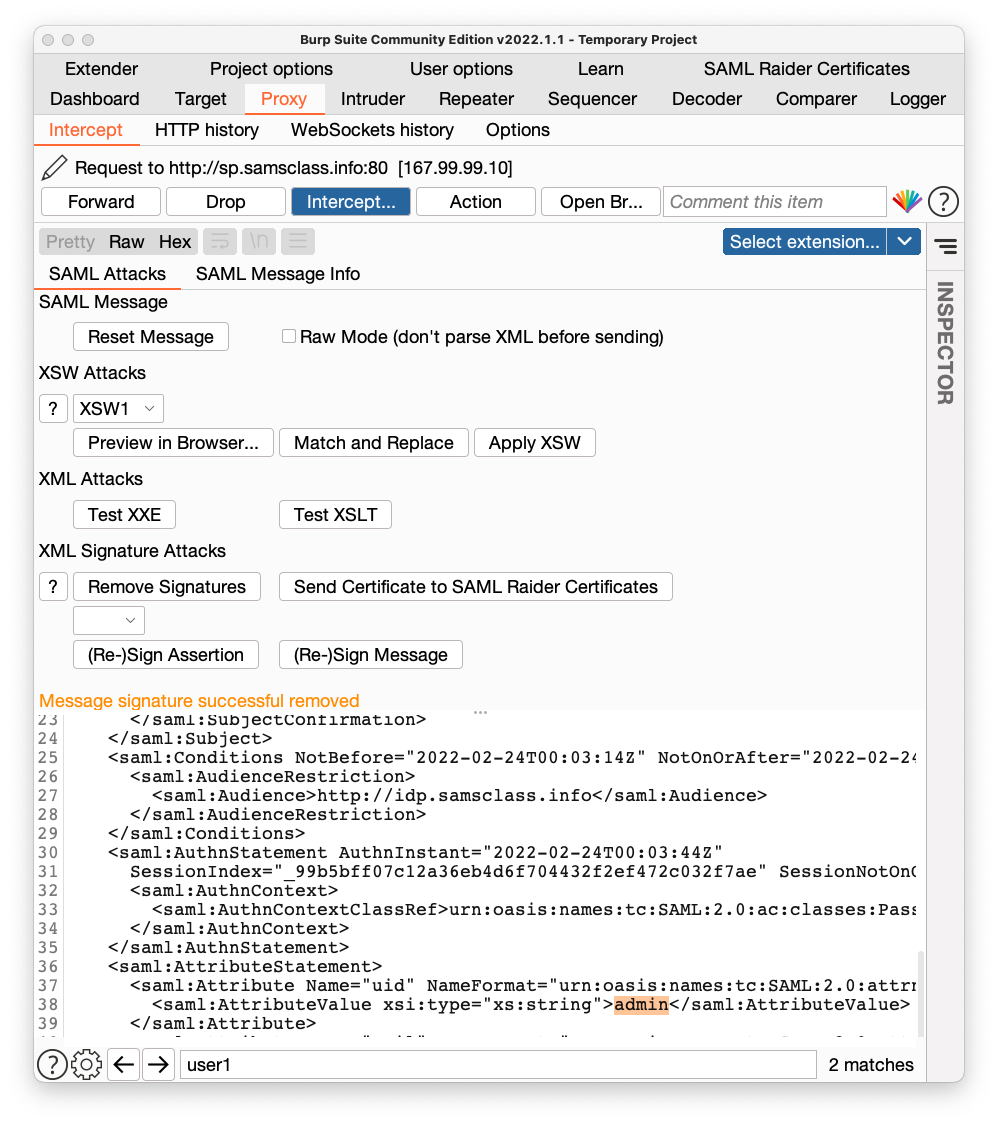
In the bottom left pane, find user1 and change it to admin, as highlighted in orange in the image shown below.
In Burp, click the "Intercept is on" button to allow traffic to resume.
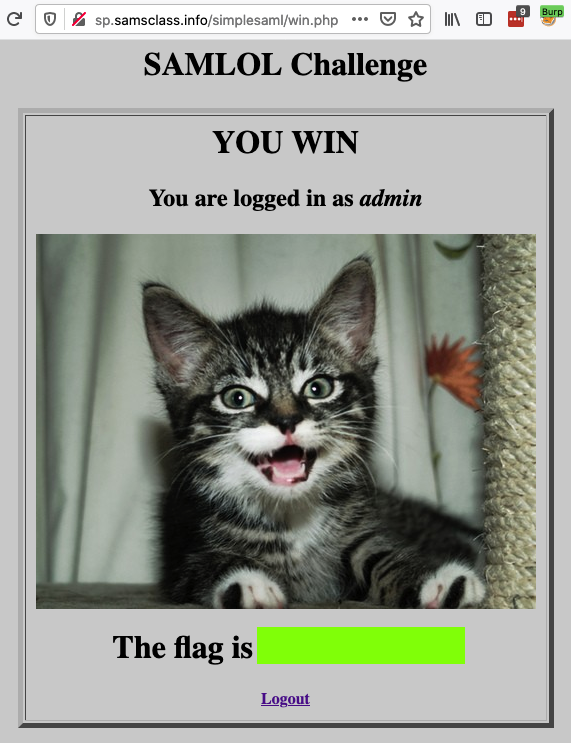
In Burp's browser, the winning page appears, as shown below. My SAML configuration has a "fail-open" vulnerability, which misinterprets a missing signature as valid.
Flag W 520: Flag (15 pts)
The flag is covered by a green rectangle in the image below.
Renumbered and changed to flag system 6-10-2020
Updated 2-23-22