At the bottom left, click "Signup now". Fill out the form.
Read your email and click the link in the message from PUB400.
Wait a few minutes and you'll get another email containing your username and initial password.
https://sourceforge.net/projects/tn5250/
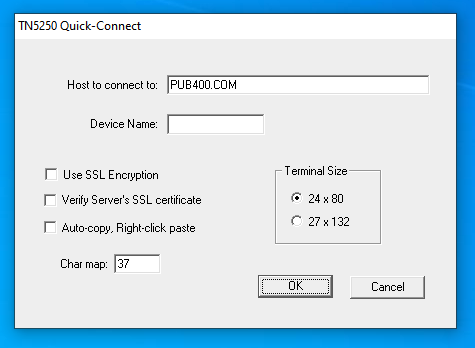
Install the software with the default options.In the "Host to connect to" box, enter
PUB400.COM
as shown below. Then click OK.
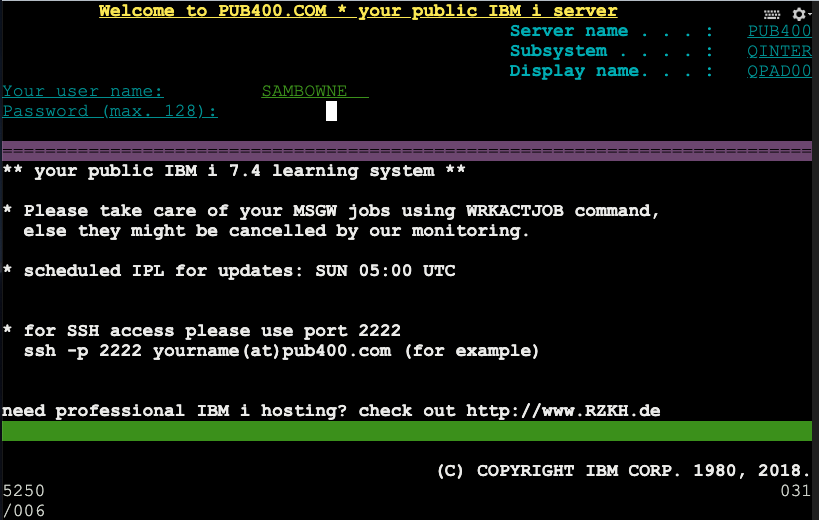
At the top left, enter your user name. Press Tab to move to the password field. Type in your password and press Enter, as shown below.
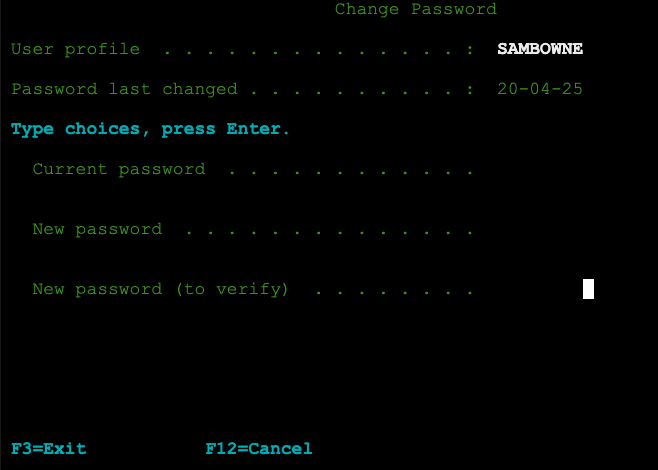
You will be forced to change your password, as shown below.
The "IBM i Main Menu" appears, as shown below.
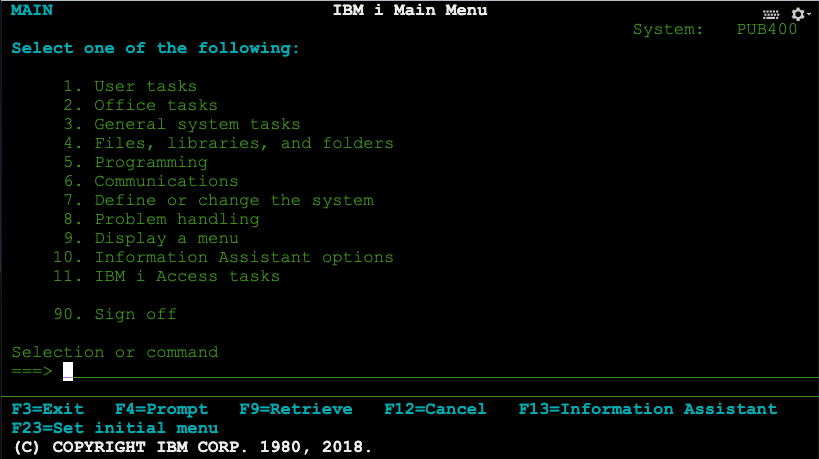
      4. Files, libraries, and folders
      2. Libraries
      1. Work with libraries
Notice the name of your personal library, outlined in yellow in the image below.
You will need this name to create files later.
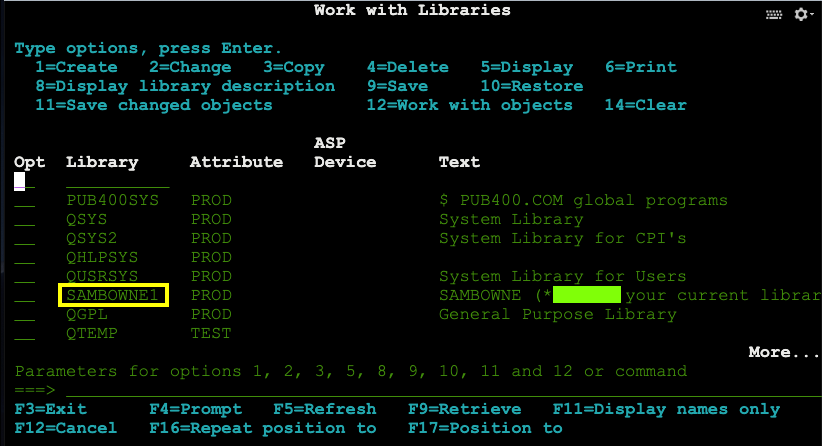
Flag CBL 8.1: Library (10 pts)
The flag is the word covered by a green box in the image above.
Press F3 several times to return to the MAIN menu.
From the MAIN menu, make these selections:
      4. Files, libraries, and folders
      1. Files
      1. Work with files
Press Enter.
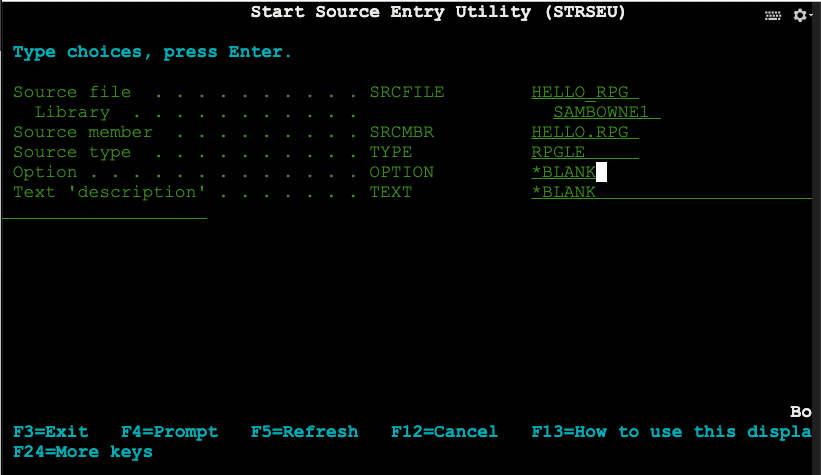
On the next page, enter these values, as shown below:
Press Enter.
On the "Select File Type" page, in the "Source Physical File" line, enter 1, as shown below:
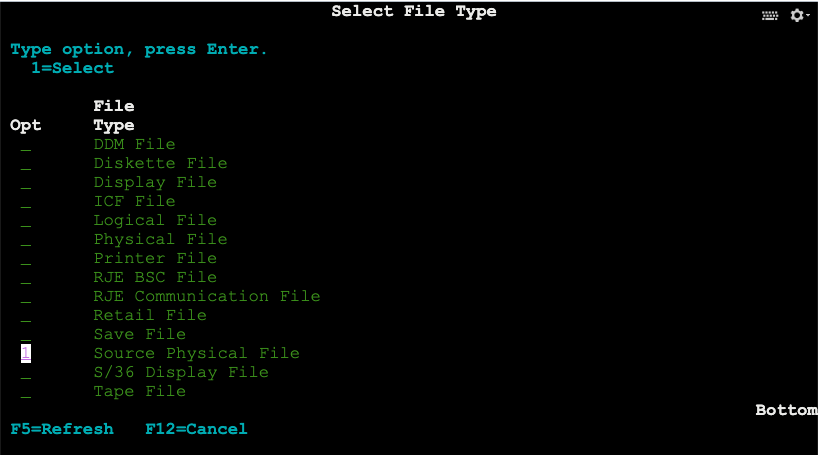
Press Enter.
On the "Create Source Physical File (CRTSRCPF)" page, enter these values, as shown below:
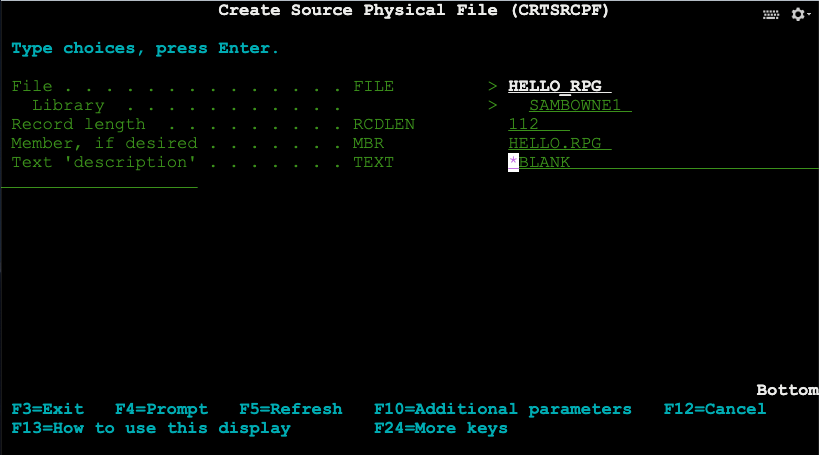
Press Enter.
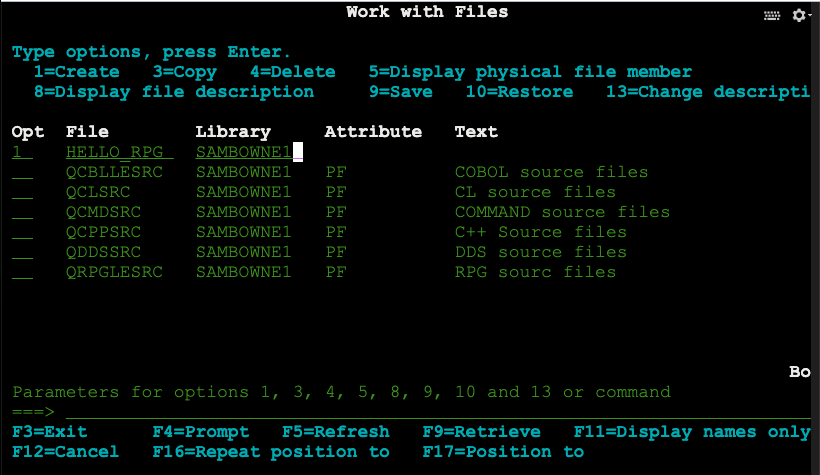
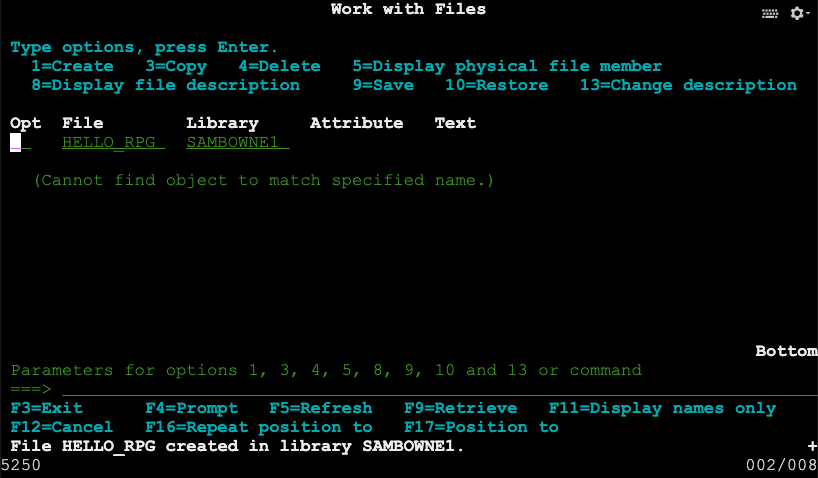
At the bottom, in white letters, a message appears saying "File HELLO_RPG created in library", as shown below.
Make this selection:
4. Edit a source file
Press Enter.
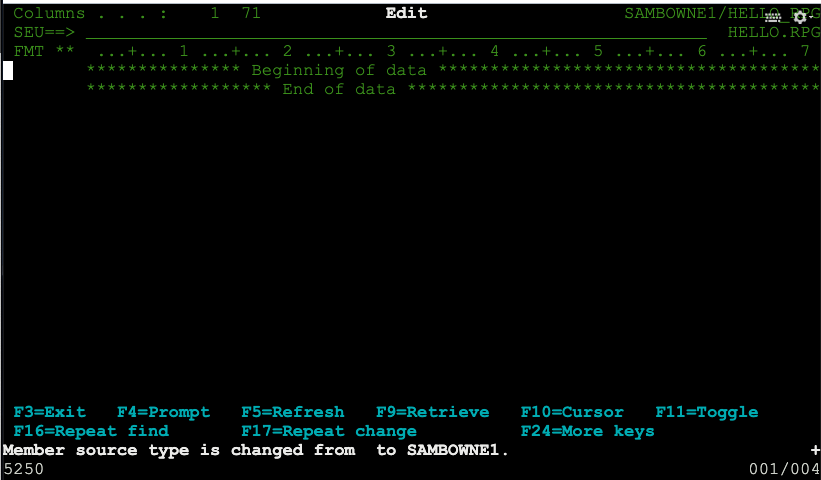
The Edit page appears, as shown below.
This is an incredibly old and primitive text editor. For what it's worth, you can read about it here
Move the cursor to the left edge of the line containing "Beginning of data", as shown below.
Type I4, as shown in the image above, and press Enter.
Four new lines appear, beginning with seven apostrophes, as shown below.
This system appears strange now, but it's based on Hollerith cards, which mainframes were designed to use. The first seven characters on each card were reserved for line numbers and other special purposes.
Carefully enter the program shown below, using the arrow keys instead of the Enter key.
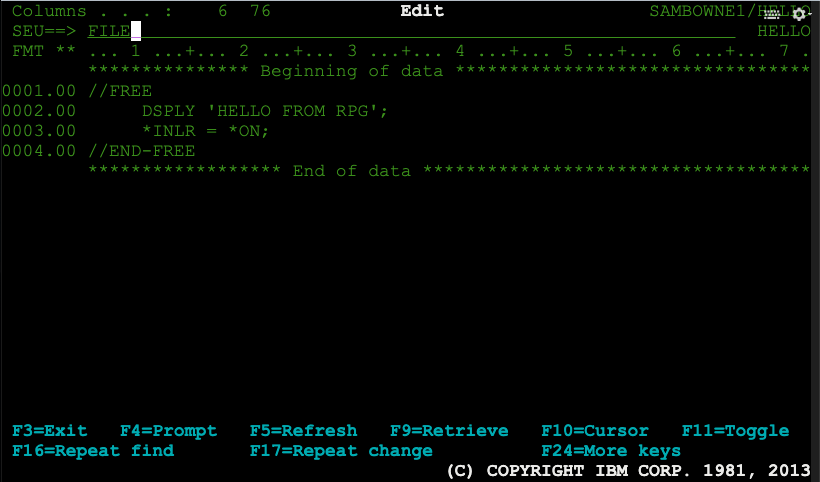
Move the cursor to the top left, after the SEU==> prompt, and type FILE, as shown in the image above.
Tips
If you make an error, and the screen stops responding to the keyboard, press Ctrl+A and F3 to unfreeze it.When you're done using tn5250, press Ctrl+Q to exit.
Press Enter to save the file.
A message appears at the bottom, in white text, saying "Member HELLO.RPG in file SAMBOWNE1/HELLO_RPG changed with 4 records.", with your library name instead of mine, as shown below.

From the MAIN menu, make these selections:
      5. Programming
      2. Programming Development Manager (PDM)
      3. Work with members
Press Enter.
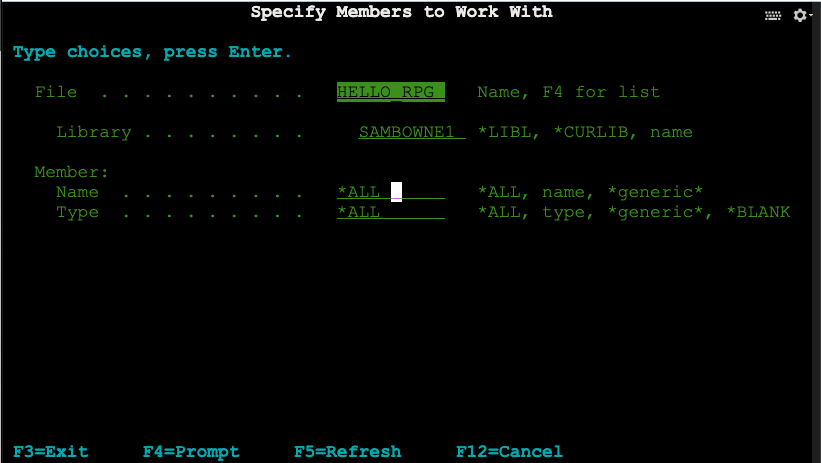
In the "Work with Members Using PDM" page, enter this value, as shown below:
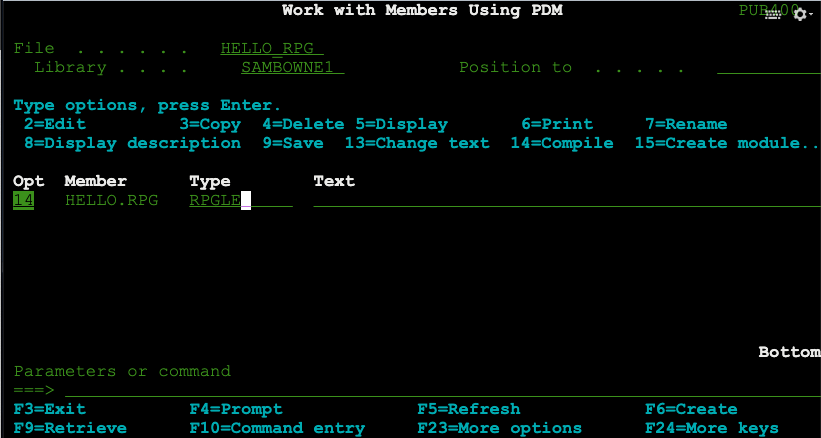
Press Enter.
At the bottom of the screen, in white letters, a message appears, saying "Program HELLO.RPG placed in library SAMBOWNE1. 00 highest severity. Created", as shown below.
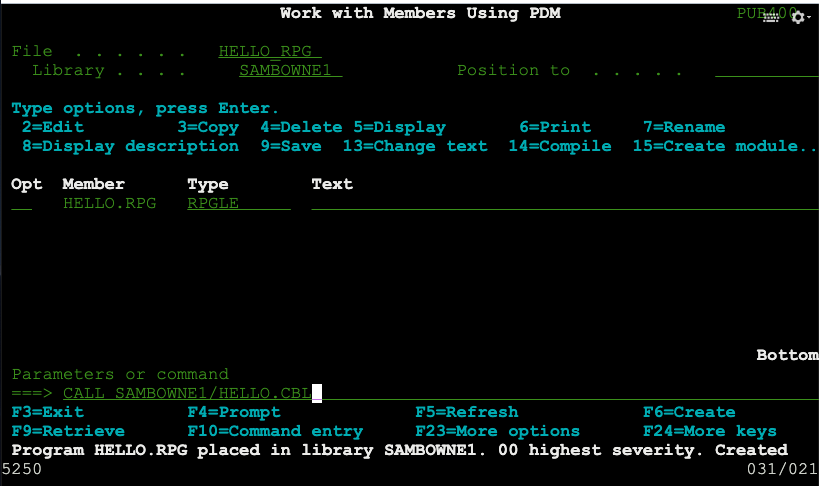
CALL SAMBOWNE1/HELLO.RPG
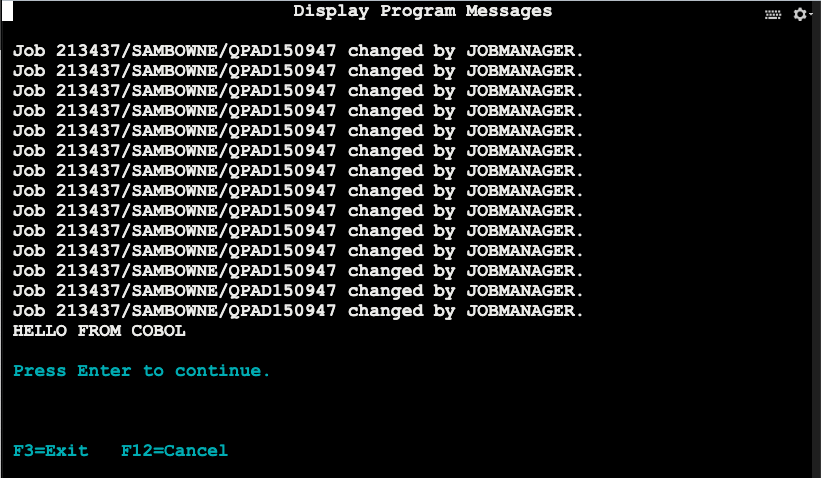
The "Display Program Messages" page appears, with "HELLO FROM RPG" at the bottom, as shown below.
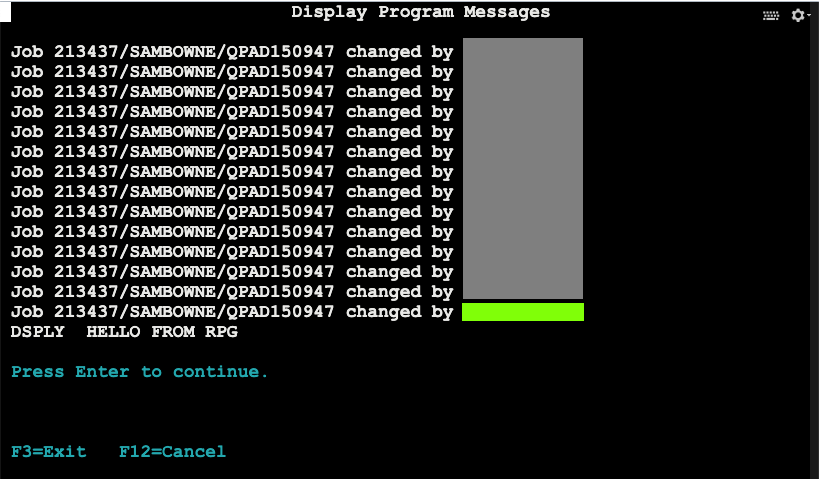
Flag CBL 8.2: Program Messages (10 pts)
The flag is the word covered by a green box in the image above.
Remember COBOL? This is a CTF about COBOL.
Press F3 several times to return to the MAIN menu.
From the MAIN menu, make these selections:
      4. Files, libraries, and folders
      1. Files
      1. Work with files
Press Enter.
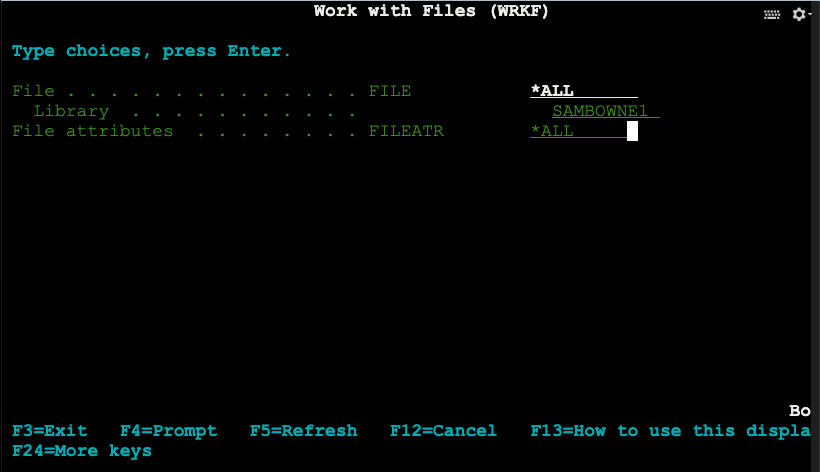
On the "Work with Files" page, enter these values, as shown below:
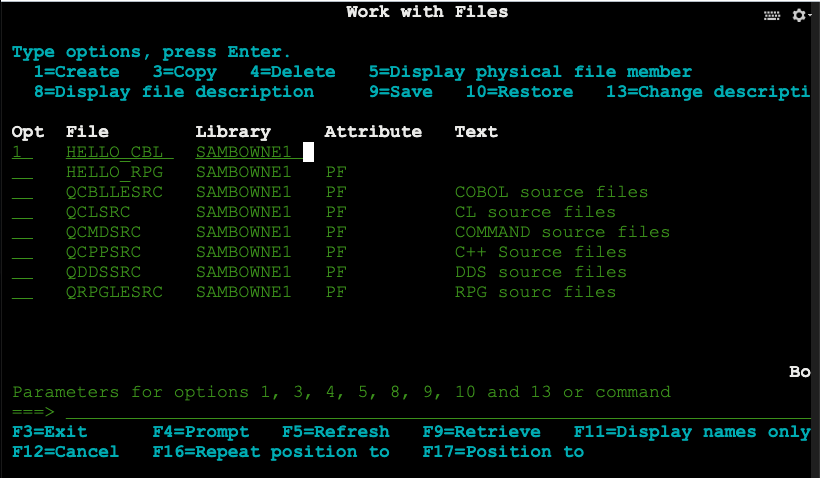
Press Enter.
On the "Select File Type" page, in the "Source Physical File" line, enter 1. Press Enter.
On the "Create Source Physical File (CRTSRCPF)" page, enter this value, as shown below:
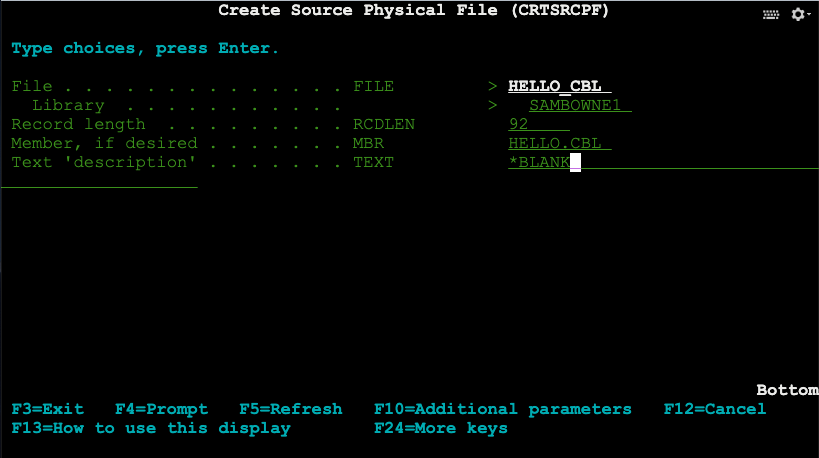
Press Enter.
At the bottom, in white letters, a message appears saying "File HELLO_CBL created in library".
Make this selection:
4. Edit a source file
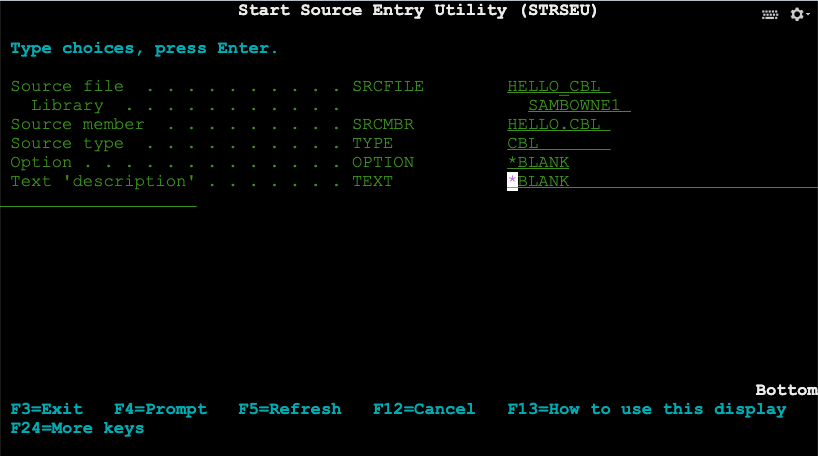
Press Enter.
The Edit page appears, as shown below.
Move the cursor to the left edge of the line containing "Beginning of data", and type I6, as shown below.
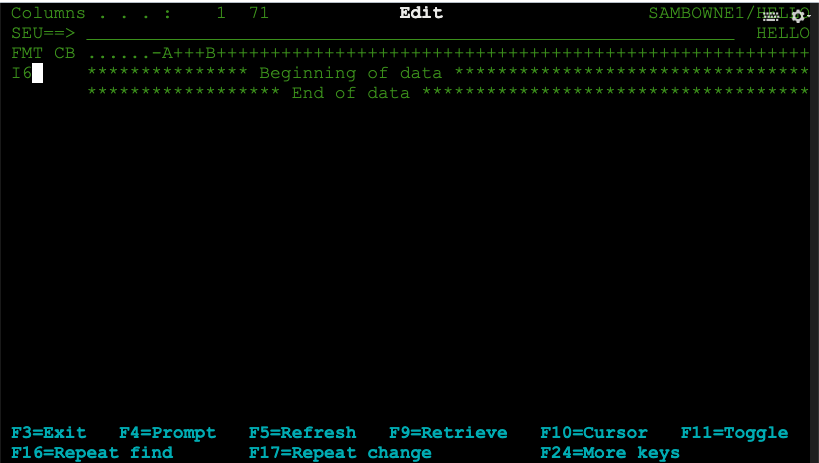
Press Enter to insert six lines.
Enter the program shown below:
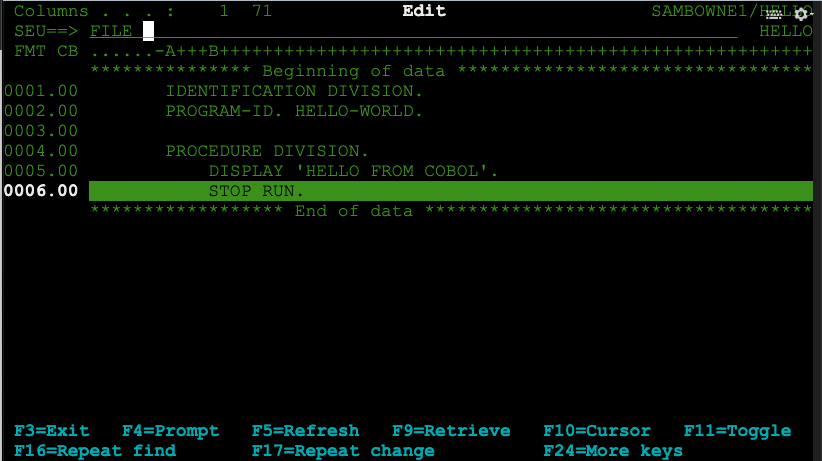
Move the cursor to the top left, after the SEU==> prompt, and type FILE, as shown in the image above.
Press Enter to save the file.
A message appears at the bottom, in white text, saying "Member HELLO.CBL in file SAMBOWNE1/HELLO_CBL changed with 6 records.", with your library name instead of mine.
From the MAIN menu, make these selections:
      5. Programming
      2. Programming Development Manager (PDM)
      3. Work with members
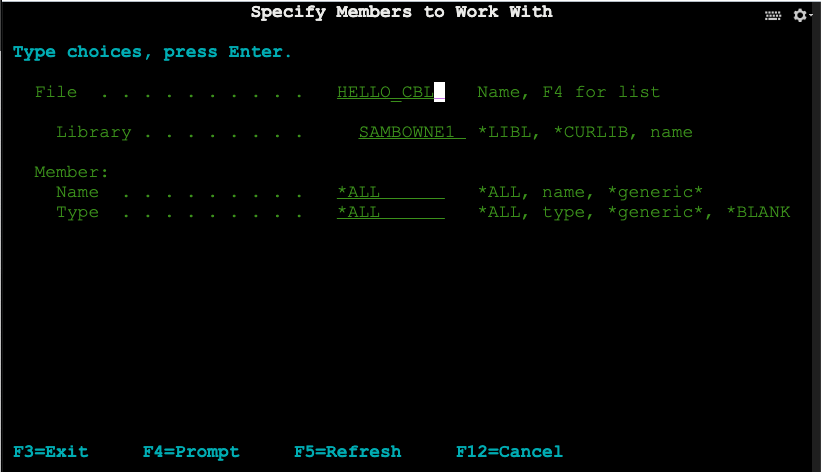
Press Enter. In the "Work with Members Using PDM" page, enter this value, as shown below:
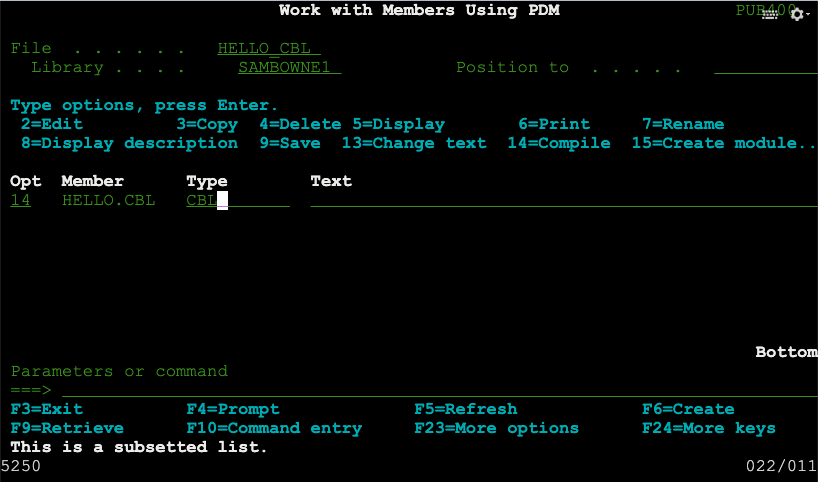
Press Enter.
At the bottom of the screen, in white letters, a message appears, saying "Program HELLO.CBL placed in library SAMBOWNE1", as shown below.
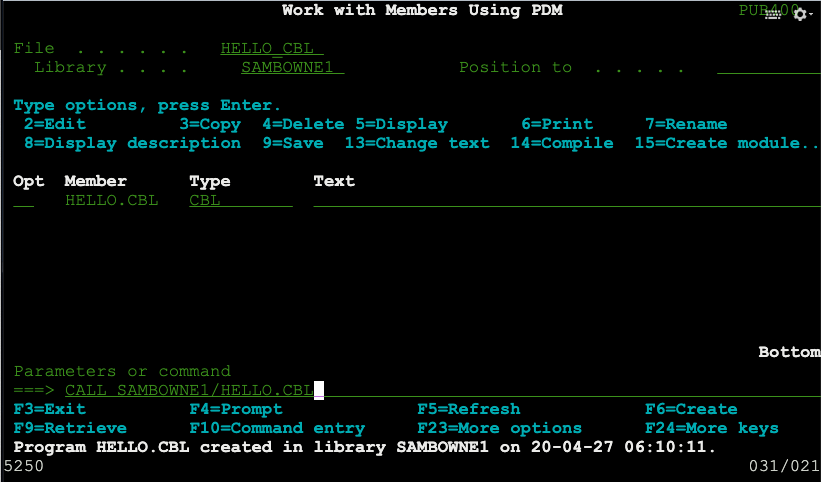
CALL SAMBOWNE1/HELLO.CBL
The "Display Program Messages" page appears, with "HELLO WORLD!" at the bottom, as shown below.
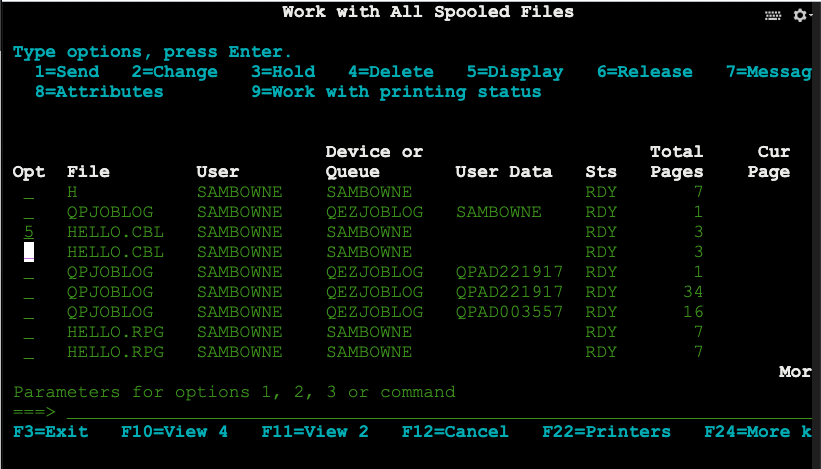
Flag CBL 8.3: Spooled File (10 pts)
Press F3 several times to return to the MAIN menu.From the MAIN menu, make these selections:
In the "Work with Spooled Files (WRKSPLF)" page, press Enter.3. General system tasks 1. Jobs 3. Work with spooled output filesIn the "Work with All Spooled Files" page, on the line for the File: HELLO.CBL, type 5, as shown below, and press Enter.
Press Enter.
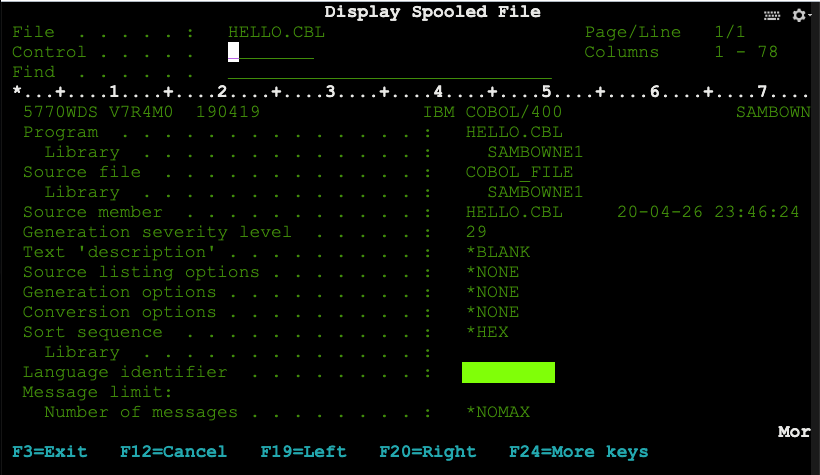
The "Display Spooled File" page appears, as shown below,
The flag is the word covered by a green rectangle in the image above.
Posted 4-27-2020 by Sam Bowne
multiarch-support added 7-20-2020
Updated to use a Windows client 6-24-22