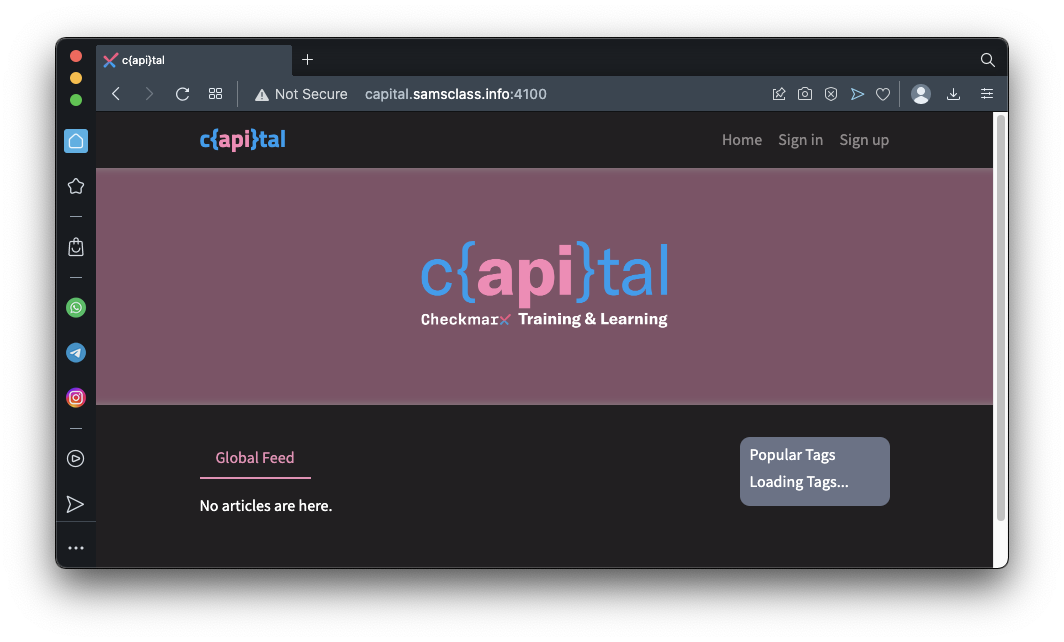
http://capital.samsclass.info:4100
Troubleshooting
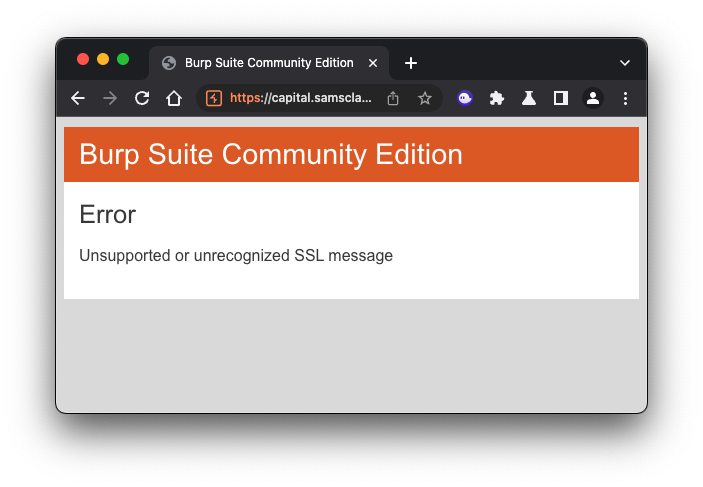
Burp's built-in Chromium browser may block the c{api}tal page as shown below.To fix this, click the little symbol in the URL bar to the left of "https".
Click "Site Settings".
Configure "Insecure Content" to Allow, as shown below.
Paste this URL in again:
The page should load now.
That's a problem. It happens because the Web page tries to load the API from localhost on port 8000 instead of the remote server.
To fix it, you need to configure port forwarding on your machine.
The steps are different for Windows and other operating systems. Follow the steps in the appropriate box below.
Mac or Linux
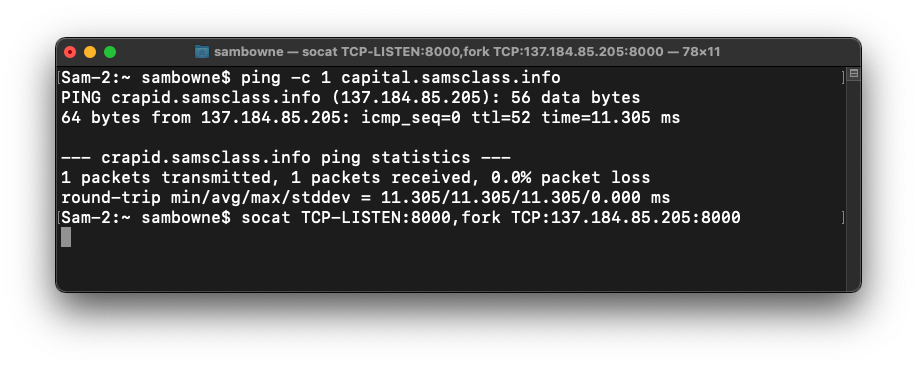
Installing socat
If you are using a Mac, execute this command:If you are using Debian Linux, execute these commands:Make sure the IP address found by ping matches the IP address in the socat command.
Leave this Terminal window open.
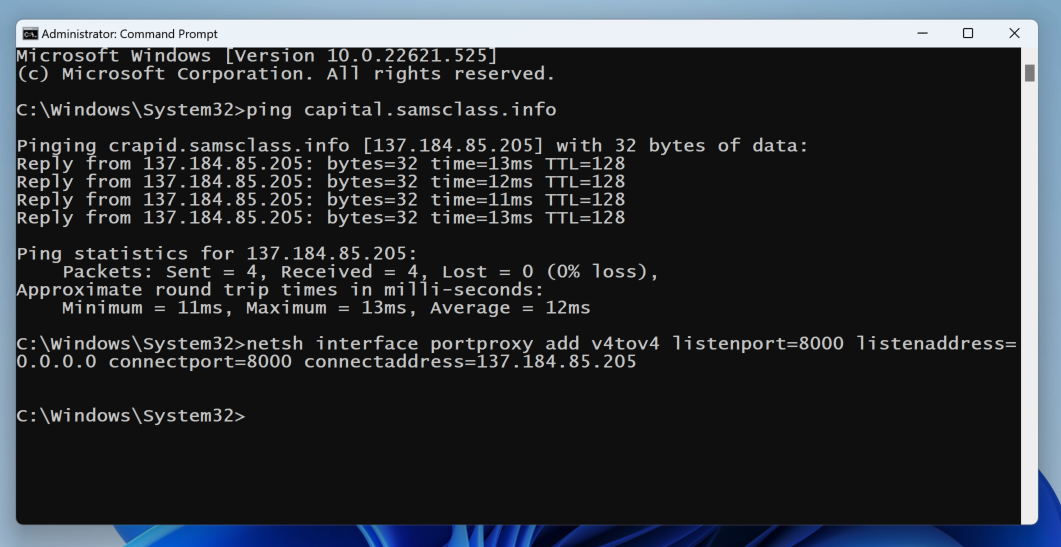
Windows
If you are using Windows, execute these commands in an Administrator Command Prompt.Make sure the IP address found by ping matches the IP address in the netsh command.
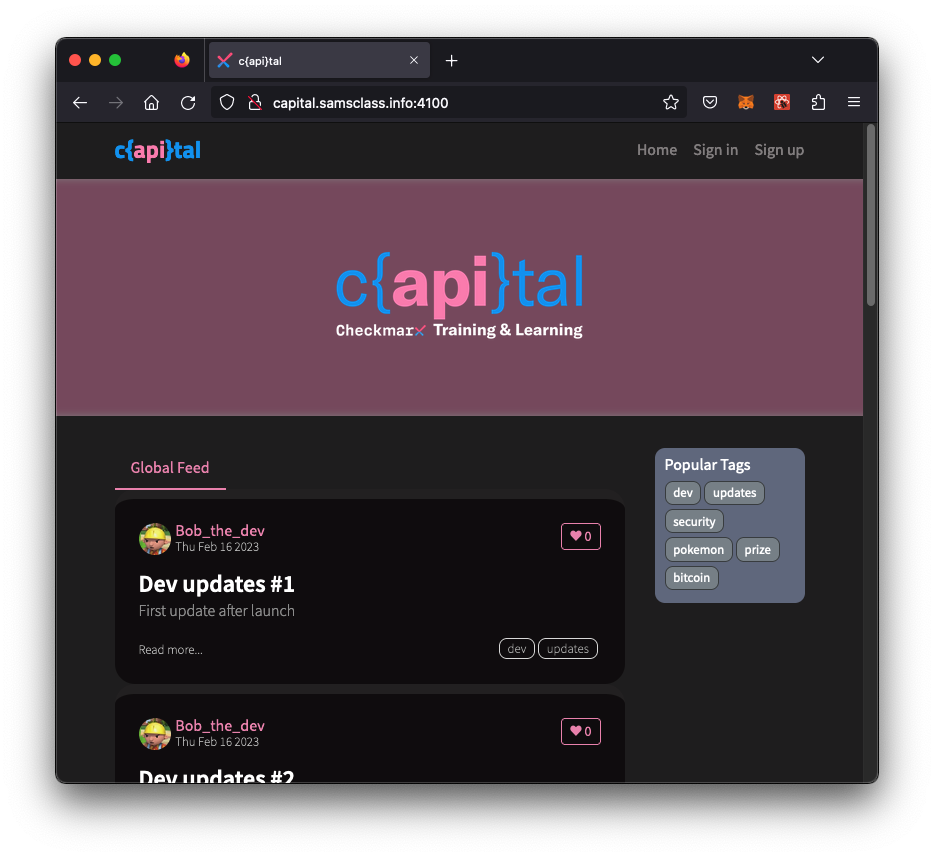
Now articles appear, as shown below.
(Note: the articles don't show up in Opera, but they do in Firefox.)
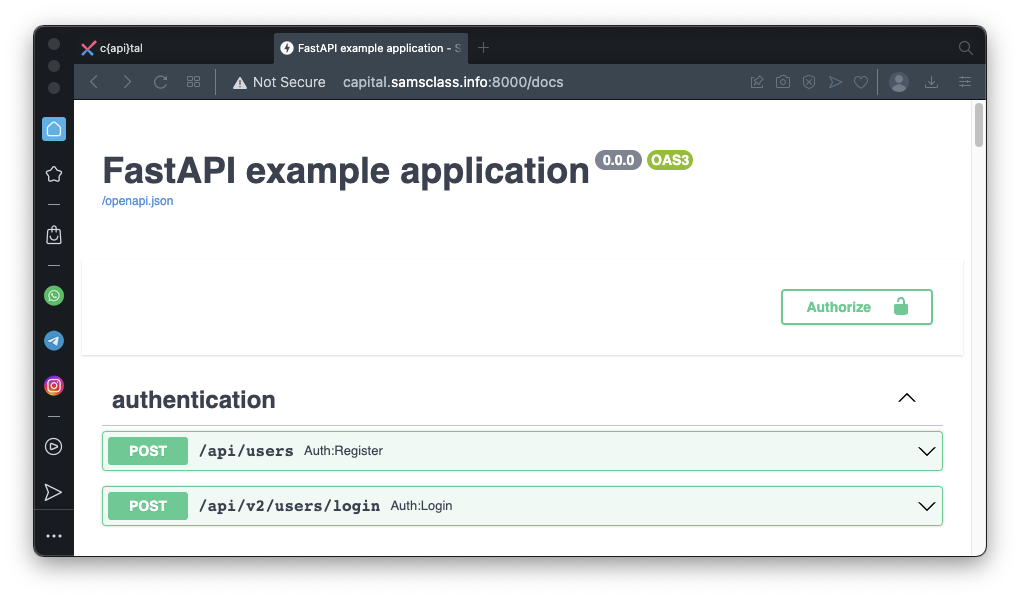
http://capital.samsclass.info:8000/docs
If you don't already have an account, in Postman, at the top right, click the orange "Create Account" button.
A Postman web page opens. Create an account, or link to an existing Google account.
At the top left, click Workspaces. Click "Create Workspace".
Accept the default of "Blank workspace" and click the orange Next button.
Name your Workspace AP130 and click the orange Create button.
Click the "Create Collection" button.
Your Postman window should resemble the image shown below.
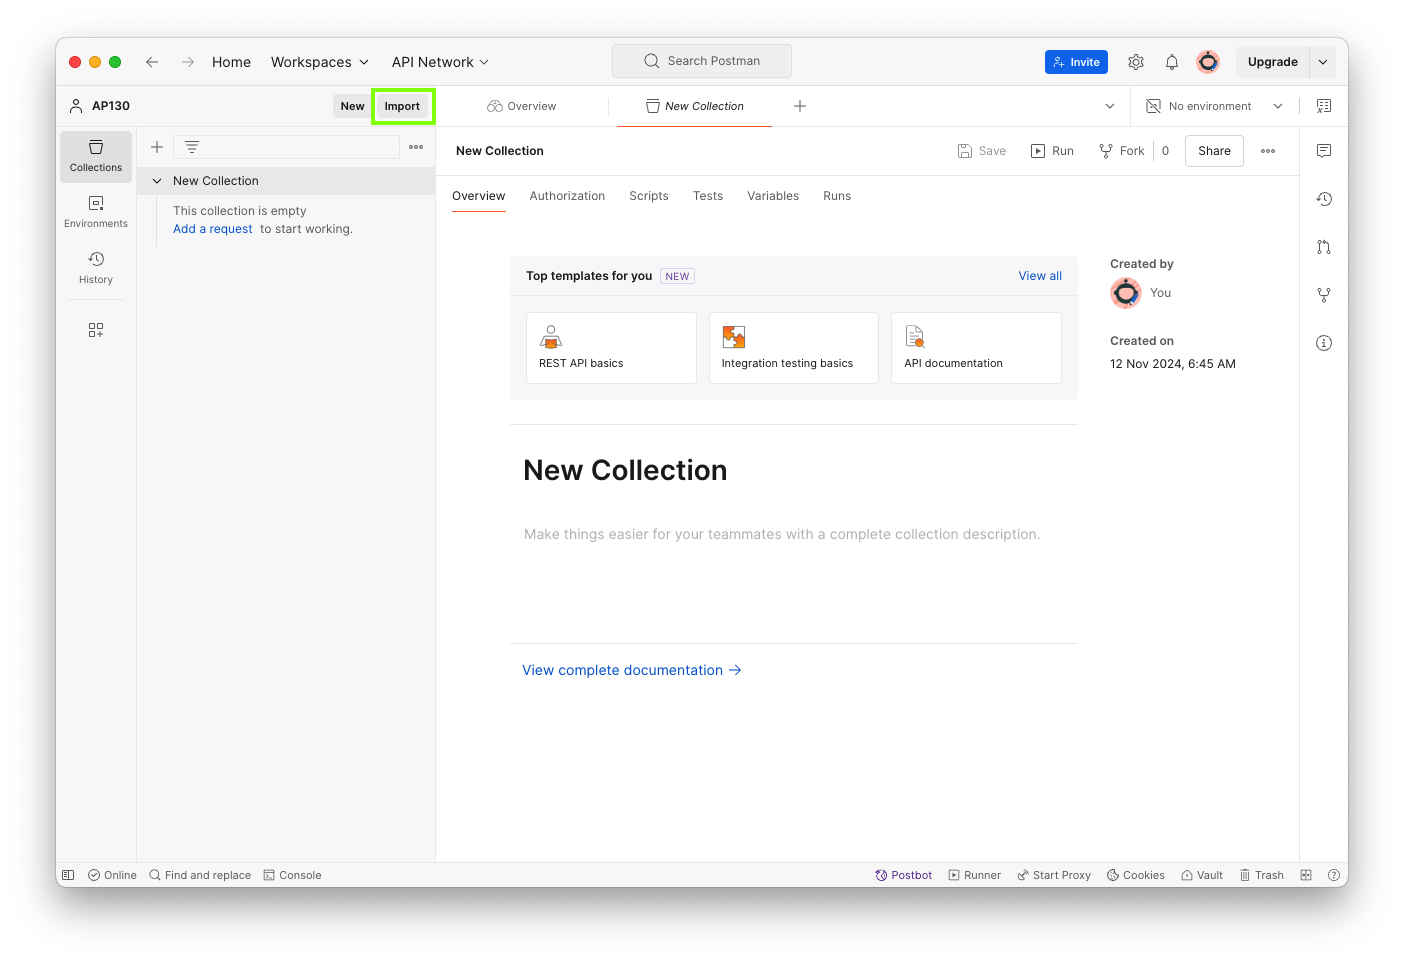
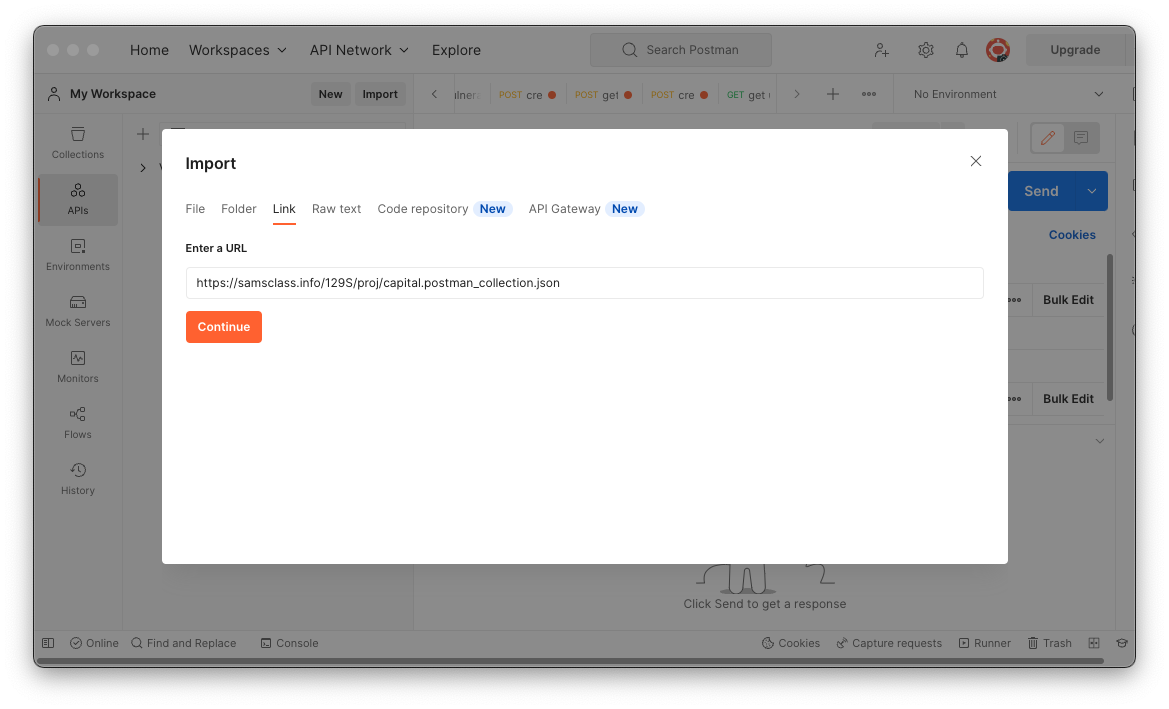
In the Import box, click the Link tab.
Enter this URL, as shown below.
https://samsclass.info/129S/proj/capital.postman_collection.json
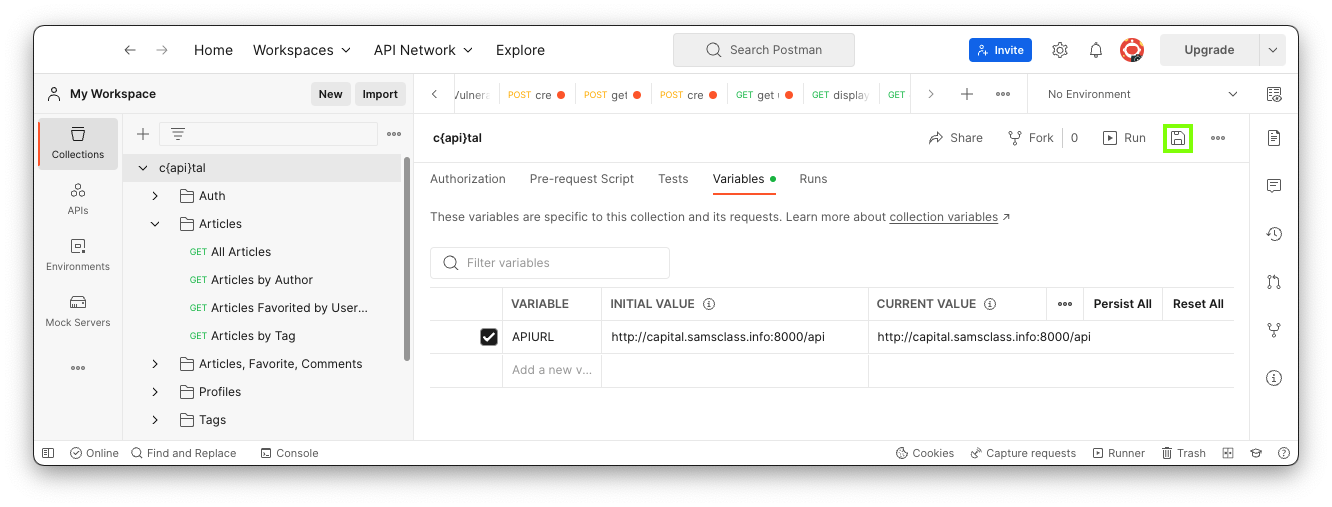
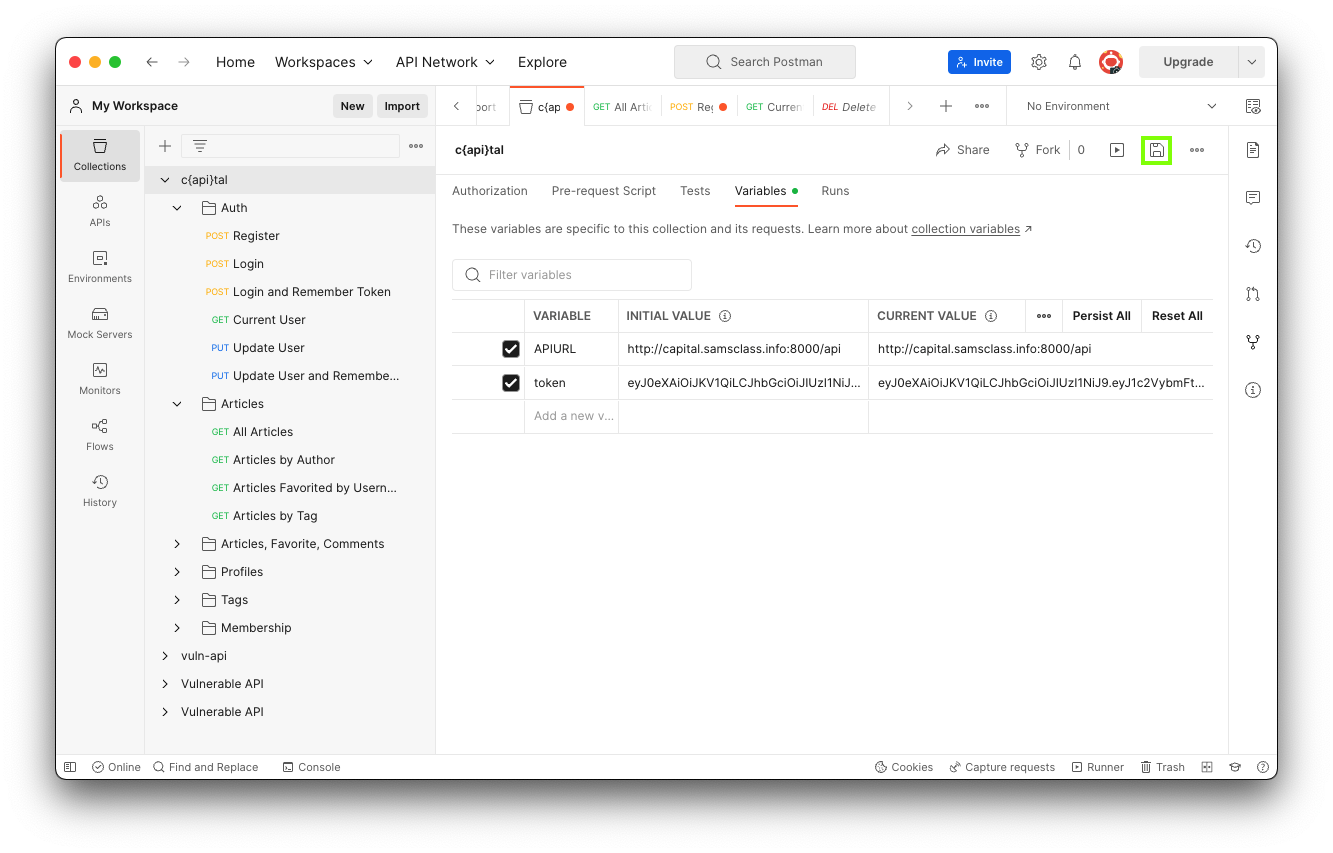
On the right side, click the Variables tab.
Enter these values, as shown below.
Then click the Save icon, outlined in green in the image below.
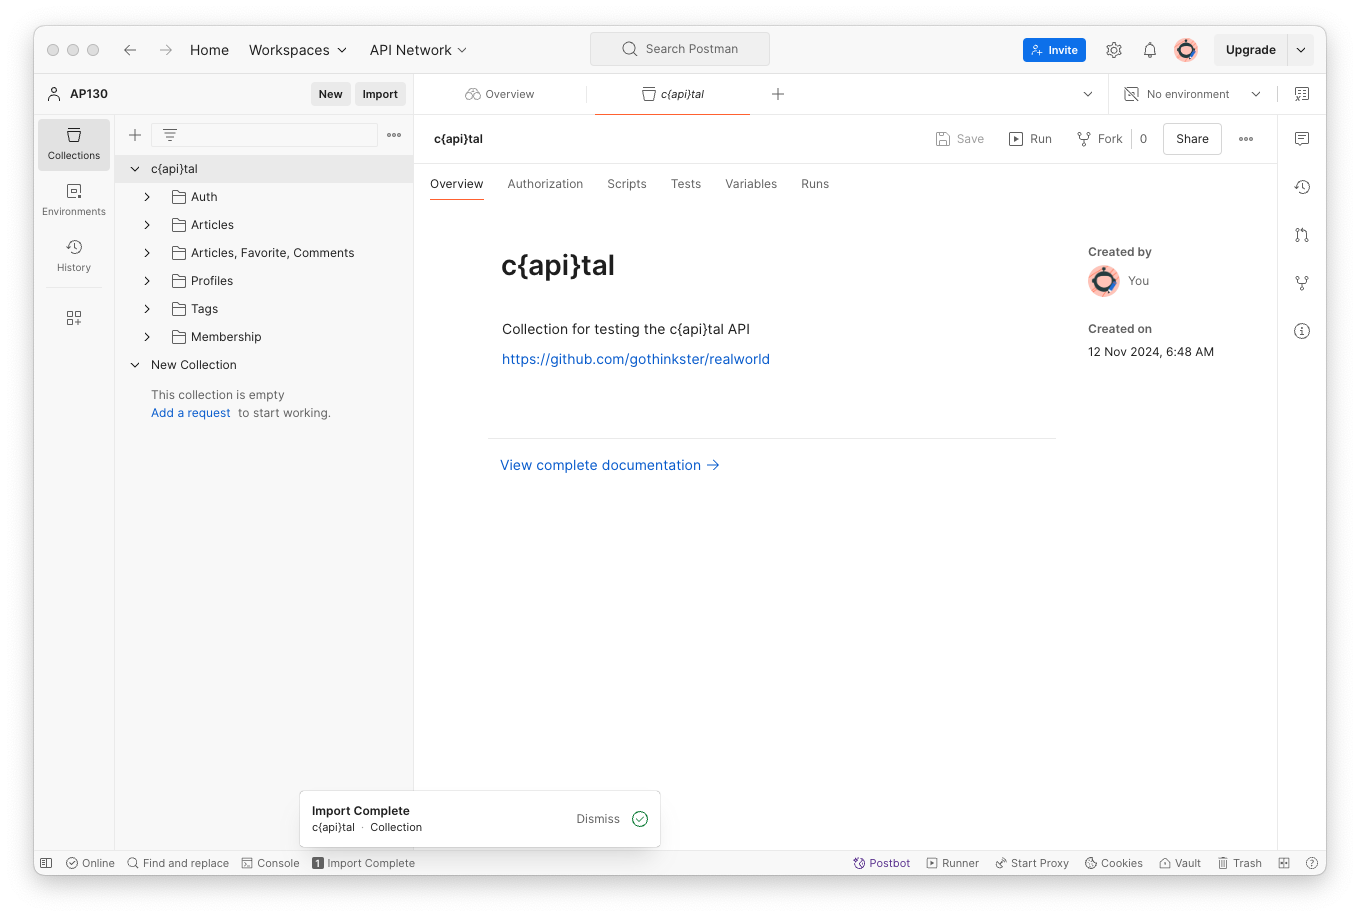
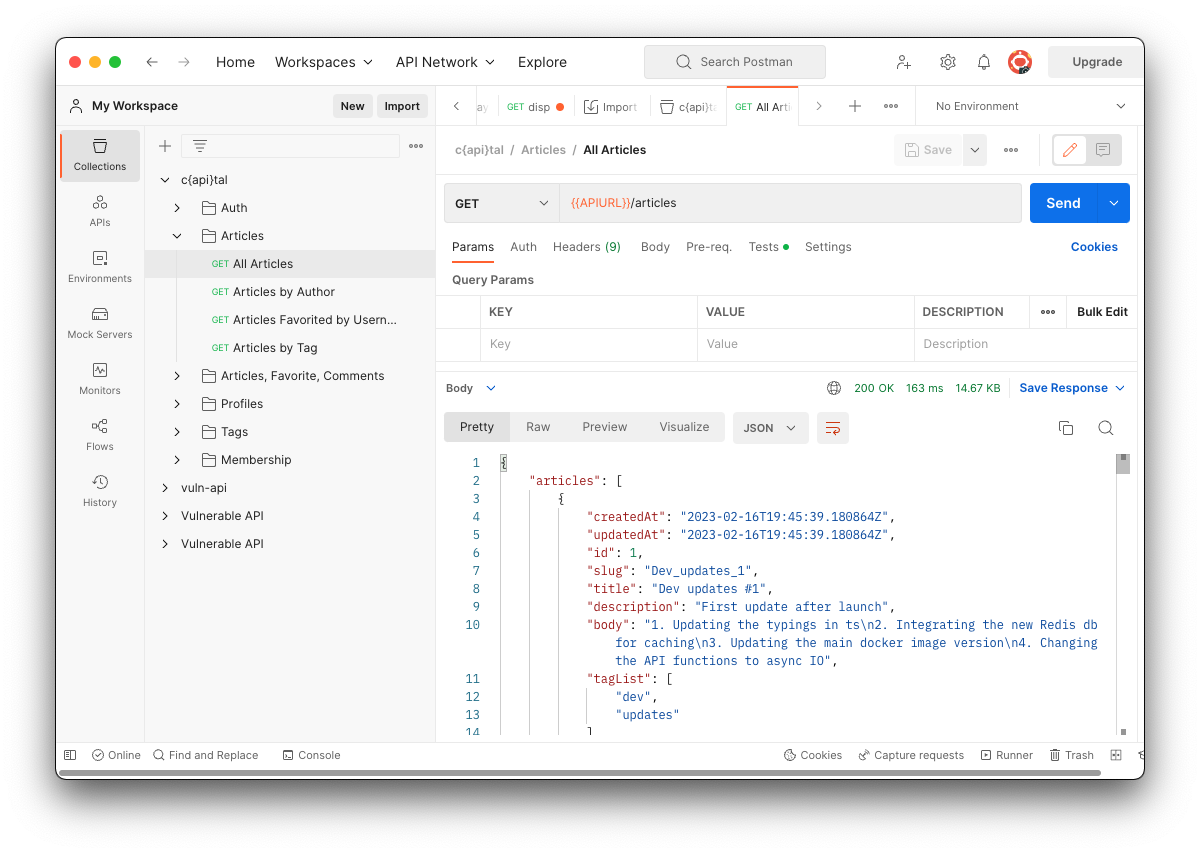
Click "All Articles".
At the top right, click the blue Send button.
In the lower right pane, you should see articles appear, as shown below.
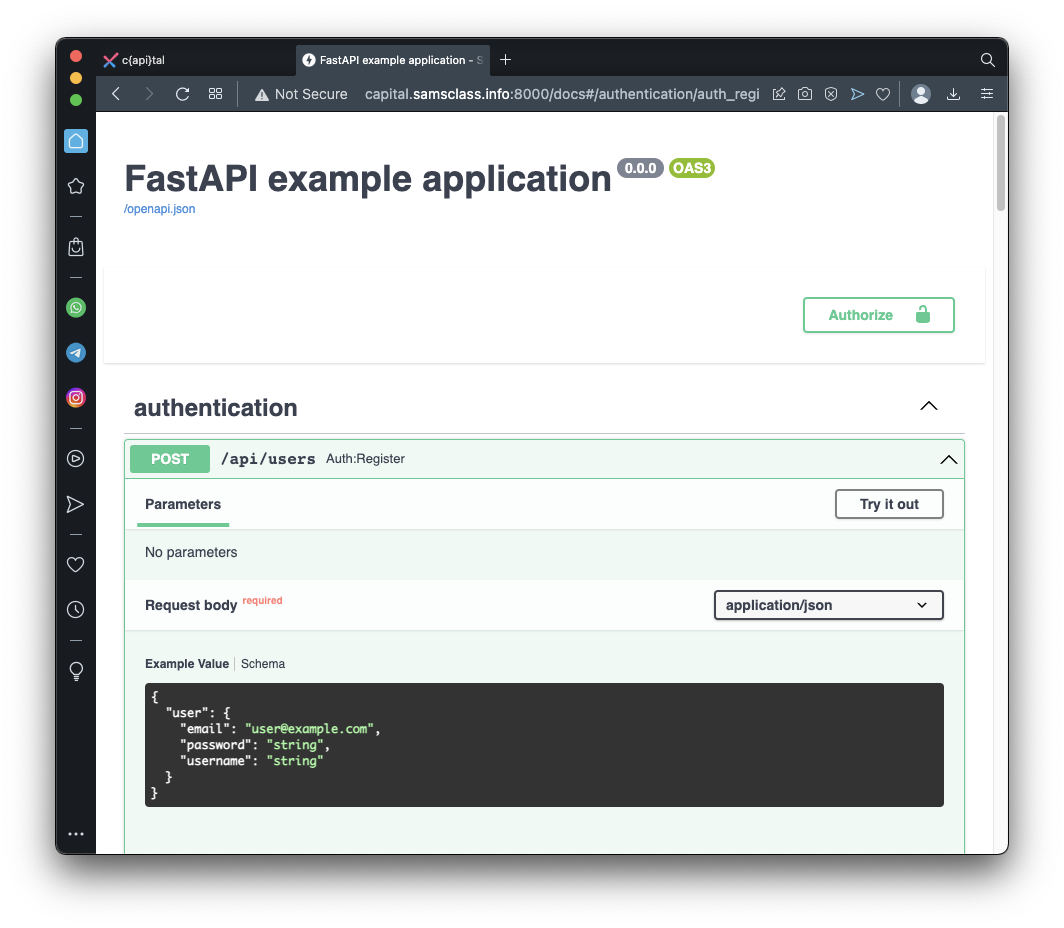
Expand the first item in the authentication section.
As shown below, to regster a new user, you need to send a POST with the user data in JSON format.
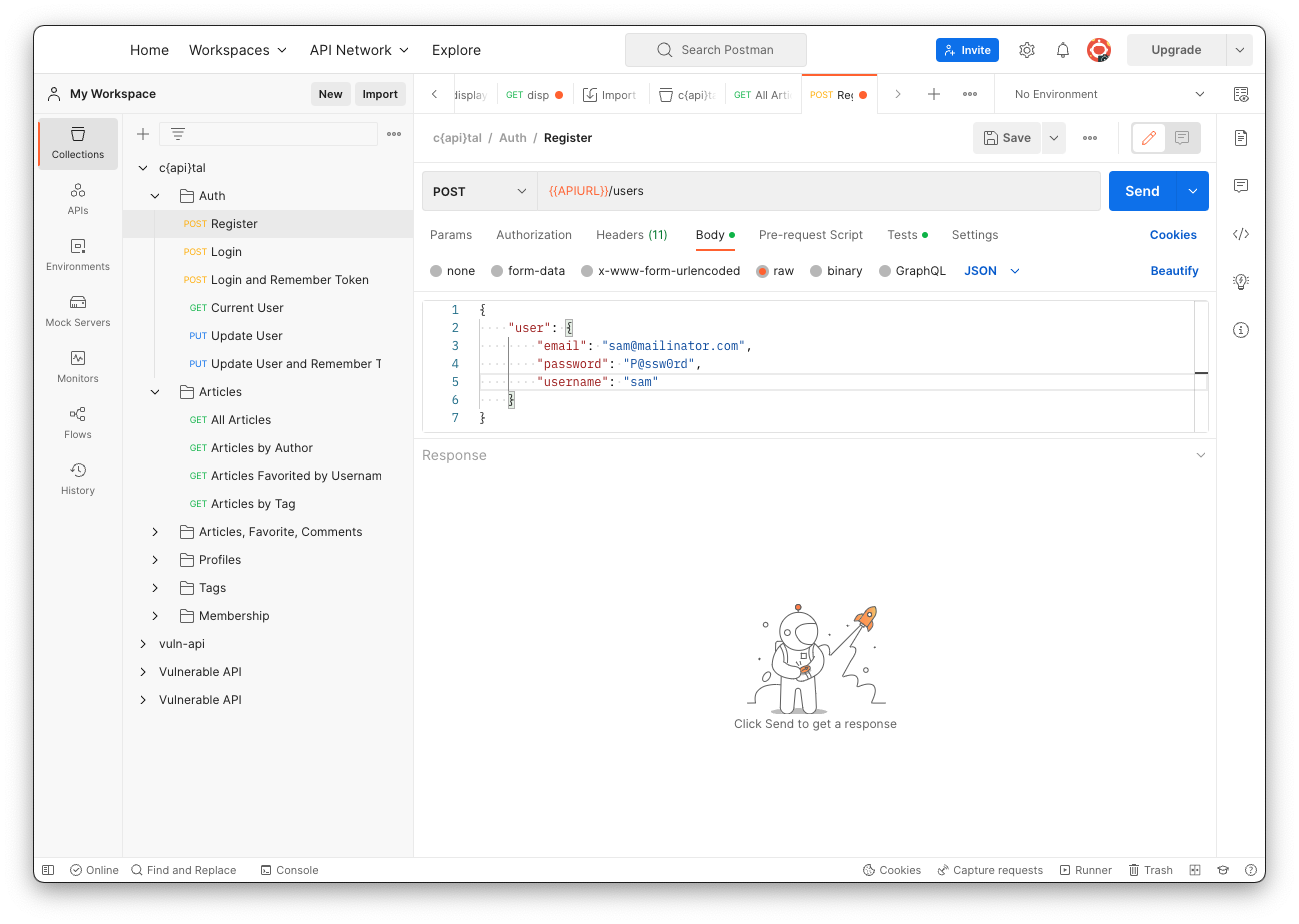
Click Register.
On the Body tab, on the right side, click the blue word Beautify.
Replace the placeholders with an email, password, and username of your choice, as shown below.
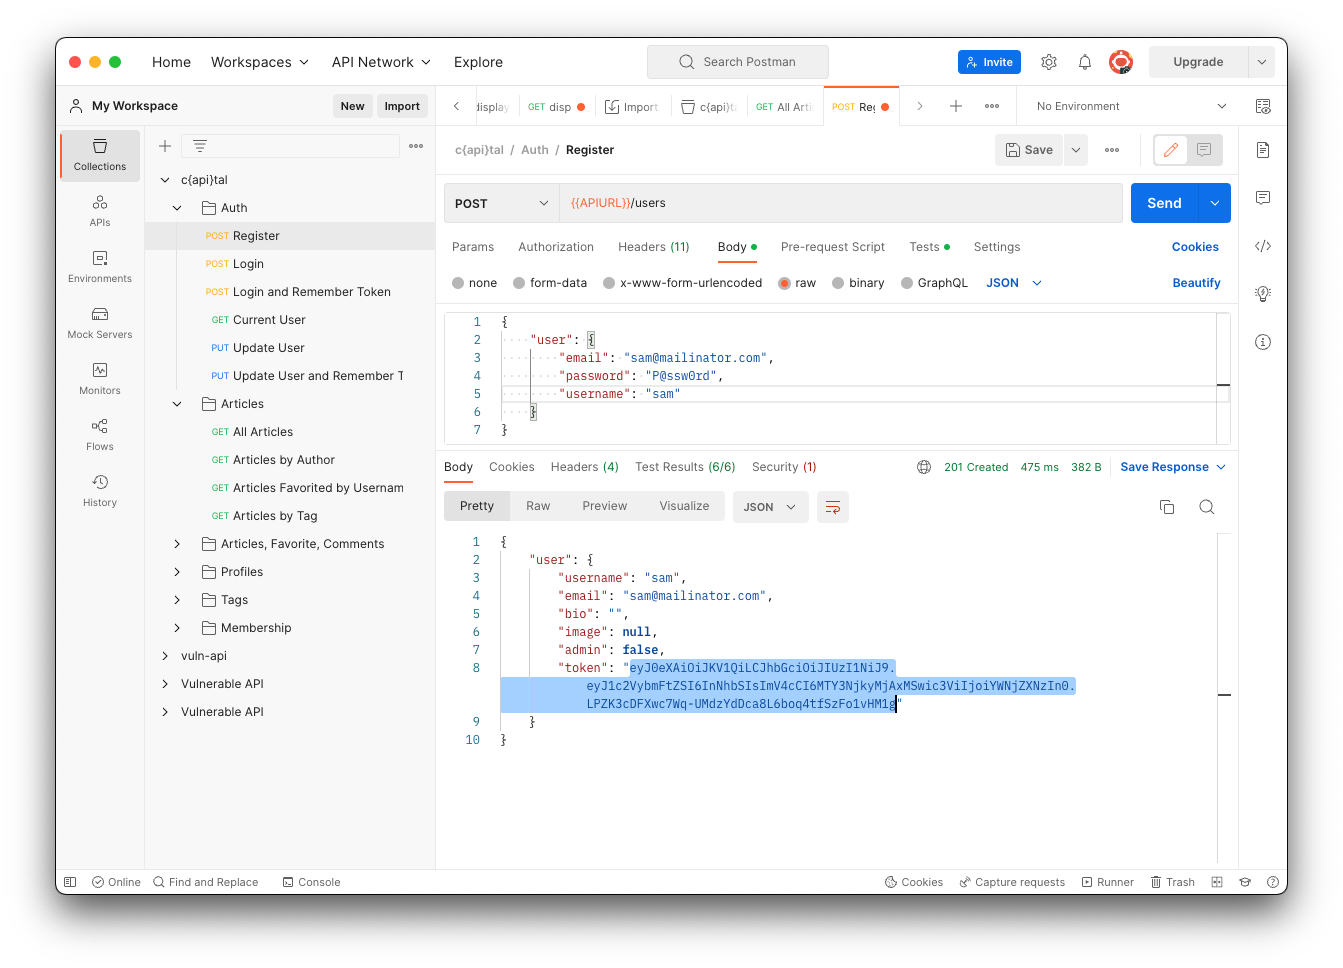
The reply shows that your account was created, and that you are not an admin, as shown below.
Highlight and copy your token value, as shown below.
On the right side, click the Variables tab.
Add a variable named token with the value you copied in the previous step, as shown below.
Then click the Save icon, outlined in green in the image below.
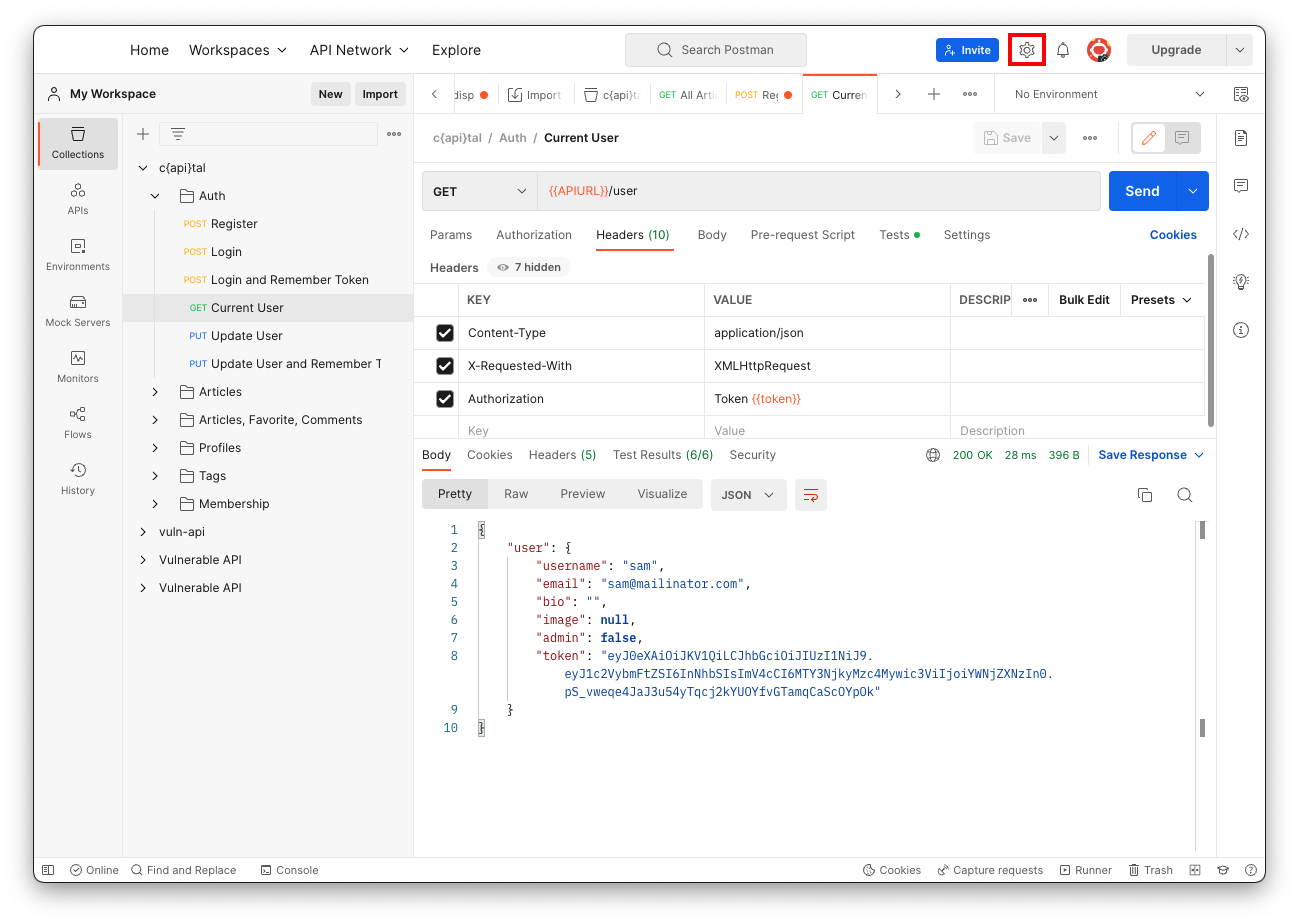
In the list of Collections, in the c{api}tal container, in the Auth container, click "Current User".
Click the blue Send button.
The reply shows the name of the current user, as shown below.
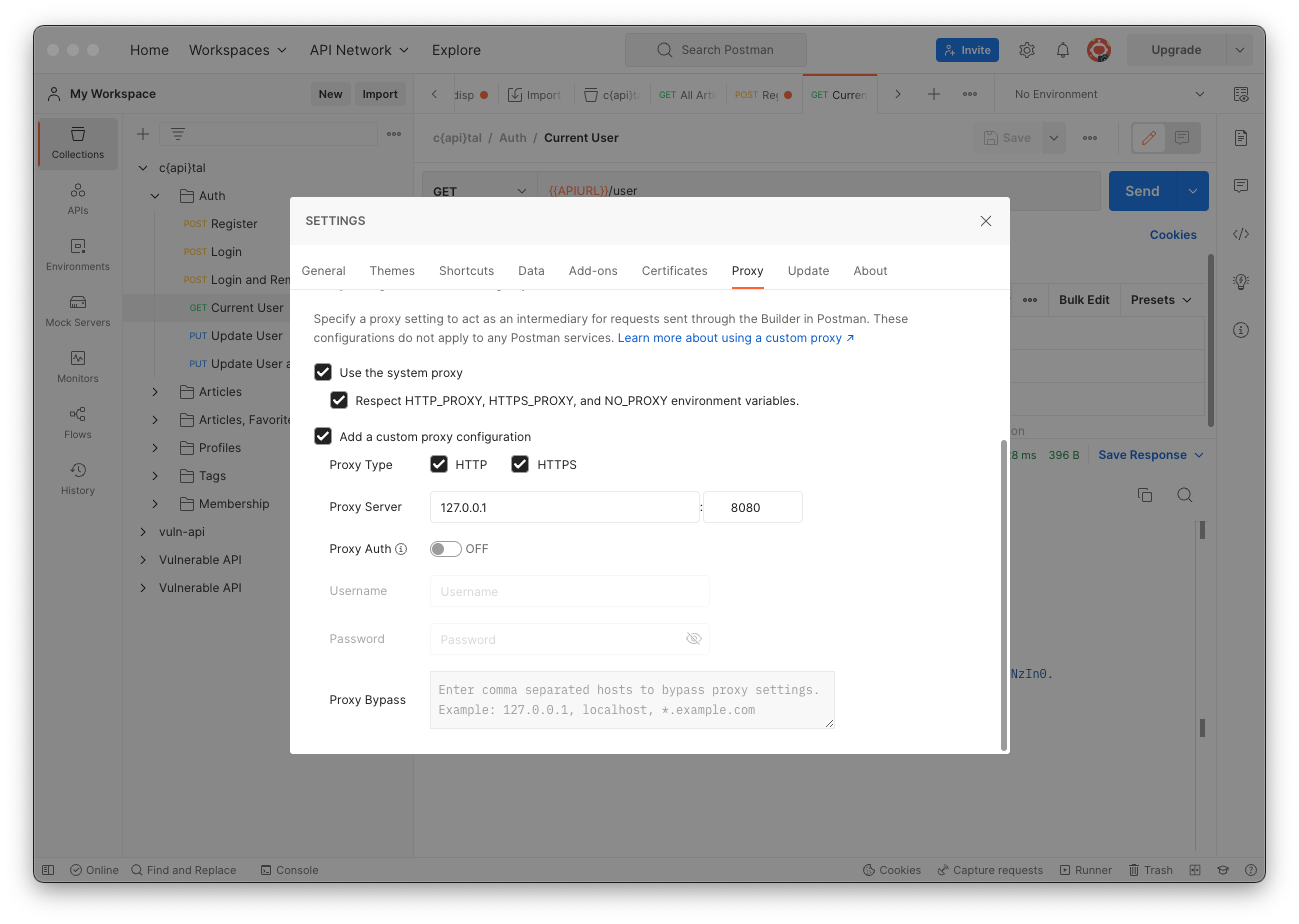
On the Proxy tab, check the "Add a custom proxy configuration" box and enter these values, as shown below.
If any requests are here, right-click one of them and click "Clear History", Yes.
In Postman, close the Settings box.
You should see the Current User request ready to go.
Click the blue Send button.
The request appears in Burp.
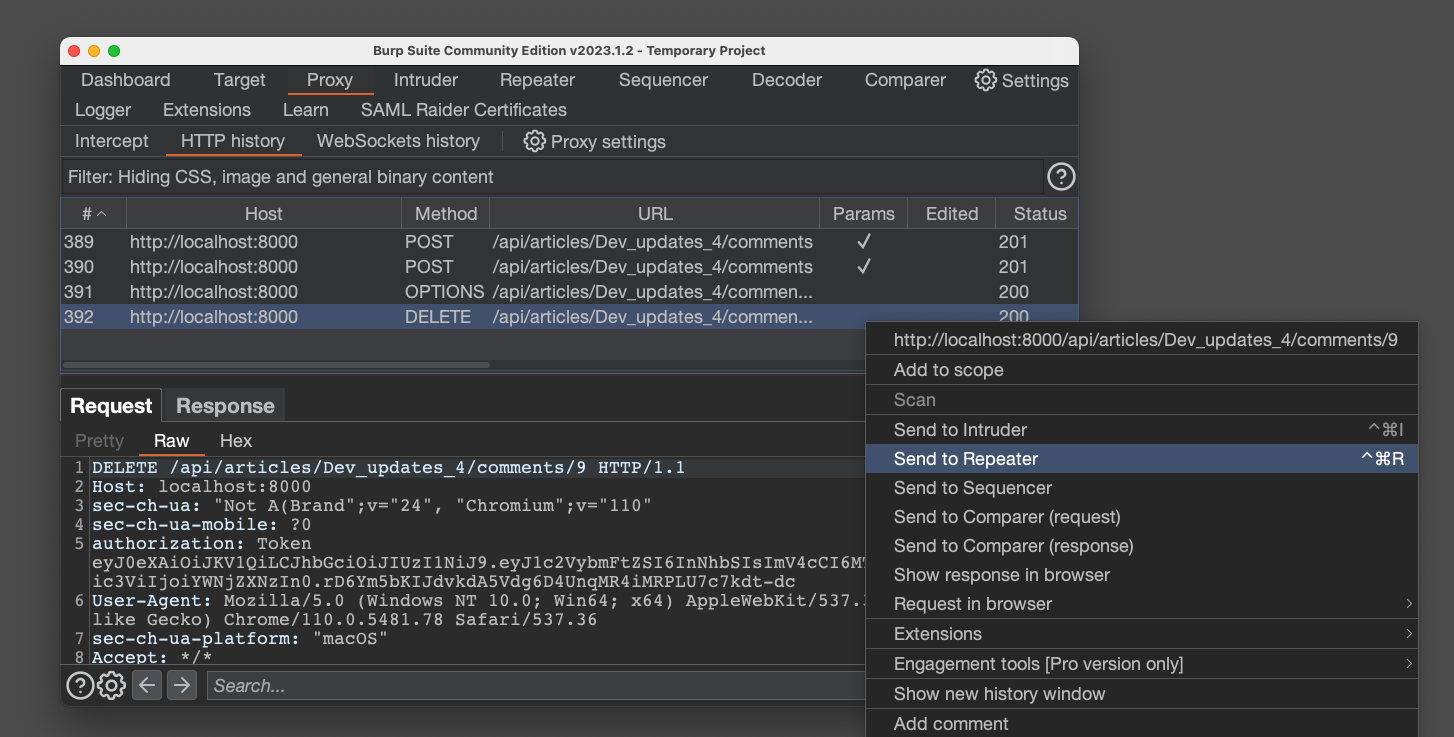
Right-click the request and click "Send to Repeater", as shown below.
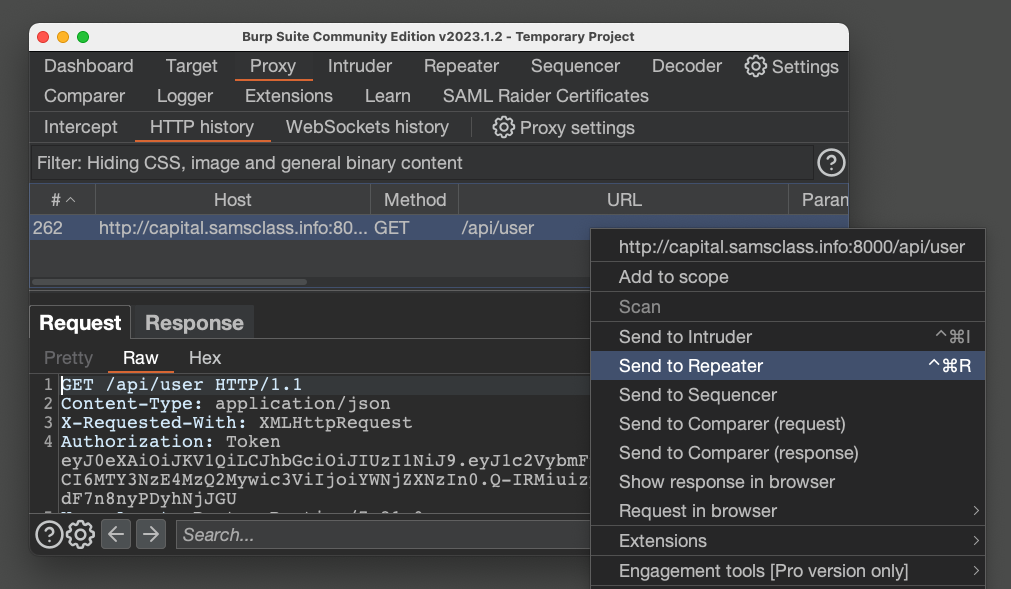
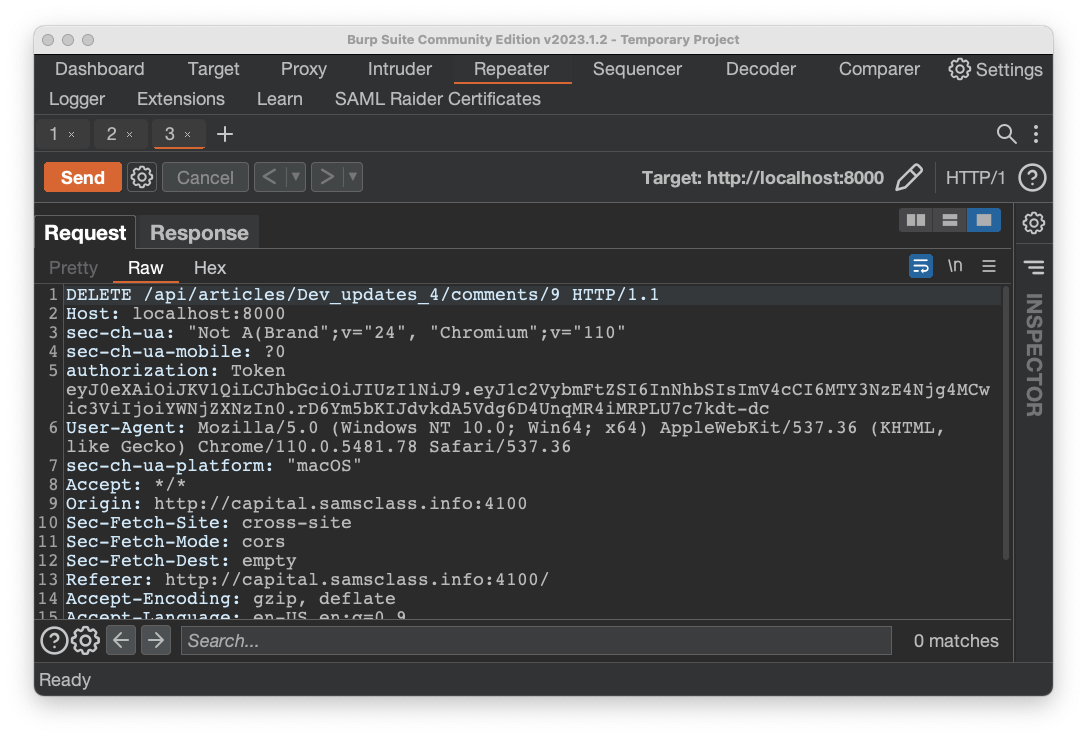
The request from Postman appears, as shown below.
Click the Send button.
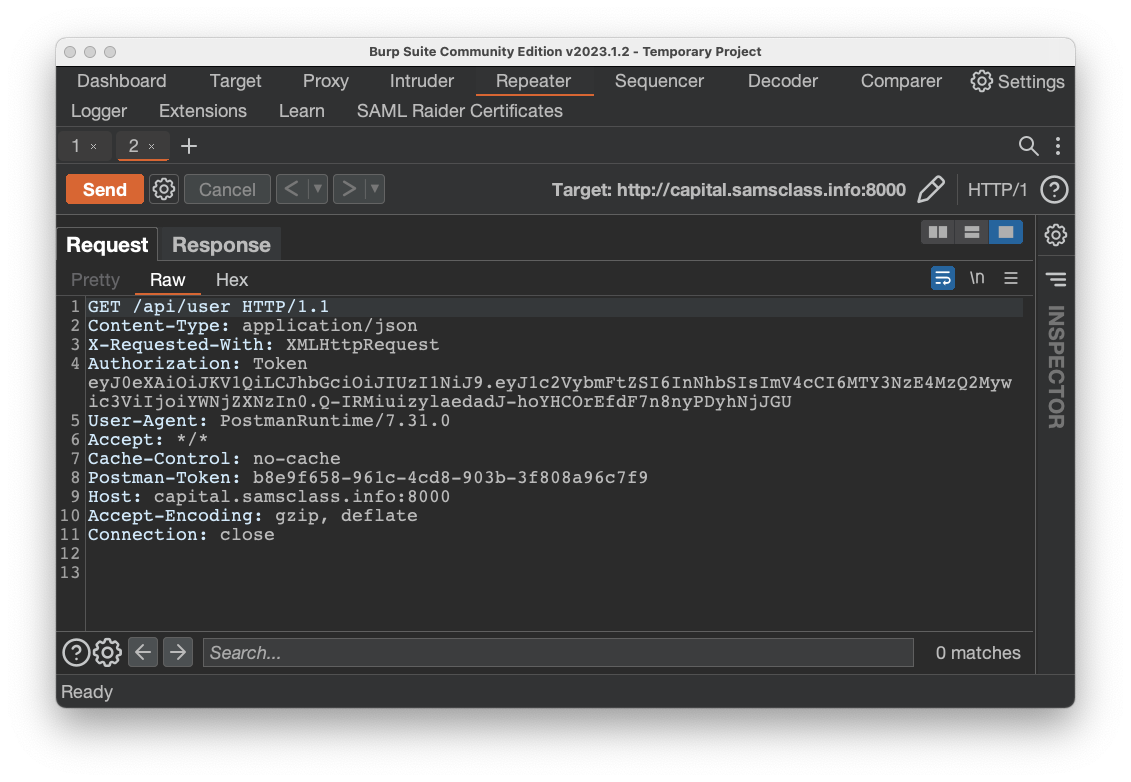
You see the current user's name, as shown below.
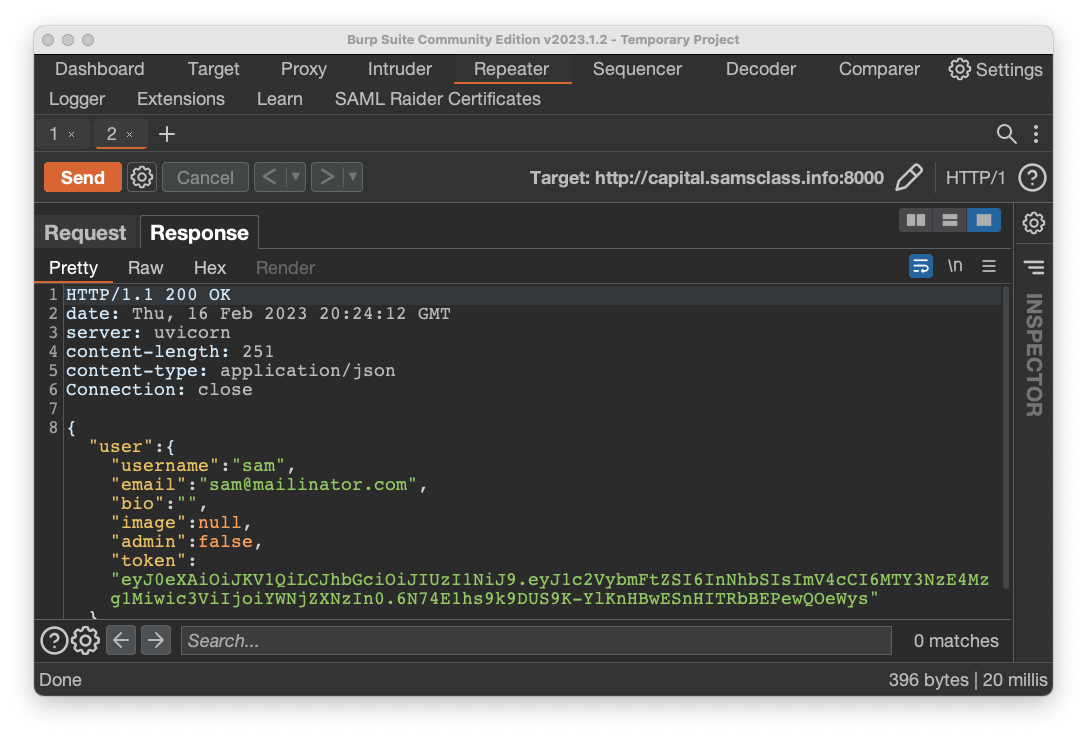
This vulnerability typically allows an API call to a function without requiring authorization. One common result is "vertical privilege escalation", from user to administrator.
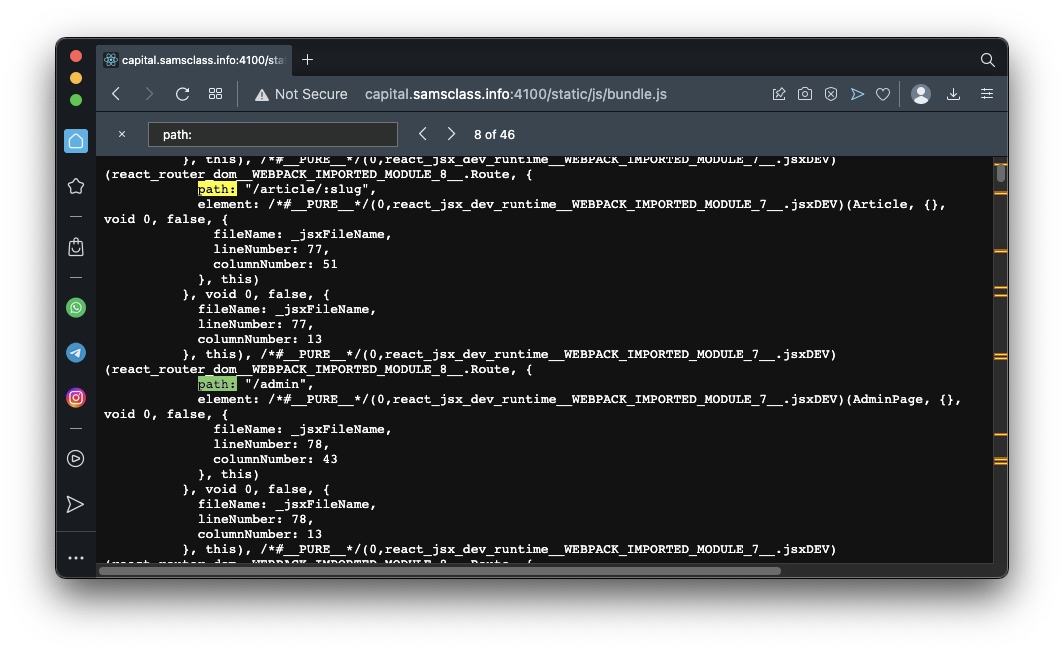
http://capital.samsclass.info:4100/static/js/bundle.js
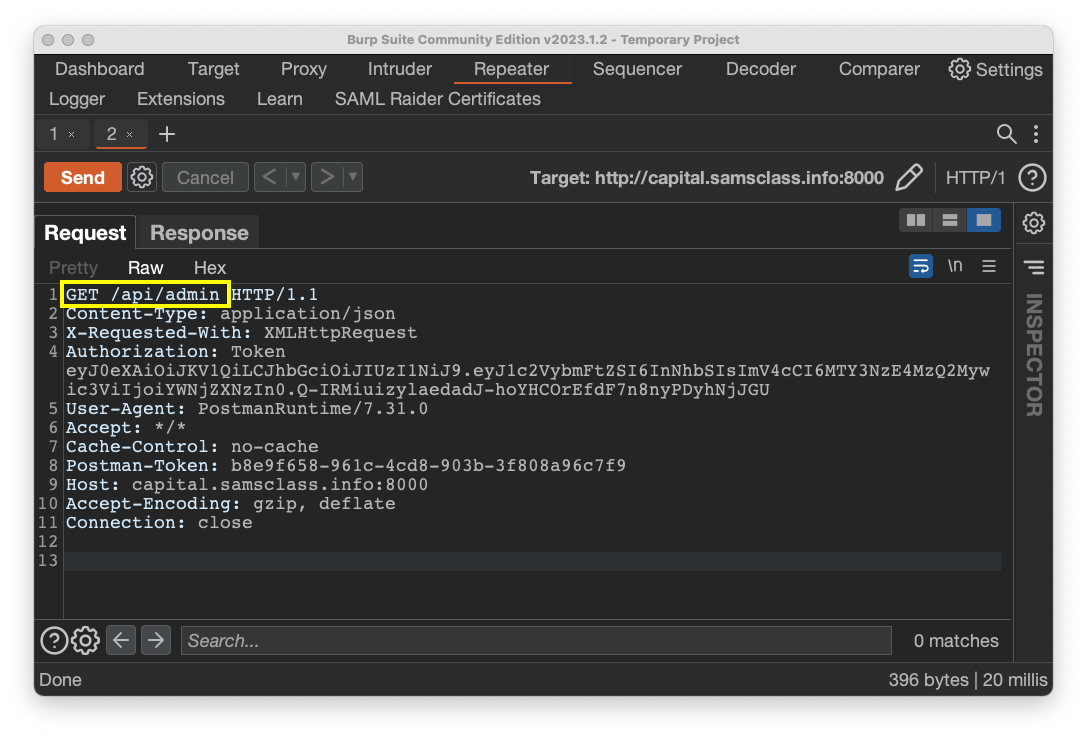
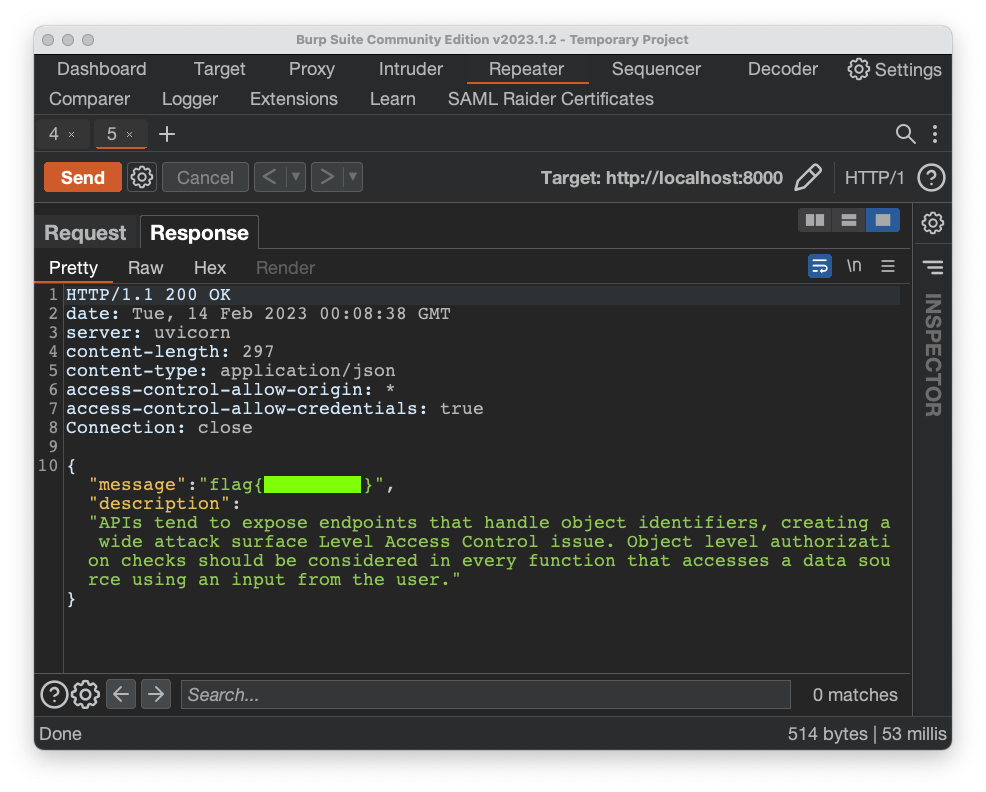
Flag AP 130.1: Broken Function Level Authorization (10 pts)
The request is allowed, without your being logged in as admin.The flag is covered by a green rectangle in the image below.
This vulnerability typically allows an API call to a function affecting another user's data without requiring authorization. This result is called "horizontal privilege estalation."
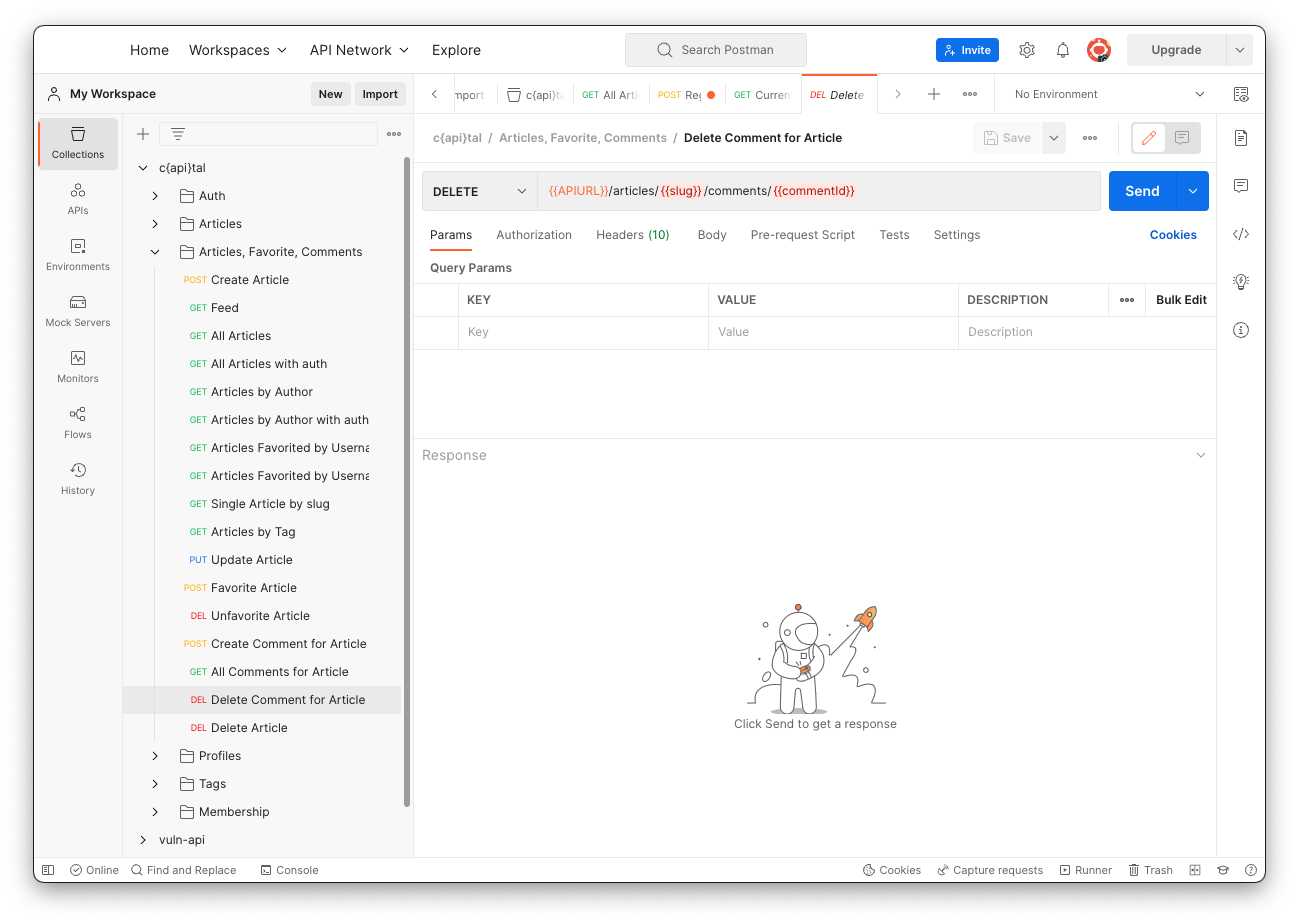
In Postman, in the c{api}tal container, expand the "Articles, Favorites, Comments" container and click "Delete Comments for Article".
This request looks like a good candidate for BOLA, as shown below.
http://capital.samsclass.info:4100
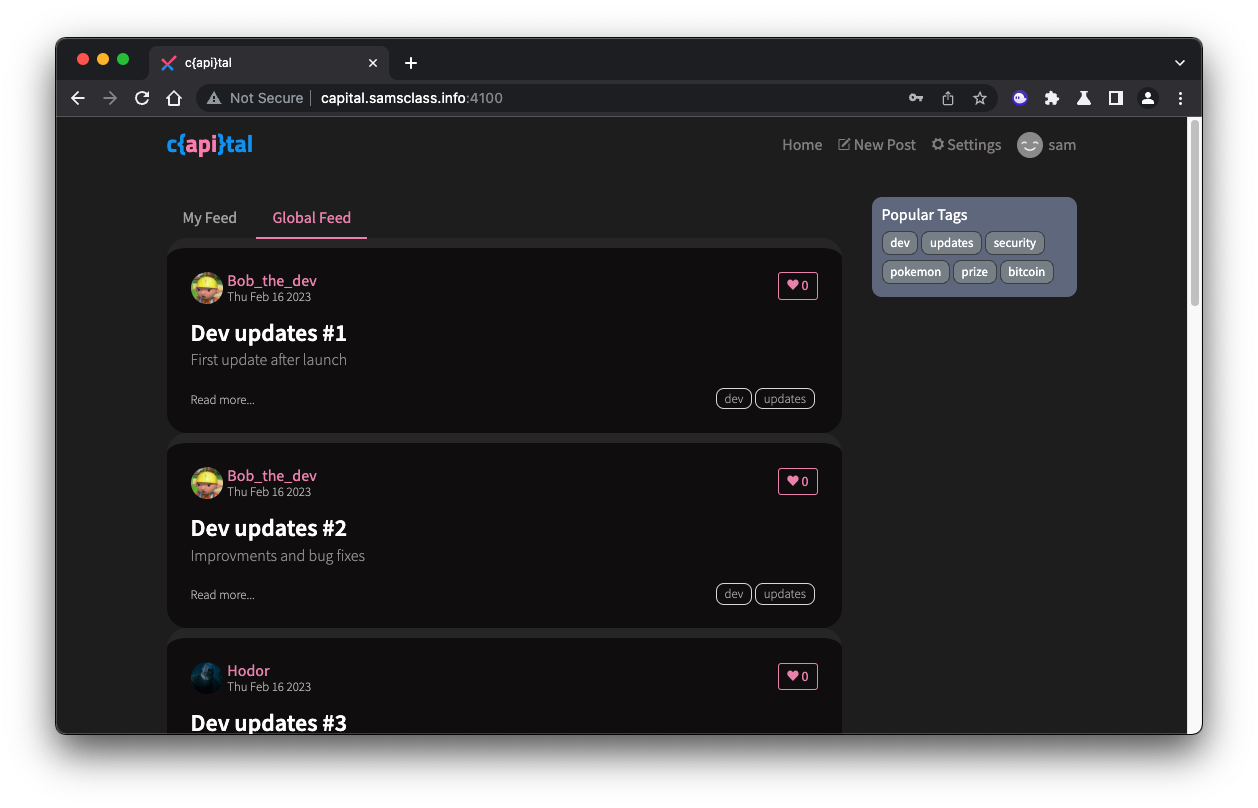
You see articles, as shown below.
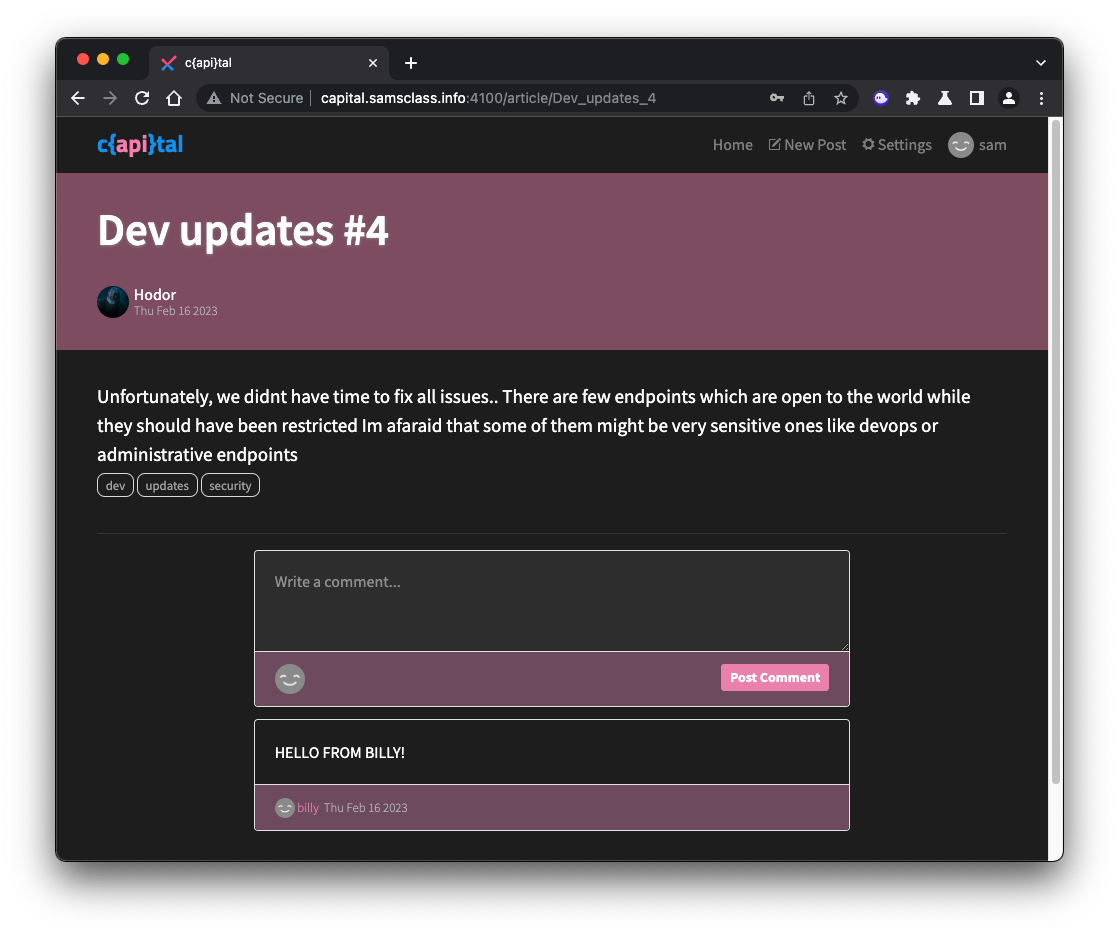
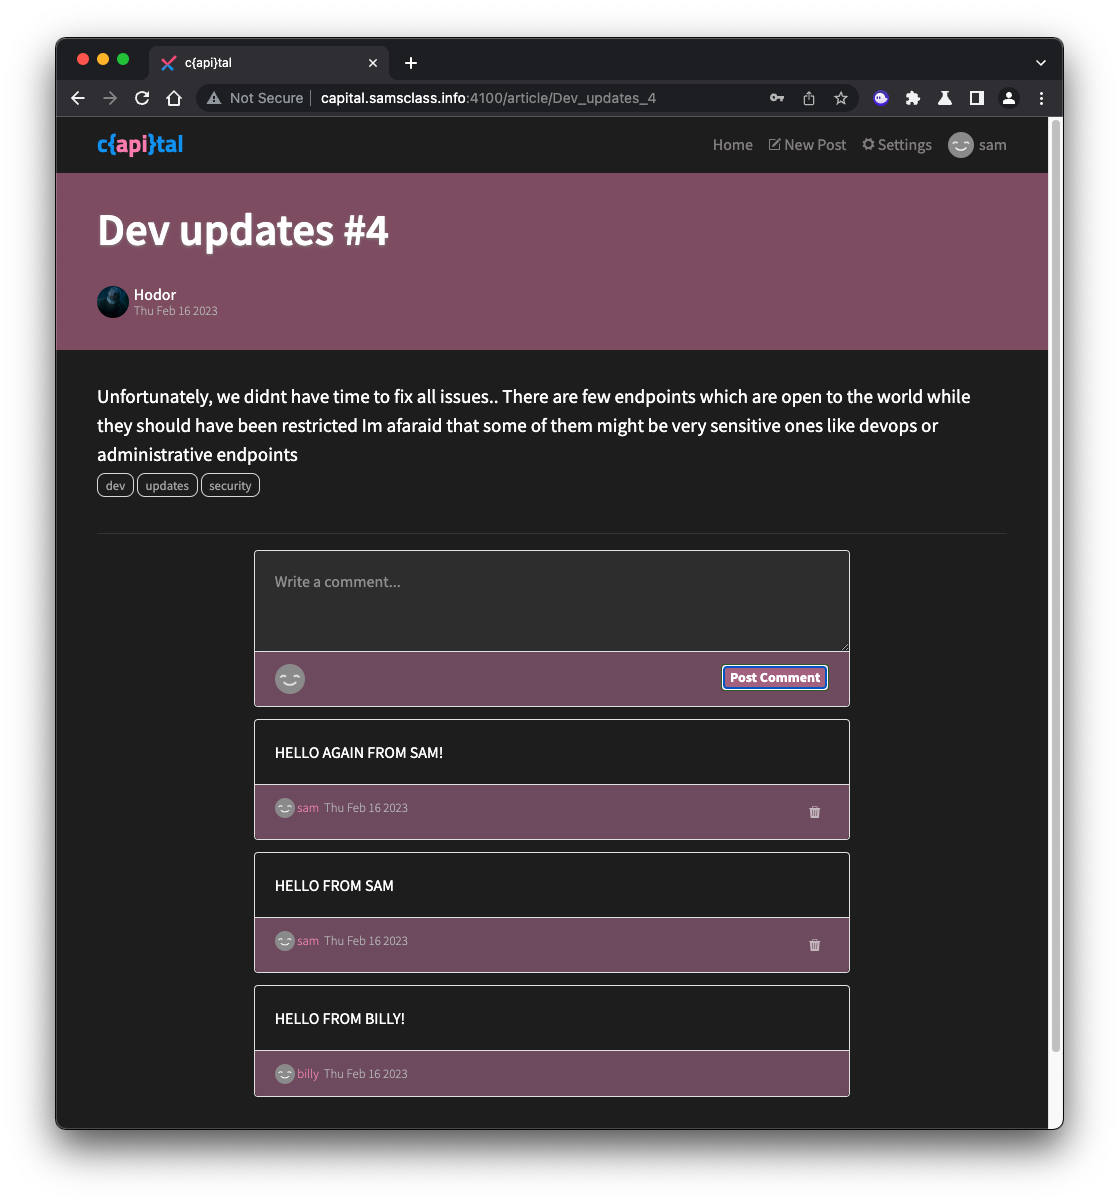
Repeat the process to add a second comment.
Notice that the comments you added have trash-can icons visible, so you can delete them. Comments from other users don't have the trash-can icon, so the developer intended to deny you the ability to delete them, as shown below.
Flag AP 130.2: Broken Object Level Authorization (BOLA) (10 pts)
Click the Response tab.The flag is covered by a green rectangle in the image below.
Click the "read more" links to read the posts.
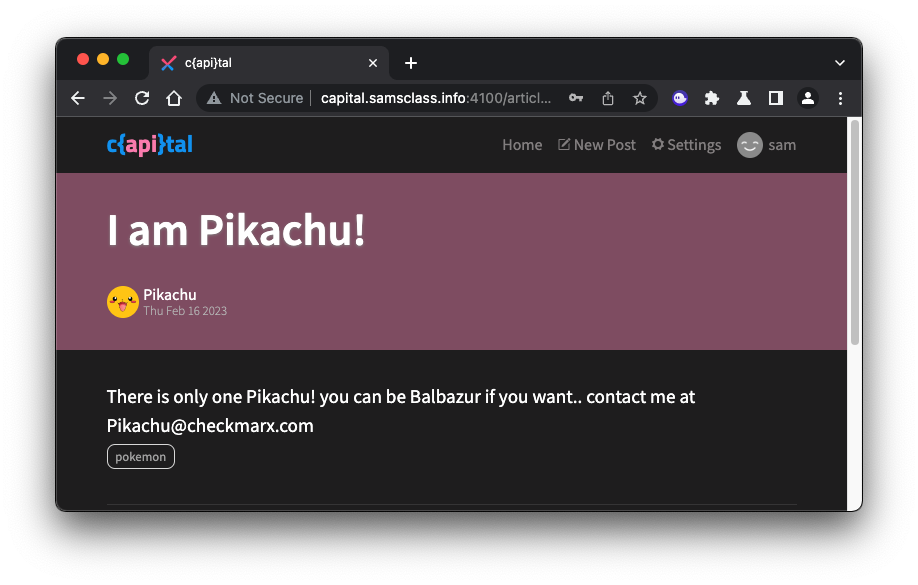
The post titled "I am Pikachu!" contains an email address, as shown below.
Copy that address to a text file for later use.
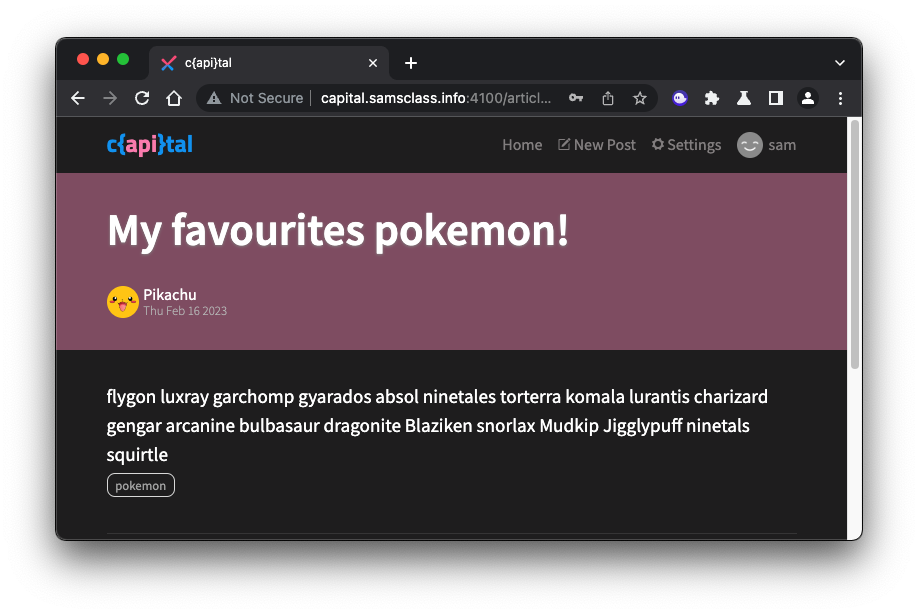
The post titled "My favourites pokemon!" contains a list of words, as shown below.
Copy those words to a text file for later use. We'll try using them as passwords.
At the bottom, click "Or click here to logout".
At the top right, click Signin. Log in again.
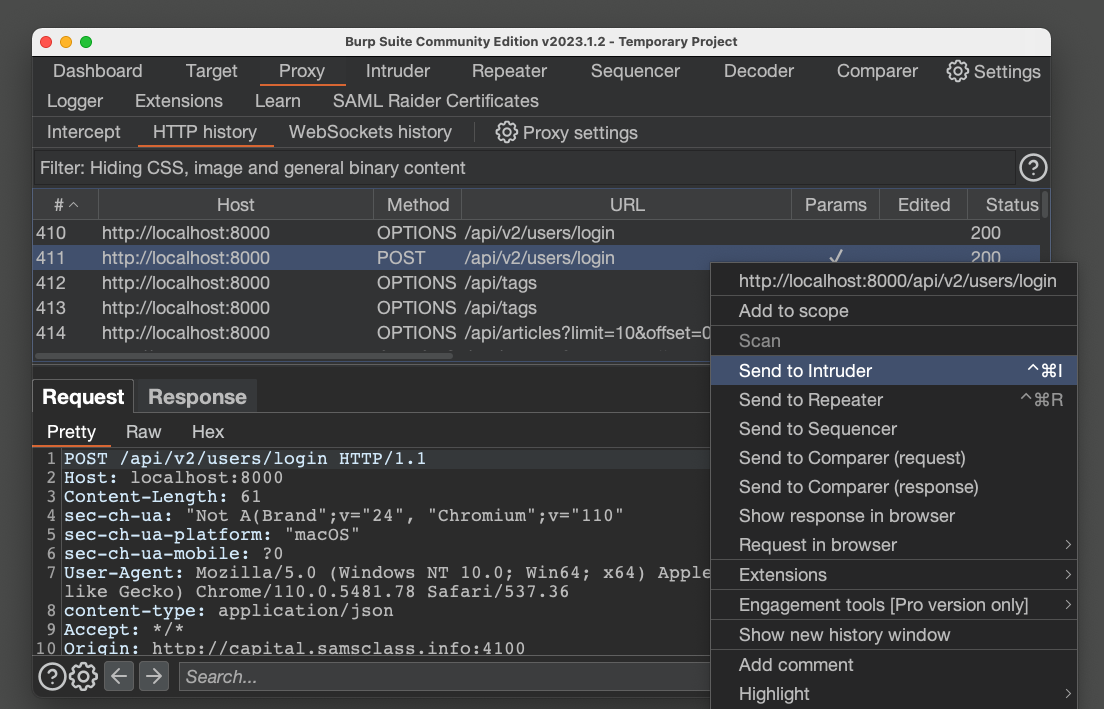
In Burp, on the Proxy tab, on the "HTTP history" sub-tab, find the login request.
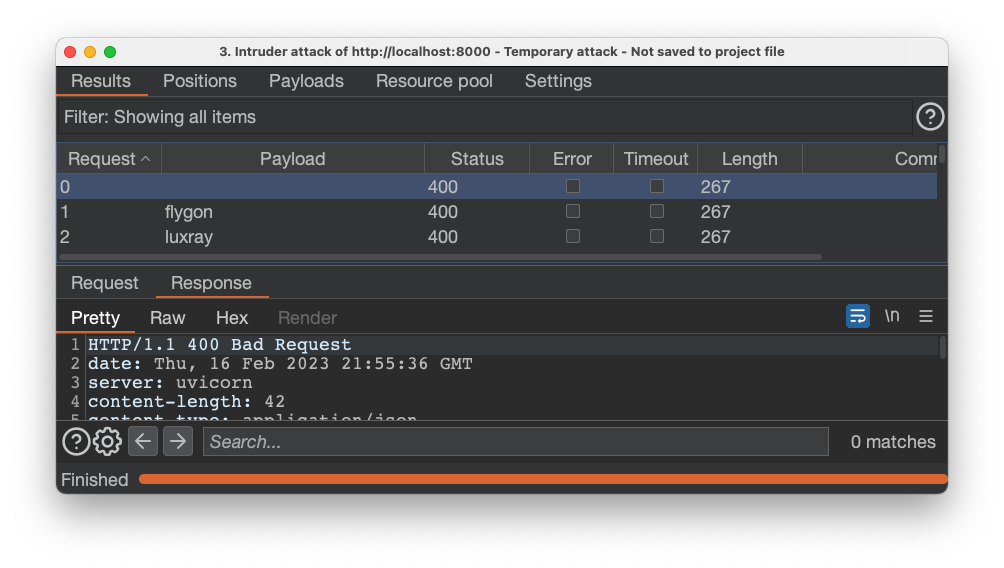
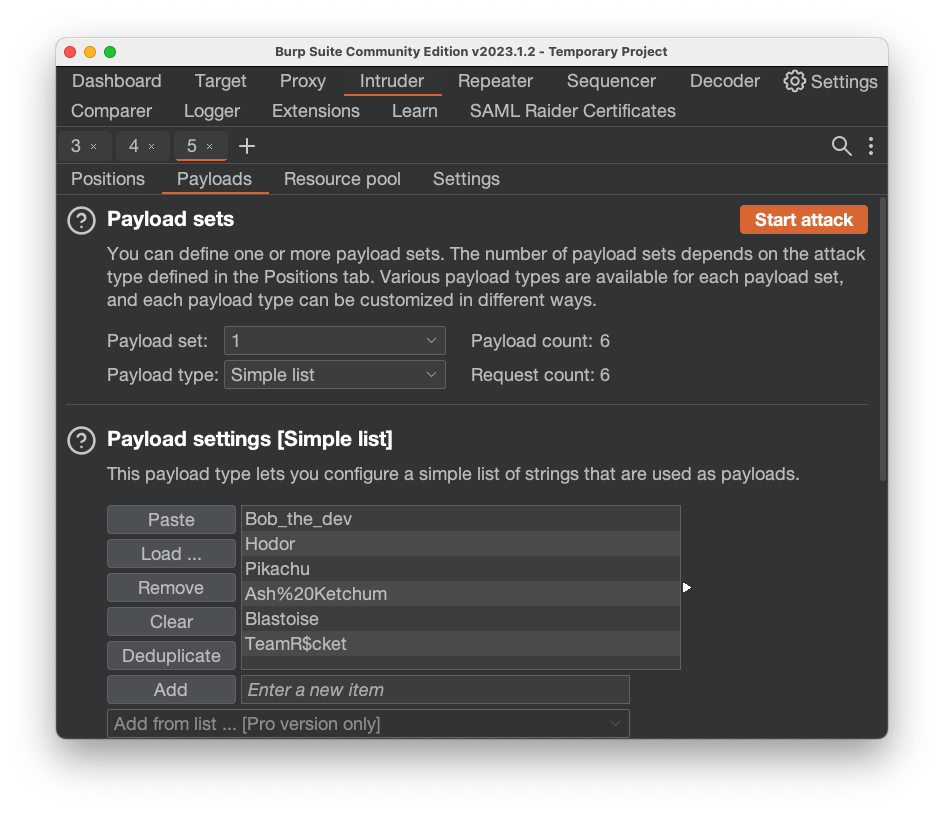
Right-click it and click "Send to Intruder", as shown below.
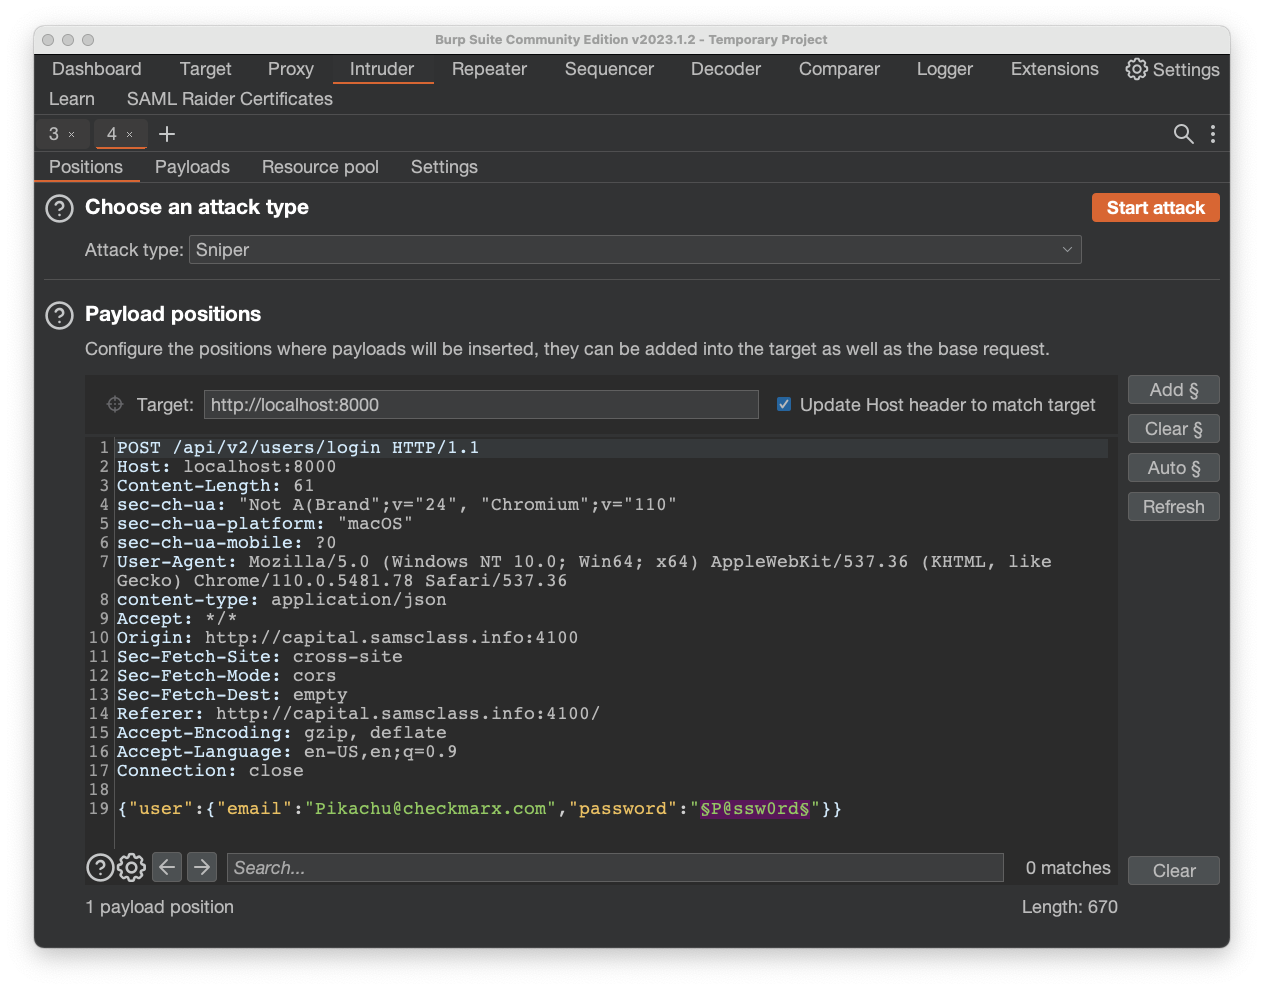
Find the text file with the possible passwords you copied previously.
Edit the list to have a carriage return after each word.
Paste the words into the "Payload settings [Simple list]" box, as shown below.
Flag AP 130.3: Broken Authentication (10 pts)
The attack proceeds, as shown below.Find the login request that has a different response from the others, and find the flag in that response.
Click your username at the top right.
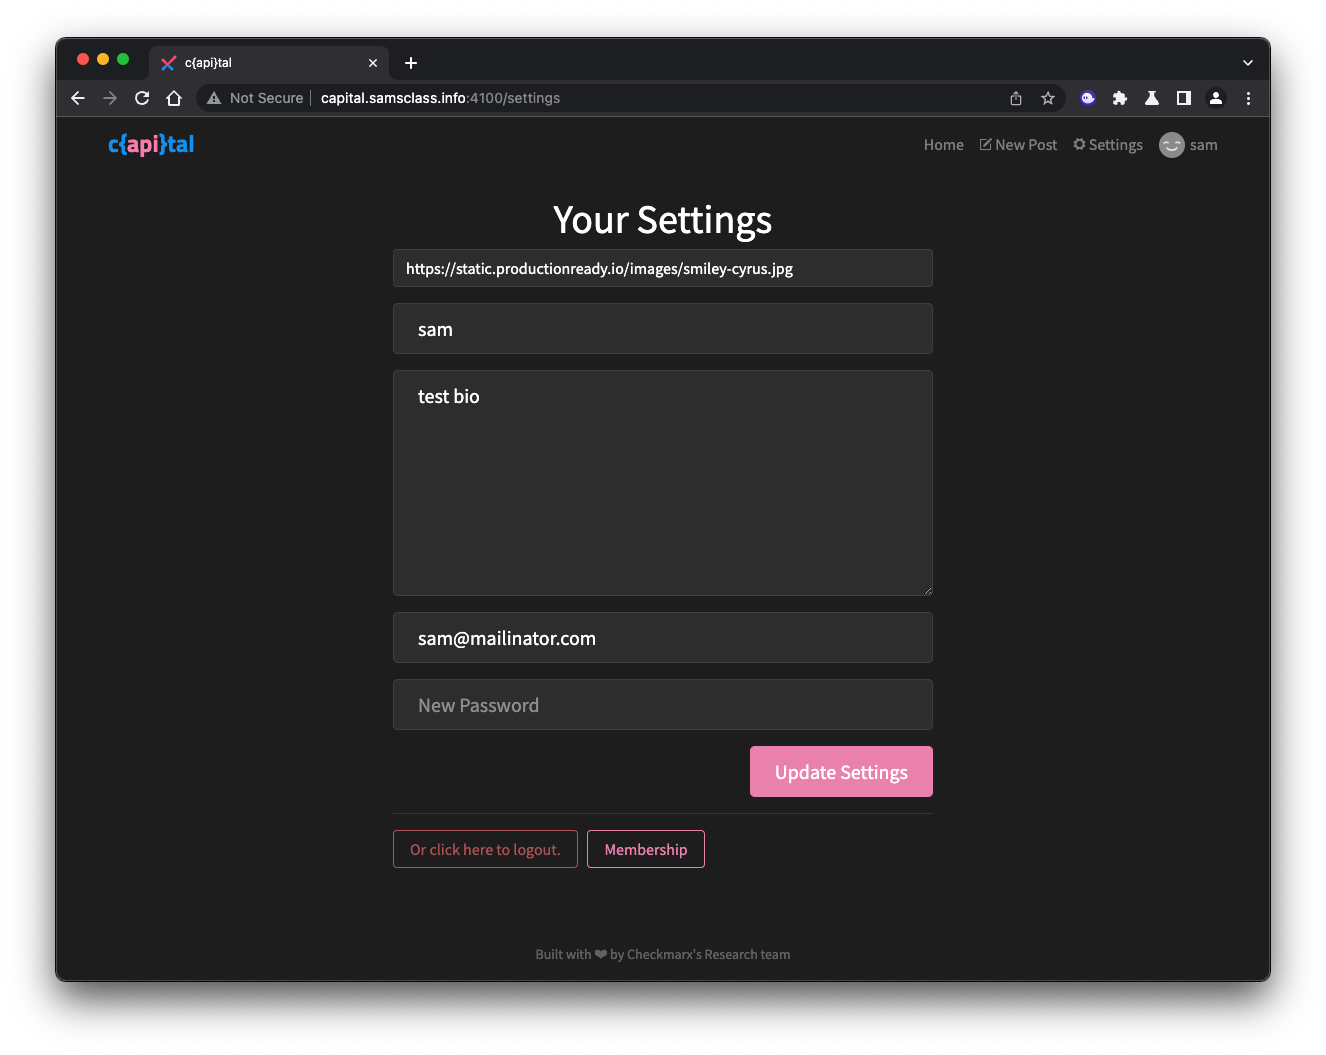
On the right side, click the "Edit Profile Settings" button.
The Your Settings page opens, as shown below.
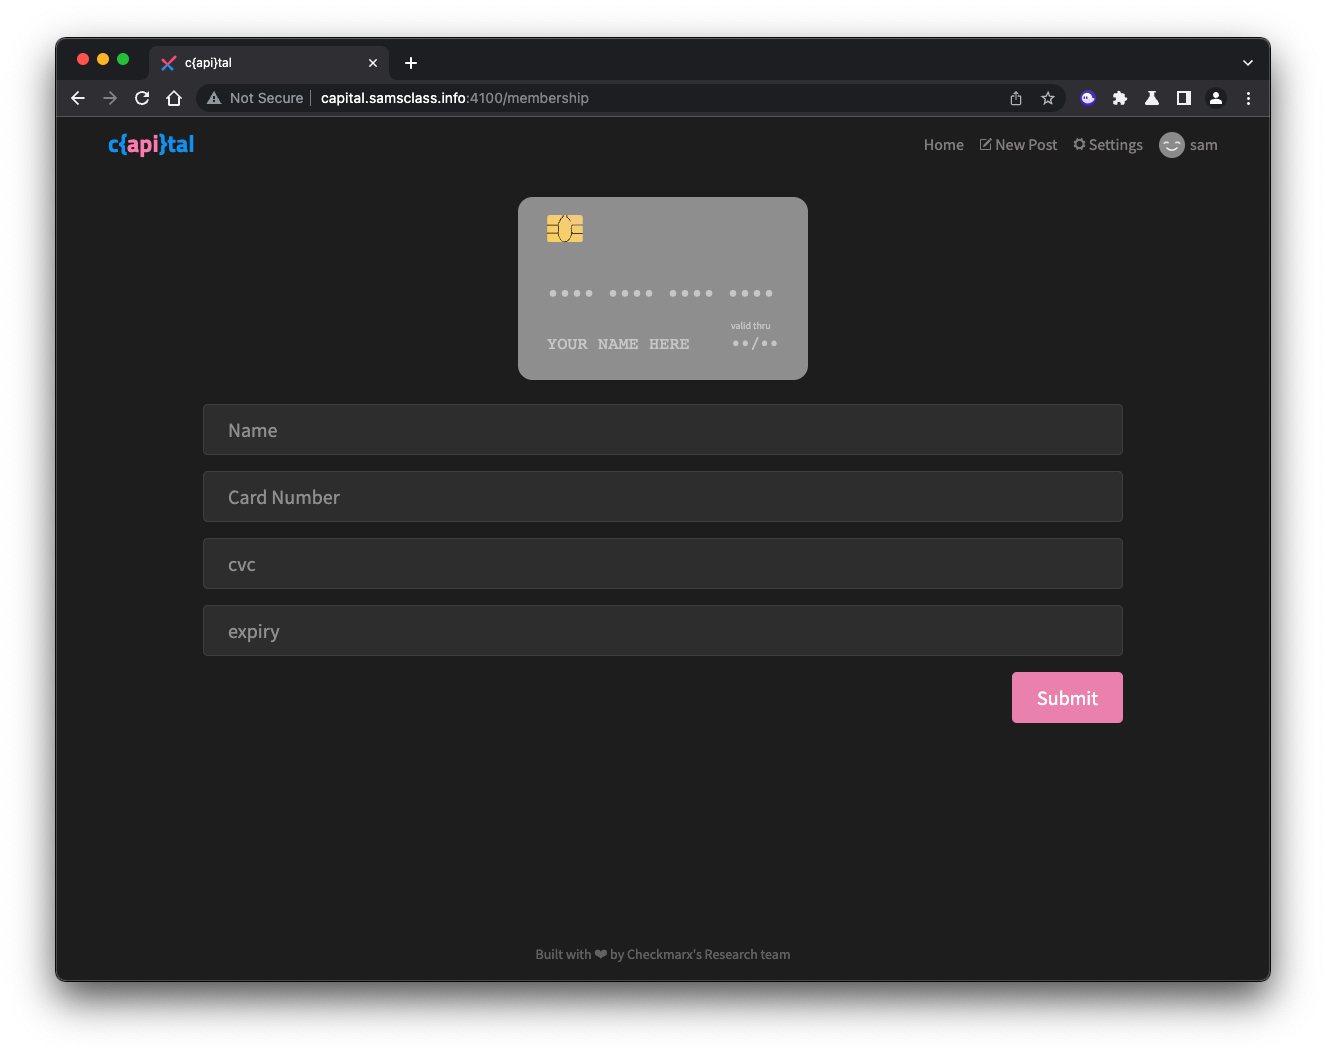
Notice that you can add a biography, and you can also purchase a Membership.
Click the Membership button.
This page collects credit card data, as shown below.
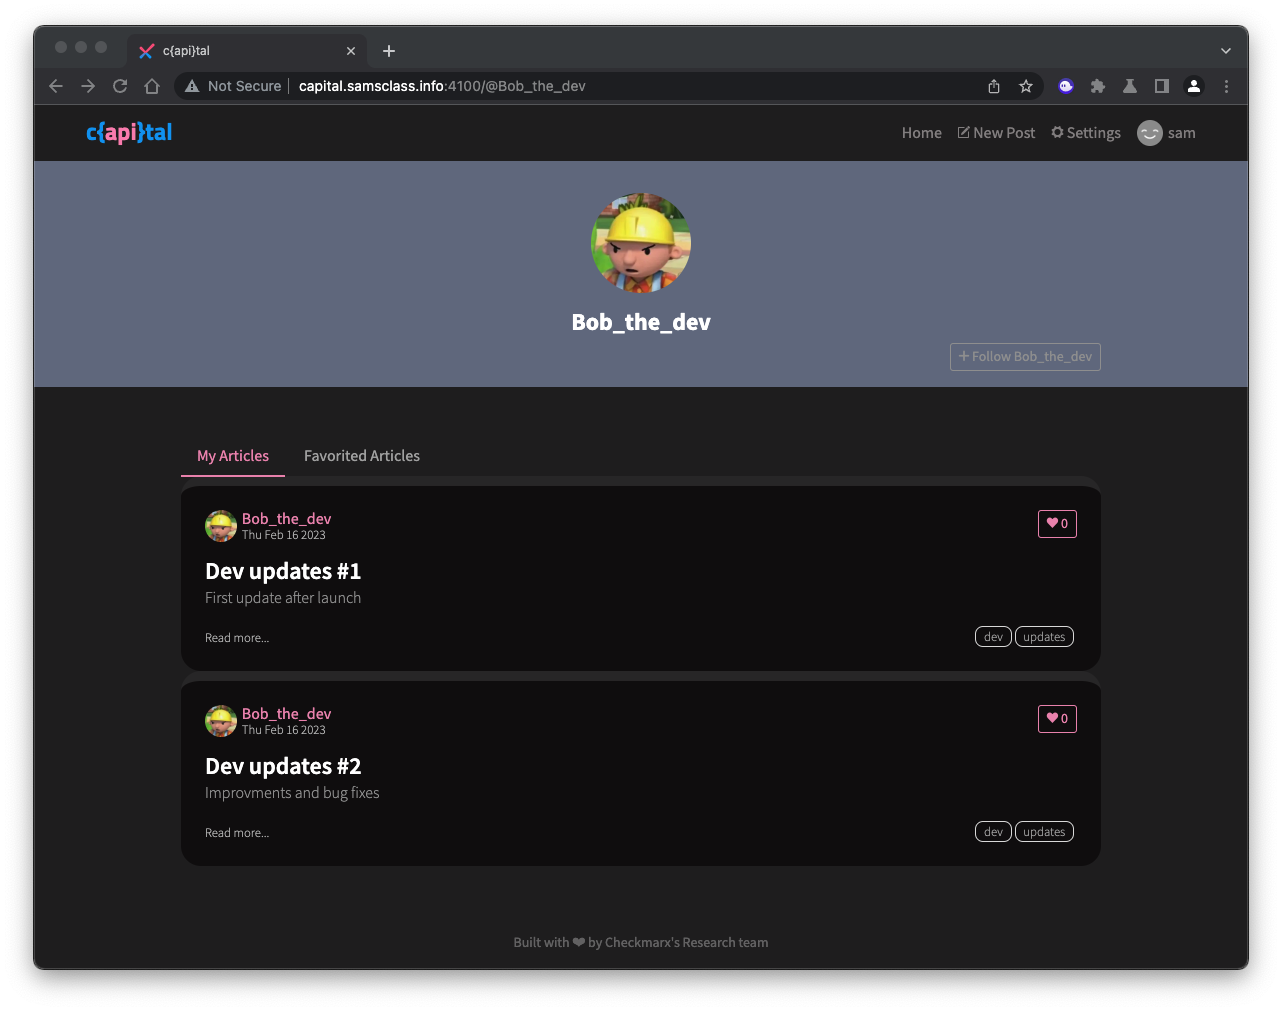
Click the pink username at the top of any article.
You see this user's profile, but no credit card data, as shown below.
Unfortunately, although the developer did not display the credit card data on the Web page, it is handled insecurely behind the scenes, by the API.
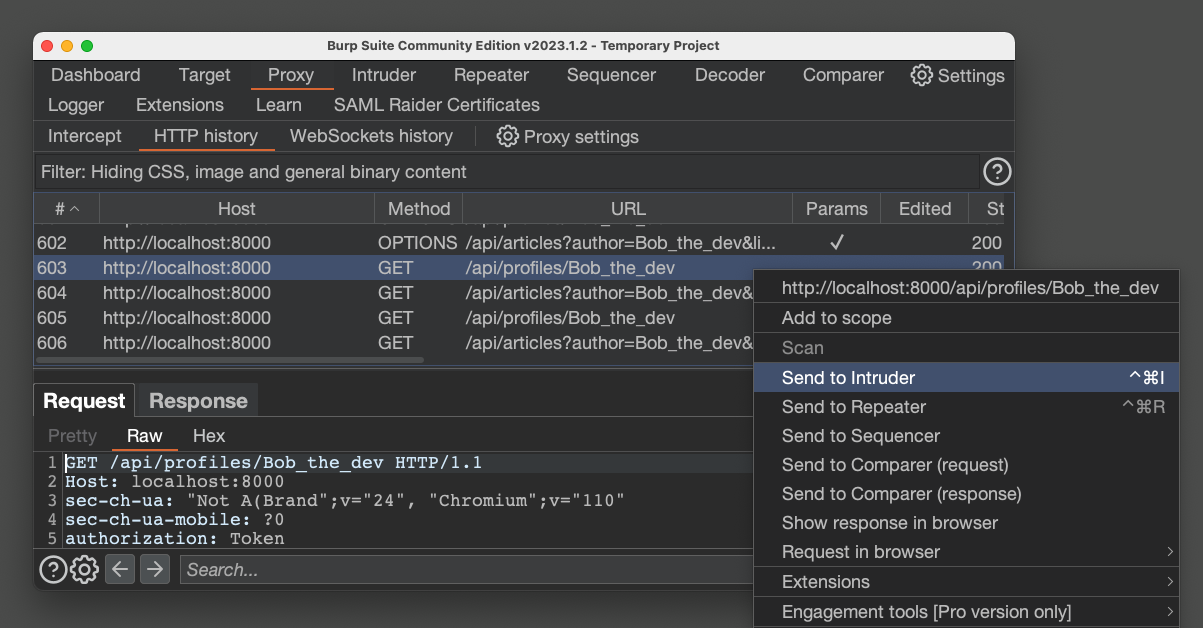
Right-click it and click "Send to Intruder", as shown below.
The name is highlighted, as shown below.
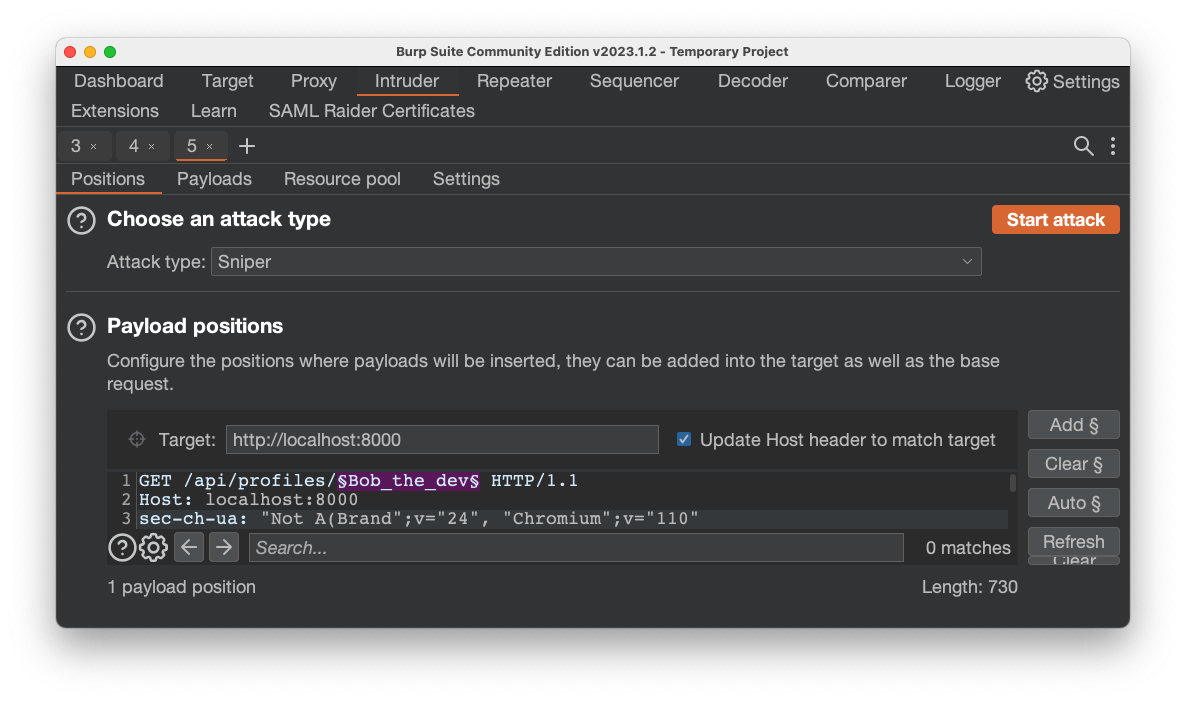
Paste in the list of users shown below.
Bob_the_dev
Hodor
Pikachu
Ash%20Ketchum
Blastoise
TeamR$cket
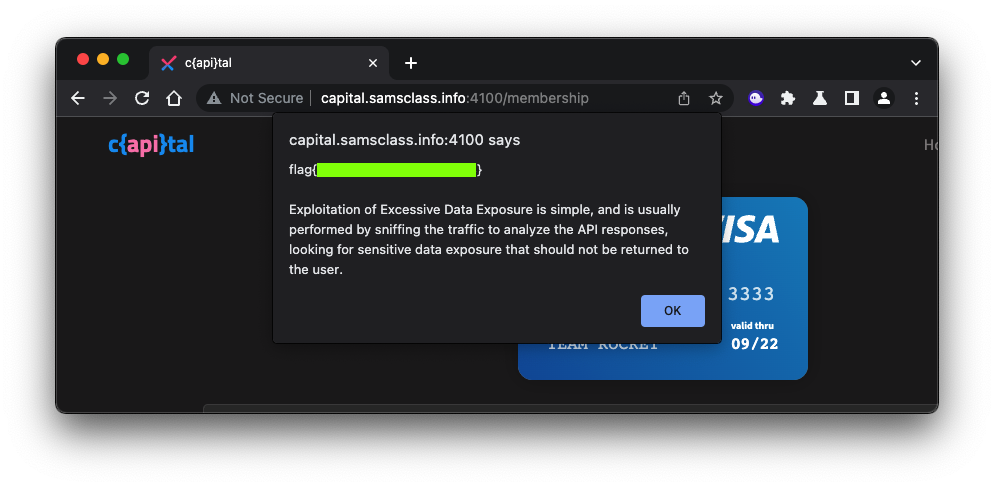
Flag AP 130.4: Excessive data exposure (10 pts)
Find the profile with the longest response.Take the credit card information found there and use it to purchase a membership for your own account.
The flag appears, covered by a green rectangle in the image below.
On the right side, notice the URL:
{{APIURL}}/usersThere's no version string in this URL, such as "v1" or "v2".
Examine the other API calls and find one that contains "v2".
Send it as it is, and adjust the data until it produces a successful response.
Change it to "v1" and send it.
Flag AP 130.5: Improper assets management (5 pts)
Change the version number to "v1" and send it.The flag appears in the response.
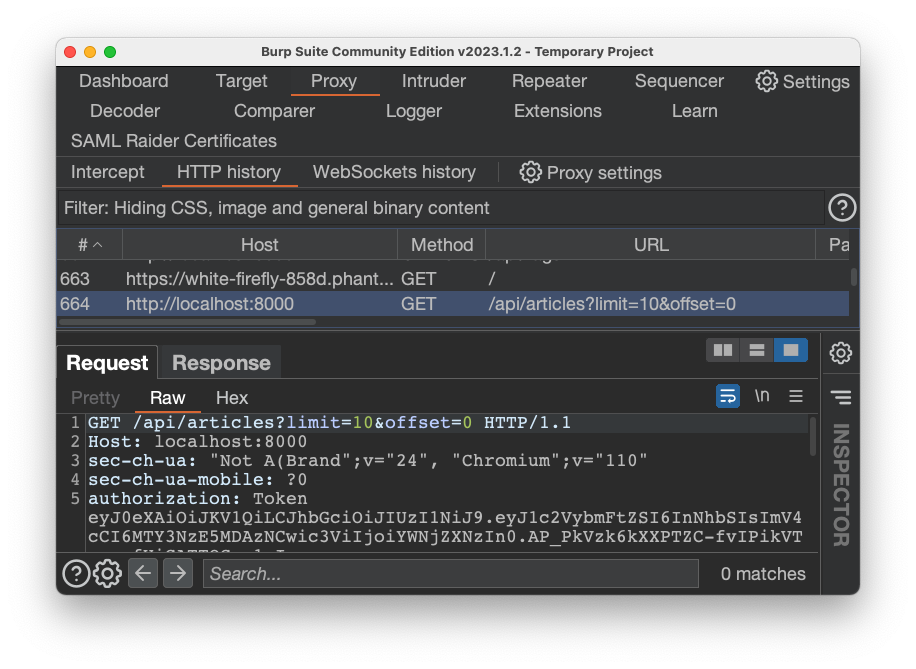
In Burp, on the Proxy tab, on the "HTTP history" sub-tab, find the GET request that loaded the articles, as shown below.
Flag AP 130.6: Lack of resources and rate limiting (5 pts)
Send the article request to the Repeater, ands increase the "limit" parameter.When it's large enough, you'll see the flag in the response.
http://capital.samsclass.info:4100/static/js/bundle.js
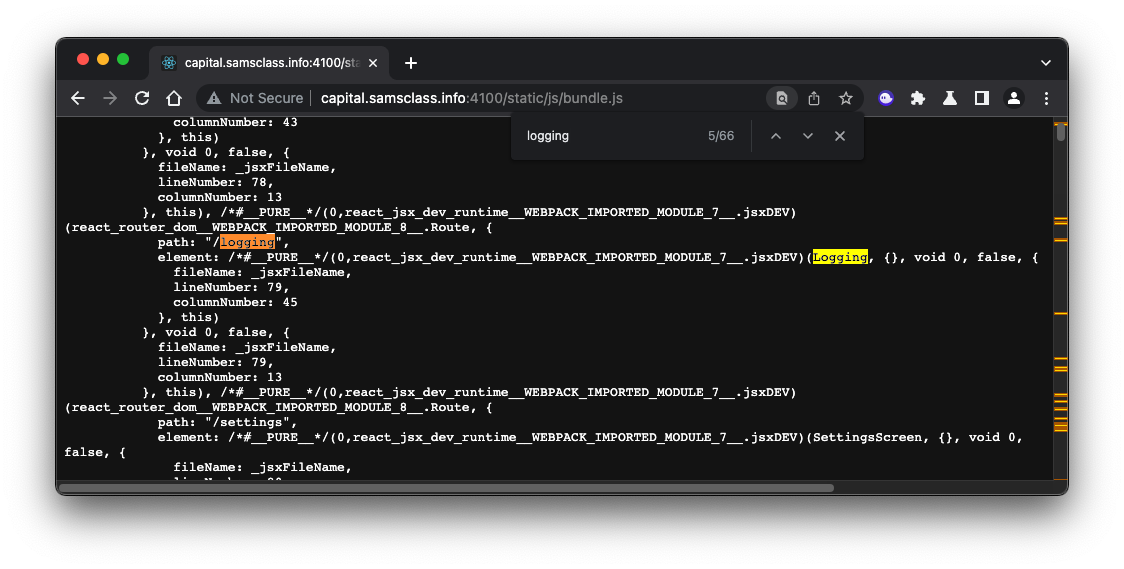
Flag AP 130.7: Insufficient logging and monitoring (5 pts)
In Burp, send a GET request from the HTTP History to Repeater, and modify it to send to the "/logging" function.The response will contain the flag.
In this case, we can assign parameters in the request that the developer did not intend for the user to control.
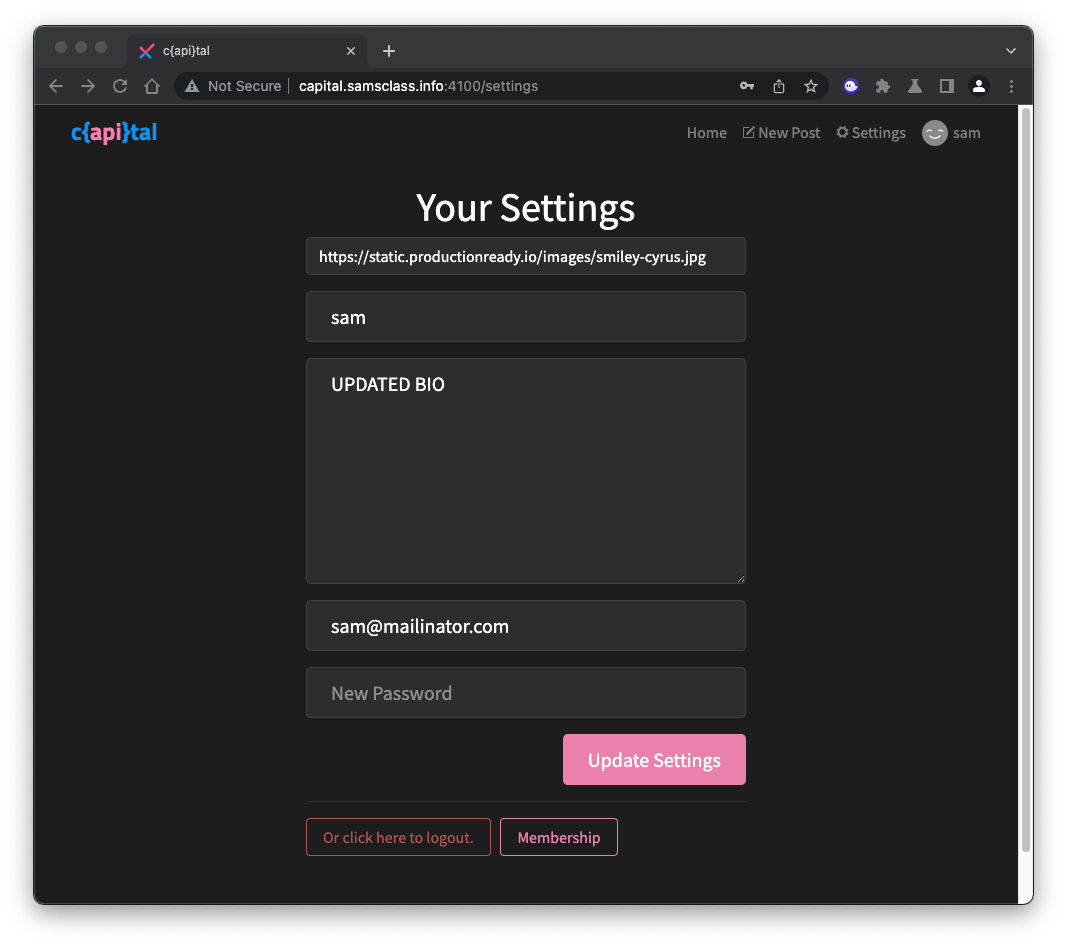
At the top right, click Settings.
Enter updated bio data, as shown below, and click the "Update Settings" button.
The Response contains:
"admin":false,as shown below.
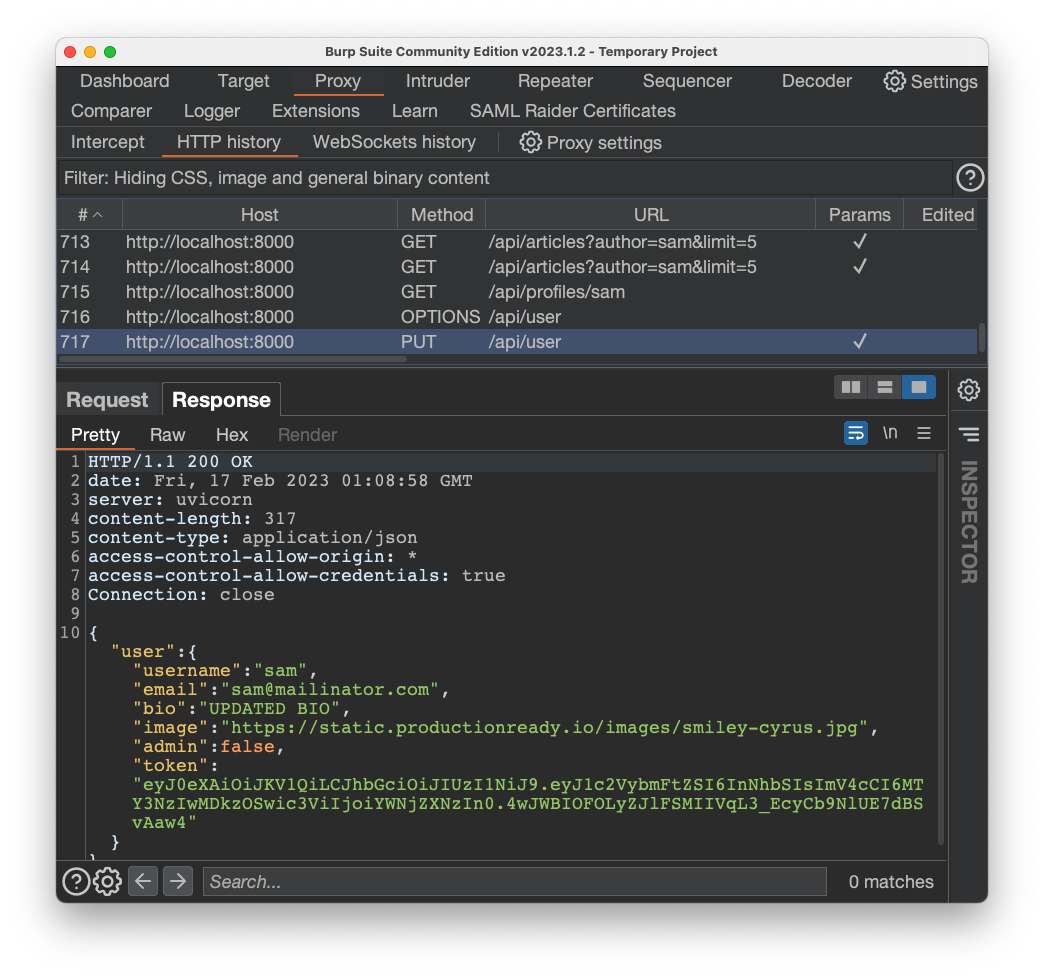
Flag AP 130.8: Mass assignment (5 pts)
In Burp, send the PUT request to Repeater, and modify it to add this parameter in the JSON data at the bottom:"admin":true,The response will contain the flag.
http://capital.samsclass.info:8000/docs
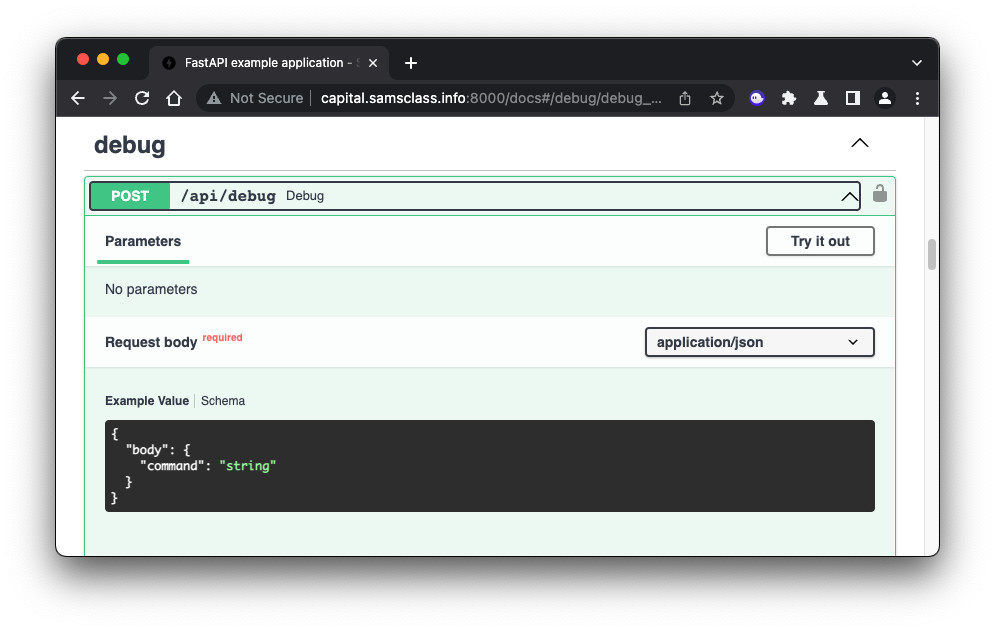
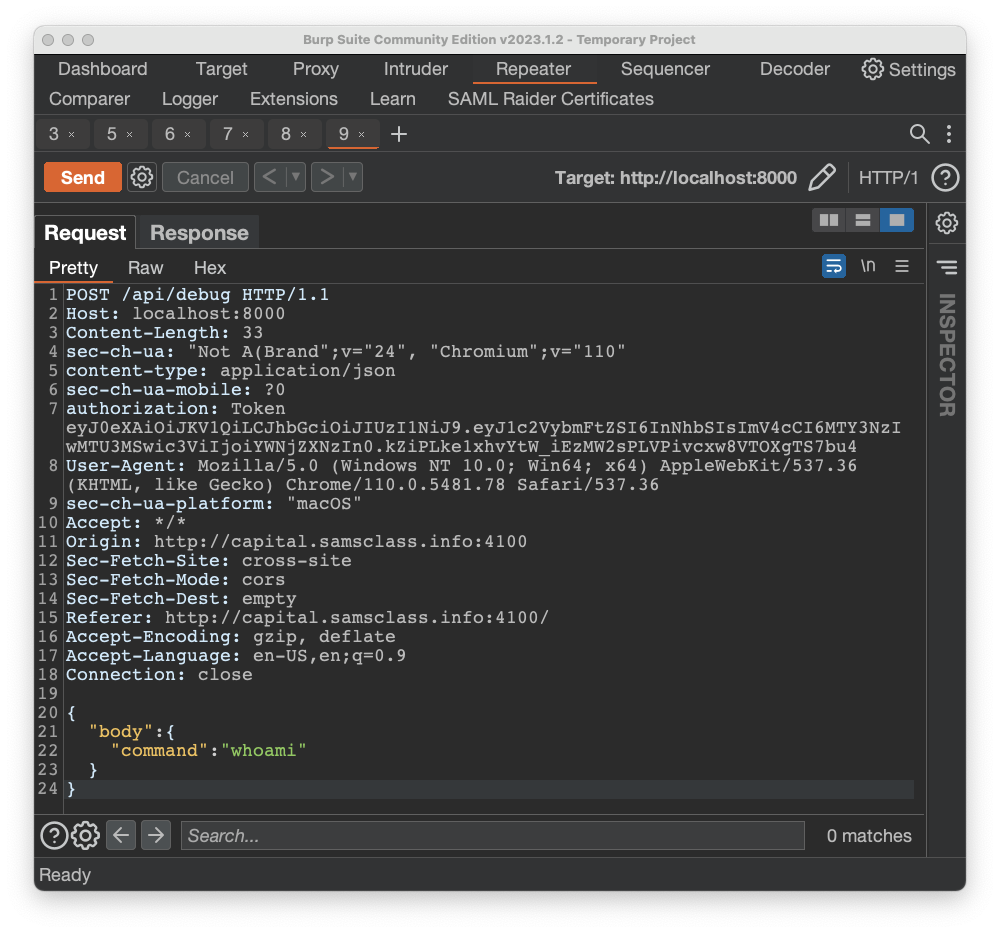
In Burp, find that POST request. send it to Repeater, and modify it to send a DEBUG request with a command of "whoami", as shown below.
Flag AP 130.9: Injection (5 pts)
Examine the response to see what commands are whitelisted.Modify the POST to execute a whitelisted command, followed by
to see the flag.
sudo apt update
sudo apt install redis-tools
redis-cli -h capital.samsclass.info -p 6379
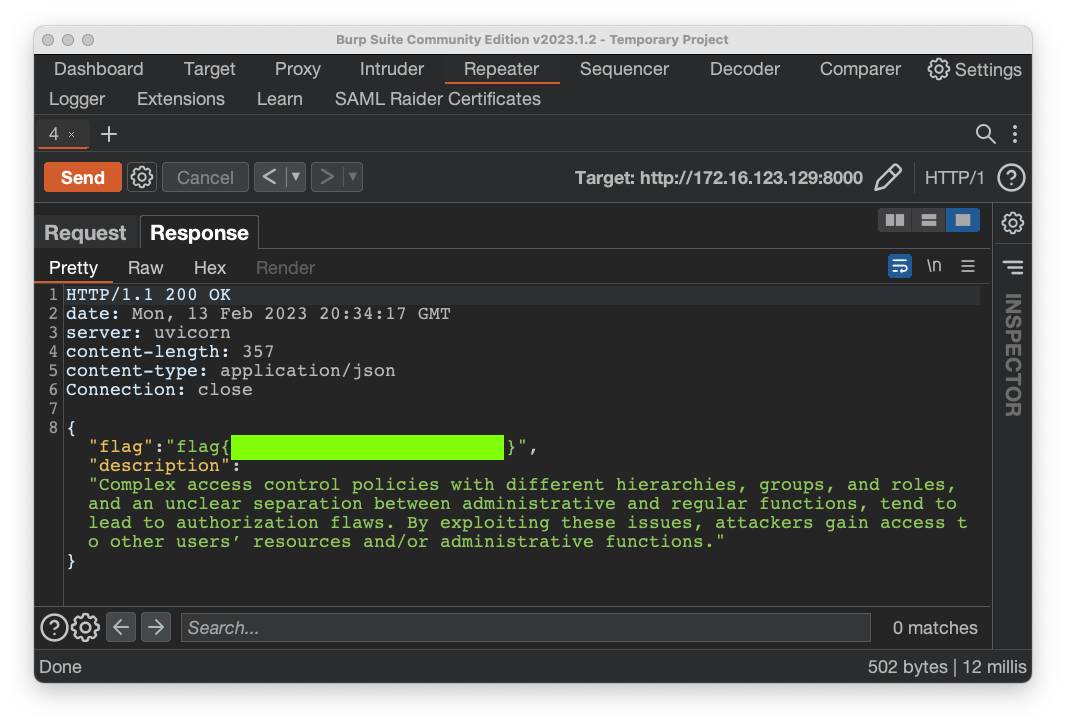
Flag AP 130.10: Security misconfiguration (10 pts)
There's a key named "flag" in the Redis database. Use the appropriate command to display its value.
How to Install c{api}tal
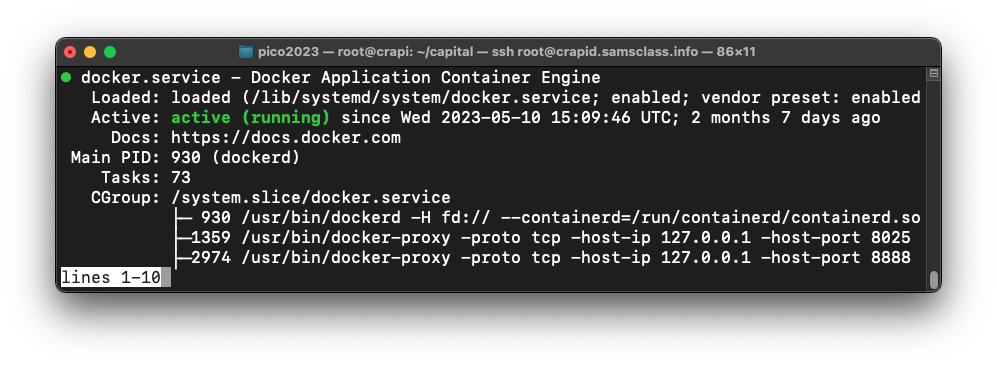
If you want to make your own server, you can use Debian 11, as shown below.Installing Docker
Execute these commands:You see an Active status of "active (running)", as shown below.Press q to exit the status view.
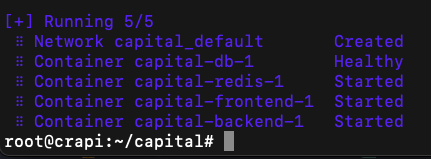
Installing c{api}tal
Execute these commands:A process of downloading and running software proceeds for several minutes. When it finishes, you see 5 running containers, as shown below.
Making it Automatically Start
Execute this command:Add this line to the file:
Posted 2-16-23
Installation instructions added 7-17-23
Chromium insecure page loading tip added 7-18-23
Minor updates and REDIS flag restored on 11-12-24