Project 7: ExploitMe Mobile Lab 4: Secure Logging (10 points)
What You Need for This Project
- A computer with Android Studio installed
- An Android device running in VirtualBox, which you prepared in a previous project
- The server which you prepared in a previous project
Purpose
To examine the Android log, and
control logging of sensitive data.
Using the Patched App
For this project, continue using
the patched App you prepared in
the previous project.
You can use either the original
app or the one you changed to
store the Statements in a
more private folder.
Standard Setup Tasks
These steps duplicate the setup
youi had in the previous lab.
They are repeated here for convenience.
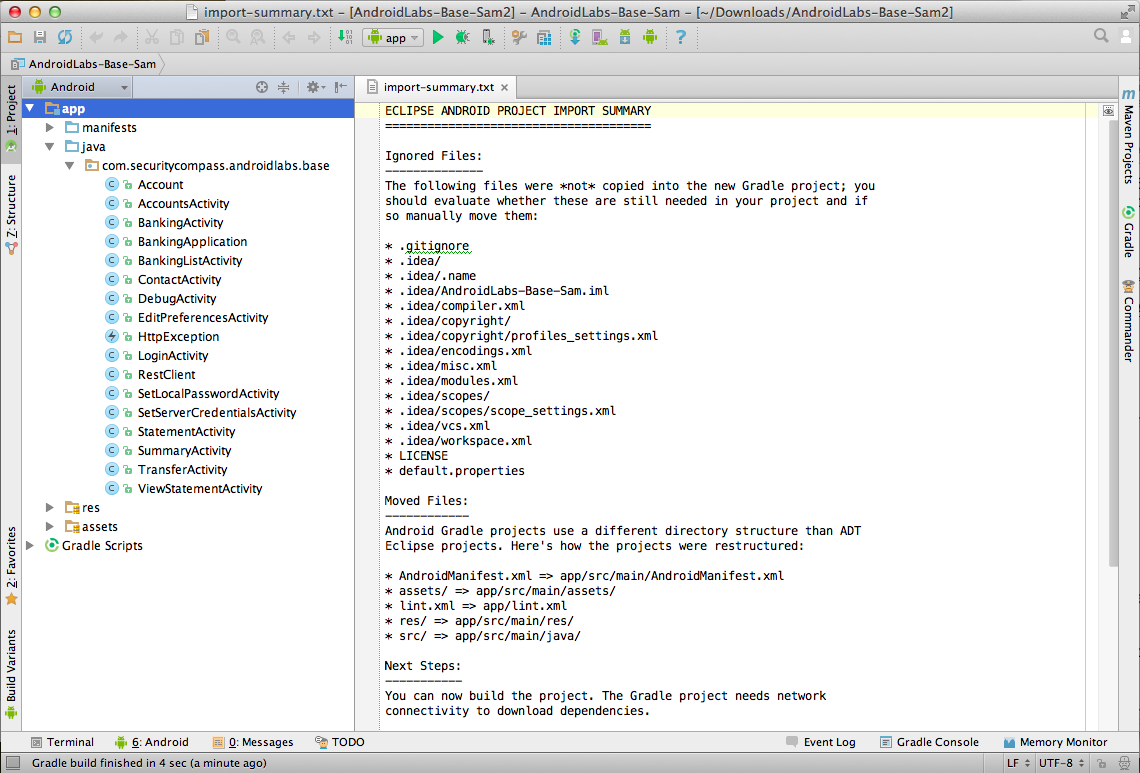
Start Android Studio
Launch Android Studio.
The "AndroidLabs-Base-Sam" project
should be loaded,
as shown below.
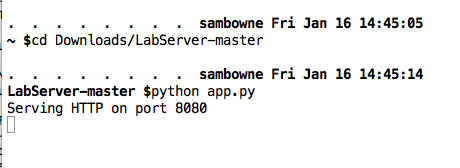
Start the Server
You should have the server app running,
listening on port 8080,
as shown below.
Adjusting Network Settings
You should have your network
set to Bridged mode from
the previous project.
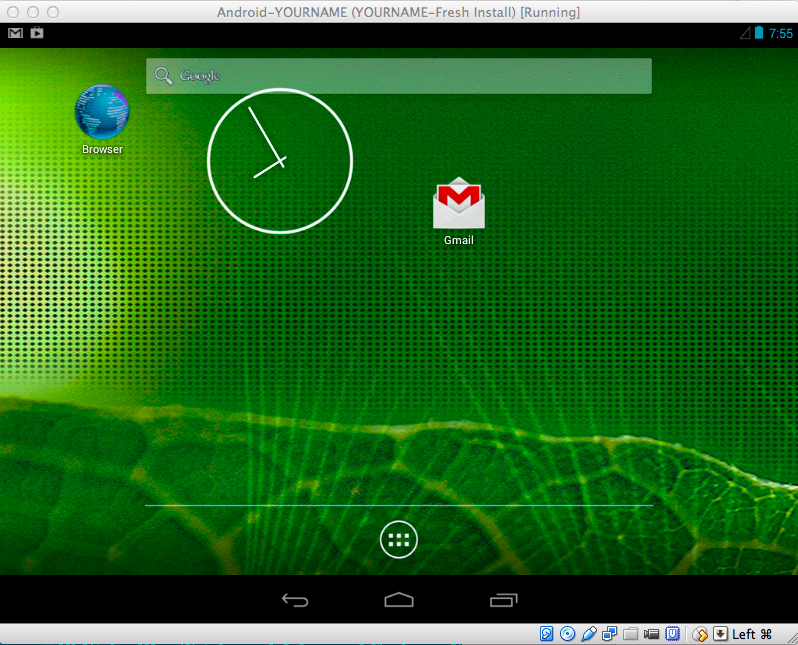
Start the Virtual Device
Start your
Android virtual machine.
Swipe the padlock to the right
to get to the Home screen,
as shown below.
Finding your Android Device's IP Address
Click in the Android virtual machine.
On a PC, press Alt+F1. On a Mac,
press fn+alt+F1.
A Terminal window opens.
Execute this command,
as shown below.
netcfg
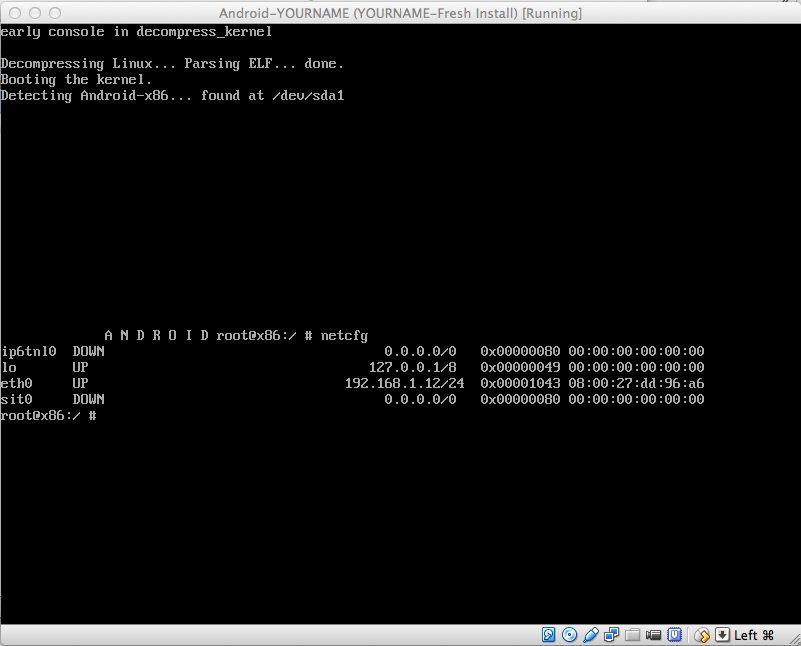
The Android device's IP address
is shown in the "eth0" row. When
I did it, my address was
192.168.1.12. Find your address
and make a note of it.
In the Android device,
on a PC, press Alt+F7. On a Mac,
press fn+alt+F7.
The Terminal window vanishes and you
are back to the Android home page.
Finding your SDK Path
In Android Studio,
click Tools,
Android, "SDK Manager.
Android SDK Manager opens,
as shown below.
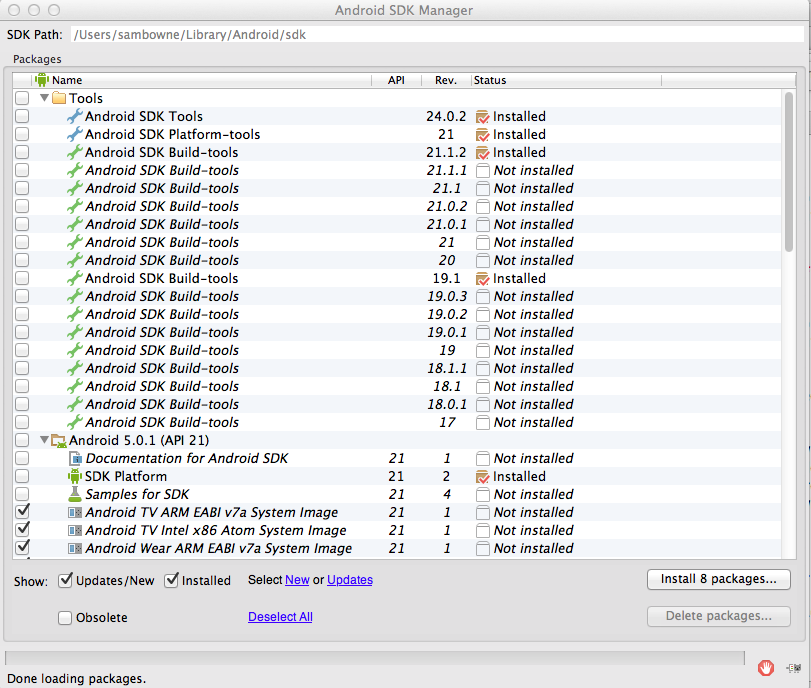
At the top of this window,
the SDK Path is shown. On my
machine, the path is
/Users/sambowne/Library/Android/sdk
Find your SDK path and make a note
of it.
Connecting with Android Debug Bridge
On your host machine, open a Terminal
or Command Prompt window.
Execute these commands, changing
the path in the first command to your
correct SDK path, and the IP address in
the last command to the IP address
of your Android device:
cd /Users/sambowne/Library/Android/sdk

cd platform-tools

./adb kill-server

./adb connect 192.168.1.12:5555
You should see the message
"connected to..",
as shown below.

Running the Vulnerable App
In Android Studio, from the menu bar,
click Run,
"Run 'app'".
A "Choose Device" box pops up,
as shown below.
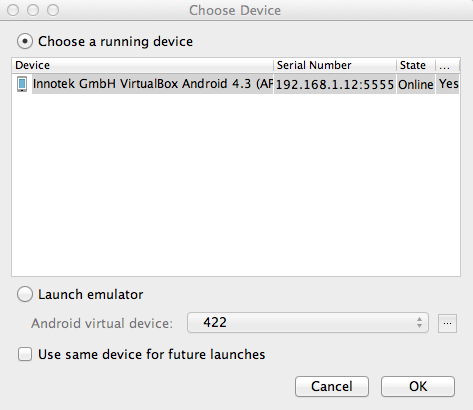
Verify that the "..VirtualBox Android..."
device is selected, as shown above,
and click OK.
The "EMM - Vulnerable" app appears
in the emulator, as shown below.
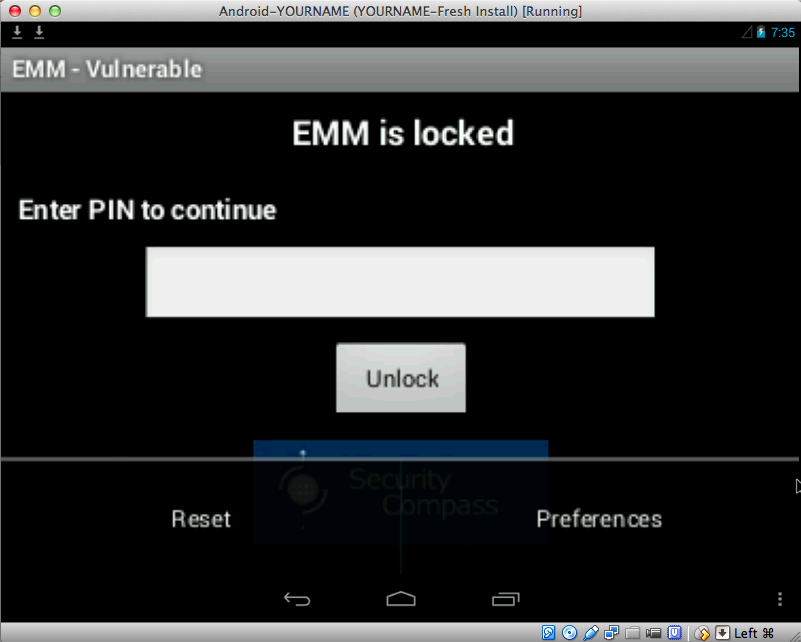
Resetting the App
At the lower right, click the
three-dot icon.
Two options appear:
"Reset" and "Preferences",
as shown below.
Click Reset.
Logging In
Now you see the "Enter the
LabServer bank credentials"
screen,
as shown below.
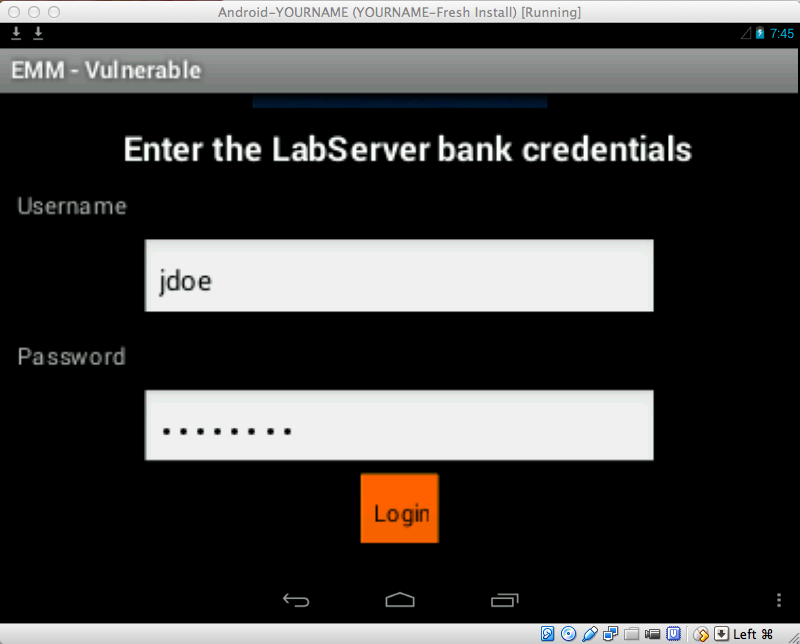
Log in with the credentials
jdoe and password
To scroll the screen down, you can
use the Tab key on the keyboard,
or use the mouse to drag the app
up.
When you have logged in,
you see the "Setup your
keylock..." screen,
as shown below.
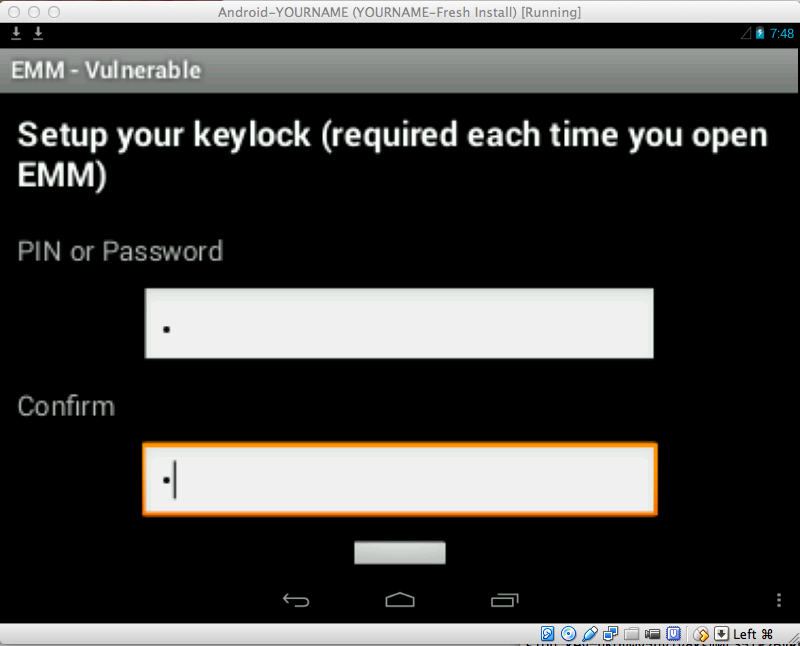
Enter a single-digit code, such as
1 in both fields and press
Enter twice.
|
New Tasks
Perform a Transfer
Click Transfer.
Enter an Amount of 5,
as shown below, and then
click Enter twice.
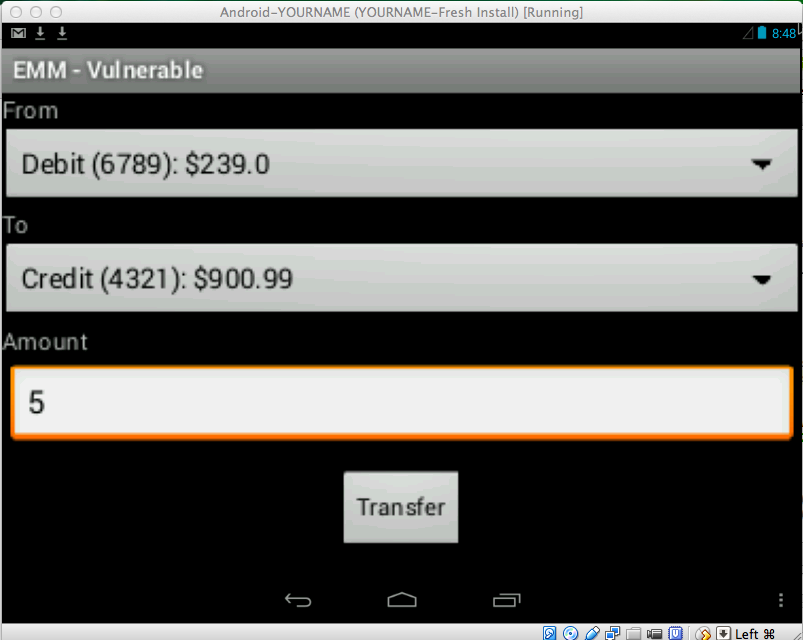
A message appears, saying
"Transfer completed".
Viewing the Android Log
In Android Studio, click
Tools, Android,
"Android Device Monitor".
The
"Android Device Monitor" opens.
In the lower pane, click the LogCat
tab,
as shown below.
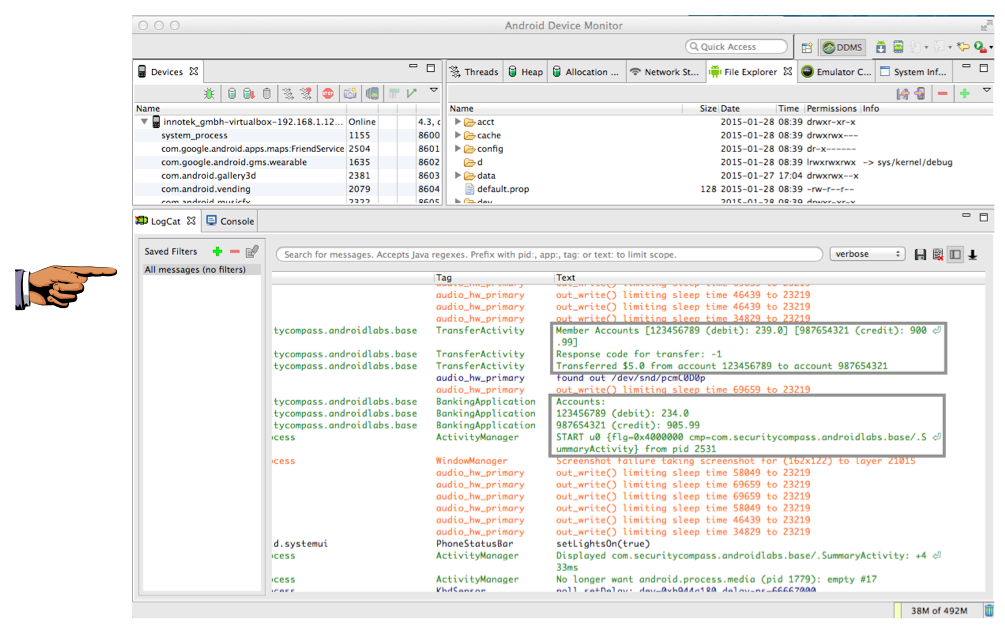
Expand the lower pane and scroll to
the right so you can see the "Text"
column.
Find Text that includes account numbers
and dollar amounts,
as shown above.
Saving a Screen Image
Make sure these two items are visible,
as shown above:
- An account number
- A Dollar amount
Save a full-desktop image. On a Mac, press Commmand+3. On a PC, press Shift+PrntScrn and paste into Paint.
YOU MUST SUBMIT A FULL-SCREEN IMAGE FOR FULL CREDIT!
Save the image with the filename "YOUR NAME Proj 7a", replacing "YOUR NAME" with your real name.
Insecure Logging
The Android log is visible
to every app, so it's a poor
place to put private data.
The log should only contain
generic statements useful
for debugging, without
account numbers or dollar amounts.
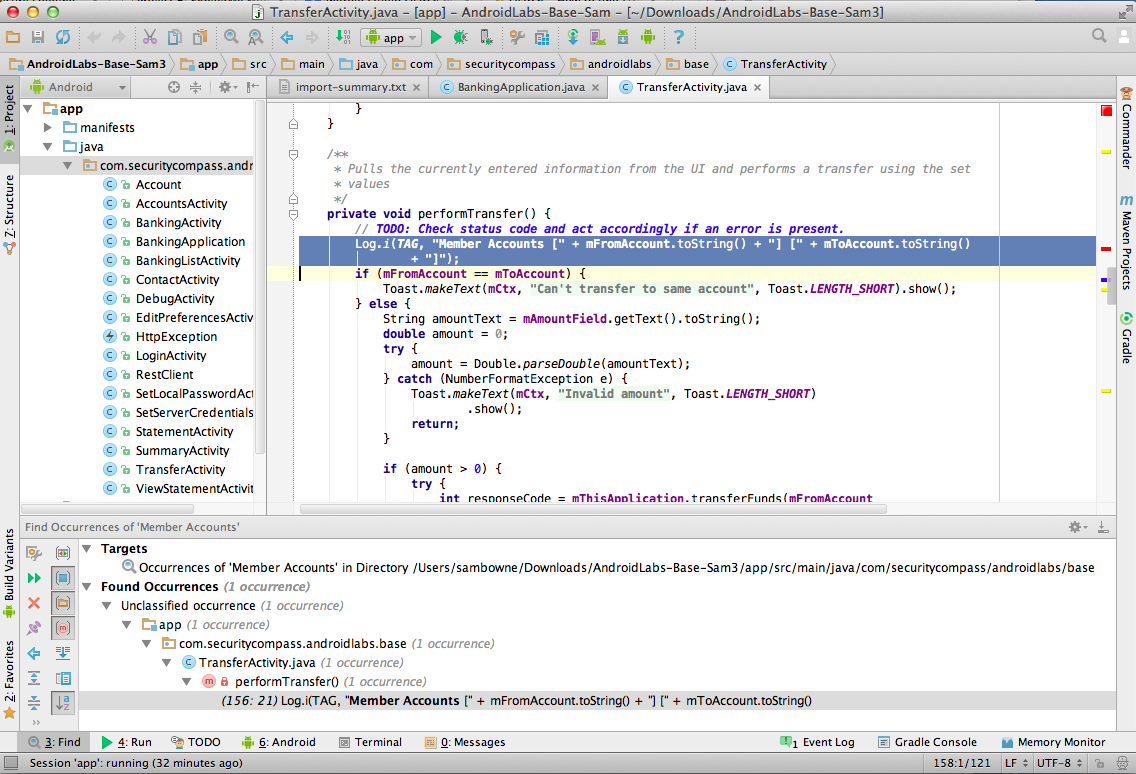
Finding the Defective Code
The first insecure log entry
begins with the words "Member
Accounts", so searching for that
is a good first step.
In Android Studio, in the top
left pane, click
.com.securitycompass.androidlabs.base
to highlight it,
as shown below.
If you are on a PC, press
Shift+Ctrl+F.
If you are on a PC, press
Shift+command+F.
This will search the entire
project.
In the "Find in Path" box,
enter "Test to find" of
Member Accounts
as shown below.
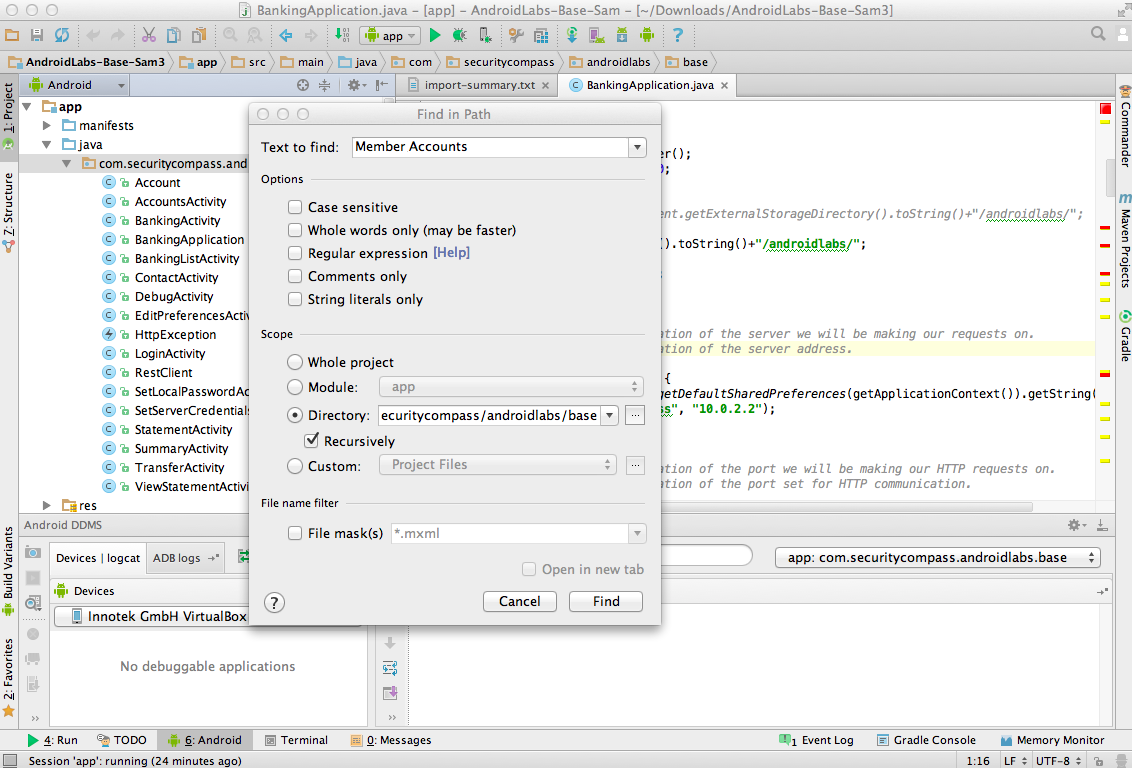
Click Find.
In the lower pane, in the
"Found Occurrences" line,
you can see that only
"1 occurrence" was found.
The lasts line in the lower
pane shows that occurrence--a
Log command, as expected.
Double-click the Log command in the
lower pane.
The top right pane shows the
insecure lines of code,
as shown below.
        Log.i(TAG, "Member Accounts [" + mFromAccount.toString() + "] [" + mToAccount.toString()
               + "]");
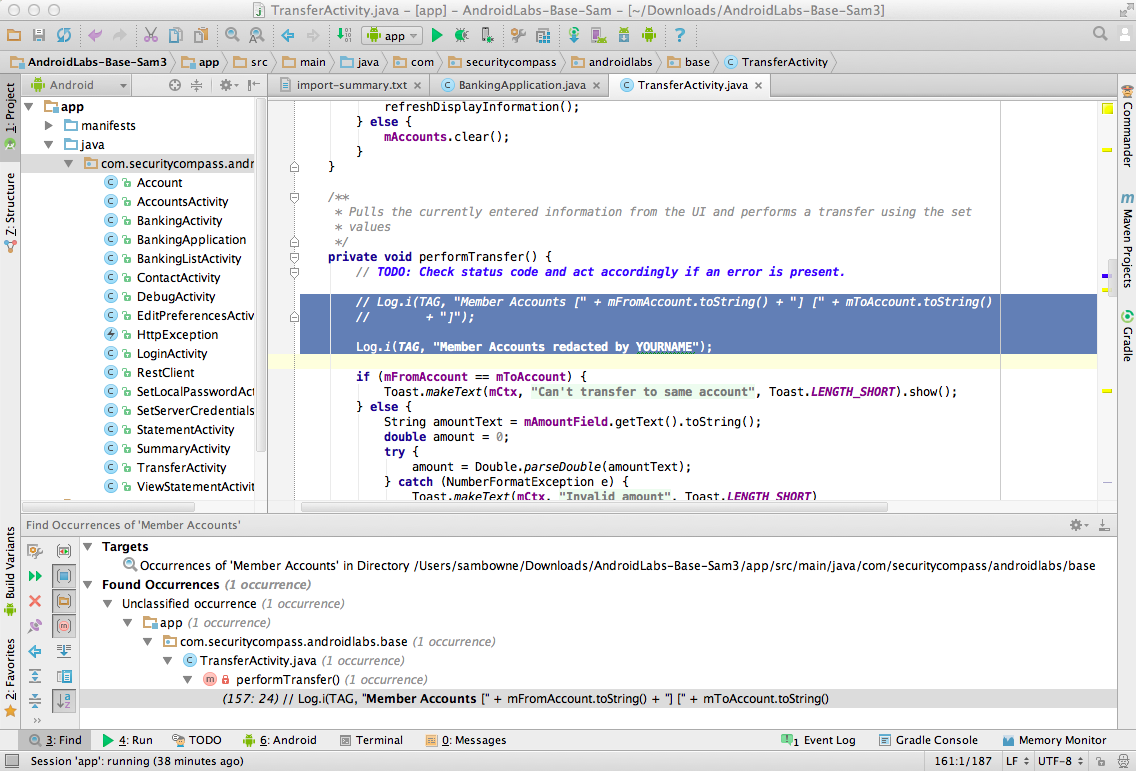
Fixing the Defective Code
Carefully add two slashes to comment
out the offending lines of code,
and add this line below them,
replacing "YOUR NAME" with your
own name, as shown below.
Log.i(TAG, "Member Accounts redacted by YOURNAME");
Running the Improved App
In Android Studio, from the menu bar,
click Run,
"Run 'app'".
A "Choose Device" box pops up,
as shown below.
Verify that the "..VirtualBox Android..."
device is selected, as shown above,
and click OK.
The "EMM - Vulnerable" app appears
in the emulator, as shown below.
Resetting the App
At the lower right, click the
three-dot icon.
Two options appear:
"Reset" and "Preferences",
as shown below.
Click Reset.
Logging In
Now you see the "Enter the
LabServer bank credentials"
screen,
as shown below.
Log in with the credentials
jdoe and password
To scroll the screen down, you can
use the Tab key on the keyboard,
or use the mouse to drag the app
up.
When you have logged in,
you see the "Setup your
keylock..." screen,
as shown below.
Enter a single-digit code, such as
1 in both fields and press
Enter twice.
Performing a Transfer
Click Transfer.
Enter an Amount of 5,
as shown below, and then
click Enter twice.
A message appears, saying
"Transfer completed".
Viewing the Android Log
In
"Android Device Monitor",
find the log entry showing your
name,
as shown below.
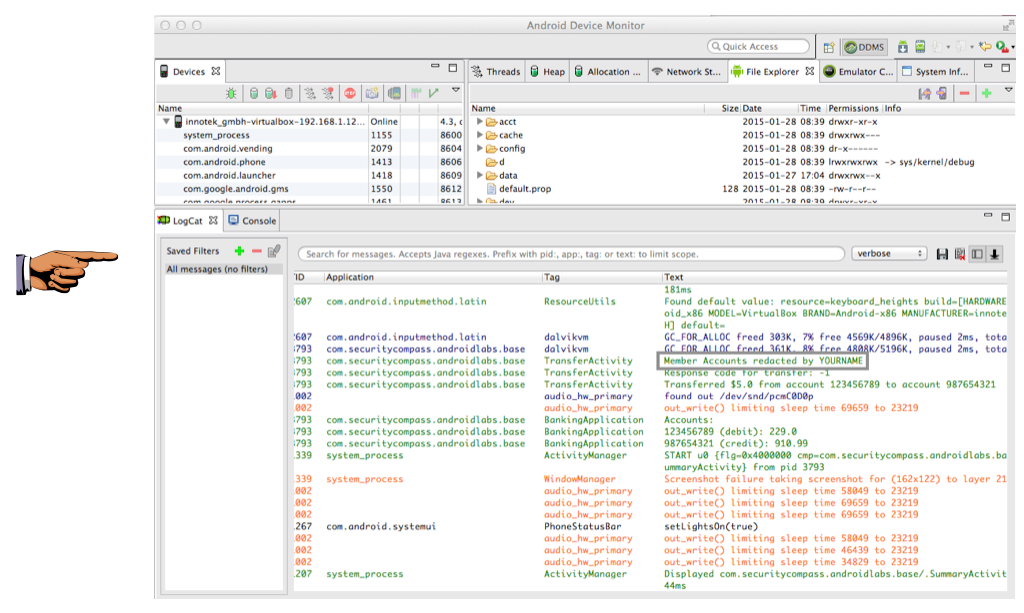
Saving a Screen Image
Make sure
the log entry showing your
name
is visible,
as shown above.
Save a full-desktop image. On a Mac, press Commmand+3. On a PC, press Shift+PrntScrn and paste into Paint.
YOU MUST SUBMIT A FULL-SCREEN IMAGE FOR FULL CREDIT!
Save the image with the filename "YOUR NAME Proj 7b", replacing "YOUR NAME" with your real name.
Turning in your Project
Email the images to
to cnit.128sam@gmail.com with the subject line:
Proj 7 from YOUR NAME
Sources
ExploitMe Mobile Android Labs
Last modified 1-29-15 2:40 pm