Windows 8 Problems
Two students got hosed using Windows 8, one using the computers in S214 and another on a personal laptop. In both cases, the Android VM worked but as soon as it was rooted in project 2 it became unusable by running so slowly that the mouse became useless.To avoid that, use Windows 7. If anyone finds a better solution, please let me know.
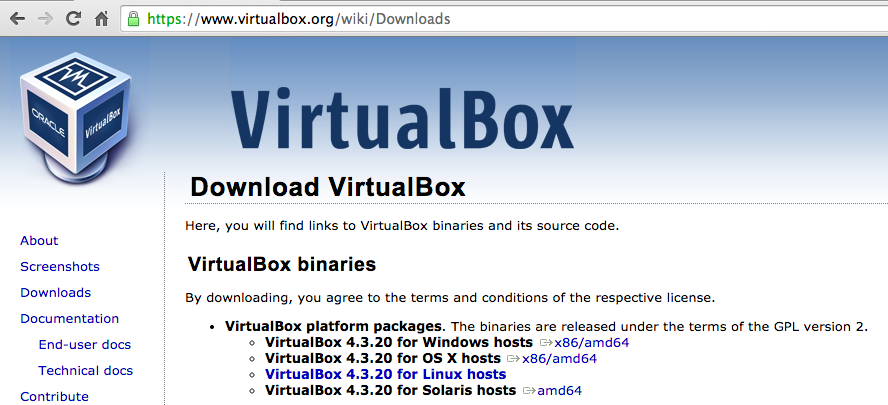
On the left side of the page, click Downloads.
On the next page, download the appropriate "VirtualBox platfotm package" for your computer, as shown below. The Windows version is a 105 MB download.
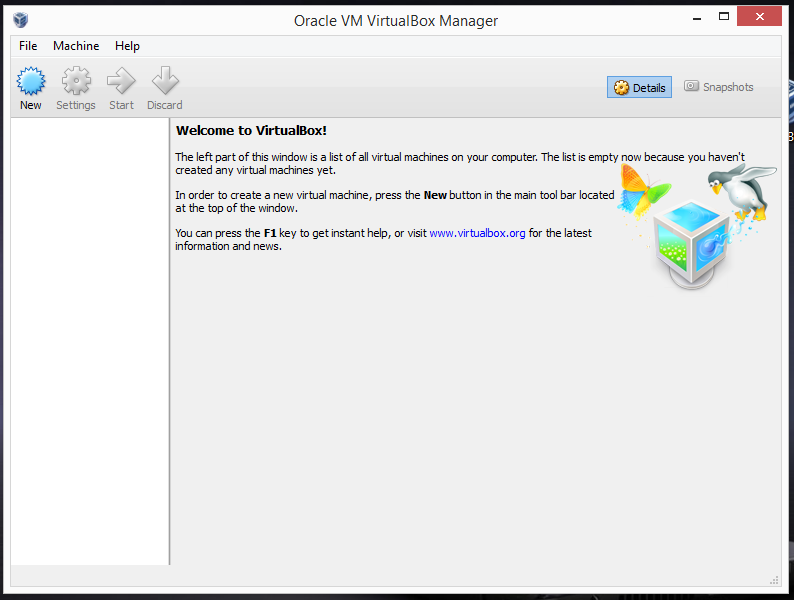
Install Virtualbox on your computer, accepting the default options.
After the installation, VirtualBox opens, as shown below.
https://code.google.com/p/android-x86/downloads/list
Click the android-x86-4.3-20130725.iso link to download the Android ISO. It is a 199 MB file.
In the "Name and operating system" box, enter these values, as shown below.
Replace "YOURNAME" with your own name.
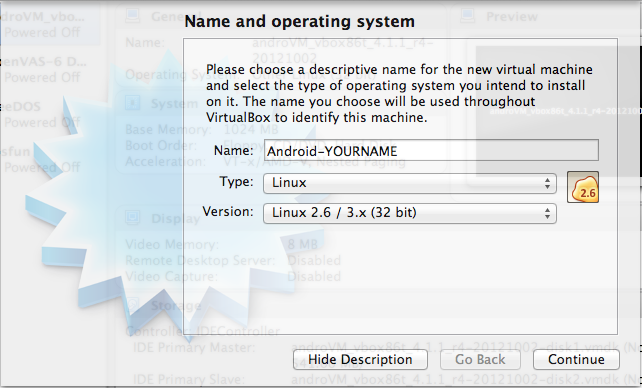
Click Continue.
In the "Memory size" box, enter 512MB.
Click Next or Continue.
In the "Hard drive" box, click Create.
In the "Hard drive file type" box, Click Next or Continue.
In the "Storage on physical hard drive" box, Click Next or Continue.
In the "File location and size" box, click Create.
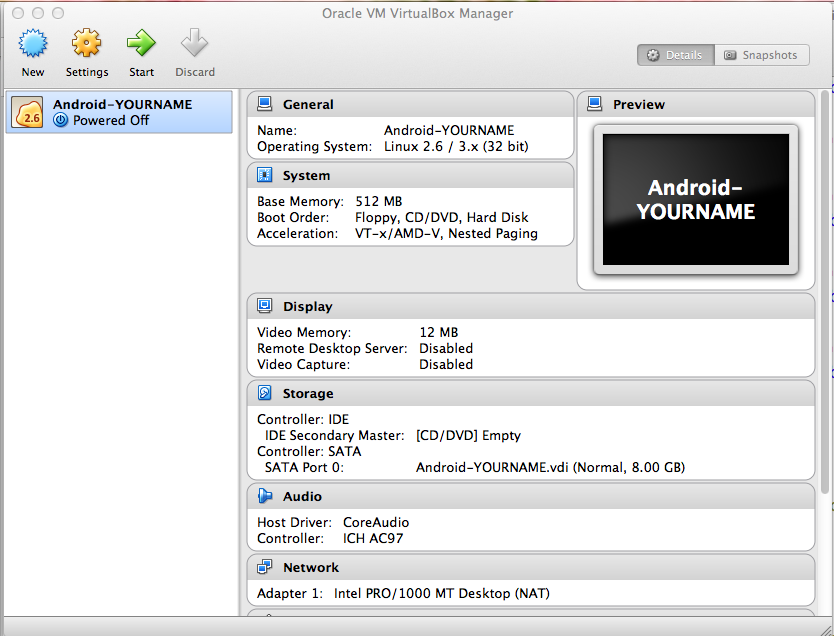
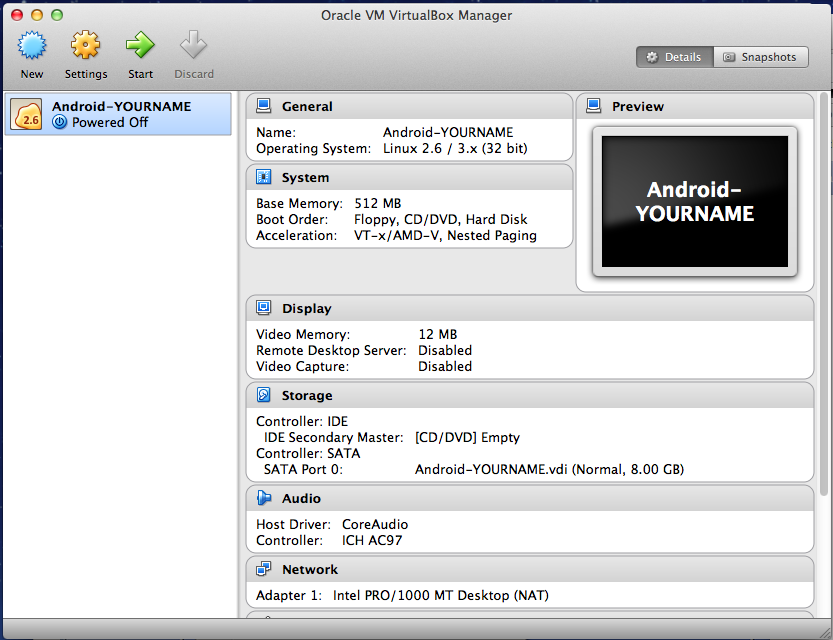
Your VM now appears in the left pane of the VirtualBox window, as shown below.
Click the green Start arrow.
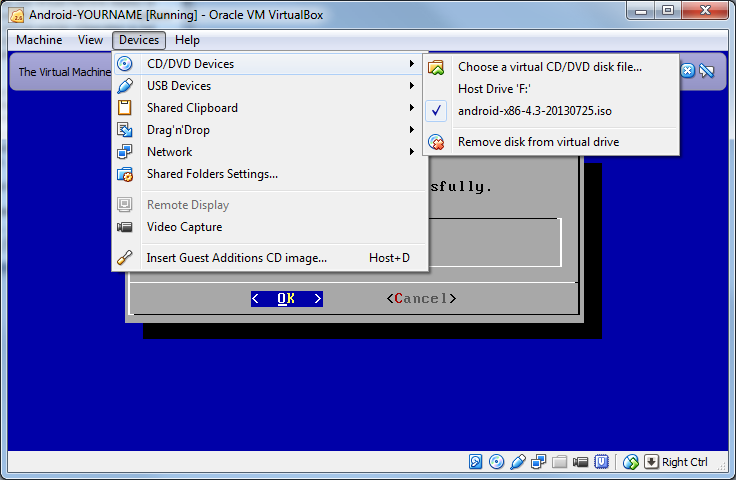
A box pops up asking you to "Please select a virtual optical disk file...", as shown below.
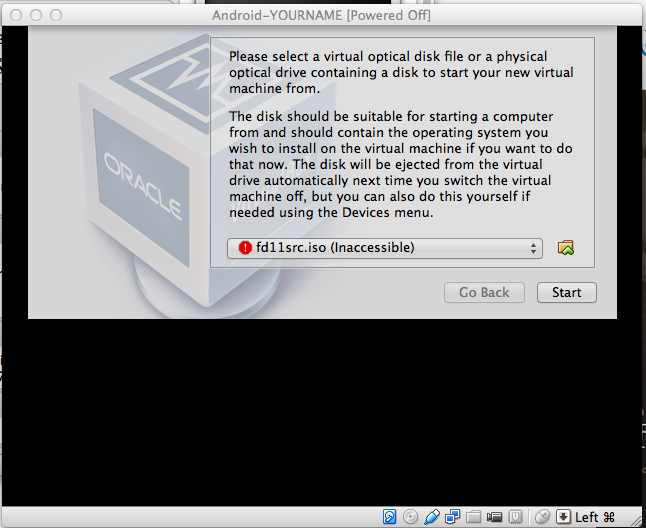
Click the tiny yellow folder icon on the right side of the box, and navigate to the android-x86-4.3-20130725.iso file you downloaded earlier and double-click it.
Then click Start.
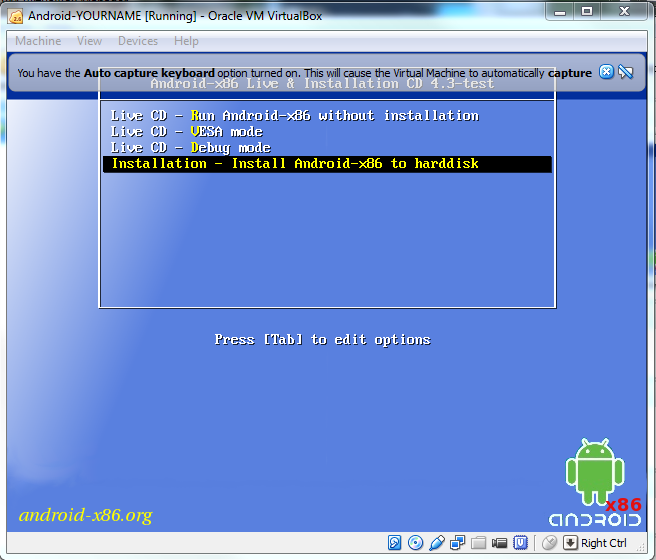
A blue Android screen appears, as shown below.
But if you click on something else, such as these instructions, the focus will move there.
At the top of the Android screen, there is a bar saying "You have the Auto capture keyboard option turned on", as shown in the image above on this page.
On the right side, click the X to close that bar.
Then click inside the blue Android window.
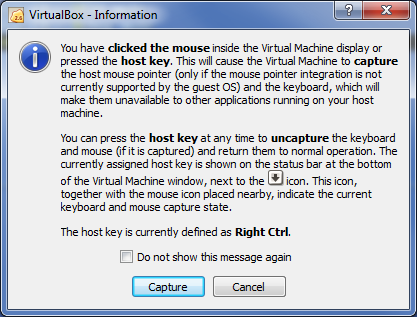
An Information box pops up,
as shown below. Click Capture.
The mouse pointer vanishes, and you cannot see it anymore. The mouse is inside the Android window, but it's invisible.
To get the mouse out of the window, look at the bottom right corner of the Android window. This will tell you what keypress gets the mouse out. On a PC, it's the "Right Ctrl" key.
Press that key. Move the mouse out of the window. Remember how to do this--it will be required often when using virtual Android machines.
Click inside the Android machine again. If an "Information" box pops up, click Capture.
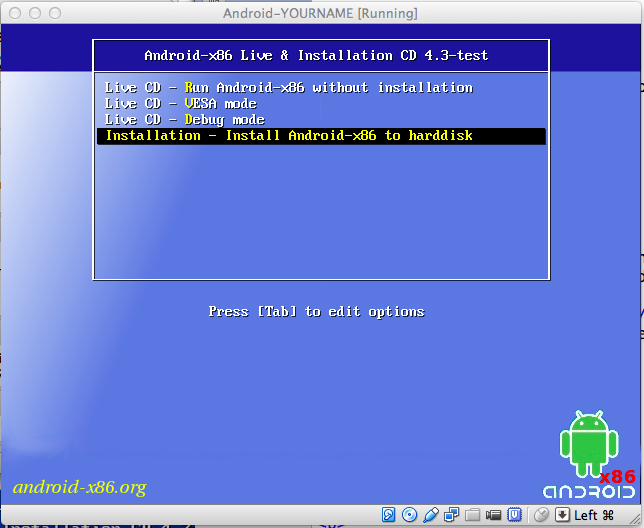
In the "Android-x86 Live & Installation CD 4.3-test" screen, press the down-arrow key on your keyboard three times to select "Installation", as shown below. Then press Enter.
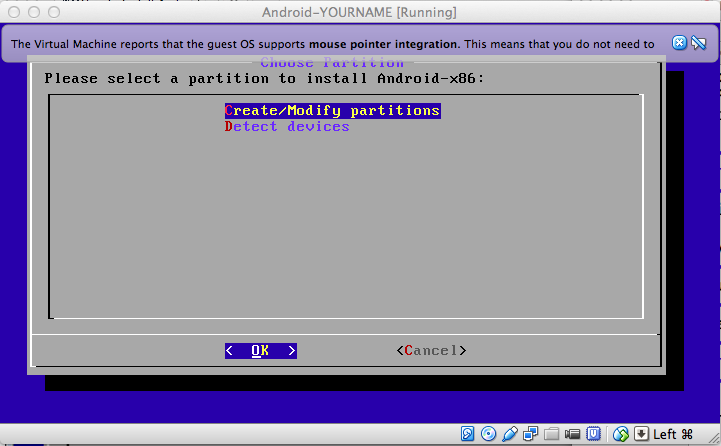
In the next screen, accept the default selection of "Create/Modify partitions", as shown below, and then press Enter.
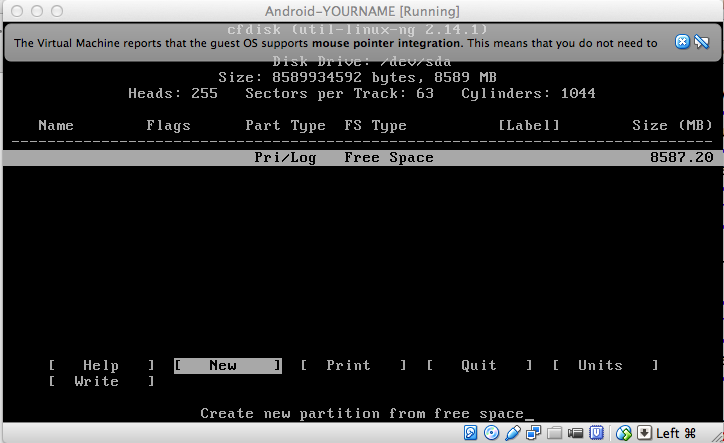
In the next screen, press the right-arrow key on the keyboard to highlight New, as shown below, and then press Enter.
In the next screen, accept the default selection of Primary and press Enter.
In the next screen, accept the default size and press Enter.
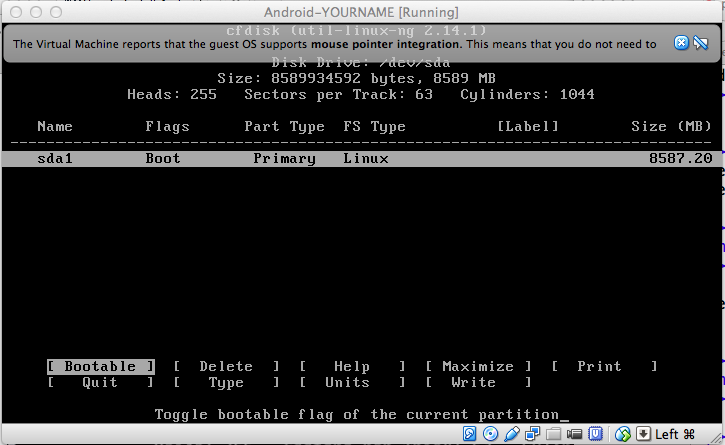
In the next screen, with the Bootable item highlighted, press Enter. The "Flags" section at the top now shows "Boot", as shown below.
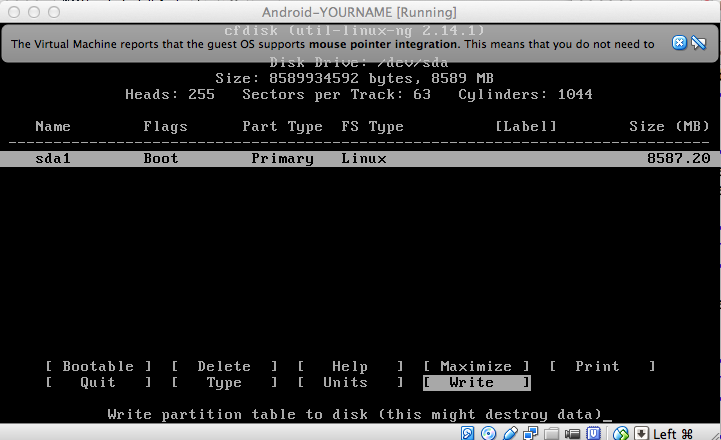
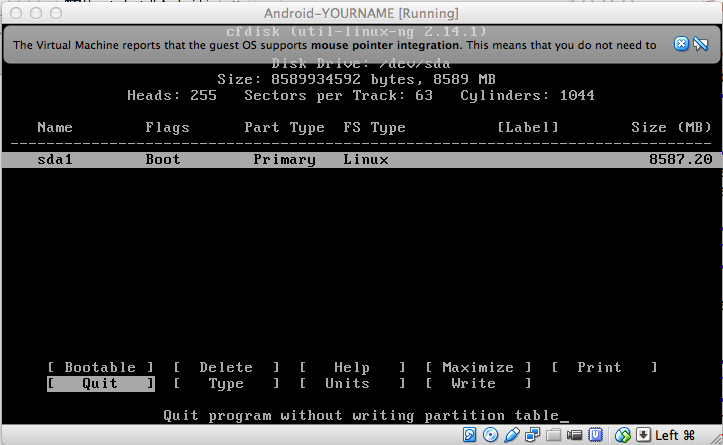
Press the right-arrow key several times, to highlight Write, as shown below. Then press Enter.
A message pops up, asking "Are you sure...".
Type yes and press Enter.
After the partition is written, a line appears showing the new partition, named "sda1", as shown below.
Press the right-arrow key several times, to highlight Quit, and then press Enter.
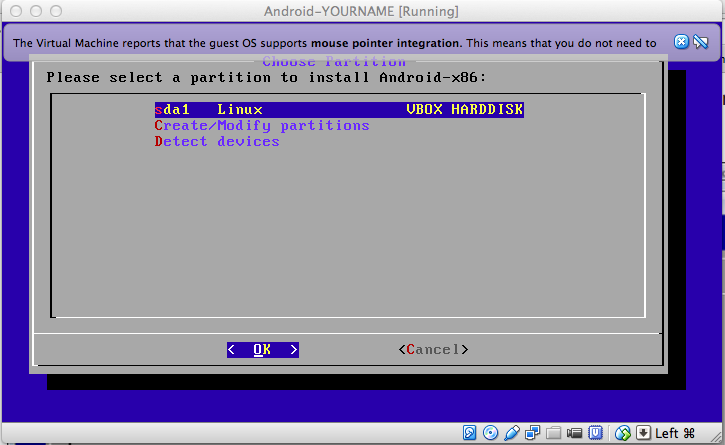
You are now back to the "Please select a partition..." screen, as shown below.
Verify that sda1 is highlighted, as shown below, and press Enter.
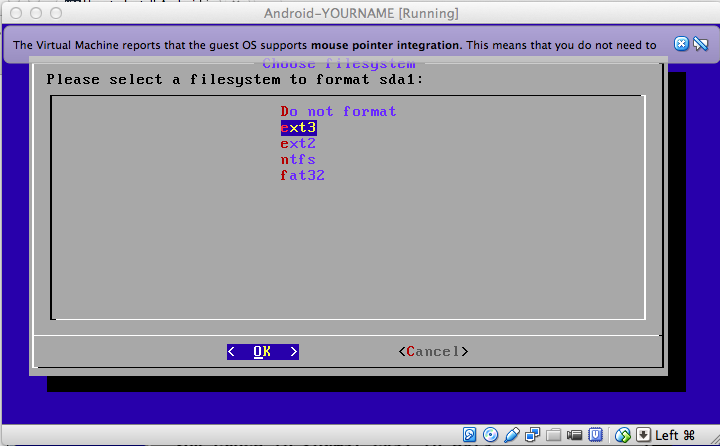
In the next screen, press the down-arrow key to highlight ext3, as shown below, and press Enter.
A box pops up, asking "Are you sure...".
Press Enter.
A box pops up, asking "Do you want to install boot loader GRUB?".
Press the left-arrow key to highlight Yes and press Enter.
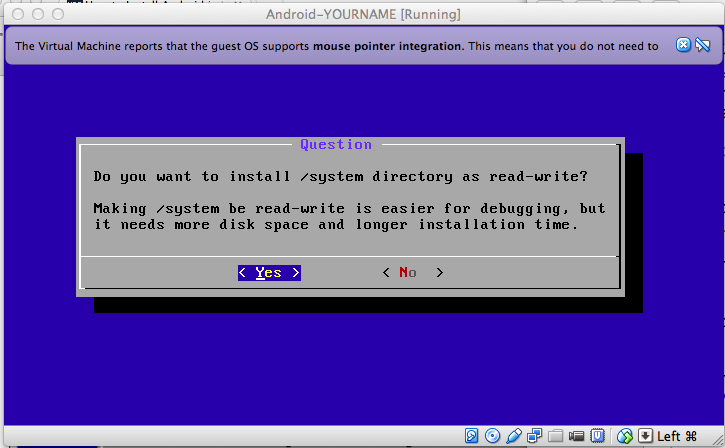
A box pops up, asking "Do you want to install /system directory as read-write?".
Accept the default selection of Yes, as shown below, and press Enter.
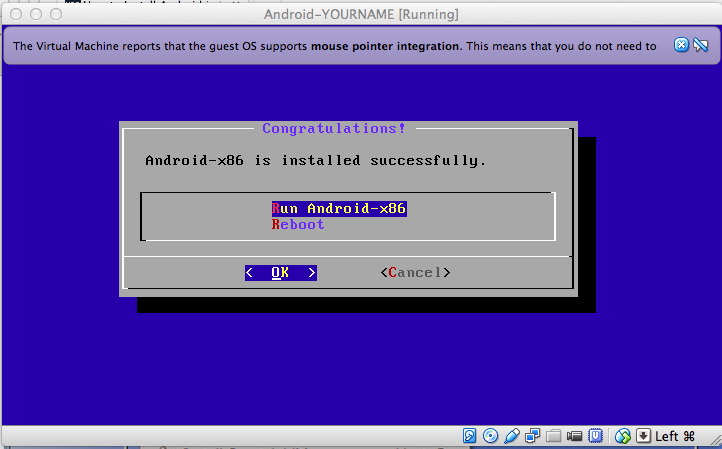
When the installation is done, you will see a message saying "Android-x86 is installed successfully", as shown below.
You will see the keystroke indicated that can release the cursor from the virtual machine.
On a Mac, it is the left Command button, as shown in the image above.
On a PC, it's the Right Ctrl key.
Press the indicated key.
The mouse pointer escapes from the VM.
A bob pops up, saying "Unable to eject...".
Click the "Force Unmount" button.
Close the "Android-YOURNAME [Running]" window by clicking the X in the top right corner.
A box pops up asking how you want to power off.
Click "Power off the machine" and click OK.
Click the green Start arrow. Let the machine boot up in its default mode.
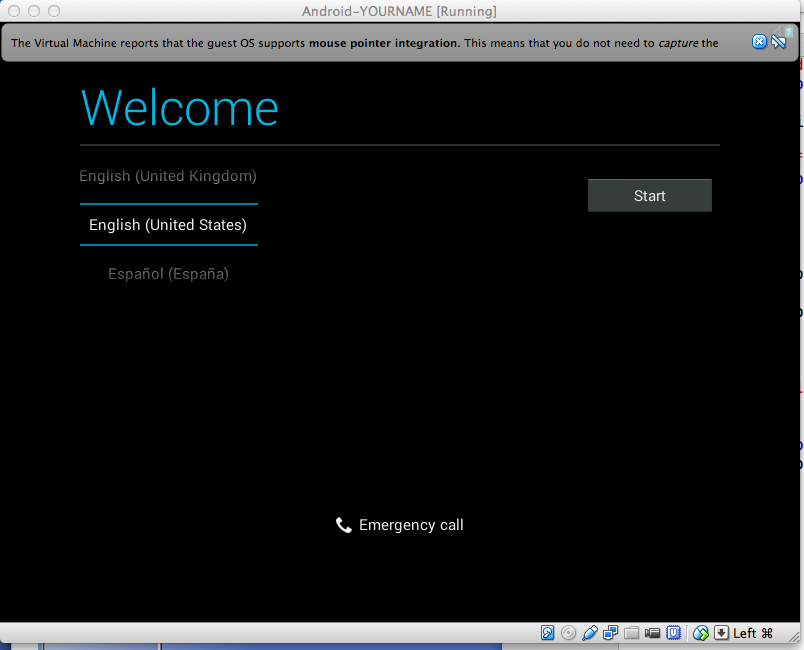
A "Welcome" screen appears, as shown below.
There is a gray bar at the top of the screen saying "The Virtual Machine reports that the guest OS supports mouse pointer integration...".
At the right of that bar, click the X to close it.
If there is a second gray bar, with a message about keyboard integration, click the X to close that one too.
From the VirtualBox menu bar, click Machine, "Disable Mouse Integration".
Troubleshooting
If the VM screen turns black, the display has shut off to conserve power.To revive it, from the VirtualBox menu bar, click Machine, "ACPI Shutdown".
This is necessary to make the mouse visible in the virtual machine.
In the Welcome screen, accept the default selection of "English (United States)" and click Start.
A "Just a sec..." message appears. Wait for it to go away.
In the "Select Wi-Fi" screen, click Skip.
A "WARNING" pops up. Click "Skip anyway".
In the "Got Google?" screen, click Yes.
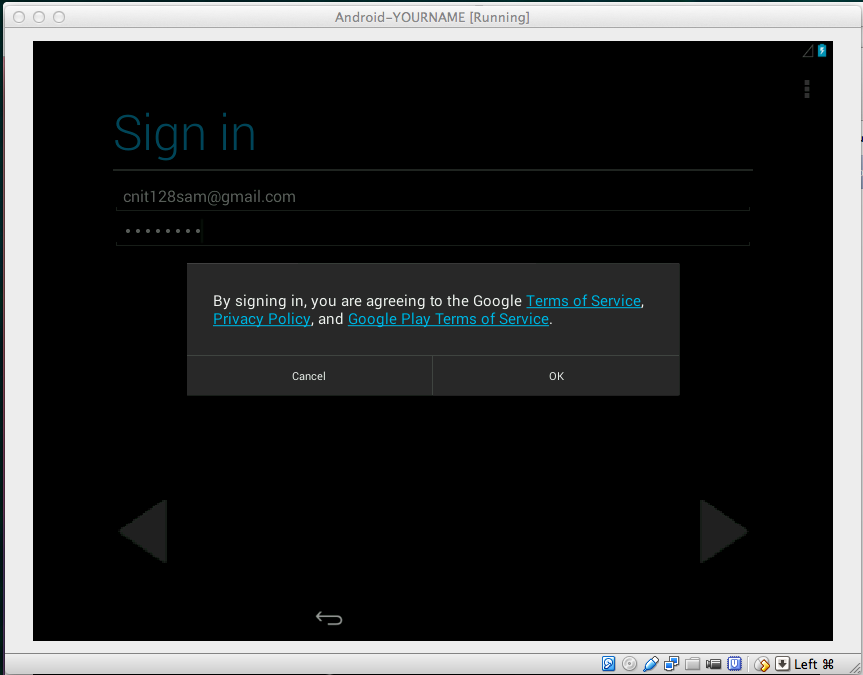
Enter your Google email and password and press Enter.
A box pops up saying "By signing in, you are agreeing...", as shown below.
Click OK.
In the "Join Google+" screen, click "Not now".
In the "Google services" screen, click the right-arrow icon.
In the "Entertainment" screen, click "Not now".
In the "Backup and restore" screen, click the right-arrow icon.
In the "This tablet belongs to..." screen, click the right-arrow icon.
In the "Setup complete" screen, click Finish.
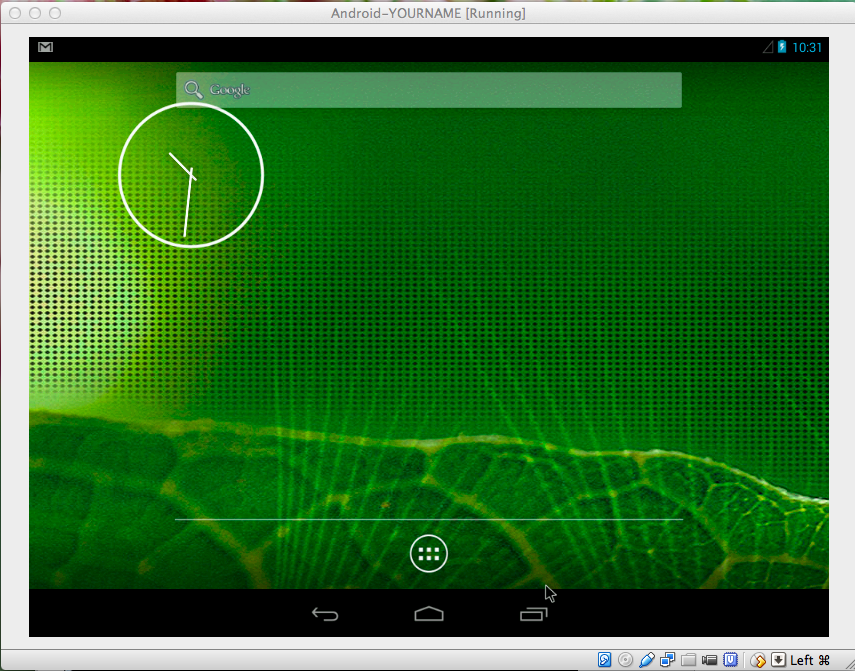
Your home screen appears, as shown below. Click OK.
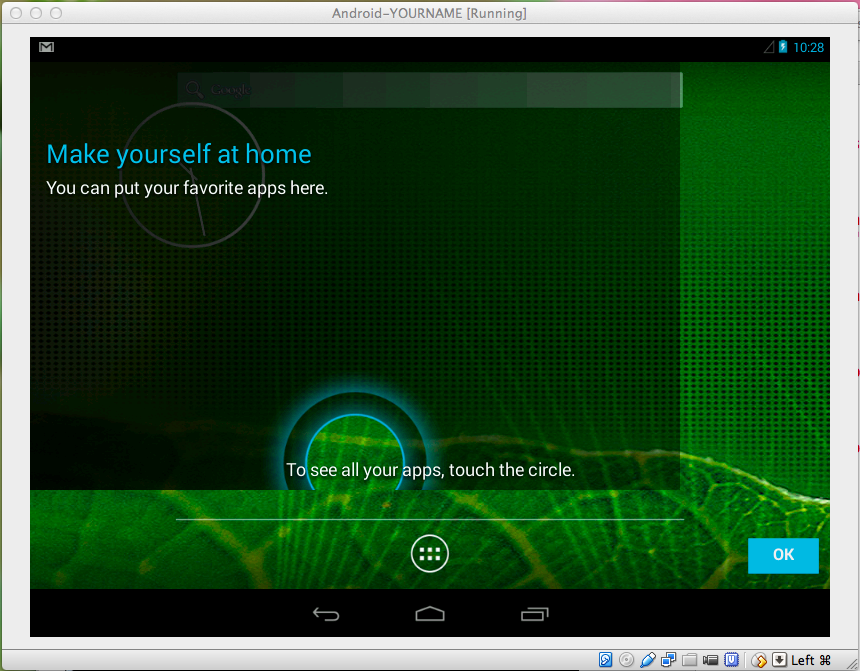
Click the circle icon at the bottom of the desktop.
Click OK.
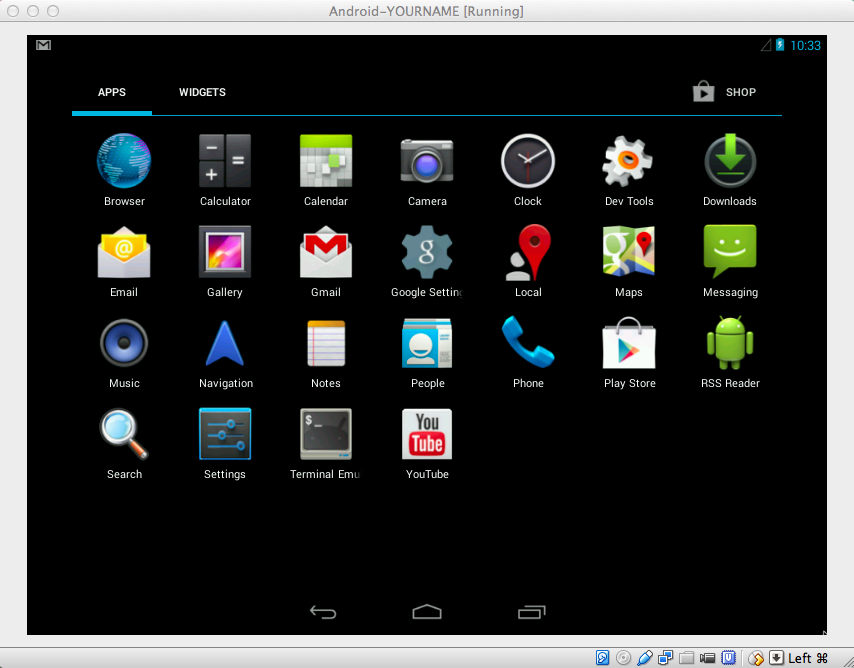
The APPS page appears, as shown below.
Click the Gmail icon and hold the mouse button down for several seconds.
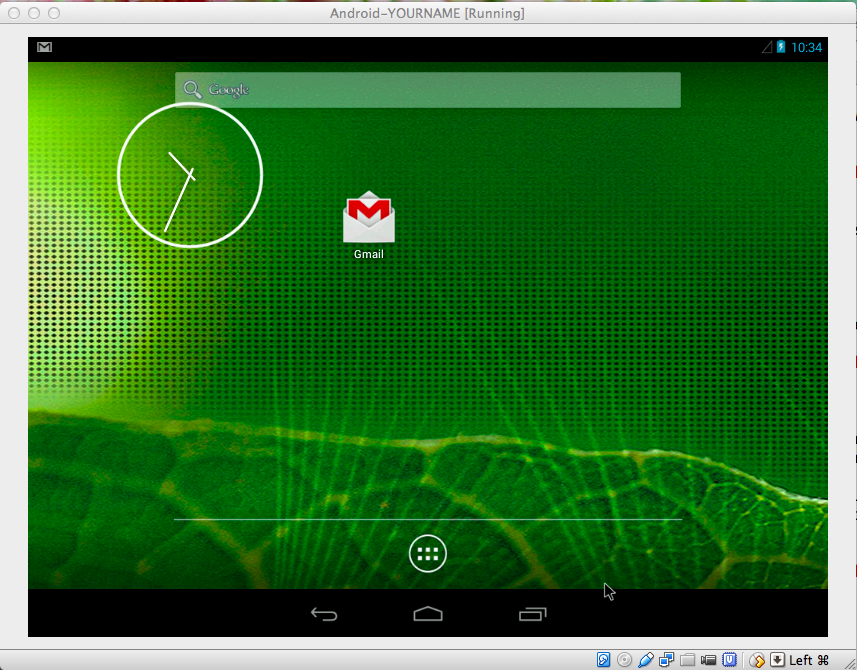
The APPS page closes and your home screen appears, now with Gmail on it, as shown below.
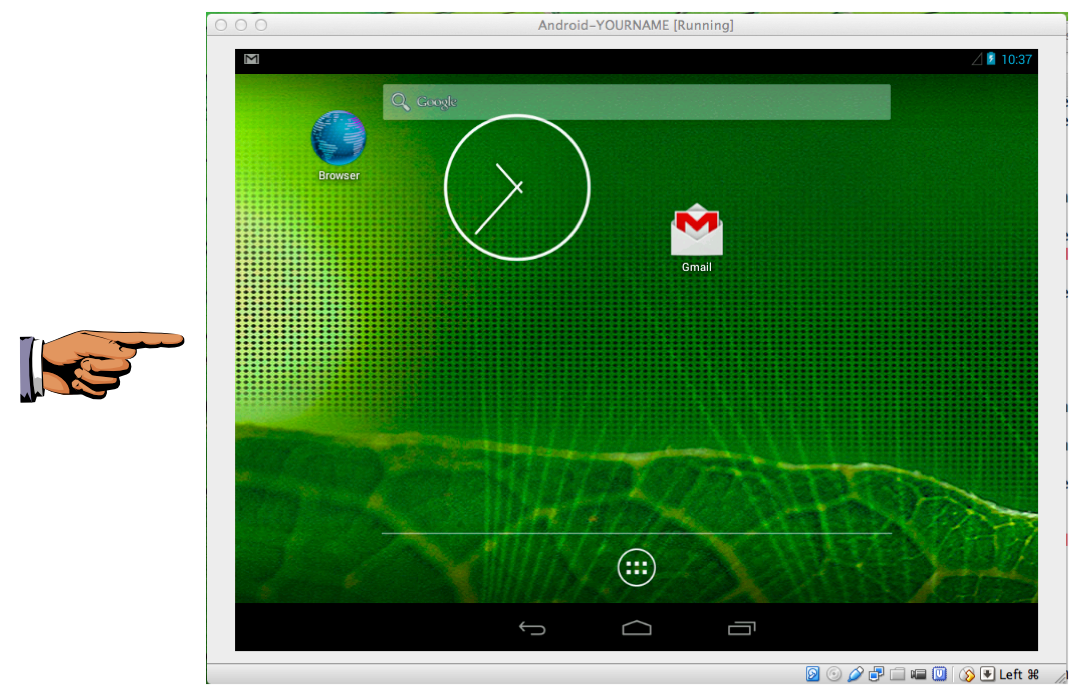
Repeat the process to add the Browser app to your home screen, as shown below.
You will see the keystroke indicated that can release the cursor from the virtual machine.
On a Mac, it is the Left Command button, as shown in the image above.
On a PC, it's the Right Ctrl key.
Press the indicated key.
The mouse pointer escapes from the VM.
Here's how to capture a screen image:
On a PC: press Shift+PrntScrn, open Paint, and press Ctrl+V.
On a Mac, press Shift+Ctrl+3. The captured image appears on your desktop.
Save the image as "Proj 1 from YOUR NAME".
Make sure your image has these required items:
Select "Save the machine state" and click OK.