M 146.4: ADB over TCP (15 pts)
In some configurations, you need to connect
ADB to an emulator running on a different
host machine.
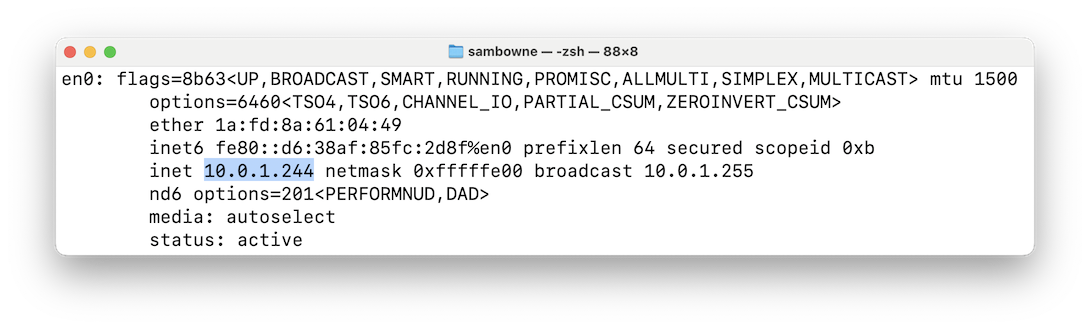
First, you need to find your
host machine's IP address.
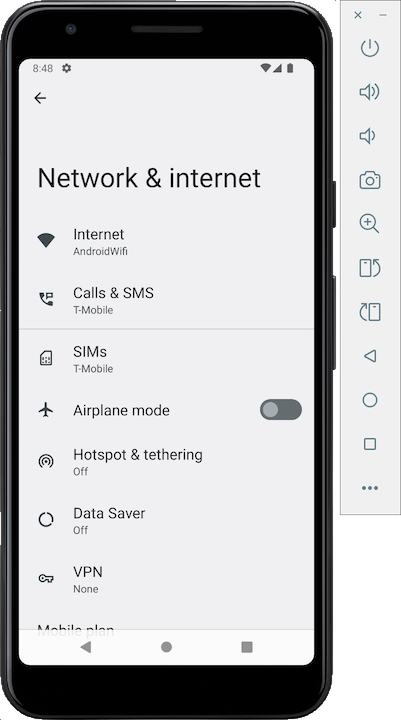
(If you are using
my Proxmox private cloud, use the Android
emulator's IP address instead, which you can find
by tapping "Network & Internet",
Internet, AndroidWifi.)
On your host machine, in a Terminal,
execute one of these commands:
- For MacOS: ifconfig
- For Linux: ip a
Find your host system's IP address,
as shown below.
Installing Socat
The procedure depends on your OS.
Follow the appropriate instructions below.
- MacOS: First, install Homebrew. Then execute this command:
brew install socat
- Windows: Get socatx6.exe4 from this Github.
- Debian Linux: Execute these commands:
  sudo apt update
  sudo apt install socat
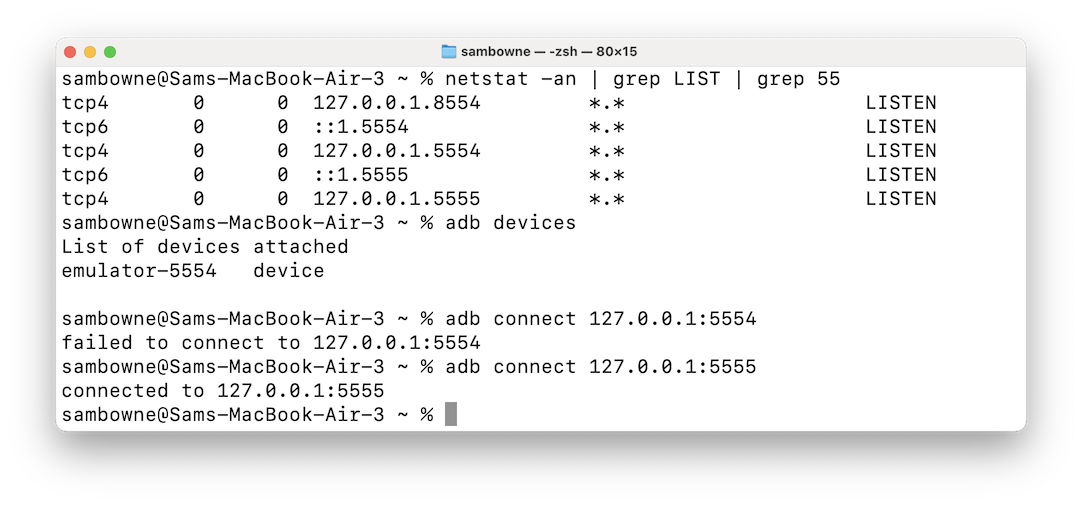
Finding the TCP Port to Connect to
On a MacOS or Linux host,
execute the command below.
netstat -an | grep LIST | grep 55
Find listening ports beginning with 55.
In the image below, ports 5554 and 5555 are
listening.
Try connecting to each port in turn, with
commands like these:
adb connect 127.0.0.1:5554
adb connect 127.0.0.1:5555
Find out which port number works to make
a connection.
In the image below, port 5555 worked.
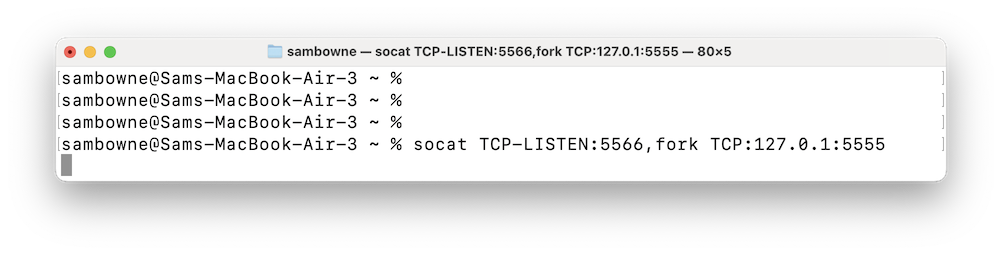
Forwarding a Local Port to a Public Port
The Android emulator listens on the localhost
adapter. We need to forward that
to a public address on port 5566.
<.>
On the system hosting your Android emulator,
in a Terminal, execute this command,
replacing 5555 with the port that worked
for connections in the previous step.
socat TCP-LISTEN:5566,fork TCP:127.0.1:5555
The program has no output, it just hangs.
Leave this window open,
as shown below.
On your remote computer, install
Android Studio and launch it.
In Android Studio, click
Tools,
"AVD Manager."
Find the Android SDK Location,
outlined in green in the image below.
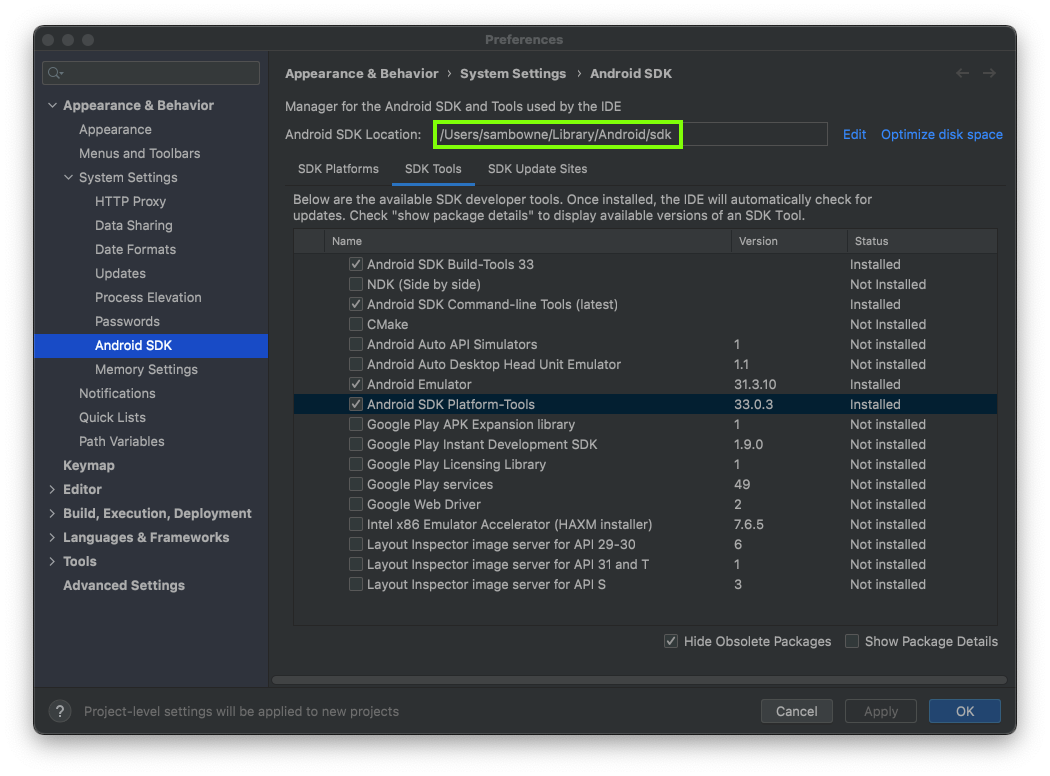
On your remote computer,
open a Terminal and navigate to that location.
First ping the host device for your Android emulator, using its
IP address you found above.
You should see replies.
Then connect using a command like this,
replacing the IP address with the correct
IP address of your
host system:
adb connect 10.0.2.16:5566
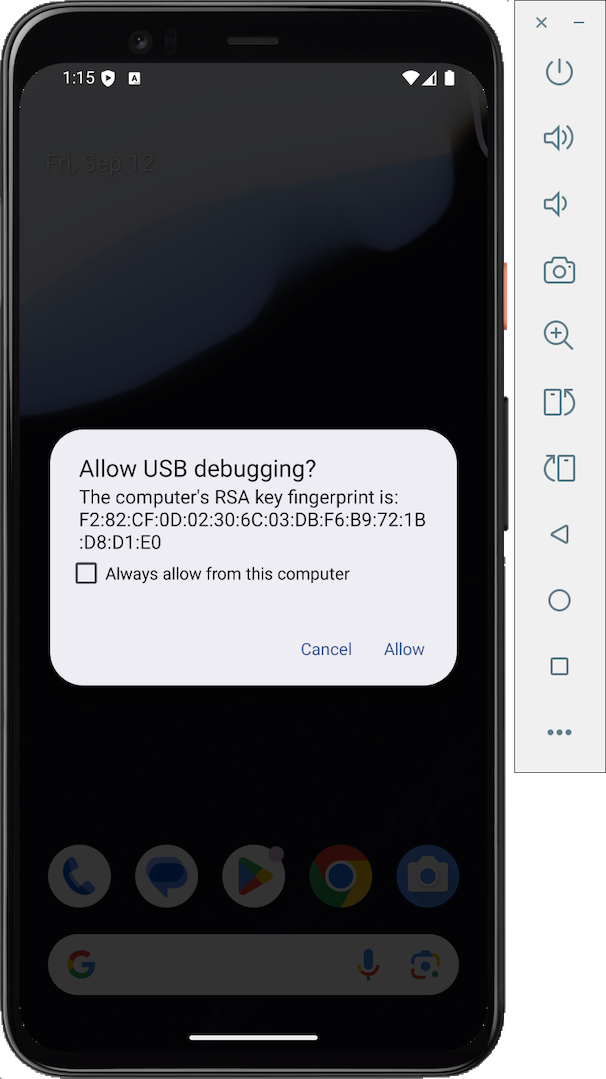
Look at your Android emulator.
It should show a connection attempt,
as shown below.
Check the box and tap Allow.
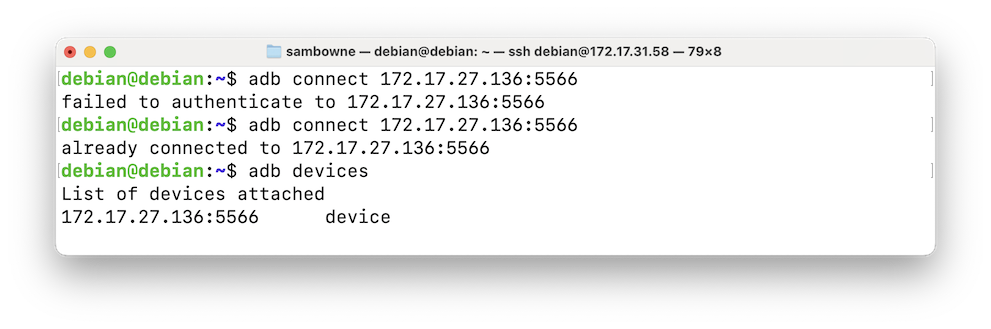
As shown below, the first connection
attempt shows "failed to authenticate".
Execute the "adb connect" command again.
Your remote system should now connect,
as shown below.
Network Status on the Android Device
On your remote computer,
execute these commands:
adb shell
netstat -anlt
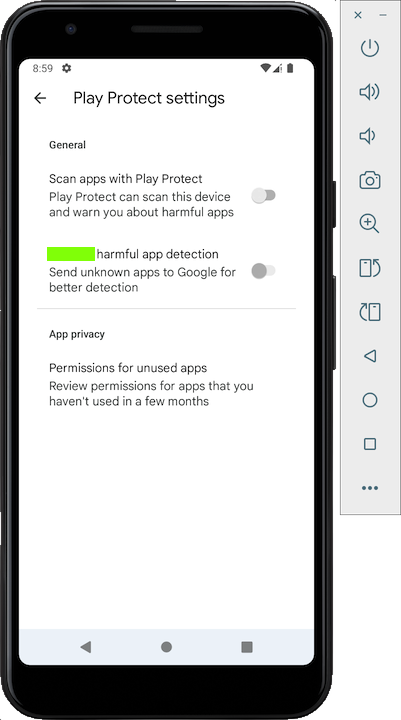
In the next screen, tap
"Play Protect".
The flag is covered by a green box
in the image below.

|