We want to add PortSwigger as a trusted certificate authority to get rid of these messages.
In Burp, click the Proxy tab.
Click the Options sub-tab.
Click the "Import /export CA certificate..." button.
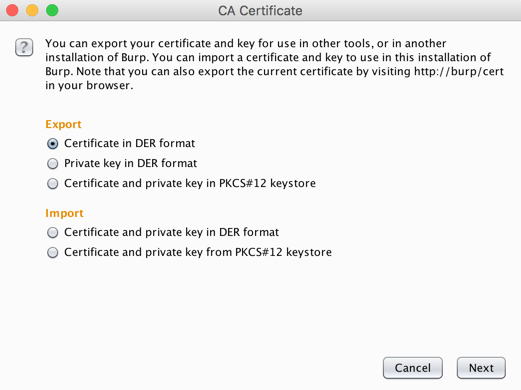
In the "CA Certificate" box, in the Export section, click the "Certificate in DER format" button, as shown below.
Click Next.
On the next page, click the "Select file..." button. Navigate to a folder you can find, such as your Desktop.
Give the file a name of portswigger.der
Click Save.
Click Next. Click Close.
On Kali, in a terminal, execute these commands, replacing the hash value in the last command with the output of the third one:
cd ~/Desktop
openssl x509 -inform DER -in portswigger.der -out portswigger.pem
openssl x509 -inform PEM -subject_hash_old -in portswigger.pem | head -1
mv portswigger.pem 9a5ba575.0
Then execute these commands, replacing the hash value in commands with the correct hash value for your certificate.
adb root
adb remount
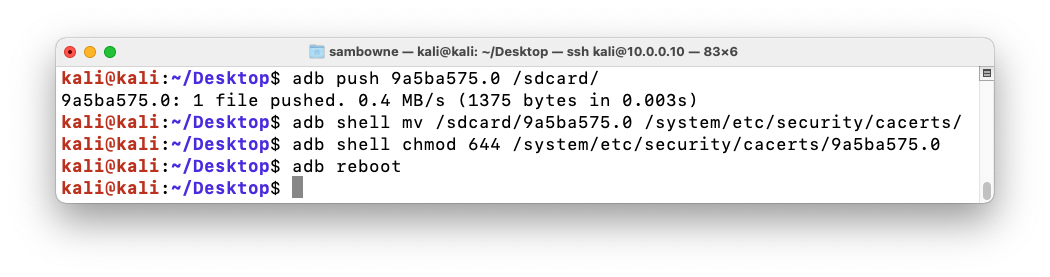
adb push 9a5ba575.0 /sdcard/
adb shell mv /sdcard/9a5ba575.0 /system/etc/security/cacerts/
adb shell chmod 644 /system/etc/security/cacerts/9a5ba575.0
adb reboot
Portswigger is on the list, as shown below.
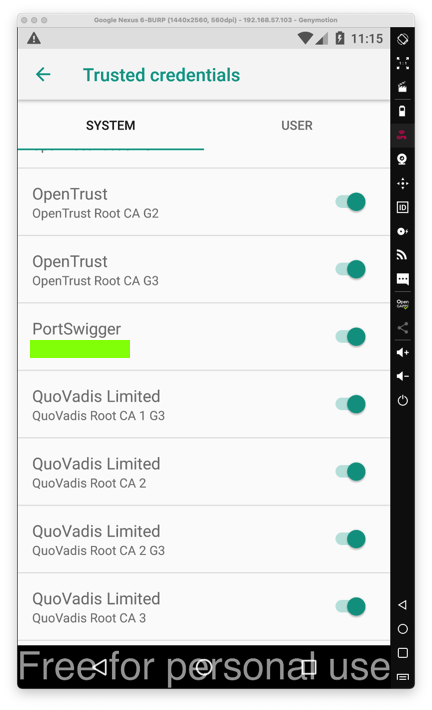
M 120.1: CA Name (10 pts)
Find the text covered by a green box in the image above. That's the flag.