http://debugger.immunityinc.com/ID_register.py
Fill in the form to download Immunity. Install it with the default options.
In a Web browser, right-click this link and save the putty.exe file:
https://samsclass.info/127/proj/putty.exe
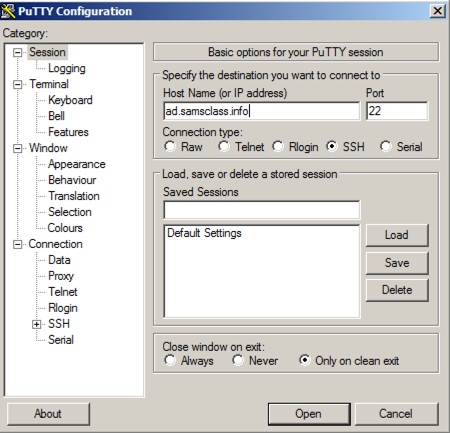
In the "Host Name (or IP address)" box, type
ad.samsclass.info
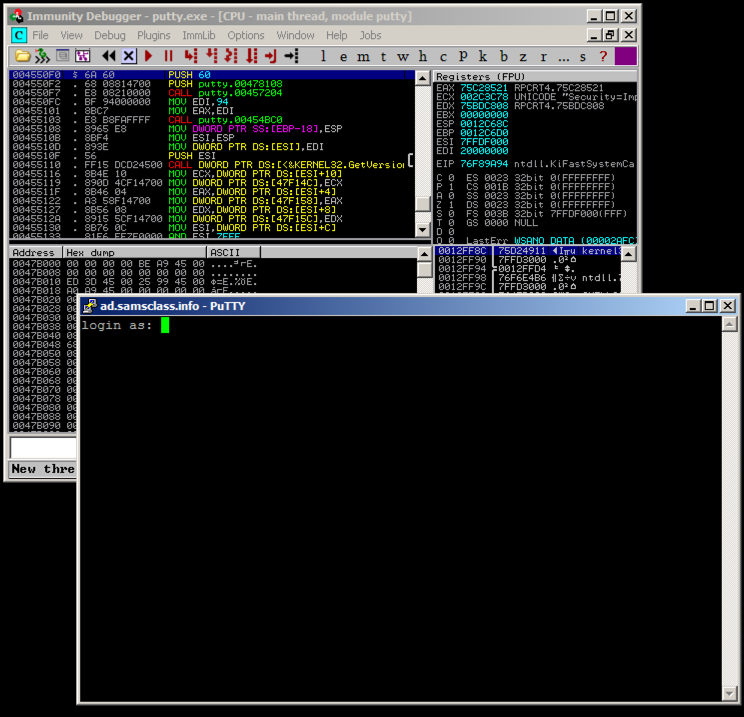
A black box opens, and shows a "login as:" prompt, as shown below.
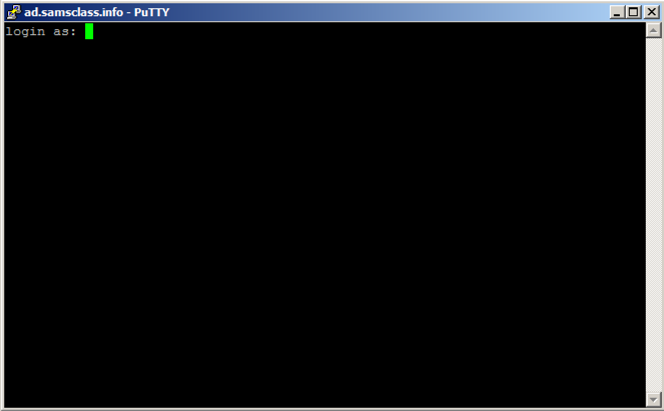
You could connect to a server at this point, but that's not the point of this project. We will alter this program to do other things instead of printing "login as".
Close the Putty window.
In Immunity, from the menu bar, click File, Open. Navigate to putty.exe and open it.
Immunity opens, as shown below. If your screen doesn't look like this, click View, CPU and maximize the CPU window.
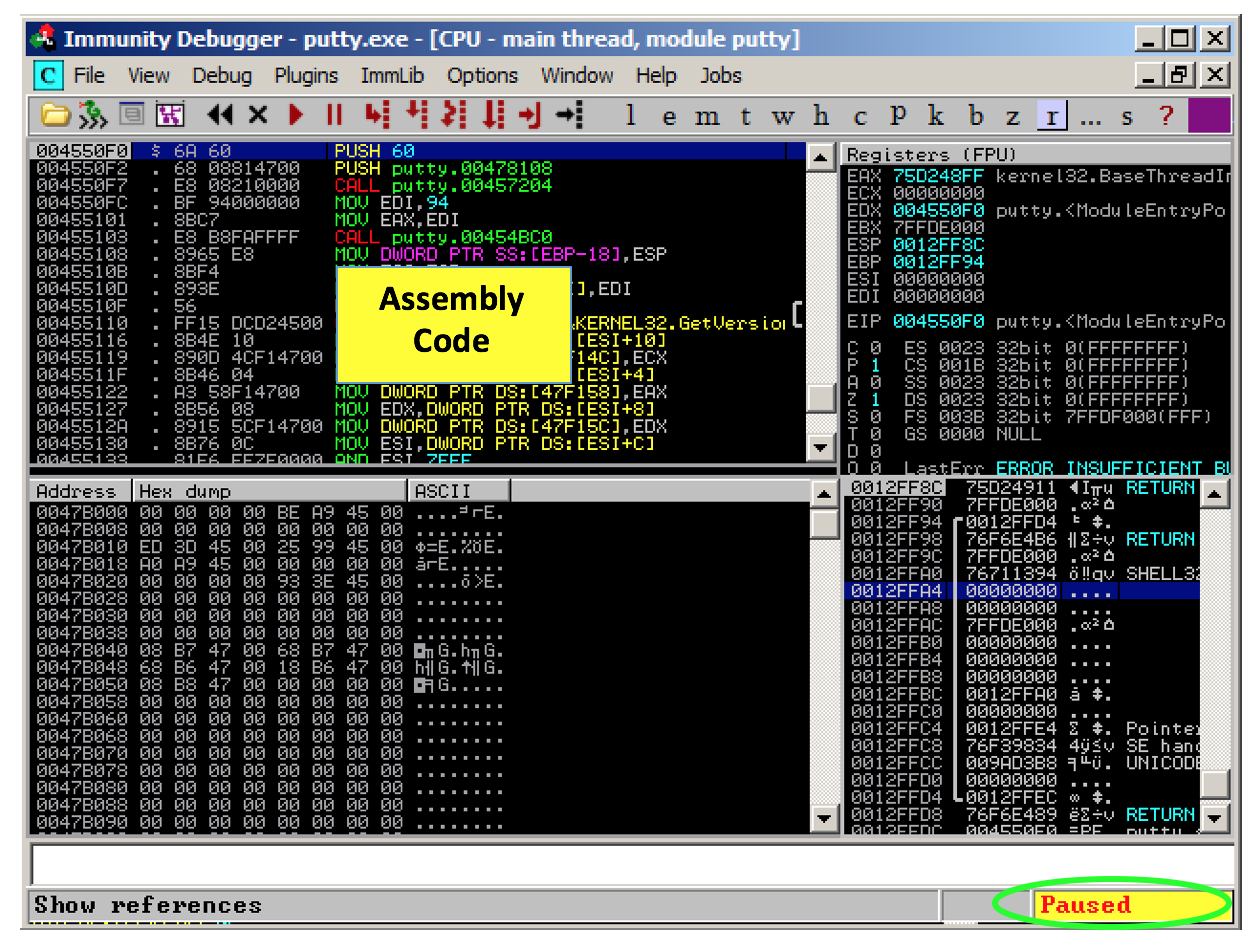
Immunity shows you a lot of data, but for now just notice the Assembly Code in the top left pane, and the Paused message in the lower right, as indicated in the figure above.
When you load a program into Immunity, it starts in a "Paused" state, with the Assembly Code window showing the first instruction.
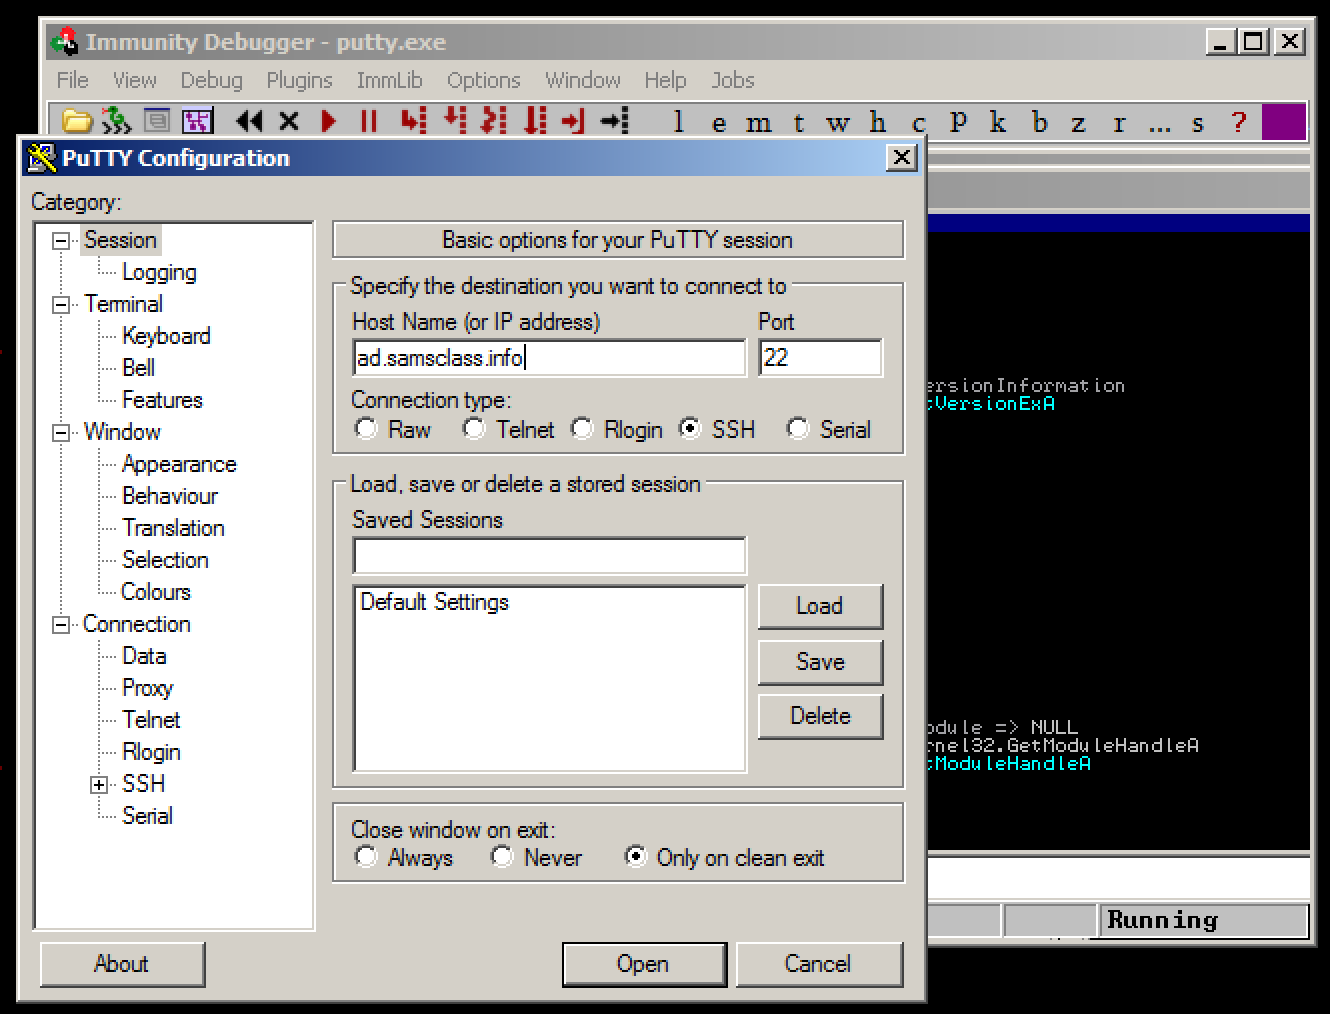
A Putty window opens, as shown below.
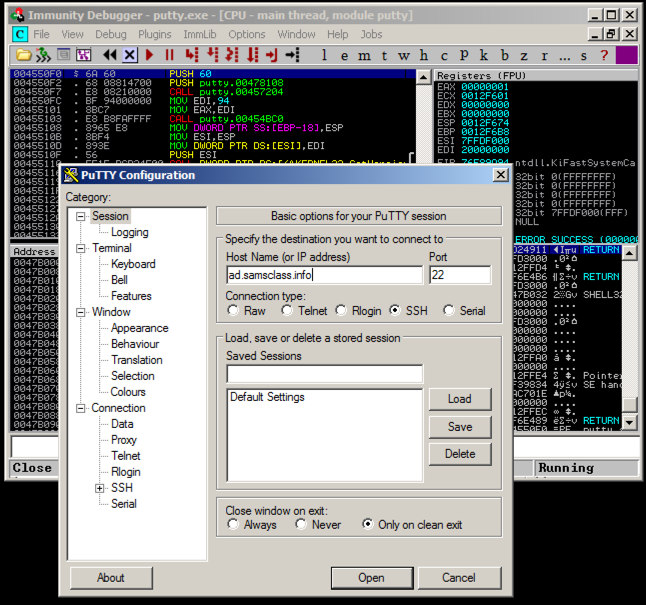
Click in the Putty window. In the "Host Name (or IP address)" box, type
ad.samsclass.info
Putty is running, but it's under the control of Immunity, so we can modify its execution.
In Immunity, from the menu bar, click Debug, Restart.
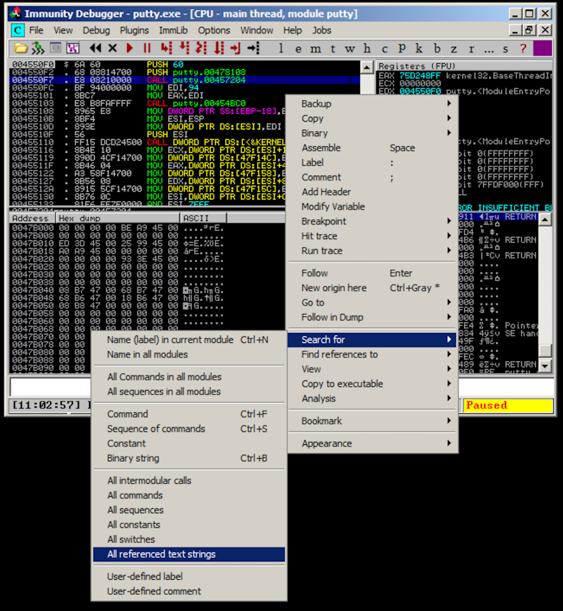
In Immunity, in the "Assembly Code" pane, right-click. Point to "Search for". Click "All referenced text strings", as shown below.
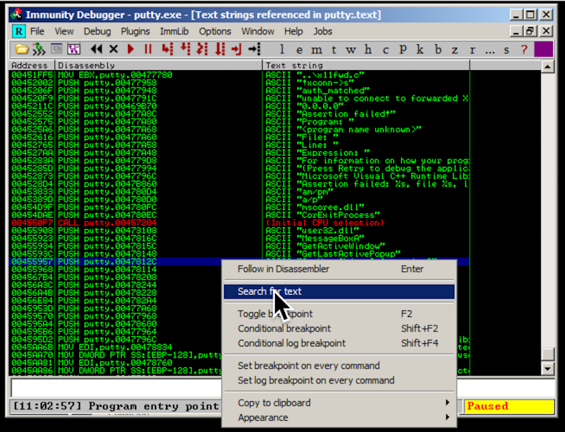
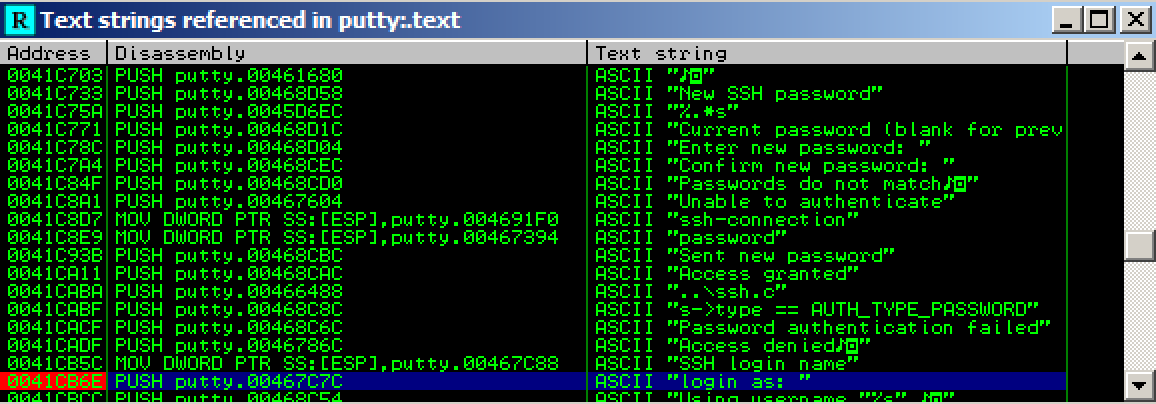
A "Text strings referenced in putty:.text" window opens, showing all the strings in the program.
Scroll to the top of the window and click on the first line, so it is highlighted.
Right-click in the window, and click "Search for text", as shown below.
Note: the search only goes down, and does not wrap, so if you begin a search near the bottom of the window it won't find "login as".
In the "Enter text to search for" box, type
login as
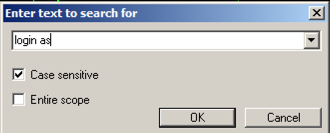
Click OK.
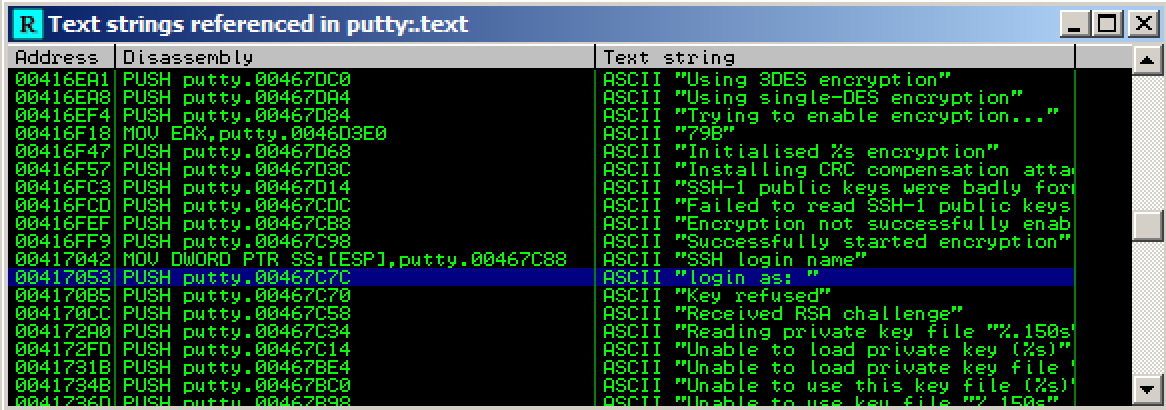
Immunity finds the ASCII string "login as", and the instruction that uses it, as shown below. This instruction is at address 00417053.
Right-click again, and click "Search next".
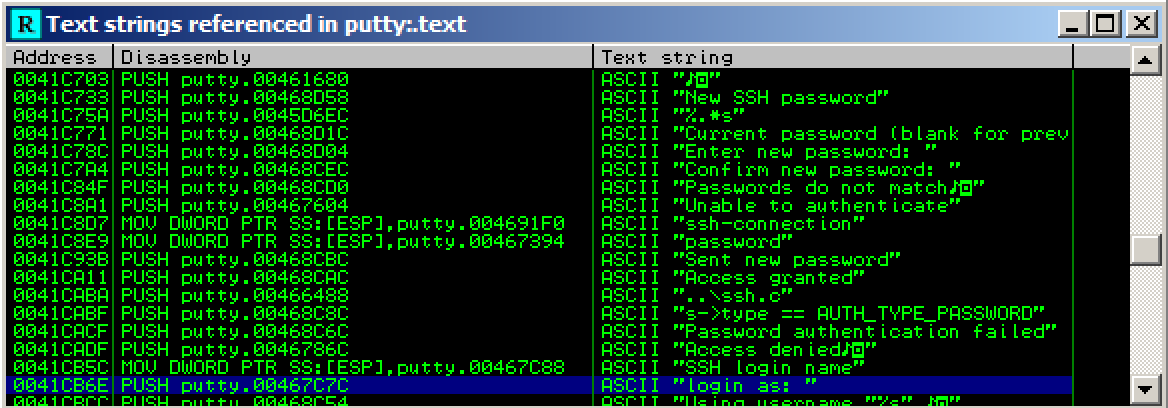
Immunity finds another line of code that uses this string, as shown below. This instruction is at address 0041CB6E.
Right-click again, and click "Search next".
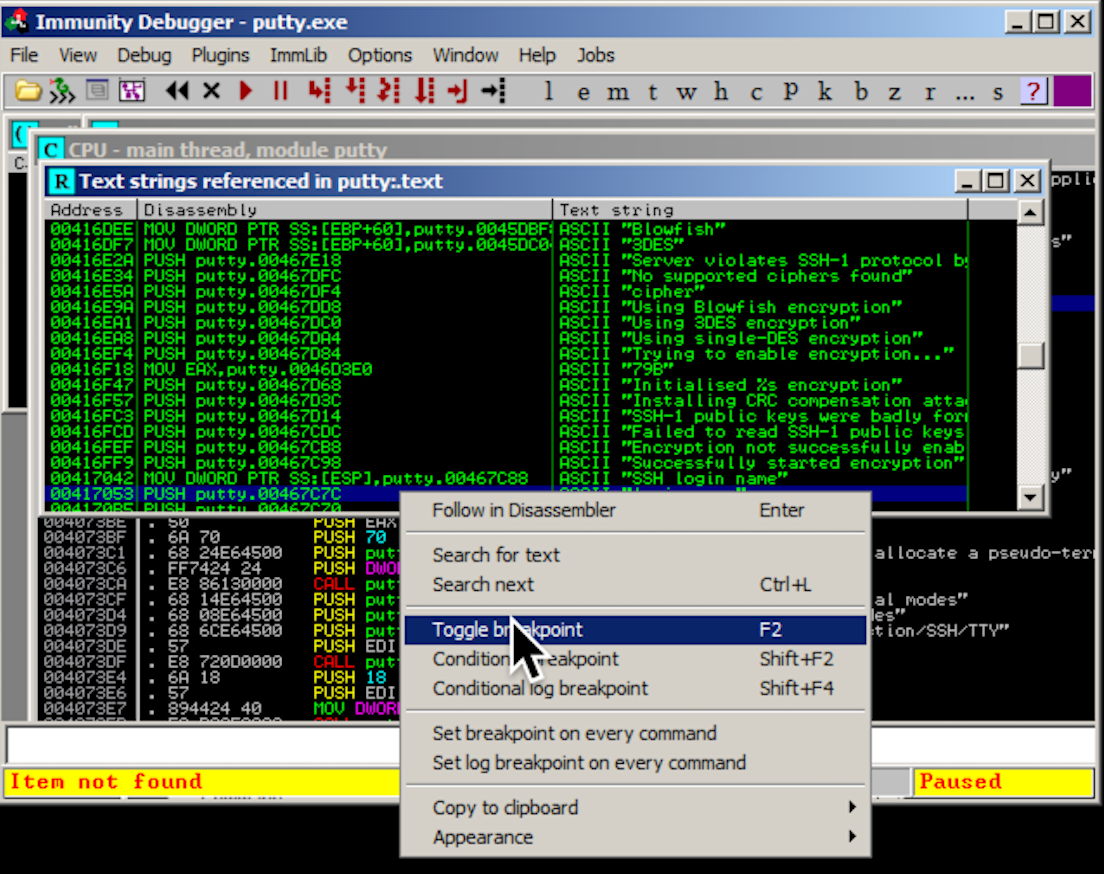
A message appears at the bottom of the window saying "Item not found". There are only two commands in the program that use this string.
In the "Text strings referenced in putty:.text" window, scroll to the top and click there.
Right-click again, and click "Search next".
The instruction at 00417053 appears again. Right-click this instruction and click "Toggle breakpoint", as shown below.
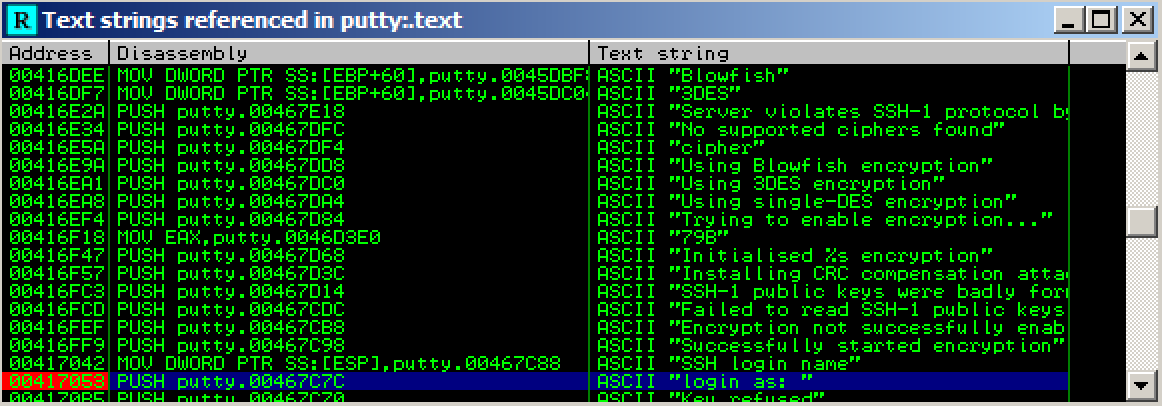
The address turns red, as shown below, to indicate that there's a breakpoint here.
Right-click again, and click "Search next". The instruction at address 0041CB6E appears. Right-click it and click "Toggle breakpoint".
The address turns red, as shown below.
In Immunity, from the menu bar, click Debug, Restart.
A box pops up warning you that "Process 'putty' is active". Click Yes.
In Immunity, from the menu bar, click Debug, Run.
A Putty window opens, as shown below.
Click in the Putty window. In the "Host Name (or IP address)" box, type
ad.samsclass.info
A black window opens, but before the "login as" message appears, the program stops, as shown below.
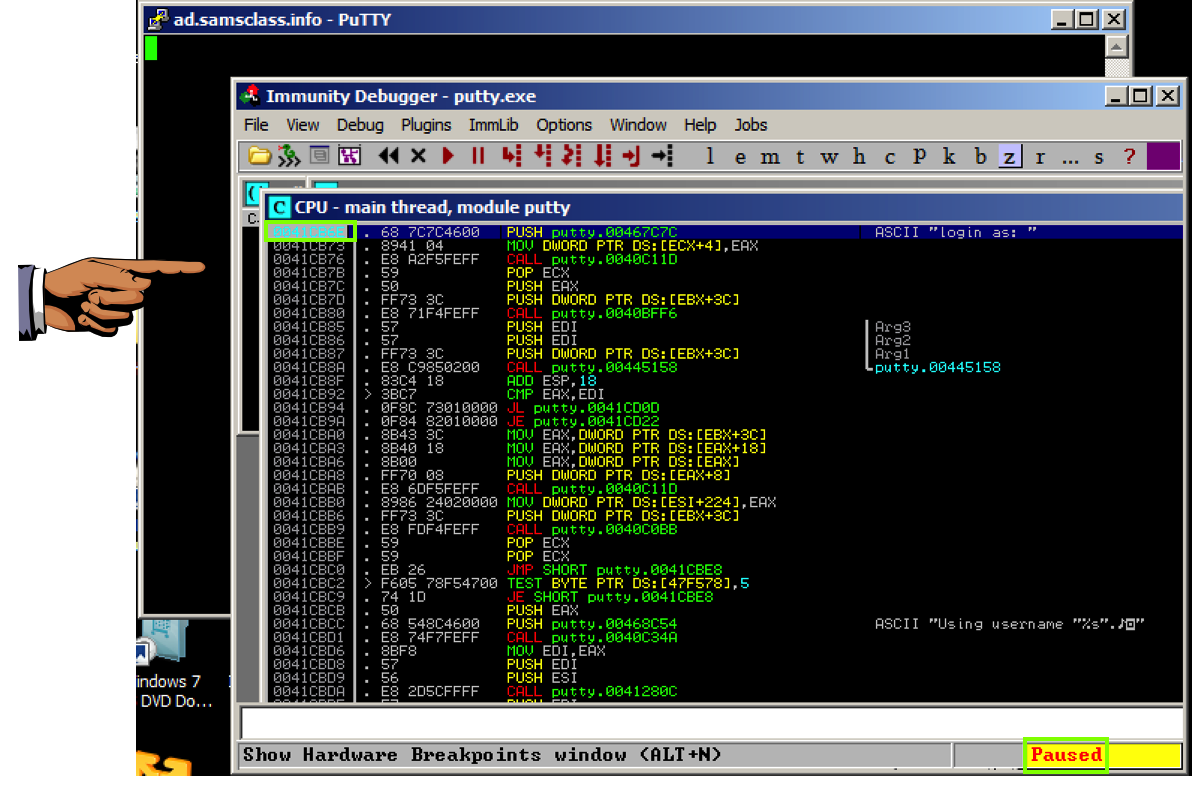
The program stopped at instruction 0041CB6E, as shown in the image above.
We'll use this instruction to hijack the program's execution.
Press the PrintScrn key to copy the whole desktop to the clipboard.
YOU MUST SUBMIT A FULL-SCREEN IMAGE FOR FULL CREDIT!
Paste the image into Paint.
Save the document with the filename "YOUR NAME Proj 8a1", replacing "YOUR NAME" with your real name.
In Immunity, from the menu bar, click View, Breakpoints.
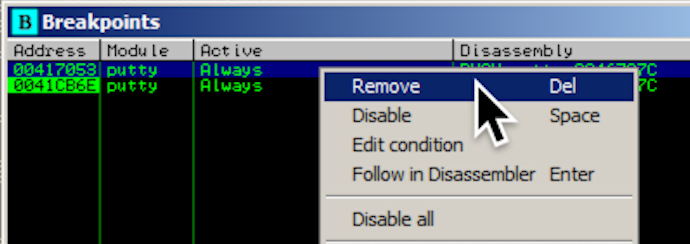
A "Breakpoints" window opens, showing two breakpoints.
Right-click the first breakpoint and click Remove, as shown below.
Repeat the process to remove the other breakpoint. Close the "Breakpoints" window.
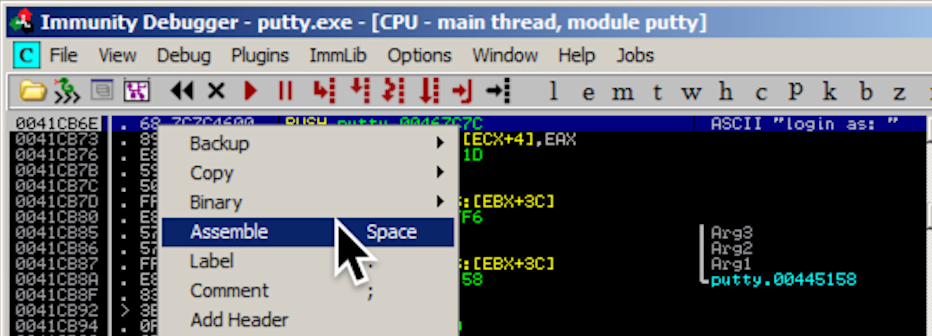
An "Assemble at 0041CB6E" box appears, as shown below.
This shows the command at this location. It's a PUSH instruction, placing the address 467C7C onto the stack. That address points to the letter "l" in the ASCII string "login as: ", as shown on the right side of the instruction line, outlined in green in the image below.

In the "Assemble at 0041CB6E" box, change the last character to D, as shown below. This will move the pointer from the "l" to the "o" in the string "login as: ".
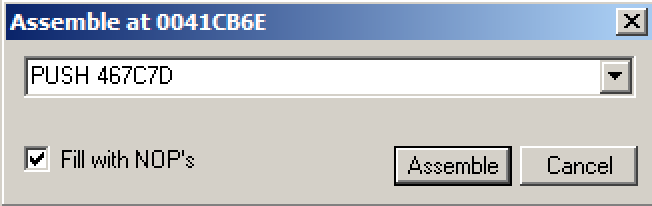
Click the Assemble button.
Click the Cancel button.
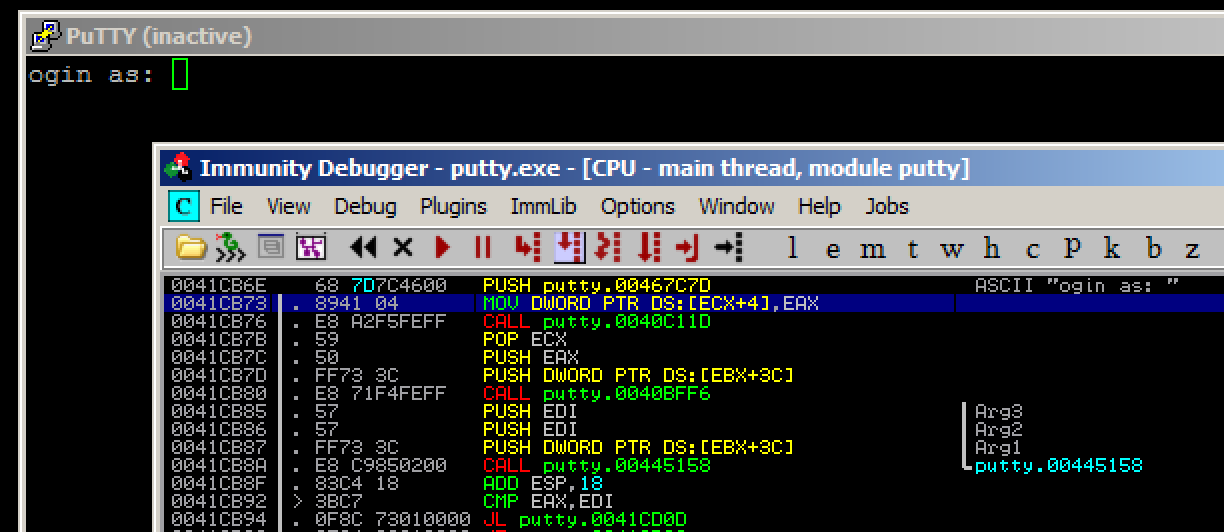
The message on the right now says "ogin as: ", as shown below.

The black login window appears, with the message "ogin as: ", as shown below.
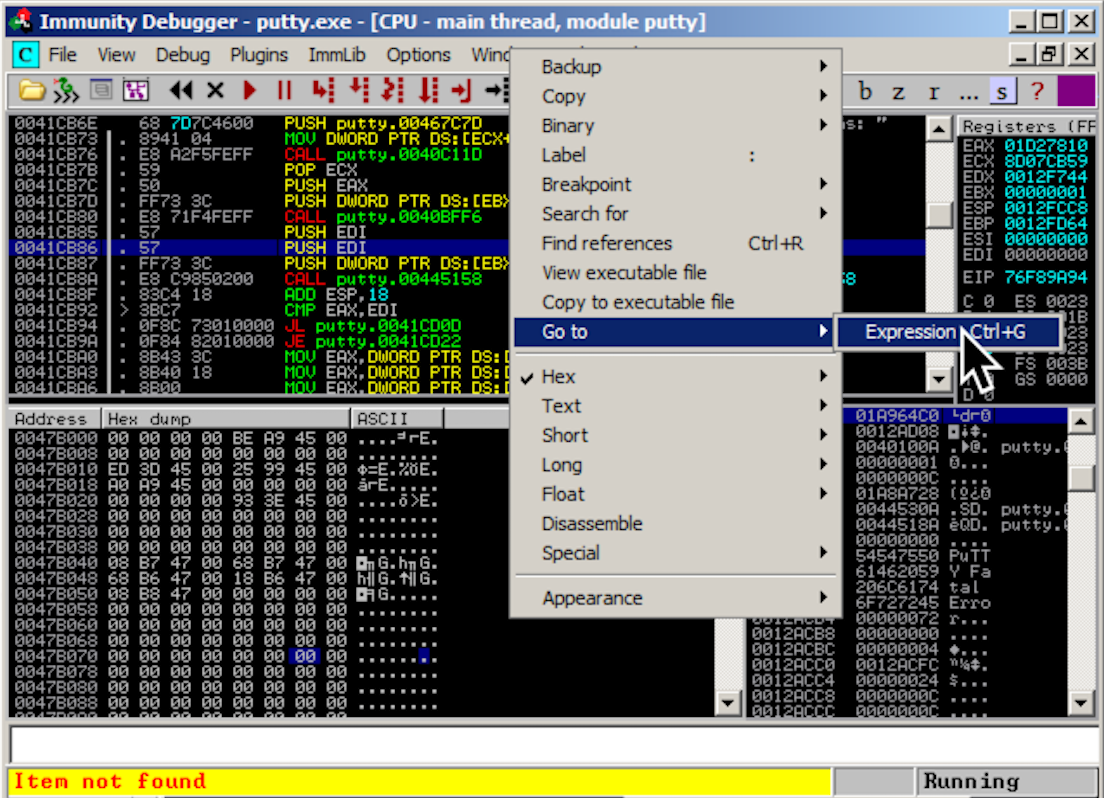
Move your mouse into the lower left pane of the CPU window, which is the "hex dump" pane.
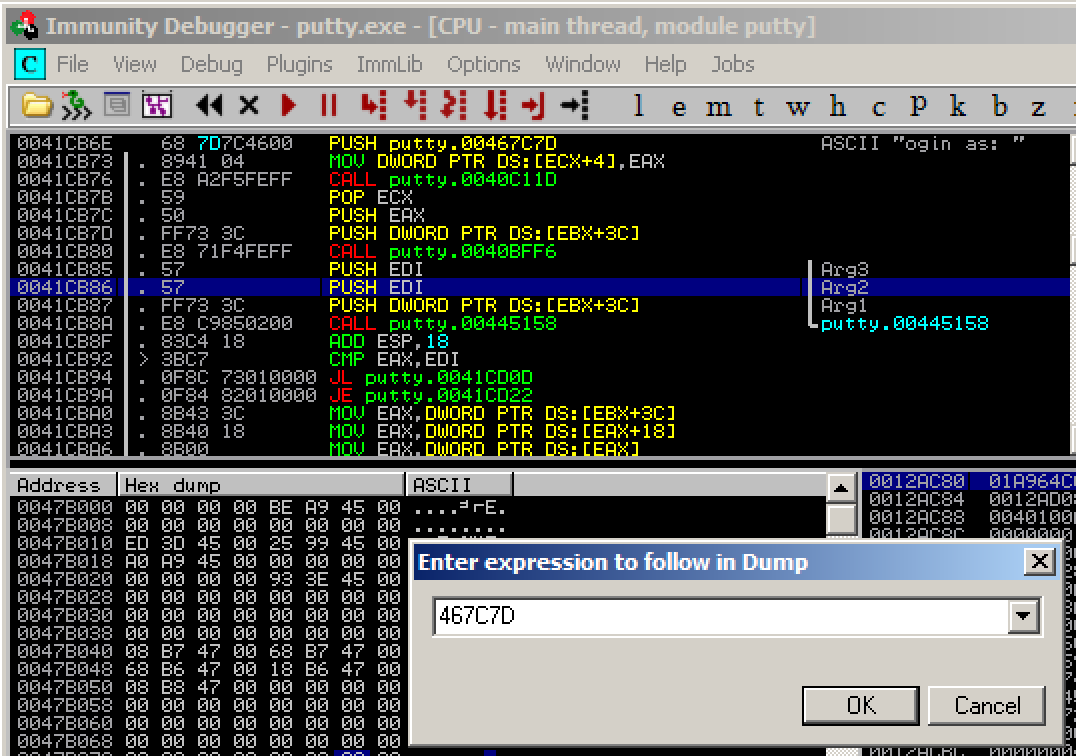
Right click, point to "Go to", and click Expression, as shown below.
Enter 467C7D into the box, as shown below. Click OK.
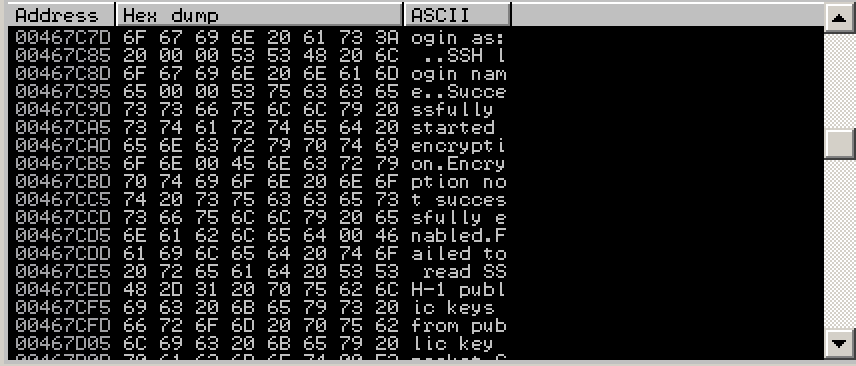
The Hex Dump shows the text "ogin as: ", as shown below.
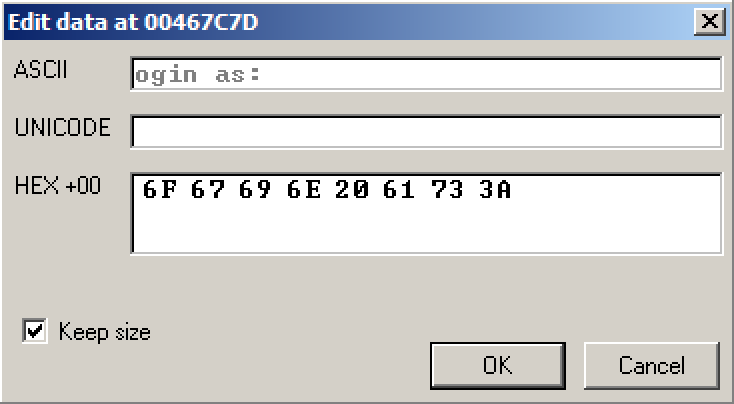
In the top left of the Hex Dump pane, point to 6F, hold down the left mouse button, and select the entire row of 8 bytes. Then release the left button, point to Binary, and click Edit, as shown below.

An "Edit data at 00467C7D" box opens, as shown below.
Click in the ASCII box, press Backspace to move back to the start, and overwrite the message with some version of your name. Make sure you insert exactly 8 letters. Don't use the literal text "YOURNAME", replace it with your own name.
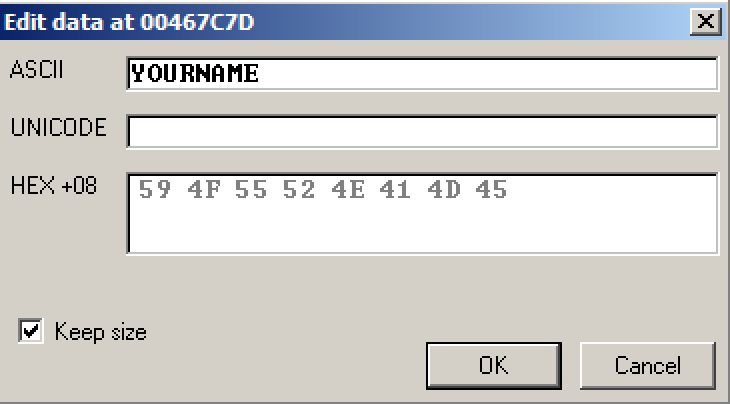
Click OK.
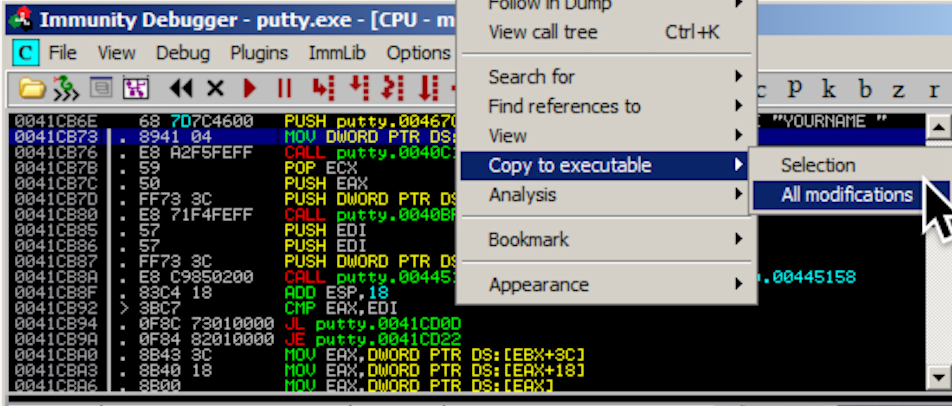
A "Copy selection to executable file" box pops up. Click the "Copy all" button.
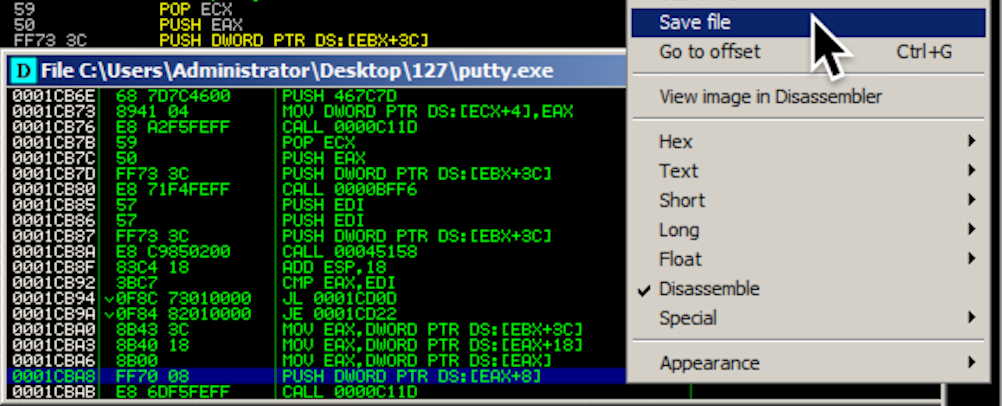
A new window pops up, with a title ending in "putty.exe", as shown below.
Right-click in the new window and click "Save file".
Save the file as "putty-YOURNAME.exe", replacing YOURNAME with your own name, as shown below.
Click Save.

Double-click putty-YOURNAME.exe.
In the "Host Name (or IP address)" box, type
ad.samsclass.info
A black box opens, and shows a "ogin as:" prompt, as shown below.

The command change was saved, so it skips the "l" in "login", but the data change inserting "YOURNAME" was not saved. I don't know how to do that with Immunity, so we'll do it with HxD.
If you don't have HxD installed, get it here:
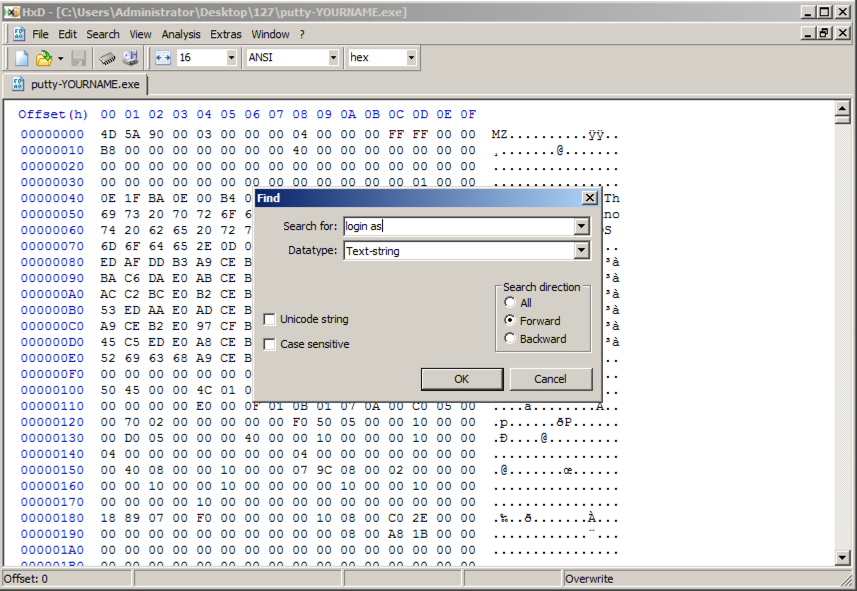
Click Search, Find.
In the Find box, enter "login as", as shown below.
Click OK.
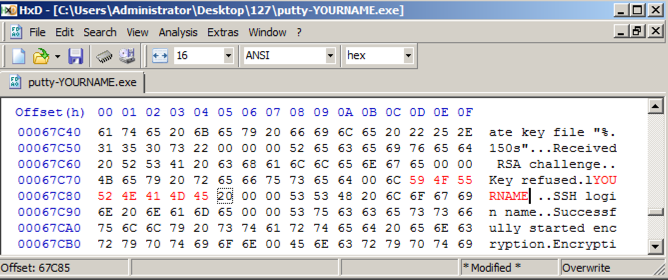
The string appears, as shown below.
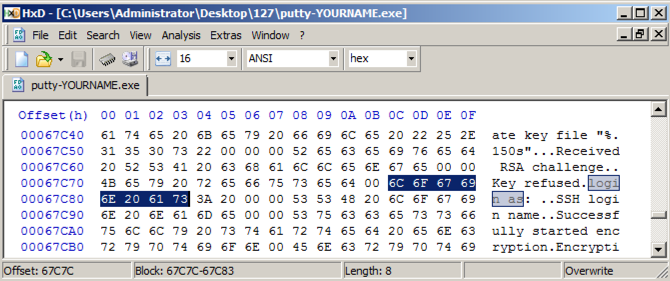
Click on the highlighted text on the right side. Carefully type an eight-letter version of your name over the "ogin as: " characters, as shown below.
In HxD, click File, Save.
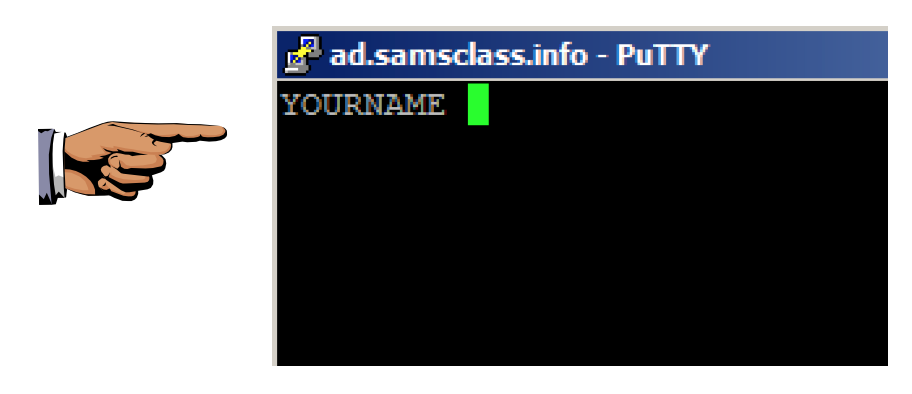
In the "Host Name (or IP address)" box, type
ad.samsclass.info
A black box opens, and shows a YOURNAME prompt, as shown below.
Press the PrintScrn key to copy the whole desktop to the clipboard.
YOU MUST SUBMIT A FULL-SCREEN IMAGE FOR FULL CREDIT!
Paste the image into Paint.
Save the document with the filename "YOUR NAME Proj 8a2", replacing "YOUR NAME" with your real name.
Art of Anti Detection 2 – PE Backdoor Manufacturing
https://github.com/EgeBalci/Cminer
https://en.wikipedia.org/wiki/Code_cave
The Beginners Guide to Codecaves
Reversing with immunity debugger