
To make the project faster, we are re-creating a known vulnerability published in 2011 in this Metasploit module:
GlobalSCAPE CuteZIP Stack Buffer Overflow
On your Windows 2008 Server machine, in a Web browser, go to:
https://www.cert.org/vulnerability-analysis/tools/foe-download.cfm?
Click the "I Agree" button.
Download the latest Windows installer file, as shown below.
To download from Internet Explorer, you must right-click the link and click "Save Target As".
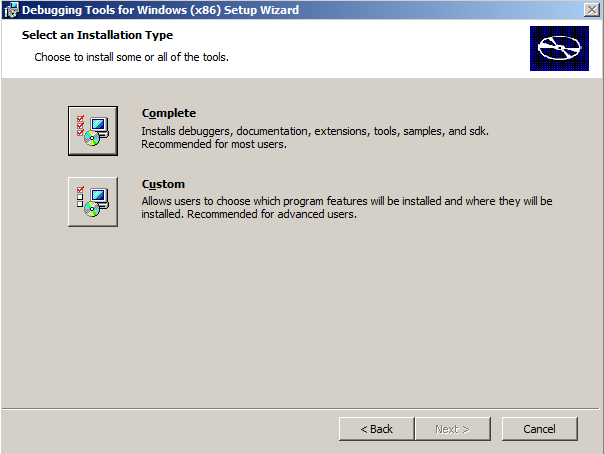
Unzip the installer and install it with the default options. It will also install other packages, including Python, SciPy, NumPy, and PyYAML. Just install it all as directed. When you see the window below, click Complete.
It also installs ImageMagick to use as a demo fuzzing target.
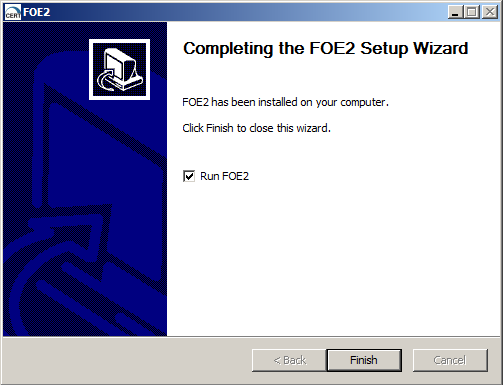
At the last page of the installer, leave the "Runs FOE" box checked, as shown below. Click Finish.
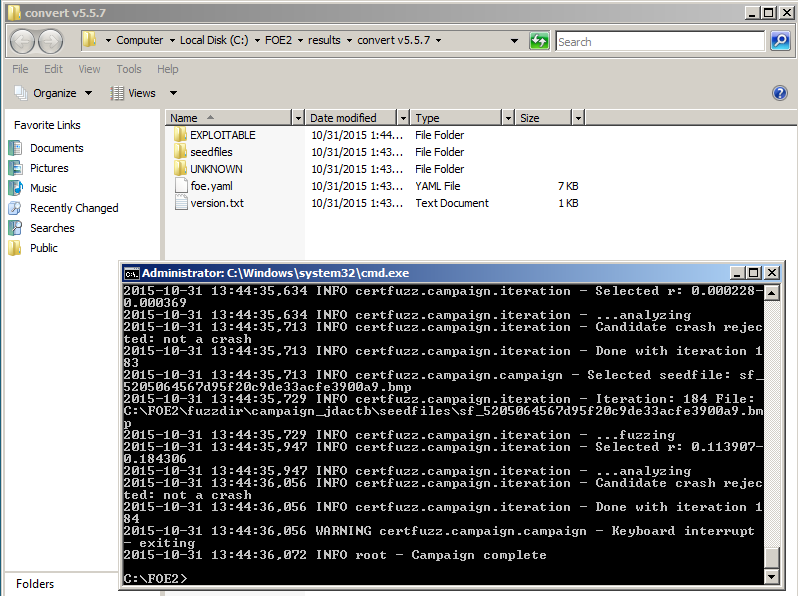
The fuzzer opens two windows, as shown below.
One window is a Windows Explorer window, showing the results of the fuzzing, in this folder:
C:\FOE2\results\convert v5.5.7
The other window is a Command Prompt window showing the progress of the fuzzing. This demonstration session will take too long, and we want to explore the options anyway, so click in the Command Prompt window and press Ctrl+C to stop the fuzzing.
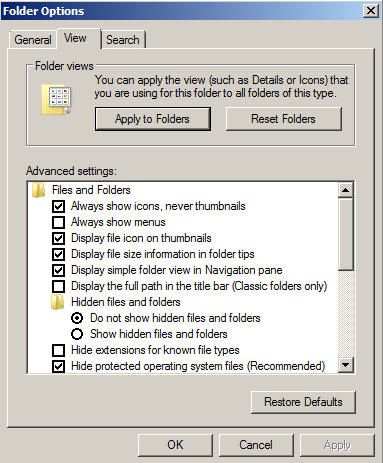
In Folder Options, on the View tab, ensure that the "Hide extensions for known file types" box is cleared, as shown below.
Click OK
http://cutezip.en.uptodown.com/
Download and install CuteZip 2.1.
Troubleshooting
If that link doesn't work, use this alternate download link:https://samsclass.info/127/proj/cutezip.exe
From your Windows 2008 Server desktop, click Start, "All Programs", GlobalSCAPE, CuteZIP, CuteZIP.
In the "Set file association" box, clear the top five options, check the "Don't show this dialog again" box, and click OK, as shown below.
Close CuteZIP.
From your Windows 2008 Server desktop, click Start. In the Search box, type REGEDIT
In the Search results, click regedit.exe
In the left pane, expand HKEY_CLASSES_ROOT.
Expand *
Right-click shell and click New, Key, as shown below.
A new key appears (it looks like a folder). Type in this name for the new key, as shown below:
Open with Notepad
Press Enter.
Right-click "Open with Notepad" and click New, Key, as shown below.

A new key appears. Type in this name for the new key, as shown below:
command
Press Enter.
In the right pane of Registry Editor double-click Default.
Iin the "Value data" field, type in this command, as shown below:
notepad.exe %1
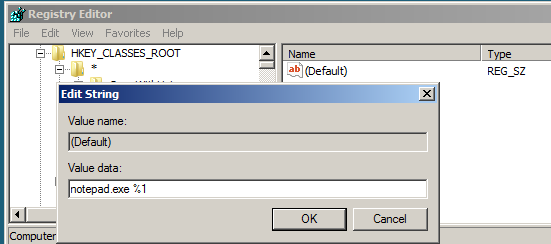
Click OK.
Close Registry Editor.
This adjustment tells it to stop whining about living on Win Server 2008 and just work.
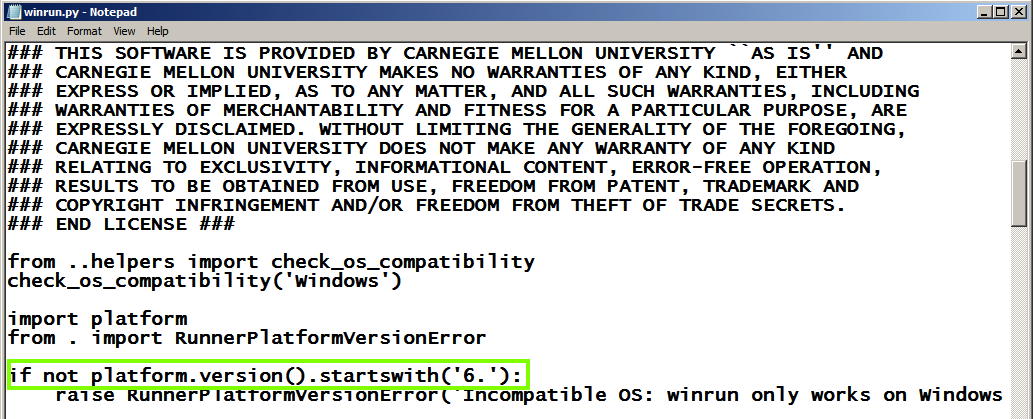
Click Start, Computer.
Navigate to this folder:
C:\FOE2\certfuzz\runners
Right-click the winrun.py file and click "Open in Notepad".
In Notepad, change the platform version from "5" to "6", as shown below.
Then save the file and close Notepad.
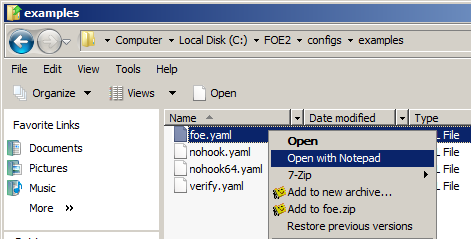
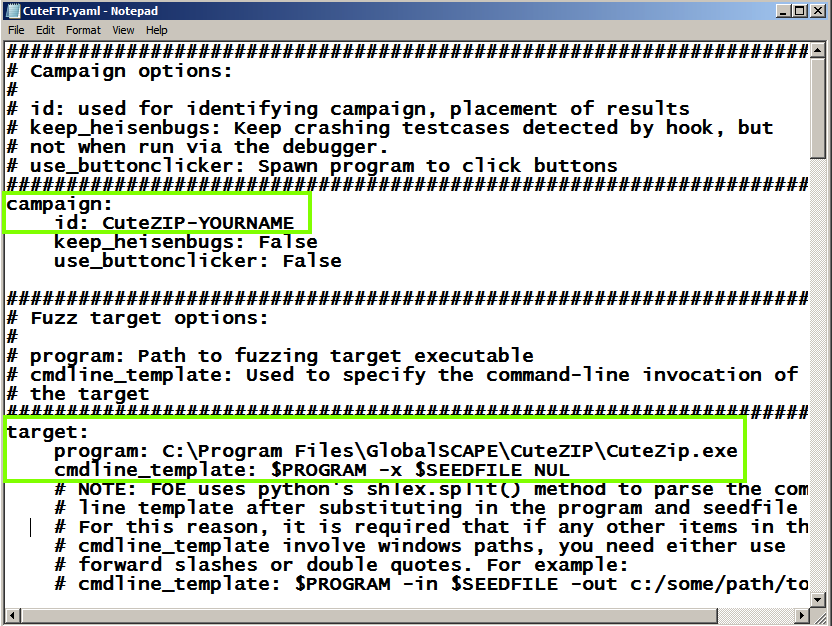
Navigate to the C:\FOE2\configs\examples folder.
Right-click
In Notepad, click
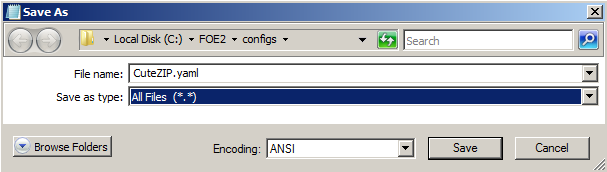
File, "Save As...".
In the "Save As" box, at the top,
in the address bar, click
configs.
In the "Save as type" field,
select "All Files (*.*)".
In the File name field, type
CuteZip.yaml
Your "Save As" box should
look like the image below.
Click Save.
Now you have a copy of the
example configuration file.
In Notepad, make these edits,
as shown below:
C:\Program Files\GlobalSCAPE\CuteZIP\CuteZip.exe
$PROGRAM -x $SEEDFILE NUL
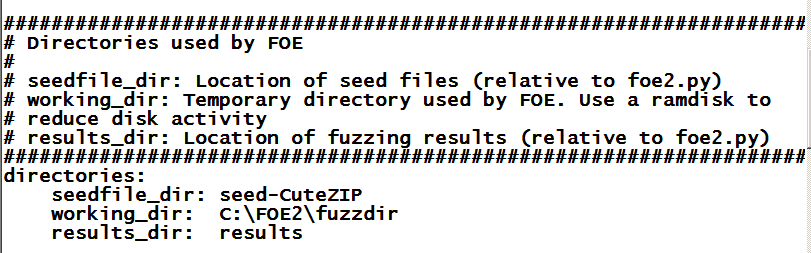
In Notepad, scroll down and find the
"seedfiles" section.
Change the seedfile_dir to
seed-CuteZIP
as shown below:
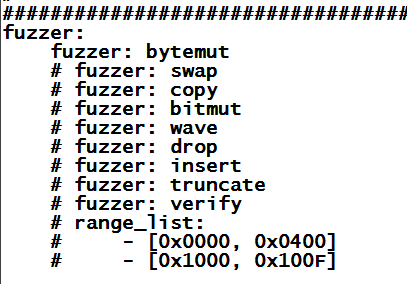
Scroll down and find the "fuzzer"
section,
as shown below:
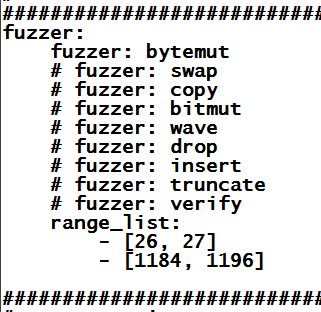
Carefully adjust the "range_list"
section to match the image below.
Be careful to get the indentation
precise--this is a Python file,
so indentation matters.
This is a cheat--we are limiting the
fuzzing to the important parts of the file
artificially, to make the fuzzing faster.
Your file should look like the
image below:
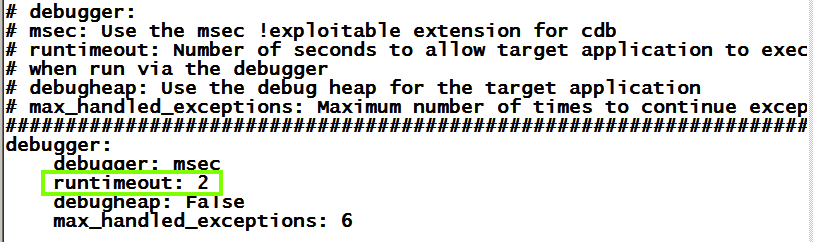
Scroll to the bottom of the file.
Change the "runtimeout" to 2
as shown below.
In Notepad, click
File,
Save.
In Internet Explorer, enter this URL:
https://samsclass.info/127/proj/abcd.zip
A box asks, "Do you want to open
or save this file?". Click
Save.
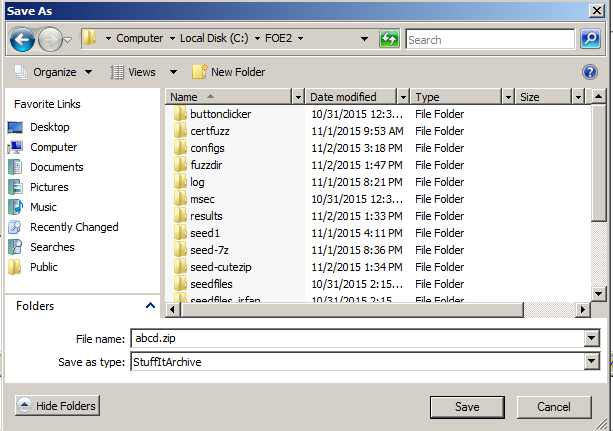
In the "Save As" box, navigate to
C:\FOE2
as shown below.
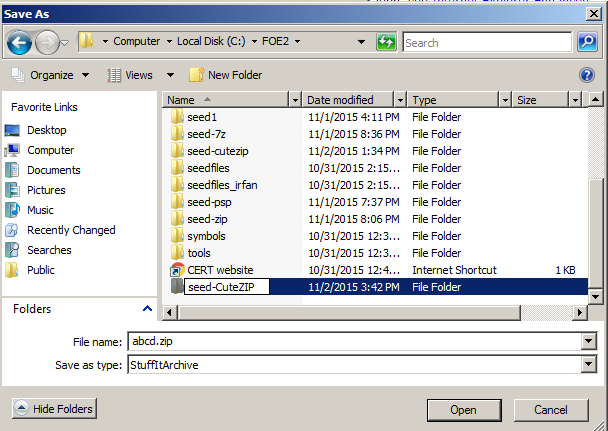
Click "New folder".
Name the new folder:
seed-CuteZIP
as shown below.
Click Open.
Click Save.
In the Command Prompt, execute these
commands,
as shown below.
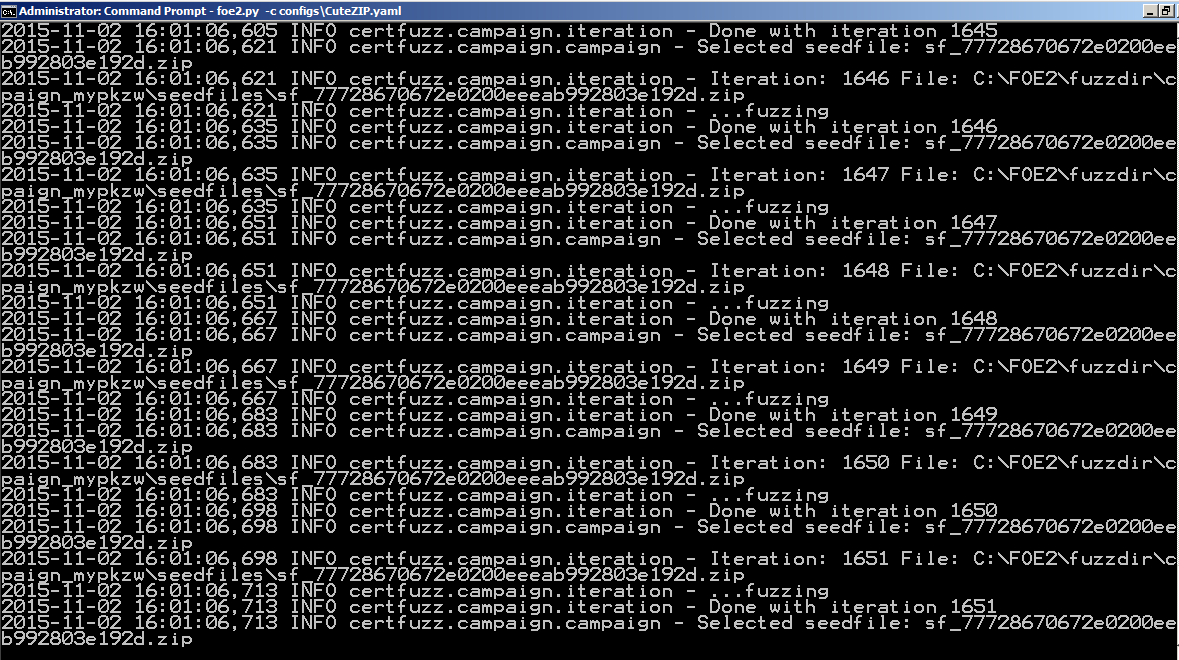
foe2.py -c configs\CuteZIP.yaml
Test scrolls by quickly, as shown below:
If you don't. click Start,
Computer, and
navigate to that folder.
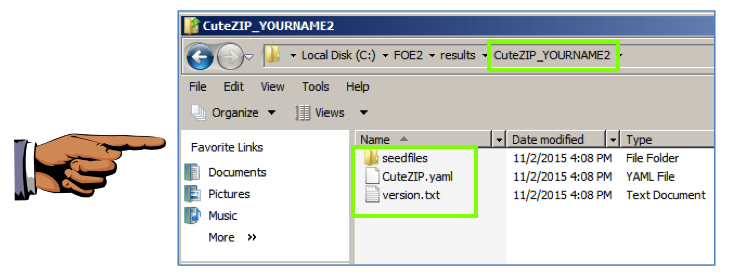
Double-click the results
folder.
Double-click the
CuteZIP_YOURNAME
folder.
You see a folder containing
a few objects,
as shown below.
These three objects are stored
there when FOE starts fuzzing,
just to record what it is doing.
Save a whole-desktop screen capture
with a filename of "Proj 16a from YOUR NAME".
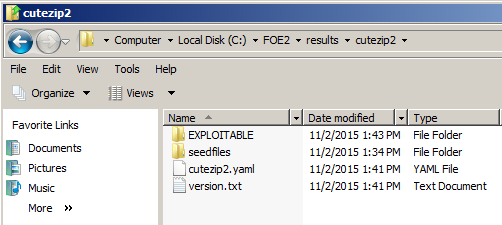
The most useful results appear
in a folder named EXPLOITABLE,
as shown below.
If you wait long enough, your
fuzzer should find a vulnerability.
However, to make the project easier,
we'll skip that part for now.
Click in the Command Prompt window
and press Ctrl+C to stop the fuzzing.
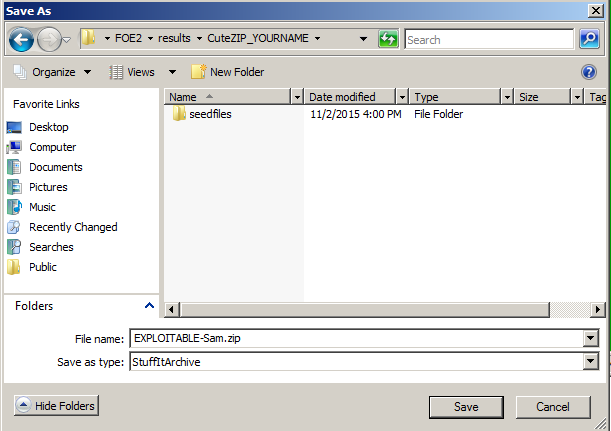
https://samsclass.info/127/proj/EXPLOITABLE-Sam.zip
A box asks, "Do you want to open
or save this file?". Click
Save.
In the "Save As" box, navigate to
C:\FOE2\results\CuteZIP_YOURNAME
as shown below.
Click Save.
In the "Download complete" box,
click the
"Open Folder" button.
A Windows Explorer window opens,
showing the
C:\FOE2\results\CuteZIP_YOURNAME
folder.
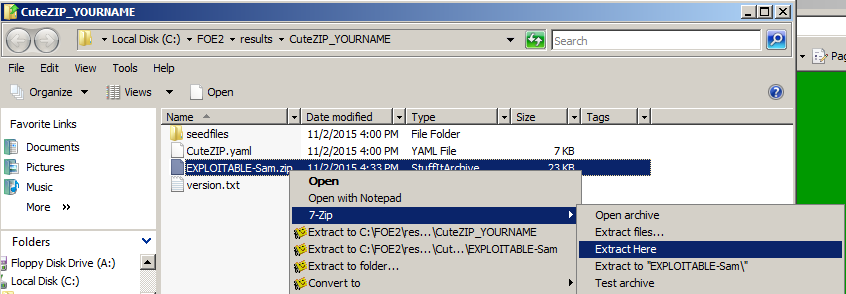
Right-click
EXPLOITABLE-Sam.zip and
click Extract, 7-Zip,
"Extract here",
as shown below.
(You may have some other archiver
instead of 7-zip; if so, use whatever
you like.)
In the top of the Windows Explorer
window, click the green Refresh
button.
You shoud now have an
"EXPLOITABLE-Sam" folder,
as shown below.
Double-click the 0x0a617d5e.0x5b7b3216
folder.
You see several files,
as shown below.
The first file is a log file. Ignore it
for now.
The second file,
sf_77728670672e0200eeeab992803e192d.zip,
is the original Zip file.
All the other .zip files are files
that caused a crash. After the first
crashing file was found, FOE performed
a "minimization" process, trying to find the
smallest number of changed bytes required
to cause this crash. So the most important
file for us to use is the file at the bottom,
with a filename ending in "minimized".
The .msec files are debugger reports from
the Windows debugger. Those are
potentially useful, but we don't need them
because we'll use Immmunity,
as we have done before.
In Immunity, click File,
Open.
Navigate to this folder:
C:\Program Files\GlobalSCAPE\CuteZIP
Double-click CuteZIP.exe.
In Immunity, from the menu bar,
click Debug, Arguments.
Enter this into the "Change arguments
of executable file" box,
as shown below (changing "YOURNAME" to
your own name):
Click OK.
Click OK.
In Immunity, from the menu bar,
click Debug, Restart.
Click Yes.
In Immunity, from the menu bar,
click Debug, Run.
The program crashes, as shown
at the bottom left, with an
"Access violation when writing to [03AE0000]".
It's this:
It apparently moved a lot of bytes
and hit a limitation of some sort.
Scroll down to find the line highlighted
in the image below. This line shows that the
address [03AE0000] is at the end of
the "stack of thread 00000E58".
We have a stack overflow here--some
data was copied to the stack, until
it filled the whole stack.
In Immunity, from the menu bar,
click View, "SEH Chain".
You see
an address of D0FDC2E6, marked as a
"*** CORRUPT ENTRY ***",
as shown below:
Save a whole-desktop screen capture
with a filename of "Proj 16b from YOUR NAME".
Is that value something we control?
If we have a simple stack overflow,
that value will be present in the
original file. Let's see.
Navigate to this file and open it
(changing "YOURNAME" to
your own name):
C:\FOE2\results\CuteZIP_YOURNAME\EXPLOITABLE-Sam\0x0a617d5e.0x5b7b3216\sf_77728670672e0200eeeab992803e192d-785-0x03bb0000-minimized.zip
In HxD, click Search, Find.
In the Find box, select a Datatype
of Hex-values.
In the "Search for" field, enter
FD.
as shown below:
Click OK.
At the top of your keyboard,
press F3 four times.
(Mac users, press fn+F3)
You see these four bytes,
as shown below:
Those are the bytes that comprise
the address D0FDC2E6
in little-endian order.
It seems like we can control the
injected address!
In HxD, click File,
"Save As...".
Save the file in the same folder
the other files are in,
with the filename:
Exploit-YOURNAME.ZIP
replacing "YOURNAME" with
your own name,
as shown below.
In HxD, move the cursor to location
45E, which contains the value E6.
Carefully type over this byte and the
next three bytes with these
values, as shown below.
The changed bytes turn red, as
shown above.
In HxD, click File,
Save.
Enter this into the "Change arguments
of executable file" box,
as shown below (changing "YOURNAME" to
your own name):
Click OK.
Click OK.
In Immunity, from the menu bar,
click Debug, Restart.
Maximize the CPU window.
In Immunity, from the menu bar,
click Debug, Run.
The program crashes with an
"Access violation when writing to [03AE0000]"
message.
In Immunity, from the menu bar,
click View, "SEH Chain".
The SEH Chain now contains
41424344, proving that you
control execution,
as shown below.
Save a whole-desktop screen capture
with a filename of "Proj 16c from YOUR NAME".
Email the image to cnit.127sam@gmail.com with a subject of
"Project 16 from YOUR NAME".
Getting a Seed File
FOE needs a "seed" file to start with,
which it will then mnutate.
We'll use a simple
image, zipped. Really, any ZIP file
would do, as long as it's at least 1250 bytes long.
Starring the Fuzzing
On your Windows Server 2008 machine,
open a Command Prompt window.
cd C:\FOE2

Viewing the Results
You should have a Windows Explorer
window open to C:\FOE2.
Saving the Screen Image
Make sure these items are visible,
as shown above:
Exploitable Vulnerabilities
When FOE finds a vulnerability,
more folders will appear here.
Downloading the EXPLOITABLE-Sam Folder
In Internet Explorer, enter this
URL:
Understanding the Fuzzer Results
Double-click the
EXPLOITABLE-Sam folder.
Observing a Crash in Immunity
Launch Immunity as the Administrator.
-x C:\FOE2\results\CuteZIP_YOURNAME\EXPLOITABLE-Sam\0x0a617d5e.0x5b7b3216\sf_77728670672e0200eeeab992803e192d-785-0x03bb0000-minimized.zip NUL

Understanding the Crash
First look at the top left pane in Immunity
to see the instruction that caused the
crash.
This instruction moves a series of bytes
from one RAM location to another--it's
the equivalent of the memcpy() function
in C.
REP MOVS DWORD PTR ES:[EDI],DWORD PTR [ESI]
Viewing the Memory Map
In Immunity, from the menu bar,
click View, Memory.
Viewing the SEH
Did the overflow write something useful?
Saving the Screen Image
Make sure the "*** CORRUPT ENTRY ***"
message is visible,
as shown above.
Locating the Injected Address
As shown above, our zipfile inserted
a value of D0FDC2E6 into the SEH
chain.
Examining the ZIP File with HxD
Open HxD. Click File,
Open.
E6 C2 FD D0
Creating an Exploit File
As usual, we'll comfirm that we
are in control by injecting an
address of
'ABCD", which is 0x44434241 in
little-endian hexadecimal.
44 43 42 41
Observing a Controlled Crash
In Immunity, from the menu bar,
click Debug, Arguments.
-x C:\FOE2\results\CuteZIP_YOURNAME\EXPLOITABLE-Sam\0x0a617d5e.0x5b7b3216\Exploit-YOURNAME.ZIP NUL
Saving the Screen Image
Make sure the 41424344
is visible,
as shown above.
Turning In Your Project
Posted 11-2-15 by Sam Bowne
Revised 11-23-15