In the search results, click "Microsoft Visual C++ 2008 Express Edition"
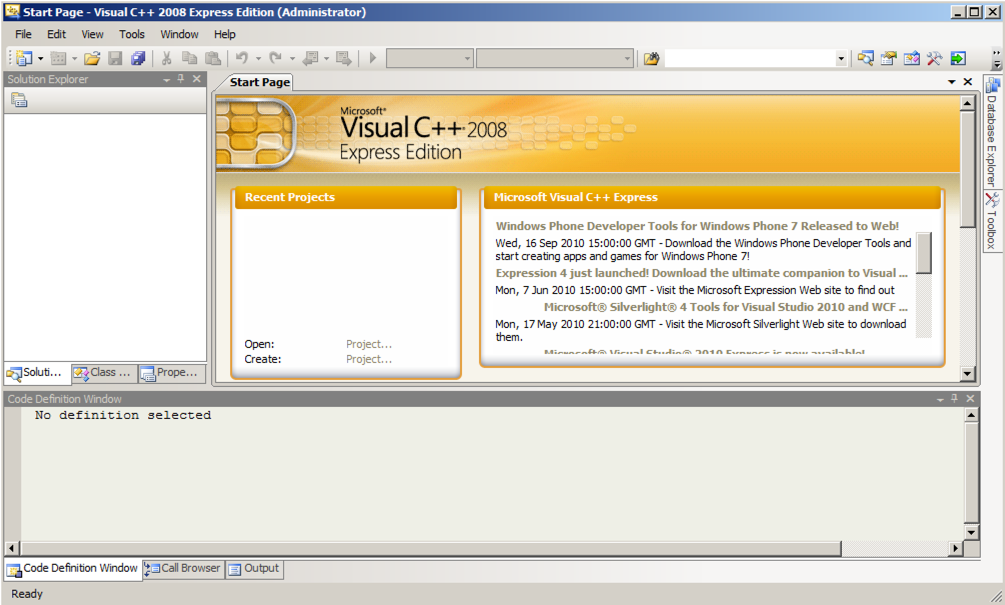
Visual C++ 2008 Express launches, as shown below:
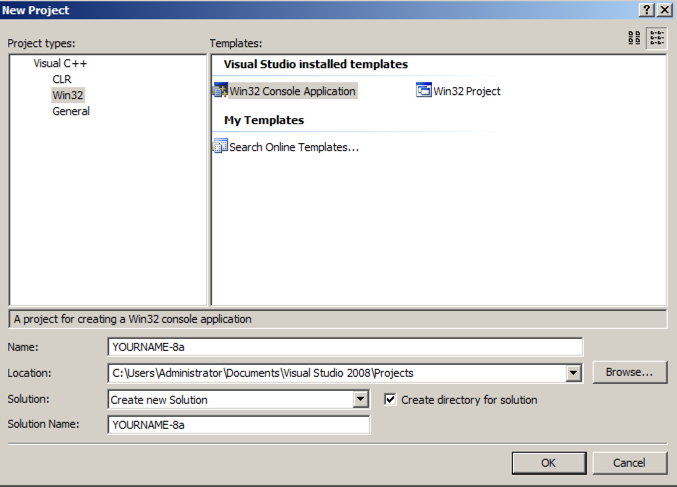
In the "New Project" window, on the left, click Win32, as shown below.
In the right pane, accept the default selection of "Win32 Console Application"
At the bottom of the "New Project" window, type a Name of YOURNAME-8a, replacing "YOURNAME" with your own name. Do not use any spaces in the name.
In the "Location" line, notice the location files will be saved in--it's a subfolder of your Documents folder.
In the "New Project" window, click OK.
A box opens, titled "Welcome to the Win32 Application Wizard".
Click Next. In the next screen, accept the default settings and click Finish.
A window opens, showing a simple C program.
Modify this program to match the code shown in text and the image below.
Do not use the literal string "YOURNAME"--replace it with your own name.
// YOURNAME-8a.cpp : Defines the entry point for the console application.

//


#include "stdafx.h"


int i=1; // GLOBAL VARIABLE


int _tmain(int argc, _TCHAR* argv[])

{

	int j=2; // LOCAL VARIABLE

	printf("YOURNAME-8a: %d %d\n", i, j);

	return 0;

}
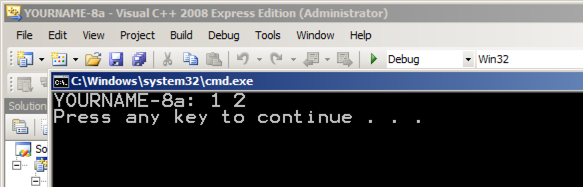
You should see the message "Build: 1 succeeded" at the bottom of the window. If you see errors, you need to correct them and re-compile the program.
A Command Prompt window opens, showing the output of "1 2", as shown below:
Minimize the Visual Studio Community Edition window.
Start IDA Pro Free.
In the "About" box, click OK.
Agree to the license.
Close the Help window.
In the "Welcome to IDA!" box, click the New button.
In the "New disassembly database" box, double-click "PE Executable".
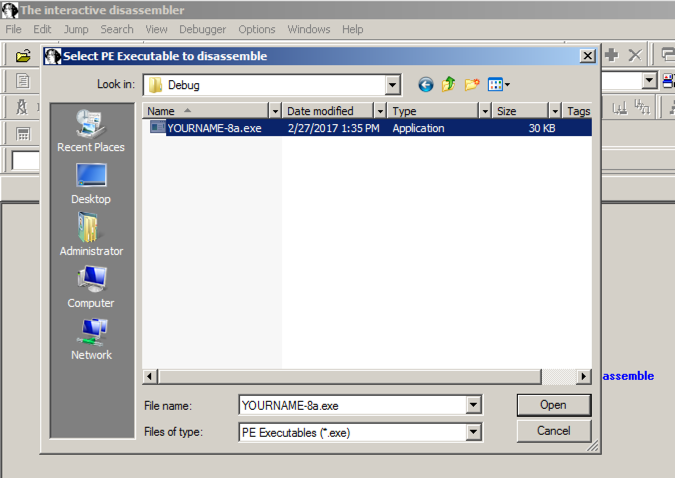
In the "Select PE Executable to disassemble" box, navigate to the folder you used to save your program. The default location is in the Administator home folder, with this relative path:
Documents\Visual Studio 2008\Projects\YOURNAME-8a\Debug
Double-click the YOURNAME-8a.exe file.
In the "PE Executable file loading Wizard", click Next, Next, Finish.
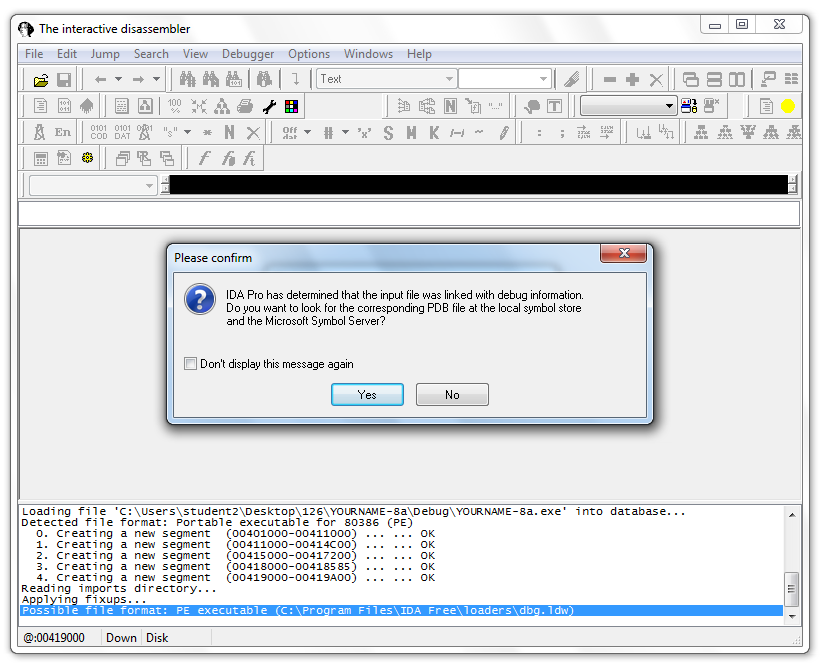
A box appears, saying this file was linked with debug information, as shown below. This is a luxury you won't often have with malware, but it's nice for this project.
Click Yes
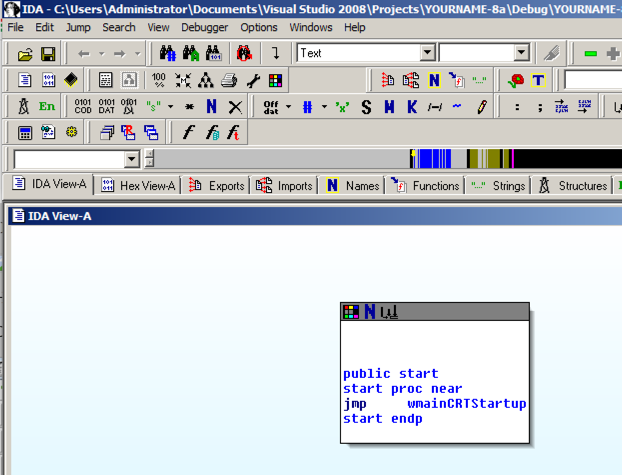
IDA Pro loads the file. Unfortunately, the graph mode isn't much use, as shown below.
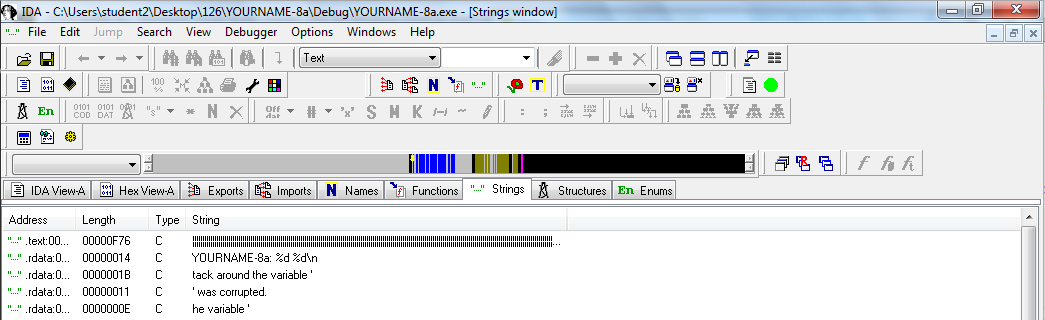
However, we can still find the code. Expand the Strings window and find "YOURNAME-8a %d %d\n", as shown below.
Double-click "YOURNAME-8a %d %D\n".
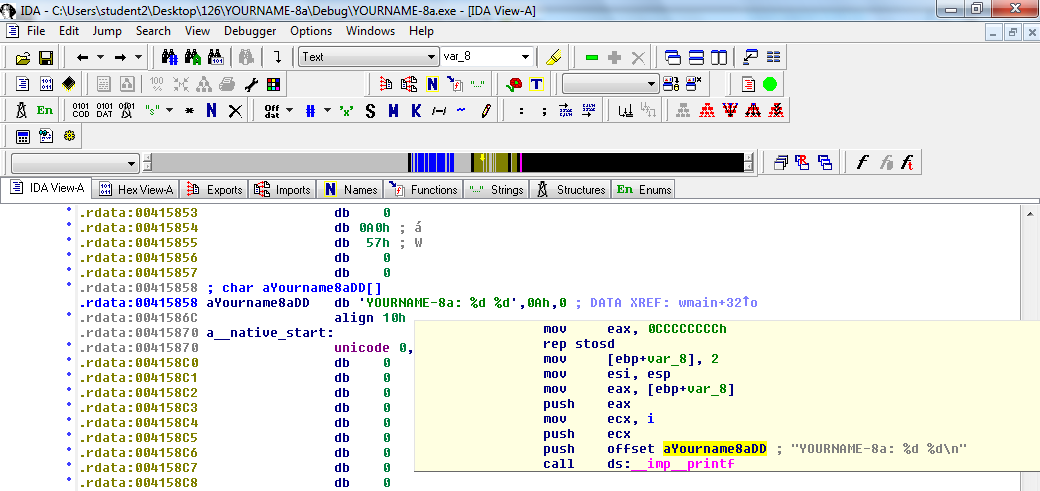
The location containing the string appears, as shown below.
This is in the .rdata section of the file, which contains data but not executable instructions.
To the right of "YOURNAME-8a" there is a "DATA XREF" comment. Hover over the address to the right of "DATA XREF", which was "wmain+32" when I did it.
The instructions that use this string appear in a yellow pop-up box, as shown below.
Double-click "wmain+32".
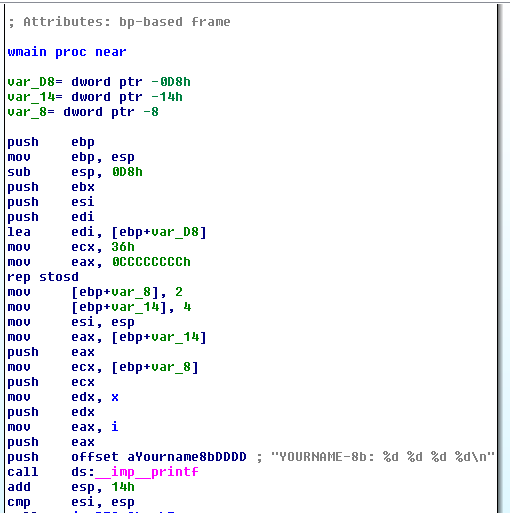
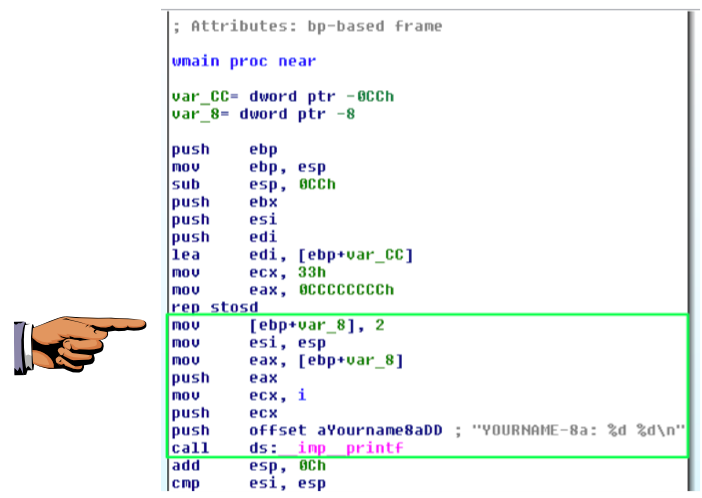
Now the assembly code that performs the task you wrote in C appears, as shown below.
Notice the region in the green box in the figure below.
These commands perform these C statements:
	int j=2;

	printf("YOURNAME-8a: %d %d\n", i, j);
The call at the end jumps into the printf() function.
as shown above. The offset value may be different, but it should contain push and YOURNAME.push offset aYourname8aDD ; "YOURNAME-8a: %d %d\n
On your keyboard, press the PrntScrn key.
Click Start, type in PAINT, and open Paint.
Press Ctrl+V to paste in the image of your desktop.
YOU MUST SUBMIT WHOLE-DESKTOP IMAGES TO GET FULL CREDIT.
Save the image with a filename of "Proj 8a from YOUR NAME".
Before the call, the three arguments are pushed onto the stack in reverse order: first j, then i, then the string "YOURNAME-8a: %d %d\n", as detailed below.
mov [ebp+var_8], 2 ; PUT 2 into j mov esi, esp mov eax, [ebp+var_8] ; PUT j into eax push eax ; PUSH j onto the stack mov ecx, i ; PUT i into ecx push ecx ; PUSH i onto the stack push offset aYourname8aDD ; "YOURNAME-8a: %d %d\n" ; PUSH the address of the string onto the stack call ds:__imp__printf ; CALL printf() |
j is a local variable, so it is simply stored on the stack at the location ebp+var_8. It's temporary, only available to the function it's defined in.
i is a global variable, and in this case IDA was able to refer to it by name in the "mov ecx, i" instruction.
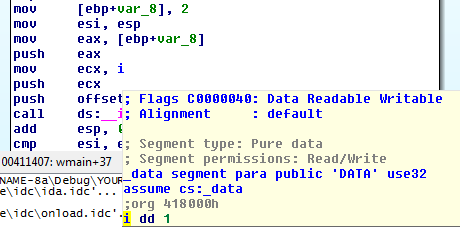
To see where i is stored, hover the mouse over it.
A yellow box pops up showing where it is stored. When I did it, it was stored at location 418000, as shown below.
This variable will be available everywhere in the program, to any function.
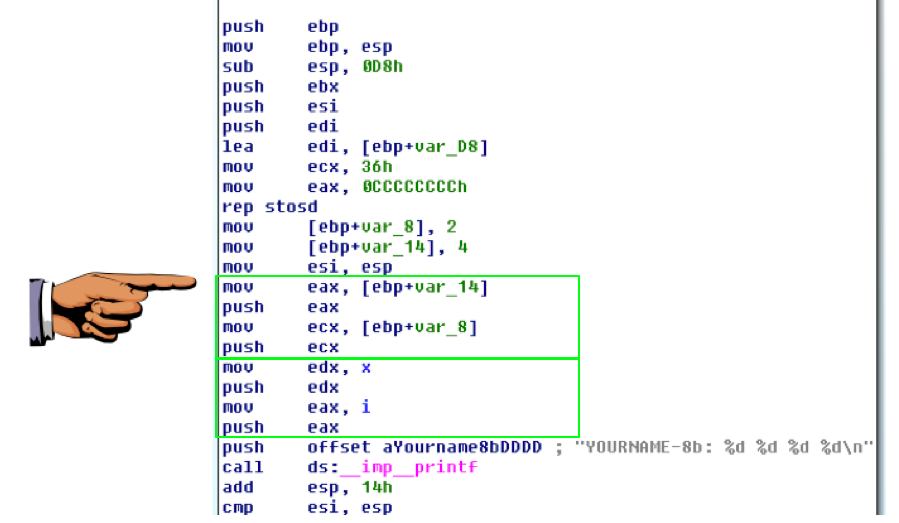
Compile it and disassemble it.
It must show these features, as shown below:
Last Modified: 2-27-17 2:51 pm