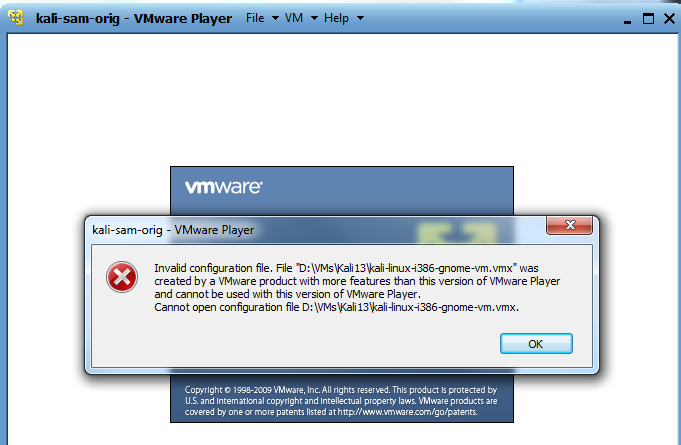
TroubleshootingIf you see the message shown below, you need to update VMware Player. An updated version of VMware Player is on the S13 disk.
|
https://my.vmware.com/web/vmware/free#desktop_end_user_computing/vmware_workstation_player/12_0|PLAYER-1252|product_downloads
In the VMs-S214 window, right-click the empty space and click New, Folder. Name the folder "YOUR NAME VMs" replacing YOUR NAME with your own name.
http://games.samsclass.info/secret/download-vms.htm
You need a username and password to view that page. The username and password are written on the blackboard in the hacking lab, and you can get them from your instructor.
The two files you need are:
If you are using a Mac, get Ez7z
DO NOT PUT VIRTUAL MACHINES ON THE C: DRIVE IN S214. They fill the drive and make the machine unusable, and will be deleted.
Right-click the Kali-Linux-2016.2-vm-i686.7z file, click 7-Zip, and click "Extract Files...". In the "Extract to:" box, enter the path to the folder you prepared, such as "G:\YOURNAME\Kali". Click OK.
DO NOT PUT VIRTUAL MACHINES ON THE C: DRIVES IN S214! They fill the drive and make the machines stop working. Virtual machines left on the desktop, Documents folder, or other C: drive locations may be deleted at any time, as needed to keep the machines working.
In the VMware Player window, click the green "Play virtual machine" button.
VMware Player will pop up several dialog boxes, asking whether this machine was moved or copied, telling you details about the processor, etc. Just accept the default choice for all those boxes.
Troubleshooting
If you see the message shown below, you need to update VMware Player. An updated version of VMware Player is on the S13 disk.
To log in, you need to send a Ctrl+Alt+Delete to the virtual machine. On a Windows host, you can usually press Ctrl+Alt+Insert to do that. If that doesn't work, hunt through the VMware menus to send a Ctrl+Alt+Delete.
Log in as Administrator with a password of P@ssw0rd
When the server starts, it opens some windows by default. Close all windows.
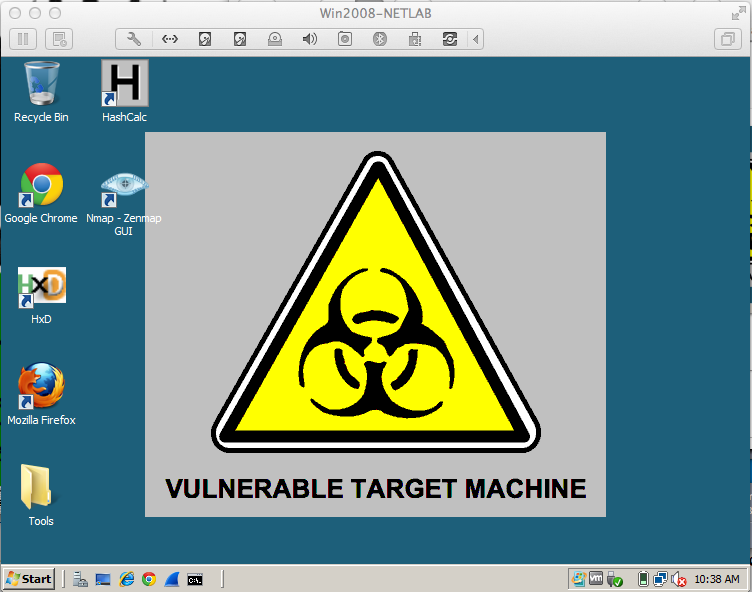
You should see the Windows Server 2008 desktop as shown below:
If you don't see a user named "root", click Other....
Log in to Kali with the username root and a password of toor
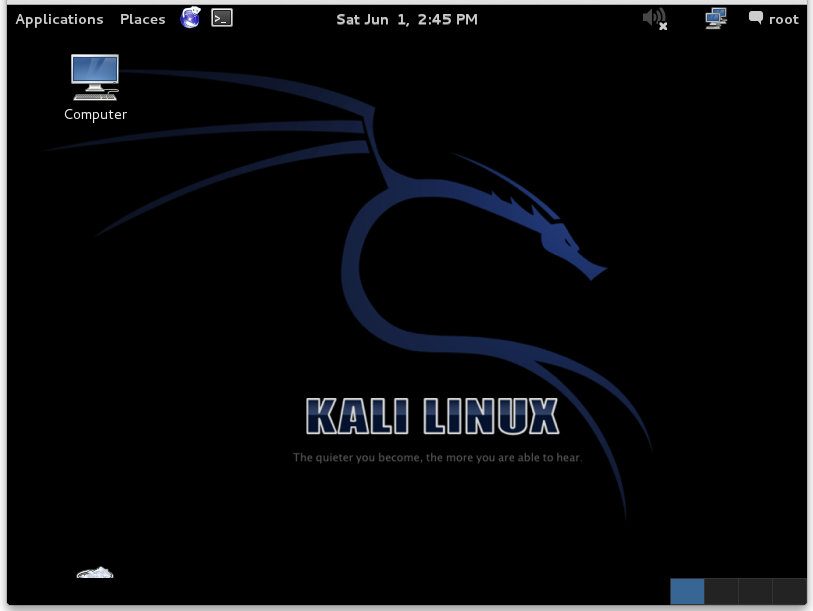
You should see the Kali Linux desktop as shown below:
In the "Virtual Machine Settings" box, on the left side, click "Network Adapter".
On the right side, click "NAT". Click OK.
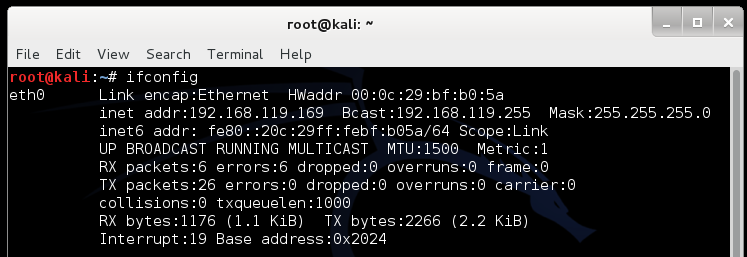
At the top left of the Kali Linux desktop, find these items:
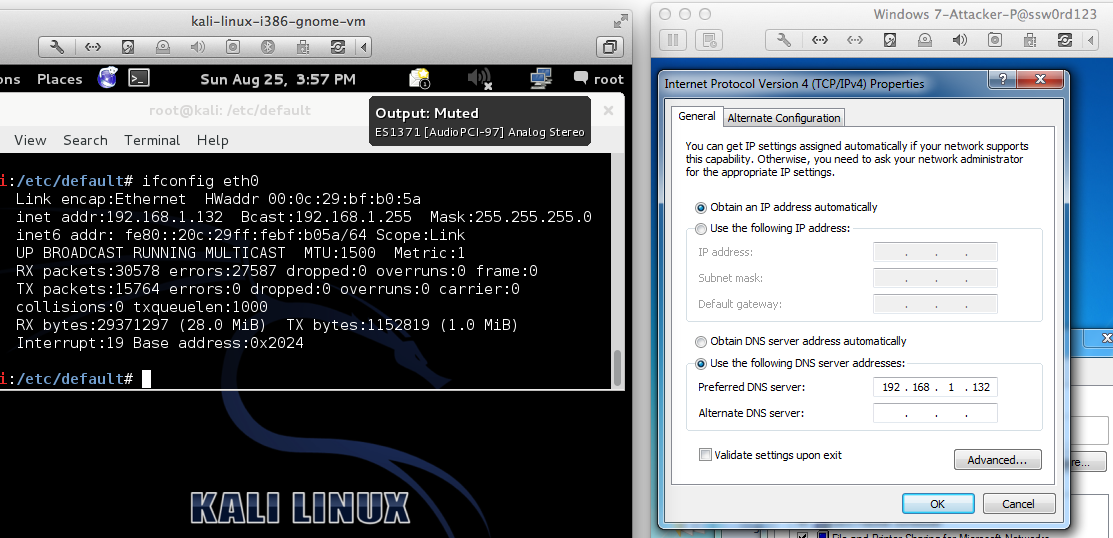
In the Terminal window, type in this command to get a new IP address, and then press the Enter key:
dhclient -v
ifconfig
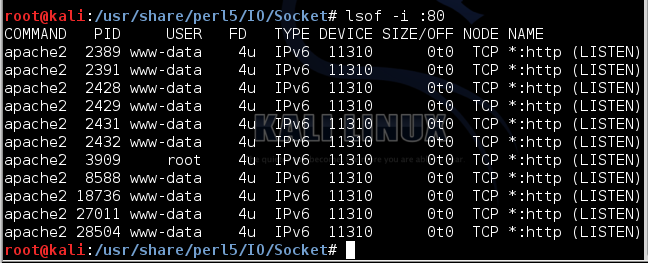
lsof -i :80
service apache2 stop
On your Linux machine, in a Terminal window, execute these commands:
cp /etc/inetsim/inetsim.conf /etc/inetsim/inetsim.conf.orig

nano /etc/inetsim/inetsim.conf
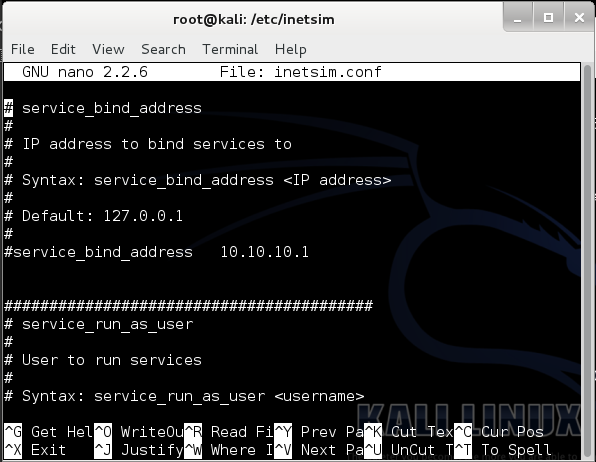
Change this line:
#service_bind_address 10.10.10.1
service_bind_address 0.0.0.0
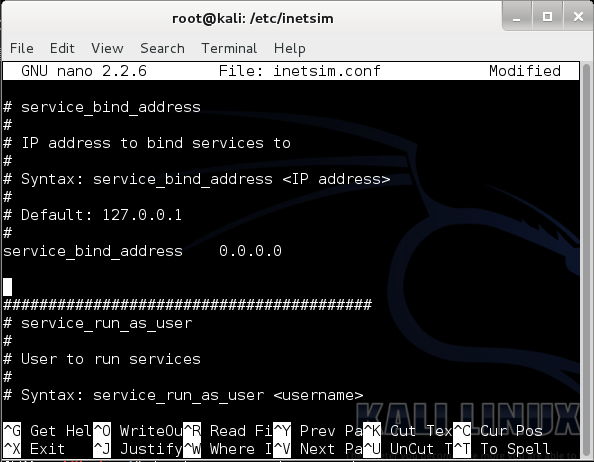
Don't forget to delete the # at the start of the line!
Scroll down another several screens to find the dns_default_ip section shown below. Find this line:
#dns_default_ip 10.10.10.1
dns_default_ip 192.168.1.132
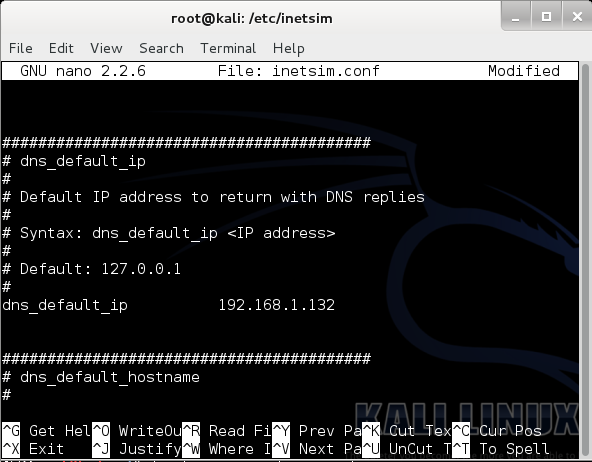
Use your correct IP address instead of "192.168.1.132"
Save the file with Ctrl+X, Y, Enter.
To start inetsim, on your Linux machine, in a Terminal window, execute this command:
inetsim
http://nmap.org/ to get it.
On the left side, click "Manage network connections". Right-click "Local Area Connection" and click Properties.
Double-click "Internet Protocol Version 4(TCP/IPv4)".
Set your DNS server to the Kali Linux machine's IP address, as show below. Then click OK twice.
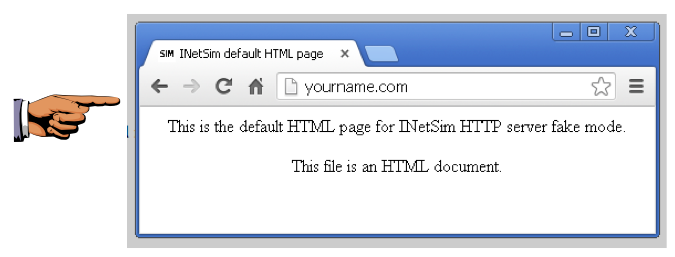
You see the INetSim default HTML page, as shown below:
Click the taskbar at the bottom of your host Windows 10 desktop, to make the host machine listen to the keyboard, instead of the virtual machine.
Press the PrintScrn key in the upper-right portion of the keyboard. That will copy the whole desktop to the clipboard.
YOU MUST SUBMIT A FULL-SCREEN IMAGE FOR FULL CREDIT!
On the host machine, not the virtual machine, click Start.
Type mspaint into the Search box and press the Enter key.
Click in the untitled - Paint window, and press Ctrl+V on the keyboard. The desktop appears in the Paint window.
Save the document with the filename "YOUR NAME Proj 3a", replacing "YOUR NAME" with your real name.
Click the Scan button.
You should see a lot of open ports, as shown below.
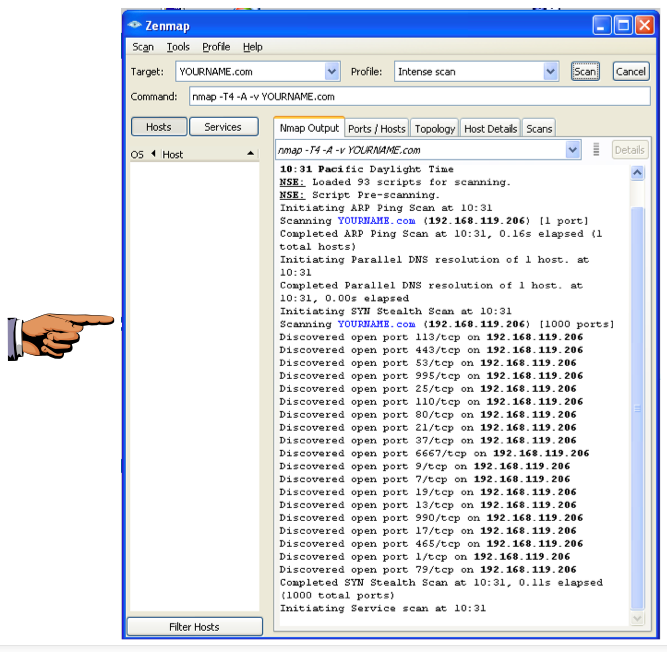
Note: If you wait too long, the scan will complete and scroll to the bottom. Drag the scroll bar back to the top to capture the image shown above.
Click the taskbar at the bottom of your host Windows 10 desktop, to make the host machine listen to the keyboard, instead of the virtual machine.
Press the PrintScrn key to copy the whole desktop to the clipboard.
YOU MUST SUBMIT A FULL-SCREEN IMAGE FOR FULL CREDIT!
Paste the image into Paint.
Save the document with the filename "YOUR NAME Proj 3b", replacing "YOUR NAME" with your real name.
http://securitygoth.blogspot.com/
http://danielabrantes.blogspot.com/2013/05/sendemail-invalid-sslversion-specified.html
Last modified 1-30-17