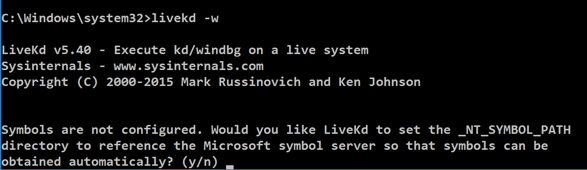
livekd -w livekd -w
Type y and press Enter . 输入 y并按Enter键 。
Livekd asks "Enter the folder to which symbols download". Livekd询问“输入符号下载的文件夹”。 Press Enter to accept the default option.按Enter接受默认选项。
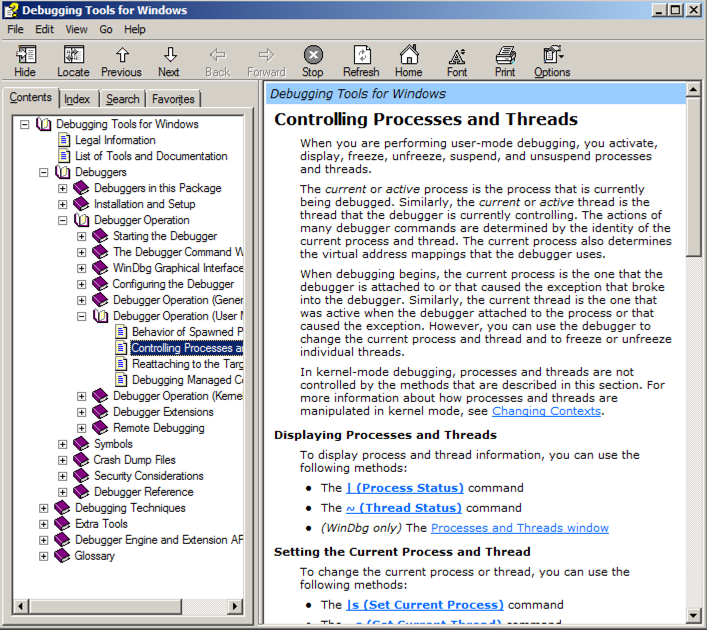
Windbg launches, as shown below. Windbg启动,如下所示。
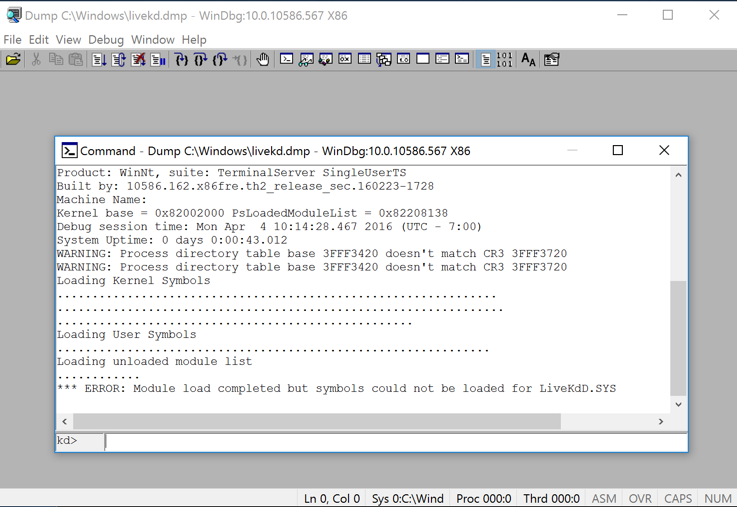
This is a strange combination of a GUI and command-line, like the other debuggers we've used.这是GUI和命令行的奇怪组合,就像我们使用的其他调试器一样。 Commands are typed into the box at the bottom and the results appear in the large top pane.命令被输入到底部的框中,结果显示在大顶部窗格中。
At the bottom of the Command window, in the command bar, execute this command:在命令窗口的底部,在命令栏中执行以下命令:
!process !处理
When I did it, the Cid was 0b14 in hexadecimal, which is 11*256 + 16 + 4 = 2836.当我这样做时,Cid是十六进制的0b14,即11 * 256 + 16 + 4 = 2836。

Find the windbg process, and its PID, as shown below.找到windbg进程及其PID,如下所示。 It should match the Cid from Windbg.它应该匹配Windbg的Cid。
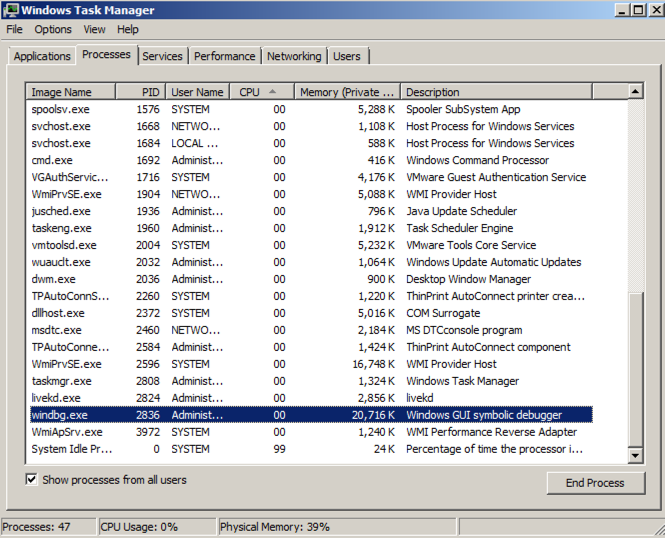
Close Task Manager.关闭任务管理器。 In Windbg, at the bottom of the Command window, in the command bar, execute this command:在Windbg中,在命令窗口的底部,在命令栏中,执行以下命令:
!process 0 0 !进程0 0
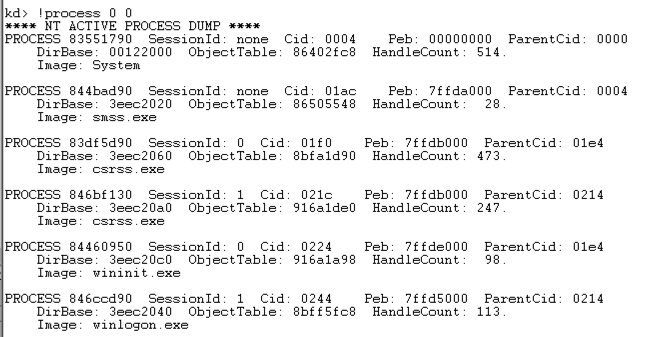
.help process .help过程

At the bottom of the Command window, in the command bar, execute this command:在命令窗口的底部,在命令栏中执行以下命令:
.hh process .hh过程
lm LM
Scroll back to see the lm command you entered, and the first few loaded kernel modules, as shown below.向后滚动查看您输入的lm命令以及前几个加载的内核模块,如下所示。
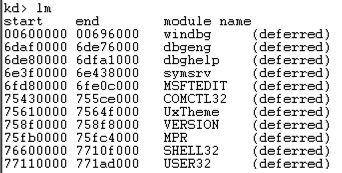
Scroll down to find the module named nt , as shown below.向下滚动以查找名为nt的模块,如下所示。 It's easy to spot because it'e one of the few modules that shows a Symbols path.很容易发现,因为它是显示符号路径的少数几个模块之一。
This is Ntoskrnl, the main kernel module.这是主要的内核模块Ntoskrnl。

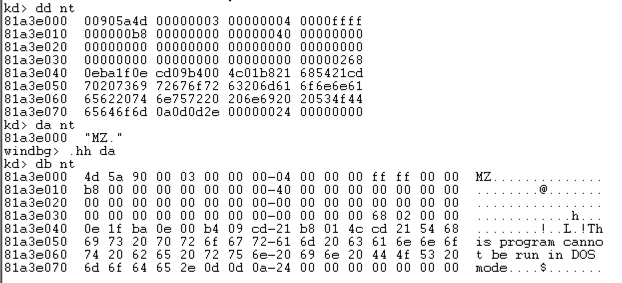
dd Display dwords (32-bit values) dd 显示双字(32位值) da Display ASCII text da 显示ASCII文本 db Display Bytes and ASCII text db 显示字节和ASCII文本 dt Display Type: Information about a variable, data type, or structure dt 显示类型:关于变量,数据类型或结构的信息 dd nt dd nt
You see the first several bytes of Ntoskrnl.exe, as shown below.您会看到Ntoskrnl.exe的前几个字节,如下所示。
This may be more familiar in ASCII.这在ASCII中可能更为熟悉。
In WinDbg, execute this command:在WinDbg中,执行以下命令:
da nt 达nt
You see the characters "MZ" --they are at the start of every EXE file.你看到字符“MZ” - 他们在每个EXE文件的开头。
In WinDbg, execute this command:在WinDbg中,执行以下命令:
db nt db nt
This displays the bytes on the left, and the ASCII on the right.这将显示左侧的字节,右侧显示ASCII。 Now you can see the message " This program cannot be run in DOS mode ", which appears at the start of many EXE files.现在你可以在许多EXE文件的开始处看到消息“ 这个程序不能在DOS模式下运行 ”。
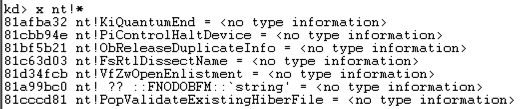
x nt!* x nt!*
This finds all the functions in Ntoskrnl.这可以找到Ntoskrnl中的所有功能。 There are a lot of them, as shown below.其中有很多,如下所示。 It may take a minute or so to show them.展示它们可能需要一分钟左右的时间。
In WinDbg, execute this command:在WinDbg中,执行以下命令:
x nt!*Create* x nt!*创建*
This finds all the symbols in Ntoskrnl that contain the word "Create".这将找到Ntoskrnl中包含单词“创建”的所有符号。
There are a lot of them, too.也有很多。
In WinDbg, execute this command:在WinDbg中,执行以下命令:
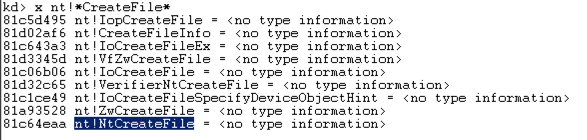
x nt!*CreateFile* x nt!* CreateFile *
This finds all the symbols in Ntoskrnl that contain the word "CreateFile".这将找到Ntoskrnl中包含单词“CreateFile”的所有符号。
There are only about ten of those, including "nt!NtCreateFile", as shown below:其中只有10个,包括“nt!NtCreateFile”,如下所示:
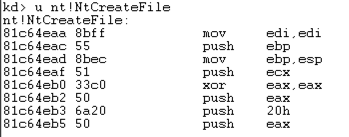
u nt!NtCreateFile nt!NtCreateFile
This shows the first few bytes of the function, disassembled, as shown below:这显示了反汇编函数的前几个字节,如下所示:
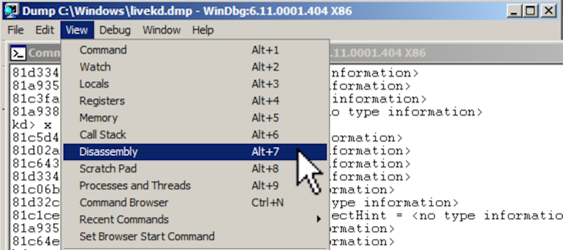
To see more of this function, it helps to use the WinDbg Disassembly window.要查看更多此功能,可以使用WinDbg Disassembly窗口。
If the Command window is maximized, make it smaller.如果命令窗口最大化,请将其缩小。
From the WinDbg menu bar, click View , Disassembly , as shown below:在WinDbg菜单栏中,单击查看 , 反汇编 ,如下所示:
In the Offset bar at the top, enter在顶部的偏移栏中,输入
nt!NtCreateFile !NT NtCreateFile
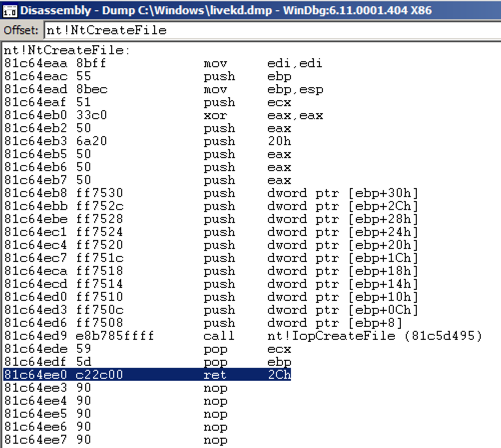
This shows the assembly code before and after the start of the NtCreateFile function.这显示了NtCreateFile函数启动之前和之后的汇编代码。 Using the up-arrow and down-arrow keys, you can scroll to see the entire assembly code for this function, as shown below:使用向上箭头和向下箭头键,您可以滚动查看该功能的整个汇编代码,如下所示:
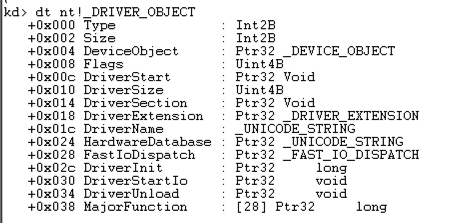
dt nt!_DRIVER_OBJECT dt nt!_DRIVER_OBJECT
This shows the first few lines of a driver object structure, which stores information about a kernel driver, as shown below.这显示了驱动程序对象结构的前几行,该结构存储有关内核驱动程序的信息,如下所示。 Notice the DriverStart pointer--this contains the location of the driver in memory.注意DriverStart指针 - 这包含驱动程序在内存中的位置。
Challenge 15a: Function Name (5 pts)挑战15a:功能名称(5分)
Find the Windows kernel function that has a name fitting this pattern: two characters, RegistryKey , then six more letters, like this:找到适合该模式的Windows内核函数:两个字符, RegistryKey ,然后是六个字母,如下所示:Use the form below to get your points.使用下面的表格来获得你的观点。--RegistryKey------
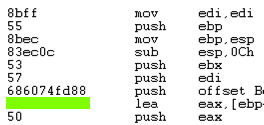
Challenge 15b: Beep (10 pts)挑战15b:哔声(10分)
Disassemble the Beep module, near its DriverEntry.拆卸Beep模块,靠近其DriverEntry。Find the hexadecimal values covered by the green box in the image below.查找下图中绿色框所涵盖的十六进制值。
Use the form below to get your points.使用下面的表格来获得你的观点。