Click Options, General. Check "Line Prefixes". Enter a "Number of opcode bytes" of 6 and click OK.
Maximize the "IDA View-A" window.
Notice that the display is not in Graph Mode, but just a long linear chart of disassembled code.
Click in the "IDA View-A" window. Press the SPACEBAR.
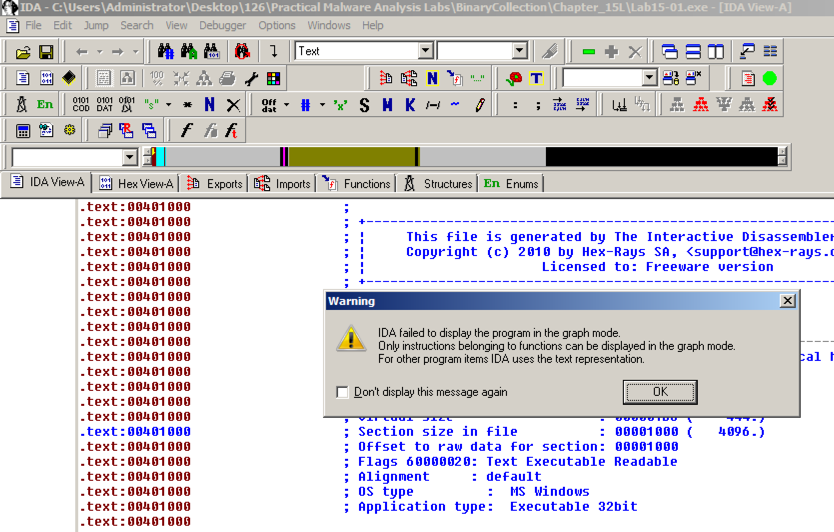
A Warning box appears, saying that IDA can't display the code in graph mode because it can't identify the functions, as shown below.
This is a clue that something is confusing IDA Pro.
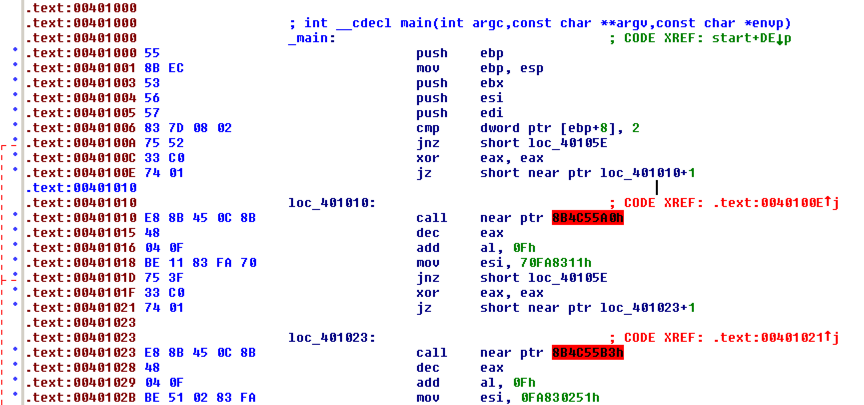
In IDA, scroll down past the blue header comments to see the actual code.
Notice that the "CODE XREF" labels are in red, as shown below. That indicates that the actual reference points inside this instruction, not at its starting byte. This is another indication that IDA has not beem able to correctly disassemble the code.
To correct the disassembly, in the left column, click any of the 401010 addresses. All three of them turn yellow.
On the keyboard, press d to convert these five bytes to data. A "Please confirm" box pops up. Click Yes.
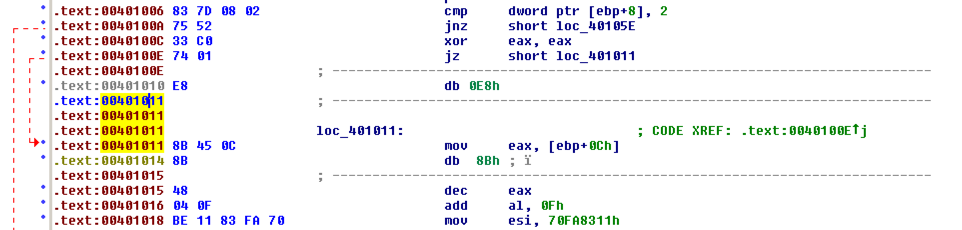
The code now shows five bytes of data after the jz instruction, as shown below.
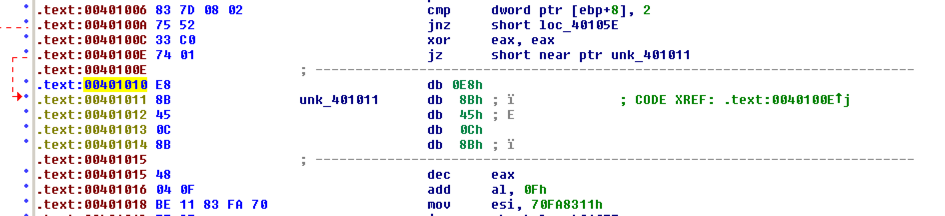
The jz resumes execution at location 401011, so we must tell IDA to interpret that address as code.
In the left column, click the 401011 address. On the keyboard, press c to convert these five bytes to code.
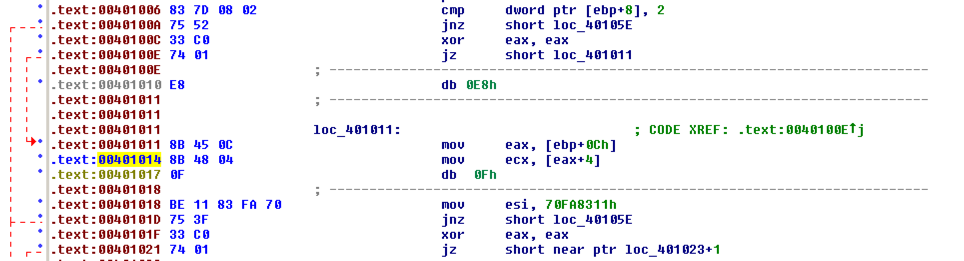
Three bytes starting at 401011 are now interpreted as a mov instruction, as shown below.
However, the byte at 401014 is still interpreted as data, and that makes the disassembly below it inaccurate as well.
In the left column, click the 401014 address. On the keyboard, press c to convert these five bytes to code. A "Please confirm" box pops up. Click Yes.
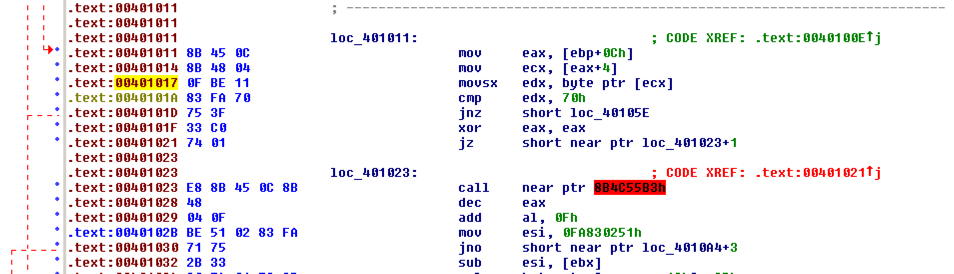
This guides IDA to disassemble another instruction correctly, but leaves another byte abandoned and interpreted as data at 401017, as shown below.
In the left column, click the 401017 address. On the keyboard, press c to convert these five bytes to code. A "Please confirm" box pops up. Click Yes.
Finally, IDA shows the correct code, without any stray "db" bytes in the middle, as shown below.

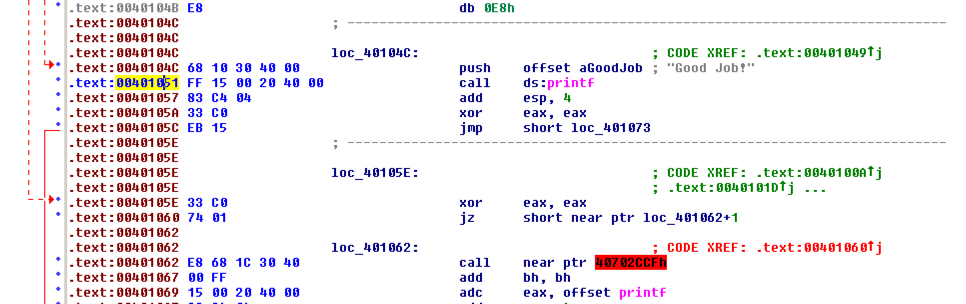
The correct disassembly shows a block of code starting at 401038 and ending with yet another use of the same trick to skip over a byte, as shown below.
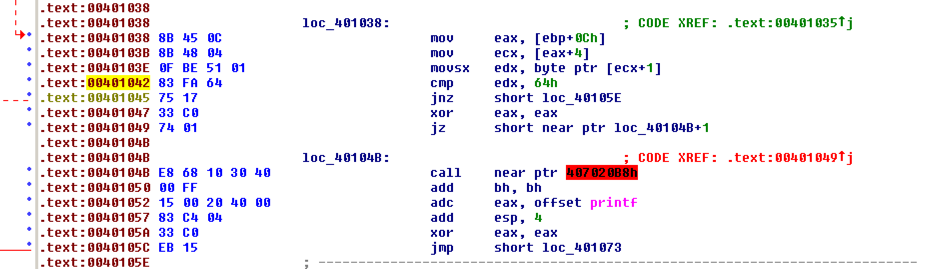
The correct disassembly shows a block of code starting at 401038 and ending with yet another use of the same trick to skip over a byte, as shown below.
Guide IDA to disassemble the code correctly.
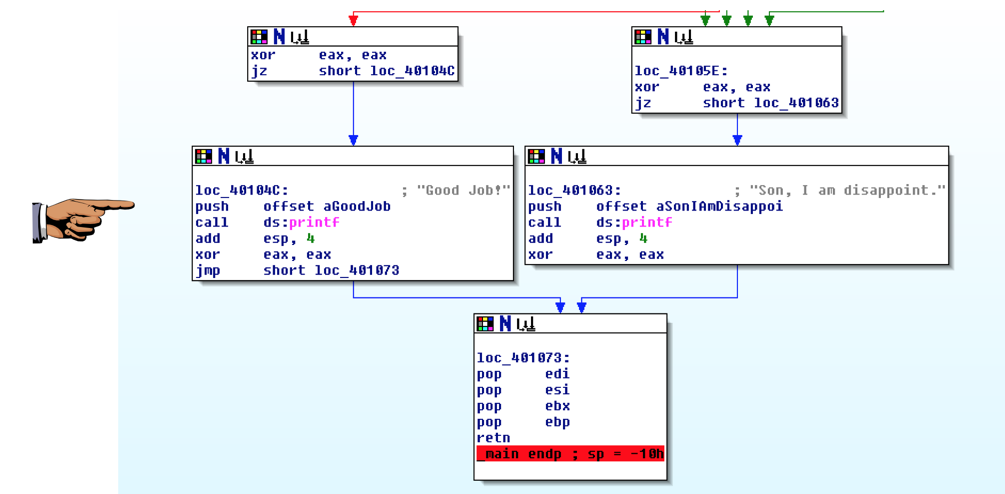
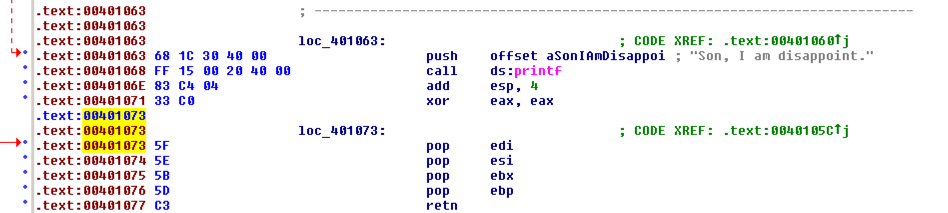
The correct disassembly prints a message and ends with four pop instructions and a retn, as shown below.
Drag the mouse to highlight all the code from 401000 through the retn instruction at 401077. Then press p to tell IDA this is a function.
IDA finally switches to Graph Mode!
Scroll down and find the functions that prints out the message "Good Job!", as shown below.