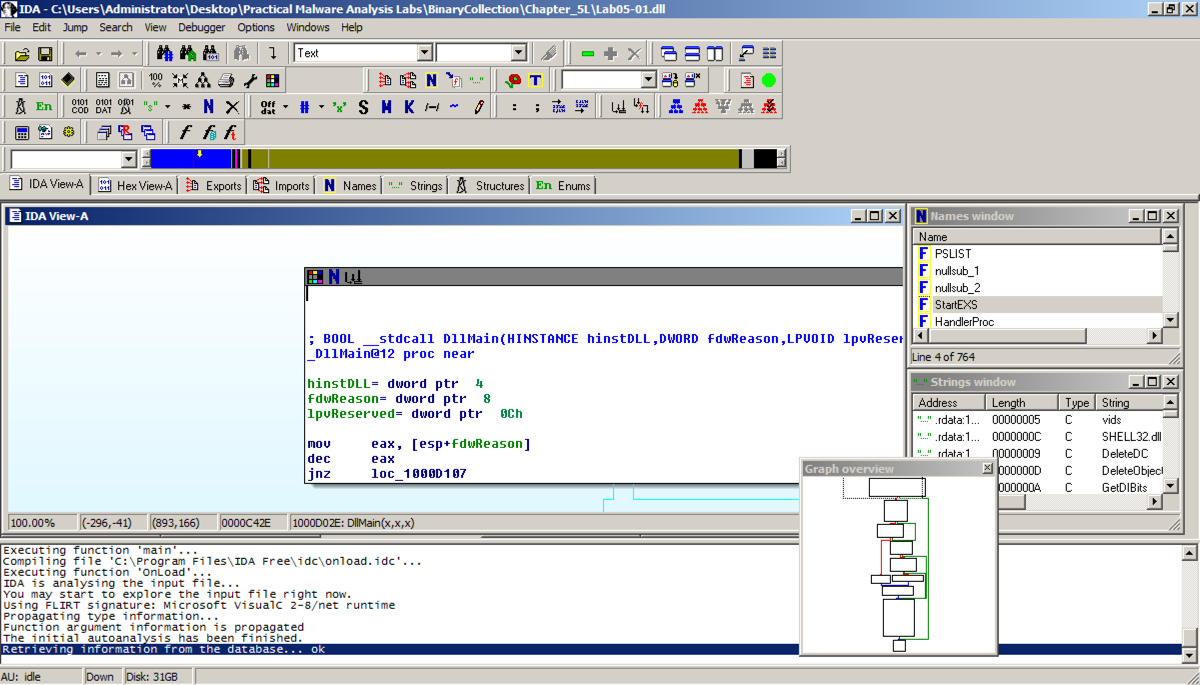
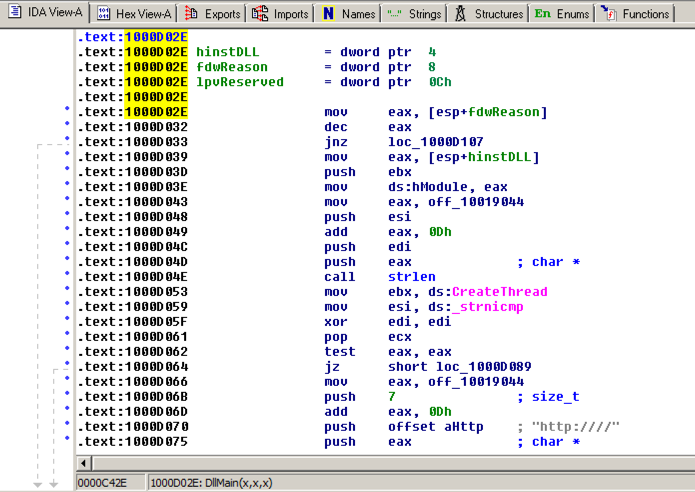
In the "Welcome to the PE Dynamic Library file loading Wizard" box, click Next, Next, Finish. IDA opens the file, as shown below:
The code doesn't show line numbers or hexadecimal instructions. To fix that, click Options, General.
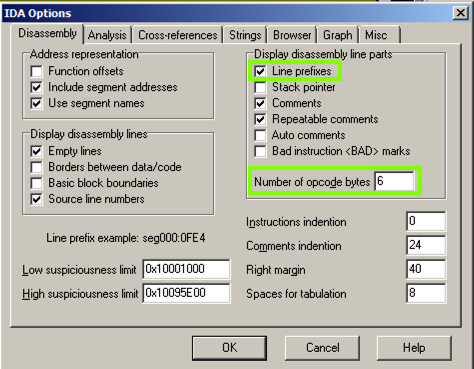
In the IDA Options box, in the top right, in the '"Display disassembly line parts" pane, make these changes, as shown below:
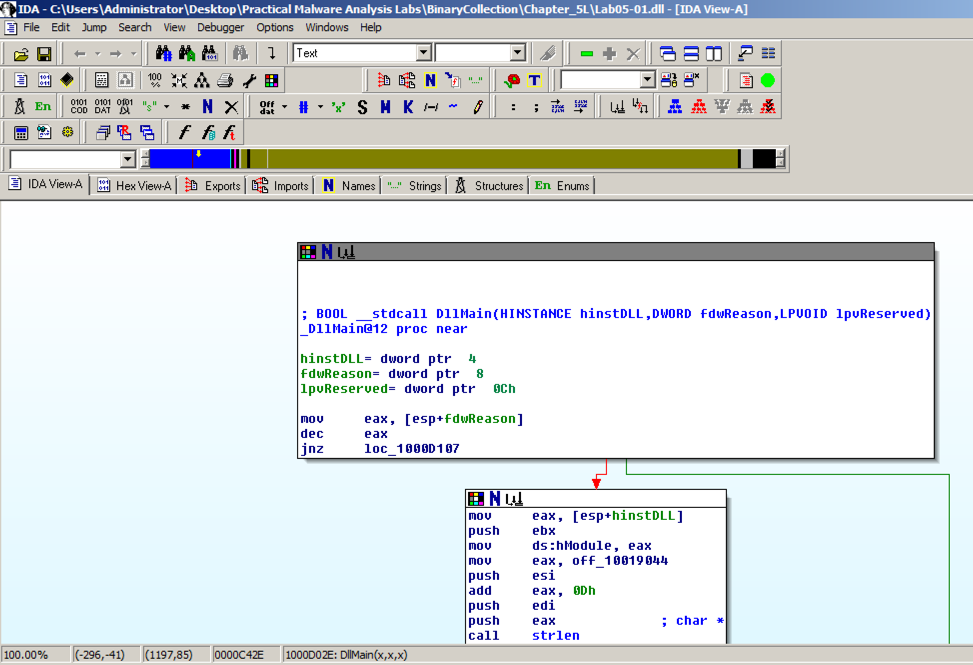
The "graph mode" display is more informative now, as shown below.
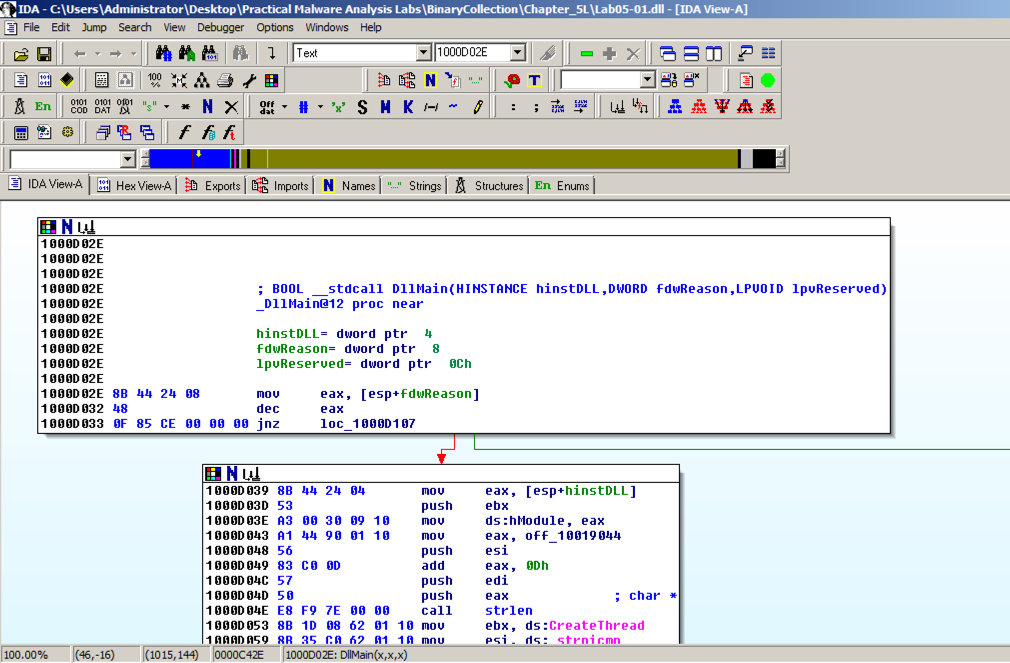
IDA shows the assembly code in a text-only view, as shown below.
Press the SPACEBAR again to return to Graph Mode.
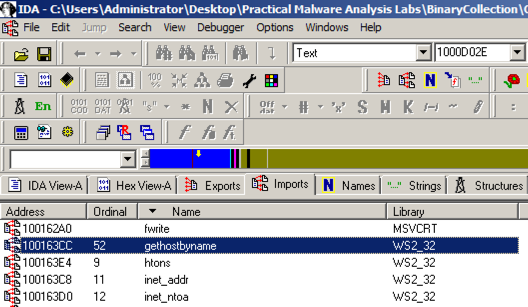
In IDA Pro, click View, "Open subview", Imports. Click the Name header to sort by name. Find "gethostbyname", as shown below. (Note that capital letters and lowercase letters sort into separate groups.)
Double-click gethostbyname.
The code for the function opens in Text mode, as shown below.
Click gethostbyname. Yellow highlights appear on both occurrences of that name, as shown below. Press Ctrl+x to open the "xrefs to gethostbyname" box shown below.
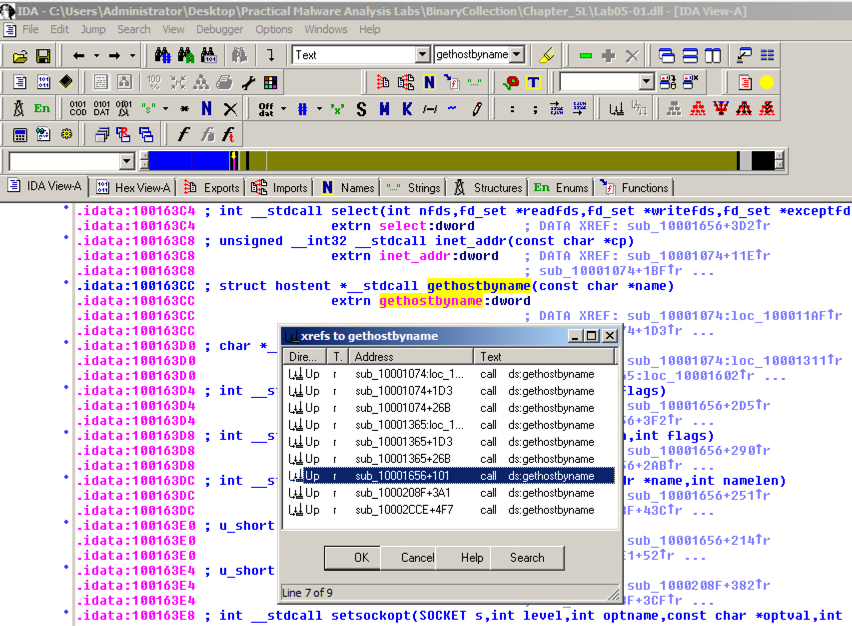
There are nine calls to gethostbyname in five different functions. Double-click the third one from the bottom, at an address of 1001656+101, as highlighted in the image above.
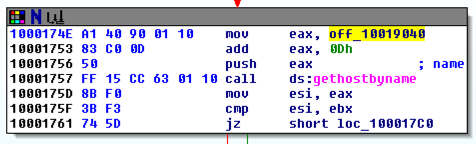
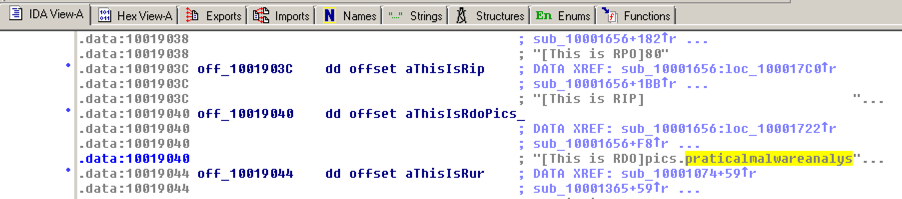
The function appears, as shown below. It loads an address named off_10019040 into register eax, adds 13 to it (0d in hexadecimal), pushes that address onto the stack, and calls gethostbyname.
Double-click off_10019040.
The Text view shows that this location contains a pointer to a string containing "praticalmalwareanalys", as shown below.
For a clearer view, click the "Hex View-A" tab.
The four bytes starting at 10019040 contain a 32-bit address in little-endian order, as highlighted in blue in the figure below. That address is 10019194. There's a series of ASCII values at that address, outlined in green in the figure below. Skipping the first 13 bytes leaves the string
pics.praticalpalwareanalysis.com
as shown below. This is the domain that will be resolved by calling gethostbyname.

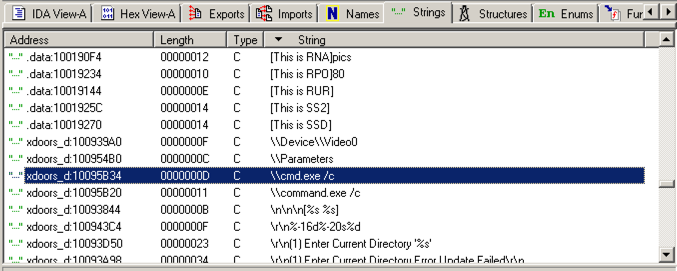
Scroll down about 3/4 of the way, and find the String "\\cmd.exe /c", as highlighted in the image below.
Double-click "\\cmd.exe /c". Click the "b>IDA View-A" tab.
The string appears in text mode, as shown below. Click in the word cmd so it's highlighted and press Ctrl+x. A "xrefs to aCmd_exeC" box appears, as shown below.
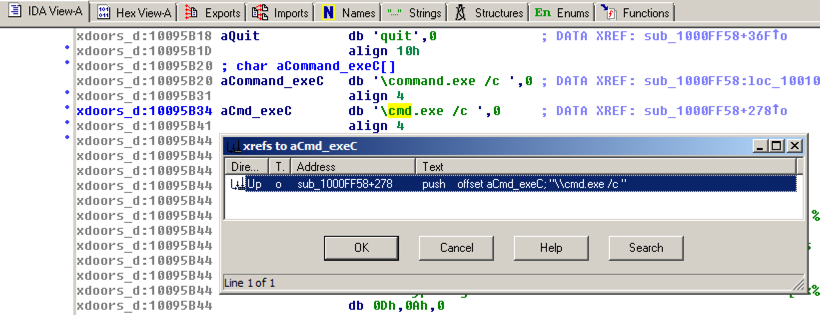
In the "xrefs to aCmd_exeC" box, double-click sub_1000FF58+278.
You see the code that uses this string. There are two boxes of code, one that starts a string with "cmd.exe -c" and the other that starts it with "command.exe /c". This looks like a remote shell, executing commands from the botmaster for either a 32-bit or 16-bit system.

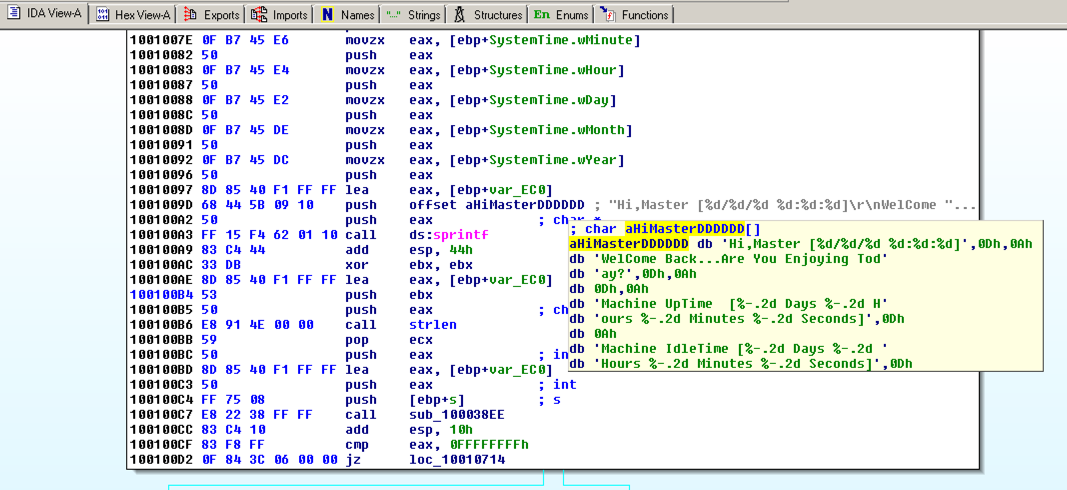
Drag the code boxes down to see the module containing "Hi, Master", as shown below.
Hover the mouse over aHiMasterDDDDDD to see more of the referenced strings, as shown below.
This looks like a message the bot sends to the botmaster, further confirming that this is a RAT (Remote Administration Tool).
Otherwise, download these files into the C:\IDA folder.
When you see the IDA window shown below, click the OK button.
Click "I Agree".
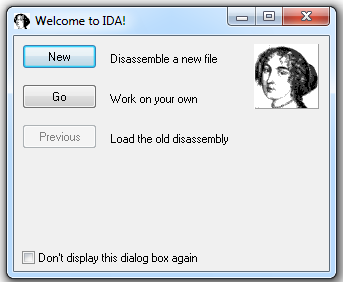
In the "Welcome to IDA!" box, as shown below, click the New button.
In the "About" box, click the OK button.
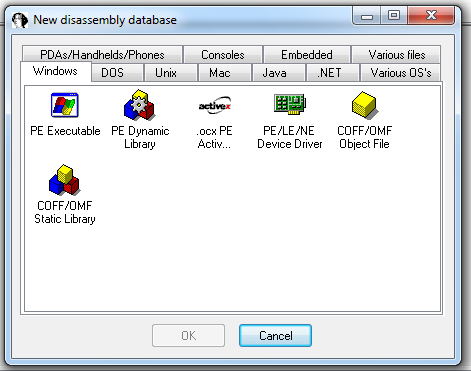
In the "New disassembly database" box, click "PE Executable", and then click OK, as shown below:
In the "Select PE Executable to disassemble" box, navigate to C:\IDA\crackme-121-1.exe and double-click it.
In the "Welcome to the PE Executable file loading Wizard" box, click the Next button, as shown below:

In the "Segment Creation" box, click Next.
In the "File loading" box, click Finish.
A box pops up saying "...the input file was linked with debug information...", as shown below. Click the Yes button.

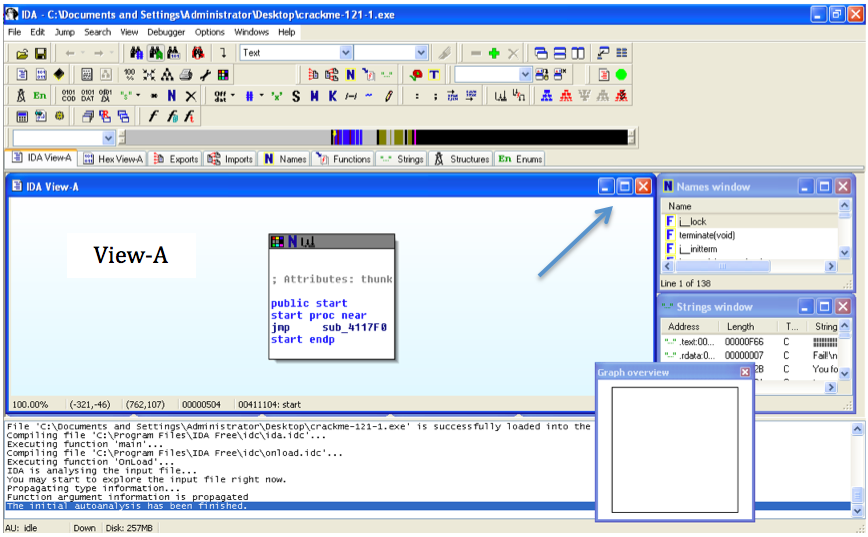
Close the "Graph Overview" box in the lower right corner.
Drag the lower border of the "View-A" pane down, to make as large a viewable area as possible.
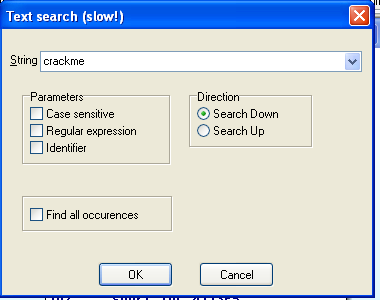
From the IDA menu bar, click Search, Text.
Search for crackme as shown below.
Click OK.
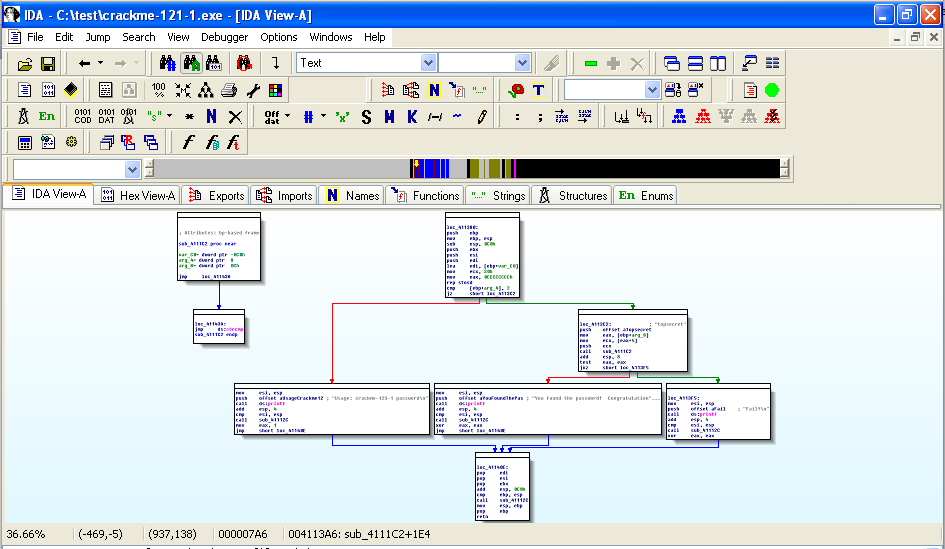
Right-click in the "View-A" box and click "Fit window", as shown below:
You should now see the entire program shown as six boxes connected by lines, as shown below. (Ignore the two extra boxes at the upper left):
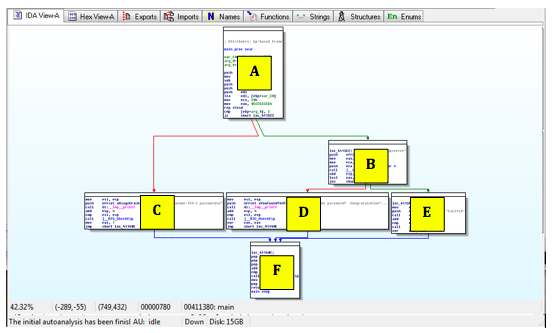
For this project, I have labelled the modules with letters as shown below:
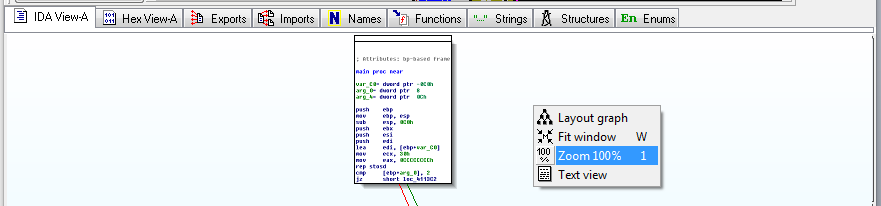
Right-click in the "View-A" box and click "Zoom 100%", as shown below:
Click and drag the "View-A" display as needed to make module A visible, as shown below:
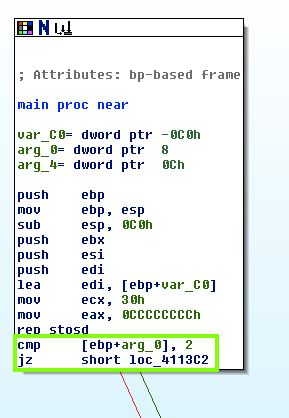
The assembly code is hard to read, but you don't need to understand it all. Focus on the last two instructions:
cmp          [ebp+arg_0], 2

jz           short loc_4113C2
This compares some number to 2 with the cmp (Compare) operation, and jumps to a different module if it is 2, using the jz (Jump if Zero) operation.
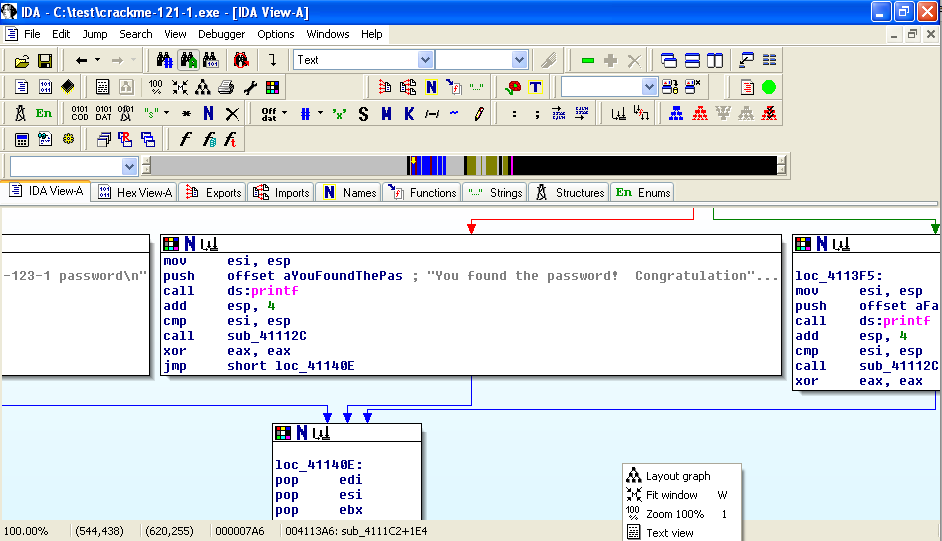
Drag the "View-A" display to make Module C visible, as show below:
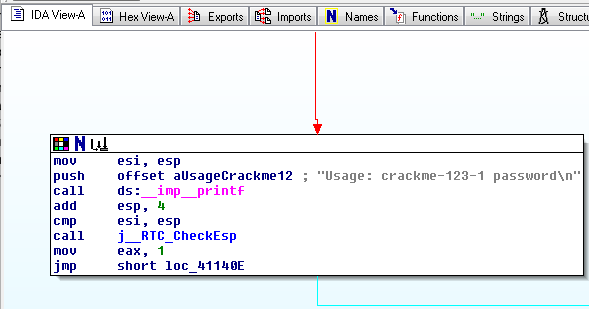
Notice the gray readable text on the right side, saying "Usage: crackme-121-1 password".
This module pushes those characters onto the stack with a push command, and then calls the printf function with the call ds:_imp_printf command.
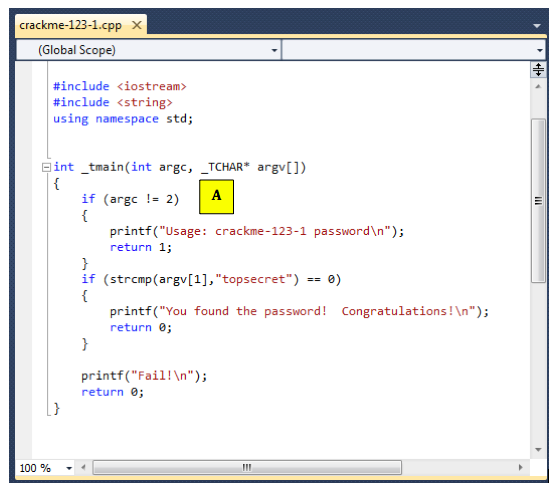
The figure below shows the C statements that comple to the "C" module:
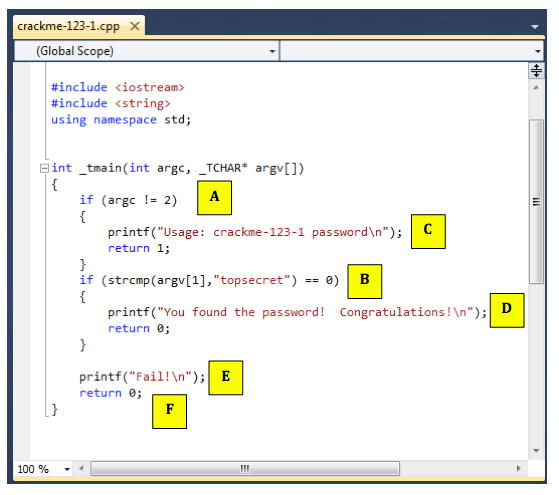
Follow along in IDA Pro and make sure you see what each of the six modules do, and how they correspond to the C source code.
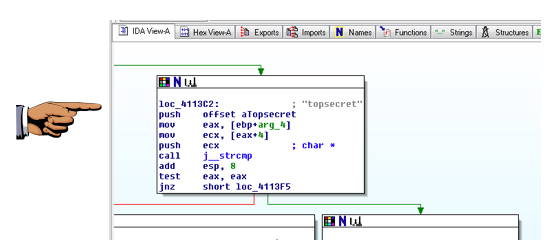
The password "topsecret" is visible.
In the Command Prompt window, execute these commands:
cd \IDA

crackme-121-1
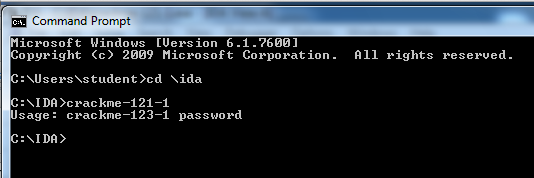
This message is telling you that you need to add a password after the "crackme-121-1".
In the Command Prompt window, execute this command:
crackme-121-1 wrongpassword
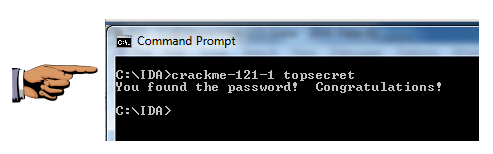
In the Command Prompt window, execute this command:
crackme-121-1 topsecret
The password is the flag.
The password is the flag.
The flag is that complete command line, like this:
notepad.exe topsecret