PMA 420: Bootkit Analysis with Bochs (15 pts)
What You Need
- A Windows machine. It works on either a server or client version.
Purpose
To examine a bootkit using the Bochs emulator.
We will debug the Master Boot Record (MBR) and
Volume Boot Record (VBR) that are used by the BIOS
when starting a PC, before the operating system
loads.
WARNING: Real Malware
This project uses real malware. You need to use
an isolated machine with no important data on it,
and you'll need to disable security software.
Source
This project follows chapter 9 of this book:
Rootkits and Bootkits: Reversing Modern Malware and Next Generation Threats
Preparing a Windows Machine
If you are using the Windows 11 with tools machine from project
PMA 41, everything you need is already installed, and Windows
Defender is already set up to exclude the C: drive.
If you are using some other Windows machine,
follow the steps below to install Immunity and turn
off Defender.
Install the Immunity Debugger
from here:
https://www.immunityinc.com/products/debugger/
We don't need Immunity, but we need Python, which it installs.
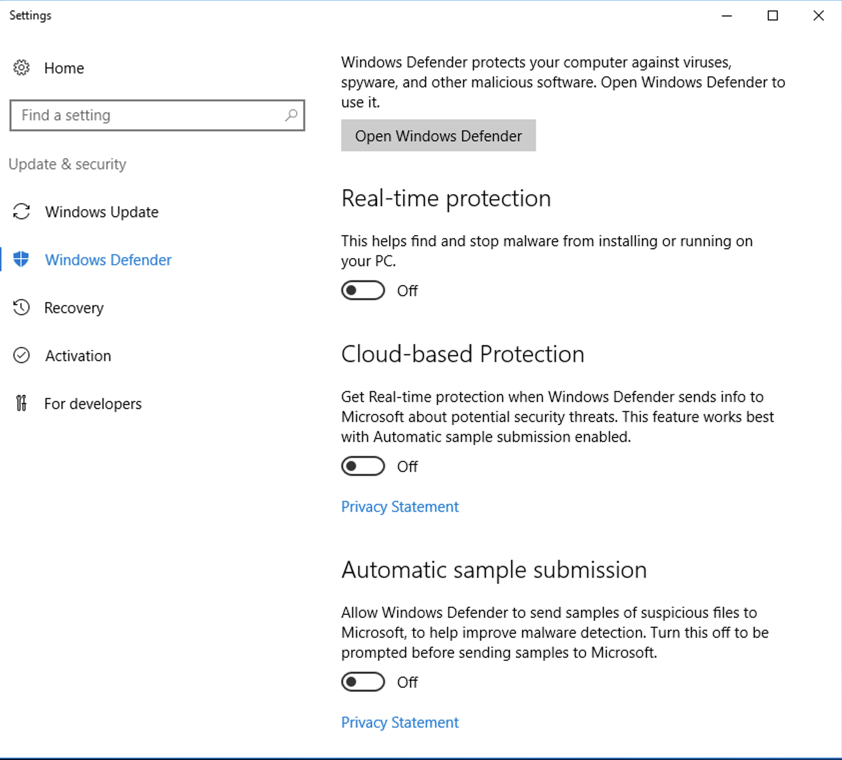
Turning Off Windows Defender
Windows Defender will delete this sample,
so it must be disabled.
Click Start and type DEFENDER.
In the search results, click
"Windows Defender settings".
Turn off the first three options,
as shown below.
Installing Bochs
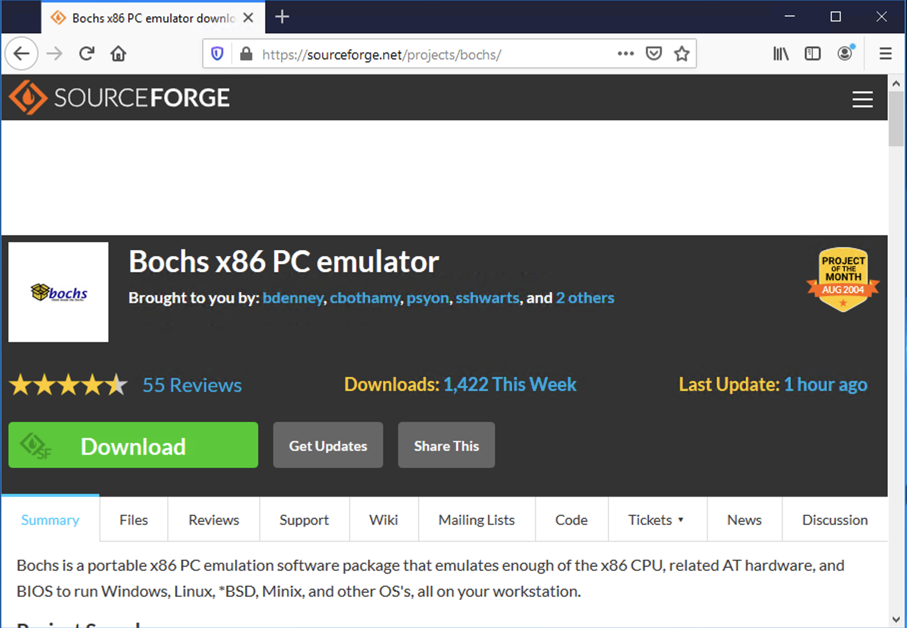
On your Windows machine, in Firefox, go to
https://sourceforge.net/projects/bochs/
Click Download,
as shown below.
The download froze on my machine, with a
"5" just sitting there in a green circle.
If that happens, click the
"Problems Downloading" button.
Then click "direct link".
Click the "Save File button.
In your Downoads folder, double-click the
Bochs-2.6.9.exe file.
Install the software with the default options.
|
Downloading Component Files
On your Windows machine, in Firefox, right-click the link below
and save the file.
bootkits-master.7z
If you don't have it, install 7-Zip from
7-Zip.org
Unzip the archive with 7-Zip. Use the password
malware.
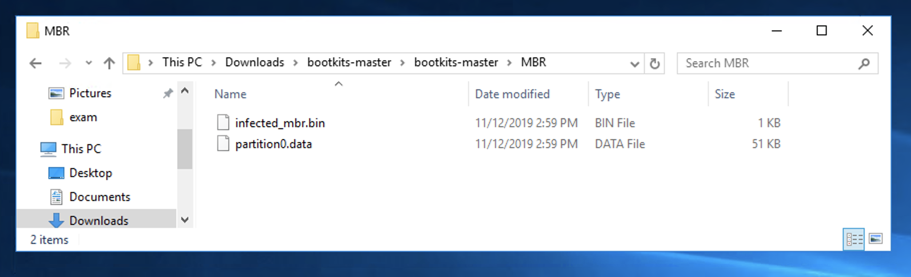
Double-click the bootkits-master
folder and
double-click the MBR
folder to find the two files you need,
as shown below.
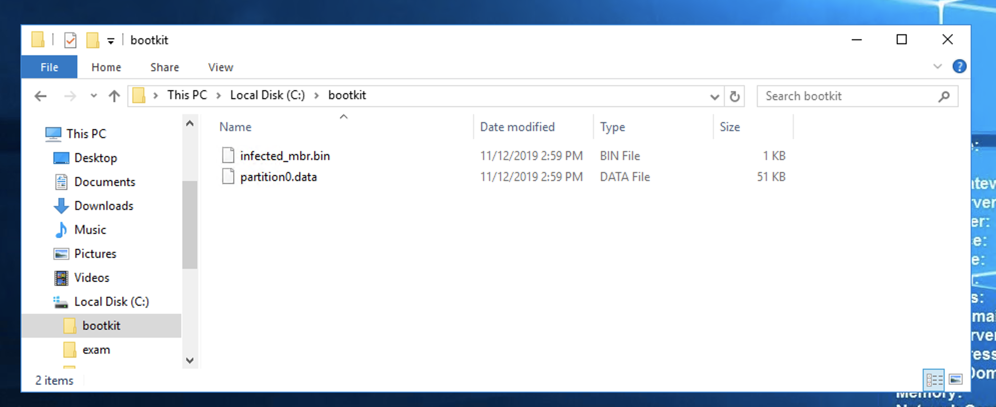
Creating a Working Folder
Open a new File Explorer window.
Navigate to the root of C:.
Create a folder named C:\bootkit.
Copy the two files you obtained in the previous
section to this folder,
as shown below.
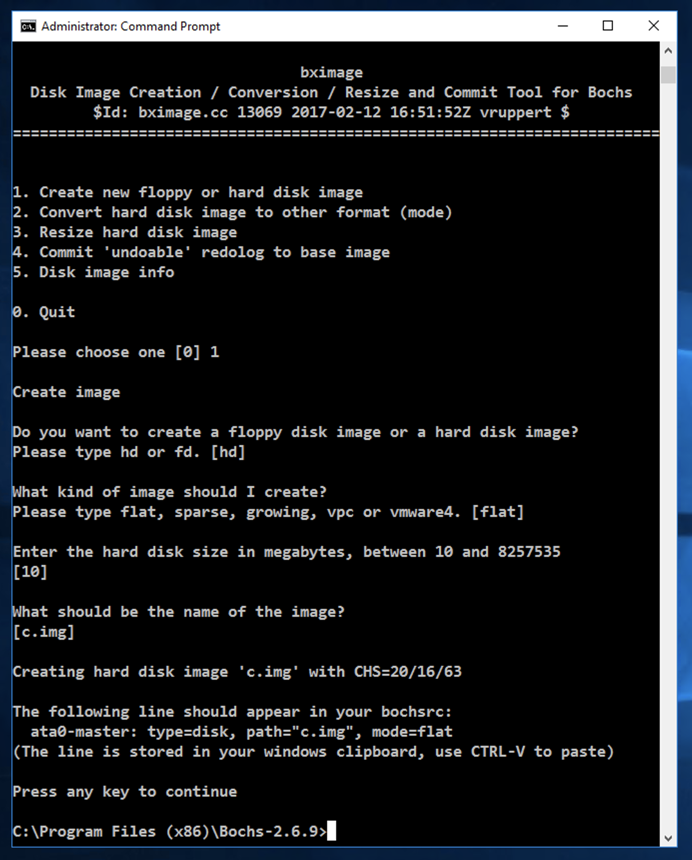
Creating a Bochs Disk Image
Open an Administrator Command Prompt.
In the User Account Control box, click
Yes.
In the Administrator Command Prompt window,
execute this command:
setx path "%path%;C:\Program Files\Bochs-2.6.9"
Close the Administrator Command Prompt
window.
Open a new
Administrator Command Prompt
window.
In the Administrator Command Prompt window,
execute these commands:
cd C:\Program Files\Bochs-2.6.11
bximage.exe
The "bximage" tool launches,
as shown below.
Enter these items:
- 1 to create a new image
- Enter for "hd"
- Enter for "flat"
- Enter for 512 byte hard disk sectors
- Enter for size "10"
- Enter to accept the default name of "c.img"
- Enter to continue and exit bximage
Creating the Configuration File
This configuration file
describes the virtual x86 PC that Bochs will emulate.
In the Administrator Command Prompt window,
execute these commands:
notepad bochsrc.bxrc
A Notepad box pops up, asking if you
want to create a new file.
Click Yes.
Enter this text into Notepad,
as shown below.
megs: 512
romimage: file="BIOS-bochs-latest"
vgaromimage: file="VGABIOS-lgpl-latest"
boot: cdrom, disk
ata0-master: type=disk, path="c.img", mode=flat
mouse: enabled=0
cpu: ips=90000000
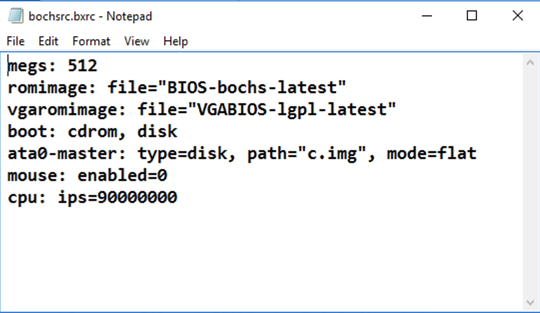
In Notepad, click File,
Save.
Close Notepad.
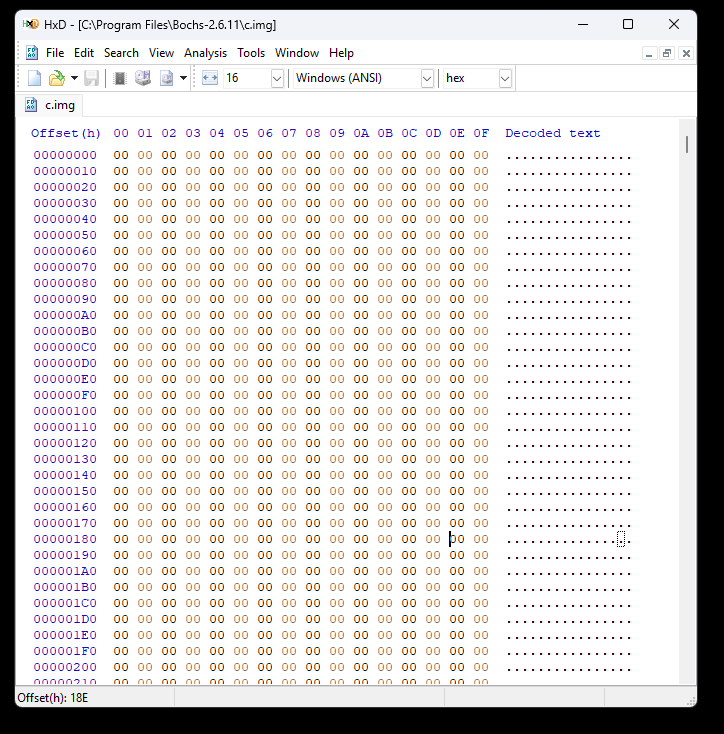
Examining the Original Disk Image with HxD
If you don't have HxD, get it here:
https://mh-nexus.de/en/hxd/
Launch HxD and open this file:
C:\Program Files\Bochs-2.6.11\c.img
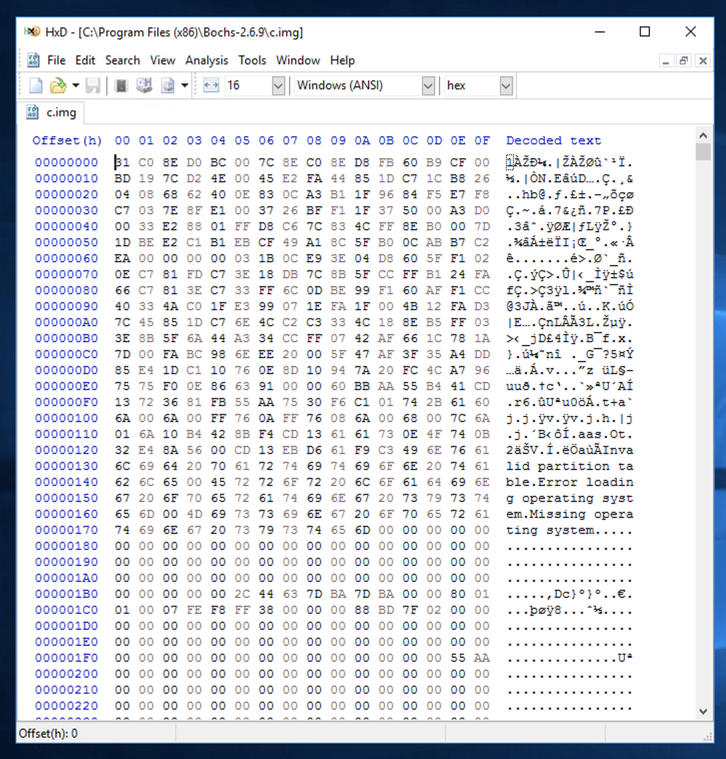
The disk image is empty, containing only
zeroes,
as shown
below.
Infecting the Disk Image
We need to copy the infected Master
Boot Record (MBR) to the disk image.
We'll use Python to do that.
In the Administrator Command Prompt window,
execute these commands:
cd c:\Windows
mklink /H python.exe c:\python27\python.exe
Close the Administrator Command Prompt
window.
Open a new
Administrator Command Prompt
window.
In the Administrator Command Prompt window,
execute these commands:
cd C:\Program Files\Bochs-2.6.11
copy C:\bootkit\infected_mbr.bin .
copy C:\bootkit\partition0.data .
notepad infect.py
A Notepad box pops up, asking if you
want to create a new file.
Click Yes.
Enter this text into Notepad,
as shown below.
mbr_file = open("infected_mbr.bin", "rb")
mbr = mbr_file.read()
mbr_file.close()

disk_image_file = open("c.img", "r+b")
disk_image_file.seek(0)
disk_image_file.write(mbr)
disk_image_file.close()
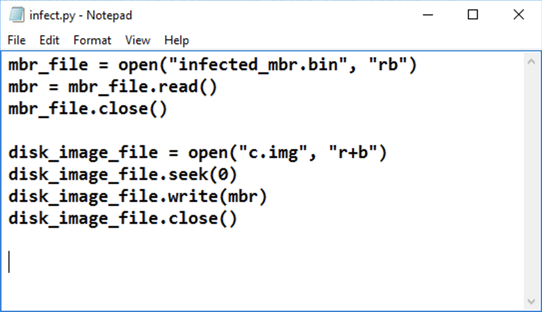
In Notepad, click File,
Save.
Close Notepad.
In the Administrator Command Prompt window,
execute this command:
python infect.py
Examining the Infected Disk with HxD
In HxD, click View, Refresh.
The file contains some binary
data,
and some readable text,
as shown
below.
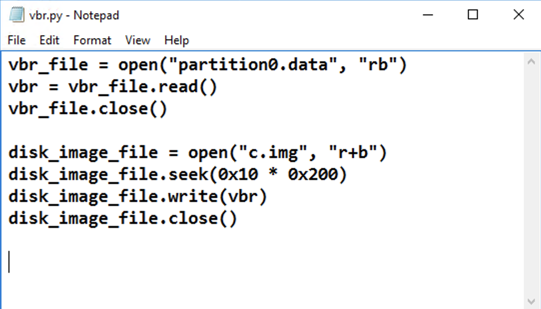
Writing the VBR and IPL to the Disk Image
Now we need to copy the Volume Boot Record (VBR)
and the Initial Program Loader (IPL)
to the disk image.
In the Administrator Command Prompt window,
execute these commands:
cd C:\Program Files\Bochs-2.6.11
notepad vbr.py
A Notepad box pops up, asking if you
want to create a new file.
Click Yes.
Enter this text into Notepad,
as shown below.
vbr_file = open("partition0.data", "rb")
vbr = vbr_file.read()
vbr_file.close()

disk_image_file = open("c.img", "r+b")
disk_image_file.seek(0x10 * 0x200)
disk_image_file.write(vbr)
disk_image_file.close()
In Notepad, click File,
Save.
Close Notepad.
In the Administrator Command Prompt window,
execute this command:
python vbr.py
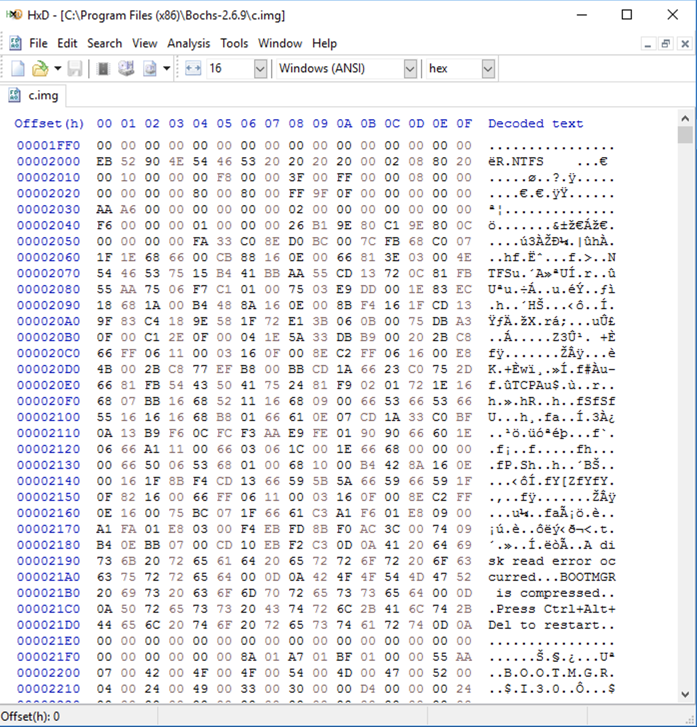
Examining the Infected Disk with HxD
In HxD, click View, Refresh.
Scroll down to Offset 2000 to
see the newly written data,
as shown below.
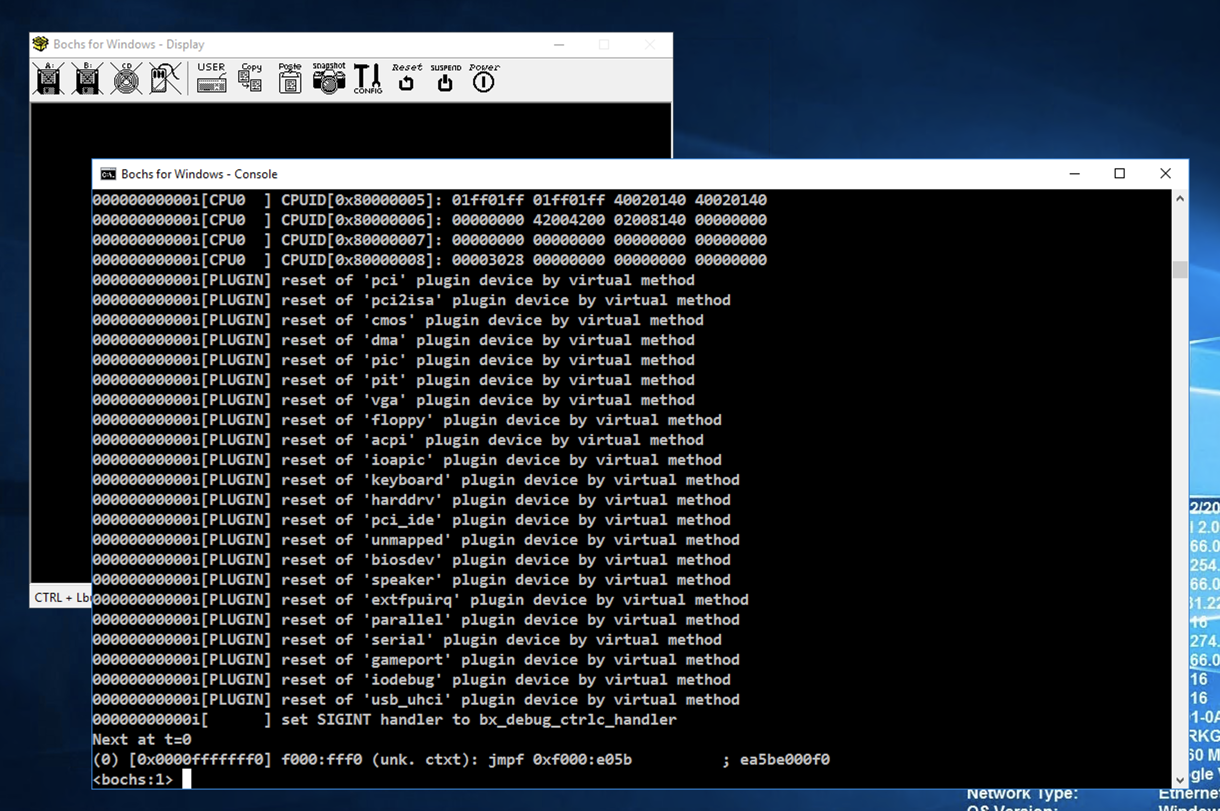
Using the Bochs Internal Debugger
In the Administrator Command Prompt window,
execute these commands:
cd C:\Program Files\Bochs-2.6.11
bochsdbg.exe -q -f bochsrc.bxrc
The virtual machine launches, showing
a dark screen. Click in the
"Bochs for Windows - Console" window to
bring it to the front,
as shown below.
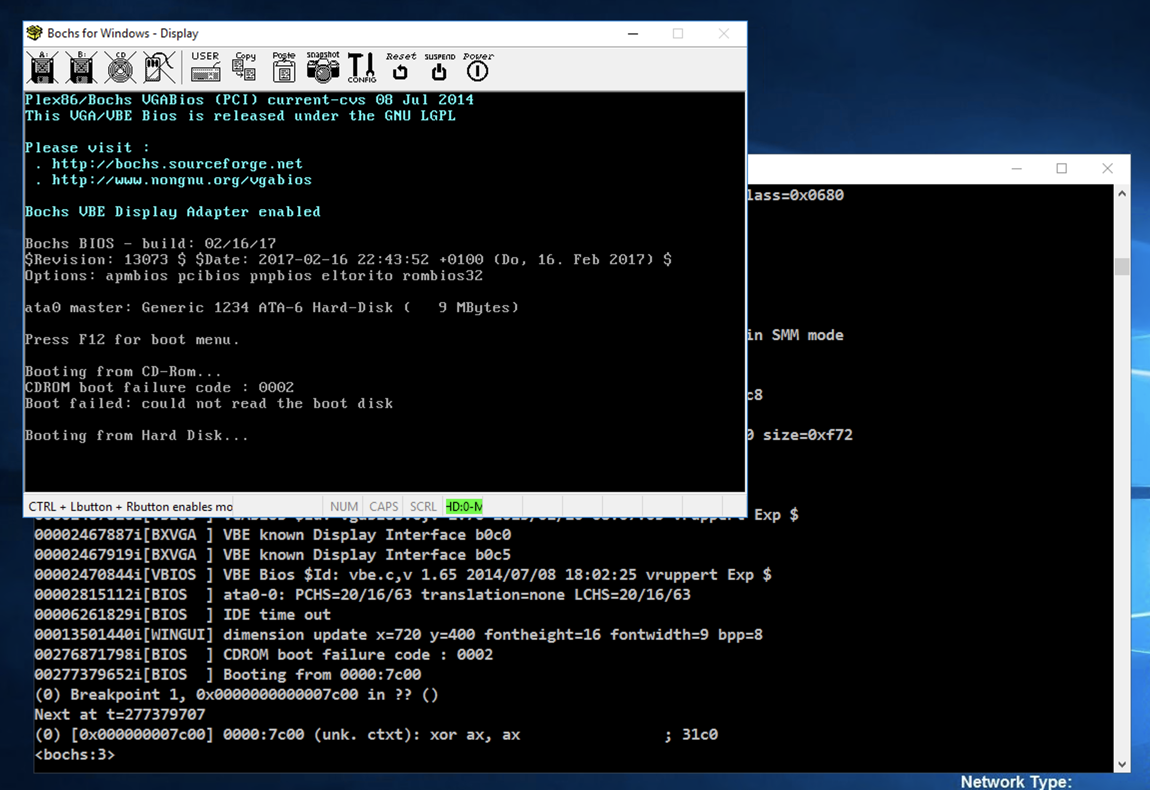
At the *lt;bochs:1> prompt,
execute these commands to set a breakpoint
at the start of the MBR code and commence
execution:
lb 0x7c00
c
The bootup sequence begins,
as shown below.
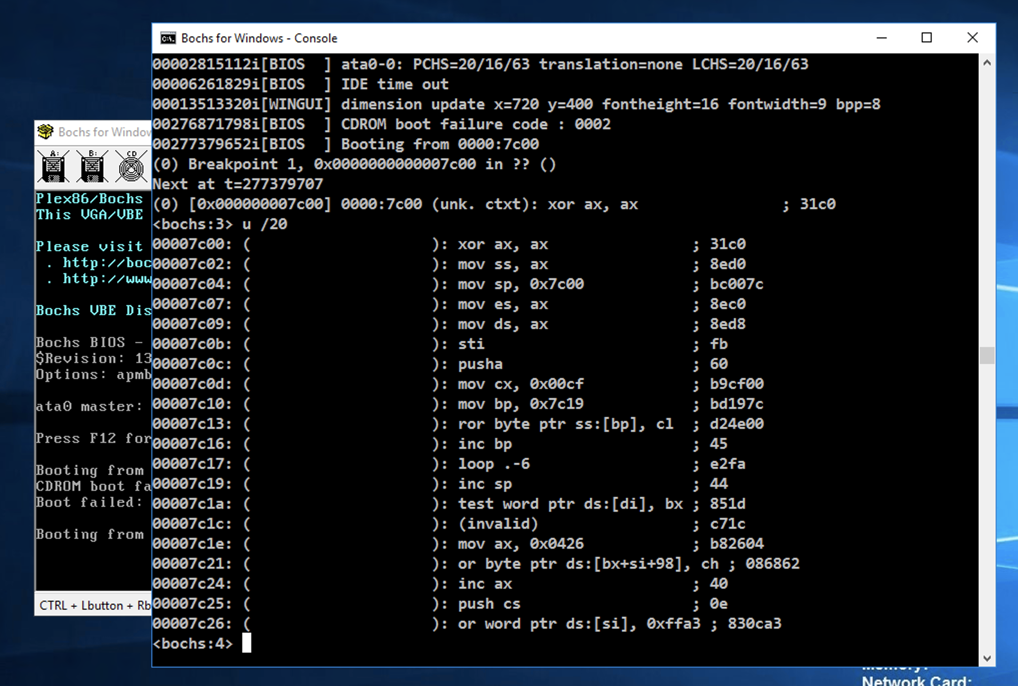
At the *lt;bochs:1> prompt,
execute this command to unassemble
the first 20 commands:
u /20
The assembly instructions appear,
starting with xor ax, ax,
as shown below.
This is a decryptor that unscrambles the
data starting at 0x7c19.
notice the invalid data at
address 0x7c1c.
Flag PMA 420.1: Viewing the Decrypted Code (15 pts)
In the "Select Bochs for Windows - Console" window,
execute these commands to set a breakpoint
after the decryption process, commence
execution, and unassemble ten commands:
lb 0x7c19
c
u /10
The code at 0x7c19 is decrypted,
as shown below. Find the flag,
which is covered by a green rectangle
in the image below.

|
Exiting Bochs
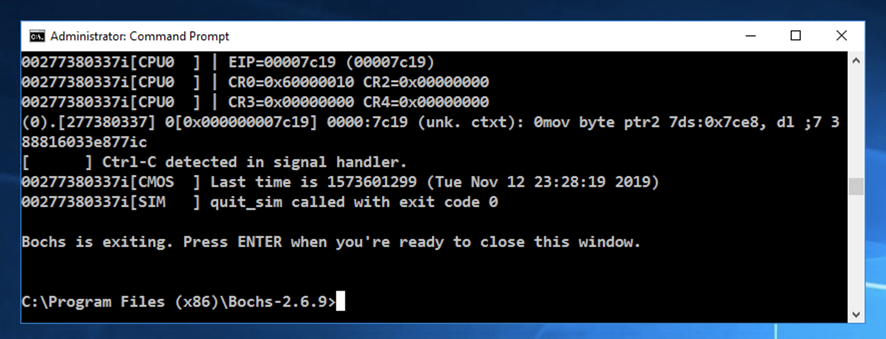
Click in the
"Bochs for Windows - Console" window.
Press Ctrl+C twice.
After a few seconds, the virtual machine
closes. Press Enter to return to
the normal Windows prompt,
as shown below.
Posted 11-12-19
"Flag" wording removed for HxD image 11-25-19
Encrypted file used to avoid Firefox malware blocking; ported to new 64-bit version of Bochs 11-7-20
Background color changed 4-24-24
Python hard link added 4-17-25
Minor updates for Windows 11 4-16-26