Click "Disk Images". Click "FreeDos", as shown below.
Alternate Download Link
If that site fails, get the file here.

Click fdos-10meg.tar.gz. Click "Problems Downloading?". Click "direct link". Save the file in your Downloads folder.
Right-click the fdos-10meg.tar.gz file and click 7-Zip, "Extract Here".
A new file appears named fdos-10meg.tar. Right-click it and extract it the same way.
A folder appears, named fdos-10meg. Move that folder to
C:\Program Files\Bochs-2-6-11
In the User Account Control box, click Yes.
In the Administrator Command Prompt window, execute these commands:
cd C:\Program Files\Bochs-2.6.11\fdos-10meg
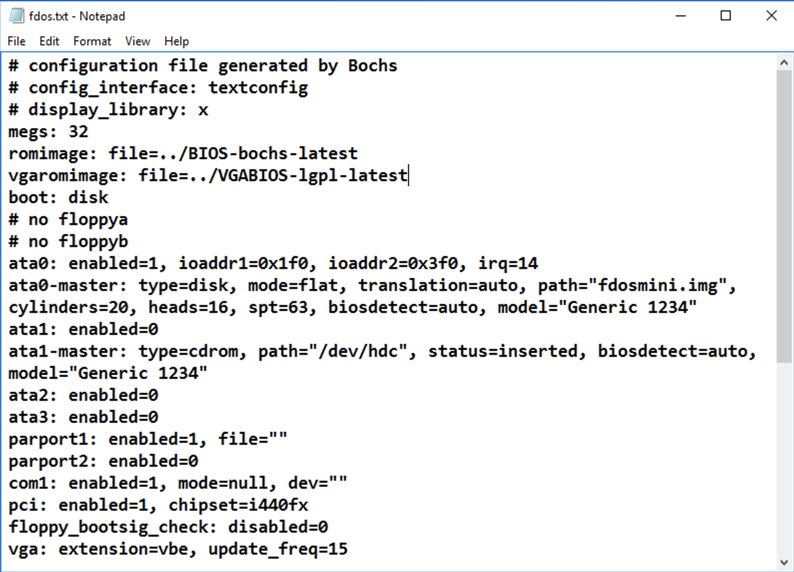
notepad fdos.txt
# configuration file generated by Bochs
# config_interface: textconfig
# display_library: x
megs: 32
romimage: file=../BIOS-bochs-latest
vgaromimage: file=../VGABIOS-lgpl-latest
boot: disk
# no floppya
# no floppyb
ata0: enabled=1, ioaddr1=0x1f0, ioaddr2=0x3f0, irq=14
ata0-master: type=disk, mode=flat, translation=auto, path="fdosmini.img", cylinders=20, heads=16, spt=63, biosdetect=auto, model="Generic 1234"
ata1: enabled=0
ata1-master: type=cdrom, path="/dev/hdc", status=inserted, biosdetect=auto, model="Generic 1234"
ata2: enabled=0
ata3: enabled=0
parport1: enabled=1, file=""
parport2: enabled=0
com1: enabled=1, mode=null, dev=""
pci: enabled=1, chipset=i440fx
floppy_bootsig_check: disabled=0
vga: extension=vbe, update_freq=15
keyboard: serial_delay=250, paste_delay=100000, type=mf, user_shortcut=none
cpu: ips=15000000
mouse: enabled=0
private_colormap: enabled=0
clock: sync=none
# no loader
log: bochsout.txt
logprefix: %t%e%d
debugger_log: -
panic: action=fatal
error: action=report
info: action=report
debug: action=ignore
# no cmosimage
In Notepad, click File, Save. Close Notepad.
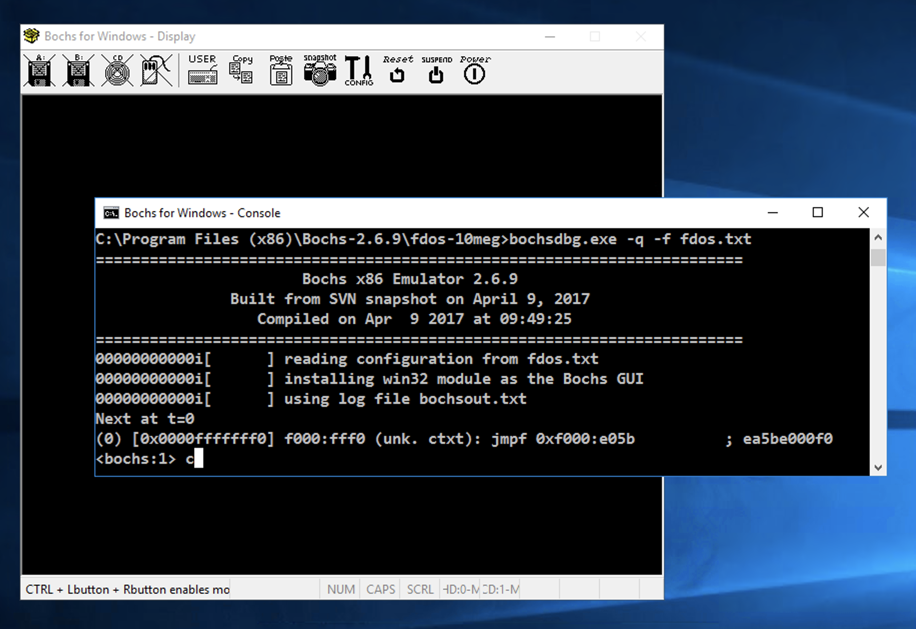
In the Administrator Command Prompt window, execute this command:
..\bochsdbg.exe -q -f fdos.txt
The Command Prompt window shows
a <bochs:1>
prompt.
Click in the Command Prompt window and execute this command, as shown below.
c
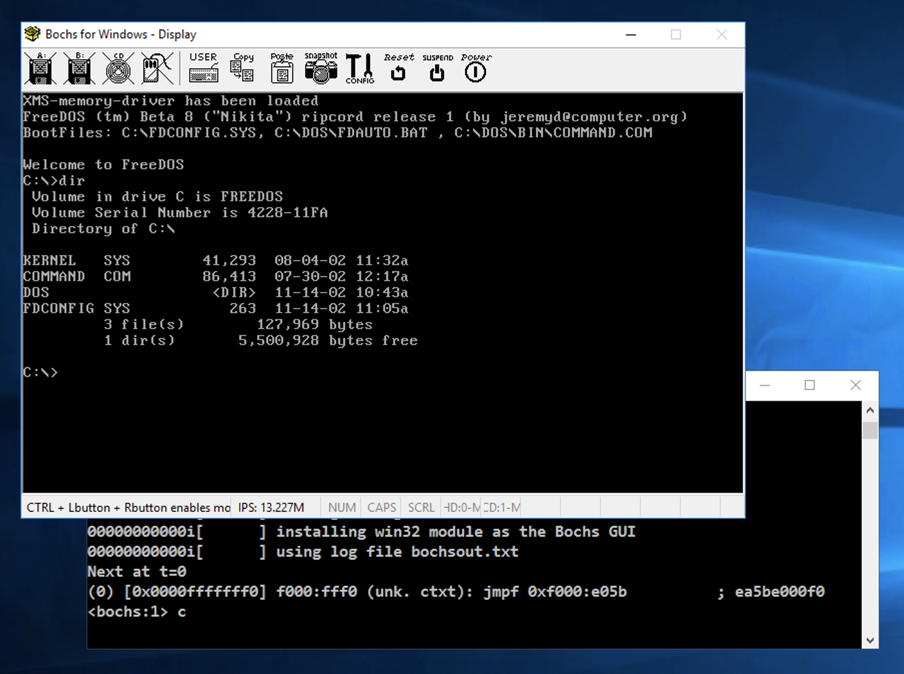
Click in the emulator window.
At the C:\
prompt,
enter this commands:
dir
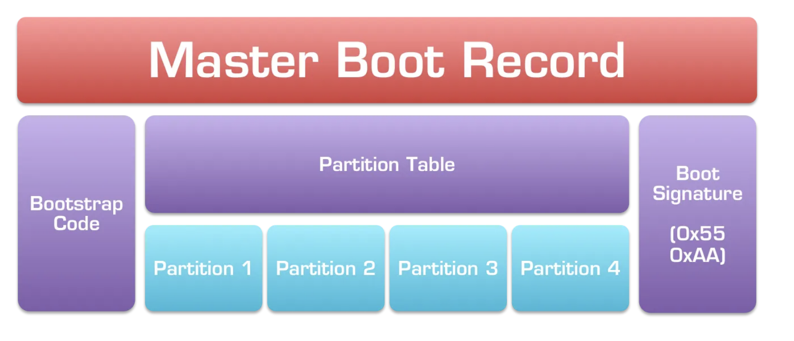
The figure below shows its structure, from : this page.
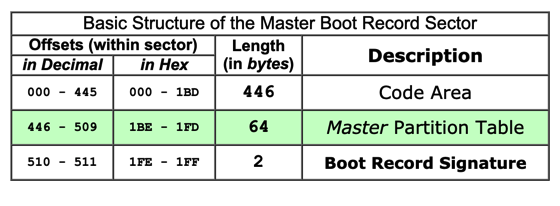
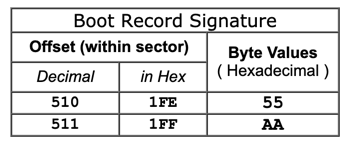
The last two bytes are always 55 AA:
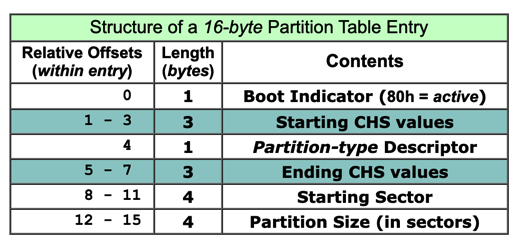
The partition table is 64 bytes long, consisting of four entries:

Each 16-byte parition record has this structure. The CHS values specify a location on a hard disk by Cylinder, Head, and Sector numbers.
C:\Program Files (x86)\Bochs-2.6.9\fdos-10meg\fdosmini.img
Notice these features, as shown below:
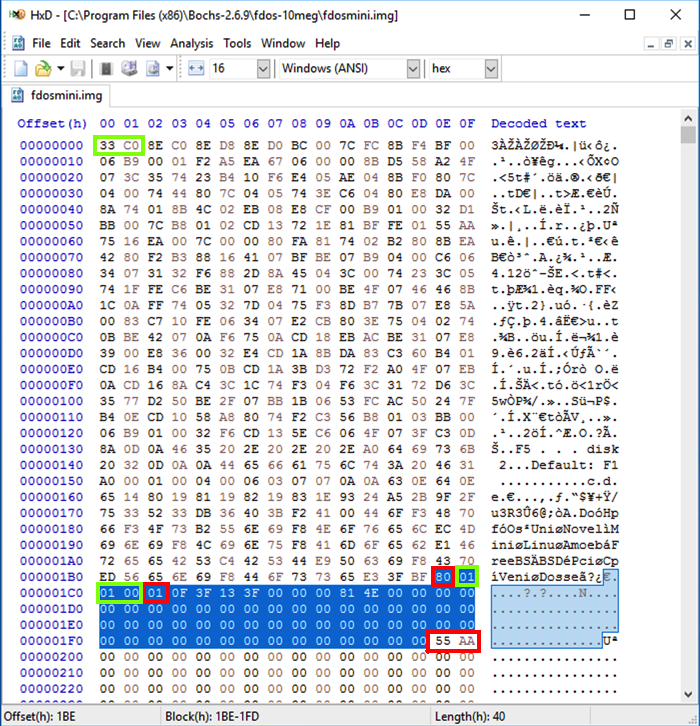
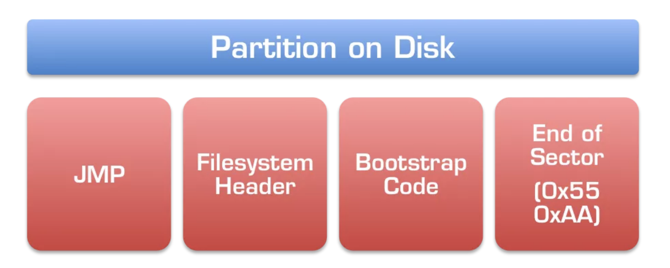
The Partition Boot Record (PBR) is the first 512 bytes of an active partition, as explained here.
Notice these items, as shown below.

..\bochsdbg.exe -q -f fdos.txt
The Command Prompt window shows
a <bochs:1>
prompt.
Click in the Command Prompt window and execute these commands, as shown below.
r
trace on
s
The "trace on" command tells the debugger to display each instruction as it executes it.
The "s" command performs one instruction (a "step").
As shown below, the first instruction is a jmpf to the address 0xf000:e05b
The next instruction is at location fe05b. This is the way addressing works in 20-bit real mode, which is a very old addressing mode used during boot-up.

To do that, execute these commands, which set a breakpoint at 7c00, turn off tracing, and continue executing.
(Note that the first command begins with lowercase LB and does not begin with the numeral "one".)
lb 0x7c00
trace off
c
Note these items:
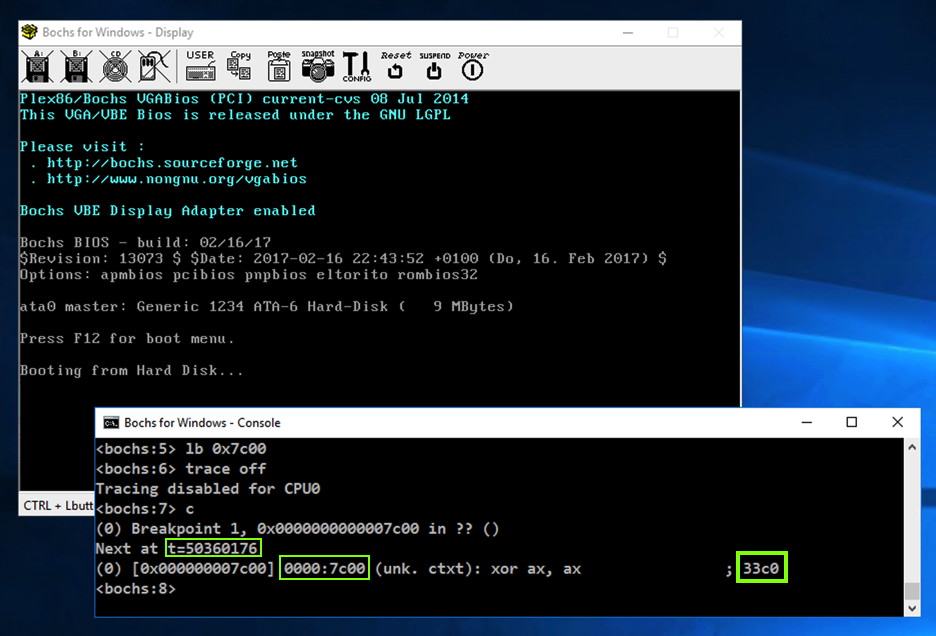
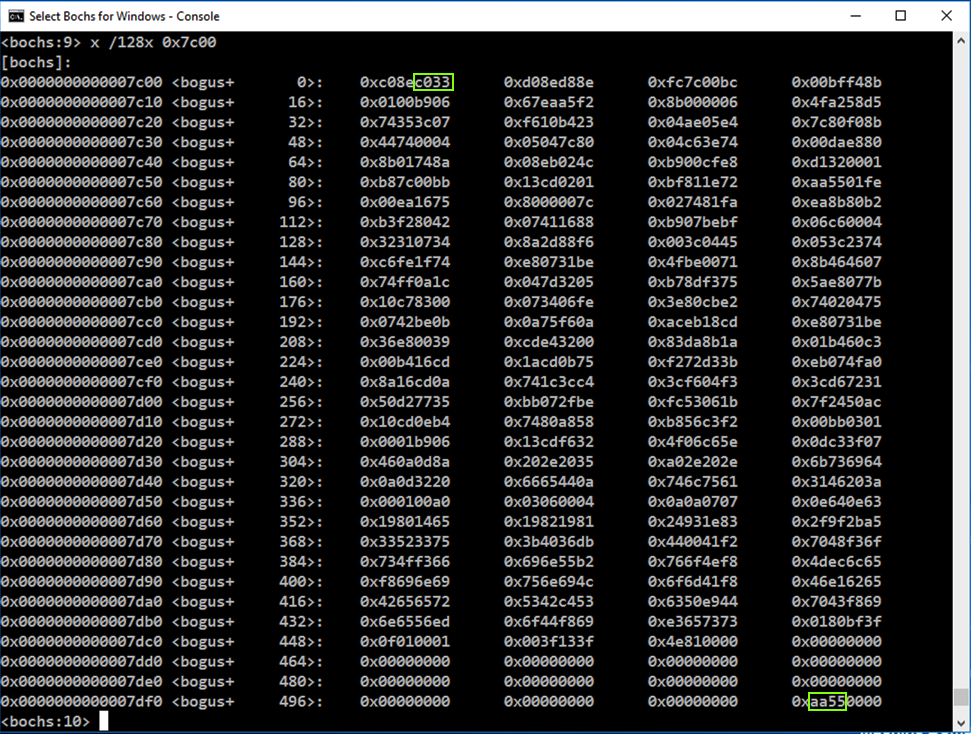
x /128x 0x7c00
Since Intel is little-endian, the bytes are out of order, filing in from the right side of each word first.
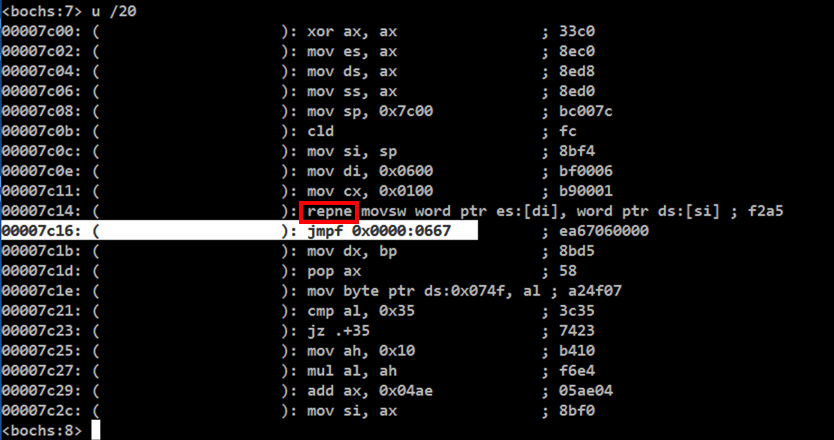
In the Bochs Console window, at the <bochs:8> prompt, execute this command:
u /20
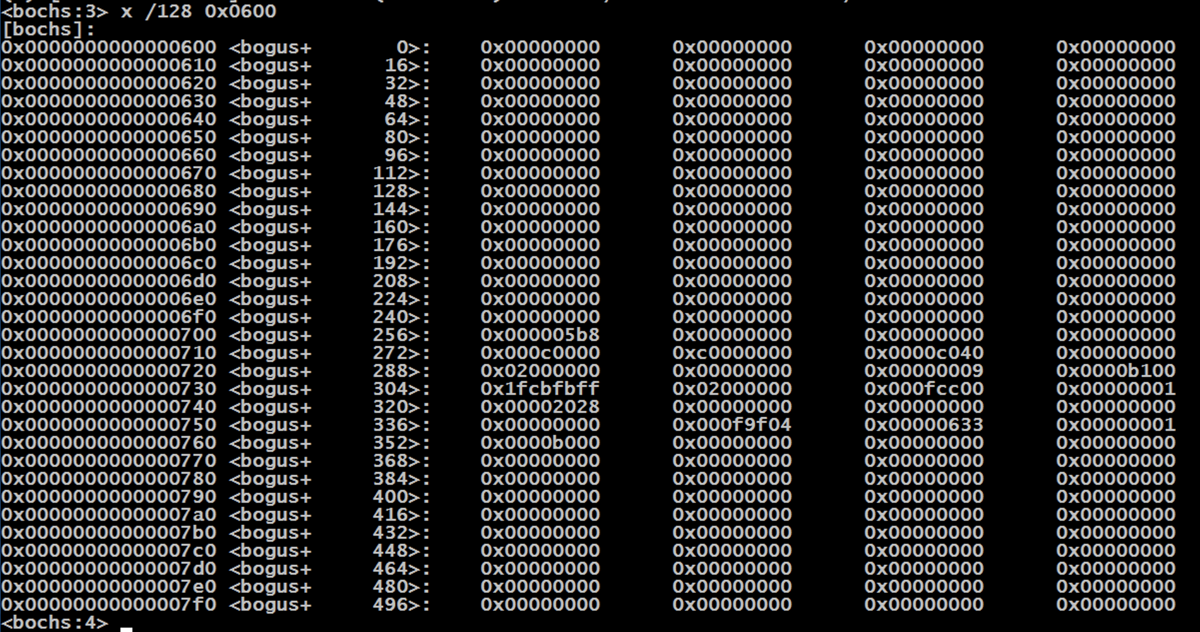
To see the data at 0x0600, execute this command:
x /128 0x0600
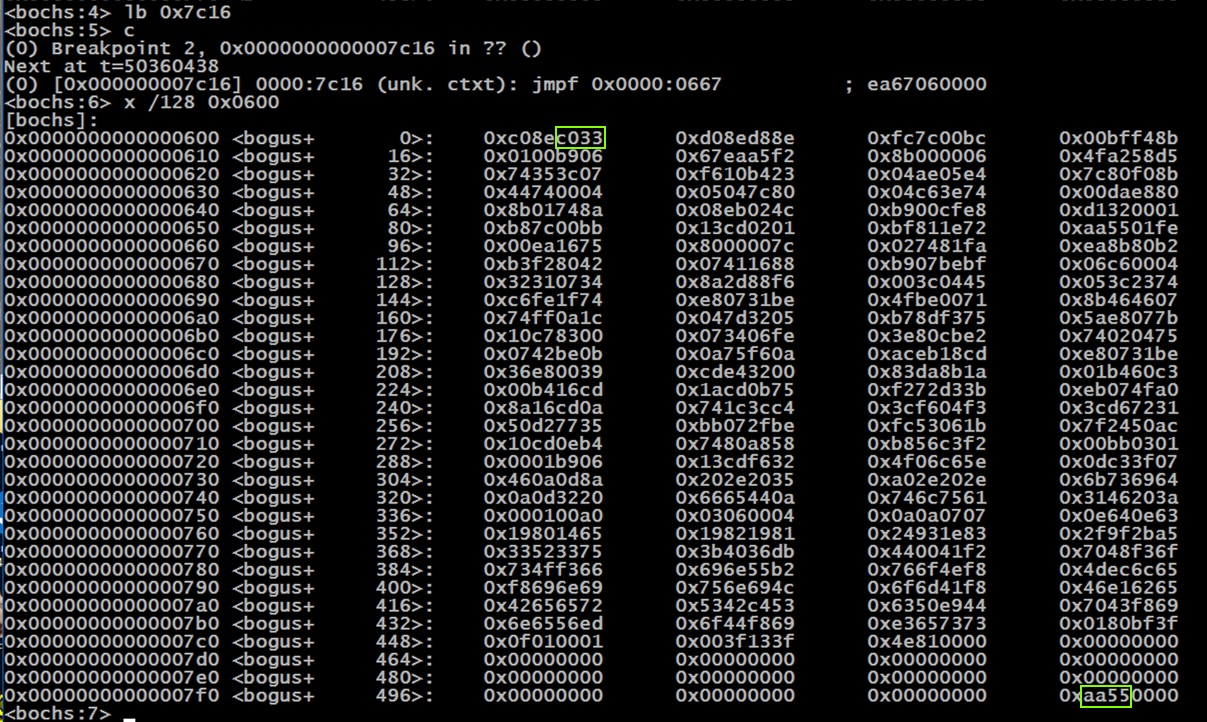
To proceed to the jmpf, execute these commands:
lb 0x7c16
c
x /128 0x0600
To proceed through the jmpf, execute these commands:
trace on
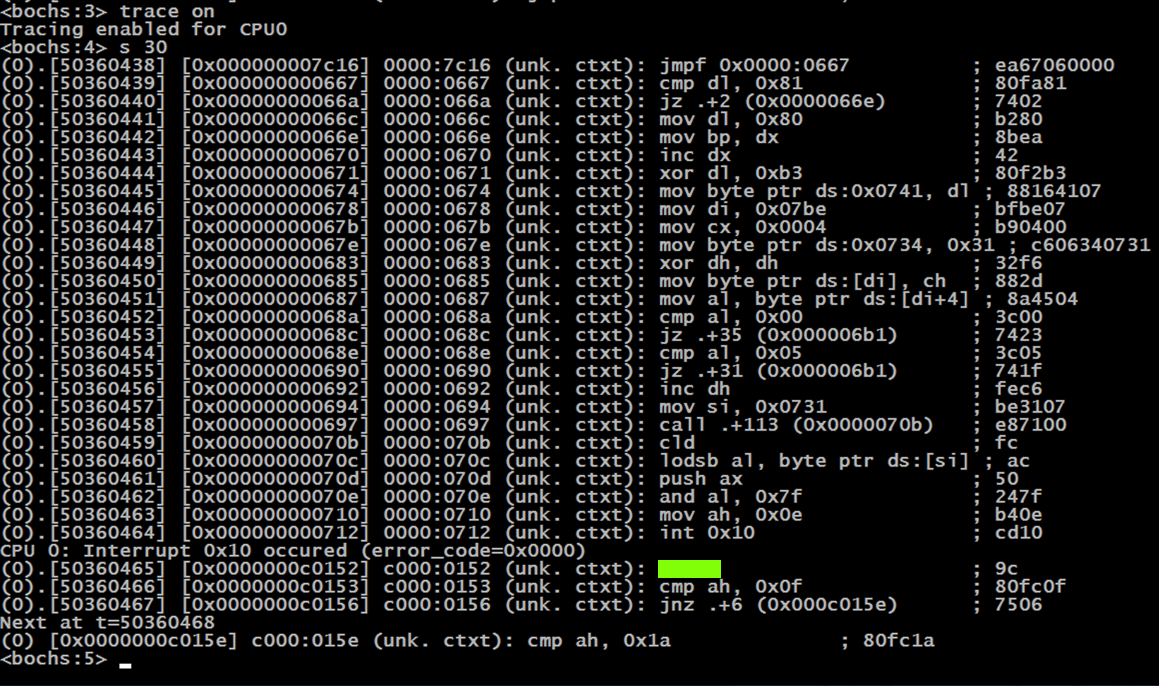
s 30
To see the characters one by one, execute these commands:
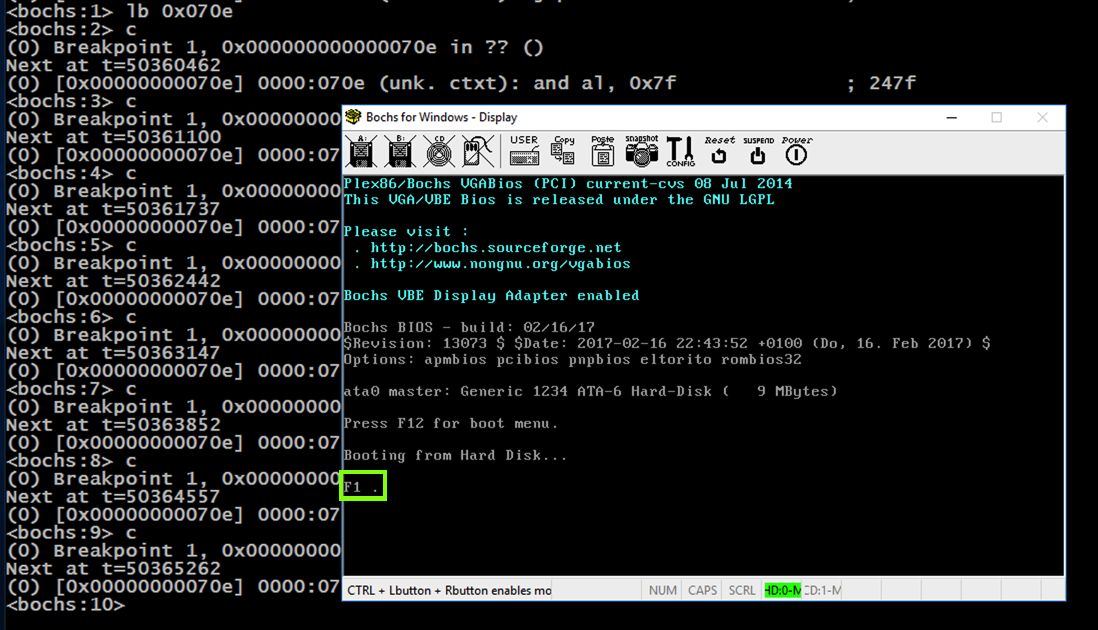
Flag PMA 421.1: BIOS Command (15 pts)
As shown below, the processor proceeds from 0x0667 through 0x0712 and then executes an "Interrupt 0x10", which types out a character.The flag is covered by a green rectangle in the imager below.
trace off
lb 0x070e
c
c
c
c
c
c
c
c
Close Bochs.
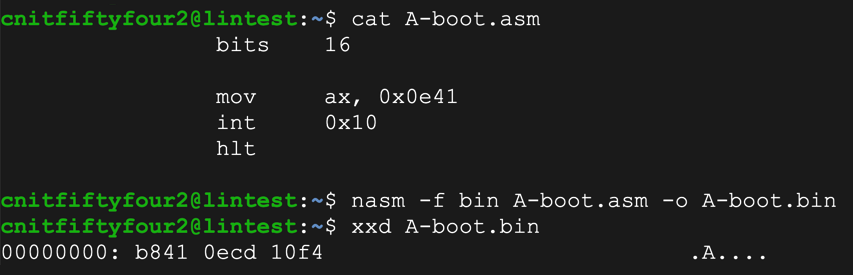
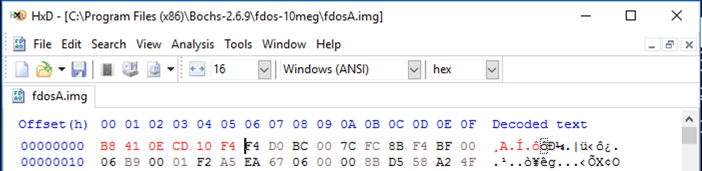
Copy the "fdosmini.img" file to a file named "fdosA.img".
Edit it to begin with the object code to print an "A", as shown below.
Copy the "fdos.txt" file to a file named "fdosA.txt". Edit it to boot from "fdosA.img" and run it.
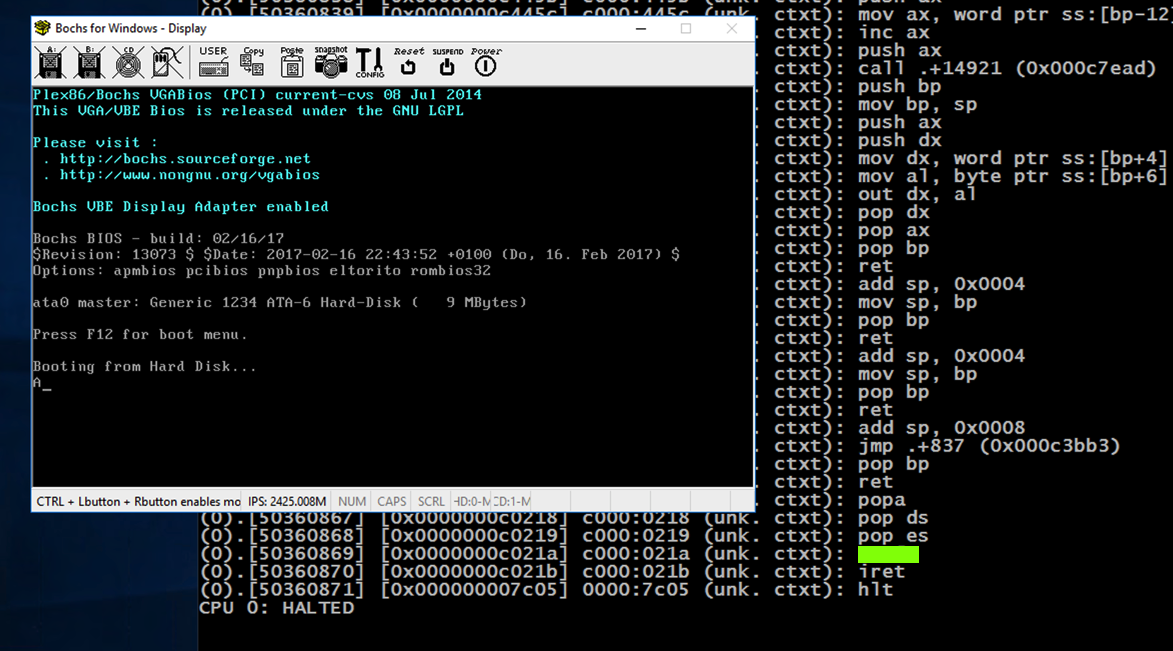
Flag PMA 421.2: "A" Bootloader (10 pts extra)
In the Bochs command window, execute these commands:The flag is covered by a green rectangle in the image below.
               bits       16

start:
               mov     bx, 0x7c11
               mov     ah, 0x0e                ; print char service
.loop          mov     al, [bx]
               or      al, al                  ; end of string?
               jz      halt
               inc     bx
               int     0x10                    ; print char
               jmp     .loop                   ; next char

halt:          hlt                             ; halt

msg:           db        "Cyber Hacker!", 0
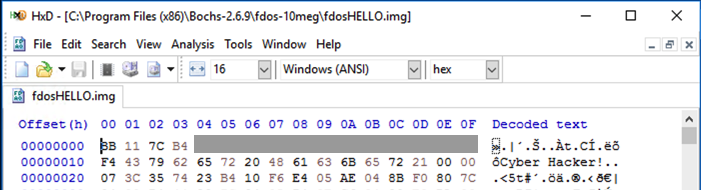
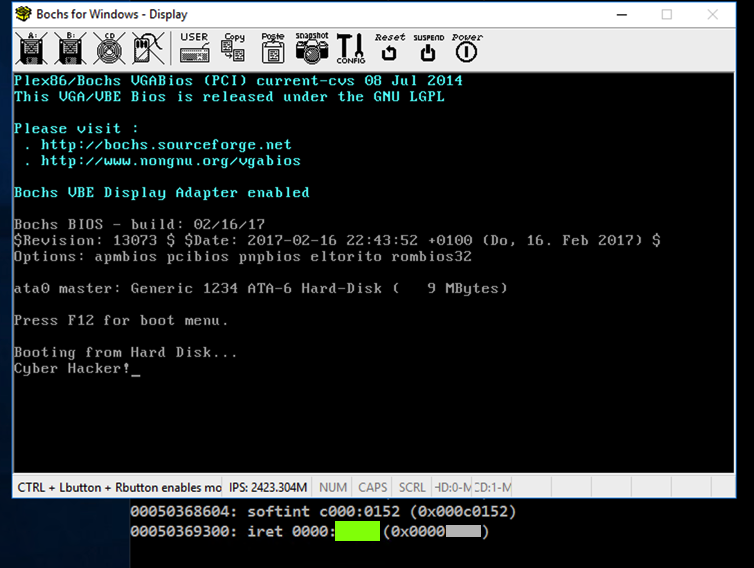
Flag PMA 421.3: "Cyber Hacker!" Bootloader (15 pts extra)
In the Bochs command window, execute these commands:The flag is covered by a green rectangle in the image below.
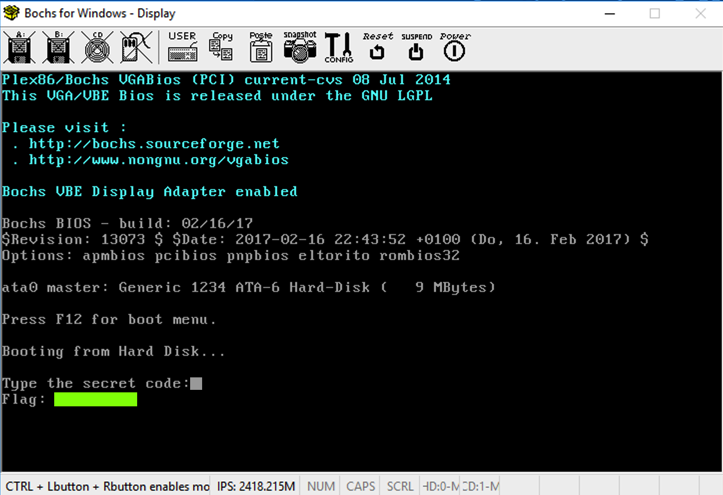
Flag PMA 421.4: Secret code (15 pts extra)
Download, unzip, and run this system:Enter the secret code to see the flag, as shown below:
Flag PMA 421.5: Secret code #2 (25 pts extra)
Download, unzip, and run this system:Enter the secret code to see the flag, as shown below: