PMA 41: Windows 11 with Analysis Tools
tracert 1.1.1.1
https://notepad-plus-plus.org/downloads/ Download "Notepad++ v 8.8.5" and install it.
You need to click the version number, and then scroll down past a lot of deceptive fake download buttons, to find the real download button with a green animal on it, as shown below.
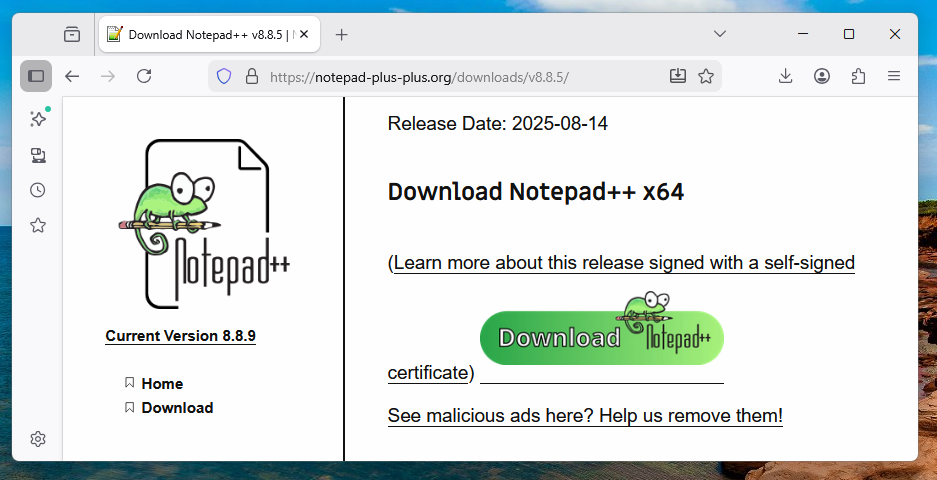
DON'T INSTALL IT YET.
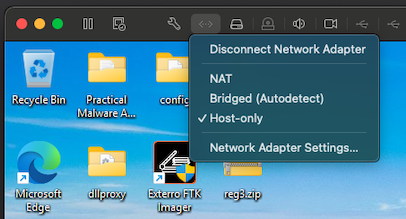
as shown below.
After a few seconds, the networking adjusts in the virtual machine.
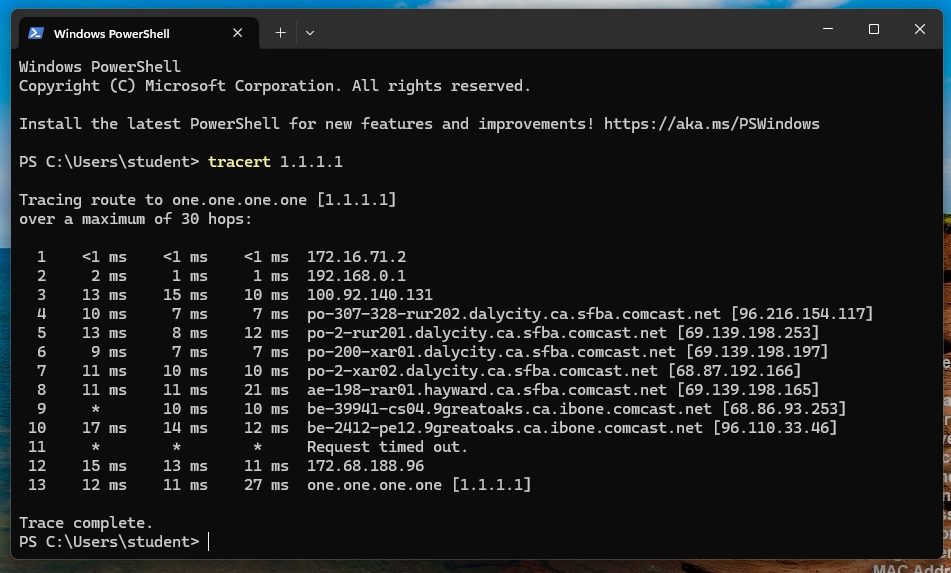
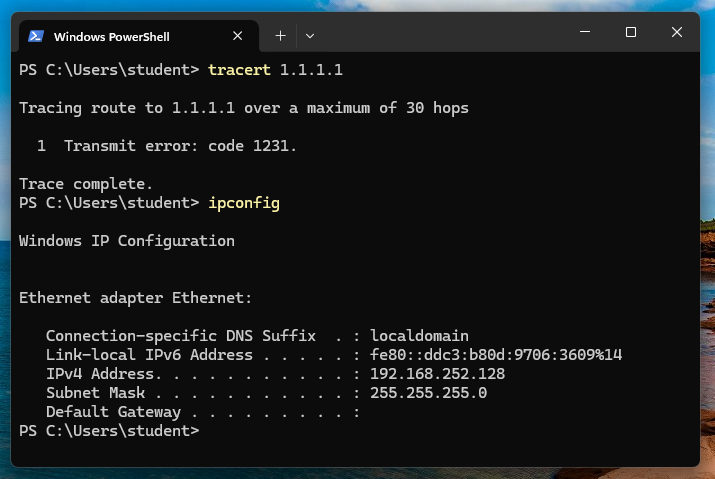
In the Windows virtual machine, in a Terminal, execute these commands:
tracert 1.1.1.1
ipconfig
Notice this IP address. In the image below, it was 192.168.252.128.
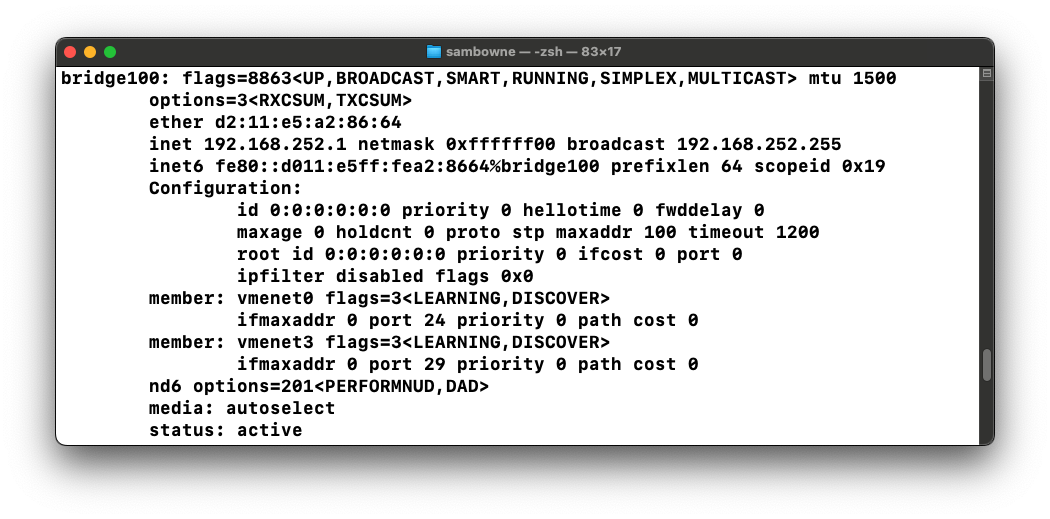
ifconfig
In my case, it was bridge100, as shown below.
Notice its IP address. In the image below, it was 192.168.252.1.
Click "View network connections".
Right-click Ethernet and click Properties.
Double-click "Internet Protocol Version 4 (TCP/IPv4)".
Configure these values, as shown below.
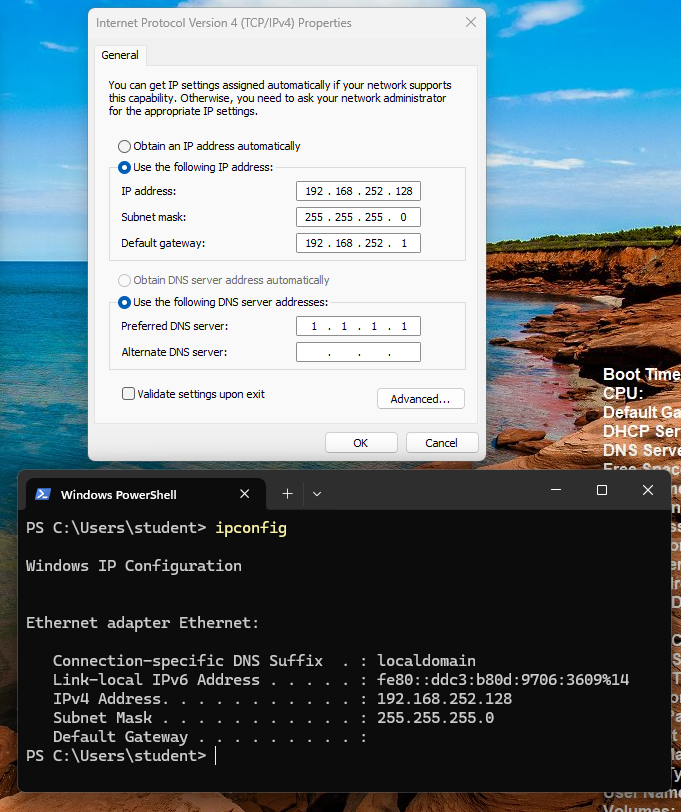
Click OK. Click OK again.
Burp opens a page saying "Temporary Project". Click Next.
Burp opens a page saying "Use Burp defaults". Click "Start Burp".
In Burp, click the Proxy tab.
If the Intercept button reads "Intercept is on", click it, so the message reads "Intercept is off".
At the top right, click "Proxy settings".
At the top, in the "Proxy Listeners" section, see if there are any entries on the box shown to the right.
If there are, click each entry to highlight it, and then click Remove to remove them all, as shown below.
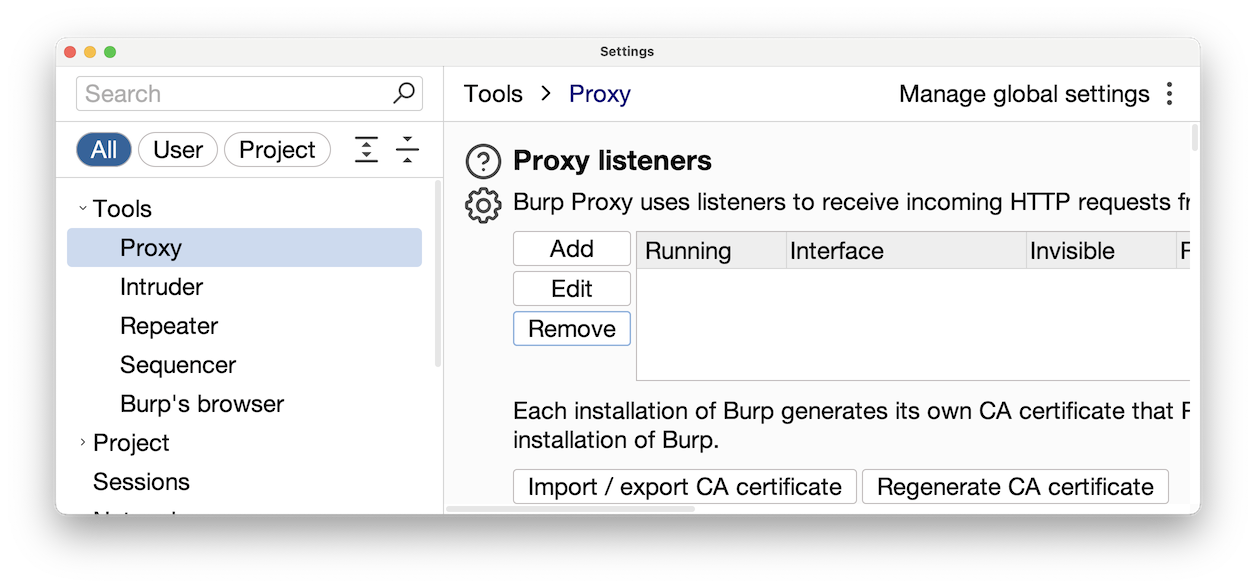
In Burp, at the top, in the "Proxy Listeners" section, click the Add button.
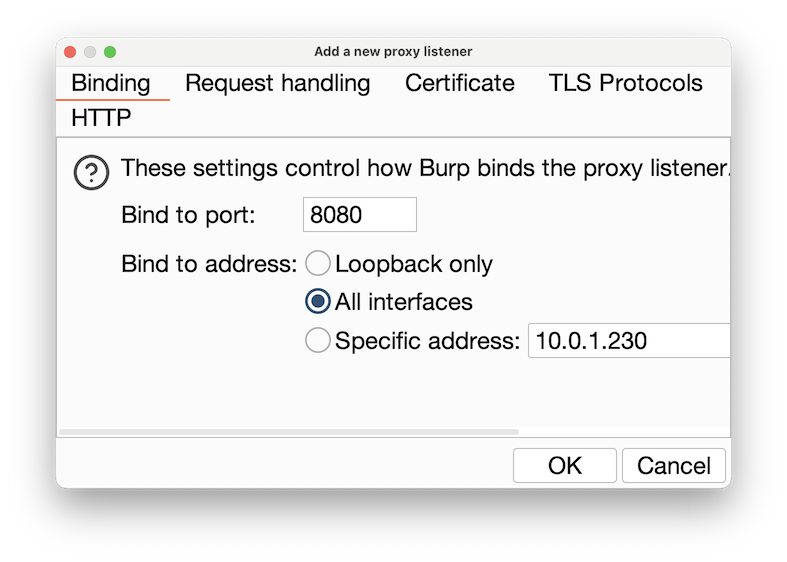
On the Binding tab, enter a "Bind to port" of 8080
Click the "All interfaces" button, as shown below.
Click the "Request handling" tab.
Click the "Support invisible proxying" box, as shown below.
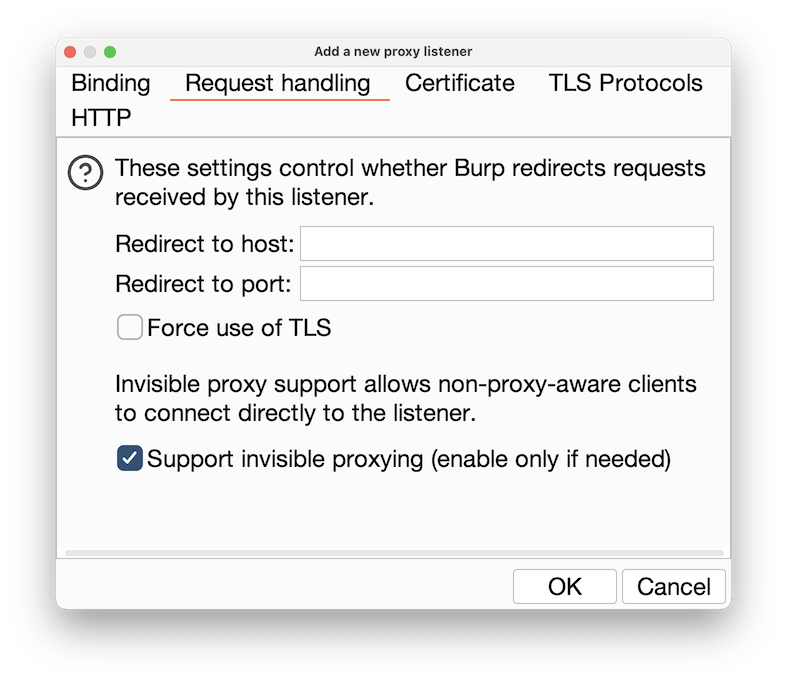
At the lower right of the box, click OK. A box pops up, asking "Are you sure...?". Click Yes.
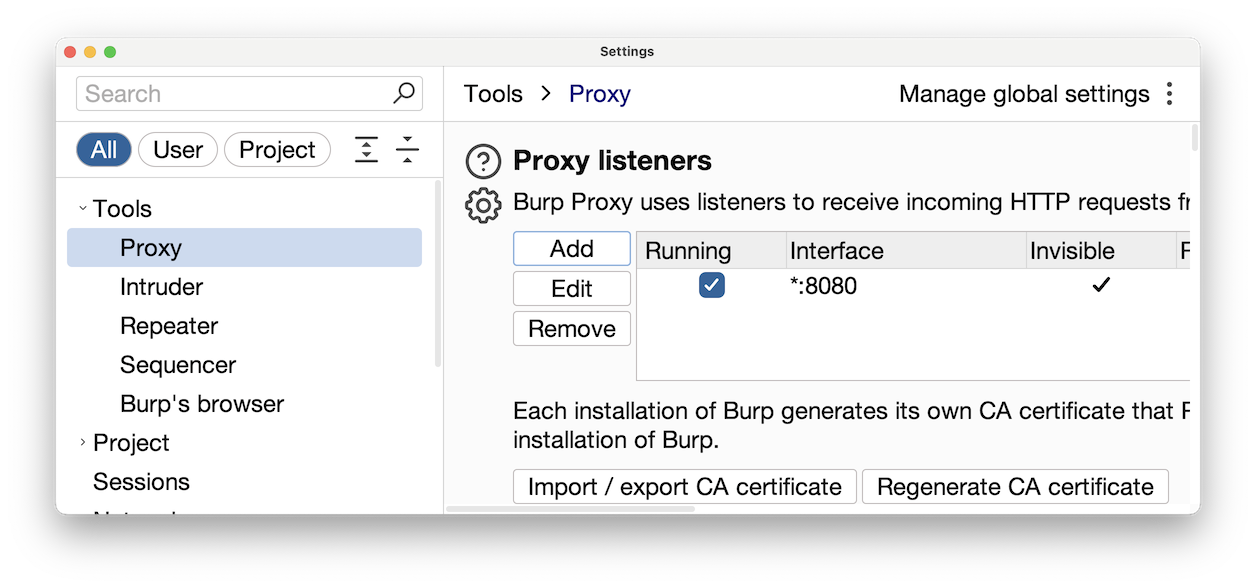
Burp should now show a Listener on "*:8080" with the Invisible box checked, and the Running box checked, as shown below.
We'll use the Mac firewall "pf" to send all traffic from the Windows virtual machine through the proxy.
To use the "pf" firewall, we need to create two files: "pf.rules" and "pf.conf". For our purposes these files can be very simple.
First, we need to enable IP forwarding on the Mac, so it can act as a router.
On your Mac, in the Terminal window, execute this command:
sudo sysctl -w net.inet.ip.forwarding=1
On your Mac, in the Terminal window, execute this command:
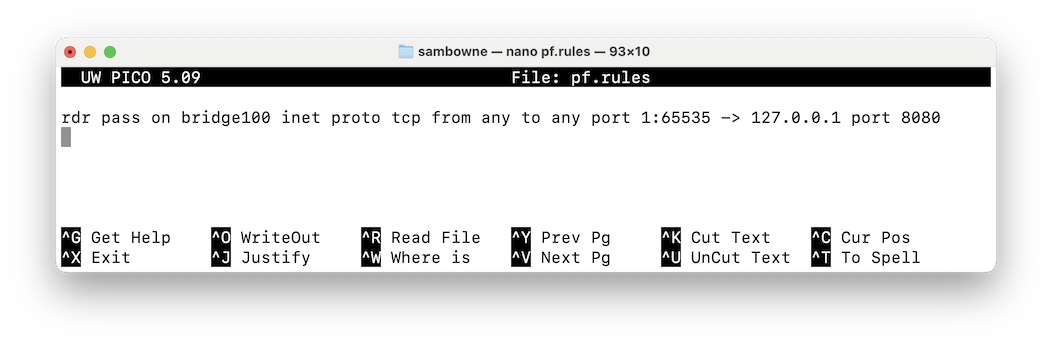
nano pf.rules
This rule redirects all TCP traffic from the USB connection to Burp, at 127.0.0.1:8080.
rdr pass on bridge100 inet proto tcp from any to any port 1:65535 -> 127.0.0.1 port 8080
Press Ctrl+X, Y, Enter to save the file.
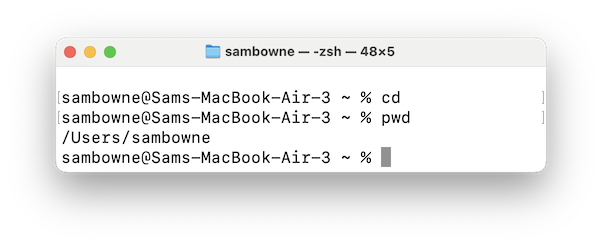
In the Terminal window, execute these commands.
cd
pwd
In my case, the directory was /Users/sambowne
Your directory will be different.
In the Terminal window, execute this command:
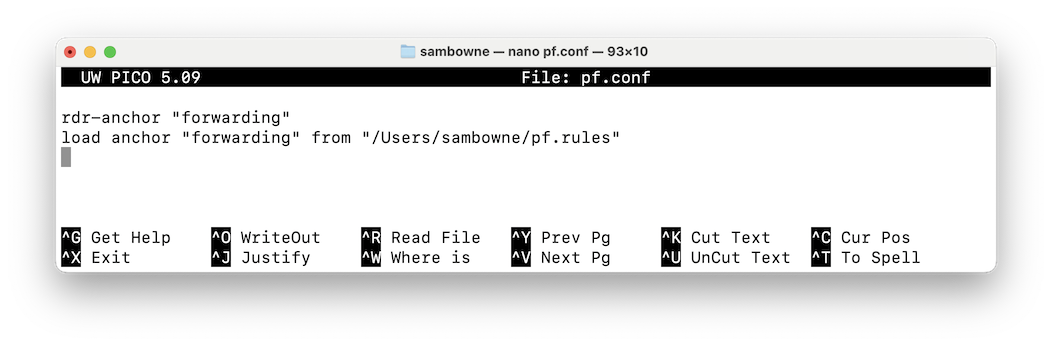
nano pf.conf
In the second line, change /Users/sambowne to the correct directory you found above.
This configuration file tells pf where to find the rules file.
rdr-anchor "forwarding"

load anchor "forwarding" from "/Users/sambowne/pf.rules"
Press Ctrl+X, Y, Enter to save the file.
The next step is to test the files.
In the Terminal window, execute this command:
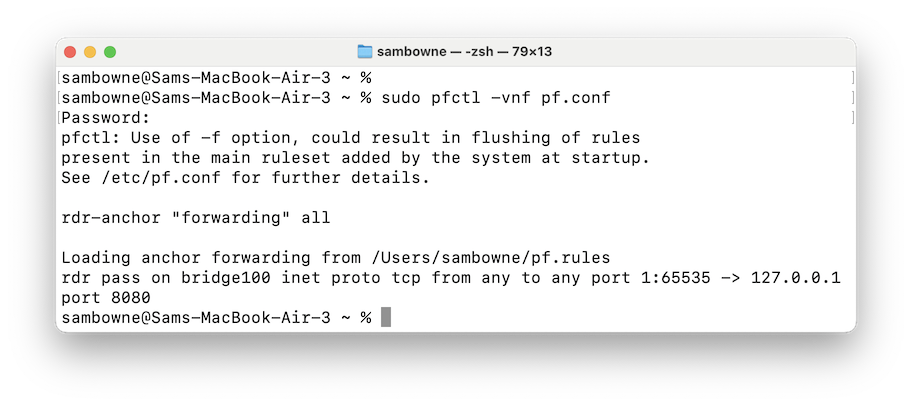
sudo pfctl -vnf pf.conf
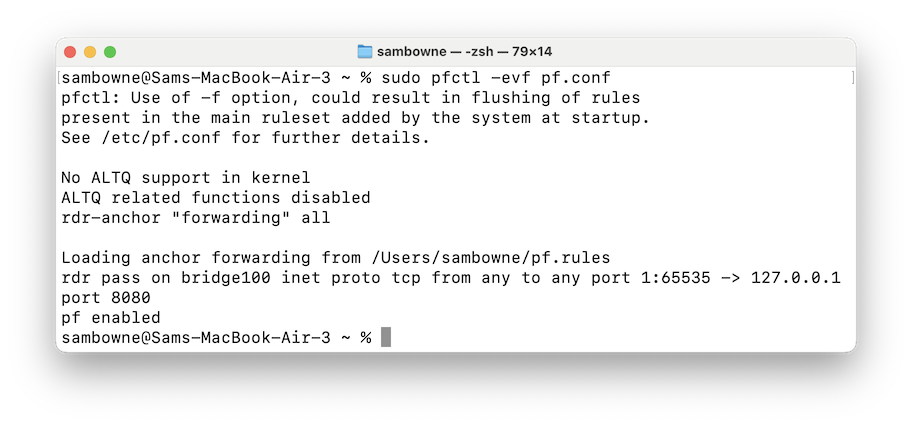
If your files are correct, you'll see a "Loading anchor forwarding..." message, followed by the line beginning with "rdr pass on bridge", as shown below.
If there are errors in your files, you'll see error messages here. If that happens, use nano to edit the files and correct the errors.
When your files pass this test without errors, execute this command to start pf:
sudo pfctl -evf pf.conf
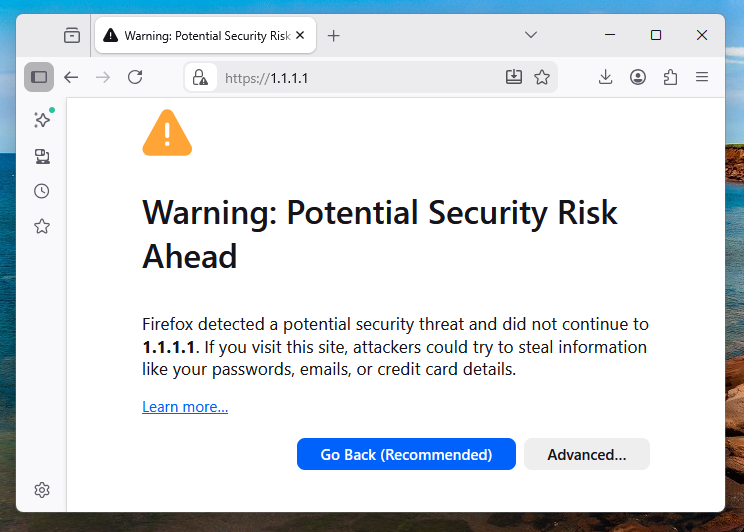
The browser should redirect to a secure page, and display a warning, as shown below.
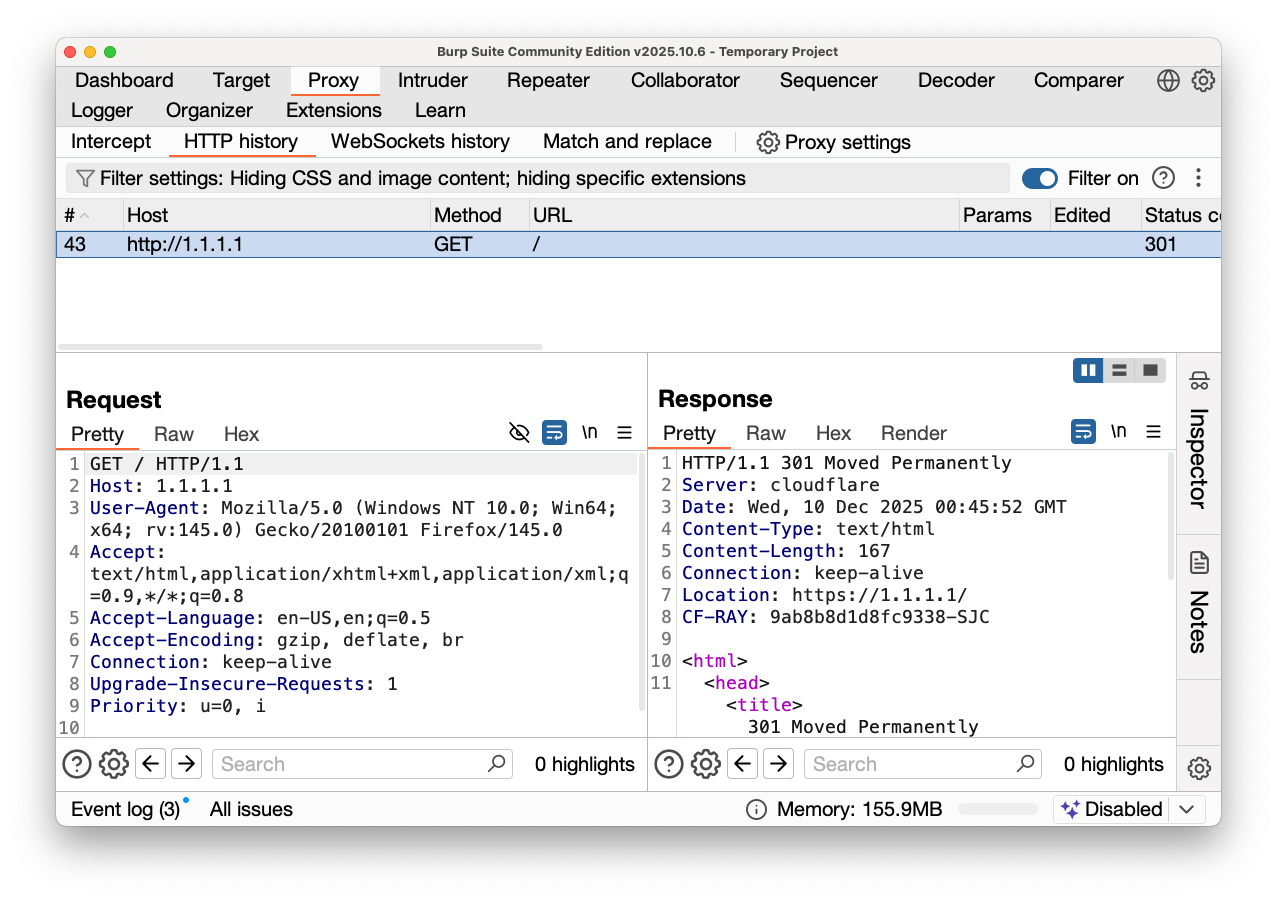
You should see the request and response in Burp, on the "HTTP history" tab, as shown below.
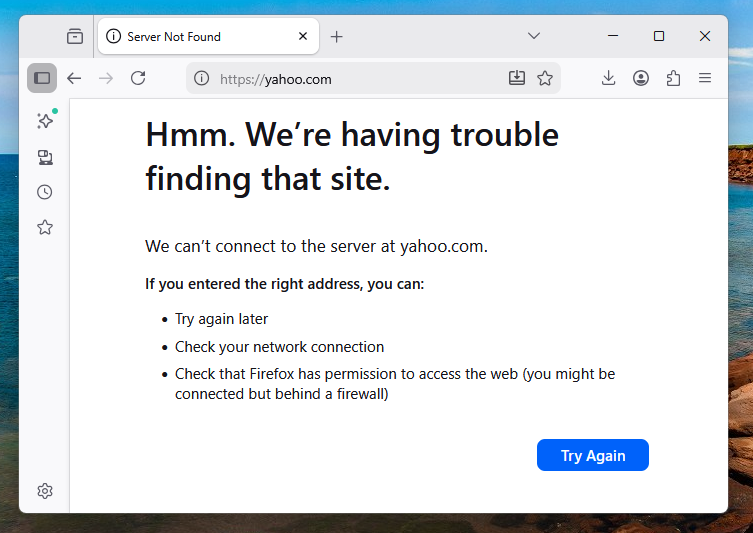
The browser times out, as shown below.
Although HTTP connections are forwarded through the proxy, DNS (which uses UDP) fails.
On your Mac, in a Terminal, execute these commands:
brew install unbound
sudo mkdir -p /usr/local/etc/unbound
sudo nano /usr/local/etc/unbound/unbound.conf
server:
    # disable user privilege protection
    username: ""
    # Listen on all interfaces
    interface: 0.0.0.0
    port: 53

    # Allow queries from anywhere
    access-control: 0.0.0.0/0 allow
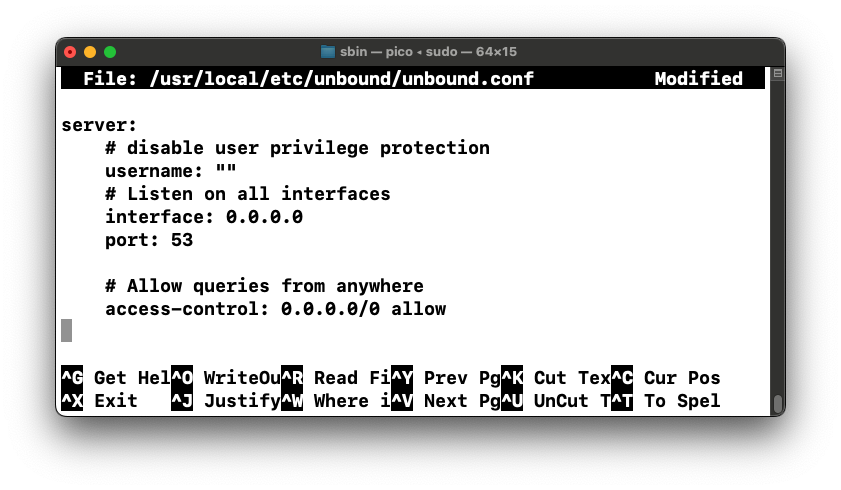
Save the file with Ctrl+x, y, Enter.
For some ungodly reason, we need to manually adjust the path. I'm used to this on Windows, but not on the Mac.
On your Mac, in a Terminal, execute this command:
nano ~/.zshrc
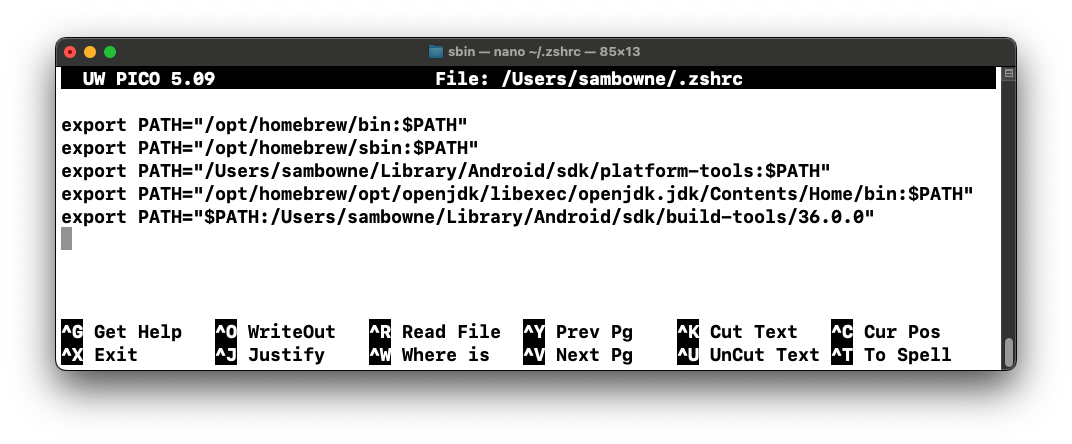
Save the file with Ctrl+x, y, Enter.
On your Mac, in a Terminal, execute this command:
source ~/.zshrc
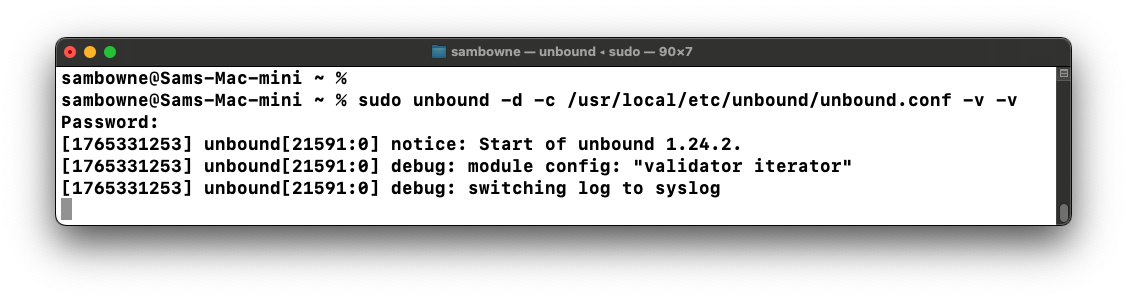
sudo unbound -d -c /usr/local/etc/unbound/unbound.conf -v -v
Leave this window open.
Click "View network connections".
Right-click Ethernet and click Properties.
Double-click "Internet Protocol Version 4 (TCP/IPv4)".
Adjust the DNS server to be the same as the Default gateway, as shown below.
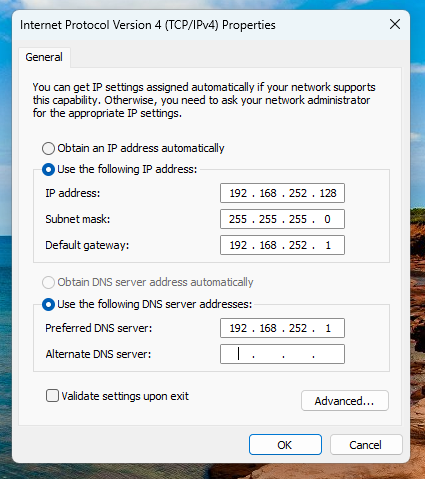
Click OK. Click OK again.
http://ad.samsclass.info
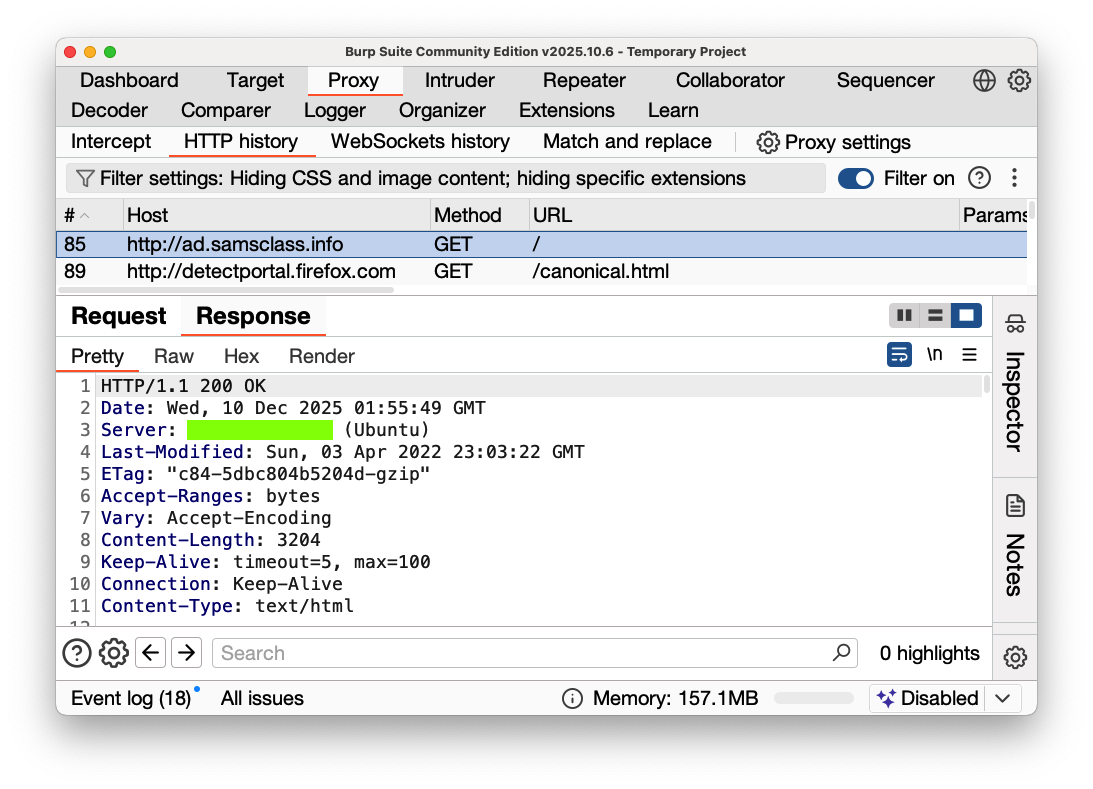
PMA 230.1: Server (10 pts)
On your Mac, in Burp, click the "HTTP History" sub-tab.You should see traffic to http://ad.samsclass.info, as shown below.
Im the top pane, click the GET request that loaded http://ad.samsclass.info.
In the lower pane, click the Response tab.
The flag is covered by a green box in the image above.
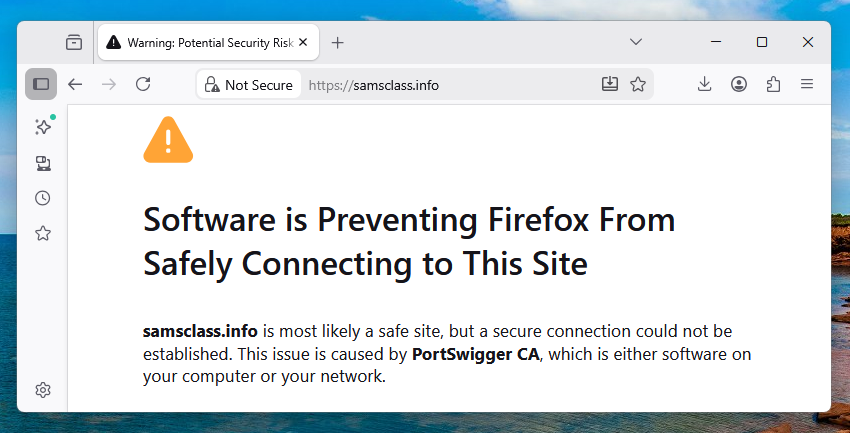
https://samsclass.info
You should see a warning that the certificate is not trusted, as shown below.
This is good--the browser correctly determines that Burp is performing an adversary-in-the-middle attack.
Microsoft will warn you that it cannot reach SmartScreen. Run it anyway.
After installing Notepad++, it opens.
From the top menu, click ? and click "Update Notepad++".
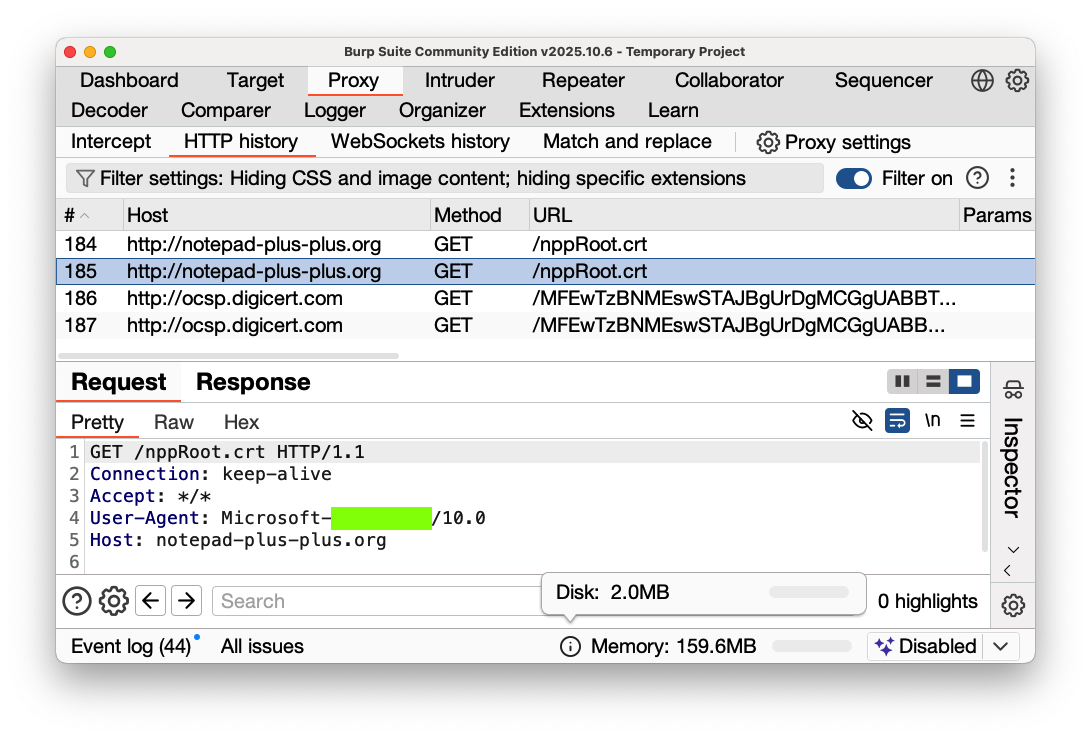
PMA 230.2: User-Agent (10 pts)
On your Mac, in Burp, on the "HTTP History" sub-tab.You should see traffic to http://notepad-plus-plus.org, as shown below.
Im the top pane, click the GET request to http://notepad-plus-plus.org.
In the lower pane, click the Request tab.
The flag is covered by a green box in the image above.
Since the certificate was downloaded via HTTP rather than HTTPS, it could be tampered with via an adversary-in-the-middle attack.
This allowed attackers to insert a malicious update into a few user's versions, as detailed in this write-up:
Small numbers of Notepad++ users reporting security woes
Posted 12-9-25
Description updated 12-17-25